
Looking for a yarn?


Comments / Questions (66)
Babo Björkell wrote:
Kunde jag få ett svar på min kommentar som jag skickade för ca 1 månad. Gäller det svårtydda mönstret. Kan man ge förklaringar på ett annat sätt? Mössan är så fin med det fungerar ej på det andra varvet från avan!!
04.04.2018 - 16:31DROPS Design answered:
Hei Babo Jeg vet ikke hvor du møter på problemer på 2 omgang, men jeg kan gi noen generelle tips: Siden mønsteret består av flere mindre diagrammer kan det lønne seg å sette en merketråd mellom hvert diagram for å lettere holde oversikten. Når det gjelder fellingen i A.3 så «tas» det en maske fra A.2 og en fra A.4 hver gang det felles. A.2 og A.4 opphører etterhvert, som forklart i oppskriften. God fornøyelse
04.05.2018 - 12:09Babo Björkell wrote:
Jag önskar att ni kunde ge nya förklaringar på mönstet. Då man stickar tillbaks på avigsidan uppstär redan problem med maskorna!! Sen då maskorna ska minskas mellan figuren vållar problem. Kunde man rita upp allt på annat sätt. Modellen helt ljuvlig!!
19.03.2018 - 13:51
![]() Anka wrote:
Anka wrote:
Es hat gut geklappt mit in Runden Stricken. Evtl ein paar weniger Maschen aufnehmen, da man keine Randmaschen benötigt zum vernähen. Ich habe erst mit Rundstricknadel gestrickt und dann auf ein Nadelspiel mit sechs Nadeln plus eine zum Stricken gewechselt.
13.03.2018 - 19:38
![]() Petra Schertel wrote:
Petra Schertel wrote:
Gibt es auch die Hefte zu kaufen?
11.03.2018 - 17:23DROPS Design answered:
Liebe Frau Schertel, Hefte haben wir keine mehr, aber Anleitung können Sie einfach von hier ausdrücken. Viel Spaß beim stricken!
12.03.2018 - 10:07Gro Holst - Christensen wrote:
Jeg har lige startet på luen, og det er noget jeg ikke forstår. Skal den ikke strikkes spejlvendt fra midten og til slut på pinden ? Og diagrammerne er ikke gode. De skal da strikkes fra højre på rettsiden, men fra venstre på vrangpinden.
08.03.2018 - 17:18DROPS Design answered:
Hej Gro, den bliver strikket spejlvendt fra midten hvis du følger diagrammerne. Ja du strikker altid første pind i diagrammet fra nederste højre hjørne når du strikker første pind fra retsiden. Og fra venstre mod højre når du strikker fra vrangen. God fornøjelse!
04.06.2018 - 09:08
![]() Anka wrote:
Anka wrote:
Ich würde die Arbeit gerne in Runden Stricken. Dann muss ich am Ende nicht zusammen nähen. Spricht etwas dagegen?
07.03.2018 - 19:39DROPS Design answered:
Liebe Anka, wahrscheinlich können Sie diese Mütze auch in der Runde stricken, aber dann die Anleitung & Strickschrifte so anpassen. Viel Spaß beim stricken!
08.03.2018 - 09:03
|
||||||||||||||||||||||||||||
Celestina Hat#celestinahat |
||||||||||||||||||||||||||||
 |
 |
|||||||||||||||||||||||||||
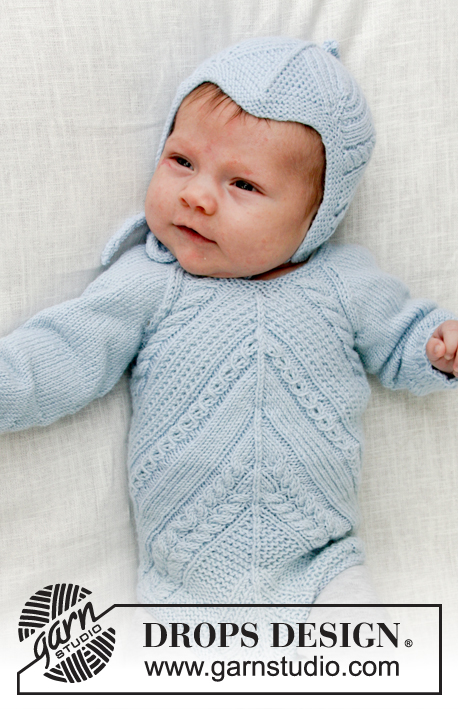
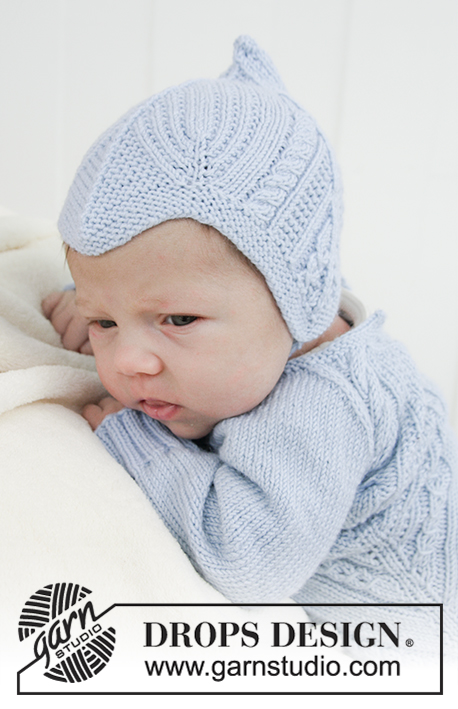
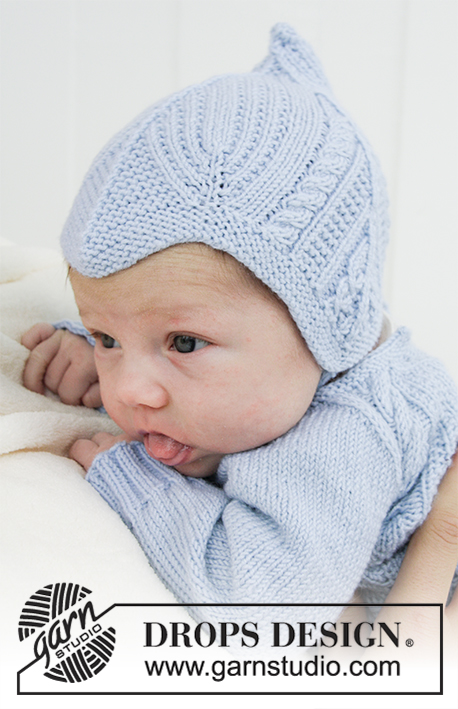
Knitted baby hat with cables and garter stitch. Sizes 1 month - 4 years. The piece is worked in DROPS BabyMerino.
DROPS Baby 31-7 |
||||||||||||||||||||||||||||
|
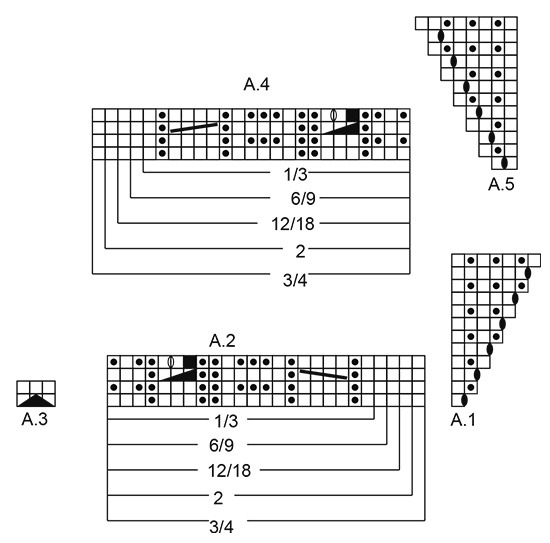
INFORMATION FOR THE PATTERN: RIDGE/GARTER STITCH (worked back and forth): 1 ridge = Knit 2 rows. PATTERN: See diagrams A.1 to A.5. Choose diagram for your size. ---------------------------------------------------------- HAT: The piece is worked back and forth from mid back and is sewn together mid back to finish. Cast on 123-129-135 (141-147) stitches (including 1 edge stitch in each side) with needle size 2.5 mm and BabyMerino. Work 4 RIDGES – see description above. Then work the next row from right side as follows: Work 1 edge stitch in garter stitch, knit 1, A.1 (= 1 stitch) (= 1 stitch increased), * A.2 over the next 21-22-23 (24-25) stitches, A.3 over the next 3 stitches (= 2 stitches decreased), A.4 over the next 21-22-23 (24-25) stitches, A.5 over the next 2 stitches (= 1 stitch increased) *, A.1 over the next stitch, 9-10-11 (12-13) stitches in garter stitch, A.3 over the next 3 stitches (= 2 stitches decreased) (= mid front of hat), 9-10-11 (12-13) stitches in garter stitch, A.5 over the next 2 stitches, A.1 over the next stitch (= 1 stitch increased), work from *-* 1 more time, finish with 1 edge stitch in garter stitch. Then work next row from wrong side as follows: Work 1 edge stitch in garter stitch, *A.5 over 3 stitches, A.4 over 20-21-22 (23-24) stitches (i.e. skip last square in diagram, this stich in A.4 has been decreased in A.3), A.3 over 3 stitches, skip 1st square in diagram A.2, and work the remaining stitches in A.2 over 20-21-22 (23-24) stitches *, A.1 over 2 stitches, A.5 over 3 stitches, 8-9-10 (11-12) stitches in garter stitch (i.e. the stitches in garter stitch are decreased in A.3), A.3 over 3 stitches, 8-9-10 (11-12) stitches in garter stitch (i.e. one stitch in garter stitch has been decreased in A.3), A.1 over 2 stitches, work from *-* 1 more time, A.1 over 2 stitches, purl 1 stitch and finish with 1 stitch in garter stitch. I.e. There will be 1 stitch less in each A.2 and A.4 (i.e. skip 1 square in the diagram for every 2nd row of diagram A.2 and A.4) and 1 stitch less in garter stitch in mid front on each side of A.3 on every 2nd row because of the decrease in A.3. Continue the pattern like this, i.e. decrease 1 stitch on each side of each A.3 on every row from the right side (= 6 stitches decreased), and increase 1 stitch in each of A.1 and A.5 (= 6 stitches increased). In other words, the number of stitches stays the same, you increase and decrease the same number of stitches, but the ridges mid front and the patterns in A.2 and A.4 are will disappear. Continue with knit over knit, purl over purl, garter stitch over garter stitch and cable over cable. REMEMBER THE KNITTING TENSION! When A.1 and A.5 have been worked 1 time in height, continue with knit over knit and garter stitch over garter stitch over these stitches, i.e. do not increase any more. When you do not have enough stitches for the cables, do not work cables; the remaining stitches here are worked in stocking stitch Continue the pattern as before over the remaining stitches, i.e. decrease 6 stitches every 2nd round (= 2 stitches by each A.3), until there are 21 stitches left on the needle. The piece measures approx. 16-16-17 (17-18) cm from the bottom tip of the first and last A.3 (= ear flaps). The next row is worked as follows from the right side: Knit 1, knit 2 together, 15 stitches pattern as before, knit 2 together, knit 1 = 19 stitches. Decrease like this in each side every row (from the wrong side purl together the 2 stitches before and after the edge stitches) until there are 5 stitches left on the needle. Cut the yarn and pull the end through the remaining stitches and tighten. ASSEMBLY: Sew the hat together mid back inside the 1 edge stitch. The middle tip of the 3 whole tips (= A.3) on the cast-on edge goes down onto the forehead mid front. CORD: Cast on 4 stitches with needle size 2.5 mm. Work as follows: * Knit 1, move the strand to front of piece (towards you), slip 1 stitch as if to purl, move the strand to back of piece again (away from you) *, work from *-* 1 more time and then continue in the same way on all rows to finished length. You have now worked a round cord. Cast off when the cord measures approx. 20-22-24 (26-28) cm. Work 1 more cord in the same way. Sew the cords to the bottom tip of each ear-flap in each side. ---------------------------------------------------------- For body see DROPS number 31-06. ---------------------------------------------------------- |
||||||||||||||||||||||||||||
Diagram explanations |
||||||||||||||||||||||||||||
|
||||||||||||||||||||||||||||
 |
||||||||||||||||||||||||||||
Have you finished this pattern?Tag your pictures with #dropspattern #celestinahat or submit them to the #dropsfan gallery. Do you need help with this pattern?You'll find 22 tutorial videos, a Comments/Questions area and more by visiting the pattern on garnstudio.com. © 1982-2025 DROPS Design A/S. We reserve all rights. This document, including all its sub-sections, has copyrights. Read more about what you can do with our patterns at the bottom of each pattern on our site. |
||||||||||||||||||||||||||||


With over 40 years in knitting and crochet design, DROPS Design offers one of the most extensive collections of free patterns on the internet - translated to 17 languages. As of today we count 320 catalogues and 12094 patterns translated into English (UK/cm). 12094
We work hard to bring you the best knitting and crochet have to offer, inspiration and advice as well as great quality yarns at incredible prices! Would you like to use our patterns for other than personal use? You can read what you are allowed to do in the Copyright text at the bottom of all our patterns. Happy crafting!
Post a comment to pattern DROPS Baby 31-7
We would love to hear what you have to say about this pattern!
If you want to leave a question, please make sure you select the correct category in the form below, to speed up the answering process. Required fields are marked *.