
Looking for a yarn?


Comments / Questions (66)
![]() Outi wrote:
Outi wrote:
Ne mallikuviot puuttuu...
07.10.2018 - 19:13
![]() Marjo Immonen wrote:
Marjo Immonen wrote:
Voisinko saada ohjeeseen kuuluvat mallipiirrokset. Ne puuttuvat ohjeesta.
14.09.2018 - 23:27
![]() Emma wrote:
Emma wrote:
Jeg har strikket pind nr 1 og 2 i følge diagrammet, men jeg forstår ikke helt forklaringen derefter. Der står som om, at der kun tages ind på mønsteret og retstrikket, hver gang man strikker fra ret siden. Men forklaringen af vrangsiden fortæller at der også vil blive én maske mindre både på A.2, A.4 og i retstrikket. Så hvis jeg både tager ind på retsiden og på vrangsiden, så forsvinder mønsteret ret hurtigt. Så jeg forstår ikke helt hvordan det skal gøres?
03.09.2018 - 07:33DROPS Design answered:
Hej Emma, Du tager 2 m ind når du strikker A3 fra retsiden. Når du strikker fra vrangen har du 2 masker mindre (for hver A3). Men da du altid skal have 3 masker i A3, så bliver der 1 maske mindre på hver side af A3 mod midt foran samt i A4 og A2 for hver gang du har strikket 1 pind fra retsiden. Samtidigt som der tages 1 maske ud for hver gang du strikker A1 og A5 fra retsiden. Det vil sige at det totale antal masker forbliver det samme. God fornøjelse!
04.09.2018 - 08:55
![]() Ancsurka wrote:
Ancsurka wrote:
NAgyon szép a minta, de nehezen követhető. A páros soroknál bajban vagyok. Pl az A3 mintát megcsinálom, és így ugye két szemmel kevesebb lesz. A diagram a 2. sorban 3 sima szemet ír, de az hol van? Azt csak úgy kapom meg, hogy ha az A2 vagy A4 szemeiből elveszek 1-1-t, de akkor meg ott nem stimmel a szemszám. A magyar fordításban nincs diagram, és a jelek fordításánál sem teljesen ugyanazok. Én csak kicsit tudok angolul, de összezavarodtam. :( Köszi a segítséget.
22.08.2018 - 10:21
![]() Charlotte Christensen wrote:
Charlotte Christensen wrote:
Jeg har virkelig problemer med mønsteret. Har pillet op flere gange nu! Når jeg strikker pind nr 2 så er der ikke plads til at strikke hele mønsteret, da A1 og A5 udvides med flere masker. Jeg kan forstå at A2 og A4 vil forsvinde, men hvorfor bliver det ved med at være samme antal masker i A2 og A4? (Altså de 21 i den mindste størrelse)
20.05.2018 - 13:17DROPS Design answered:
Hej Charlotte, på første pind udvides mønsteret med 1 maske i A.1 og A.5. Har du set at vi har lagt en forklaring ud med 2.pind som strikkes fra vrangen? God fornøjelse :)
21.05.2018 - 09:34
![]() Joyce Sierhujis wrote:
Joyce Sierhujis wrote:
Hi, ik brei A2 zoals door jullie beschreven maar ik denk dat ik al weet hoe het komt dat ik bij toer 3 een steek tekort kom als ik A2 brei, dat komt doordat ik vergeet dat ik 1 steek geminderd heb bij waardoor ik niet 22 steken bij A2 heb maar 21. dank voor je meedenken, groetJS
17.05.2018 - 19:36
![]() Joyce Sierhuis wrote:
Joyce Sierhuis wrote:
Bij toer 3 verschuift bij mij A2 ik brei kantsteek A1 (omhaal 2 recht) en dan A2 ik kan wel smokkelen om bij A3 aan beide kanten 1 steek te minderen maar ik wil graag weten wat ik fout doe (kom telkenmale 1 steek tekort) dank voor uw antwoord
15.05.2018 - 14:48DROPS Design answered:
Hallo Joyce, Ik probeer even mee te denken... Kan het zijn dat je bij het symbool met een liggende driehoek over drie steken (haal 1 steek recht af, 2 recht, haal de afgehaalde steek over de gebreide steken) per ongeluk 2 steken samenbreit en de afgehaalde steek overhaalt?
16.05.2018 - 16:43
![]() Kathrin wrote:
Kathrin wrote:
Hi, ich habe nun schon ein paar Mal angefangen und habe echt Probleme mit dem Muster. Stricke ich die Rückreihen nach dem Muster, oder wie die Maschen kommen. Also eigentlich, wie ist die Strickschrift gemeint. Sind das nur die Hinreihen, oder auch die Rückreihen? Vielen Dank für die Hilfe!
23.04.2018 - 21:27DROPS Design answered:
Liebe Kathrin, die Diagramme zeigen alle Reihen, dh Hin- sowie Rück-Reihen. Bei den Rückreihen sollen Sie wie im Diagram stricken (lesen Sie die Diagramm von links nach rechts auf der Rückseite). Viel Spaß beim stricken!
24.04.2018 - 08:57
![]() Ann-Catrin Johansson wrote:
Ann-Catrin Johansson wrote:
Stämmer mönstret verkligen? Får det inte att stämma, varv två i mönsterstickningen fungerar inte. Tror det är A3 som rör till det.
08.04.2018 - 19:55DROPS Design answered:
Hei Ann-Cathrin. Mønsteret stemmer så det er bare å fortsette å strikke. Det er mange små diagrammer som må settes sammen på dette mønsteret, og det kan være utfordrende å holde oversikt. Et tips er å sette merketråder på hver side av diagrammene for å lettere holde oversikten. A3 har fellling av 2 masker annenhver omgang, og det «tas» en maske fra A.2 og en fra A.4 hver gang det felles. A.2 og A.4 opphører etterhvert, som forklart i oppskriften. God fornøyelse
12.04.2018 - 13:19
![]() Jess wrote:
Jess wrote:
Ich habe mich sehr über das neue Modell (ähnlich dem Aladdin) gefreut. Nun habe ich aber frustriert aufgegeben. Das Muster ist total schlecht erklärt, man muss immer zwischen Text uns Muster hin und her wechseln, gleichzeitig alles rückwärts denken für die Rückreihen und dann ist es nicht selbsterklärend, wann sich die Muster wie auflösen sollen. Besser wäre es, eine Steickschrift über das ganze Muster zu haben.
07.04.2018 - 16:01DROPS Design answered:
Liebe Jess, ich habe dieses Modell vor kurzem gestrickt, die ersten Reihen brauchen etwas mehr Konzentration, dann geht es wieder: wenn Sie A.3 stricken werden die Muster A.2 und A.4 immer über weniger Maschen gestrickt, dh A.3 wird A.2 und A.4 abnehmen. Setzen Sie so viel Markierer wie Sie brauchen (z.B. zwischen jedes Diagram), und dann geht es einfacher. Viel Spaß beim stricken!
09.04.2018 - 13:56
|
||||||||||||||||||||||||||||
Celestina Hat#celestinahat |
||||||||||||||||||||||||||||
 |
 |
|||||||||||||||||||||||||||
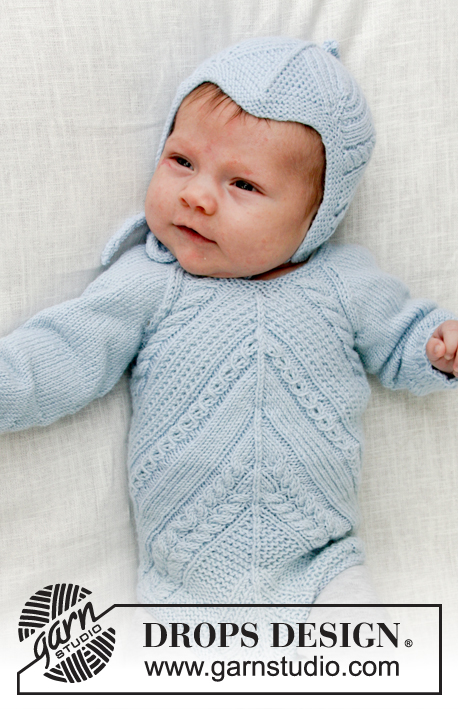
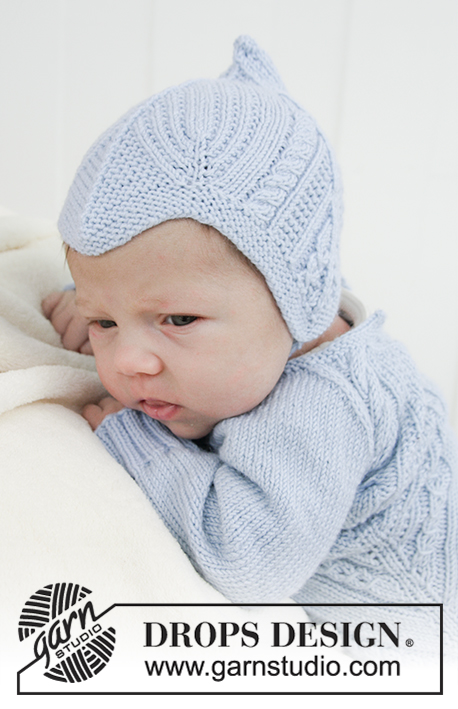
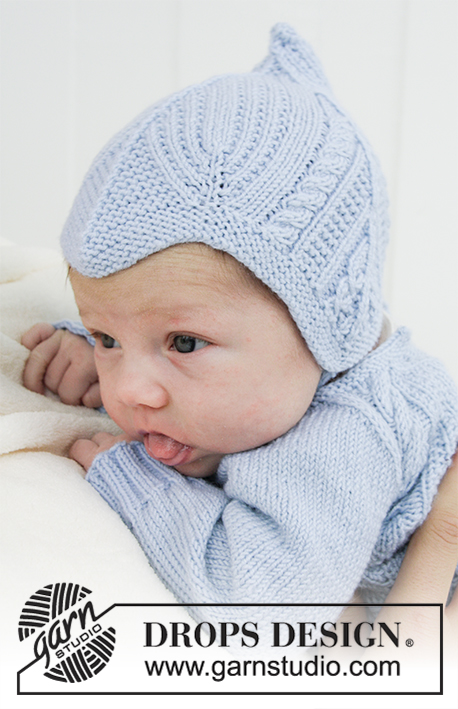
Knitted baby hat with cables and garter stitch. Sizes 1 month - 4 years. The piece is worked in DROPS BabyMerino.
DROPS Baby 31-7 |
||||||||||||||||||||||||||||
|
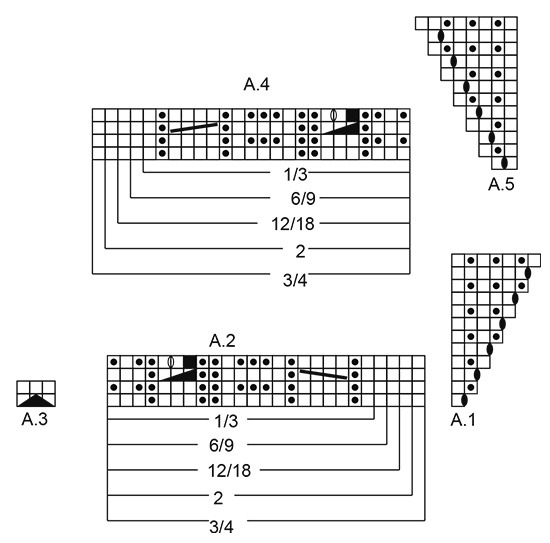
INFORMATION FOR THE PATTERN: RIDGE/GARTER STITCH (worked back and forth): 1 ridge = Knit 2 rows. PATTERN: See diagrams A.1 to A.5. Choose diagram for your size. ---------------------------------------------------------- HAT: The piece is worked back and forth from mid back and is sewn together mid back to finish. Cast on 123-129-135 (141-147) stitches (including 1 edge stitch in each side) with needle size 2.5 mm and BabyMerino. Work 4 RIDGES – see description above. Then work the next row from right side as follows: Work 1 edge stitch in garter stitch, knit 1, A.1 (= 1 stitch) (= 1 stitch increased), * A.2 over the next 21-22-23 (24-25) stitches, A.3 over the next 3 stitches (= 2 stitches decreased), A.4 over the next 21-22-23 (24-25) stitches, A.5 over the next 2 stitches (= 1 stitch increased) *, A.1 over the next stitch, 9-10-11 (12-13) stitches in garter stitch, A.3 over the next 3 stitches (= 2 stitches decreased) (= mid front of hat), 9-10-11 (12-13) stitches in garter stitch, A.5 over the next 2 stitches, A.1 over the next stitch (= 1 stitch increased), work from *-* 1 more time, finish with 1 edge stitch in garter stitch. Then work next row from wrong side as follows: Work 1 edge stitch in garter stitch, *A.5 over 3 stitches, A.4 over 20-21-22 (23-24) stitches (i.e. skip last square in diagram, this stich in A.4 has been decreased in A.3), A.3 over 3 stitches, skip 1st square in diagram A.2, and work the remaining stitches in A.2 over 20-21-22 (23-24) stitches *, A.1 over 2 stitches, A.5 over 3 stitches, 8-9-10 (11-12) stitches in garter stitch (i.e. the stitches in garter stitch are decreased in A.3), A.3 over 3 stitches, 8-9-10 (11-12) stitches in garter stitch (i.e. one stitch in garter stitch has been decreased in A.3), A.1 over 2 stitches, work from *-* 1 more time, A.1 over 2 stitches, purl 1 stitch and finish with 1 stitch in garter stitch. I.e. There will be 1 stitch less in each A.2 and A.4 (i.e. skip 1 square in the diagram for every 2nd row of diagram A.2 and A.4) and 1 stitch less in garter stitch in mid front on each side of A.3 on every 2nd row because of the decrease in A.3. Continue the pattern like this, i.e. decrease 1 stitch on each side of each A.3 on every row from the right side (= 6 stitches decreased), and increase 1 stitch in each of A.1 and A.5 (= 6 stitches increased). In other words, the number of stitches stays the same, you increase and decrease the same number of stitches, but the ridges mid front and the patterns in A.2 and A.4 are will disappear. Continue with knit over knit, purl over purl, garter stitch over garter stitch and cable over cable. REMEMBER THE KNITTING TENSION! When A.1 and A.5 have been worked 1 time in height, continue with knit over knit and garter stitch over garter stitch over these stitches, i.e. do not increase any more. When you do not have enough stitches for the cables, do not work cables; the remaining stitches here are worked in stocking stitch Continue the pattern as before over the remaining stitches, i.e. decrease 6 stitches every 2nd round (= 2 stitches by each A.3), until there are 21 stitches left on the needle. The piece measures approx. 16-16-17 (17-18) cm from the bottom tip of the first and last A.3 (= ear flaps). The next row is worked as follows from the right side: Knit 1, knit 2 together, 15 stitches pattern as before, knit 2 together, knit 1 = 19 stitches. Decrease like this in each side every row (from the wrong side purl together the 2 stitches before and after the edge stitches) until there are 5 stitches left on the needle. Cut the yarn and pull the end through the remaining stitches and tighten. ASSEMBLY: Sew the hat together mid back inside the 1 edge stitch. The middle tip of the 3 whole tips (= A.3) on the cast-on edge goes down onto the forehead mid front. CORD: Cast on 4 stitches with needle size 2.5 mm. Work as follows: * Knit 1, move the strand to front of piece (towards you), slip 1 stitch as if to purl, move the strand to back of piece again (away from you) *, work from *-* 1 more time and then continue in the same way on all rows to finished length. You have now worked a round cord. Cast off when the cord measures approx. 20-22-24 (26-28) cm. Work 1 more cord in the same way. Sew the cords to the bottom tip of each ear-flap in each side. ---------------------------------------------------------- For body see DROPS number 31-06. ---------------------------------------------------------- |
||||||||||||||||||||||||||||
Diagram explanations |
||||||||||||||||||||||||||||
|
||||||||||||||||||||||||||||
 |
||||||||||||||||||||||||||||
Have you finished this pattern?Tag your pictures with #dropspattern #celestinahat or submit them to the #dropsfan gallery. Do you need help with this pattern?You'll find 22 tutorial videos, a Comments/Questions area and more by visiting the pattern on garnstudio.com. © 1982-2025 DROPS Design A/S. We reserve all rights. This document, including all its sub-sections, has copyrights. Read more about what you can do with our patterns at the bottom of each pattern on our site. |
||||||||||||||||||||||||||||


With over 40 years in knitting and crochet design, DROPS Design offers one of the most extensive collections of free patterns on the internet - translated to 17 languages. As of today we count 320 catalogues and 12094 patterns translated into English (UK/cm). 12094
We work hard to bring you the best knitting and crochet have to offer, inspiration and advice as well as great quality yarns at incredible prices! Would you like to use our patterns for other than personal use? You can read what you are allowed to do in the Copyright text at the bottom of all our patterns. Happy crafting!
Post a comment to pattern DROPS Baby 31-7
We would love to hear what you have to say about this pattern!
If you want to leave a question, please make sure you select the correct category in the form below, to speed up the answering process. Required fields are marked *.