Comments / Questions (280)
![]() Willem-Jan Zeelenberg wrote:
Willem-Jan Zeelenberg wrote:
Ik kom niet uit de sjaalkraag. Het gaat om de maat xl. Ik begin op 43 cm met de eerste meerdering. Vervolgens meerder ik 3 keer op 1,5 cm daarna 27 keer op 1 cm dit geeft inclusief de eerste steek van A1 in totaal 29 steken en niet zoals in de beschrijving staat 27 steken. Of lees ik het heel verkeerd. Hoop dat jullie mij kunnen helpen.
01.12.2017 - 10:57DROPS Design answered:
Hallo Willem Jan, In het rechter voorpand verschuif je als het ware A.1 door steeds 1 omslag te maken na de eerste steek in A.1 en na A.1 een mindering te maken. Dit doe je 3 keer om de anderhalve cm en daarna 24 keer om de cm. Daardoor heb je in totaal 27 steken gemeerderd (3+24) voor de sjaalkraag. (Het totaal aantal steken blijft gelijk, omdat je na A.1 mindert). Deze gemeerderde steken brei je in ribbelsteek. Daarnaast moet je tegelijkertijd verkorte toeren breien in de sjaalkraag (zie uitleg in patroon)
13.12.2017 - 08:41
![]() Xandra wrote:
Xandra wrote:
Beste Drops Design, kijk hiermee is het dus al opgelost. Kwestie van interpretatie... Het moeten dus in totaal 6x 3av, 2r zijn. Ik had eerst in totaal eerst maar 5x. Klopt dus toch helemaal.... Zelfs met minderen in nld 13 kom ik uit. Dus ik ga mooi verder. Ik weet alleen niet waarom er zo nadrukkelijk staat " DENK OM DE STEKENVERHOUDING" Wat wordt hier mee bedoelt? Groeten Xandra
23.11.2017 - 13:40DROPS Design answered:
Hoi Xandra, Daarmee wordt bedoeld dat je tijdens het breien in de gaten houd of de stekenverhouding nog klopt door na te meten of de afmetingen overeenkomt met de tekening onderaan. Als je een proeflapje hebt gemaakt en de stekenverhouding komt overeen met de aangegeven stekenverhouding bij 'materialen' dan zal het waarschijnlijk wel goed komen. Maar altijd goed om even na te meten.
23.11.2017 - 16:41
![]() Xandra Boon wrote:
Xandra Boon wrote:
Dank je wel voor het antwoord, maar het klopt echt niet. Heb het patroon voor mijn gemak in Excel gemaakt en nageteld. Ik houd echt 5 steken over bij het maken van maat L en de 158 steken als basis. Dus ben ik nu bijna klaar met de boord van het achterpand. Hebben jullie een idee waar de fout gemaakt kan zijn? In A.5 en A.6 gaat het om 4 steken meer met maat XL. In totaal dus 8 steken in de boord. Dat kan het niet zijn. Met vriendelijke groet, Xandra
23.11.2017 - 09:59DROPS Design answered:
Hallo Xandra, Heb het ook even nageteld en kom toch op 158 steken in totaal: 1 kantsteek, A6 (=14 st), A4 (=10st), A3(=36 st), *3 av, 2r* herhaal nog 5 keer (= 30 st), 2 av, A3 (=36 st), A4 (=10 st), A5 (=14 st), 1 kantsteek. Is het misschien mis gegaan bij het herhalen van van 3 av, 2 r?
23.11.2017 - 10:16
![]() Xandra Boon wrote:
Xandra Boon wrote:
Ik ben met veel enthousiasme begonnen met het maken van het vest in maat L hou ik bij het rugpand 5 steken over. Heb 158 steken opgezet. Daarom het repeteerpatroon 6x ingevoegd. Kom ik nu verder wel uit?
22.11.2017 - 07:24DROPS Design answered:
Hallo Xandra, Het is de bedoeling dat je precies uitkomt en geen steken over houdt. Tel alles even heel goed na, waarschijnlijk heb je iets over het hoofd gezien.
22.11.2017 - 19:41
![]() Birgit wrote:
Birgit wrote:
Liebes Drops Team, Ich tue mich etwas schwer mit euren Diagrammen, leider sind ja keine Reihennummern angegeben. Sind hier die Hin- und Rückreihen gezeichnet? Kann es sein, dass die erste Reihe nach der Abnahme bei Größe L nicht ganz korrekt ist? Ich musste hier 28 und nicht 24 Maschen im Muster A8 stricken? Kleiner Tipp am Rande, ein großes Diagramm wäre wirklich viel einfacher!
11.10.2017 - 05:53DROPS Design answered:
Liebe Birgit, die Diagramme zeigen alle Reihen, dh die Hin- sowie die Rückreihe - siehe MUSTER. Setzen Sie am besten Markierer zwischen jedem Diagram/Muster ein, damit es einfacher wird, die Diagramme und das Muster zu folgen. Viel Spaß beim stricken!
11.10.2017 - 09:24
![]() Sarah Feldrain wrote:
Sarah Feldrain wrote:
Dank für die Antwort - aber dass nicht nur ich so dumm bin, aus der Textanleitung allein nicht schlau zu werden, erkenne ich an Ihrer Antwort vom 07.10.2016 kl. 08:32: - das ist mal eine klare Ansage :) Ich hoffe, dass ich danach besser verstehe, wann welches Diagramm / Muster gemeint ist.
09.10.2017 - 14:01
![]() Sarah Feldrain wrote:
Sarah Feldrain wrote:
Hallo, leider komme ich mit Ihrer Art von Anleitung überhaupt nicht Fange mit dem Rücken (große Größe) an, habe 12 R gestrickt, im Mittelteil Maschen zusammengestrickt und möchte jetzt das Muster anfangen.... Auf dem Bild sind Zöpfe zu erkennen, verschieden breite. Zopfmuster erkenne ich aber nur im Diagramm A3. Ab wann? und was bis dahin? Sieht mir nicht nach 2r 2L aus Ehrlich erkenne ich keinen Unterschied zwischen den Diagrammen A5 A6 A8 und A9. Verzweifelte Grüße SF
09.10.2017 - 11:42DROPS Design answered:
Liebe Frau Feldrain, nach diesen 12 Reihen stricken Sie Vom 3. Reihe in allen Diagram (= Reihe 3 = Abnahme, Rückreihe (= 4. R) und Muster von Reihe 5 ab. Dann werden Sie die Zöpfe in A.3 und das Muster wie im A.8 stricken. Viel Spaß beim stricken!
09.10.2017 - 12:57
![]() Jolanda wrote:
Jolanda wrote:
Ik snap niet hoe de volgorde is na de 12 naalden. Met welk patroon begin je dan? Alvast bedankt
03.09.2017 - 00:34DROPS Design answered:
Hoi Jolanda, Je doet hetzelfde als hiervoor, dus de volgorde van het patroon dat je in de 12 naalden hebt gebreid, alleen brei je nu vanaf de 3e naald in het patroon. Verder volg je de instructies op m.b.t. het minderen (in de averechte delen) zoals beschreven in de tekst.
04.09.2017 - 16:39
![]() Prescilla wrote:
Prescilla wrote:
Ik kom niet uit de naald na de minderingen. Tussen A2 en A3 moest 2av. Maar nu door de minderingen trekt een steek zich bij de A3 en hou ik 1av steek over. Ik kan nergens vinden hoe ik die moet breien? Het gaat om maat m
01.09.2017 - 10:26DROPS Design answered:
Hallo Precsilla, Na de 12 naalden brei je verder met de 3e naald in het tepatroon, waarbij in telpatroon A.3 2x 2 steken averecht geminderd worden (deze staan aagegeven met een symbool). Op de volgende naald wordt deze samengebreide steek averecht gebreid op de goede kant (en recht op de verkeerde kant). Deze minderingen staan los van de minderingen die beschreven staan in de tekst. Wat bedoel je met dat steken naar A.3 trekken?
04.09.2017 - 17:08
![]() Maryse wrote:
Maryse wrote:
Bonjour, pour le devant gauche quel diagramme utilise t on ? Merci .
18.07.2017 - 13:10DROPS Design answered:
Bonjour Maryse, pour le devant gauche, on tricote les diagrammes A.6, A.4, A.3, A.9 et A.10. Bon tricot!
18.07.2017 - 14:25
Finnley |
|||||||||||||||||||
 |
 |
||||||||||||||||||
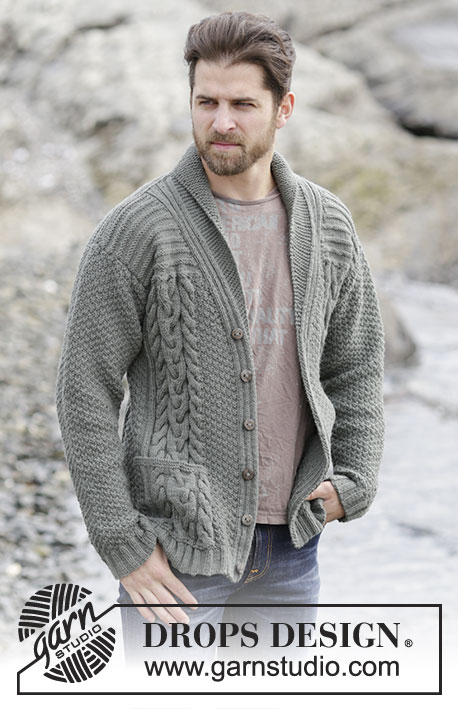
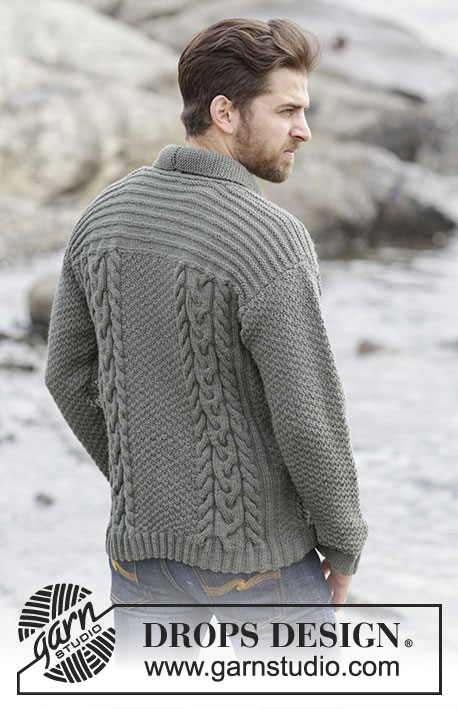
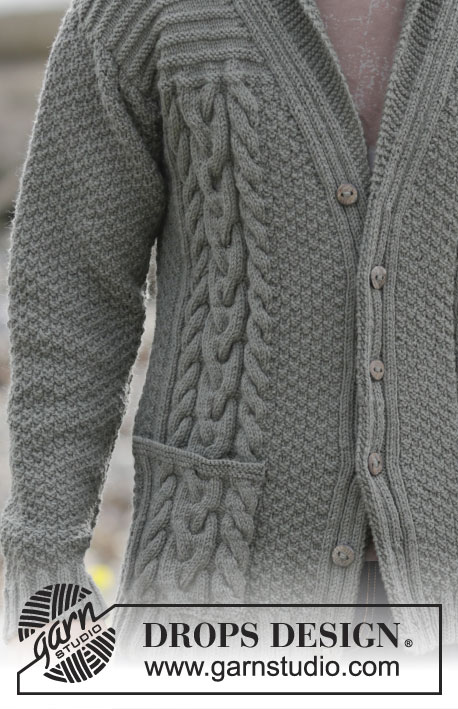
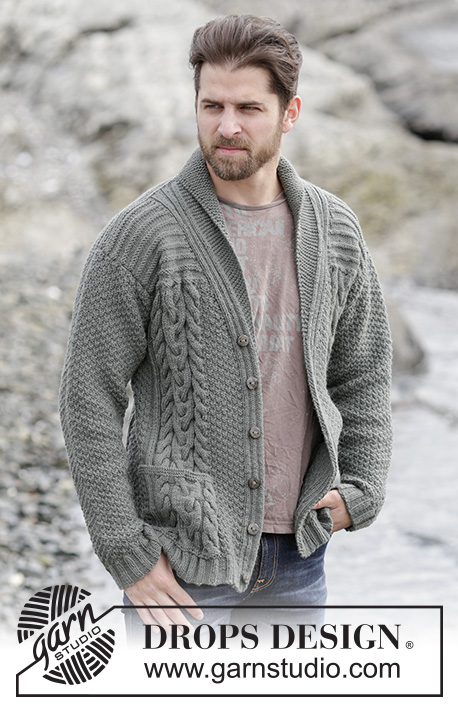
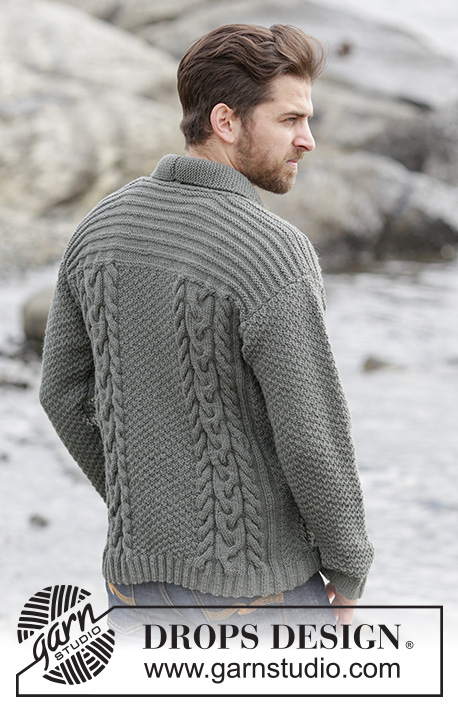
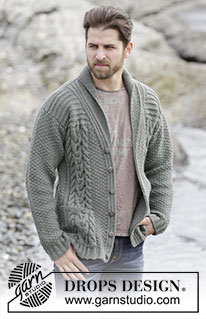
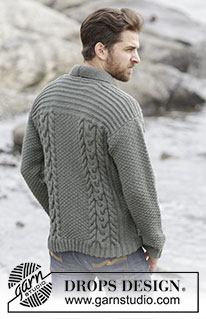
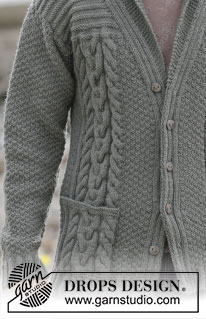
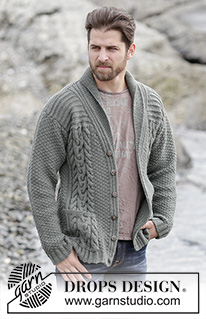
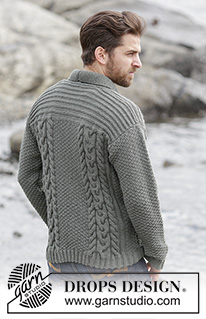
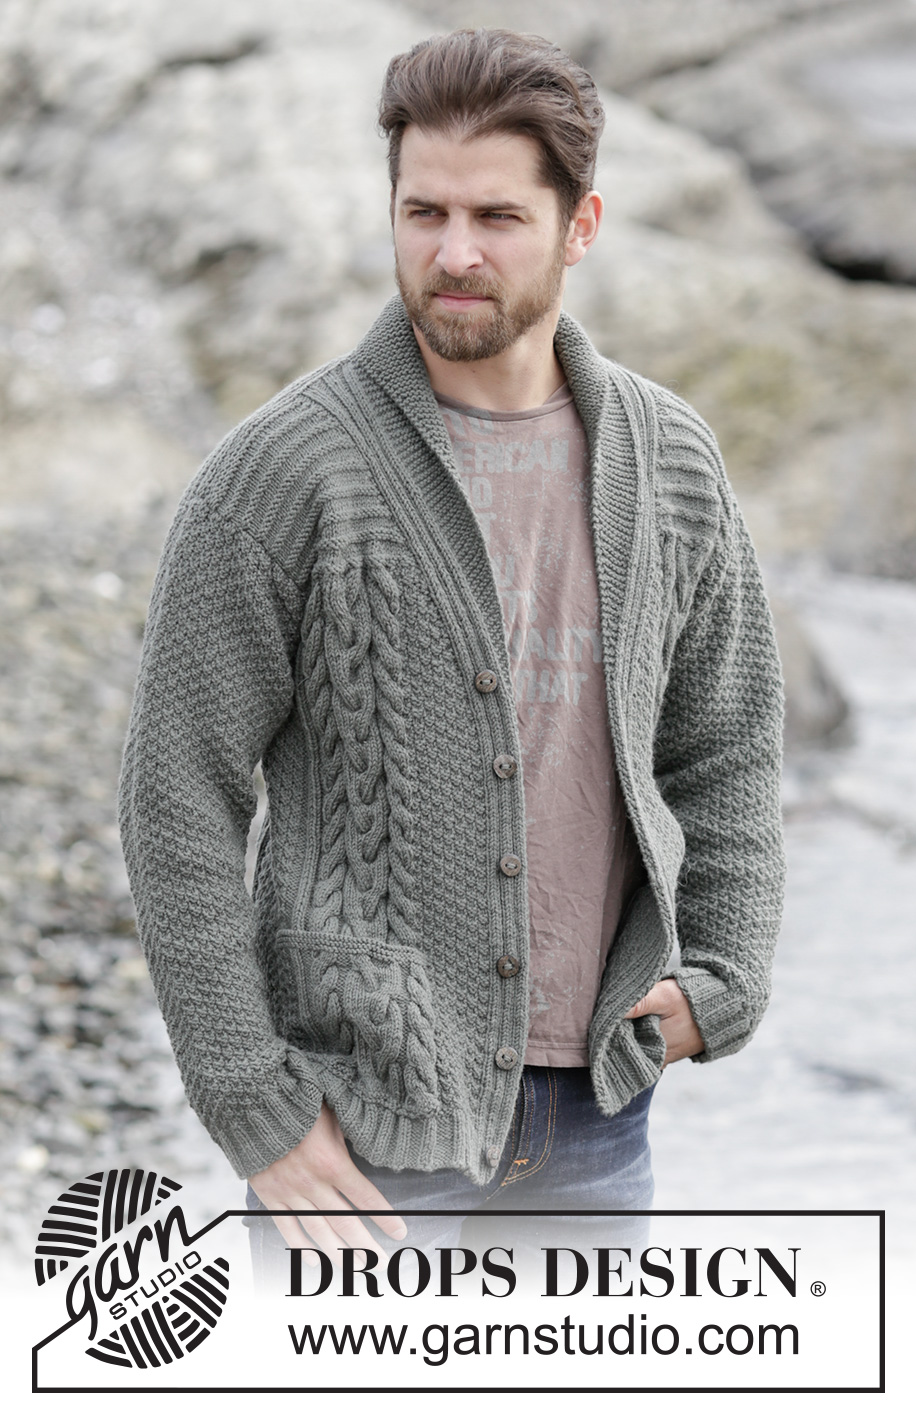
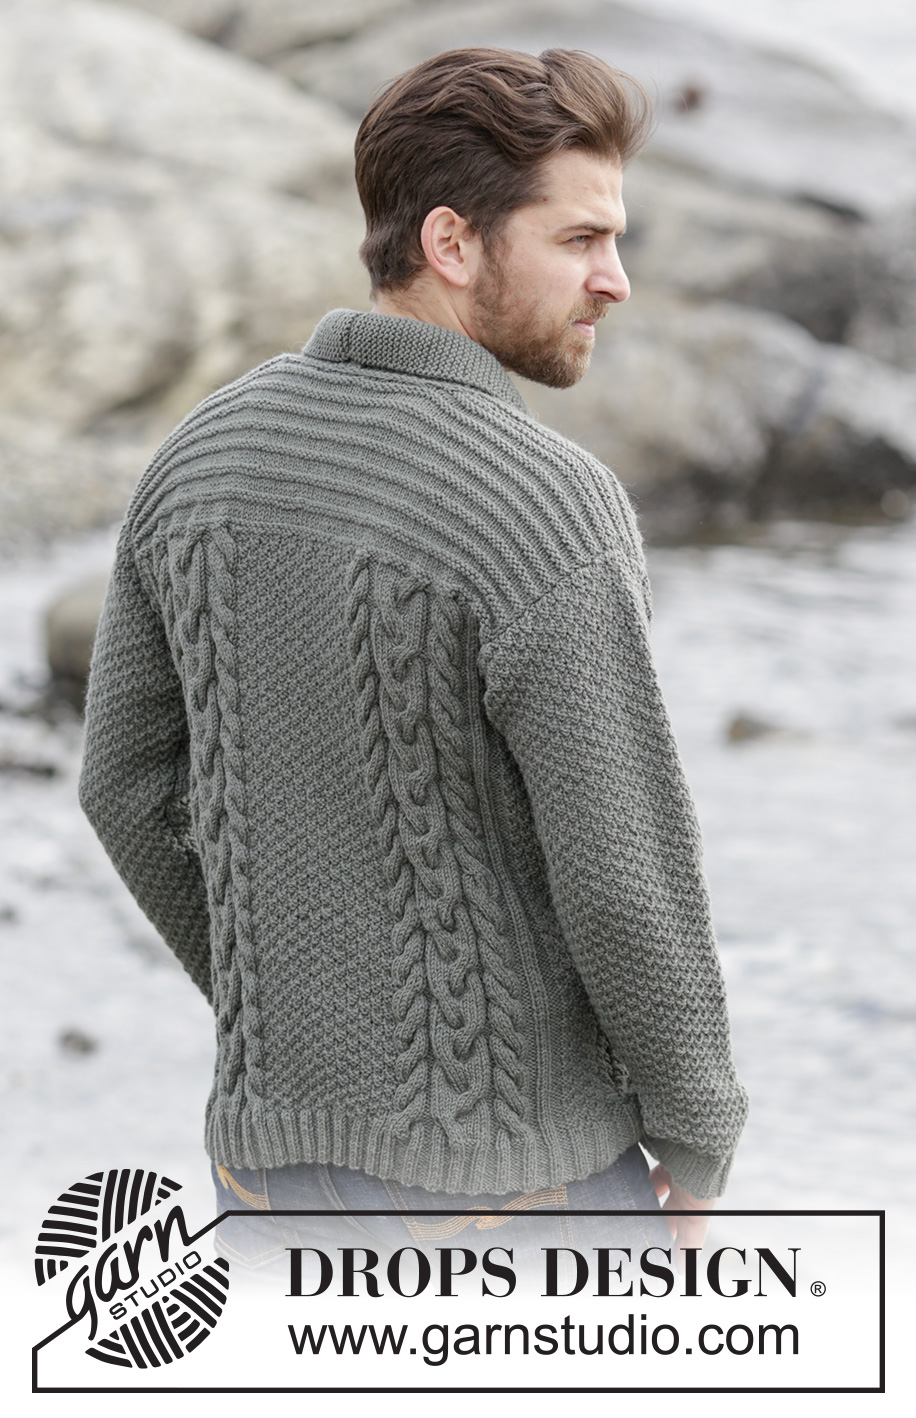
Men's knitted jacket in DROPS Lima, with cables and shawl collar. Size: S - XXXL.
DROPS Extra 0-1132 |
|||||||||||||||||||
|
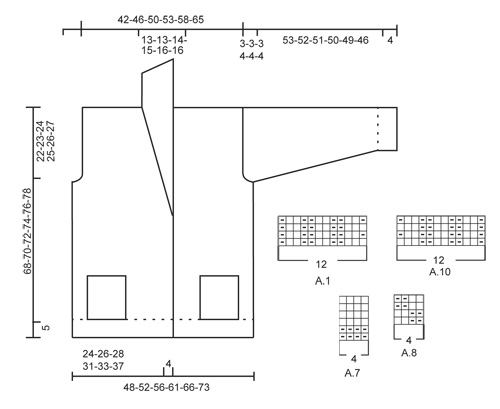
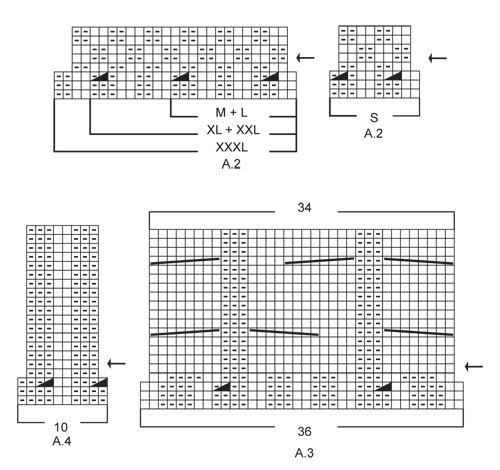
GARTER ST (back and forth): K all rows. 1 ridge = 2 rows K. PATTERN: See diagrams A.1-A.10. The diagrams show all rows in pattern seen from RS. INCREASE TIP: Inc 1 st by making 1 YO, on next row work YO twisted (i.e. work in the back loop of st instead front) to avoid holes. DECREASE TIP: All dec are done from RS! Dec as follows after A.1: P 2 tog Dec as follows before A.1: Work until 2 sts remain before A.1, P 2 tog. BUTTONHOLES: Dec for buttonholes on left band. 1 buttonhole = K tog sixth and seventh st from edge and make 1 YO. Dec for buttonholes when piece measures: SIZE S: 2, 9, 17, 25, 33 and 41 cm. SIZE M: 2, 10, 18, 26, 34 and 42 cm. SIZE L: 3, 11, 19, 27, 35 and 43 cm. SIZE XL: 3, 12, 20, 28, 36 and 44 cm. SIZE XXL: 4, 13, 21, 29, 37 and 45 cm. SIZE XXXL: 5, 14, 22, 30, 38 and 46 cm. SHORT ROWS (applies to shawl collar): Work short rows over sts in garter st from mid front as follows: For every 14th row work as follows (beg from RS): Work over all sts in garter st, turn piece, tighten yarn and K back, turn piece and work as before over all sts. That way the ridges in collar will not contract as much. On left front piece work reversed, i.e. beg short rows from WS. ---------------------------------------------------------- JACKET: Worked back and forth and sewn tog when finished. BACK PIECE: Cast on 145-150-158-178-186-206 sts on circular needle size 3.5 mm with Lima. Work rib as follows: 1 edge st in GARTER ST - see explanation above, A.6 (find diagram for correct size), A.4, A.3, P 2, K 2, * P 3, K 2 *, repeat from *-* 4-5-5-9-9-11 more times, P 2, A.3, A.4, A.5 (find diagram for correct size), 1 edge st in garter st. Continue like this and repeat the first 2 rows in A.3-A.6 until 12 rows have been worked. Now continue pattern from 3rd row in diagram and work as follows: Work the first 59-59-63-63-67-72 sts as before, work the next 27-32-32-52-52-62 sts AT THE SAME TIME dec 11-8-8-12-12-14 sts evenly in sections with P, continue as before over the remaining 59-59-63-63-67-72 sts = 122-130-138-154-162-178 sts. Work 1 row. Now switch to circular needle size 4 mm and continue with pattern but work A.8 over the middle 16-24-24-40-40-48 sts. NOTE: Now repeat A.3- A.6 from arrow in diagram. REMEMBER THE KNITTING TENSION When piece measures 46-47-48-49-50-51 cm, cast off 3-3-3-4-4-4 sts at beg of the next 4 rows for armholes = 110-118-126-138-146-162 sts on needle. When piece measures 53-54-55-56-57-58 cm, work A.7 over all sts inside 1 edge st in garter st in each side AT THE SAME TIME on first row dec 20-20-18-24-22-24 sts evenly in all sizes = 90-98-108-114-124-138 sts. Repeat A.7 until finished measurements. When piece measures 66-68-70-72-74-76 cm, work as follows: Work the first 32-36-40-42-46-53 sts, cast off the next 26-26-28-30-32-32 sts and work the remaining 32-36-40-42-46-53 sts. Then finish each shoulder separately as follows: On next row from the neck, dec 1 st = 31-35-39-41-45-52 sts remain on each shoulder. When piece measures 68-70-72-74-76-78 cm, work 1 ridge over all sts. Cast off. Work the other shoulder the same way. RIGHT FRONT PIECE: Cast on 81-85-89-98-102-111 sts on circular needle size 3.5 mm with Lima. Work rib as follows: A.1 (= 12 sts), A.2 (find diagram for correct size), P 2, A.3, A.4, A.5 (find diagram for correct size), 1 edge st in garter st. Continue like this and repeat the first 2 rows in A.2-A.5 until 12 rows have been worked. Switch to circular needle size 4 mm and continue with pattern = 73-77-81-89-93-101 sts. NOTE: Now repeat diagram from arrow. When piece measures 40-41-42-43-44-46 cm, beg shawl collar while AT THE SAME TIME working shoulder as explained below: READ ALL OF THE FOLLOWING SECTION BEFORE CONTINUING! SHAWL COLLAR: Work first st in A.1, 1 YO, work the remaining 11 sts in A.1, dec 1 st - READ DECREASE TIP, continue over the remaining sts on needle as before. Repeat displacement over A.1 every 1½ cm 0-2-3-3-3-4 times in total and every cm 26-24-23-24-25-24 times = 26-26-26-27-28-28 sts (incl the first st in A.1). Work the inc sts towards mid front in garter st, AT THE SAME TIME work SHORT ROWS - see explanation above. SHOULDER: When piece measures 46-47-48-49-50-51 cm, cast off 3-3-3-4-4-4 sts at beg of the next 2 rows from WS = 67-71-75-81-85-93 sts on needle. When piece measures 53-54-55-56-57-58 cm, work collar sts in garter st and A.1 as before, then work A.7 over the remaining sts on needle, AT THE SAME TIME dec 10-10-10-13-12-13 sts evenly = 57-61-65-68-73-80 sts. Continue pattern until finished measurements. Then work as follows from RS: When piece measures 68-70-72-74-76-78 cm - adjust after back piece - work the first 26-26-26-27-28-28 sts before slipping them on a stitch holder, then work a ridge over the remaining 31-35-39-41-45-52 sts. Cast off. Slip sts back on needle. Then work short rows in garter st as follows, beg from WS: Work over all 26-26-26-27-28-28 sts, * 2 rows back and forth over the first 13-13-14-14-15-15 sts, 2 rows over all sts *, repeat from *-* until piece measures 7-7-7-8-8-8 cm on the shortest. Cast off. LEFT FRONT PIECE: Work as right front piece but reversed. I.e. work A.10 instead of A.1, A.9 instead of A.2 and A.6 instead of A.5. Remember BUTTONHOLES on left band - see explanation above. SLEEVE: The sleeve is worked back and forth on circular needle. Cast on 59-64-64-69-69-74 sts (incl 1 edge st in garter st in each side) on circular needle size 3.5 mm with Lima. Work rib as follows: 1 edge st in garter st, * K 2, P 3 *, repeat from *-* until 3 sts remain, K 2, 1 edge st in garter st. Continue like this until rib measures 4 cm. Switch to circular needle size 4 mm and work 1 row in stocking st while AT THE SAME TIME dec 9-10-10-11-11-12 sts evenly = 50-54-54-58-58-62 sts. Continue with A.8 inside 1 edge st in garter st in each side. When piece measures 14-13-8-8-13-11 cm, inc 1 st inside edge st in garter st in each side - read INCREASE TIP. Repeat inc approx. every 2-2-1½-1½-1½-1½ cm 20-20-22-22-25-25 more times = 92-96-100-104-110-114 sts. When piece measures 57-56-55-54-53-50 cm, cast off at beg of every row in each side: 3 sts 1-1-1-2-2-2 times, 2 sts 1 time and 3 st 2-2-2-3-3-3 times. Cast off. Sleeve measures approx. 60-59-58-58-57-54 cm. Knit another sleeve. POCKETS: Worked back and forth on circular needle. Cast on 42 sts on circular needle size 4 mm with Lima. Work 1 ridge in garter st AT THE SAME TIME inc 6 sts evenly on row from RS = 48 sts. On next row from RS work pattern as follows: NOTE: Beg and repeat pattern in A.3 and A.4 from 5th row in A.3 and A.4. 1 edge sts in garter st, A.3, A.4, A.8, 1 edge st in garter st. Continue like this back and forth until A.3 and A.4 have been worked 2 times vertically. Then continue with the first 6 rows from arrows in diagram 1 more time. Then work and dec as follows: 1 edge st in garter st, K the next 4 sts tog 2 by 2 (= 2 sts dec), continue as before over the next 7 sts, K the next 4 sts tog 2 by 2, continue with pattern as before over the next 15 sts, K the next 4 sts tog 2 by 2, Work remaining sts as before and finish with 1 edge st in garter st. Then switch to needle 3.5 mm and work 2 ridges over all sts, beg from WS. Cast off from WS. Work another pocket the same way but reversed. ASSEMBLY: Sew the shoulder seams tog. Sew sleeves in body. Sew underarm and side seams in one inside 1 edge st in garter st. Sew the buttons on to the right band. Sew cast-off edge on collars tog mid back, sew collar to the back of neck. Fasten pockets on front pieces so that pattern on pocket is placed over pattern on front piece. Sew pocket neatly through both layers in edge st in garter st in each side and at the bottom of pocket. Cut the yarn and fasten. |
|||||||||||||||||||
Diagram explanations |
|||||||||||||||||||
|
|||||||||||||||||||
 |
|||||||||||||||||||
 |
|||||||||||||||||||
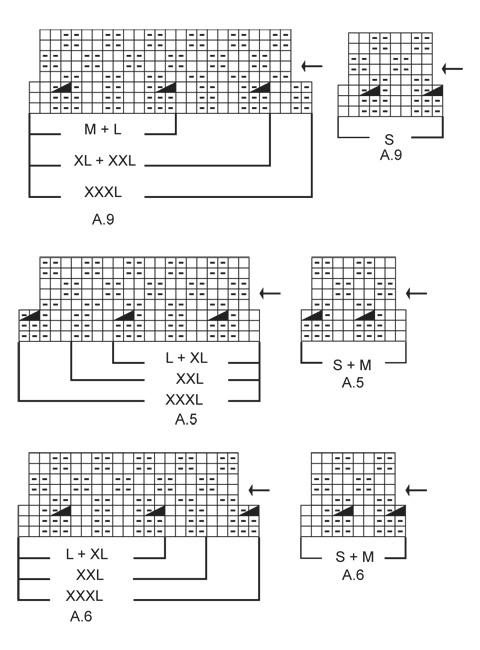 |
|||||||||||||||||||
Have you finished this pattern?Tag your pictures with #dropspattern or submit them to the #dropsfan gallery. Do you need help with this pattern?You'll find 24 tutorial videos, a Comments/Questions area and more by visiting the pattern on garnstudio.com. © 1982-2026 DROPS Design A/S. We reserve all rights. This document, including all its sub-sections, has copyrights. Read more about what you can do with our patterns at the bottom of each pattern on our site. |
|||||||||||||||||||






Post a comment to pattern DROPS Extra 0-1132
We would love to hear what you have to say about this pattern!
If you want to leave a question, please make sure you select the correct category in the form below, to speed up the answering process. Required fields are marked *.