
Looking for a yarn?


Comments / Questions (73)
![]() MYRIAM DEVAUCHELLE wrote:
MYRIAM DEVAUCHELLE wrote:
Merci pour votre réponse, mais j'avoue ne pas réussir à comprendre. A quel moment doit on mettre les 12 mailles avant encolure en attente, après avoir mis la quatrième fois les 4 mailles en attente? ou avant? quand j'ai rabattu les 28 mailles centrales, est ce que c'est en reprenant les mailles en attente qu'il faut en rabattre deux fois une pour l'encolure? je suis vraiment perdue. j'ai vu votre réponse à Madame Le Blanc et c'est encore pour moi mystérieux Merci de votre aide
17.09.2024 - 16:44DROPS Design answered:
Bonjour Mme Devauchelle, toutes les mailles mises en attente sont celles de l'épaule, vous mettez ainsi 4 x 4 m puis les 12 dernières mailles (ces mailles se trouvent entre l'encolure (après/avant les 28 m centrales + les 2 mailles rabattues ) et les 16 mailles en attente). Vous allez donc mettre en attente au début de chaque rang à partir de l'emmanchure: 4 x 4 m et 1 x 12 m et rabattre 2 m au début du 1er rang à partir de l'encolure après avoir divisé pour les 2 épaules (quand les 28 m centrales sont rabattues). Bon tricot!
18.09.2024 - 07:58
![]() MYRIAM DEVAUCHELLE wrote:
MYRIAM DEVAUCHELLE wrote:
Bonjour, au niveau des épaules dos et taille M, je mets en attente 4 fois 4 mailles de chaque côté, soit 32 mailles, à la fin je mets en attente 12 mailles de chaque côté, soit 24 mailles, entre temps je rabats 28 mailles . il me reste donc: 88 - (32 + 24 +28) = 84 mailles, reste 2 de chaque côté encolure, or vous dites de tricoter en jersey les trois mailles côté encolure. Je suis perdue pour cette encolure. Il y a une explication que je dois pas saisir, merci d'avance de votre aide.
17.09.2024 - 13:37DROPS Design answered:
Bonjour Mme Devauchelle, pour le biais des épaules vous mettez en attente 4 x 4 m + 1 x 12 m (= 28 m pour chaque épaule), et, en même temps, vous rabattez les 28 mailles centrales puis terminez chaque épaule séparément (continuez à mettre les mailles en attente pour l'épaule) et rabattez encore 2 fois 1 maille pour l'encolure, il reste 26 mailles pour l'épaule, soit 28 + (2+28+2) +2 = 88 mailles. Bon tricot!
17.09.2024 - 16:14
![]() MYRIAM DEVAUCHELLE wrote:
MYRIAM DEVAUCHELLE wrote:
Merci pour vos réponses toujours très claires
09.09.2024 - 11:56
![]() Myriam Devauchelle wrote:
Myriam Devauchelle wrote:
Bonjour, j’ai fait les diminutions des emmanchures au rang 7 de A4 qui en totalise 27. est-ce normal de commencer A1 par un rang sur l’envers, où faut-il faire un 28 ème rang à A4 , si oui faut il le faire en mailles endroit ou envers. En outre j’ai oublié mes deux augmentations après les emmanchures est-ce gênant ou puis-je rajouter ces deux mailles au niveau du dernier rang de A4, ou faut il détricoter ? Merci d’avance de votre réponse
08.09.2024 - 17:50DROPS Design answered:
Bonjour Mme Devauchelle, les 2 augmentations se font au dernier rang sur l'endroit de A.4 (ainsi le nombre de mailles est divisible par 4 + 2 m lis + 2 m pour que le motif soit symétrique), vous pouvez ensuite tricoter A.1 en commençant sur l'envers. Bon tricot!
09.09.2024 - 10:44
![]() Devauchelle wrote:
Devauchelle wrote:
Bonjour, merci pour les dernières explications, je pense avoir compris. Je viens de rabattre les mailles pour les emmanchures et j’en déduis que les rangs ne commencent plus au même endroit mais 5 mailles avant , est-ce bien cela ? Dans ce cas le milieu dos comme le milieu devant se trouvent aussi décalés. Je n’ose pas poursuivre sans vos conseils. Merci d’avance
02.09.2024 - 19:08DROPS Design answered:
Bonjour Mme Devauchelle, votre motif va effectivement être décalé de 5 mailles, vous allez commencer 5 mailles après le début des tours précédents, marquez la 1ère maille tricotée dans A.4 sur le tour où vous avez rabattu, comptez 5 mailles (de la gauche vers la droite, recommencez un motif encore une fois si besoin), cette maille est désormais la 1ère maille du rang. La maille avec le triangle noir dans A.4 doit toujours être au milieu devant/dos car elle a été centrée au moment de commencer A.4. Bon tricot!
03.09.2024 - 09:43
![]() Myriam Devauchelle wrote:
Myriam Devauchelle wrote:
Bonjour, je fais la taille M et je débute A4, je tricote un centimètre puis je divise l’ouvrage en diminuant pour les emmanchures. Pour le diagramme, si je comprends bien au huitième rang je commence par 2 mailles endroit et 4 envers, puis je continue 4 mailles endroit, 4 mailles envers jusqu’au bout du rang. Est-ce bien cela ? Merci d’avance
01.09.2024 - 16:11DROPS Design answered:
Bonjour Mme Devauchelle, dans cette leçon nous expliquons comment centrer un diagramme, pour A.4 ici vous devez avoir la maille avec le triangle noir dans A.4 au milieu du devant et au milieu dos dos (le motif ne tombera pas juste sur les côtés). Bon tricot!
02.09.2024 - 09:01
![]() Mimi wrote:
Mimi wrote:
Bonjour, Pour le col, qu'arrive-t-il aux mailles centrales du devant en attente? Quand on relève les mailles autour, on reprend ces mailles? Pourquoi ne pas rabattre comme pour le dos et relever des mailles partout? Ou est-ce que j'ai loupé un truc? Surtout que si je commence à l'épaule à relever des mailles, le fil ne suivra pas si je reprend ces mailles en attente. Et si je travaille autour, on en fait quoi à la fin?
16.04.2024 - 21:10DROPS Design answered:
Bonjour Mimi, on va effectivement reprendre les mailles en attente pour le col quand on va relever tout autour de l'encolure. On rabat les mailles de l'encolure dos pour garder un meilleur maintien et on met en attente celles de l'encolure devant pour donner plus de souplesse à l'encolure/ au col. Lorsque les mailles centrales ont été mises en attente, on termine chaque épaule séparément. Bon tricot!
17.04.2024 - 08:28
![]() Line wrote:
Line wrote:
Pour faire l'échantillon, est-ce que l'on prend des aiguilles 3,5 ou 5, 5 cm ? Merci beaucoup ! Vos explications sont toujours si faciles à suivre
25.03.2024 - 14:31DROPS Design answered:
Bonjour Line et merci, tricotez l'échantillon avec les aiguilles 5 (ou adaptez la taille si besoin pour que l'échantillon soit juste). Bon tricot!
02.04.2024 - 09:38
![]() Bergeron Sylvie wrote:
Bergeron Sylvie wrote:
Bonjour ! Si vous pouviez me donner un pas a pas pour le modèle 237_7 gr large Pour le biais et encolure cela serais apprécier . Rang par rang jusqu'à la réussite de l'encolure . Merci ! Je me fais aider par des femmes d'expérience qui ne sont pas a leurs premier chandail et ne comprennent pas vos explications Merci beaucoup
02.03.2024 - 18:04DROPS Design answered:
Bonjour Mme Bergeron, dans cette vidéo, nous montrons (pour un autre modèle, suivez attentivement les explications de ce pull) comment mettre les mailles de l'épaule en attente et, en même temps, comment former l'encolure. Bon tricot!
04.03.2024 - 08:21
![]() Bergeron Sylvie wrote:
Bergeron Sylvie wrote:
Bonjour ! Encore moi hihi Pour le modèle 237_7 gr; large Pour encolure diminution . J'ai 12 mailles coter encolure de chaque coter . Je sais que l'on diminue 1 fois au début et fin de rang mais j'aimerais savoir combien Il devrait me rester de mailles a la fin des diminution complète ? Pour le biais des épaules . Merci
02.03.2024 - 17:54DROPS Design answered:
Bonjour Mme Bergeron, mettez en attente les mailles de l'épaule en début de rang à partir de l'emmanchure (- de chaque côté avant d'avoir rabattu les mailles centrales) et rabattez les 28mailles centrales pour l'encolure puis continuez chaque épaule séparément: continuez à mettre en attente les mailles de l'épaule en début de rang à partir de l'emmanchure (sur l'endroit épaule droite/sur l'envers épaule gauche pour le dos) et, rabattez 2 x 1 maille au début du rang suivant à partir de l'encolure (sur l'envers, épaule gauche / sur l'endroit, épaule droite - dos). Bon tricot!
04.03.2024 - 08:19
|
|||||||||||||
Around Town#aroundtownsweater |
|||||||||||||
 |
 |
||||||||||||
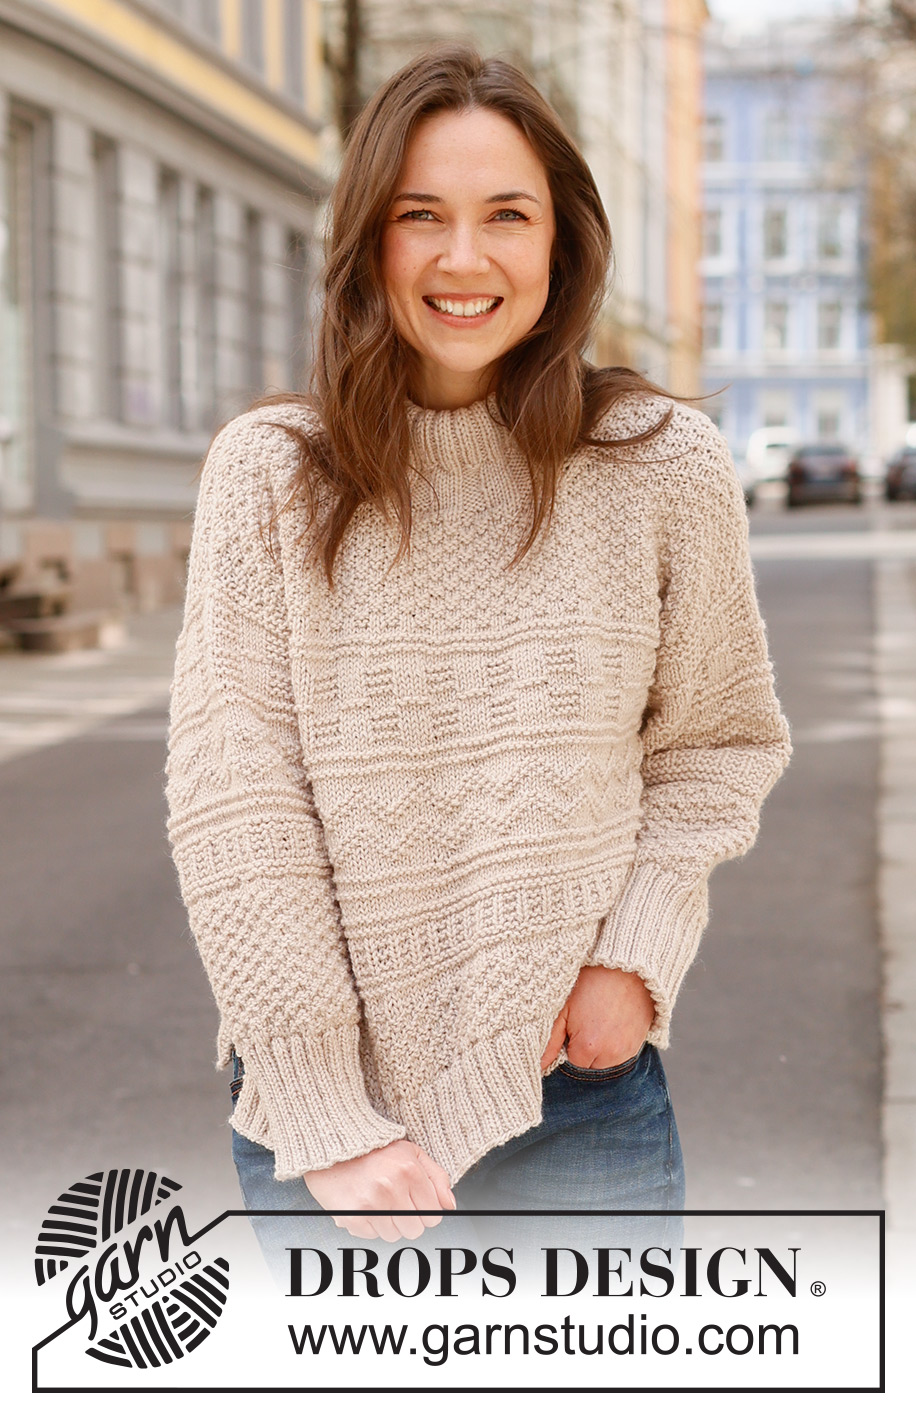
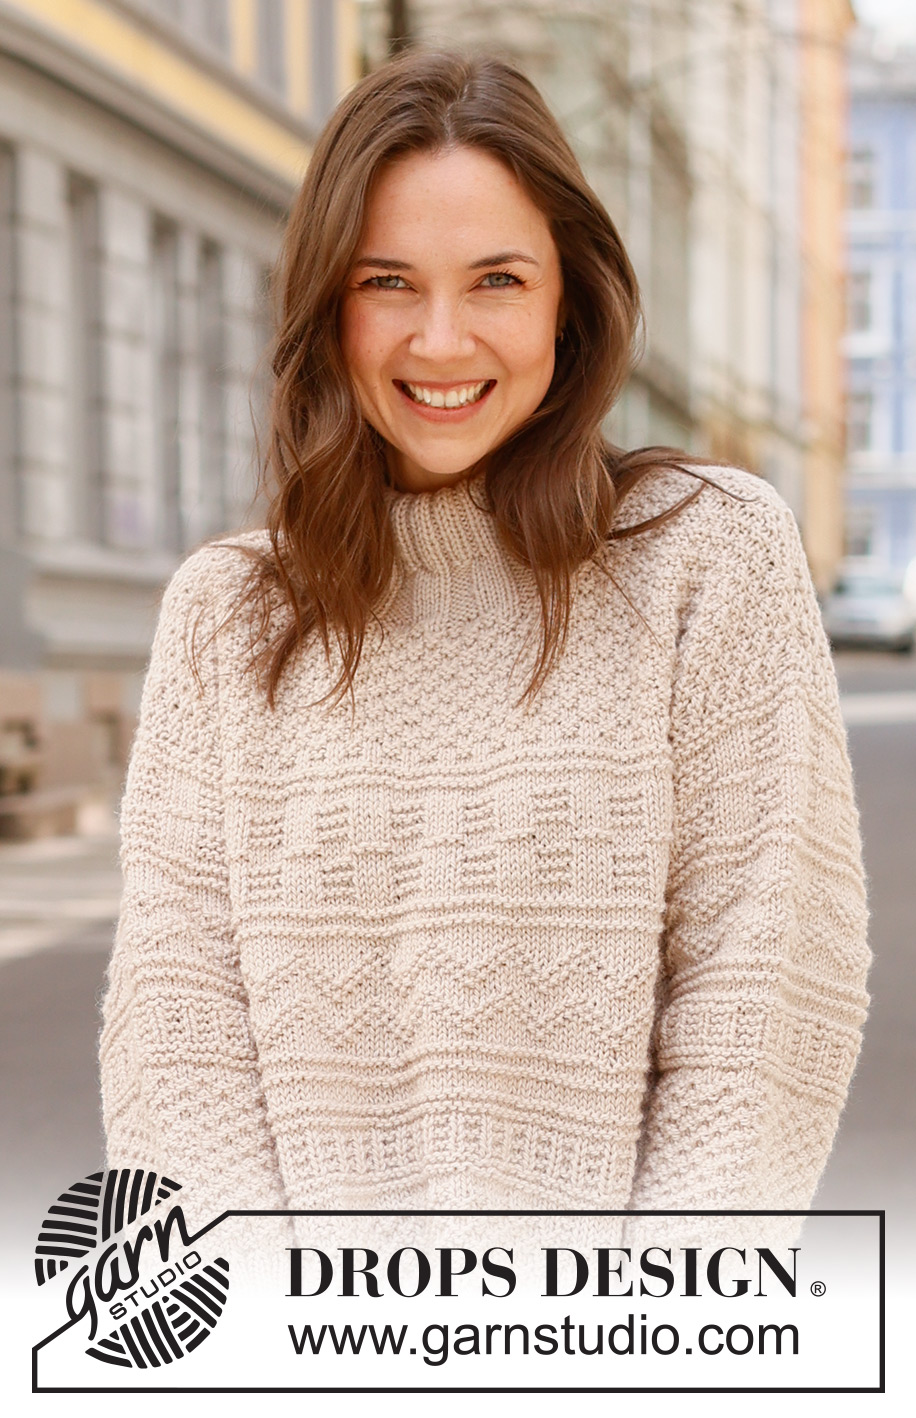
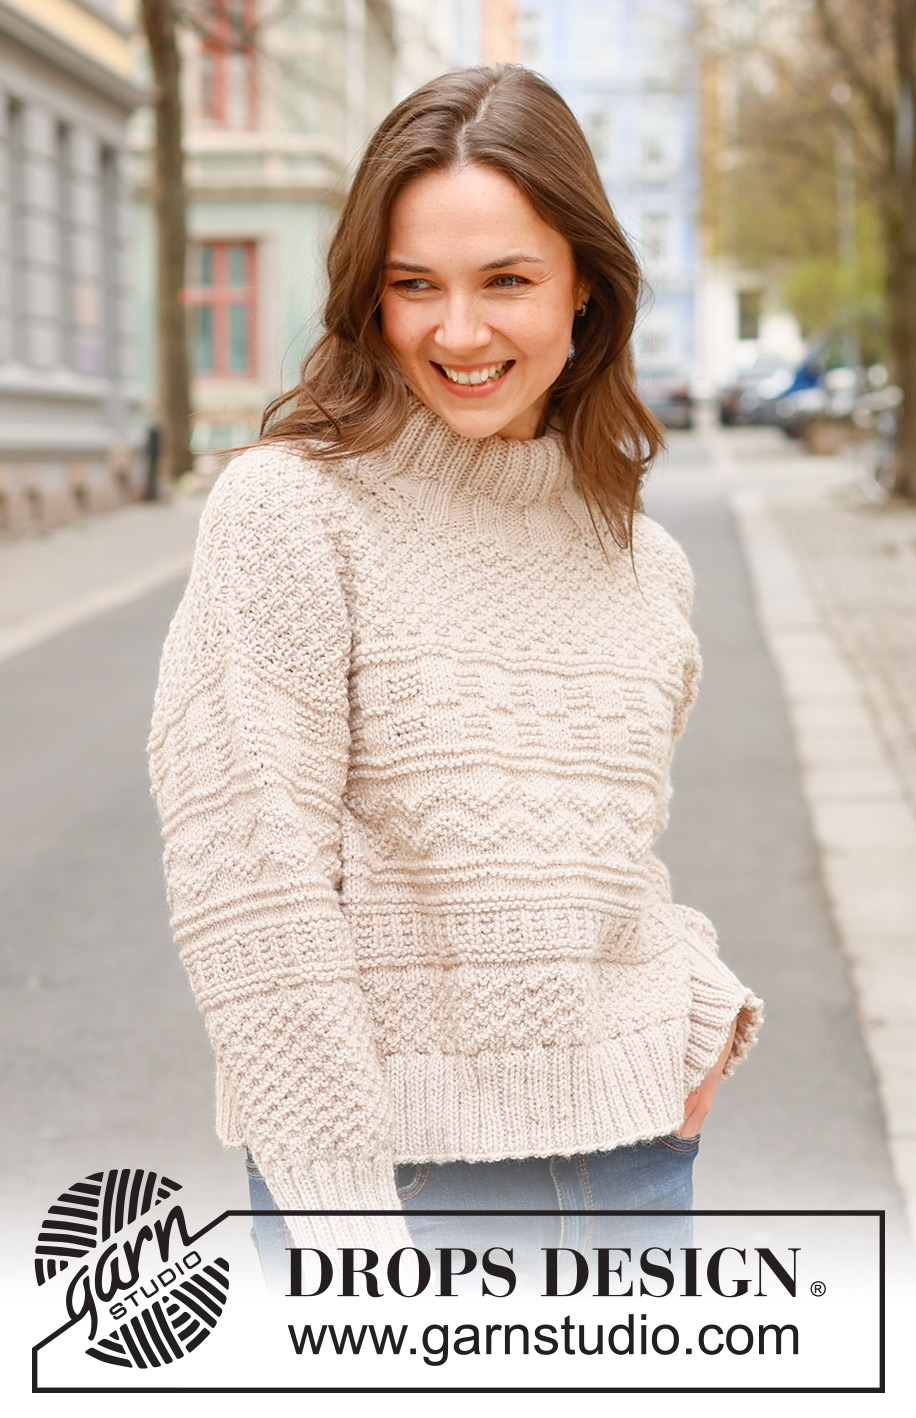
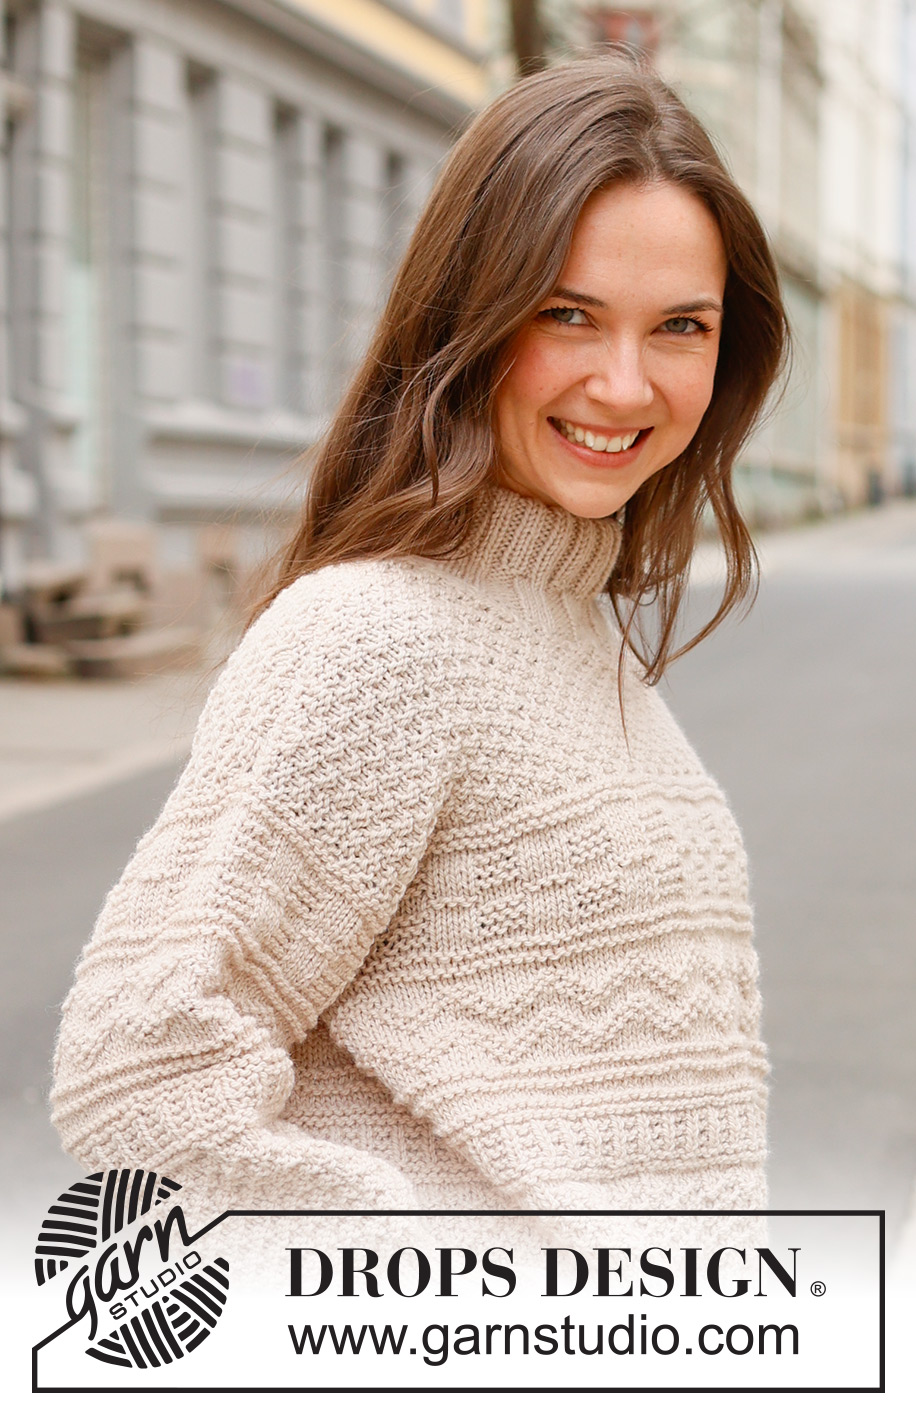
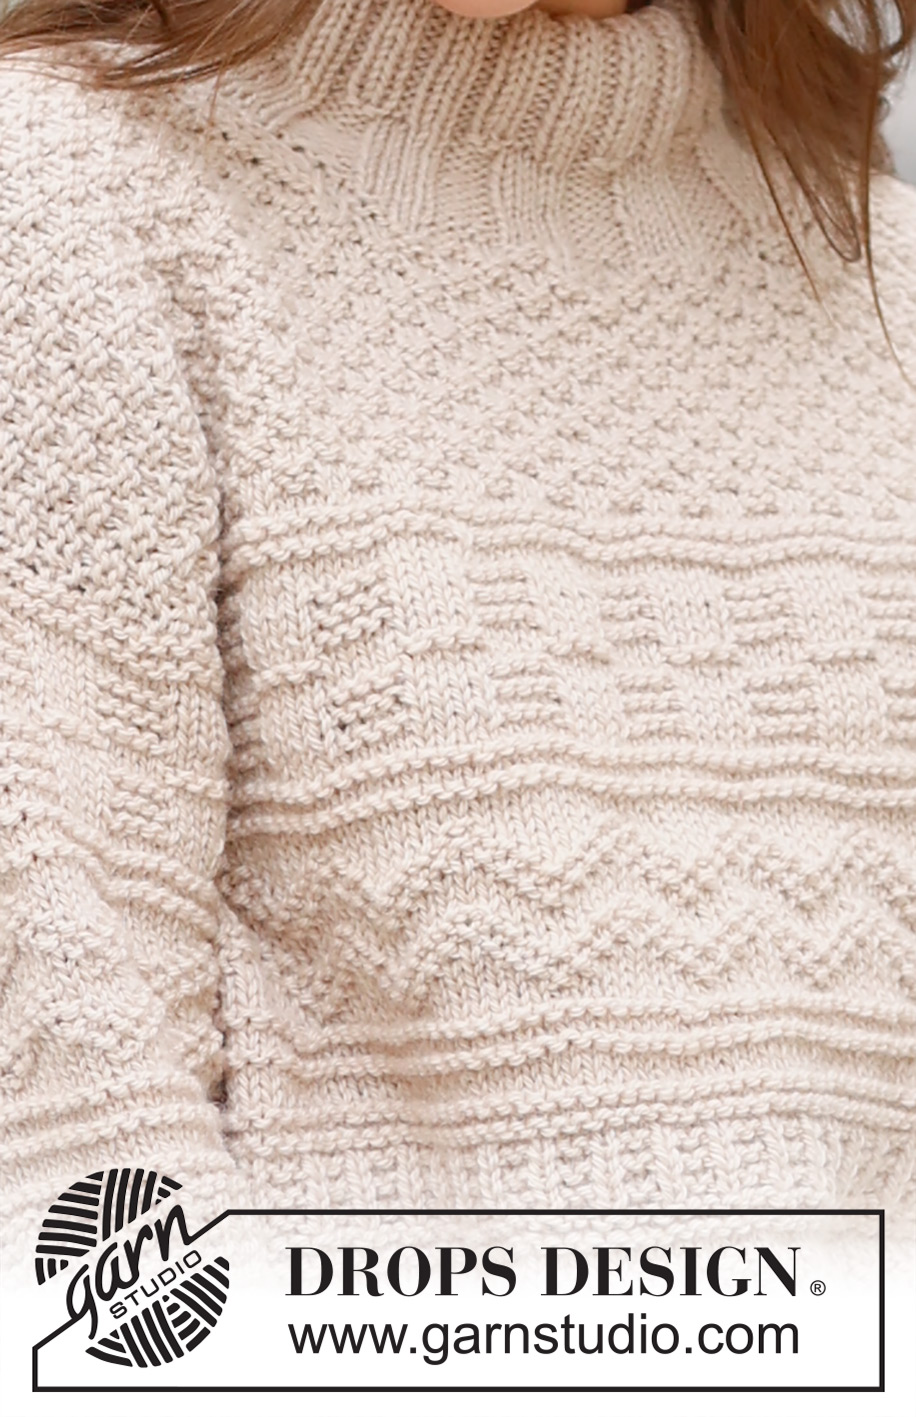
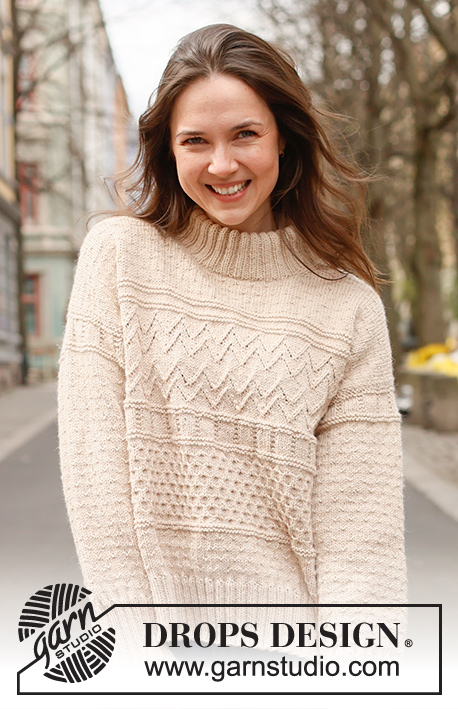
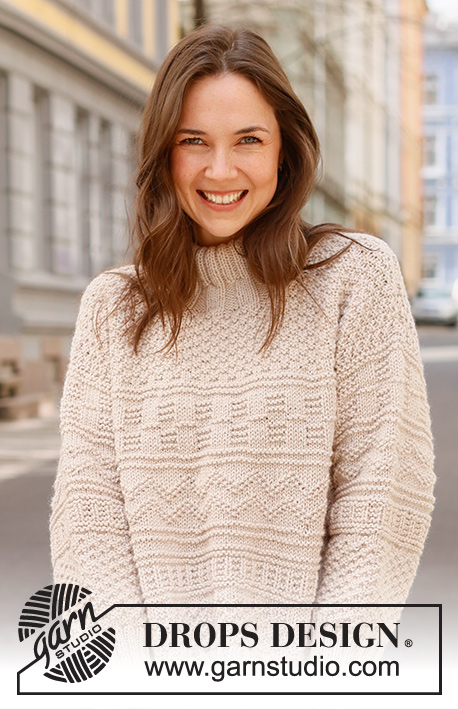
Knitted jumper in DROPS Alaska or DROPS Big Merino. Piece is knitted bottom up with relief pattern and double neck edge. Size XS – XXL.
DROPS 237-7 |
|||||||||||||
|
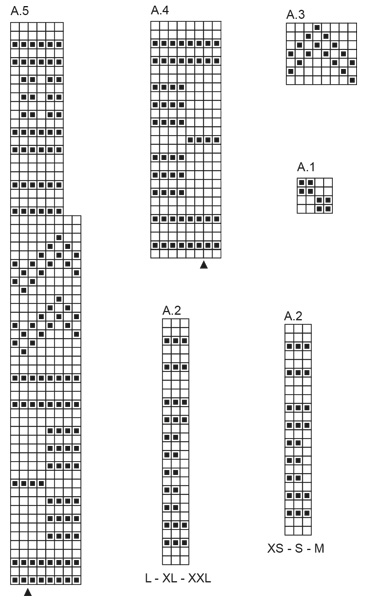
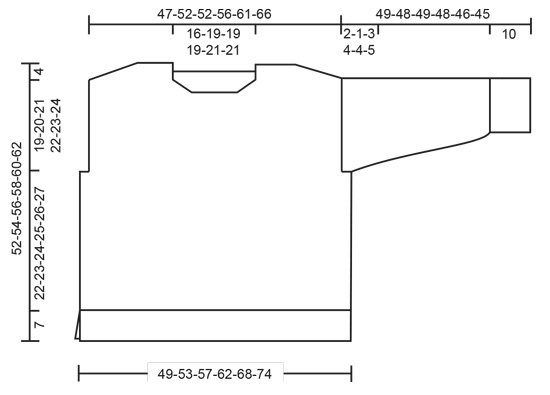
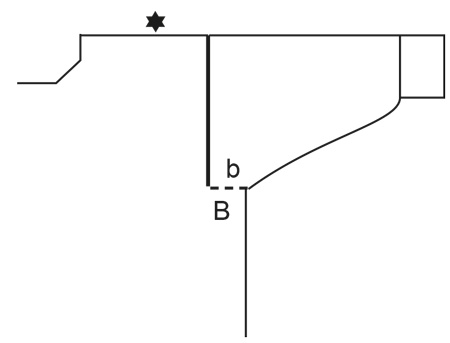
---------------------------------------------------------- EXPLANATION FOR THE PATTERN: ---------------------------------------------------------- GARTER STITCH (back and forth): Knit all rows. 1 ridge vertically = knit 2 rows. PATTERN: See diagrams A.1 to A.5. Choose diagram for your size (applies to A.2). Diagrams show all rows in pattern seen from the right side. DECREASE TIP-1 (applies to neck): All decreases are done from the right side! DECREASE AT BEGINNING OF ROW AS FOLLOWS FROM RIGHT SIDE: Work 2 stitches in stocking stitch, slip 1 stitch knitwise, knit 1, pass slipped stitch over stitch worked (1 stitch decreased). DECREASE AS FOLLOWS AT THE END OF ROW FROM RIGHT SIDE: Work until 4 stitches remain, knit 2 together and 2 stitches in stocking stitch (1 stitch decreased). DECREASE TIP-2 (applies to mid under sleeves): Decrease 1 stitch on each side of marker thread as follows: Work until 2 stitches remain before marker thread, knit/purl 2 together depending on pattern, marker thread, slip 1 stitch knitwise, knit 1, pass slipped stitch over stitch worked/purl 2 twisted together depending on pattern (2 stitches decreased). ---------------------------------------------------------- START THE PIECE HERE: ---------------------------------------------------------- JUMPER - SHORT OVERVIEW OF THE PIECE: Front and back piece back and forth on circular needle, bottom up until rib has been worked, then place piece together. Body is worked in the round on circular needle up to armholes. Then finish back piece and front piece back and forth on circular needle separately until finished measurements. Sew the shoulder seams. Pick up stitches along armholes and work the sleeves top down. Work sleeve cap back and forth on circular needle, work the rest of sleeve in the round on double pointed needles/a short circular needle, top down. Finish with a double neck edge. BACK PIECE: Cast on 110-118-126-138-150-162 stitches on circular needle size 3.5 mm with DROPS Alaska or DROPS Big Merino. Purl 1 row from wrong side. Work next row as follows from right side: 2 stitches in GARTER STITCH - read explanation above - * knit 2, purl 2 *, work from *-* until 4 stitches remain, knit 2 and finish with 2 stitches in garter stitch. Continue rib like this for 7 cm – adjust after a row from wrong side. Put piece aside and work the front piece. FRONT PIECE: Cast on the same number of stitches as on back piece and work piece the same way as back piece until piece measures 7 cm - finish after a row from wrong side. BODY: Put piece together as follows: Knit stitch from front piece and decrease at the same time 26-28-30-32-34-36 stitches evenly, knit over stitch from back piece and decrease at the same time 26-28-30-32-34-36 stitches evenly = 168-180-192-212-232-252 stitches on needle (84-90-96-106-116-126 stitches on front piece and 84-90-96-106-116-126 stitches on back piece). Switch to circular needle size 5 mm. Knit 1 round. Then work A.1 in the round on body. REMEMBER THE KNITTING TENSION! When piece measures 13-13-13-13-15-15 cm, work A.2 in the round - AT THE SAME TIME adjust number of stitches to 168-180-192-213-231-252 on the first round. On last round in A.2 increase 0-4-0-3-1-4 stitches evenly = 168-184-192-216-232-256 stitches. When A.2 has been worked, piece measures approx. 22-22-22-23-25-25 cm from cast-on edge on front/back piece. If the garment is shorter than this, continue in stocking stitch until correct measurements. Then work A.3 in the round on body. Repeat A.3 2-2-3-3-3-4 times in total vertically. When A.3 has been worked, piece measures approx. 27-27-30-31-33-35 cm from cast-on edge. If the garment is shorter than this, continue until correct measurements. Knit 1 round while decreasing 0-4-0-4-0-4 stitches evenly = 168-180-192-212-232-252 stitches. Insert 1 marker thread mid front and 1 marker thread mid back, insert in addition 1 marker in each side on body - this is done as follows: Insert 1 marker at beginning of round, count 42-45-48-53-58-63 stitches, insert 1 marker thread before next stitch (mid front), count 42-45-48-53-58-63 stitches, insert 1 marker before next stitch, count 42-45-48-53-58-63 stitches, insert 1 marker thread before next stitch (mid back). 42-45-48-53-58-63 stitches remain on round after last marker thread. Work A.4 as follows: Count out from symbol marked as the middle in diagram and marker thread mid from where pattern should start in the side, work A.4 as far as you can towards the marker in the side (marker thread mid front should fit symbol for the middle in A.4), then begin A.4 again the same way as on beginning of round, and work A.4 as far as you can until marker at the beginning of round (marker thread mid back should fit symbol for the middle in A.4). Continue pattern like this, and cast off for armholes as explained below. ARMHOLE: When piece measures 29-30-31-32-33-34 cm, cast off for armholes as follows: Begin 3-2-5-6-7-8 stitches remain before marker at the beginning of round, cast off 6-4-10-12-14-16 stitches for armhole, work as before until 3-2-5-6-7-8 stitches remain before marker in the other side, cast off 6-4-10-12-14-16 stitches for armhole, work as before the rest of round. Finish back piece and front piece separately. BACK PIECE: = 78-86-86-94-102-110 stitches. Begin from wrong side and continue A.4 with 1 stitch in garter stitch in each side. On last row from right side, increase 2 stitches evenly in all sizes = 80-88-88-96-104-112 stitches. When A.4 has been worked, A.1 with 1 stitch in garter stitch in each side. Repeat A.1 vertically until finished measurements. Then cast off for diagonal shoulder and neck as explained below. DIAGONAL SHOULDER: When piece measures 48-50-52-54-56-58 cm, slip stitches on a thread in each side for diagonal shoulder (to avoid cutting the yarn work stitches before slipping them on the thread): Slip stitches on a thread from the side as follows: 4-4-4-5-5-6 stitches 4 times and then the last the last 10-12-12-12-14-14 stitches towards the neck. When all stitches are on a thread, slip stitch back on needle size 5 mm. Purl 1 row from wrong side (to avoid a hole in the transitions where stitches where slipped on a thread, pick up the yarn between 2 stitches and purl them twisted together with first stitch on left needle). Cast off knitting from right side. NECK: At the same time when piece measures 49-51-53-55-57-59 cm, cast off the middle 24-28-28-28-32-32 stitches for neck and finish each shoulder separately. Continue A.1, continue to slip stitches on a thread for diagonal shoulder and work in addition the 3 stitches towards the neck in stocking stitch. AT THE SAME TIME on next row from right side, decrease 1 stitch for neck - read DECREASE TIP-1. Decrease like this on every row from right side 2 times in total. When all stitches have been cast off, piece measures approx. 52-54-56-58-60-62 cm from highest point on the shoulder and down. Repeat on the other shoulder. FRONT PIECE: = 78-86-86-94-102-110 stitches. Cast on and work pattern the same way as on back piece. In addition decrease for neck and diagonal shoulder as explained below. NECK: When piece measures 46-48-49-51-52-54 cm, slip the middle 20-24-24-24-26-26 stitches on a thread for neck, and finish each shoulder separately. Continue A.1 but work the outermost 3 stitches towards the neck in stocking stitch. AT THE SAME TIME on next row from right side, decrease 1 stitch for neck - read DECREASE TIP-1. Decrease like this on every row from right side 4-4-4-4-5-5 times in total. DIAGONAL SHOULDER: At the same time when piece measures 48-50-52-54-56-58 cm, slip stitches on a thread for diagonal shoulder the same way as on back piece, i.e. slip 4-4-4-5-5-6 stitches on a thread 4 times then slip the last 10-12-12-12-14-14 stitches towards the neck. When all stitches have been slipped on a thread, purl 1 row from wrong side as on back piece before casting off by knitting from right side. Repeat on the other shoulder. ASSEMBLY: Sew the shoulder seams. SLEEVES: Use circular needle size 5 mm and DROPS Alaska or DROPS Big Merino, pick up from right side 32-34-36-37-39-41 stitches from the bottom of armhole up to shoulder and 32-34-36-37-39-41 stitches from the shoulder and down to the bottom of armhole on the other side = 64-68-72-74-78-82 stitches along armhole. Insert 1 marker thread in the middle of the row - measure sleeve from this marker and use the marker thread when counting to where pattern should begin. Begin from wrong side and work A.5 as follows: Count out from the symbol marked as the middle in diagram and marker thread on sleeve where pattern should begin, and work A.5 back and forth with 1 stitch in garter stitch in each side. When sleeve measures 2-1-3-4-4-5 cm from where marker thread was inserted, put piece together on a short circular needle or double pointed needles size 5 mm – work the rest of sleeve in the round. Insert 1 marker thread at the beginning of round (mid under sleeve). Move marker thread upwards when working. Begin round mid under sleeve and continue pattern in the round (symbol for the middle in diagram should still fit marker thread mid on top of sleeve - pattern does not fit mid under sleeve). When piece measures 5-4-6-7-7-8 cm from where marker thread was inserted mid on top of sleeve, decrease 2 stitches mid under sleeve - read DECREASE TIP-2. Decrease like this every 4-4-3½-3-2½-2 cm 8-9-10-11-12-13 times in total = 48-50-52-52-54-56 stitches. When A.5 has been worked vertically, work A.1 in the round. Work until sleeve measures 39-38-39-38-36-35 cm from marker. 10 cm remain until finished measurements. Try the jumper and work to desired length before rib. Knit 1 round while increasing 12-14-12-16-18-16 stitches evenly = 60-64-64-68-72-72 stitches. Switch to double pointed needles size 3.5 mm. Work rib (knit 2/purl 2) for 10 cm. Loosely cast off. Sleeve measures approx. 49-48-49-48-46-45 cm from marker mid on top of sleeve. Work the other sleeve the same way. Sew bottom of armholes - see chart. DOUBLE NECK EDGE: Begin at one shoulder, use a short circular needle size 3.5 mm and pick up approx. 80-96-96-104-112-112 stitches around the neck inside 1 stitch (including stitches on thread). Work rib in the round (knit 4/purl 4 -adjust beginning of rib so that there are 4 purl stitches or 4 knit stitches on mid front). Insert 1 marker on row when rib measures 4 cm, use marker for measurements. Then work knit 2/purl 2 over all stitches. When rib measures 9-9-9-11-11-11 cm from marker, switch to a short circular needle size 5 mm. Cast off stitches with knit over knit and purl over purl. Fold the rib (knit 2/purl 2) down on the inside of garment. Fasten rib to get a double neck edge of approx. 4-4-4-5-5-5 cm. To avoid a tight neck edge that sticks out it is important to keep the seam elastic. |
|||||||||||||
Diagram explanations |
|||||||||||||
|
|||||||||||||
 |
|||||||||||||
 |
|||||||||||||
 |
|||||||||||||
Have you finished this pattern?Tag your pictures with #dropspattern #aroundtownsweater or submit them to the #dropsfan gallery. Do you need help with this pattern?You'll find 31 tutorial videos, a Comments/Questions area and more by visiting the pattern on garnstudio.com. © 1982-2025 DROPS Design A/S. We reserve all rights. This document, including all its sub-sections, has copyrights. Read more about what you can do with our patterns at the bottom of each pattern on our site. |
|||||||||||||


With over 40 years in knitting and crochet design, DROPS Design offers one of the most extensive collections of free patterns on the internet - translated to 17 languages. As of today we count 320 catalogues and 12095 patterns translated into English (UK/cm). 12095
We work hard to bring you the best knitting and crochet have to offer, inspiration and advice as well as great quality yarns at incredible prices! Would you like to use our patterns for other than personal use? You can read what you are allowed to do in the Copyright text at the bottom of all our patterns. Happy crafting!
Post a comment to pattern DROPS 237-7
We would love to hear what you have to say about this pattern!
If you want to leave a question, please make sure you select the correct category in the form below, to speed up the answering process. Required fields are marked *.