Comments / Questions (14)
![]() Anna wrote:
Anna wrote:
Ska nu börja med dom första ökningarna. Jag ska få in 43 maskor på 118 maskor, 128 med knappkanten. Hur jag än räknar så får jag bara ihop 39 maskor. "När reåren är färdig stickas det 1 varv rätt från rätsidan där det ökas 18-21-24-34-33-43 maskor jämnt fördelat – läs ÖKNINGSTIPS-1 = 122-129-136-150-157-171 maskor. "
27.04.2022 - 20:40
![]() Rosie wrote:
Rosie wrote:
Hi is the A1 pattern read from the RS, and when you get to the end of the row do you turn and purl back on the WS . Thanks Rosie
12.08.2021 - 21:53DROPS Design answered:
Dear Rosie, read diagram starting from bottom corner on the right side towards the left from the right side (= knittting all stitches) and read diagram from the left towards the right from the wrong side (= purling all stitches). Read even more about diagrams here. Happy knitting!
13.08.2021 - 07:30
![]() Susan wrote:
Susan wrote:
Is the rib on the neck part, front facing row - band stitches then k2, p2 until the last band part. Is the back facing row simply purl?
30.05.2021 - 09:54DROPS Design answered:
Dear Susan, yes, the neck, after the initial row of purls (from the wrong side) is 5 stitch (band) garter stitch, ribbing, and 5 stitch garter (band). On the wrong side 5 stitch (band) garter stitch, ribbing (as it shows), and 5 stitch garter (band). Happy Knitting!
30.05.2021 - 13:06
![]() Susan wrote:
Susan wrote:
I have never knitted anything in one round, or a pattern. where do i start putting the pattern in, i.e. how many rows do i do before i start the pattern, how many stitches in from the edge do i start the pattern?
29.05.2021 - 10:22DROPS Design answered:
Dear Susan, the piece is knitted with a round yoke, but it is a cardigan, only the sleeves are knitted on the round. Please read through the pattern and see the diagram, you start knitting the yoke (and the pattern) right after you finished the neck edge. Happy Knitting!
29.05.2021 - 11:14
![]() Allis wrote:
Allis wrote:
Jeg har en overvidde på 96 med bh og bluse på. Skal jeg vælge str. M eller L? Jeg bruger str. 38 i bukser. Er opskriften beregnet med "positiv ease" og i så fald hvor mange ekstra cm? Tak for hjælpen!
12.04.2021 - 10:59DROPS Design answered:
Hej Allis, du finder målene (på jakken) i måleskitsen nederst i opskriften. Brystmålet i skitsen ganger du med 2 for at få omkredsen. God fornøjelse!
12.04.2021 - 13:23
![]() KATHLEEN PENNY wrote:
KATHLEEN PENNY wrote:
I would like to purchase this pattern along with 207-27, 207-13 and 207-14 but I would like them as a paper pattern-I cannot see anywhere where I can buy then=m - I cannot download as I do not have a printer - Can you help me at all?
23.01.2021 - 16:16DROPS Design answered:
Dear Kathleen, our patterns are all of free access, therefore they are not for sale. Even if you don't have a printer, you can press the print button below the photo and, in your computer's printing window, select save as pdf.
23.01.2021 - 20:37
![]() Tanyuk wrote:
Tanyuk wrote:
Hallo, wenn ich A1 fertig gestrickt habe bin ich schon bei einer Gesamthöhe von 24,5cm bei Gr.S. Also nicht 22cm wie beschrieben. Ich benutze das Originalgarn. Was mache ich nun?
18.11.2019 - 16:31DROPS Design answered:
Liebe Frau Tanyuk, stimmt Ihre Maschenprobe? Sie sollen 28 Reihen = 10 cm haben, Sie können mal mit einer dünneren Nadel versuchen, beachten Sie aber, daß Ihre Maschenprobe in der Breite immer stimmt. Viel Spaß beim stricken!
18.11.2019 - 16:41
![]() Elizabeth Petrie wrote:
Elizabeth Petrie wrote:
Your patterns and yarn suggestions are my go-to these days, but I have a question/comment. Drops Design seems to be the only company that uses letters to describe their yarn groups. I would very much like to see them correlated with the number system (000–6) that is predominant in North America. I spend a frustrating amount of time trying to consult various charts, gauge measurements, and so on. Please consider providing a chart or table with comparisons/equivalents. Thanks!
14.08.2019 - 23:20DROPS Design answered:
Dear Mrs Petrie, you can find all these informations about each yarn in its shadecard as well as here - for any further assistance do not hesitate to contact the DROPS Stores in/shipping to Canada. Happy Knitting!
15.08.2019 - 10:15
![]() Rosa Mance wrote:
Rosa Mance wrote:
Thanks for sharing pattern and tutorials for a beautiful Nordic pattern. I can't wait to get started on it.
12.08.2019 - 21:18
![]() Jane Ellegaard wrote:
Jane Ellegaard wrote:
Der var en sommer cardigan med hulmønster som blomst den var gul.bliver den lagt ud med opskrift. Der var flere vi kunne stemme om modellerne fandt jeg på Pinterest.
08.08.2019 - 13:34
Mandal Jacket#mandaljacket |
||||||||||
 |
 |
|||||||||
Knitted jacket with round yoke and Nordic pattern in DROPS Merino Extra Fine. The piece is worked top down. Sizes S - XXXL.
DROPS 207-6 |
||||||||||
|
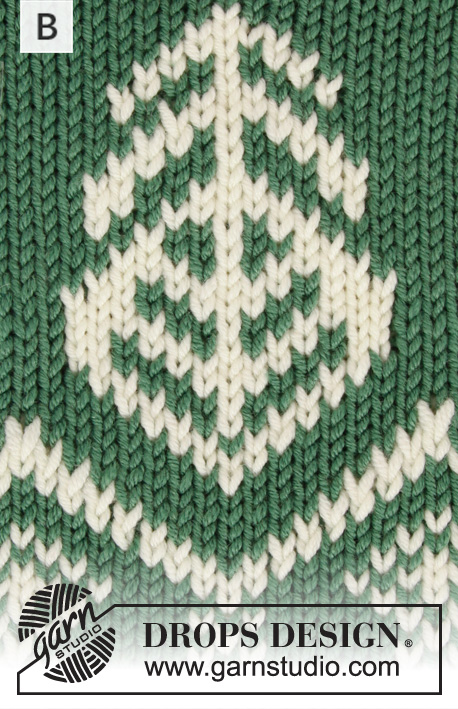
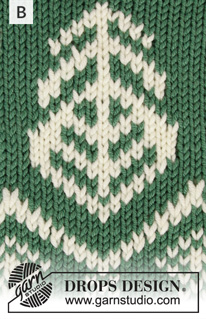
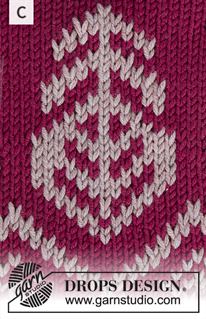
------------------------------------------------------- EXPLANATIONS FOR THE PATTERN: ------------------------------------------------------- PATTERN: See diagram A.1. The diagram is worked in stockinette stitch. RIDGE/GARTER STITCH (worked back and forth): Knit all rows. 1 ridge in height = Knit 2 rows. INCREASE TIP-1 (evenly spaced): To work out how to increase evenly, count the total number of stitches on the needle (e.g. 104 stitches) minus bands (e.g. 10 stitches) and divide the remaining stitches by the number of increases to be made (e.g. 18) = 5.2. In this example, increase by making 1 yarn over after approx each 5th stitch. On the next row purl the yarn overs twisted to avoid holes. INCREASE TIP-2 (for sides of body): Work until there are 2 stitches left before the marker thread, make 1 yarn over, knit 4 (marker thread sits between these 4 stitches) make 1 yarn over (= 2 stitches increased at each marker thread; 4 stitches increased on row). On the next row purl the yarn overs twisted to avoid holes. Then work the new stitches in stockinette stitch. DECREASE TIP (for sleeves): Decrease 1 stitch on each side of the marker thread as follows: Work until there are 3 stitches left before the marker thread, knit 2 together, knit 2 (marker thread sits between these 2 stitches), slip 1 stitch as if to knit, knit 1 and pass the slipped stitch over the knitted stitch = 2 stitches decreased. BUTTONHOLE: Work buttonholes on right band (when garment is worn). Work from the right side when there are 3 stitches left on row as follows: Make 1 yarn over, knit 2 together and knit the last stitch. On the next row (wrong side) knit the yarn over to leave a hole. The first buttonhole is worked when the neck measures approx. 2 cm = ¾". Then work the other 5-6-6-7-7-7 buttonholes with approx. 8-8-8-8-8-9 cm = 3⅛"-3⅛"-3⅛"-3⅛"-3⅛"-3½" between each one. ------------------------------------------------------- START THE PIECE HERE: ------------------------------------------------------- JACKET – SHORT OVERVIEW OF THE PIECE: The neck and yoke are worked back and forth with circular needle, top down from mid front. The yoke is divided for body and sleeves and the body continued back and forth with circular needle. The sleeves are worked in the round with short circular needle/double pointed needles, top down. NECK: Cast on 104-108-112-116-124-128 stitches (including 5 band stitches on each side towards mid front) with circular needle size 3.5 mm = US 4 and light brown. Purl 1 row (= wrong side). The next row is worked as follows from the right side: 5 band stitches in GARTER STITCH – read description above, * knit 2, purl 2 *, work from *-* until there are 7 stitches left on the row, knit 2 and finish with 5 band stitches in garter stitch. Continue this rib for 3 cm = 1⅛". When the rib is finished knit 1 row from the right side where you increase 18-21-24-34-33-43 stitches evenly spaced – read INCREASE TIP-1 = 122-129-136-150-157-171 stitches. Change to circular needle size 4 mm = US 6 and purl 1 row from the wrong side (bands are knitted). Then work the yoke as described below. YOKE: Work as follows from the right side: 5 band stitches in garter stitch, A.1 over the next 112-119-126-140-147-161 stitches (= 16-17-18-20-21-23 repeats of 7 stitches) and finish with 5 band stitches in garter stitch. Work and increase as shown in A.1; the bands are continued in garter stitch. When A.1 has been completed there are 330-350-370-410-430-470 stitches on the needle. Continue with light brown until the piece measures 22-24-25-27-29-31 cm = 8¾"-9½"-9¾"-10⅝"-11⅜"-12¼" from the cast-on edge; on the last row increase 0-16-12-0-4-0 stitches evenly spaced = 330-366-382-410-434-470 stitches. The next row is worked as follows from the wrong side: Work the first 50-55-58-63-68-75 stitches in garter stitch and stockinette stitch as before (= front piece), place the next 70-78-80-84-86-90 stitches on 1 thread for sleeve, cast on 6-6-8-8-10-10 new stitches on the needle (= in side under sleeve), work 90-100-106-116-126-140 stitches in stockinette stitch as before (= back piece), place the next 70-78-80-84-86-90 stitches on 1 thread for sleeve, cast on 6-6-8-8-10-10 new stitches on the needle (= in side under sleeve) and work the remaining 50-55-58-63-68-75 stitches in stockinette stitch and garter stitch as before (= front piece). Body and sleeves are finished separately. THE PIECE IS NOW MEASURED FROM HERE! BODY: = 202-222-238-258-282-310 stitches. Insert 1 marker thread 53-58-62-67-73-80 stitches in from each side (= 96-106-114-124-136-150 stitches between marker threads on the back piece). Allow the threads to follow your work onwards; they will be used when increasing in the sides. Work stockinette stitch back and forth with light brown and 5 band stitches in garter stitch on each side. When the piece measures 4 cm = 1½" from the division, increase 1 stitch on each side of both marker threads – read INCREASE TIP-2. Increase like this every 4 cm = 1½" a total of 7 times on each side = 230-250-266-286-310-338 stitches. Continue working until the piece measures 37-37-38-38-38-38 cm = 14½"-14½"-15"-15"-15"-15" from the division in all sizes (or to desired length; there is 4 cm = 1½" left to finished length). Knit 1 row from the right side where you increase 46-50-54-58-62-70 stitches evenly spaced = 276-300-320-344-372-408 stitches. Change to circular needle size 3.5 mm = US 4 and work the next row as follows from the wrong side: 5 band stitches in garter stitch, * purl 2, knit 2 *, work from *-* until there are 7 stitches left on the row, purl 2 and finish with 5 band stitches in garter stitch. Continue this rib for 4 cm = 1½". Loosely bind off with garter stitch over garter stitch, knit over knit and purl over purl. The jacket measures approx. 63-65-67-69-71-73 cm = 24¾"-25½"-26⅜"-27⅛"-28"-28¾" from the shoulder down. SLEEVE: Place the 70-78-80-84-86-90 stitches from the thread on the one side of the piece on short circular needle/double pointed needles size 4 mm = US 6 and knit up 1 stitch in each of the 6-6-8-8-10-10 stitches cast on under the sleeve = 76-84-88-92-96-100 stitches. Insert 1 marker thread in the middle of the 6-6-8-8-10-10 stitches under the sleeve. Allow the thread to follow your work onwards; it will be used when decreasing mid under sleeve. Start the round at the marker thread and work stockinette stitch in the round with light brown. When the piece measures 3 cm = 1⅛" from the division decrease 2 stitches mid under sleeve – read DECREASE TIP. Decrease like this every 2½-2-1½-1½-1½-1 cm = 1"-¾"-½"-½"-½"-⅜" a total of 12-15-16-17-18-19 times = 52-54-56-58-60-62 stitches. Continue working until the sleeve measures 38-37-36-35-34-33 cm = 15"-14½"-14½"-13¾"-13⅜"-13" from the division (shorter measurements in larger sizes due to wider neck and longer yoke). Knit 1 round where you increase 8-10-8-10-8-10 stitches evenly spaced = 60-64-64-68-68-72 stitches. Change to double pointed needles size 3.5 mm = US 4 and work rib (= knit 2 / purl 2) for 3 cm = 1⅛". Loosely bind off with knit over knit and purl over purl. The sleeve measures approx. 41-40-39-38-37-36 cm = 16⅛"-15 3/4-15¼"-15"-14½"-14¼" from the division. Work the other sleeve in the same way. ASSEMBLY: Sew buttons onto left band. |
||||||||||
Diagram explanations |
||||||||||
|
||||||||||

|
||||||||||

|
||||||||||
Have you finished this pattern?Tag your pictures with #dropspattern #mandaljacket or submit them to the #dropsfan gallery. Do you need help with this pattern?You'll find 27 tutorial videos, a Comments/Questions area and more by visiting the pattern on garnstudio.com. © 1982-2025 DROPS Design A/S. We reserve all rights. This document, including all its sub-sections, has copyrights. Read more about what you can do with our patterns at the bottom of each pattern on our site. |
||||||||||


Post a comment to pattern DROPS 207-6
We would love to hear what you have to say about this pattern!
If you want to leave a question, please make sure you select the correct category in the form below, to speed up the answering process. Required fields are marked *.