
Looking for a yarn?


Comments / Questions (33)
![]() Tammy Thornhill wrote:
Tammy Thornhill wrote:
Approximately how much yarn does each flounce need? I want to do a ombre stripe version and I want to make sure I have enough of each colour. Thank you.
03.02.2025 - 20:10DROPS Design answered:
Dear Mrs Thornhil, we unfortunately only have the total amount of yarn used for the skirt and not for each flounce. Your store might be able to help you - even per mail or telephone. Happy knitting!
04.02.2025 - 09:50
![]() Jessica wrote:
Jessica wrote:
Yes, I know what stockinette is. No, the answer to whether I go straight into decreases after the flounces are created did not help. Summer Dance skirt
27.05.2024 - 01:42DROPS Design answered:
Dear Jessica, after you put togetherthe flounces, in the second round, you start the decreases. Happy Knitting!
27.05.2024 - 03:51
![]() Jessica wrote:
Jessica wrote:
After the flounces are made, it says to stockinette stitch to finished measurements, but doesn't say what that is. I am thinking it should be knit in stockinette the rest of the way and to jump right into the decreases on 159-19, Summer Dance skirt?
26.05.2024 - 12:16DROPS Design answered:
Dear Jessica, stockinett is when you have knit stitches on teh RS and purl on the WS. If you knit stockinett back and forth, you knit on the RS rows and purl on the WS rows. If you knit stockinett on the round, you are knitting in every round. I hope this helps. Happy Knitting!
26.05.2024 - 19:48
![]() Ranu wrote:
Ranu wrote:
Ich versuche grade diese Maßskizze zu verstehen. Die obere Angabe kann sich ja nicht auf den Rockumfang beziehen, 34 cm Taillenumfang haben nur kleine Kinder. Ich habe normalerweise Größe S/M und möchte, dass der Rock mehr auf der Hüfte sitzt als in der Taille. Da habe ich einen Umfang von 90 cm. Selbst wenn auf der Maßskizze nicht der Umfang sondern nur die halbe Seite des Rockes gemessen wurde, würde ich dann hier XL stricken müssen. Stimmt das?
25.10.2022 - 15:05DROPS Design answered:
Liebe Frau Ranu, in die 1. Größe werden die übrigen 144 Maschen ca 68 cm messen, so hat man die Maße von 34 cm - gerne können Sie je nach Wunsch und Maßen die Anleitung so anpassen damit der Rock Ihre Hüfte sowie Ihre Taille passt. Viel Spaß beim stricken!
25.10.2022 - 15:59
![]() Myra Jane Sloan wrote:
Myra Jane Sloan wrote:
For some reason, I am having a hard time following this pattern. I basically would just like to get the basic flounce pattern as I would like to make a ruffle around a sleeve. How can I do just the basic pattern in simple terms and then I can repeat it as many times as I want around the sleeve cuff. Thank you so much for your time.
18.09.2020 - 04:41DROPS Design answered:
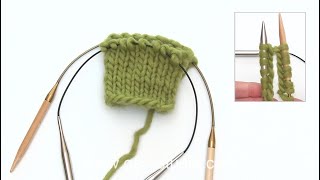
Dear Mrs Sloan, you first work A.1 (= knit 1 round with decreases, purl 1 round), then repeat A.2 (= round 1 = K2 tog, K2 tog, (YO, K1)x3, YO, K2 tog, K2 tog - round 2+3: knit, round 4 = purl) - read more about diagrams here. Then work flounces together as shown in this video. Happy knitting!
18.09.2020 - 08:47
![]() Jessica wrote:
Jessica wrote:
I see you have size listed as S-M-L-XL and such,but what does that correspond to? If I am an XL in US sizings, it is not the same as European sizes. Please help?
17.04.2017 - 03:15DROPS Design answered:
Dear Jessica, the actual size of a garment depends on style and design. Please refer to the measurements on the drawig at the bottom of the pattern. Also of the knitting style and gauge also plays a big role- please always do a gauge swatch and check it, change needle size if necessary. I hope this helps. Happy Knitting!
17.04.2017 - 10:12
![]() Line Margrete Normann wrote:
Line Margrete Normann wrote:
Kære rette vedkommende Jeg er ikke sikker på om jeg forstår opskriften rigtigt? Betyder det at jeg skal strikke A1 først, men ikke hele omgangen? og så starte A2 efter 275 masker (str. m). Synes det lyder mærkeligt, at man ikke skal have det samme mønster omg ud, for derefter at starte A2. Håber I kan hjælpe mig til at blive lidt klogere. Tak :-)
22.10.2016 - 15:52DROPS Design answered:
Hej Line. Du har 325 m paa pinden og strikker först A.1 1 gang i höjden (gentages 25 gange paa omgangen). Naar A.1 er faerdig har du taget ind saa du har 275 m. Herefter strikker du A.2 over alle masker.
25.10.2016 - 12:51
![]() Jessica wrote:
Jessica wrote:
Also wanted to know possible yardage ranges if I wanted to make the flounces in one color and the body of the skirt another?
19.02.2016 - 10:51DROPS Design answered:
Dear Jessica, you are welcome to contact your DROPS store for any help adjusting the pattern/colours to your own wishes. Happy knitting!
19.02.2016 - 10:59
![]() Jessica wrote:
Jessica wrote:
In reading through the pattern, I am stumped. At the beginning of the flounces I understand to work Chart A1 first then A2. But it doesn't specify how many times of each? Thanks Jessica
19.02.2016 - 10:04DROPS Design answered:
Dear Jessica, you work diagram A.1 1 time in height, then repeat A.2 6 times in height, then work the first 2 rounds in A.2 again. Happy knitting!
19.02.2016 - 10:58
![]() Marja Jokiniemi wrote:
Marja Jokiniemi wrote:
Miten lasken kuinka monen silmukan välein teen kavennukset noissa röyhelöissä? Onko siihen joku laskukaava. Terveisin eräs joka AINA tuskailee näiden tasavälein kavennusten kanssa.
09.07.2015 - 11:30DROPS Design answered:
Hei! Voit laskea lisäysten s-välin seuraavasti: Laske kuinka monta silmukkaa kerroksella on (esim. 1. liehureunuksessa koossa S on 253 s). Jaa tämä luku lisäysten määrän kanssa (51 s) = n. 5. Eli kavennukset tehdään tässä esimerkissä aina kerran 5 silmukan kohdalla (voit neuloa esim. 3 s, 2 s yhteen, 3 s, 2 s yhteen jne.).
13.07.2015 - 14:00
|
|||||||||||||
Summer Dance#summerdanceskirt |
|||||||||||||
 |
 |
||||||||||||
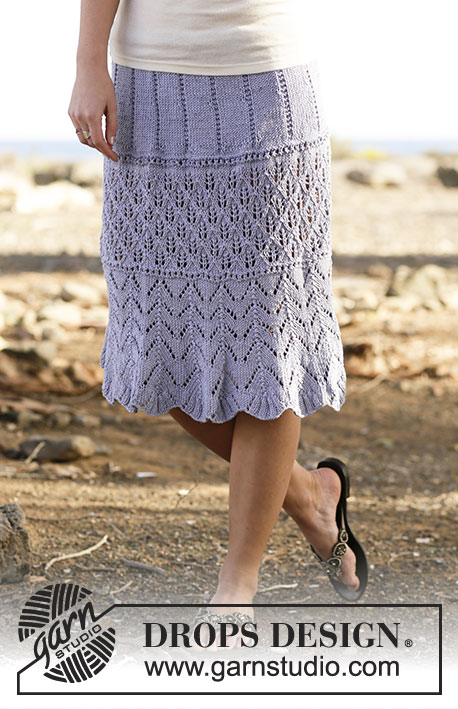
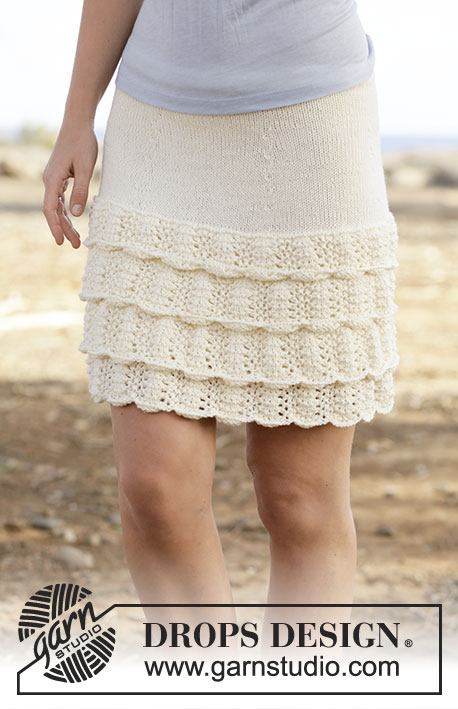
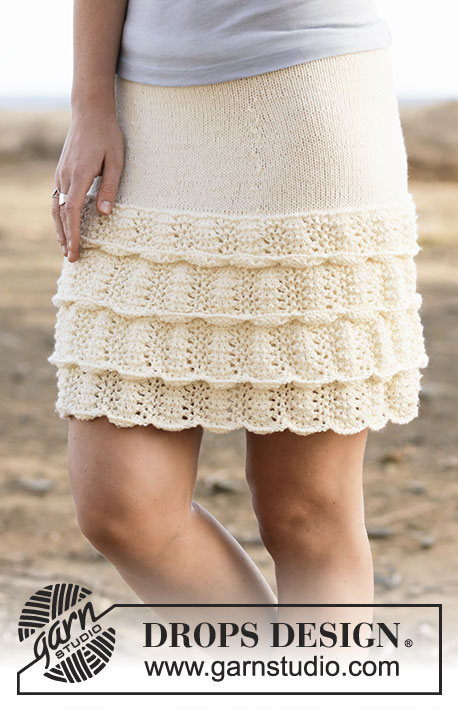
Knitted DROPS skirt with flounce in wave pattern in ”Cotton Merino”. Size S-XXXL.
DROPS 159-19 |
|||||||||||||
|
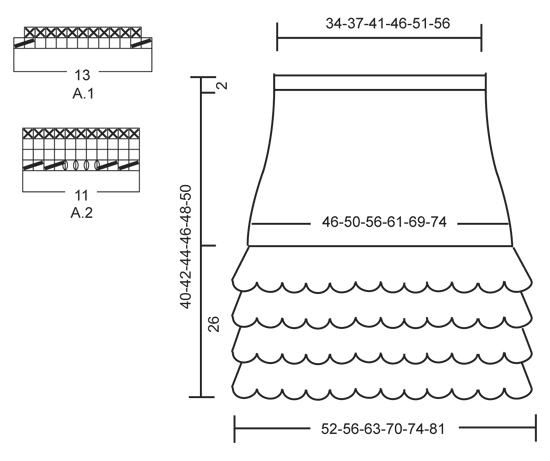
PATTERN: See diagrams A.1 and A.2. The diagrams show all rows in pattern seen from RS. KNITTING TIP: If there are too many sts on needle, work in the round on both circular needle to make room for all the sts. DECREASE TIP: Dec 1 st alternately on the right and left side of all markers. I.e 1st times dec on the right side of all markers and 2nd time dec on the left side of all markers, etc. Dec as follows 2 sts before marker: K 2 tog. Dec as follows after marker: Slip 1 st as if to K, K 1, psso. ---------------------------------------------------------- SKIRT: Worked in the round on circular needle. Bottom part of skirt consists of 4 layered flounces. FLOUNCE 1: Cast on 299-325-364-403-429-468 sts on circular needle size 4 mm / US 6 with Cotton Merino - READ KNITTING TIP. Now work pattern in the round as follows: A.1 (= 13 sts) 23-25-28-31-33-36 times in width = 253-275-308-341-363-396 sts. Continue with A.2 (= 11 sts). REMEMBER THE KNITTING GAUGE When A.2 has been worked 6 times vertically, work the first 2 rounds in A.2 one more time. Now work in stockinette st AT THE SAME TIME on first round dec 51-51-57-64-58-64 sts evenly = 202-224-251-277-305-332 sts. When piece measures 14 cm / 5½'', put piece aside. FLOUNCE 2: Cast on 286-312-351-390-416-455 sts on circular needle size 4 mm / US 6 with Cotton Merino. Now work in the round as follows: A.1 (= 13 sts) 22-24-27-30-32-35 times in width = 242-264-297-330-352-385 sts. Continue with A.2 (= 11 sts). When A.2 has been worked 6 times vertically, work the first 2 rounds in A.2 one more time. Now work in stockinette st AT THE SAME TIME on first round dec 40-40-46-53-47-53 sts evenly = 202-224-251-277-305-332 sts. Place flounce 2 on top of flounce 1 and work them tog as follows: 1 st from first flounce is K tog with 1 st from second flounce, do this until all sts have been worked tog = 202-224-251-277-305-332 sts. Work 6 cm / 2 3/8'' in stockinette st over all sts. Put piece aside. FLOUNCE 3: Cast on 273-299-338-377-403-442 sts on circular needle size 4 mm / US 6 with Cotton Merino. Now work in the round as follows: A.1 (= 13 sts) 21-23-26-29-31-34 times in width = 231-253-286-319-341-374 sts. Continue with A.2 (= 11 sts). When A.2 has been worked 6 times vertically, work the first 2 rounds in A.2 one more time. Now work in stockinette st AT THE SAME TIME on first round dec 29-29-35-42-36-42 sts evenly = 202-224-251-277-305-332 sts. Work flounce 3 tog with flounce 2 the same way as flounce 1 and 2 were worked tog. Continue with 6 cm / 2 3/8'' in stockinette st AT THE SAME TIME on last round dec 10-14-17-19-17-20 sts evenly = 192-210-234-258-288-312 sts. FLOUNCE 4: Cast on 260-286-325-364-390-429 sts on circular needle size 4 mm / US 6 with Cotton Merino. Then work in the round as follows: A.1 (= 13 sts) 20-22-25-28-30-33 times in width = 220-242-275-308-330-363 sts. Continue with A.2 (= 11 sts). When A.2 has been worked 6 times vertically, work the first 2 rounds in A.2 one more time. Now work in stockinette st AT THE SAME TIME on first round dec 28-32-41-50-42-51 sts evenly = 192-210-234-258-288-312 sts. Work flounce 4 tog with flounce 3 the same way as flounce 1 and 2 were worked tog = 192-210-234-258-288-312 sts. Piece measures approx. 26 cm / 10 1/4''. Then continue in stockinette st until finished measurements. On next round insert 6 markers in the piece as follows, beg mid back (= beg of round): Work 16-18-20-22-24-26 sts, insert a marker, then insert 5 markers 32-35-39-43-48-52 sts apart. 16-17-19-21-24-26 sts remain on round after last marker. On next round beg dec - READ DECREASE TIP! Repeat dec every 2 cm / 3/4'' 3-4-5-6-7-8 more times and every cm / 3/8'' 4 times = 144-156-174-192-216-234 sts. When piece measures 40-42-44-46-48-50 cm / 15¾''-16½''-17¼''-18''-19''-19¾'', P 1 round (= folding edge), then work in stockinette st for 2 cm / 3/4'' for hem before loosely binding off. ASSEMBLY: Fold the hem double towards the WS and fasten with neat stitches. Leave a little opening to thread the elastic through. |
|||||||||||||
Diagram explanations |
|||||||||||||
|
|||||||||||||
|
|||||||||||||
Have you finished this pattern?Tag your pictures with #dropspattern #summerdanceskirt or submit them to the #dropsfan gallery. Do you need help with this pattern?You'll find 21 tutorial videos, a Comments/Questions area and more by visiting the pattern on garnstudio.com. © 1982-2025 DROPS Design A/S. We reserve all rights. This document, including all its sub-sections, has copyrights. Read more about what you can do with our patterns at the bottom of each pattern on our site. |
|||||||||||||


With over 40 years in knitting and crochet design, DROPS Design offers one of the most extensive collections of free patterns on the internet - translated to 17 languages. As of today we count 314 catalogs and 11821 patterns - 11811 of which are translated into English (US/in).
We work hard to bring you the best knitting and crochet have to offer, inspiration and advice as well as great quality yarns at incredible prices! Would you like to use our patterns for other than personal use? You can read what you are allowed to do in the Copyright text at the bottom of all our patterns. Happy crafting!
Post a comment to pattern DROPS 159-19
We would love to hear what you have to say about this pattern!
If you want to leave a question, please make sure you select the correct category in the form below, to speed up the answering process. Required fields are marked *.