
Looking for a yarn?


Comments / Questions (29)
![]() Karen Gray wrote:
Karen Gray wrote:
Hi, is it possible to work this pattern on straight knitting needles? If so would the pattern need to be altered?
07.05.2025 - 09:35DROPS Design answered:
Dear Mrs Gray, this lesson will help you to adpat patterns into straight needles, note that you work here body back and forth on circular needle, you then just can use straight needles instead, for sleeves, lesson will help. Happy knitting!
07.05.2025 - 13:06
![]() Marie wrote:
Marie wrote:
Je voulais tricoter une taille L (pour une taille 40/42) mais c était tellement grand que j’ai du détricoter. Selon votre patron, 246 mailles pour une taille L, avec un échantillon de 16 mailles pour 10cm en largeur, cela fait un gilet de 153cm de large (dos et devant) et c’est immense!… pouvez-vous expliquer un peu plus ce patron svp?
12.01.2025 - 22:30DROPS Design answered:
Bonjour Marie, ce modèle est volontairement large (oversize), pour trouver la taille qui vous convient, mesurez un vêtement similaire que vous avez et dont vous aimez la forme et comparez ces mesures à celles du schéma en bas de page (cf aussi ici). Notez qu'après les côtes, vous diminuerez à 216 mailles, et qu'en taille L , vous aurez ainsi 100 mailles pour le dos soit avec 16 m = 10 cm, environ 63 cm. Bon tricot!
13.01.2025 - 10:16
![]() Malin wrote:
Malin wrote:
Hur får man till kullen på ärmen? Behöver man maska av? Hur många maskor utgör sprundet och hur många är ärmkullen?
18.11.2024 - 20:51DROPS Design answered:
Hei Malin. När ärmen mäter 47-45-45-43-41-39 cm, stickas ärmkullen fram och tillbaka på rundsticka till färdigt mått. Sticka vidare till ärmen mäter ca 48-48-48-47-46-45 cm, dvs det är ett sprund på 1-3-3-4-5-6 cm överst på ärmen. Maska av. Ta gjerne en titt på hjelpevideoen: Hur man syr fast en ärmkulle i ärmhålet. mvh DROPS Design
25.11.2024 - 09:05
![]() Sara wrote:
Sara wrote:
Bonjour, j'ai une laine plus fine et j'ai essayé de faire un échantillon avec une plus grosse aiguille mais je n'arrive toujours pas à avoir les mêmes mesures que l'échantillon de jauge, j'obtiens 20 m=10 cm et 29 rangs=10 cm. Je ne peux pas encore augmenter la taille des aiguilles car ça va faire trop lâche. Alors est-ce que si je travaille avec les données de la taille XL je peux avoir à la fin des mesures qui corresponde à une taille L par exemple ? Merci
15.09.2024 - 17:49
![]() Sara wrote:
Sara wrote:
Bonjour, j'ai une laine plus fine et j'ai essayé de faire un échantillon avec une plus grosse aiguille mais je n'arrive toujours pas à avoir les mêmes mesures que l'échantillon de jauge, j'obtiens 20 m=10 cm et 29 rangs=10 cm. Je ne peux pas encore augmenter la taille des aiguilles car ça va faire trop lâche. Alors est-ce que si je travaille avec les données de la taille XL je peux avoir à la fin des mesures qui corresponde à une taille L par exemple ? Merci
15.09.2024 - 17:49DROPS Design answered:
Bonjour Sara, si vous n'avez pas la bonne tension ni en largeur ni en hauteur, vous allez devoir calculer à nouveau les explications en fonction de vos propres mesures (à la fois en largeur et en hauteur). Bon tricot!
16.09.2024 - 09:26
![]() Theresa wrote:
Theresa wrote:
Hallo zusammen. Es geht um das Abketten beim Rückenteil. Wenn ich die mittleren Reihen abgekettet habe, endet die Reihe an der Schulterseite. In der Anleitung steht die Schultern einzeln weiter stricken und die nächste Reihe beginnt am Halsrand. Wie passt das zusammen? Danke
31.07.2024 - 18:17DROPS Design answered:
Liebe Theresa, wenn die mittleren Maschen bei einer Hinreihe abgekettet sind, stricken Sie zuerst die linke Schulter fertig, stricken Sie die Rückreihe dann, am Anfang der nächsten Hinreihe = ab Hals ketten Sie 1 Masche ab; stricken Sie bis die gewünschte Länge und ketten Sie die Maschen ab; dann stricken Sie die 2. Schulter fertig wie die 1. Viel Spaß beim Stricken!
01.08.2024 - 08:39
![]() Theresa wrote:
Theresa wrote:
Guten Abend, im Abschnitt zum linken Vorderteil steht: „Die V-Ausschnitt-Abnahmen in Hin-Reihen neben den 9 Maschen weiterarbeiten.“ Ich wollte gerne wissen was für 9 Maschen gemeint sind? Die Blende hat doch nur 8 Maschen. Danke
30.06.2024 - 21:12DROPS Design answered:
Liebe Theresa, diese 9 Maschen sind unter ABNAHMETIPP (gilt für den V-Ausschnitt): am Anfang der schriftlichen Anleitung beschrieben, dh 8 Blenden-Maschen+ 1 Masche glatt rechts. Viel Spaß beim Stricken!
01.07.2024 - 10:14
![]() Theresa wrote:
Theresa wrote:
Vielen Dank das habe ich jetzt verstanden. Noch eine letzte Frage: Wenn ich zu dem 1 Faden Fabel wechsle, lasse ich die anderen 3 Fäden liegen und schneide sie nicht ab, oder? Viele Grüße
04.06.2024 - 07:22DROPS Design answered:
Liebe Theresa, am besten benutzen Sie ein neues Knäuel Fabel und lassen die anderen 3 Fäden liegen, mit diesen 3 Fäden stricken Sie dann die Jacke weiter, wenn die Tasche fertig ist. Sie können auch die 2 Fäden Kid-Silk liegen lassen und mit nur dem Faden Fabel die Tasche stricken, dann stricken Sie mit den 2 Fäden Kid-Silk nach der Tasche weiter. Viel Spaß beim Stricken!
04.06.2024 - 08:20
![]() Theresa wrote:
Theresa wrote:
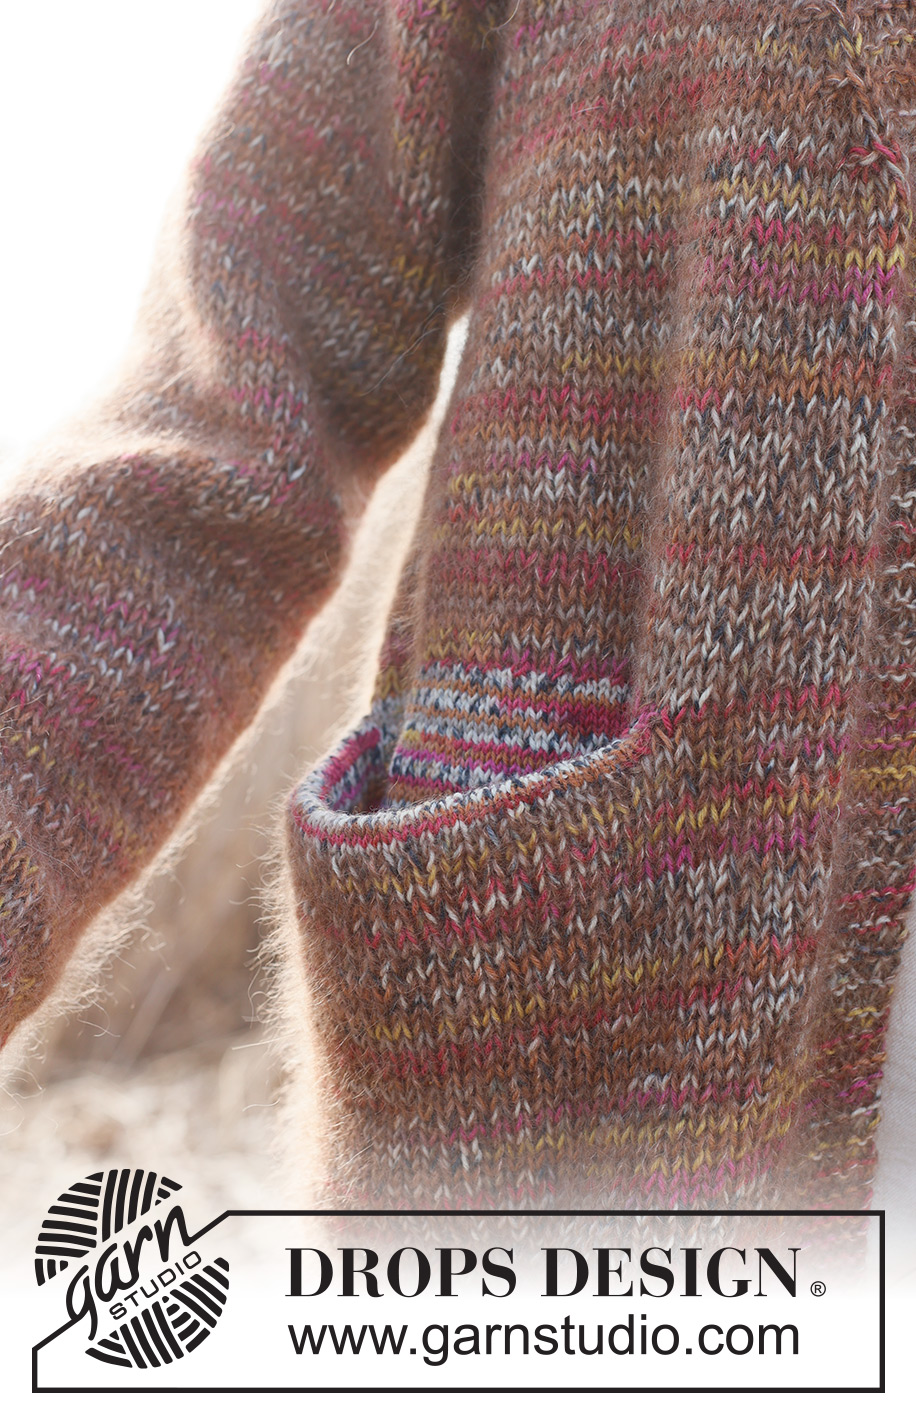
Hallo zusammen. Also auf dem letzten Foto sieht man auch ganz deutlich diese dünnen Silkfäden bei den Taschen..
03.06.2024 - 14:21DROPS Design answered:
Liebe Theresa, bei der Aussenseite der Tasche aber die Innenseite der Tasche wird nur einfädig gestrickt, dh genauso wie bei der Anleitung. Viel Spaß beim Stricken!
03.06.2024 - 15:46
![]() Theresa wrote:
Theresa wrote:
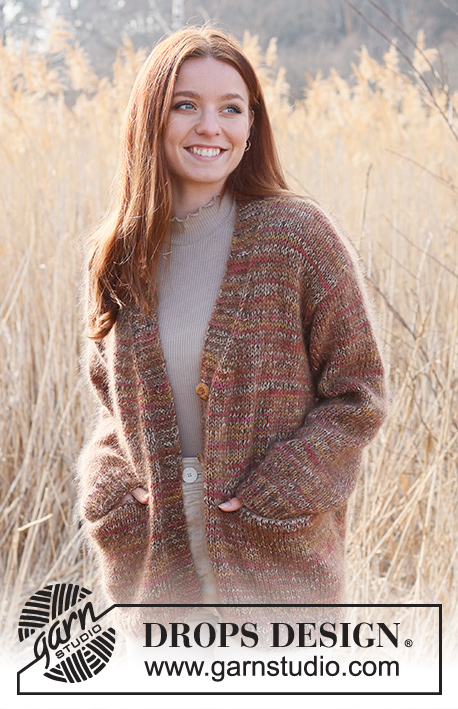
Hallo zusammen, man soll die Taschen nur mit einem Faden Fabel stricken? Auf den Fotos unterscheiden sich die Taschen nicht vom Rest der Jacke. Das würden sie aber, wenn man nur einen Faden Fabel statt einen Faden Fabel + 2 Silk nehmen würde. Bitte um kurze Info. Danke!
02.06.2024 - 17:09DROPS Design answered:
Liebe Theresa, ja genau, die Taschen werden nur mit 1 Faden Fabel und die Nadel Nr 3 gestrickt - bei dem letzten Foto kann man das vielleicht besser sehen. Viel Spaß beim Stricken!
03.06.2024 - 07:55
|
||||||||||
All about Autumn Cardigan#allaboutautumncardigan |
||||||||||
 |
 |
|||||||||
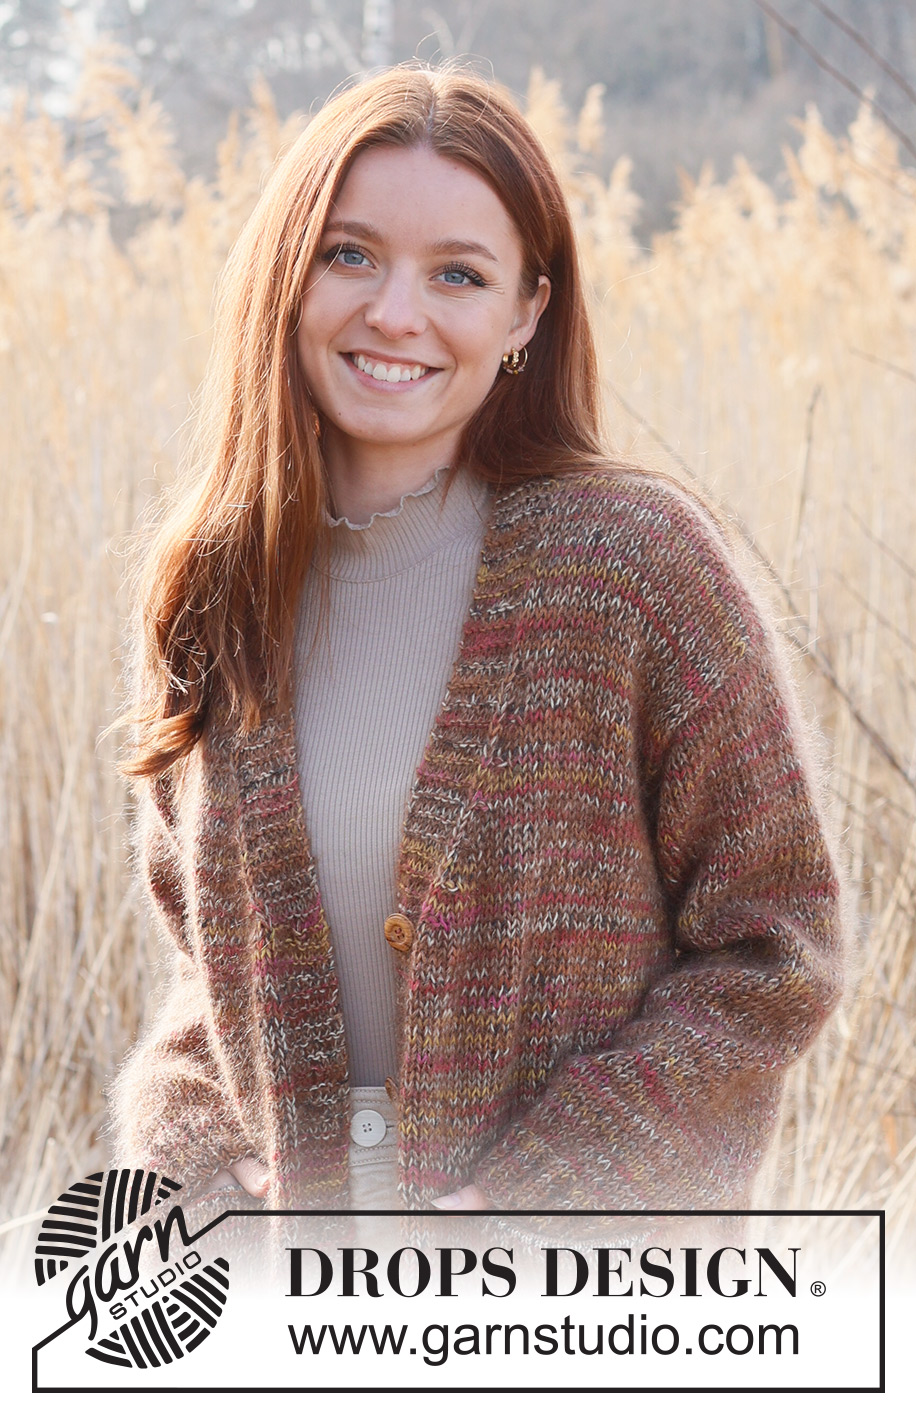
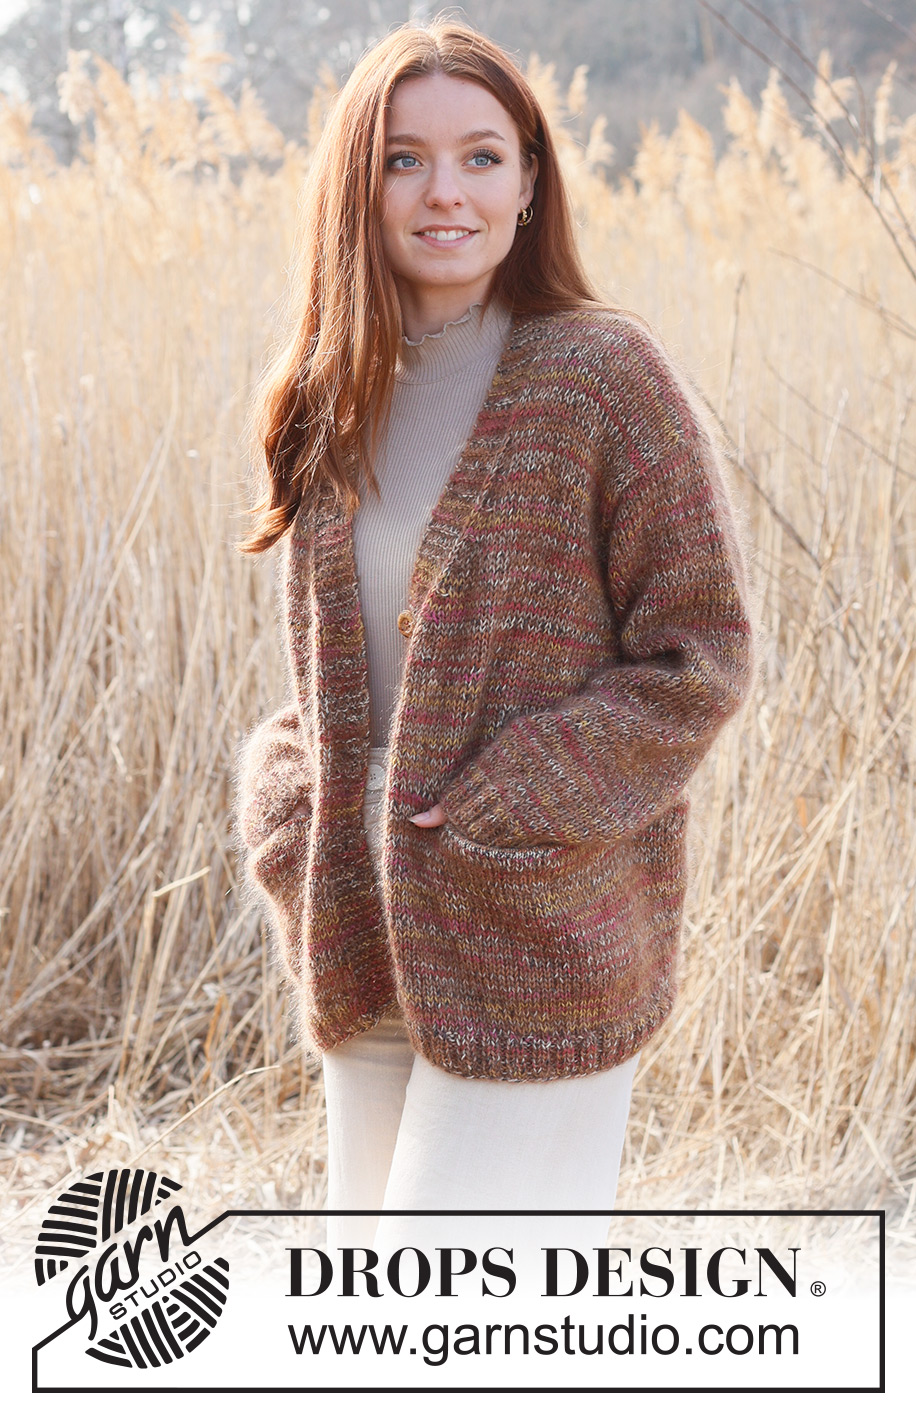
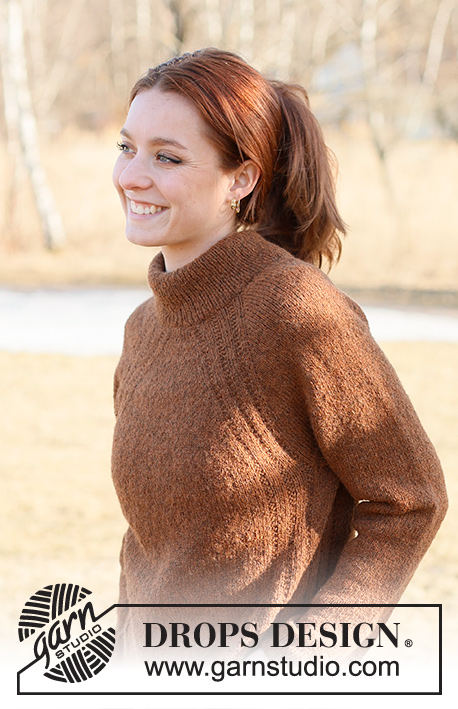
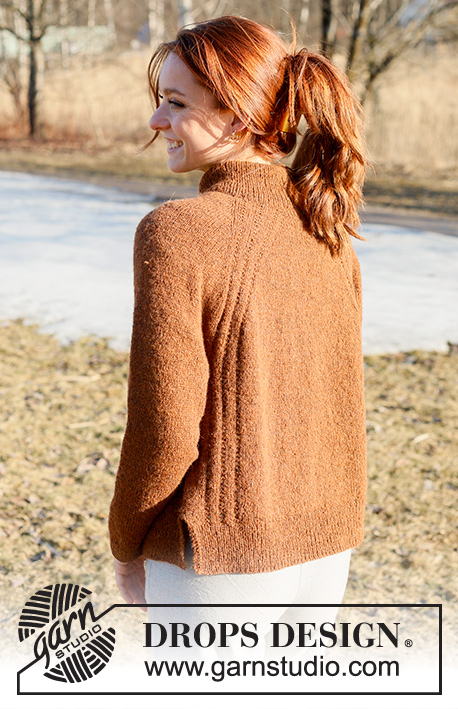
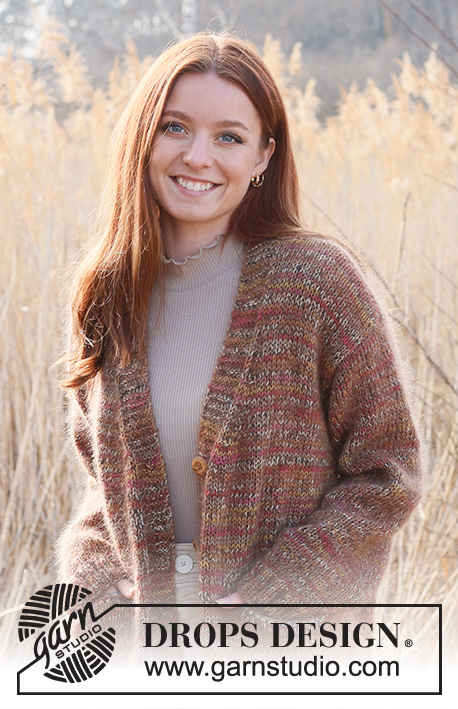
Knitted oversized jacket in DROPS Fabel and DROPS Kid-Silk. Piece is knitted bottom up in stockinette stitch with V-neck and pockets. Size: S - XXXL
DROPS 237-17 |
||||||||||
|
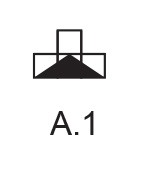
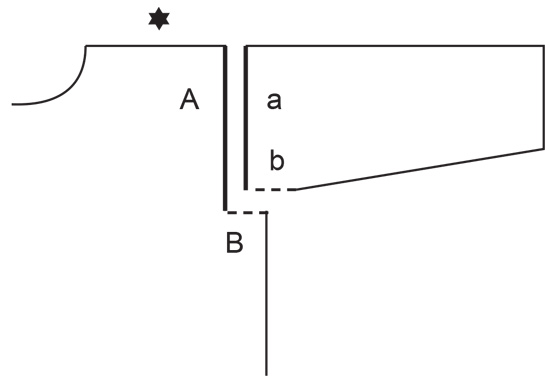
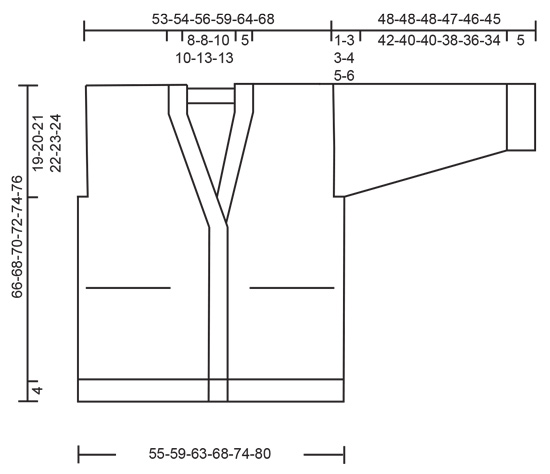
---------------------------------------------------------- EXPLANATION FOR THE PATTERN: ---------------------------------------------------------- PATTERN: See diagram A.1. Diagrams show all rows in pattern seen from the right side. GARTER STITCH (back and forth): Knit all rows. 1 ridge vertically = knit 2 rows. DECREASE TIP (applies to decreases for V-neck): All decreases are done from the right side! DECREASE 2 STITCHES AT THE BEGINNING OF ROW AS FOLLOWS: Work 8 band stitches in garter stitch, knit 1, work A.1 over the next 3 stitches. DECREASE 2 STITCHES AT THE END OF ROW AS FOLLOWS: Work until 12 stitches remain on row, A.1 over the next 3 stitches, knit 1, 8 band stitches in garter stitch. INCREASE TIP (applies to sleeves): Knit 1 past marker thread, make 1 yarn over, knit until 1 stitch remain before marker thread, make 1 yarn over. On next row knit yarn overs twisted. Then work the new stitches in stockinette stitch. BUTTONHOLES: Decrease for buttonholes on right band. 1 BUTTONHOLE = knit third and fourth stitch from edge together and make 1 yarn over. On next row knit yarn over to make hole. Decrease for buttonholes when piece measures: S: 6, 15, 24, 33 and 41 cm = 2⅜", 6", 9½", 13" and 16⅛". M: 6, 15, 24, 33 and 41 cm = 2⅜", 6", 9½", 13" and 16⅛". L: 6, 15, 24, 33 and 41 cm = 2⅜", 6", 9½", 13" and 16⅛". XL: 6, 15, 24, 33 and 42 cm = 2⅜", 6", 9½", 13" and 16½". XXL: 6, 16, 25, 34 and 43 cm = 2⅜", 6¼", 9¾", 13⅜" and 17". XXXL: 6, 16, 26, 35 and 44 cm = 2⅜", 6¼", 10¼", 13¾" and 17¼". ---------------------------------------------------------- START THE PIECE HERE: ---------------------------------------------------------- JACKET - SHORT OVERVIEW OF THE PIECE: Work piece back and forth on circular needle, from the bottom up to armholes. Then divide the piece for back piece and front pieces, and work parts back and forth on circular needle separately. Work sleeves in the round on double pointed needles/short circular needle up to where sleeve cap begins, then work back and forth on circular needle. BODY: Cast on 218-234-246-262-282-306 stitches on circular needle size 4 MM = US 6 with 1 strand DROPS Fabel and 2 strands DROPS Kid-Silk (3 strands). Purl 1 row from wrong side. On next row (from right side ) work rib as follows: 8 band stitches in GARTER STITCH - read explanation above, * knit 2, purl 2 *, work from *-* until 10 stitches remain, knit 2, 8 band stitches in garter stitch. Continue rib like this. When rib measures 4 cm = 1½", knit 1 row (from right side) while at the same time decreasing 26-30-30-30-30-34 stitches evenly (do not decrease over band stitches) = 192-204-216-232-252-272 stitches. Switch to circular needle size 5.5 MM = US 9. Insert 1 marker thread 52-55-58-62-67-72 stitches in from each side (= 88-94-100-108-118-128 stitches on back piece). Move the markers threads upwards when working, they mark the sides of body and should be used when decreasing for armholes. Work in stockinette stitch with 8 band stitches in garter stitch in each side. REMEMBER THE KNITTING GAUGE! When piece measures 23 cm = 9" work pockets as follows: POCKETS: Now work a pocket pouch on each front piece, on next row from right side, as follows: Pocket pouches are worked double and sewn together in the side. Knit 8 band stitches in garter stitch, knit 9-10-10-12-14-14 and slip them on a thread, knit 27-29-29-31-33-35, cast on 1 stitch, turn. Then work pockets over 28-30-30-32-34-36 stitches as follows: Switch to straight needle size 3 MM = US 2.5 and 1 strand DROPS Fabel. Work first row as follows from wrong side: 1 edge stitch in garter stitch, purl and increase 17-17-17-18-21-22 stitches evenly the entire row and cast on 1 stitch at the end of row = 46-48-48-51-56-59 stitches. Work in stockinette stitch back and forth with 1 edge stitch in garter stitch in each side. When pocket measures 36 cm = 14¼" (measured from where the first stitches were put on a thread) work next row as follows from right side: Switch to circular needle size 5.5 MM = US 9, 1 strand DROPS Fabel and 2 strands DROPS Kid-Silk and work as follows: Knit 2 together, knit and decrease 17-17-17-18-21-22 stitches evenly, until 2 stitches remain, knit 2 together = 27-29-29-31-33-35 stitches. Knit the next 104-110-122-130-142-158 stitches, knit the next 27-29-29-31-33-35 stitches and work a pocket over these stitches the same way. When pocket has been worked, knit over the next 9-10-10-12-14-14 stitches and 8 band stitches in garter stitch. Work in stockinette stitch with 8 band stitches in garter stitch in each side. OVERVIEW OF NEXT SECTION: When piece measures 42-42-42-43-44-45 cm = 16½"-16½"-16½"-17"-17¼"-17¾", begin decreases for V-neck. AT THE SAME TIME as decreasing for V-neck, bind off stitches for armholes, and then finish each part separately as explained below. Read V-NECK and ARMHOLES before continuing. V-NECK: When piece measures 42-42-42-43-44-45 cm = 16½"-16½"-16½"-17"-17¼"-17¾", decrease for V-neck in each side on next row from right side - read DECREASE TIP. Decrease 2 stitches in each side on every 4th row 7-7-8-8-9-9 times in total. ARMHOLES: AT THE SAME TIME when piece measures 47-48-49-50-51-52 cm = 18½"-19"-19¼"-19¾"-20"-20½" and next row is from right side, bind off for armholes as follows: Work as before until 2-4-5-7-8-10 stitches remain before first marker thread in the side, bind off 4-8-10-14-16-20 stitches for armhole, work as before until 2-4-5-7-8-10 stitches remain before the other marker thread, bind off 4-8-10-14-16-20 stitches for armholes, work as before the rest of row. Finish front pieces and back piece separately. LEFT FRONT PIECE (when garment is worn): Begin from wrong side, work in stockinette stitch with 8 band stitches in garter stitch towards mid front. Continue neck decrease from right side inside the 9 stitches. After all decreases for V-neck and armhole, 36-37-37-39-41-44 stitches remain on shoulder. When piece measures 66-68-70-72-74-76 cm = 26"-26¾"-27½"-28⅜"-29⅛"-29½", bind off the first 28-29-29-31-33-36 stitches on next row from right side = 8 band stitches remain on needle. Work in garter stitch back and forth over these stitches for 9-9-10-10-11-11 cm = 3½"-3½"-4"-4"-4⅜"-4⅜". Bind off. RIGHT FRONT PIECE: Begin from wrong side, work in stockinette stitch with 8 band stitches in garter stitch towards mid front. Continue neck decrease from right side inside the 9 stitches. After all decreases for V-neck and armhole, 36-37-37-39-41-44 stitches remain on shoulder. When piece measures 66-68-70-72-74-76 cm = 26"-26¾"-27½"-28⅜"-29⅛"-29½", bind off the first 28-29-29-31-33-36 stitches on next row from wrong side = 8 band stitches remain on needle. Work in garter stitch back and forth over these stitches for 9-9-10-10-11-11 cm = 3½"-3½"-4"-4"-4⅜"-4⅜". Bind off. BACK PIECE: = 84-86-90-94-102-108 stitches. Begin from wrong side, and work in stockinette stitch. When piece measures 63-65-67-69-71-73, bind off the middle 26-26-30-30-34-34 stitches for neck (29-30-30-32-34-37 stitches remain on each shoulder). Finish each shoulder separately. On next row from the neck, bind off 1 stitch = 28-29-29-31-33-36 stitches. Bind off when piece measures 66-68-70-72-74-76 cm = 26"-26¾"-27½"-28⅜"-29⅛"-29½". Work the other shoulder the same way. SLEEVES: Cast on 44-44-48-48-52-52 stitches on double pointed needle size 4 MM = US 6 with 1 strand DROPS Fabel and 2 strands DROPS Kid-Silk (3 strands). Knit 1 round. Then work rib in the round (knit 2/purl 2) for 5 cm = 2". Knit 1 round while decreasing 6-4-6-4-6-6 stitches evenly = 38-40-42-44-46-46 stitches. Insert a marker thread at beginning of round (mid under sleeve). Move the marker thread upwards when working - marker thread should be used for increase mid under sleeve. Switch to double pointed needles size 5.5 MM = US 9, and work in stockinette stitch. When sleeve measures 9-10-8-10-8-10 cm = 3½"-4"-3⅛"-4"-3⅛"-4", increase 1 stitch on each side of marker thread - read INCREASE TIP. Increase like this every 3½-3-3-2½-2½-2 cm = 1¼"-1⅛"-1⅛"-1"-1"-¾" 11-12-13-13-14-15 times in total = 60-64-68-70-74-76 stitches. When sleeve measures 47-45-45-43-41-39 cm = 18½"-17¾"-17¾"-17"-16⅛"-15¼", work sleeve cap back and forth on circular needle until finished measurements. Work until sleeve measures approx. 48-48-48-47-46-45 cm = 19"-19"-19"-18½"-18"-17¾", i.e. there is a vent of 1-3-3-4-5-6 cm = ⅜"-1⅛"-1⅛"-1½"-2"-2⅜" at the top of sleeve. Bind off. Work the other sleeve the same way. ASSEMBLY: Sew shoulder seams inside bind-off edge. Sew sleeve cap to armhole. Then sew vent at the top of sleeve to bottom of armhole - see chart. Sew side seams on both pockets. Sew the band together mid back and sew it to the neckline on back piece. Sew the buttons on to the left band. |
||||||||||
Diagram explanations |
||||||||||
|
||||||||||
|
||||||||||
|
||||||||||
|
||||||||||
Have you finished this pattern?Tag your pictures with #dropspattern #allaboutautumncardigan or submit them to the #dropsfan gallery. Do you need help with this pattern?You'll find 31 tutorial videos, a Comments/Questions area and more by visiting the pattern on garnstudio.com. © 1982-2025 DROPS Design A/S. We reserve all rights. This document, including all its sub-sections, has copyrights. Read more about what you can do with our patterns at the bottom of each pattern on our site. |
||||||||||


With over 40 years in knitting and crochet design, DROPS Design offers one of the most extensive collections of free patterns on the internet - translated to 17 languages. As of today we count 314 catalogs and 11822 patterns - 11812 of which are translated into English (US/in).
We work hard to bring you the best knitting and crochet have to offer, inspiration and advice as well as great quality yarns at incredible prices! Would you like to use our patterns for other than personal use? You can read what you are allowed to do in the Copyright text at the bottom of all our patterns. Happy crafting!
Post a comment to pattern DROPS 237-17
We would love to hear what you have to say about this pattern!
If you want to leave a question, please make sure you select the correct category in the form below, to speed up the answering process. Required fields are marked *.