
Popular categories
Looking for a yarn?


Comments / Questions (24)
![]() Lisa Bjartmar wrote:
Lisa Bjartmar wrote:
Efter ökningen till ärmhål säger beskrivningen att man ska (i M) ha 103 maskor och därefter lägga upp maskor till sammanlagt 111. Men när man börjar mönsterstickningen i början har man redan 103 maskor. Något är fel i mönstret
21.04.2025 - 16:12DROPS Design answered:
Hej Lisa. Du börjar med 103 maskor, men sedan minskas det maskor i A.1 och A.2 så när dessa 2 diagram har stickats klart så har du minskat 18 maskor, och du ökar 18 maskor till ärmhål så därför slutar du på 103 maskor igen. Mvh DROPS Design
25.04.2025 - 10:46
![]() Daria wrote:
Daria wrote:
I’m confused as to how to connect the right shoulder strap to the left shoulder strap with the left shoulder having 65 stitches cast on after completing the wrong side to desired length of straps. When I finish the straps from the wrong side and go to do the ribbing from right side starting on the right shoulder, correct? Should I do the knitted cast on from the wrong side or the backward loop cast on? Is there a video to show any of the strap connection with cast on neck section?
03.08.2024 - 22:55DROPS Design answered:
Dear Daria, the last row both straps was worked from WS, after last row from WS on right shoulder turn and work next row from RS on the right shoulder, cast on the 18-22 sts for neck then work the left strap from RS - cast on these stitches using this method in video/this lesson. Happy knitting!
05.08.2024 - 07:40
![]() Mdev wrote:
Mdev wrote:
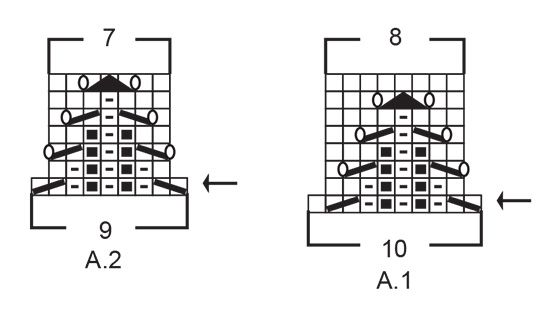
Bonjour , je bloque au niveau du diagramme Je comprends pas je dois faire le didiagramme 1 sur toutes les mailles ...le diagramme 2 ? Je le fais quand.Merci de votre aide
02.06.2024 - 17:07DROPS Design answered:
Bonjour Mdev, on répète le diagramme A.1 et on termine par le diagramme A.2 (vu sur l'endroit), ainsi, le motif est symétrique. Bon tricot!
03.06.2024 - 08:29
![]() Patricia wrote:
Patricia wrote:
Bonjour J’ai un doute à propos du diagramme. Il se lit bien de droite à gauche ? Merci
30.04.2024 - 19:12DROPS Design answered:
Bonjour Patricia, Les diagrames sont tricotes de droite à gauche sur l'endroit et de gauche a droite sur l'envers. Bon tricot!
01.05.2024 - 15:12
![]() Patricia wrote:
Patricia wrote:
Bonjour Est-ce normal que les côtes des bretelles et du haut soient avec une aiguille n° 3 et non pas 2,5 comme dans les côtes du bas ? Ou bien est-ce une erreur ? Merci
24.04.2024 - 17:44DROPS Design answered:
Bonjour Patricia, c'est bien ainsi que l'on doit procéder: les bretelles se tricotent avec les aiguilles 3 mais les côtes du bas du top avec les 2,5. Bon tricot!
25.04.2024 - 07:47
![]() Else Rasmussen wrote:
Else Rasmussen wrote:
Kan ikke finde ud af mønsteret
24.03.2024 - 11:23DROPS Design answered:
Hej Else, er det selve diagrammet du ikke kan finde ud af. Prøv at strikke de få masker i selve diagrammet, så du kan se hvordan det skal se ud :)
03.04.2024 - 13:54
![]() Corina wrote:
Corina wrote:
Thank you! But I don’t understand what “put aside” means. I keep the left shoulder and the 65 sts for neck on the needle I worked then and then cast on (on the same needle ) the right shoulder? Or do I take another pair of needles and work the right shoulder as indicated? And how do I put them together? Please help:) thanks
06.03.2024 - 16:35DROPS Design answered:
Dear Corina, you can slip them on a thread or another holder, then work the right shoulder, then after the last row worked on right shoulder, work from RS the stitches of right shoulder, and the stitches put aside (starting with the 65 sts); read PATTERN and ARMHOLE. Happy knitting!
07.03.2024 - 07:55
![]() Corina wrote:
Corina wrote:
Hello! I don't understand this part: Left shoulder - " cast on 65 new stitches at the end of row for the neck. Put piece aside and work the right shoulder" I followed the instructions, but it's not clear to me: do I put the stitches on a holder? should I have spare 3mm needles to work the next part? Thanks
06.03.2024 - 15:54DROPS Design answered:
Dear Corina, after you have worked the left shoulder for 8-9 cm (see size) you cast on 65 new stitches for neck (between both straps/shoulders) and put aside. work now the right shoulder for 8-9 cm and then from RS work both shoulders together as follows: work the right shoulder, then work the 65 sts cast on + the left shoulder = you have now front piece and you will now increase for armholes on each side. Happy knitting!
06.03.2024 - 16:30
![]() Zuzana wrote:
Zuzana wrote:
Skvelý model. Páči sa mi tento patentový vzor. Podľa návodu sa mi dobre plietlo a top veľmi pekne sedí. Mám z neho radosť. Plietla som vo farbe 06 džínovo modrej.
21.08.2023 - 09:26
![]() Ratna wrote:
Ratna wrote:
Hi -- can you pls help with the count of the increases at the armhold. I am knitting a size XL. At the beginning of the armhole increase I have 107 stitches, same as in the pattern. Pattern calls for 5 increases every other row (10 stitches) and 11 increases every row (22 stitches) -- At this point, I will have 107 + 32 = 149 stitches. This is very different from the stitch count given in the pattern (121 stitches) Pls help
21.02.2023 - 11:15DROPS Design answered:
Dear Ratna, please note that when you work the first row in A.1/A.2 before you will decrease 2 sts in each diagram (= there will remain 89 stitches after first row has been worked, then you increase 31 sts for armholes and get 121 stitches. Happy knitting!
21.02.2023 - 17:37
|
|||||||||||||||||||||||||
Spring Peak#springpeaktop |
|||||||||||||||||||||||||
 |
 |
||||||||||||||||||||||||
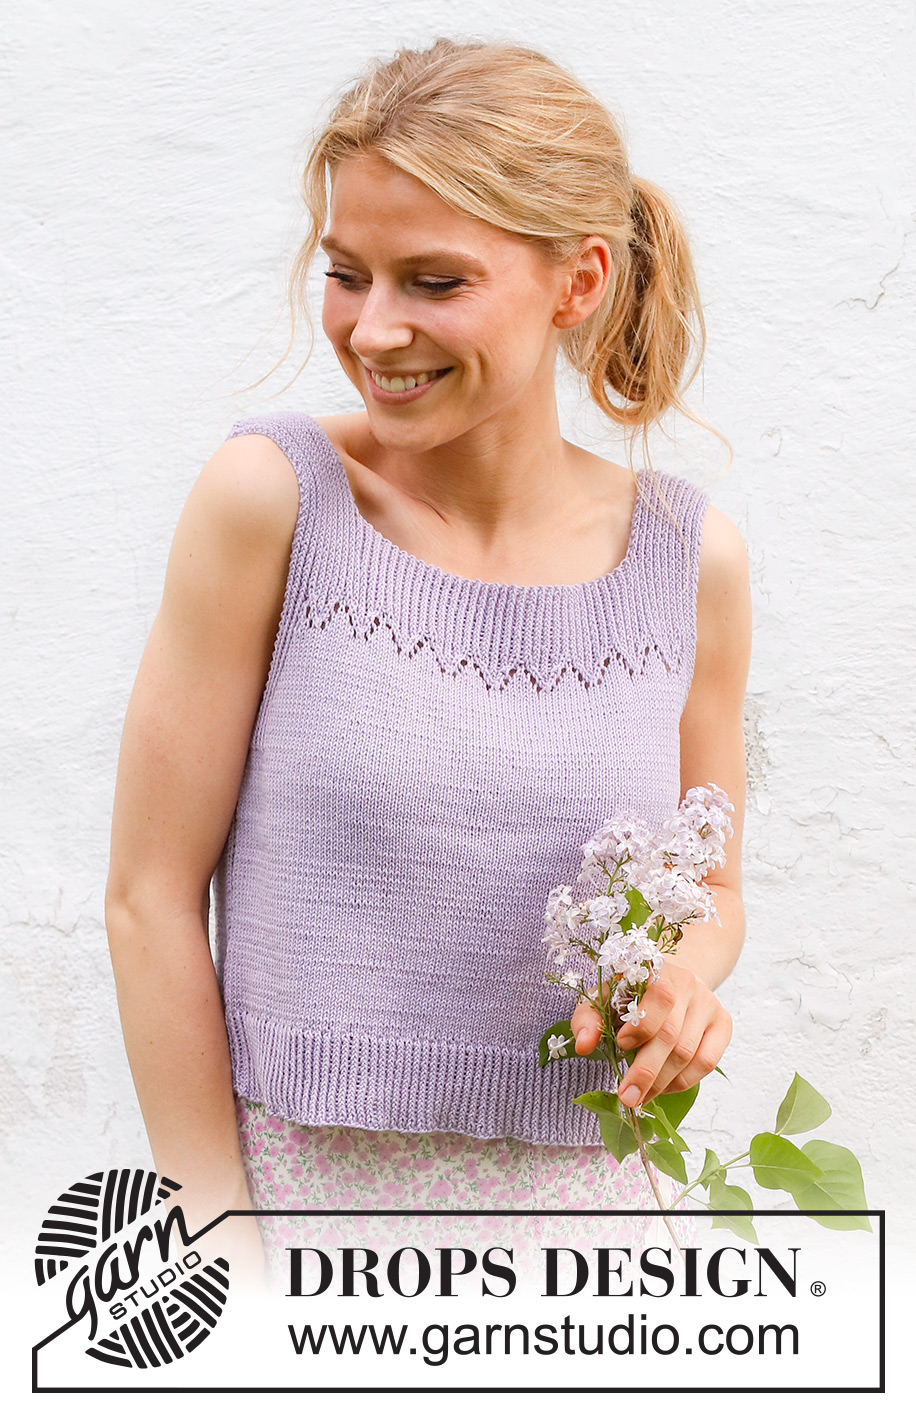
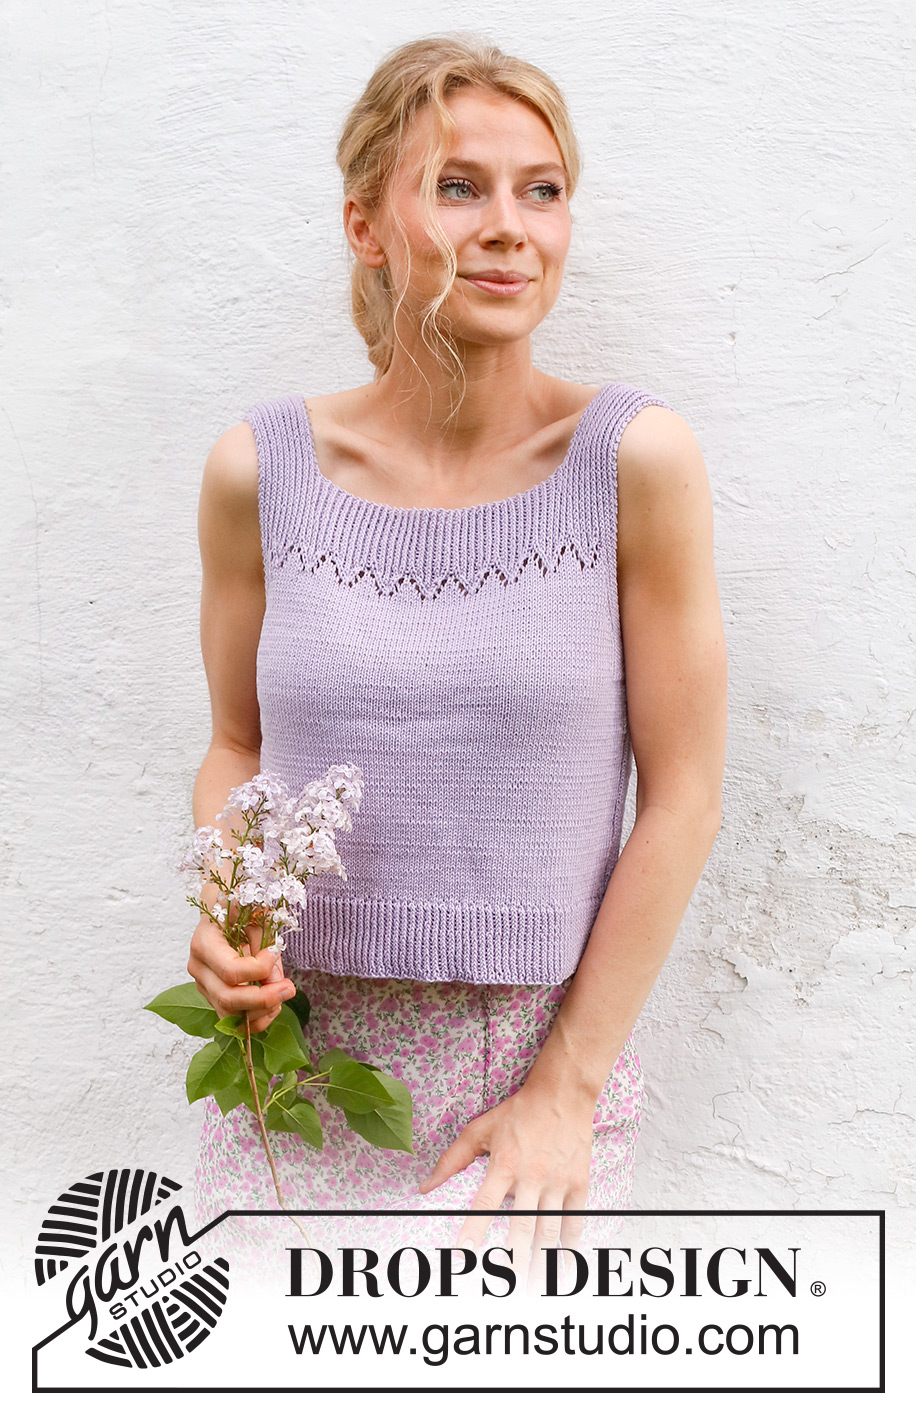
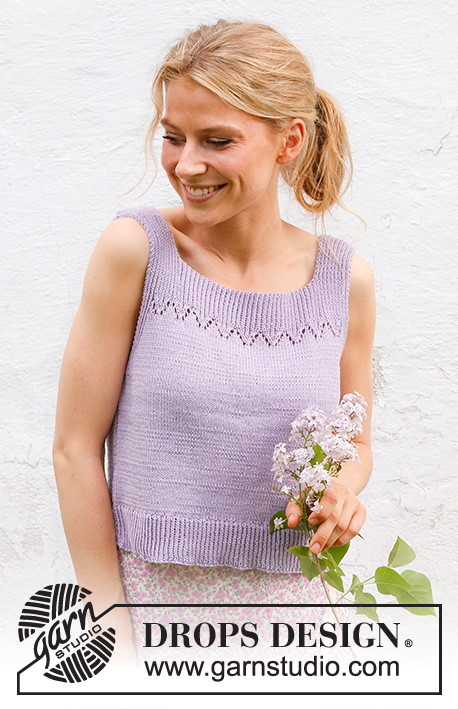
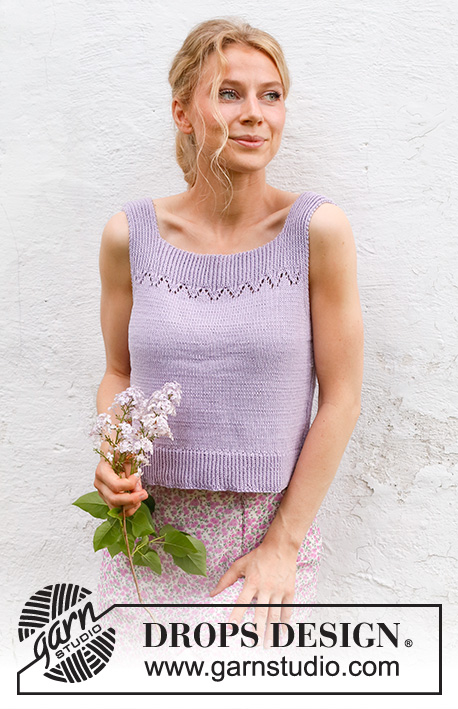
Knitted top top/singlet in DROPS Safran. Piece is knitted top down with lace pattern and vents in the sides. Size: S - XXXL
DROPS 230-54 |
|||||||||||||||||||||||||
|
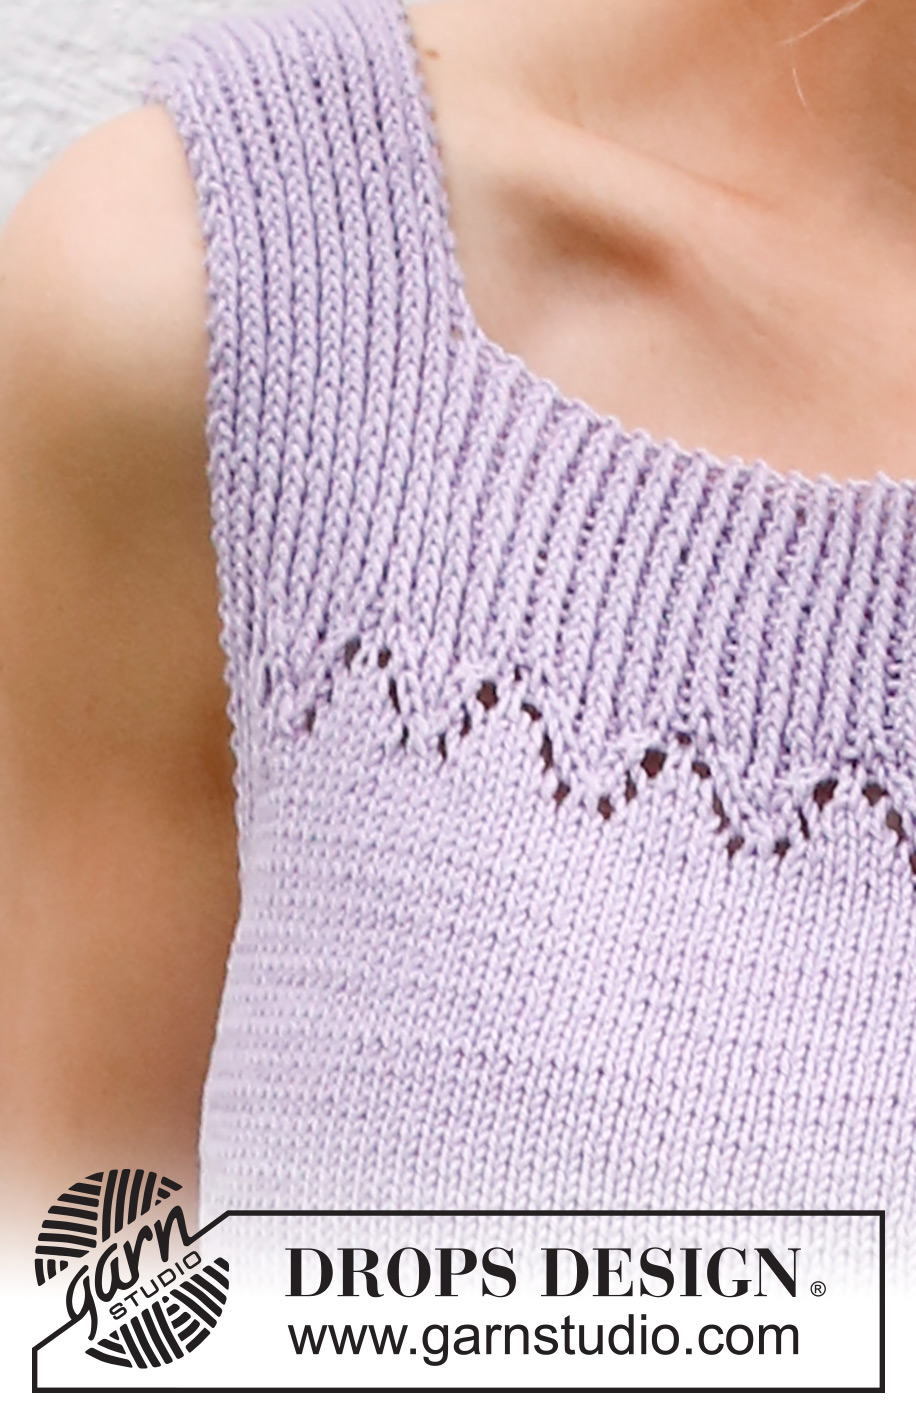
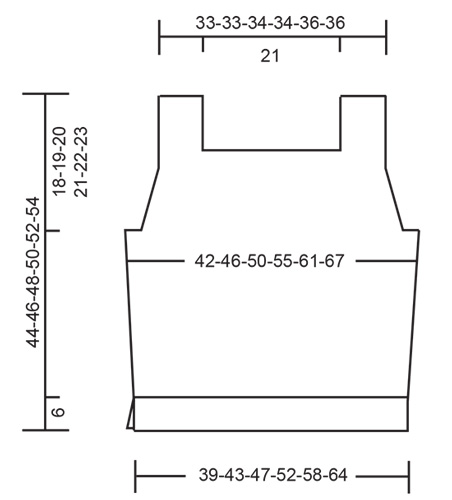
---------------------------------------------------------- EXPLANATION FOR THE PATTERN: ---------------------------------------------------------- GARTER STITCH (back and forth): Knit all rows. 1 ridge vertically = knit 2 rows. PATTERN: See diagrams A.1 and A.2. Diagrams show all rows in pattern seen from the right side. INCREASE TIP (applies to armholes): Increase 1 stitch by making 1 yarn over inside the outermost 7-7-9-9-11-11 stitches in each side. On next row work yarn over twisted to avoid holes Then work the new stitches in stockinette stitch. DECREASE TIP (applies to sides on front and back piece): All decreases are done from the right side! DECREASE AT BEGINNING OF ROW AS FOLLOWS: Work 1 stitch in garter stitch, 2 stitches in stockinette stitch, slip 1 stitch knitwise, knit 1, pass slipped stitch over stitch worked DECREASE AT END OF ROW AS FOLLOWS: Work until 5 stitches remain, knit 2 together, 2 stitches in stockinette stitch, and 1 stitch in garter stitch. ---------------------------------------------------------- START THE PIECE HERE: ---------------------------------------------------------- TOP - SHORT OVERVIEW OF THE PIECE: Work front and back piece back and forth separately and work top down. Sew piece together on the shoulders and in the sides. FRONT PIECE: Begin with left shoulder at the front (when garment is worn). LEFT SHOULDER: Cast on 19-19-21-21-23-23 stitches on circular needle size 3 MM = US 2.5 with DROPS Safran. Purl 1 row from wrong side. Then work a rib as follows: ROW 1 (= right side): 1 stitch in GARTER STITCH - read explanation above - * knit 1 twisted, purl 1 *, work from *-* until 2 stitches remain on needle, knit 1 twisted and 1 stitch in garter stitch. ROW 2 (= wrong side): 1 stitch in garter stitch, * purl 1 twisted, knit 1 *, repeat from *-* until 2 stitches remain, purl 1 twisted and 1 stitch in garter stitch. Repeat 1st and 2nd row until piece measures 8-8-8-9-9-9 cm = 3⅛"-3⅛"-3⅛"-3½"-3½"-3½" – finish after a row from wrong side, do not turn piece, but cast on 65 new stitches at the ned of row for neck. Put piece aside and work the right shoulder. RIGHT SHOULDER: Cast on 19-19-21-21-23-23 stitches on circular needle size 3 MM = US 2.5 with DROPS Safran. Purl 1 row from wrong side. Then work rib the same way as on left shoulder until piece measures 8-8-8-9-9-9 cm = 3⅛"-3⅛"-3⅛"-3½"-3½"-3½" – finish after a row from wrong side. OVERVIEW OF NEXT SECTION: Now put parts together and work pattern as explained below - in addition increase for armholes in each side. Read section PATTERN and ARMHOLES before continuing! PATTERN: Work from right side as before over the first 18-18-20-20-22-22 stitches on right shoulder, purl next stitch, continue rib over the 65 stitches cast on for neck, purl first stitch on left shoulder, and work the last 18-18-20-20-22-22 stitches on left shoulder in rib as before = 103-103-107-107-111-111 stitches. Work rib like this over all stitches with 1 stitch in garter stitch in each side until piece measures 13-13-14-14-15-15 cm = 5⅛"-5⅛"-5½"-5½"-6"-6" from cast-on edge on shoulder straps. Work next row as follows from right side: 1 stitch in garter stitch, work rib as before over the next 6-6-8-8-10-10 stitches, work A.1 8 times in total, A.2, rib as before over the next 6-6-8-8-10-10 stitches, and 1 stitch in garter stitch. Continue this pattern back and forth like this. When A.1 and A.2 have been worked vertically, work in stockinette stitch with 6-6-8-8-10-10 stitches in rib and 1 stitch in garter stitch at the edge in each side. REMEMBER THE KNITTING GAUGE! ARMHOLE: AT THE SAME TIME when first row in A.1/A.2 is worked, begin increase for armhole – read INCREASE TIP. Increase 1 stitch in each side on every 4th row 4-2-0-0-0-0 times in total, on every other row 0-7-10-5-6-2 times in total, and then every row 0-0-0-11-13-24 times in total = 93-103-109-121-131-145 stitches. When a row has been worked after last increase for armhole, cast on 4-4-6-6-8-8 new stitch for armhole at the end of the next 2 rows = 101-111-121-133-147-161 stitches. Piece measures approx. 18-19-20-21-22-23 cm = 7"-7½"-8"-8¼"-8¾"-9" from cast-on edge on shoulder straps. Continue front piece as explained below. Insert 1 marker on row – now measure piece from this marker. Work in stockinette stitch with 6-6-8-8-10-10 stitches in rib and 1 stitch in garter stitch at the edge in each side. When piece measures 2 cm = ¾" from marker, work in stockinette stitch with 1 stitch in garter stitch at the edge in each side. When piece measures 5 cm = 2" from marker, decrease 1 stitch in each side - read DECREASE TIP. Decrease like this every 5 cm = 2" 4 times in total in each side = 93-103-113-125-139-153 stitches. When piece measures 20-21-22-23-24-25 cm = 8"-8¼"-8¾"-9"-9½"-9¾" from marker, knit 1 row from right side while increasing 28-30-34-38-42-46 stitches evenly = 121-133-147-163-181-199 stitches. Piece measures now approx. 38-40-42-44-46-48 cm = 15"-15¾"-16½"-17¼"-18"-19" from cast-on edge on shoulder straps. Switch to circular needle size 2.5 MM = US 1.5. Then work a rib as follows: ROW 1 (= wrong side): 1 stitch in garter stitch, * purl 1 twisted, knit 1 *, repeat from *-* until 2 stitches remain, purl 1 twisted and 1 stitch in garter stitch. ROW 2 (= right side): 1 stitch in garter stitch, * knit 1 twisted, purl 1 *, work from *-* until 2 stitches remain, knit 1 twisted and 1 stitch in garter stitch. Repeat 1st and 2nd row until rib measures 6 cm = 2⅜". Loosely bind off. Front piece measures approx. 44-46-48-50-52-54 cm = 17¼"-18"-19"-19¾"-20½"-21¼". BACK PIECE: Cast on and work as front piece – back and front pieces are exactly the same. ASSEMBLY: Sew the shoulder seams. Sew side seams in outer loops of edge stitch - begin seam at armholes and stop when 6 cm = 2⅜" remain at the bottom in each side (vent). |
|||||||||||||||||||||||||
Diagram explanations |
|||||||||||||||||||||||||
|
|||||||||||||||||||||||||
|
|||||||||||||||||||||||||
|
|||||||||||||||||||||||||
Have you finished this pattern?Tag your pictures with #dropspattern #springpeaktop or submit them to the #dropsfan gallery. Do you need help with this pattern?You'll find 24 tutorial videos, a Comments/Questions area and more by visiting the pattern on garnstudio.com. © 1982-2025 DROPS Design A/S. We reserve all rights. This document, including all its sub-sections, has copyrights. Read more about what you can do with our patterns at the bottom of each pattern on our site. |
|||||||||||||||||||||||||


With over 40 years in knitting and crochet design, DROPS Design offers one of the most extensive collections of free patterns on the internet - translated to 17 languages. As of today we count 314 catalogs and 11822 patterns - 11812 of which are translated into English (US/in).
We work hard to bring you the best knitting and crochet have to offer, inspiration and advice as well as great quality yarns at incredible prices! Would you like to use our patterns for other than personal use? You can read what you are allowed to do in the Copyright text at the bottom of all our patterns. Happy crafting!
Post a comment to pattern DROPS 230-54
We would love to hear what you have to say about this pattern!
If you want to leave a question, please make sure you select the correct category in the form below, to speed up the answering process. Required fields are marked *.