
Looking for a yarn?


Comments / Questions (5)
![]() Y M Markerink wrote:
Y M Markerink wrote:
Graag zou ik willen weten hoeveel garen ik nodig heb voor dit patroon maat xxxl
17.03.2024 - 14:01DROPS Design answered:
Dag Y M Markerink,
Bovenaan bij de materialenlijst staat per maat aangegeven hoeveel gram je nodig hebt. (Het eerste getal geldt voor maat S, het tweede getal voor maat M, enzovoort). 1 bol weegt meestal 50 gram, maar let erop dat dit per garensoort verschillend kan zijn. Dus als er bijvoorbeeld 400 gram staat dan zou je 8 bollen nodig hebben als 1 bol 50 gram weegt.
17.03.2024 - 18:55
![]() Corina Avram wrote:
Corina Avram wrote:
Me again. I am trying to understand exactly how many stitches to cast on for the right side. The pattern says 32 (size S), but how many edge sts should I add? 1 or 2? Thanks for all the clarifications :)
18.01.2024 - 14:05DROPS Design answered:
Dear Mrs Avram, don't add any extra stitches, in size S you just need 32 sts and work them as explained from RS: 1 edge stitch, *K2, P2* until 7 sts remain, finish with K3 and 5 front band stitches in garter stitch. Happy knitting!
19.01.2024 - 08:21
![]() Corina Avram wrote:
Corina Avram wrote:
Thank you for the help! Please explain more clearly the shoulder part. "Cast off 1 stitch on the next row from the neck = 10-12-13-14-14-15 stitches on the shoulder. Continue working until the piece measures 64-66-68-70-72-74 cm from the shoulder. Cast off". How do I cast off "1 sts from the neck"? Do I then continue knitting until I have 64cm (size S) and then prepare the cast off for the other shoulder? Thanks
18.01.2024 - 11:43DROPS Design answered:
Dear Mrs Avram, let's say you cast off the middle stitches for neck on a row from RS then you will finish each shoulder separately and cast off for neck at the beginning of next row starting from neck: at the beginning of the next row from WS on right shoulder, then continue as before until piece measures 64 cm, cast off all stitches and work the left shoulder starting from WS and cast off 1 st at the beginning of next row from neck = at the beg of first row from RS. Happy knitting!
19.01.2024 - 08:18
![]() Corina Avram wrote:
Corina Avram wrote:
Hello again :) I assume that the sleeve edge should be knitted with 60cm needles, so that are worked in the round. Is there a way to work them with 80cm? I only have these available. What would be the best way? I am thinking of working the edge separately and then sewing it together. Please illuminate me :) thanks
18.01.2024 - 07:01DROPS Design answered:
Dear Mrs Avram, sure you can use a 80 cm needle using the magic loop technique. Happy knitting!
18.01.2024 - 09:06
![]() Corina Avram wrote:
Corina Avram wrote:
Hello! I am getting a different knitting tension for this pattern, 1.2 sts/cm in needles 8mm and I like to keep the gauge like this. For Size S, should I cast the sts needed for M so I don't get a vest that's too small? How would you advise? Thank you!
17.01.2024 - 06:52DROPS Design answered:
Hi Corina, It is easier to increase your needle size and try to get the 11 sts per 10 cm, as stated in the knitting tension (remember to use 1 strand of each quality when working your swatch). Then you can follow the stitch number and row number for the size you are working. Happy crafting!
17.01.2024 - 08:08
|
|
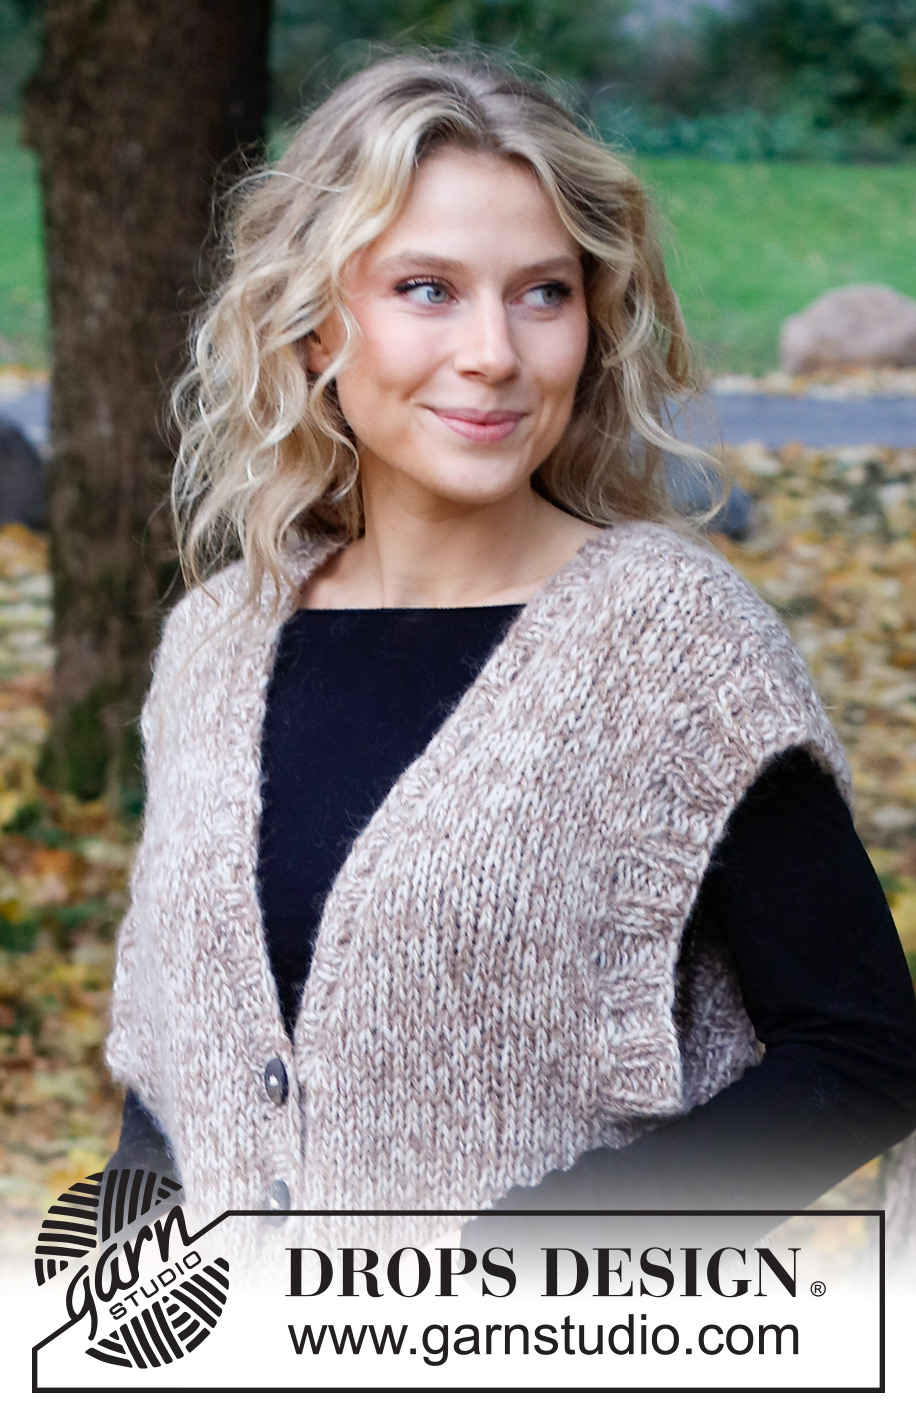
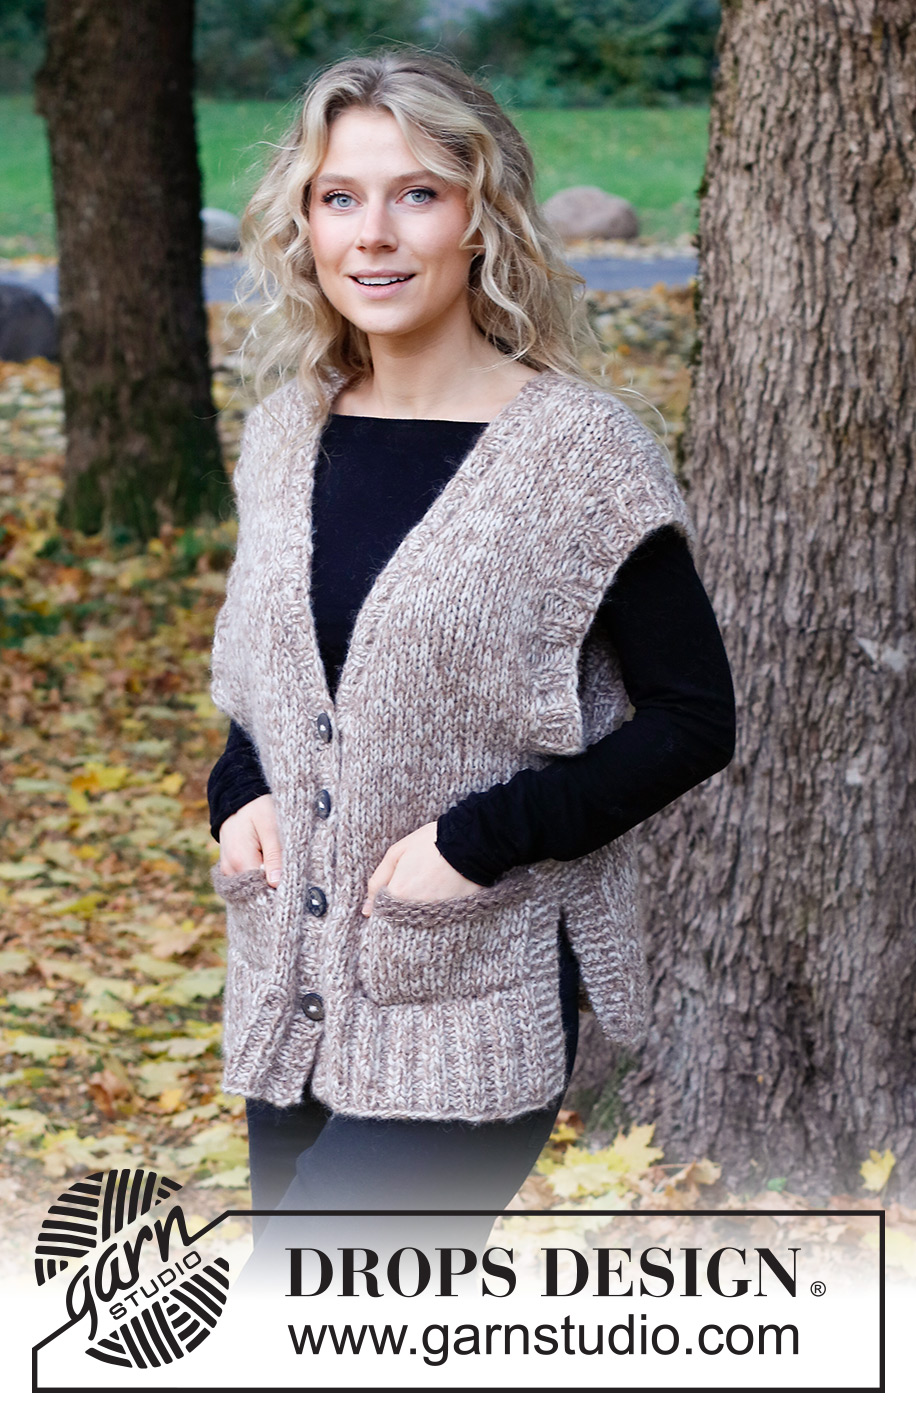
Cosy Mosey#cosymoseyvest |
|
 |
 |
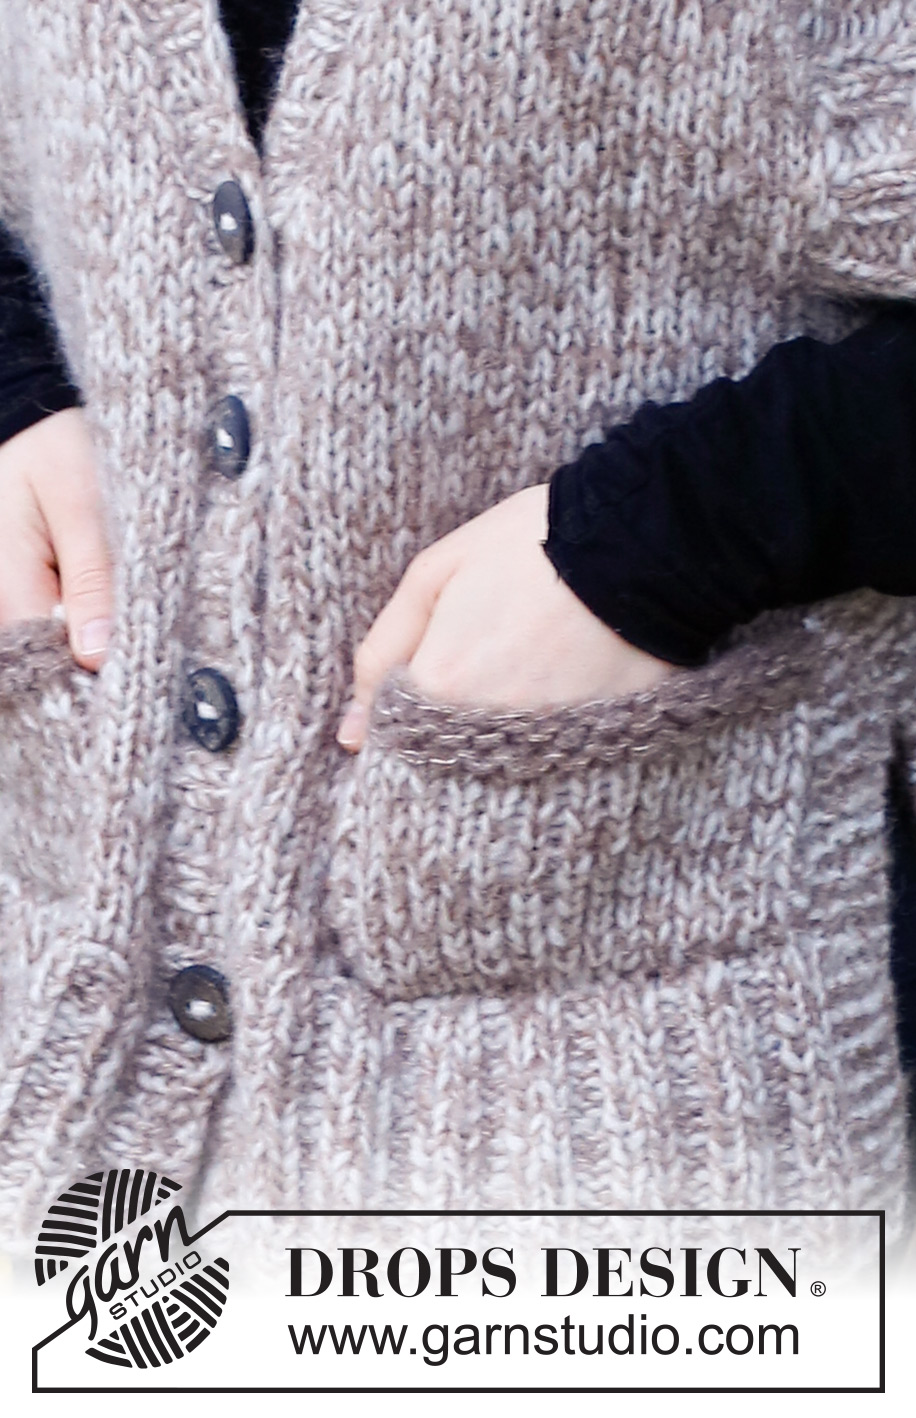
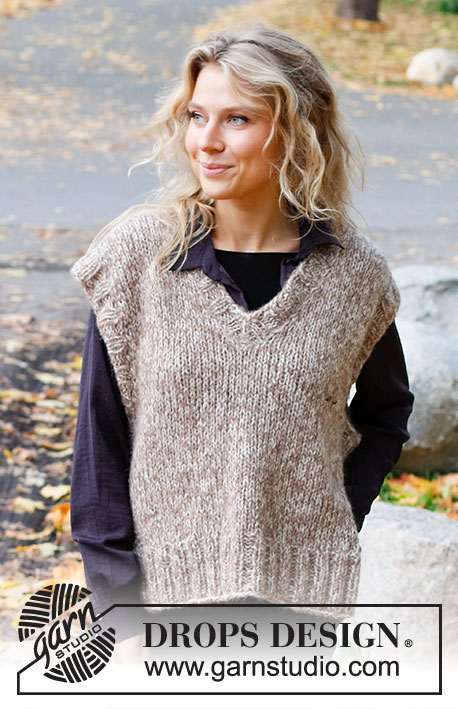
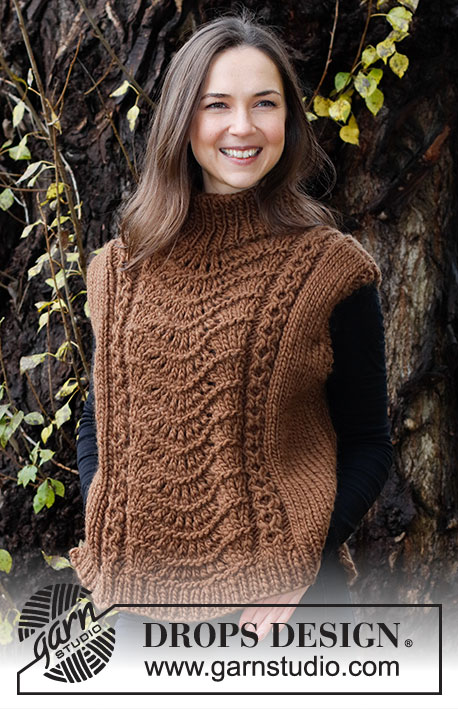
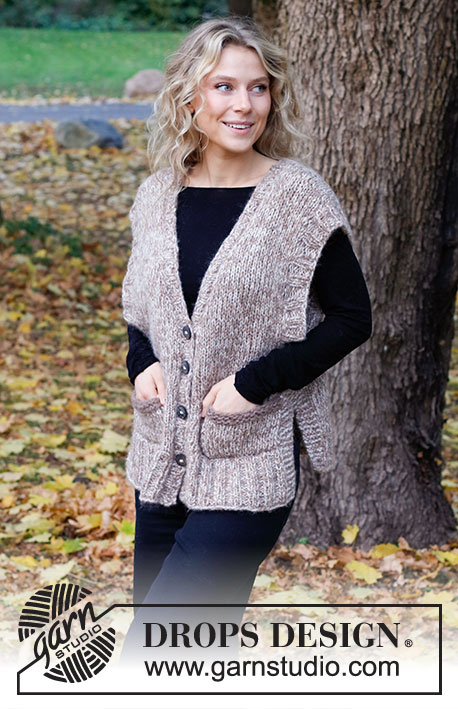
Knitted vest in DROPS Air and DROPS Brushed Alpaca Silk. The piece is worked with V-neck, ribbed edges and pockets. Sizes S - XXXL.
DROPS 226-35 |
|
|
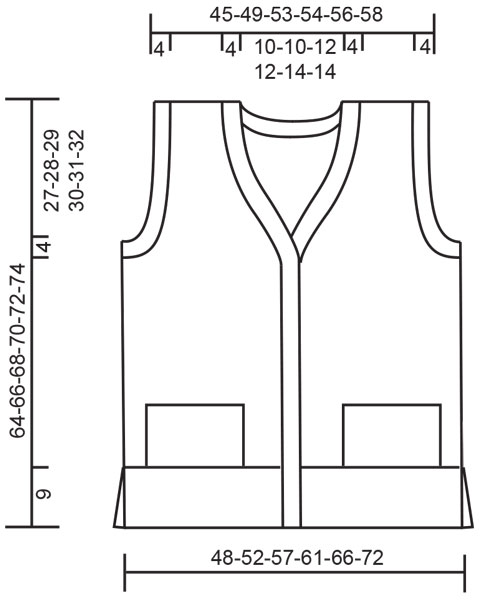
------------------------------------------------------- EXPLANATIONS FOR THE PATTERN: ------------------------------------------------------- RIDGE/GARTER STITCH (worked back and forth): Knit all rows. 1 ridge = knit 2 rows. DECREASE TIP (evenly spaced): To work out how to decrease evenly, count the total number of stitches on needle (e.g. 54 stitches) and divide by number of decreases to be made (e.g. 11) = 4.9. In this example decrease by knitting together approx. each 4th and 5th stitch. Do not decrease over the edge stitches on each side. BINDING-OFF TIP: To avoid the bind-off edge being tight you can bind off with a larger size needle. If the edge is still tight, make 1 yarn over after approx. each 4th stitch at the same time as binding off; the yarn overs are bind off as normal stitches. ------------------------------------------------------- START THE PIECE HERE: ------------------------------------------------------- VEST – SHORT OVERVIEW OF THE PIECE: The front and back pieces are worked separately, back and forth then sewn together. Rib is worked around the armholes, the bands and the neck. BACK PIECE: Cast on 64-72-80-84-92-100 stitches with circular needle size 7 MM = US 10.75 and 1 strand DROPS Air and 1 strand DROPS Brushed Alpaca Silk (= 2 strands). Purl 1 row from the wrong side, then work rib as follows: 5 stitches in GARTER STITCH – read description above, * knit 2, purl 2 *, work from *-* until there are 7 stitches left, knit 2, 5 stitches in garter stitch. Continue this rib back and forth for 9 cm = 3½". The next row is worked from the right side as follows: 5 stitches in garter stitch, knit 54-62-70-74-82-90 stitches and decrease 11-15-17-17-19-21 stitches evenly over these stitches – read DECREASE TIP, work 5 stitches in garter stitch = 53-57-63-67-73-79 stitches. Change to circular needle size 8 MM = US 11. Continue with stockinette stitch with 5 stitches in garter stitch on each side. REMEMBER THE KNITTING GAUGE! When the piece measures 33-34-35-36-37-38 cm = 13"-13⅜"-13¾"-14¼"-14½"-15", bind off stitches for the armholes at the beginning of each row as follows. Bind off 5-5-5-5-7-8 stitches 1 time and 1 stitch 1-1-2-3-3-4 times (= 6-6-7-8-10-12 stitches on each side) = 41-45-49-51-53-55 stitches. Continue with stockinette stitch and 1 edge stitch in garter stitch on each side. When the piece measures 62-64-66-68-70-72 cm = 24⅜"-25¼"-26"-26¾"-27½"-28⅜", bind off the middle 19-19-21-21-23-23 stitches for the neck and each shoulder is finished separately. Bind off 1 stitch on the next row from the neck = 10-12-13-14-14-15 stitches on the shoulder. Continue working until the piece measures 64-66-68-70-72-74 cm = 25¼"-26"-26¾"-27½"-28⅜"-29⅛" from the shoulder. Bind off. Work the other shoulder in the same way. RIGHT FRONT PIECE: Cast on 32-36-40-44-48-52 stitches with circular needle size 7 MM = US 10.75 and 1 strand DROPS Air and 1 strand DROPS Brushed Alpaca Silk (= 2 strands). Purl 1 row from the wrong side, then work rib as follows: 1 edge stitch in garter stitch, * knit 2, purl 2 *, work from *-* until there are 7 stitches left, knit 2 and 5 stitches in garter stitch. Continue this rib back and forth for 9 cm = 3½". The next row from the right side is worked as follows: 1 edge stitch in garter stitch, knit 26-30-34-38-42-46 stitches and decrease 6-8-9-11-12-13 stitches evenly over these stitches – remember DECREASE TIP, 5 stitches in garter stitch = 26-28-31-33-36-39 stitches. Change to circular needle size 8 MM = US 11. Continue with stockinette stitch, 1 edge stitch in garter stitch towards mid-front and 5 stitches in garter stitch towards the side. When the piece measures 33-34-35-36-37-38 cm = 13"-13⅜"-13¾"-14¼"-14½"-15", bind off stitches for the armhole at the beginning of each row from the wrong side as follows: 5-5-5-5-7-8 stitches 1 time and 1 stitch 1-1-2-3-3-4 times. Continue working with stockinette stitch and 1 edge stitch in garter stitch on each side. When the piece measures 39-41-42-44-45-47 cm = 15¼"-16⅛"-16½"-17¼"-17¾"-18½", start to decrease for the V-neck. Decrease 1 stitch at the beginning of each row from the right side as follows: Work 1 edge stitch in garter stitch, slip 1 stitch as if to knit, knit 1 and pass the slipped stitch over (= 1 stitch decreased). Decrease like this every 2nd row 4-4-5-5-6-6 times, then every 4th row 6-6-6-6-6-6 times. When all the decreases for the V-neck and armhole are finished there are 10-12-13-14-14-15 stitches on the shoulder. Continue working until the piece measures 64-66-68-70-72-74 cm = 25¼"-26"-26¾"-27½"-28⅜"-29⅛". Bind off. LEFT FRONT PIECE: Cast on 32-36-40-44-48-52 stitches with circular needle size 7 MM = US 10.75 and 1 strand DROPS Air and 1 strand DROPS Brushed Alpaca Silk (= 2 strands). Purl 1 row from the wrong side, then work rib as follows: 5 stitches in garter stitch, * knit 2, purl 2 *, work from *-* until there are 3 stitches left, knit 2 and 1 edge stitch in garter stitch. Continue this rib back and forth for 9 cm = 3½". The next row from the right side is worked as follows: 5 stitches in garter stitch, knit 26-30-34-38-42-46 stitches and decrease 6-8-9-11-12-13 stitches evenly over these stitches, 1 stitch in garter stitch = 26-28-31-33-36-39 stitches. Change to circular needle size 8 MM = US 11. Continue with stockinette stitch, 1 edge stitch in garter stitch towards mid-front and 5 stitches in garter stitch towards the side. When the piece measures 33-34-35-36-37-38 cm = 13"-13⅜"-13¾"-14¼"-14½"-15", bind off stitches for the armhole at the beginning of each row from the right side as follows: 5-5-5-5-7-8 stitches 1 time and 1 stitch 1-1-2-3-3-4 times. Continue working with stockinette stitch and 1 edge stitch in garter stitch on each side. When the piece measures 39-41-42-44-45-47 cm = 15¼"-16⅛"-16½"-17¼"-17¾"-18½", start to decrease for the V-neck. Decrease 1 stitch at the end of each row from the right side as follows: Work until there are 3 stitches left, knit 2 together and 1 edge stitch in garter stitch (= 1 stitch decreased). Decrease like this every 2nd row 4-4-5-5-6-6 times, then every 4th row 6-6-6-6-6-6 times. When all the decreases for the V-neck and armhole are finished there are 10-12-13-14-14-15 stitches on the shoulder. Continue working until the piece measures 64-66-68-70-72-74 cm = 25¼"-26"-26¾"-27½"-28⅜"-29⅛". Bind off. ASSEMBLY: Sew the shoulder seams with grafting stitches. Sew the side seams from the armholes down, sewing in the outermost loop of the outermost stitch. Leave 17 cm = 6¾" for a split on each side. SLEEVE-EDGES: Start mid-under the sleeve and knit up 72 to 84 stitches evenly inside the 1 edge stitch, with circular needle size 7 MM = US 10.75 and 1 strand of each quality. The number of stitches should be divisible by 4. Work rib (knit 2, purl 2) in the round for 4 cm = 1½". Bind off with knit over knit and purl over purl – read BINDING-OFF TIP. Work the other sleeve-edge in the same way. V-NECK: Insert a marker mid-back; it will be used when knitting up stitches for the bands and neck. Right band: Start from the right side at the bottom of the right front piece, using circular needle size 7 MM = US 10.75 and 1 strand of each quality (= 2 strands). Knit up 93 to 113 stitches as far as the marker mid-back (the number of stitches should be divisible by 4 + 1). Turn and purl 1 row from the wrong side, at the same time as you increase where the decreases for the V-neck start as follows: * Knit 1, 1 yarn over *, work from *-* 4 times (= 4 stitches increased). On the next row work the yarn overs twisted to avoid holes. Work rib as follows: 1 edge stitch in garter stitch, * knit 2, purl 2 *, work from *-* until there are 4 stitches left, knit 2, purl 1 and 1 edge stitch in garter stitch. Continue this rib back and forth. When you have worked 1 cm = ⅜" work 4-4-4-4-4-4 buttonholes evenly spaced. The top buttonhole is worked where the decreases for the V-neck begin, the bottom buttonhole 9 cm = 3½" from the bottom edge. Buttonhole = make 1 yarn over and work 2 together. NOTE: It is neatest if the buttonholes are worked in a purled section (seen from the right side). Bind off with knit over knit and purl over purl when the band measures 4 cm = 1½" – remember BINDING-OFF TIP. Left band: Start from the right side at the marker in the back of the neck using circular needle size 7 MM = US 10.75 and 1 strand of each quality (= 2 strands). Knit up 93 to 113 stitches down the left front piece (the number of stitches should be divisible by 4 + 1). Turn and purl 1 row from the wrong side, at the same time as you increase where the decreases for the V-neck start as follows: * Knit 1, 1 yarn over *, work from *-* 4 times (= 4 stitches increased). On the next row work the yarn overs twisted to avoid holes. Work rib as follows: 1 edge stitch in garter stitch, purl 1, * knit 2, purl 2 *, work from *-* until there are 3 stitches left, knit 2 and 1 edge stitch in garter stitch. Continue this rib for 4 cm = 1½". Bind off with knit over knit and purl over purl. Sew the band together mid-back. Sew the buttons onto the left band. POCKETS: Cast on 15 stitches with 3 strands DROPS Brushed Alpaca Silk and circular needle size 7 MM = US 10.75. Work 3 ridges. Change to 1 strand DROPS Air and 1 strand DROPS Brushed Alpaca Silk. Work stockinette stitch with 1 edge stitch in garter stitch on each side until the pocket measures 10 cm = 4". Bind off. Work 1 more pocket in the same way. Place the pockets on each front piece, with the bottom of the pocket where the rib finishes and the side of the pocket along the garter-stitch edge on the side. Fasten the pockets with small, invisible stitches. |
|
|
|
Have you finished this pattern?Tag your pictures with #dropspattern #cosymoseyvest or submit them to the #dropsfan gallery. Do you need help with this pattern?You'll find 27 tutorial videos, a Comments/Questions area and more by visiting the pattern on garnstudio.com. © 1982-2025 DROPS Design A/S. We reserve all rights. This document, including all its sub-sections, has copyrights. Read more about what you can do with our patterns at the bottom of each pattern on our site. |
|


With over 40 years in knitting and crochet design, DROPS Design offers one of the most extensive collections of free patterns on the internet - translated to 17 languages. As of today we count 314 catalogs and 11822 patterns - 11812 of which are translated into English (US/in).
We work hard to bring you the best knitting and crochet have to offer, inspiration and advice as well as great quality yarns at incredible prices! Would you like to use our patterns for other than personal use? You can read what you are allowed to do in the Copyright text at the bottom of all our patterns. Happy crafting!
Post a comment to pattern DROPS 226-35
We would love to hear what you have to say about this pattern!
If you want to leave a question, please make sure you select the correct category in the form below, to speed up the answering process. Required fields are marked *.