
Popular categories
Looking for a yarn?


Comments / Questions (282)
![]() Maryse wrote:
Maryse wrote:
Je bloque au 12 rangs du début . Je fait une maille lisière et ensuite le 1 er rang de A3 à A6 sur mon rang , mais sa ne tombe pas juste A3: 36 m, A4:10 m, A5 :10 m, A6 10 m donc 66 mailles et mon rang en fait 150 . Je ne comprend pas .
15.03.2017 - 23:41DROPS Design answered:
Bonjour Maryse, en taille M on tricote ainsi: 1 m point mousse, A.6 (= 10 m)), A.4 (=10 m), A.3 (=36 m), 2 m env, 2 m end, *3 m env, 2 m end *, répéter de *-* encore 5 fois, 2 m env, A.3 (= 36 m), A.4 (= 10 m), A.5 (= 10 m), 1 m lis au point mousse, soit: 1 + 10 + 10 + 36 + 2+ 2 + [(3+2) x 6] + 2+36+10+10+1 = 150 m. Bon tricot!
16.03.2017 - 08:54
![]() Mounine wrote:
Mounine wrote:
Le dos : je suis arrivée aux diminutions de l'encolure au rang suivant à partir de l'encolure, diminuer une maille =il reste pour chaque épaule ? je ne comprends pas la phrase. merci
18.02.2017 - 17:31DROPS Design answered:
Bonjour Mme Mounine, après avoir rabattu les mailles centrales, continuez chaque épaule séparément, en même temps au rang suivant qui commence côté encolure vers l'emmanchure, diminuez 1 m en début de rang (pour continuer à former l'encolure). Continuez ensuite sur les mailles restantes comme indiqué. Bon tricot!
20.02.2017 - 09:39
![]() Marie wrote:
Marie wrote:
I am beginning the shawl collar and I am unsure if I should increase and decrease on every row. Also, is the short row only worked every 14th row? Thank you.
17.02.2017 - 22:58DROPS Design answered:
Dear Marie, when working the shawl collar, repeat the inc/dec every 1,5 cm a total of 0-4 times (see size) and then every 1 cm a total of 26-24 times, and at the same time continue the short rows as before, ie every 14th row. Happy knitting!
20.02.2017 - 09:17
![]() Tonie Westlund wrote:
Tonie Westlund wrote:
Hej igen! Väntar på svar angående min tidigare fråga om ärmmaskorna i strl L.....
10.01.2017 - 17:50DROPS Design answered:
Hej Tonie. Jeg har ret travlt med at svare paa spörgsmaal endnu fra juleferien, jeg maa bede dig have lidt taalmodighed endnu ;) (Eller spörg i din butik). Jeg kommer hurtigst muligt til dig
11.01.2017 - 10:58
![]() Tonie Westlund wrote:
Tonie Westlund wrote:
Hej! Håller på med ärmen i strl L. Började med 64 m och minskade sedan till 54 som jag förstod av beskrivningen. Men sen ska jag öka 22 x 2 m. När jag gjort det har jag 98 m men det står att det ska vara 100 m? Är det jag som inte förstår eller står det fel? 54 m plus 22 ökningar a' 2 m blir väl bara 98 m? Med vänlig hälsning Tonie
03.01.2017 - 21:54DROPS Design answered:
Hej Tonie. Ja, du feller efter vrbord til 54 m. Du öker i hver side i alt 23 ganger (der staar 22 ganger til), saa det er 46 nye masker: 100 m i alt.
12.01.2017 - 15:52
![]() Von Stumpff wrote:
Von Stumpff wrote:
Als Ergänzung zur vorherigen Frage nochmal zum Schalkragen. Ich weiß nicht was mit Verschiebung gemeint ist und mir ist unklar, wann Maschen ab- und wann Maschen zugenommen werden. Was soll im Abstand von 1,5 und 1 cm passieren?
14.12.2016 - 01:15DROPS Design answered:
Liebe Frau Von Stumpff - siehe Antwort unten. Viel Spaß beim stricken!
14.12.2016 - 09:08
![]() Von Stumpff wrote:
Von Stumpff wrote:
Hallo, ich verstehe nicht, was beim Schalkragen mit "Verschiebung" gemeint ist.
14.12.2016 - 01:10DROPS Design answered:
Liebe Frau Von Stumpff, Sie werden vor A.1 (= nach der ersten M von A.1) zunehmen und nach A.1 1 M abnehmen, so wird A.1 sich verschieben. Diese Zu- bzw Abnahmen sollen Sie insgesamt 0-4 x alle 1.5 cm und dann 26-24 x alle jede cm arbeiten. Viel Spaß beim stricken!
14.12.2016 - 09:07
![]() Philippe Katty wrote:
Philippe Katty wrote:
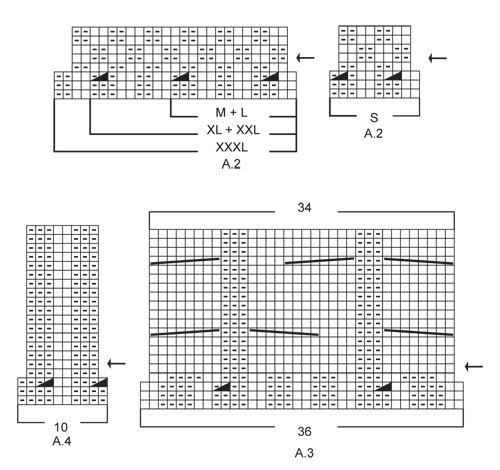
Je ne comprends vos diagrammes. Exemple diagramme A2 à partir de la flèche, en lisant le diagramme je n'obtiens pas un aspect carré comme représenté sur votre diagramme. En effet, la 1er ligne au niveau de la flèche est tricotée toute à l'end et au retour je tricote 2 mailles env, 2 mailles end, 2 mailles env, 2 mailles end, donc aucun aspect carré. Si j'ai mal compris votre diagramme, merci de m'aider.
27.11.2016 - 21:24DROPS Design answered:
Bonjour Mme Philippe, en commençant par la flèche dans A.2, on tricote alternativement 2 m env, 2 m end (tricotez les m comme elles se présentent sur l'envers) puis 2 m end, 2 m env (tricotez les m comme elles se présentent sur l'envers), on a ainsi un damier de 2 m env/2 m end sur 4 rangs. Bon tricot!
28.11.2016 - 09:42
![]() Lena Kruse wrote:
Lena Kruse wrote:
Jeg har svært ved at se i hvilken rækkefølge de forskellige mønstre skal strikkes efter ribben. Der står kun at A2 - A6 strikkes fra pilene. Og at de midterste m skal strikkes i A8.
07.11.2016 - 15:36DROPS Design answered:
Hej Lene. Det er beskrevet först i opskriften: Strik Rib således: 1 kantm RETSTRIK - se forkl over, A.6 (se diag til rigtig str), A.4, A.3, 2 vr, 2 r, * 3 vr, 2 r *, gentag fra *-* 4-5-5-9-9-11 gange til, 2 vr, A.3, A.4, A.5 (se diag til rigtig str), 1 kantm retstrik. Fortsæt således og gentag de 2 første p i A.3 - A.6 til der er strikket 12 p....osv. Naar du saa skifter til p 4 strikker du videre som för, og gentager A.2 til A.6 fra pilen + du strikker de midterste m i A.8
08.11.2016 - 11:51
![]() Alexandra wrote:
Alexandra wrote:
Bonjour, je suis bloquée dès le début... je ne comprends pas pour le dos"Continuer ainsi et répéter les deux premiers rangs de A3,A6 jusqu'à ce que douze rangs aient été tricotés... Cela signifie en gros que je dois tricoter les mailles comme elles se présentent sur douze rangs? ou bien, dois-je uniquement répéter les A3 et A6 ? Merci pour votre réponse...
04.11.2016 - 00:17DROPS Design answered:
Bonjour Alexandra, vous répétez 6 fois au total les 2 premiers rangs des diagrammes A.3 à A.6 = 12 rangs au total. Bon tricot!
04.11.2016 - 09:17
|
|||||||||||||||||||
Finnley |
|||||||||||||||||||
 |
 |
||||||||||||||||||
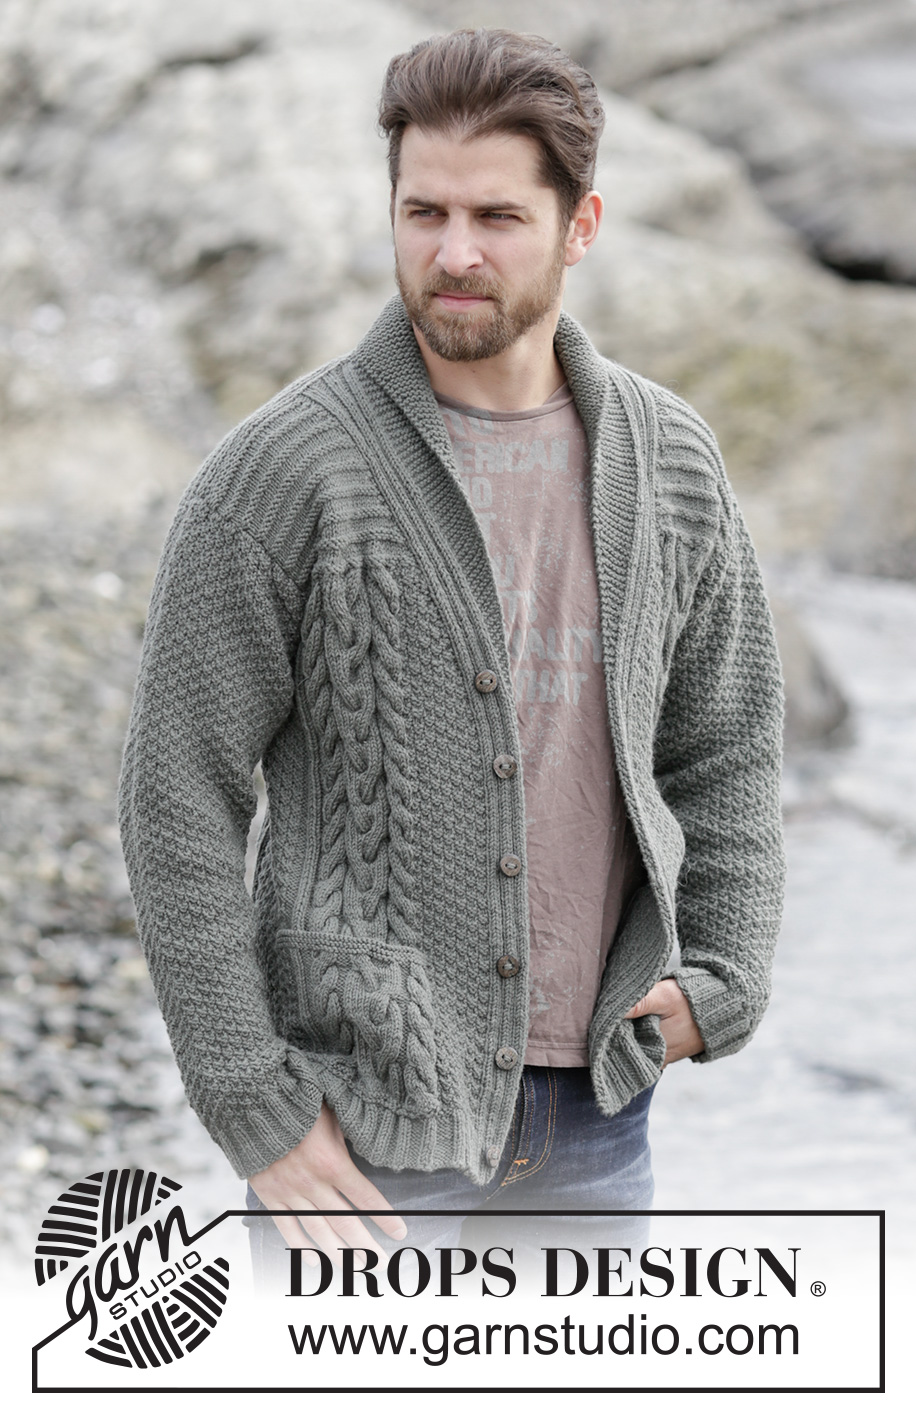
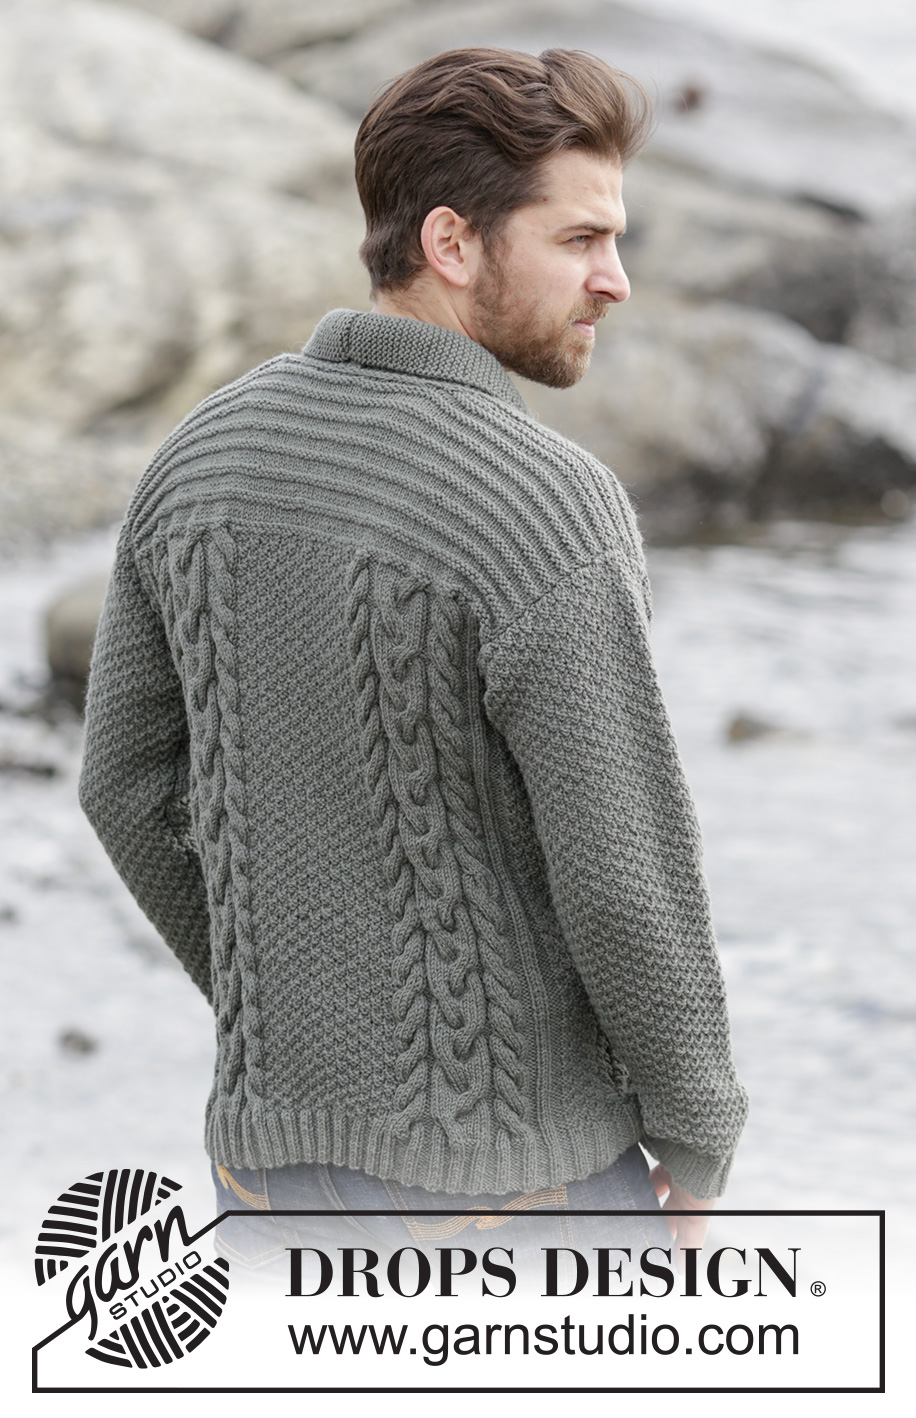
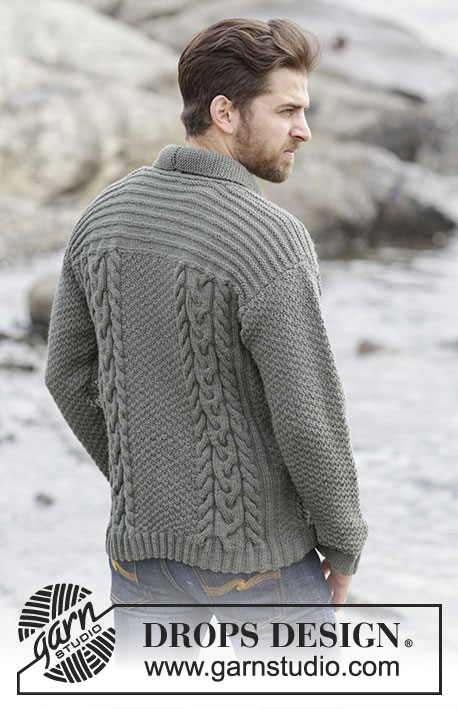
Men's knitted jacket in DROPS Lima, with cables and shawl collar. Size: S - XXXL.
DROPS Extra 0-1132 |
|||||||||||||||||||
|
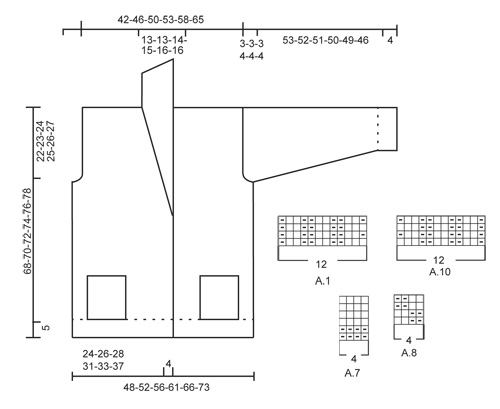
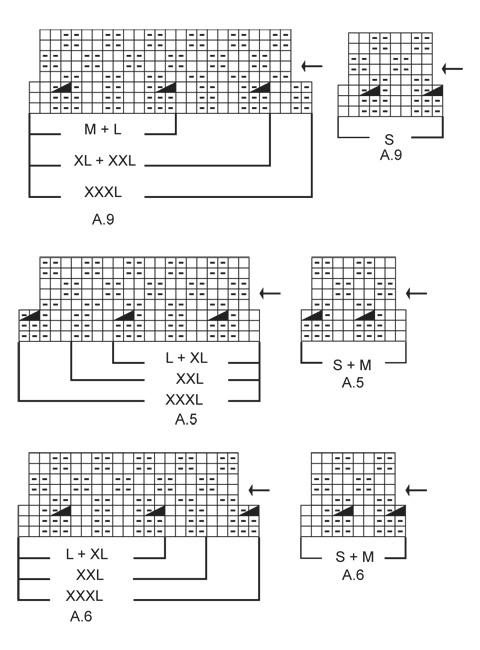
GARTER ST (back and forth): K all rows. 1 ridge = 2 rows K. PATTERN: See diagrams A.1-A.10. The diagrams show all rows in pattern seen from RS. INCREASE TIP: Inc 1 st by making 1 YO, on next row work YO twisted (i.e. work in the back loop of st instead front) to avoid holes. DECREASE TIP: All dec are done from RS! Dec as follows after A.1: P 2 tog Dec as follows before A.1: Work until 2 sts remain before A.1, P 2 tog. BUTTONHOLES: Dec for buttonholes on left band. 1 buttonhole = K tog sixth and seventh st from edge and make 1 YO. Dec for buttonholes when piece measures: SIZE S: 2, 9, 17, 25, 33 and 41 cm. SIZE M: 2, 10, 18, 26, 34 and 42 cm. SIZE L: 3, 11, 19, 27, 35 and 43 cm. SIZE XL: 3, 12, 20, 28, 36 and 44 cm. SIZE XXL: 4, 13, 21, 29, 37 and 45 cm. SIZE XXXL: 5, 14, 22, 30, 38 and 46 cm. SHORT ROWS (applies to shawl collar): Work short rows over sts in garter st from mid front as follows: For every 14th row work as follows (beg from RS): Work over all sts in garter st, turn piece, tighten yarn and K back, turn piece and work as before over all sts. That way the ridges in collar will not contract as much. On left front piece work reversed, i.e. beg short rows from WS. ---------------------------------------------------------- JACKET: Worked back and forth and sewn tog when finished. BACK PIECE: Cast on 145-150-158-178-186-206 sts on circular needle size 3.5 mm with Lima. Work rib as follows: 1 edge st in GARTER ST - see explanation above, A.6 (find diagram for correct size), A.4, A.3, P 2, K 2, * P 3, K 2 *, repeat from *-* 4-5-5-9-9-11 more times, P 2, A.3, A.4, A.5 (find diagram for correct size), 1 edge st in garter st. Continue like this and repeat the first 2 rows in A.3-A.6 until 12 rows have been worked. Now continue pattern from 3rd row in diagram and work as follows: Work the first 59-59-63-63-67-72 sts as before, work the next 27-32-32-52-52-62 sts AT THE SAME TIME dec 11-8-8-12-12-14 sts evenly in sections with P, continue as before over the remaining 59-59-63-63-67-72 sts = 122-130-138-154-162-178 sts. Work 1 row. Now switch to circular needle size 4 mm and continue with pattern but work A.8 over the middle 16-24-24-40-40-48 sts. NOTE: Now repeat A.3- A.6 from arrow in diagram. REMEMBER THE KNITTING TENSION When piece measures 46-47-48-49-50-51 cm, cast off 3-3-3-4-4-4 sts at beg of the next 4 rows for armholes = 110-118-126-138-146-162 sts on needle. When piece measures 53-54-55-56-57-58 cm, work A.7 over all sts inside 1 edge st in garter st in each side AT THE SAME TIME on first row dec 20-20-18-24-22-24 sts evenly in all sizes = 90-98-108-114-124-138 sts. Repeat A.7 until finished measurements. When piece measures 66-68-70-72-74-76 cm, work as follows: Work the first 32-36-40-42-46-53 sts, cast off the next 26-26-28-30-32-32 sts and work the remaining 32-36-40-42-46-53 sts. Then finish each shoulder separately as follows: On next row from the neck, dec 1 st = 31-35-39-41-45-52 sts remain on each shoulder. When piece measures 68-70-72-74-76-78 cm, work 1 ridge over all sts. Cast off. Work the other shoulder the same way. RIGHT FRONT PIECE: Cast on 81-85-89-98-102-111 sts on circular needle size 3.5 mm with Lima. Work rib as follows: A.1 (= 12 sts), A.2 (find diagram for correct size), P 2, A.3, A.4, A.5 (find diagram for correct size), 1 edge st in garter st. Continue like this and repeat the first 2 rows in A.2-A.5 until 12 rows have been worked. Switch to circular needle size 4 mm and continue with pattern = 73-77-81-89-93-101 sts. NOTE: Now repeat diagram from arrow. When piece measures 40-41-42-43-44-46 cm, beg shawl collar while AT THE SAME TIME working shoulder as explained below: READ ALL OF THE FOLLOWING SECTION BEFORE CONTINUING! SHAWL COLLAR: Work first st in A.1, 1 YO, work the remaining 11 sts in A.1, dec 1 st - READ DECREASE TIP, continue over the remaining sts on needle as before. Repeat displacement over A.1 every 1½ cm 0-2-3-3-3-4 times in total and every cm 26-24-23-24-25-24 times = 26-26-26-27-28-28 sts (incl the first st in A.1). Work the inc sts towards mid front in garter st, AT THE SAME TIME work SHORT ROWS - see explanation above. SHOULDER: When piece measures 46-47-48-49-50-51 cm, cast off 3-3-3-4-4-4 sts at beg of the next 2 rows from WS = 67-71-75-81-85-93 sts on needle. When piece measures 53-54-55-56-57-58 cm, work collar sts in garter st and A.1 as before, then work A.7 over the remaining sts on needle, AT THE SAME TIME dec 10-10-10-13-12-13 sts evenly = 57-61-65-68-73-80 sts. Continue pattern until finished measurements. Then work as follows from RS: When piece measures 68-70-72-74-76-78 cm - adjust after back piece - work the first 26-26-26-27-28-28 sts before slipping them on a stitch holder, then work a ridge over the remaining 31-35-39-41-45-52 sts. Cast off. Slip sts back on needle. Then work short rows in garter st as follows, beg from WS: Work over all 26-26-26-27-28-28 sts, * 2 rows back and forth over the first 13-13-14-14-15-15 sts, 2 rows over all sts *, repeat from *-* until piece measures 7-7-7-8-8-8 cm on the shortest. Cast off. LEFT FRONT PIECE: Work as right front piece but reversed. I.e. work A.10 instead of A.1, A.9 instead of A.2 and A.6 instead of A.5. Remember BUTTONHOLES on left band - see explanation above. SLEEVE: The sleeve is worked back and forth on circular needle. Cast on 59-64-64-69-69-74 sts (incl 1 edge st in garter st in each side) on circular needle size 3.5 mm with Lima. Work rib as follows: 1 edge st in garter st, * K 2, P 3 *, repeat from *-* until 3 sts remain, K 2, 1 edge st in garter st. Continue like this until rib measures 4 cm. Switch to circular needle size 4 mm and work 1 row in stocking st while AT THE SAME TIME dec 9-10-10-11-11-12 sts evenly = 50-54-54-58-58-62 sts. Continue with A.8 inside 1 edge st in garter st in each side. When piece measures 14-13-8-8-13-11 cm, inc 1 st inside edge st in garter st in each side - read INCREASE TIP. Repeat inc approx. every 2-2-1½-1½-1½-1½ cm 20-20-22-22-25-25 more times = 92-96-100-104-110-114 sts. When piece measures 57-56-55-54-53-50 cm, cast off at beg of every row in each side: 3 sts 1-1-1-2-2-2 times, 2 sts 1 time and 3 st 2-2-2-3-3-3 times. Cast off. Sleeve measures approx. 60-59-58-58-57-54 cm. Knit another sleeve. POCKETS: Worked back and forth on circular needle. Cast on 42 sts on circular needle size 4 mm with Lima. Work 1 ridge in garter st AT THE SAME TIME inc 6 sts evenly on row from RS = 48 sts. On next row from RS work pattern as follows: NOTE: Beg and repeat pattern in A.3 and A.4 from 5th row in A.3 and A.4. 1 edge sts in garter st, A.3, A.4, A.8, 1 edge st in garter st. Continue like this back and forth until A.3 and A.4 have been worked 2 times vertically. Then continue with the first 6 rows from arrows in diagram 1 more time. Then work and dec as follows: 1 edge st in garter st, K the next 4 sts tog 2 by 2 (= 2 sts dec), continue as before over the next 7 sts, K the next 4 sts tog 2 by 2, continue with pattern as before over the next 15 sts, K the next 4 sts tog 2 by 2, Work remaining sts as before and finish with 1 edge st in garter st. Then switch to needle 3.5 mm and work 2 ridges over all sts, beg from WS. Cast off from WS. Work another pocket the same way but reversed. ASSEMBLY: Sew the shoulder seams tog. Sew sleeves in body. Sew underarm and side seams in one inside 1 edge st in garter st. Sew the buttons on to the right band. Sew cast-off edge on collars tog mid back, sew collar to the back of neck. Fasten pockets on front pieces so that pattern on pocket is placed over pattern on front piece. Sew pocket neatly through both layers in edge st in garter st in each side and at the bottom of pocket. Cut the yarn and fasten. |
|||||||||||||||||||
Diagram explanations |
|||||||||||||||||||
|
|||||||||||||||||||
 |
|||||||||||||||||||
 |
|||||||||||||||||||
 |
|||||||||||||||||||
Have you finished this pattern?Tag your pictures with #dropspattern or submit them to the #dropsfan gallery. Do you need help with this pattern?You'll find 24 tutorial videos, a Comments/Questions area and more by visiting the pattern on garnstudio.com. © 1982-2026 DROPS Design A/S. We reserve all rights. This document, including all its sub-sections, has copyrights. Read more about what you can do with our patterns at the bottom of each pattern on our site. |
|||||||||||||||||||


With over 40 years in knitting and crochet design, DROPS Design offers one of the most extensive collections of free patterns on the internet - translated to 17 languages. As of today we count 324 catalogues and 12245 patterns translated into English (UK/cm). 12245
We work hard to bring you the best knitting and crochet have to offer, inspiration and advice as well as great quality yarns at incredible prices! Would you like to use our patterns for other than personal use? You can read what you are allowed to do in the Copyright text at the bottom of all our patterns. Happy crafting!
Post a comment to pattern DROPS Extra 0-1132
We would love to hear what you have to say about this pattern!
If you want to leave a question, please make sure you select the correct category in the form below, to speed up the answering process. Required fields are marked *.