
Looking for a yarn?


Comments / Questions (167)
![]() Donna wrote:
Donna wrote:
What does begin and end with 1 knitted stitch in English rib inside 1 edge stitch in garter stitch seen from the right side mean
08.01.2023 - 04:09DROPS Design answered:
Dear Donna, starting from WS work first the 2nd stitch in A.2 (= first stitch from the left towards the right) after the edge stitch, repeating the 2 sts A.2 you will automatically end with the 1st stitch in A.2 before the edge stitch. This means inside 1 edge stitch you will work the stitch alternately 1 yarn over, slip purled stitch onto right needle as if to purl (from wrong side) and yarn over and knitted stitch knitted together (from right side). Happy knitting!
09.01.2023 - 09:42
![]() Clara Schenkels wrote:
Clara Schenkels wrote:
Als het achterpand 8 cm langer is moet ik dan voor het achterpand geen 18cm boord breien voordat ik aan het patroon begin zodat het patroon aan de voor- en achterpand doorloopt? Ik hoor het graag. Hartelijke groet Clara
07.01.2023 - 10:57
![]() Annemiek Van Der Gaag wrote:
Annemiek Van Der Gaag wrote:
Ik lees net dat het achterpand op dezelfde manier wordt gebreid als het voorpand, maar dat kan ik niet uit het patroon halen. Er staat dat je A1 2-2-2-3-3-3 keer in de hoogte en dat begrijp ik dus niet. Kunt u mij verder helpen. Met vriendelijke groeten, Annemiek
05.01.2023 - 15:52DROPS Design answered:
Dag Annemiek,
Je breit eerst het achterpand volgens de instructies. Daarna brei je het voorpand, waarbij je op dezelfde manier opzet en breit, tot het werk 34-35-36-37-38-39 cm meet. Volg dan verder de instructies die bij het voorpand staan.
06.01.2023 - 19:33
![]() Marlies Van Dortmont wrote:
Marlies Van Dortmont wrote:
Hallo, op de foto waar de hele trui op staat zie ik een stukje van de achterkant (onderaan) daar zie ik geen patentsteek? Is het axhterpand in rechtse steek gebreid? Ik hoor het graag!
04.01.2023 - 18:07DROPS Design answered:
Dag Marlies,
Nee, het voorpand en het achterpand worden op dezelfde manier gebreid, dus met hetzelfde patroon erin.
04.01.2023 - 20:45
![]() Bernadette PACCAUD wrote:
Bernadette PACCAUD wrote:
Bonjour, je commence le pull "rain chain", combien de cotes doit-on faire pour le dos, 10 cm ou 18 cm et combien pour le devant? Merci pour votre réponse.
21.12.2022 - 16:09DROPS Design answered:
Bonjour Mme Paccaud, on a 10 cm de côtes en bas du dos et en bas du devant et les fentes côtés mesurent 18 cm côté dos/10 cm côté devant, autrement dit, le dos est 8 cm plus long que le devant. Bon tricot!
22.12.2022 - 08:44
![]() Laura wrote:
Laura wrote:
Hola! En la descripción del patrón pone que la parte de atrás empieza montando los puntos en agujas circulares, pero acabo de leer por aquí que este patrón no está adaptado para agujas circulares… entonces, es un fallo lo que pone de la parte de detrás? Cuánto tienen que medir de largo las agujas de doble punta para tejer este jersey? Gracias de antemano
21.12.2022 - 00:53DROPS Design answered:
Hola Laura, el patrón sí se trabaja con agujas circulares, pero de ida y vuelta. La pregunta en concreto se refería a patrones con canesú redondo (es decir, trabajado en redondo con agujas circulares) y de arriba abajo.
25.12.2022 - 20:41
![]() Leonhardt wrote:
Leonhardt wrote:
IL semble que les explications ne soient pas conformes à la photo: sur la photo les 2 A1 sont séparés alors que dans les explications ils s'enchainent ,,et sur la photo A1 correspond à deux cotes de point mousse alors que dans les explications les 6 rangs de A1 formes 3 cotes de point mousse ?
18.12.2022 - 23:29
![]() Leonhardt wrote:
Leonhardt wrote:
IL semble que les explications ne soient pas conformes à la photo: A1 (6rangs) correspond à 3 rangs mousse, alors que sur la photo on ne voit que 2 rangs.De plus sur la photo les 2 A1 semblent séparés alors que dans les explications ils s'enchainent.
18.12.2022 - 23:24DROPS Design answered:
Bonjour Mme Leonhardt, on n'a que 2 côtes mousse dans A.1 (les 2 rangs à tricoter à l'endroit sur l'envers), et vous aurez 2 rangs jersey endroit après la 2ème côte mousse, autrement dit tricotez: 4 rangs point mousse, 2 rangs jersey pour A.1. Bon tricot!
19.12.2022 - 09:45
![]() Paula wrote:
Paula wrote:
Would this pattern work knitted in eyelash wool / faux fur and if so how do I calculate the size and what needle size would I need . The ball states 10 mm needels and I would normally wear a size 16 . Thankyou
12.12.2022 - 21:02DROPS Design answered:
Dear Paula, we are unfortunately not able to adjust every pattern to every single request - you will have to recalculate the whole pattern with your own tension, or then look for another pattern matching your tension. This lesson explains how to choose your size. Happy knitting!
13.12.2022 - 08:05
![]() MIREILLE FRANCOIS wrote:
MIREILLE FRANCOIS wrote:
Bonjour combien de pelotes faut il acheter pour une taille M SVP MERCI
12.12.2022 - 11:42DROPS Design answered:
Bonjour Mme François, vous trouverez toutes les quantités indiquées dans l'en-tête pour chaque taille, autrement dit, il faut en taille M 500 g DROPS Wish/50 g la pelote = 10 pelotes en taille M. Bon tricot!
12.12.2022 - 16:07
|
||||||||||||||||
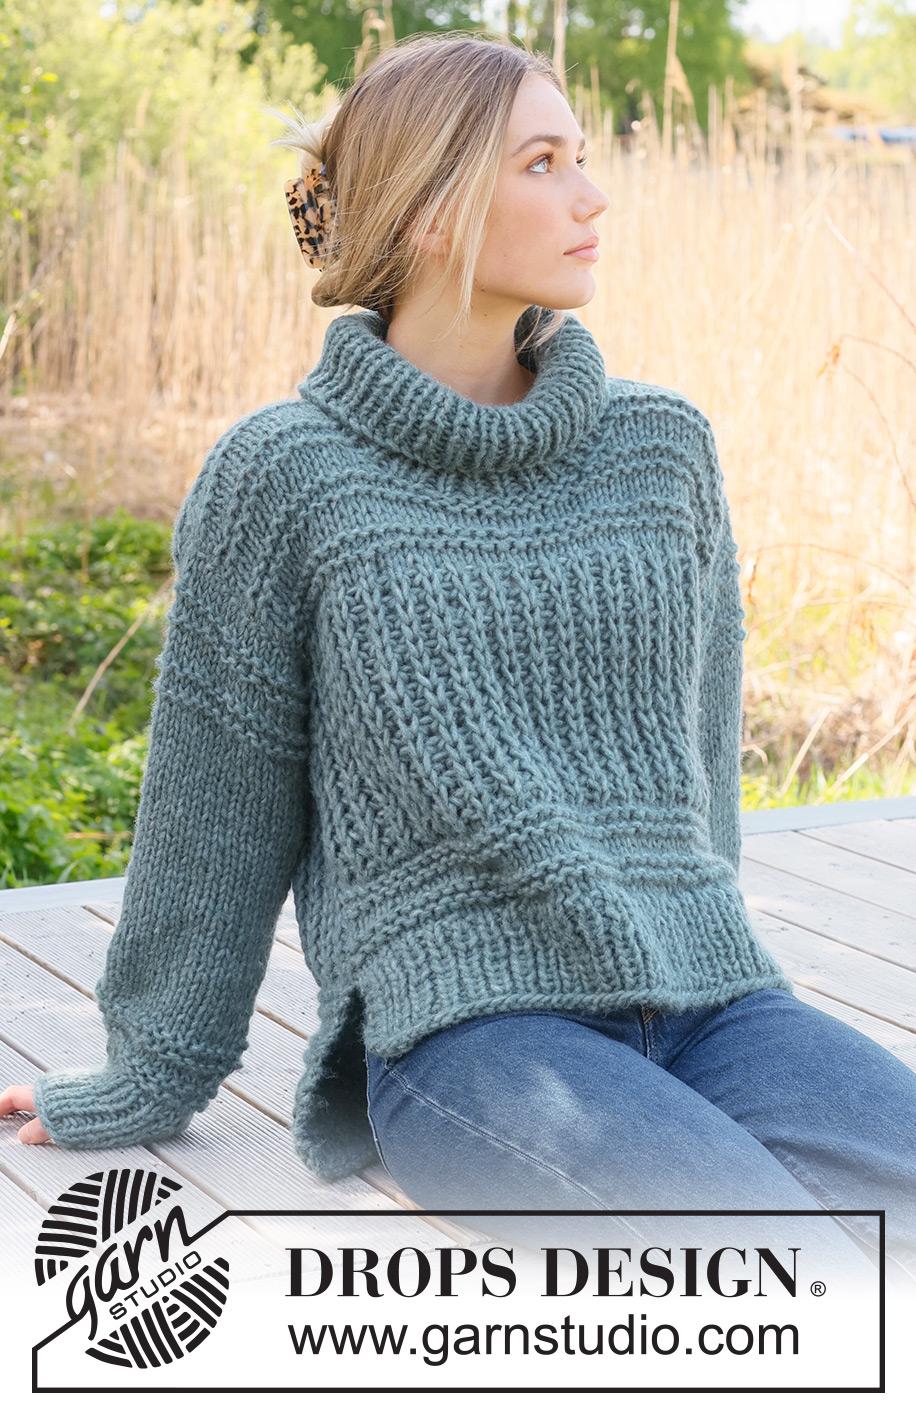
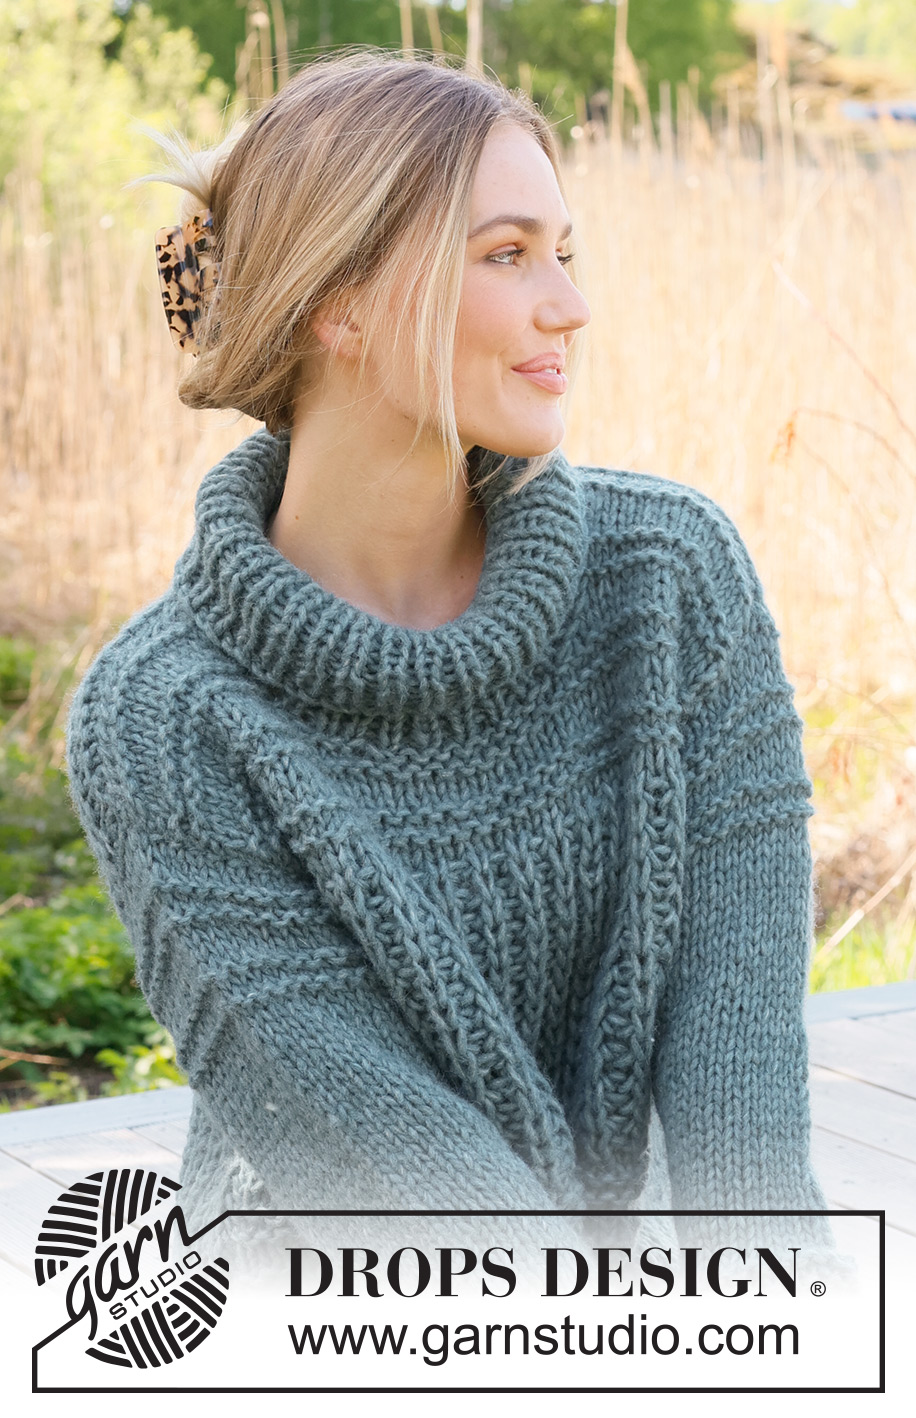
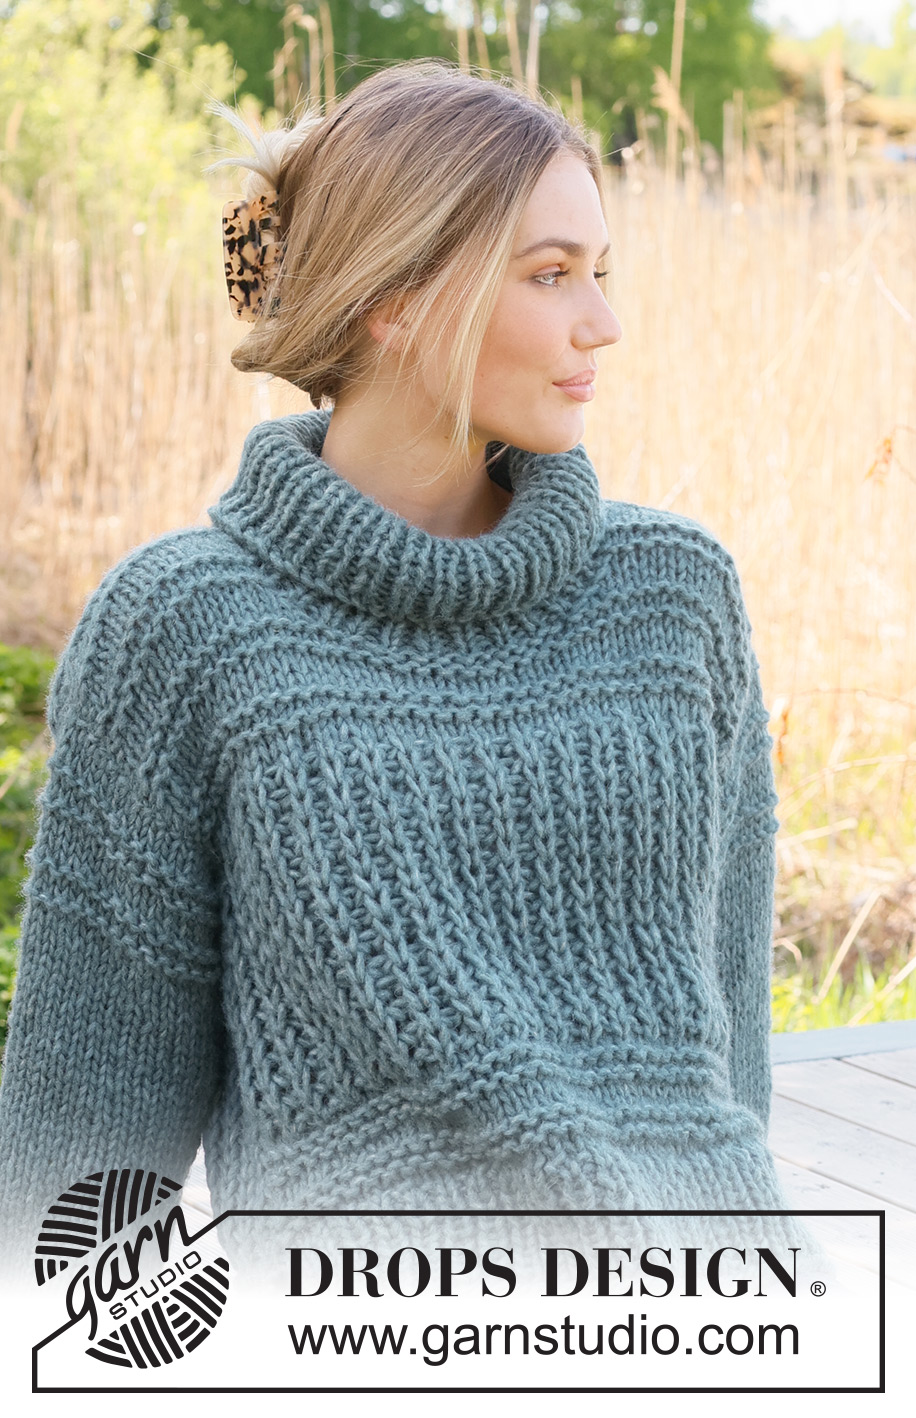
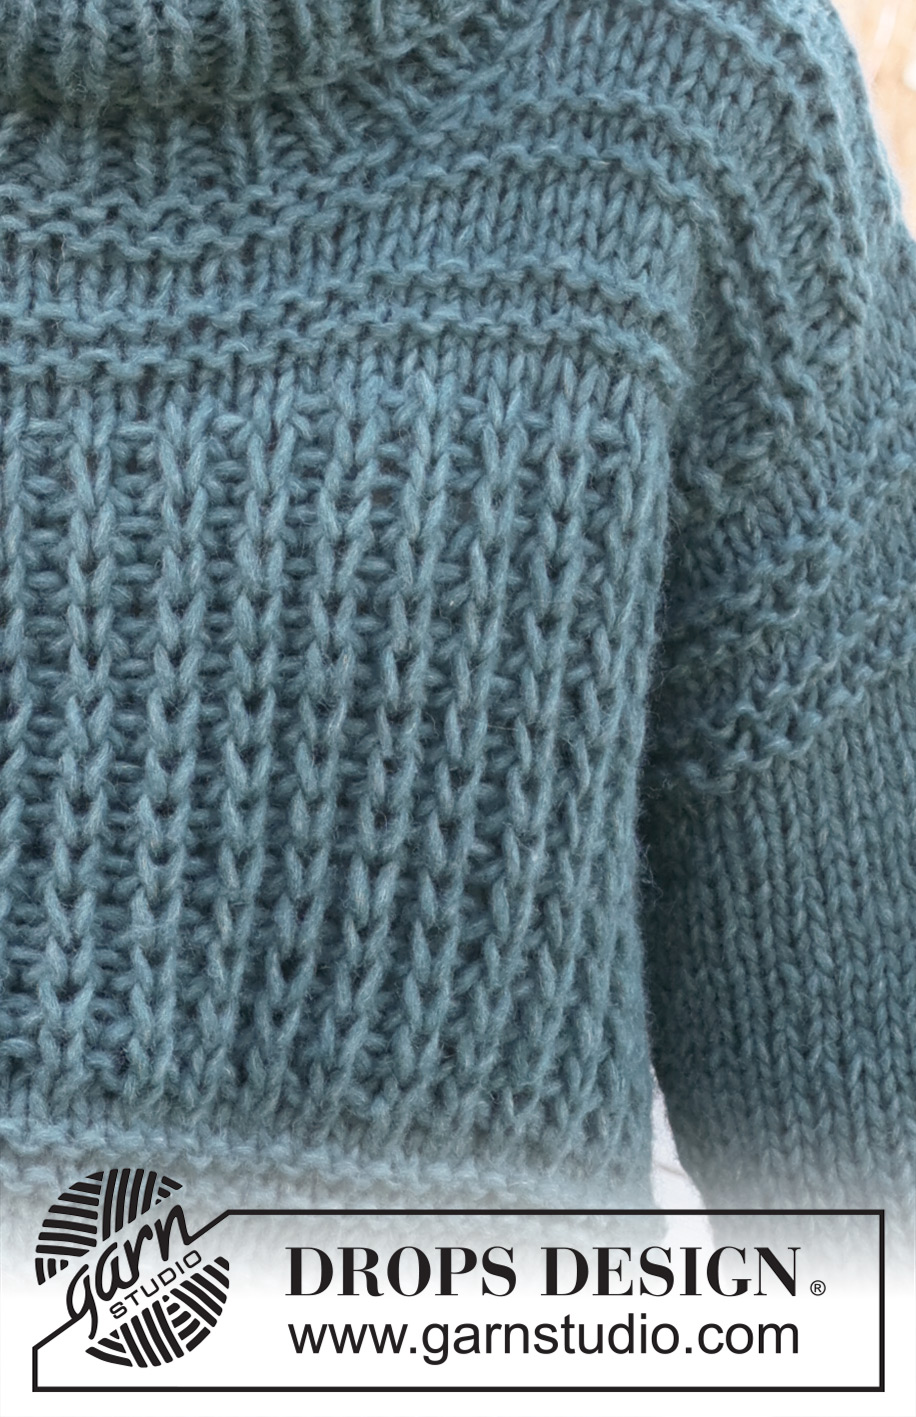
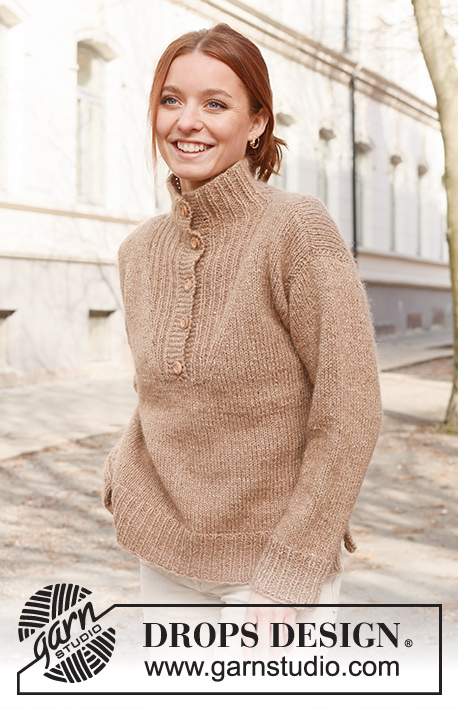
Rain Chain#rainchainsweater |
||||||||||||||||
 |
 |
|||||||||||||||
Knitted jumper in 1 strand DROPS Wish or 2 strands DROPS Air. The piece is worked bottom up with English rib, open garter stitch and split in the sides. Sizes S - XXXL.
DROPS 236-9 |
||||||||||||||||
|
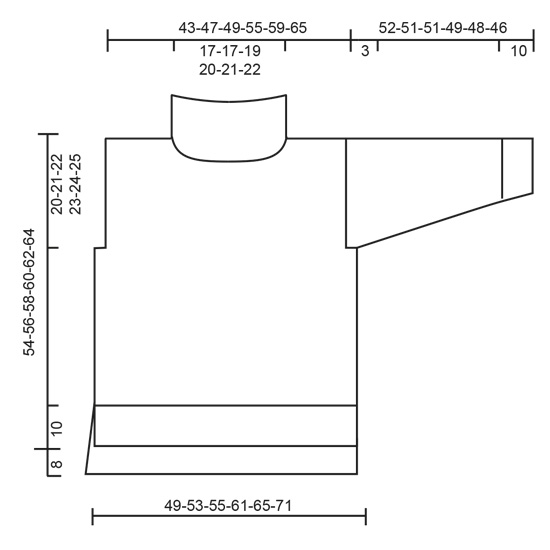
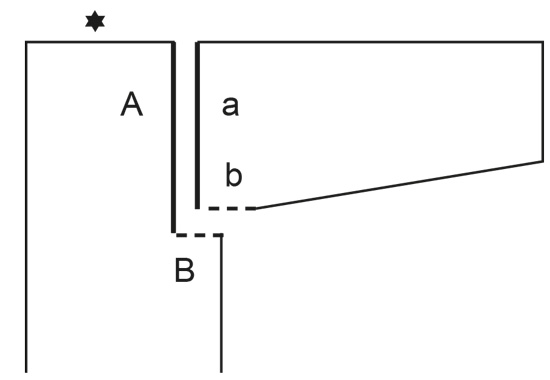
------------------------------------------------------- EXPLANATIONS FOR THE PATTERN: ------------------------------------------------------- PATTERN: See diagrams A.1 and A.2. The diagrams show all rows in the pattern from the right side. RIDGE/GARTER STITCH (worked back and forth): Knit all rows. 1 ridge = knit 2 rows. INCREASE TIP (for sleeves): Work until there is 1 stitch left before the marker thread, 1 yarn over, knit 2 (marker thread sits between these stitches), 1 yarn over. On the next round knit the yarn overs twisted to avoid holes. Then work the new stitches in stocking stitch. ------------------------------------------------------- JUMPER – SHORT OVERVIEW OF THE PIECE: The piece is worked in sections, back and forth and bottom up, then sewn together. The sleeves are worked in the round with double pointed needles/short circular needle bottom up. The back piece is 8 cm longer than the front. BACK PIECE: Cast on 59-63-67-73-79-85 stitches with circular needle size 8 mm and 1 strand DROPS Wish or 2 strands DROPS Air. Purl 1 row from the wrong side then work rib as follows from the right side: 2 edge stitches in GARTER STITCH – read description above, * knit 1, purl 1 *, work from *-* until there are 3 stitches left, knit 1 and 2 edge stitches in garter stitch. Continue this rib for 10 cm. Purl 1 row from the wrong side and decrease 10-10-12-12-14-14 stitches evenly spaced = 49-53-55-61-65-71 stitches. Change to circular needle size 9 mm. REMEMBER THE KNITTING TENSION! Work A.1, 2-2-2-3-3-3 times in height. Now work 1 row as follows from the right side: 1 edge stitch in garter stitch, * knit 1, purl 1 *, work from *-* until there are 2 stitches left, knit 1 and 1 edge stitch in garter stitch. Work A.2 (first row from the wrong side, reading the diagram from left to right and the pattern beginning and ending with 1 knitted stitch in English rib inside 1 edge stitch in garter stitch, seen from the right side). Continue A.2 onwards. When the piece measures 42-43-44-45-46-47 cm, cast off 3 stitches at the beginning of the next 2 rows for the armholes = 43-47-49-55-59-65 stitches. Continue A.2. When the piece measures 44-46-48-50-52-54 cm, purl the next row from the wrong side. Then work according to A.1. When the piece measures 60-62-64-66-68-70 cm, cast off the middle 13-13-15-15-17-17 stitches for the neck and finish each shoulder separately. Cast off 1 stitch on the next row from the neck = 14-16-16-19-20-23 stitches on the shoulder. Cast off when the piece measures 62-64-66-68-70-72 cm. Work the other shoulder in the same way. FRONT PIECE: Cast on and work in the same way as the back piece until the front measures 34-35-36-37-38-39 cm. Cast off 3 stitches at the beginning of the next 2 rows for the armholes = 43-47-49-55-59-65 stitches. Continue A.2. When the piece measures 36-38-40-42-44-46 cm, purl the next row from the wrong side. Then work according to A.1. When the piece measures 47-49-51-53-55-57 cm, work the neck as follows: Place the middle 9-9-11-11-13-13 stitches on a thread and finish each shoulder separately. Cast off for the neck every 2nd row as follows: 2 stitches 1 time, 1 stitch 1 time = 14-16-16-19-20-23 stitches on the shoulder. Cast off when the piece measures 54-56-58-60-62-64 cm. Work the other shoulder in the same way. SLEEVES: Cast on 30-32-32-34-34-36 stitches with double pointed needles size 8 mm and 1 strand DROPS Wish or 2 strands DROPS Air. Insert 1 marker-thread at the beginning of the round (mid-under sleeve). Knit 1 round, then work rib in the round (knit 1, purl 1) for 10 cm. Knit 1 round and decrease 3-3-3-3-3-3-3 stitches evenly spaced = 27-29-29-31-31-33 stitches. Change to double pointed needles size 9 mm. Work A.1, 2 times in height then continue with stocking stitch. AT THE SAME TIME when the sleeve measures 12 cm, increase 1 stitch on each side of the marker-thread – read INCREASE TIP. Increase like this every 5½-5½-5-4-3½-3½ cm a total of 7-7-7-8-9-9 times = 41-43-43-47-49-51 stitches. When the sleeve measures 43-42-42-40-39-37 cm, continue with A.1. When the sleeve measures 49-48-48-46-45-43 cm, work the sleeve cap back and forth (from mid-under sleeve) to finished length. Cast off when the sleeve measures 52-51-51-49-48-46 cm. Work the other sleeve in the same way. ASSEMBLY: Sew the shoulder seams. Sew in the sleeves, inside the 1 edge stitch and sew the bottom of the armholes – see sketch. Sew the side seams as far as the rib (= 10 cm split on the front piece, 18 cm on the back), sew in the outermost loop of the outermost stitch so the seam is flat. NECK: Start at the top of the right shoulder and knit up (including the stitches on the thread) 60 to 72 stitches with short circular needle size 8 mm and 1 strand DROPS Wish or 2 strands DROPS Air. The number of stitches should be divisible by 2. Work rib in the round (knit 1, purl 1) for 20-20-20-22-22-22 cm. Cast off. |
||||||||||||||||
Diagram explanations |
||||||||||||||||
|
||||||||||||||||
 |
||||||||||||||||
 |
||||||||||||||||
 |
||||||||||||||||
Have you finished this pattern?Tag your pictures with #dropspattern #rainchainsweater or submit them to the #dropsfan gallery. Do you need help with this pattern?You'll find 34 tutorial videos, a Comments/Questions area and more by visiting the pattern on garnstudio.com. © 1982-2025 DROPS Design A/S. We reserve all rights. This document, including all its sub-sections, has copyrights. Read more about what you can do with our patterns at the bottom of each pattern on our site. |
||||||||||||||||


With over 40 years in knitting and crochet design, DROPS Design offers one of the most extensive collections of free patterns on the internet - translated to 17 languages. As of today we count 320 catalogues and 12094 patterns translated into English (UK/cm). 12094
We work hard to bring you the best knitting and crochet have to offer, inspiration and advice as well as great quality yarns at incredible prices! Would you like to use our patterns for other than personal use? You can read what you are allowed to do in the Copyright text at the bottom of all our patterns. Happy crafting!
Post a comment to pattern DROPS 236-9
We would love to hear what you have to say about this pattern!
If you want to leave a question, please make sure you select the correct category in the form below, to speed up the answering process. Required fields are marked *.