
Popular categories
Looking for a yarn?


Comments / Questions (73)
![]() Karen Cochran wrote:
Karen Cochran wrote:
I need help with shoulder decreases. I do not understand how to decrease at the top of the back. Slip 4 - 4 times? What do I do next? Can you clarify directions. I am a size medium.
29.12.2024 - 23:04DROPS Design answered:
Dear Karen, for the shoulder decreases work as follows: In the first row work and slip the first 4 stitches for the first shoulder, work normally up to the end of the row. Now turn and work and slip the first 4 stitches on this side (for the 2nd shoulder) and work backwards normally. Repeat these 2 rows 3 more times, slipping 4 stitches 4 times for each shoulder (16 stitches in total on each shoulder). However, you are also decreasing for the neck, as indicated in the next paragraph, so when the piece measures 53 cm you cast off the middle 28 stitches for the neck and finish each shoulder separately.
31.12.2024 - 00:15
![]() Karen Cochran wrote:
Karen Cochran wrote:
I have just finished working A3 and added markers. I do not understand the following instructions: "Work A.4 as follows: Count out from symbol marked as the middle in diagram and marker thread mid from where pattern should start in the side, work A.4 as far as you can towards the marker in the side (marker thread mid front should fit symbol for the middle in A.4), then begin A.4 again the same way as on beginning of round, and work A.4 ... etc. " I do not see the symbol as well. Please help!
20.12.2024 - 21:35DROPS Design answered:
Dear Karen, you start counting from the black triangle under the A.4 chart. This black triangle marks the marker thread inserted between 2 stitches. This means that the stitches at the sides of the marker in the mid front and mid back should be the stitches at the sides of this black triangle. Then, calculate in which stitch you should start A.4 if you need to have these stitches at the sides of the markers. This lesson can help you understand how to center a pattern in the mid front/mid back: https://www.garnstudio.com/lesson.php?id=39&cid=19. Happy knitting!
22.12.2024 - 19:52
![]() Line wrote:
Line wrote:
Pour l' encolure, les 3 mailles à tricoter, je ne comprends pas.
29.11.2024 - 23:55DROPS Design answered:
Bonjour Line, quand vous avez mis les mailles centrales en attente sur un fil pour l'encolure, vous tricotez en jersey les 3 mailles côté encolure, autrement dit, les 3 dernières mailles sur l'endroit pour le devant gauche et les 3 premières mailles sur l'endroit pour le devant droit. Bon tricot!
02.12.2024 - 08:27
![]() Line wrote:
Line wrote:
Pour le biais des manches 4 fois 4, est-ce que ça veut dire 4 rangs de suite que l'on mets les mailles sur un fil et le 5e rang suivant les 12 autres mailles ??
24.11.2024 - 21:49DROPS Design answered:
Bonjour Line, regardez la réponse précédente et peut-être que cette vidéo pourra aussi vous aider, on y montre comment tricoter le biais des épaules pour le dos d'un pull (pour un autre modèle/nombre de mailles mais la technique est la même). Bon tricot!
25.11.2024 - 09:43
![]() Line wrote:
Line wrote:
Pour le biais des épaules, grandeur M, ça veut donc dire qu'à 52 cm après avoir terminé A4, je mets sur un fil 28 mailles pour une épaule, je tricote 32 mailles et je mets sur un fil les 28 dernières mailles pour l'autre épaule. Est-ce celà ? Merci de votre réponse toujours très claire.
24.11.2024 - 18:48DROPS Design answered:
Bonjour Line, après A.4, tricotez A.1; à 52 cm, tricotez sur l'endroit les 4 premières mailles et mettez-les en attente, terminez le rang, tournez, tricotez les 4 premières mailles sur l'envers et mettez-les en attente - continuez ainsi jusqu'à ce que vous ayez mis 4 fois 4 mailles en attente côté manche, en même temps, rabattrez les mailles centrales pour l'encolure et terminez chaque épaule séparément (vous mettrez les mailles en attente côté manche comme avant); il restera 12 m pour chacune des épaules- reprenez toutes les mailles, tricotez 1 rang sur toutes ces mailles et rabattez les au rang suivant. Bon tricot!
25.11.2024 - 09:32
![]() MYRIAM DEVAUCHELLE wrote:
MYRIAM DEVAUCHELLE wrote:
Je n'arrive pas à comprendre comment relever les mailles de l'encolure à une maille du bord, tant pour la partie des mailles rabattues que pour les mailles en attente. Pouvez vous m'expliquer, ou me transmettre une vidéo ou un lien. merci d'avance
12.11.2024 - 13:54DROPS Design answered:
Bonjour Mme Devauchelle, relevez les mailles du col dans les mailles rabattues comme dans cette vidéo, le long des "rangs" de l'encolure comme dans cette vidéo. Dans cette autre vidéo, nous montrons (pour un autre type de modèle, mais la technique reste la même) comment relever les mailles tout autour de l'encolure. Bon tricot!
12.11.2024 - 16:01
![]() MYRIAM DEVAUCHELLE wrote:
MYRIAM DEVAUCHELLE wrote:
Bonsoir, j'en suis aux manches taille M. Quand vous dites de relever 36 mailles à partir du bas de l'emmanchure, est ce que cela signifie que la première maille relevée se trouve au niveau du milieu des 10 mailles rabattues ? et la dernière au niveau de l'épaule. ensuite on continue encore 36 mailles, ce qui relie les deux épaules. Merci de me confirmer que c'est bien ainsi qu'il faut procéder. cordialement
02.10.2024 - 20:57DROPS Design answered:
Bonjour Mme Devauchelle, vous ne relevez les mailles des manches que le long des emmanchures et pas dans les mailles rabattues; les premiers cm de la manche sont tricotés en allers et retours et sont ensuite assemblés le long des mailles rabattues pour les emmanchures § cf schéma (b= les premiers cm de la manche cousus à B = les mailles rabattues des emmanchures). Bon tricot!
03.10.2024 - 09:38
![]() Myriam Devauchelle wrote:
Myriam Devauchelle wrote:
Bonjour, en réalité j’ai fini par comprendre, je compliquai trop. Mon dos est terminé, je reprends maintenant le devant. Merci de toutes vos réponses.
24.09.2024 - 18:51
![]() MYRIAM DEVAUCHELLE wrote:
MYRIAM DEVAUCHELLE wrote:
Bonjour, pourrais je avoir une réponse à ma dernière question N° 54? merci d'avance
21.09.2024 - 14:17DROPS Design answered:
Bonjour Mme Devauchelle, vous tricotez encore 2 rangs sur ces 12 dernières mailles pour l'épaule, puis vous reprenez toutes les mailles de l'épaule : les 12 m + les 4 x 4 m en attente, vous tricotez 1 rang jersey et vous rabattez toutes les mailles. Peut-être que cette vidéo qui montre pour un autre modèle comment tricoter le biais des épaules et l'encolure en même temps pourra vous aider. Bon tricot!
23.09.2024 - 09:13
![]() MYRIAM DEVAUCHELLE wrote:
MYRIAM DEVAUCHELLE wrote:
Bonjour, j'avance pas à pas, mais je bloque à nouveau. mon dos est divisé en deux, car j'ai rabattu les 28 mailles centrales, j'ai 16 mailles en attente côté épaule, il me reste 14 mailles. Je diminue de 2 mailles côté encolure, que faut il faire avec les 12 mailles restantes en attente. J'ai tenté les diminutions 1 jusqu'à la fin, mais je trouve le résultat bizarre. Est ce cela qu'il faut faire? merci encore de votre aide
19.09.2024 - 16:58
|
|||||||||||||
Around Town#aroundtownsweater |
|||||||||||||
 |
 |
||||||||||||
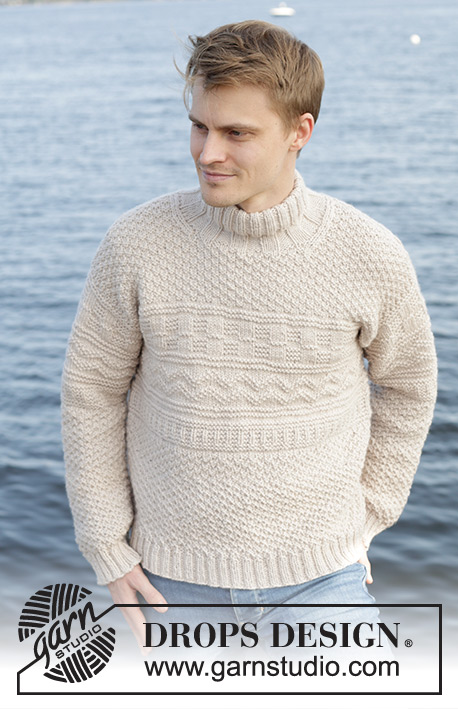
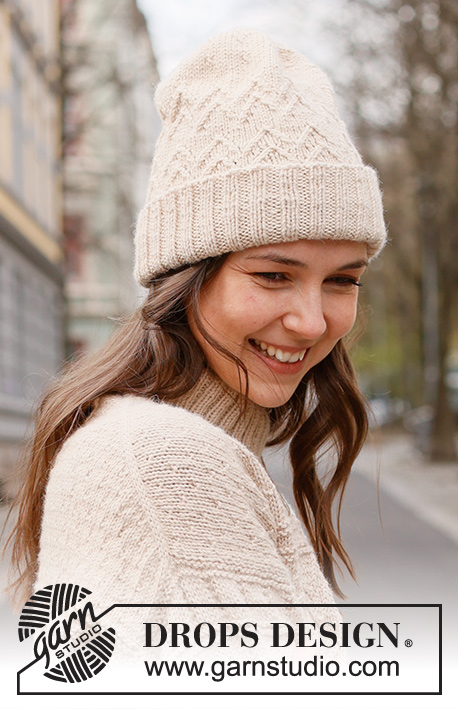
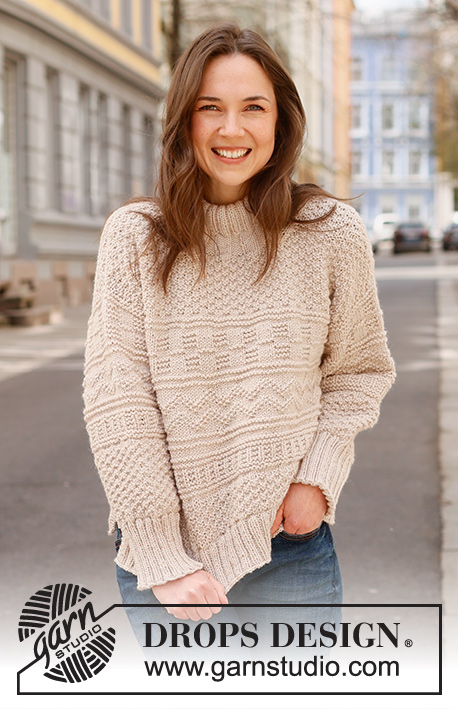
Knitted jumper in DROPS Alaska or DROPS Big Merino. Piece is knitted bottom up with relief pattern and double neck edge. Size XS – XXL.
DROPS 237-7 |
|||||||||||||
|
---------------------------------------------------------- EXPLANATION FOR THE PATTERN: ---------------------------------------------------------- GARTER STITCH (back and forth): Knit all rows. 1 ridge vertically = knit 2 rows. PATTERN: See diagrams A.1 to A.5. Choose diagram for your size (applies to A.2). Diagrams show all rows in pattern seen from the right side. DECREASE TIP-1 (applies to neck): All decreases are done from the right side! DECREASE AT BEGINNING OF ROW AS FOLLOWS FROM RIGHT SIDE: Work 2 stitches in stocking stitch, slip 1 stitch knitwise, knit 1, pass slipped stitch over stitch worked (1 stitch decreased). DECREASE AS FOLLOWS AT THE END OF ROW FROM RIGHT SIDE: Work until 4 stitches remain, knit 2 together and 2 stitches in stocking stitch (1 stitch decreased). DECREASE TIP-2 (applies to mid under sleeves): Decrease 1 stitch on each side of marker thread as follows: Work until 2 stitches remain before marker thread, knit/purl 2 together depending on pattern, marker thread, slip 1 stitch knitwise, knit 1, pass slipped stitch over stitch worked/purl 2 twisted together depending on pattern (2 stitches decreased). ---------------------------------------------------------- START THE PIECE HERE: ---------------------------------------------------------- JUMPER - SHORT OVERVIEW OF THE PIECE: Front and back piece back and forth on circular needle, bottom up until rib has been worked, then place piece together. Body is worked in the round on circular needle up to armholes. Then finish back piece and front piece back and forth on circular needle separately until finished measurements. Sew the shoulder seams. Pick up stitches along armholes and work the sleeves top down. Work sleeve cap back and forth on circular needle, work the rest of sleeve in the round on double pointed needles/a short circular needle, top down. Finish with a double neck edge. BACK PIECE: Cast on 110-118-126-138-150-162 stitches on circular needle size 3.5 mm with DROPS Alaska or DROPS Big Merino. Purl 1 row from wrong side. Work next row as follows from right side: 2 stitches in GARTER STITCH - read explanation above - * knit 2, purl 2 *, work from *-* until 4 stitches remain, knit 2 and finish with 2 stitches in garter stitch. Continue rib like this for 7 cm – adjust after a row from wrong side. Put piece aside and work the front piece. FRONT PIECE: Cast on the same number of stitches as on back piece and work piece the same way as back piece until piece measures 7 cm - finish after a row from wrong side. BODY: Put piece together as follows: Knit stitch from front piece and decrease at the same time 26-28-30-32-34-36 stitches evenly, knit over stitch from back piece and decrease at the same time 26-28-30-32-34-36 stitches evenly = 168-180-192-212-232-252 stitches on needle (84-90-96-106-116-126 stitches on front piece and 84-90-96-106-116-126 stitches on back piece). Switch to circular needle size 5 mm. Knit 1 round. Then work A.1 in the round on body. REMEMBER THE KNITTING TENSION! When piece measures 13-13-13-13-15-15 cm, work A.2 in the round - AT THE SAME TIME adjust number of stitches to 168-180-192-213-231-252 on the first round. On last round in A.2 increase 0-4-0-3-1-4 stitches evenly = 168-184-192-216-232-256 stitches. When A.2 has been worked, piece measures approx. 22-22-22-23-25-25 cm from cast-on edge on front/back piece. If the garment is shorter than this, continue in stocking stitch until correct measurements. Then work A.3 in the round on body. Repeat A.3 2-2-3-3-3-4 times in total vertically. When A.3 has been worked, piece measures approx. 27-27-30-31-33-35 cm from cast-on edge. If the garment is shorter than this, continue until correct measurements. Knit 1 round while decreasing 0-4-0-4-0-4 stitches evenly = 168-180-192-212-232-252 stitches. Insert 1 marker thread mid front and 1 marker thread mid back, insert in addition 1 marker in each side on body - this is done as follows: Insert 1 marker at beginning of round, count 42-45-48-53-58-63 stitches, insert 1 marker thread before next stitch (mid front), count 42-45-48-53-58-63 stitches, insert 1 marker before next stitch, count 42-45-48-53-58-63 stitches, insert 1 marker thread before next stitch (mid back). 42-45-48-53-58-63 stitches remain on round after last marker thread. Work A.4 as follows: Count out from symbol marked as the middle in diagram and marker thread mid from where pattern should start in the side, work A.4 as far as you can towards the marker in the side (marker thread mid front should fit symbol for the middle in A.4), then begin A.4 again the same way as on beginning of round, and work A.4 as far as you can until marker at the beginning of round (marker thread mid back should fit symbol for the middle in A.4). Continue pattern like this, and cast off for armholes as explained below. ARMHOLE: When piece measures 29-30-31-32-33-34 cm, cast off for armholes as follows: Begin 3-2-5-6-7-8 stitches remain before marker at the beginning of round, cast off 6-4-10-12-14-16 stitches for armhole, work as before until 3-2-5-6-7-8 stitches remain before marker in the other side, cast off 6-4-10-12-14-16 stitches for armhole, work as before the rest of round. Finish back piece and front piece separately. BACK PIECE: = 78-86-86-94-102-110 stitches. Begin from wrong side and continue A.4 with 1 stitch in garter stitch in each side. On last row from right side, increase 2 stitches evenly in all sizes = 80-88-88-96-104-112 stitches. When A.4 has been worked, A.1 with 1 stitch in garter stitch in each side. Repeat A.1 vertically until finished measurements. Then cast off for diagonal shoulder and neck as explained below. DIAGONAL SHOULDER: When piece measures 48-50-52-54-56-58 cm, slip stitches on a thread in each side for diagonal shoulder (to avoid cutting the yarn work stitches before slipping them on the thread): Slip stitches on a thread from the side as follows: 4-4-4-5-5-6 stitches 4 times and then the last the last 10-12-12-12-14-14 stitches towards the neck. When all stitches are on a thread, slip stitch back on needle size 5 mm. Purl 1 row from wrong side (to avoid a hole in the transitions where stitches where slipped on a thread, pick up the yarn between 2 stitches and purl them twisted together with first stitch on left needle). Cast off knitting from right side. NECK: At the same time when piece measures 49-51-53-55-57-59 cm, cast off the middle 24-28-28-28-32-32 stitches for neck and finish each shoulder separately. Continue A.1, continue to slip stitches on a thread for diagonal shoulder and work in addition the 3 stitches towards the neck in stocking stitch. AT THE SAME TIME on next row from right side, decrease 1 stitch for neck - read DECREASE TIP-1. Decrease like this on every row from right side 2 times in total. When all stitches have been cast off, piece measures approx. 52-54-56-58-60-62 cm from highest point on the shoulder and down. Repeat on the other shoulder. FRONT PIECE: = 78-86-86-94-102-110 stitches. Cast on and work pattern the same way as on back piece. In addition decrease for neck and diagonal shoulder as explained below. NECK: When piece measures 46-48-49-51-52-54 cm, slip the middle 20-24-24-24-26-26 stitches on a thread for neck, and finish each shoulder separately. Continue A.1 but work the outermost 3 stitches towards the neck in stocking stitch. AT THE SAME TIME on next row from right side, decrease 1 stitch for neck - read DECREASE TIP-1. Decrease like this on every row from right side 4-4-4-4-5-5 times in total. DIAGONAL SHOULDER: At the same time when piece measures 48-50-52-54-56-58 cm, slip stitches on a thread for diagonal shoulder the same way as on back piece, i.e. slip 4-4-4-5-5-6 stitches on a thread 4 times then slip the last 10-12-12-12-14-14 stitches towards the neck. When all stitches have been slipped on a thread, purl 1 row from wrong side as on back piece before casting off by knitting from right side. Repeat on the other shoulder. ASSEMBLY: Sew the shoulder seams. SLEEVES: Use circular needle size 5 mm and DROPS Alaska or DROPS Big Merino, pick up from right side 32-34-36-37-39-41 stitches from the bottom of armhole up to shoulder and 32-34-36-37-39-41 stitches from the shoulder and down to the bottom of armhole on the other side = 64-68-72-74-78-82 stitches along armhole. Insert 1 marker thread in the middle of the row - measure sleeve from this marker and use the marker thread when counting to where pattern should begin. Begin from wrong side and work A.5 as follows: Count out from the symbol marked as the middle in diagram and marker thread on sleeve where pattern should begin, and work A.5 back and forth with 1 stitch in garter stitch in each side. When sleeve measures 2-1-3-4-4-5 cm from where marker thread was inserted, put piece together on a short circular needle or double pointed needles size 5 mm – work the rest of sleeve in the round. Insert 1 marker thread at the beginning of round (mid under sleeve). Move marker thread upwards when working. Begin round mid under sleeve and continue pattern in the round (symbol for the middle in diagram should still fit marker thread mid on top of sleeve - pattern does not fit mid under sleeve). When piece measures 5-4-6-7-7-8 cm from where marker thread was inserted mid on top of sleeve, decrease 2 stitches mid under sleeve - read DECREASE TIP-2. Decrease like this every 4-4-3½-3-2½-2 cm 8-9-10-11-12-13 times in total = 48-50-52-52-54-56 stitches. When A.5 has been worked vertically, work A.1 in the round. Work until sleeve measures 39-38-39-38-36-35 cm from marker. 10 cm remain until finished measurements. Try the jumper and work to desired length before rib. Knit 1 round while increasing 12-14-12-16-18-16 stitches evenly = 60-64-64-68-72-72 stitches. Switch to double pointed needles size 3.5 mm. Work rib (knit 2/purl 2) for 10 cm. Loosely cast off. Sleeve measures approx. 49-48-49-48-46-45 cm from marker mid on top of sleeve. Work the other sleeve the same way. Sew bottom of armholes - see chart. DOUBLE NECK EDGE: Begin at one shoulder, use a short circular needle size 3.5 mm and pick up approx. 80-96-96-104-112-112 stitches around the neck inside 1 stitch (including stitches on thread). Work rib in the round (knit 4/purl 4 -adjust beginning of rib so that there are 4 purl stitches or 4 knit stitches on mid front). Insert 1 marker on row when rib measures 4 cm, use marker for measurements. Then work knit 2/purl 2 over all stitches. When rib measures 9-9-9-11-11-11 cm from marker, switch to a short circular needle size 5 mm. Cast off stitches with knit over knit and purl over purl. Fold the rib (knit 2/purl 2) down on the inside of garment. Fasten rib to get a double neck edge of approx. 4-4-4-5-5-5 cm. To avoid a tight neck edge that sticks out it is important to keep the seam elastic. |
|||||||||||||
Diagram explanations |
|||||||||||||
|
|||||||||||||

|
|||||||||||||

|
|||||||||||||

|
|||||||||||||
Have you finished this pattern?Tag your pictures with #dropspattern #aroundtownsweater or submit them to the #dropsfan gallery. Do you need help with this pattern?You'll find 31 tutorial videos, a Comments/Questions area and more by visiting the pattern on garnstudio.com. © 1982-2025 DROPS Design A/S. We reserve all rights. This document, including all its sub-sections, has copyrights. Read more about what you can do with our patterns at the bottom of each pattern on our site. |
|||||||||||||


With over 40 years in knitting and crochet design, DROPS Design offers one of the most extensive collections of free patterns on the internet - translated to 17 languages. As of today we count 314 catalogues and 11820 patterns translated into English (UK/cm). 11820
We work hard to bring you the best knitting and crochet have to offer, inspiration and advice as well as great quality yarns at incredible prices! Would you like to use our patterns for other than personal use? You can read what you are allowed to do in the Copyright text at the bottom of all our patterns. Happy crafting!
Post a comment to pattern DROPS 237-7
We would love to hear what you have to say about this pattern!
If you want to leave a question, please make sure you select the correct category in the form below, to speed up the answering process. Required fields are marked *.