
Popular categories
Looking for a yarn?


Comments / Questions (19)
![]() Cathie VILLATE wrote:
Cathie VILLATE wrote:
Juste pour vous remercier de proposer tous ces beaux modèles et ces belles matières que j'achète chez Kalidou. Et en plus de répondre à toutes nos questions. J'ai trouvé réponse à la question que je me posais grâce aux "commentaires/questions". Merci beaucoup ! votre site est tellement précieux
30.04.2025 - 11:22
![]() Marianne wrote:
Marianne wrote:
Opskriften er meget åben i halsen. Kan man gøre halsen 'højere' - og i så fald hvordan? Tak.
12.03.2025 - 11:58DROPS Design answered:
Hej Marianne, du kan eventuelt vælge at slå op efter den mindste størrelse og så tage ud så du har det maskeantal i den størrelse du vil strikke :)
14.03.2025 - 13:42
![]() Véronique wrote:
Véronique wrote:
Bonjour, combien faut-il de pelotes ou de grammes en Drops Melody ? Merci
14.02.2025 - 21:08DROPS Design answered:
Bonjour Véronique, retrouvez ici comment procéder; Rappelez-vous toutefois que vous devrez avoir exactement le même échantillon, soit 14 m x 16 rangs pour que ce calcul fonctionne correctement (autrement dit aussi bien en largeur qu'en hauteur). Bon tricot!
17.02.2025 - 07:44
![]() Nancy wrote:
Nancy wrote:
Est-il possible de ne tricoter cette veste qu'avec de la brushed alpaca, et alors quelle quantité de laine utiliser ?
04.02.2025 - 16:25DROPS Design answered:
Bonjour Nancy, en ne tricotant que Brushed Alpaca Silk seule, vous n'aurez pas la bonne tension/le bon échantillon, vous pouvez remplacer Kid-Silk par une autre laine du groupe E, mais il vaut probablement mieux tricoter 2 fils comme ici pour avoir une texture similaire. Utilisez éventuellement le convertisseur pour voir les alternatives possibles et les quantités correspondantes. Bon tricot!
05.02.2025 - 07:41
![]() Nadine wrote:
Nadine wrote:
Bonjour, pouvez vous me confirmer si les rangs pairs sont indiqués sur les diagrammes ?
11.10.2024 - 10:47DROPS Design answered:
Bonjour Nadine, tout à fait, tous les rangs sont dessinés dans les diagrammes, les rangs sur l'endroit mais aussi les rangs sur l'envers. Bon tricot!
11.10.2024 - 16:15
![]() Meizepol wrote:
Meizepol wrote:
Bonjour! Je voulais juste vous dire que j'ai réalisé ce cardigan en taille S et j'ai dû acheter une pelote de plus en drops kid-silk. C'est la première fois que j'ai ce problème... C'est donc peut être mieux de recommander 100 gr au lieu de 75gr? Merci encore pour vos laines et votre aide avec les patrons. Je me régale!
30.08.2024 - 10:02
![]() Ledru Michèle wrote:
Ledru Michèle wrote:
Bonjour, je désire commander la laine pour tricoter le pull Round Lake Cardigan. J'hésite entre Alpaga et soie et Mahairet soir. LEquel est le plus doux et moelleux ? Combien de pelotes dois-je commander svp. Merci
24.08.2024 - 17:31
![]() Елена wrote:
Елена wrote:
Перевод?
18.09.2023 - 13:49DROPS Design answered:
Dear Елена, we only have now 16 languages and hope one of them can help you. Thanks for your comprehension. Happy knitting!
18.09.2023 - 16:09
![]() Becky wrote:
Becky wrote:
Oh thanks so much for helping me understand pattern! Just 1 more question diagram says slip 1 st knit and passover on row 3 of LG cardigan. Is it ssk . Or sk. Slip 1st or slip 2 st knit then pass over?
27.03.2023 - 22:45DROPS Design answered:
Dear Becky, this video shows how to work: slip 1, K1, psso. Happy knitting!
28.03.2023 - 10:19
![]() Becky wrote:
Becky wrote:
For large cardigan On row 3 on diagram is it knit 2 together for whole row minus garter edges? Cause if I do yarn overs after each knit 2tog it's alot more then 36 yarn overs on whole row. I'm stuck can you explain. Can u explain why increase arrow is on row 7. And also I am to do yarn overs on row 3 and 5 ?rows also I am told. Pattern says 36 yarn overs on row 7. Can u explain how to do rows 3 5 7?
26.03.2023 - 05:46DROPS Design answered:
Dear Becky, on row 3 you knit 2 together and make 1 yarn over the whole row, except for the 5 band stitches and 1 stitch in stocking stitch on each side. The number of yarn overs is not relevant for this row, since it's compensated by knitting 2 together, so the number of stitches remains the same. Row 5 is worked similar to row 3, but you work the yarn over first and then work a simple decrease. Rows 7 and 15 have arrows which indicate that you need to work 36 increases in these rows. These increases are independent of the pattern/charts and simply need to be evenly distributed on the row (see INCREASE TIP for more information). Happy knitting!
26.03.2023 - 22:14
|
||||||||||||||||||||||
Round Lake Cardigan#roundlakecardigan |
||||||||||||||||||||||
 |
 |
|||||||||||||||||||||
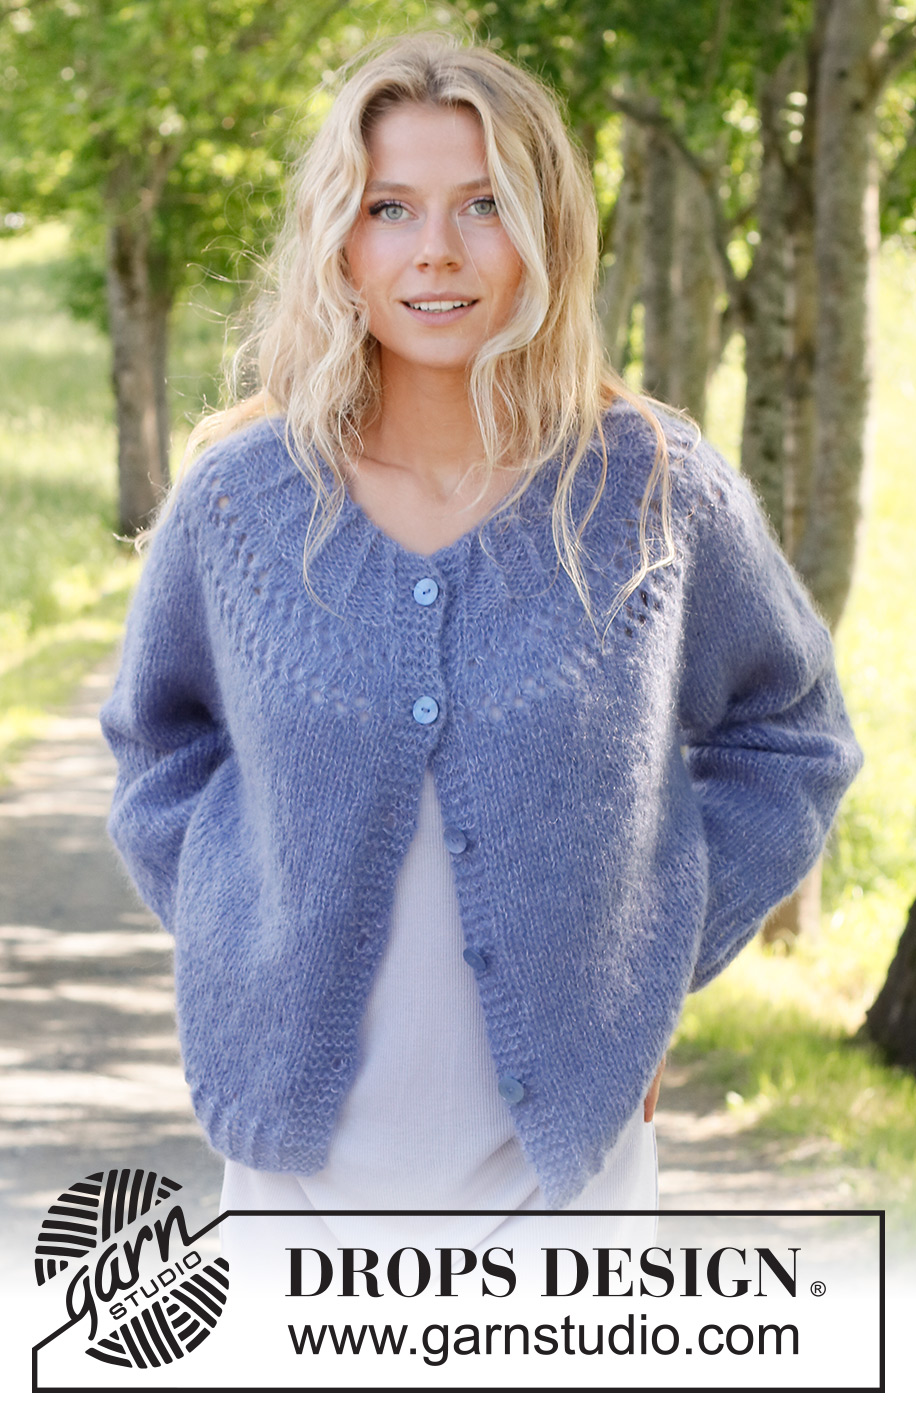
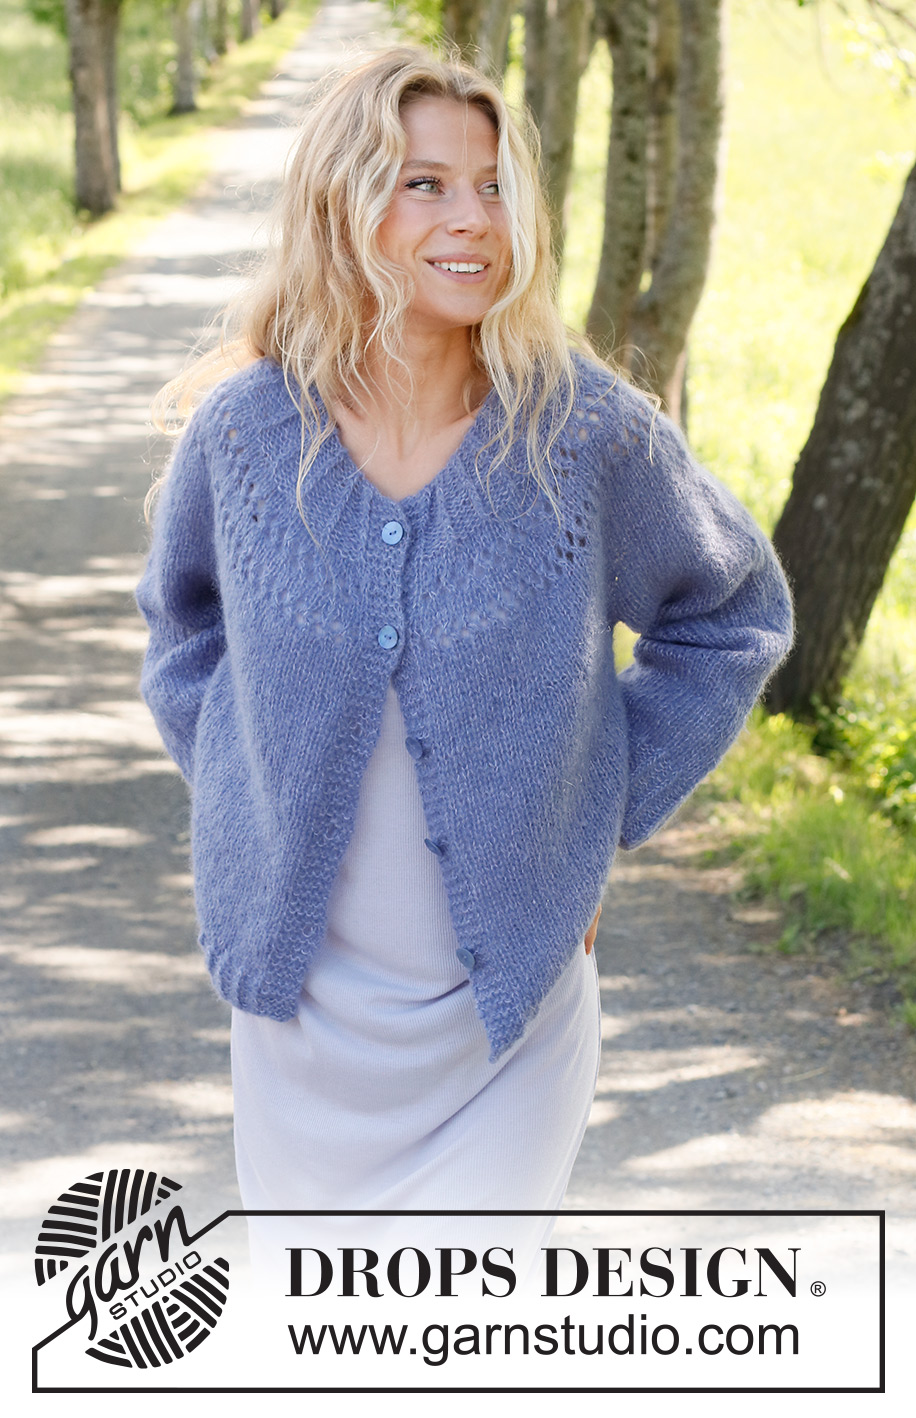
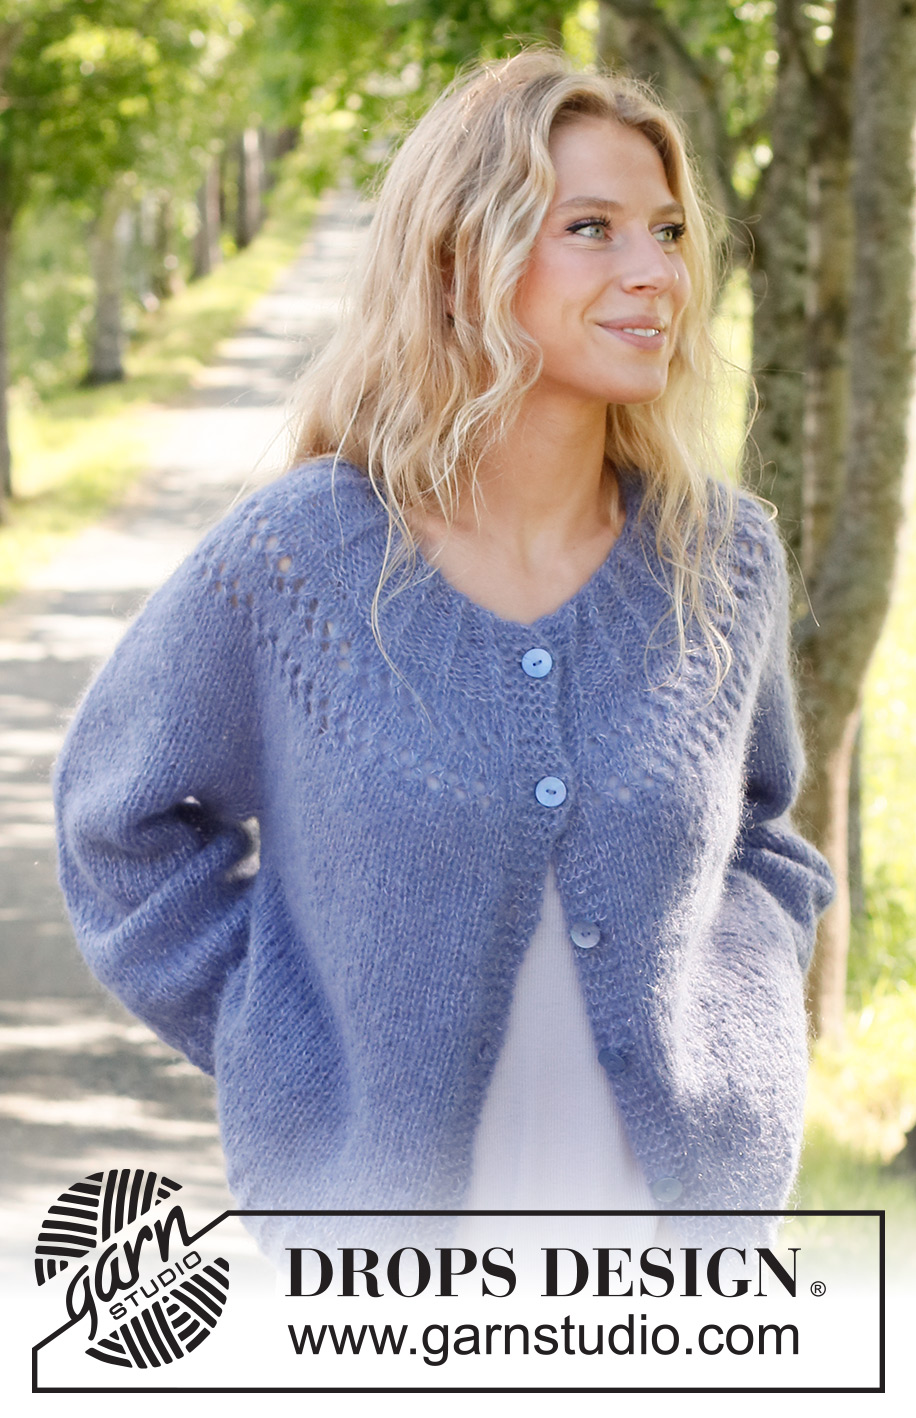
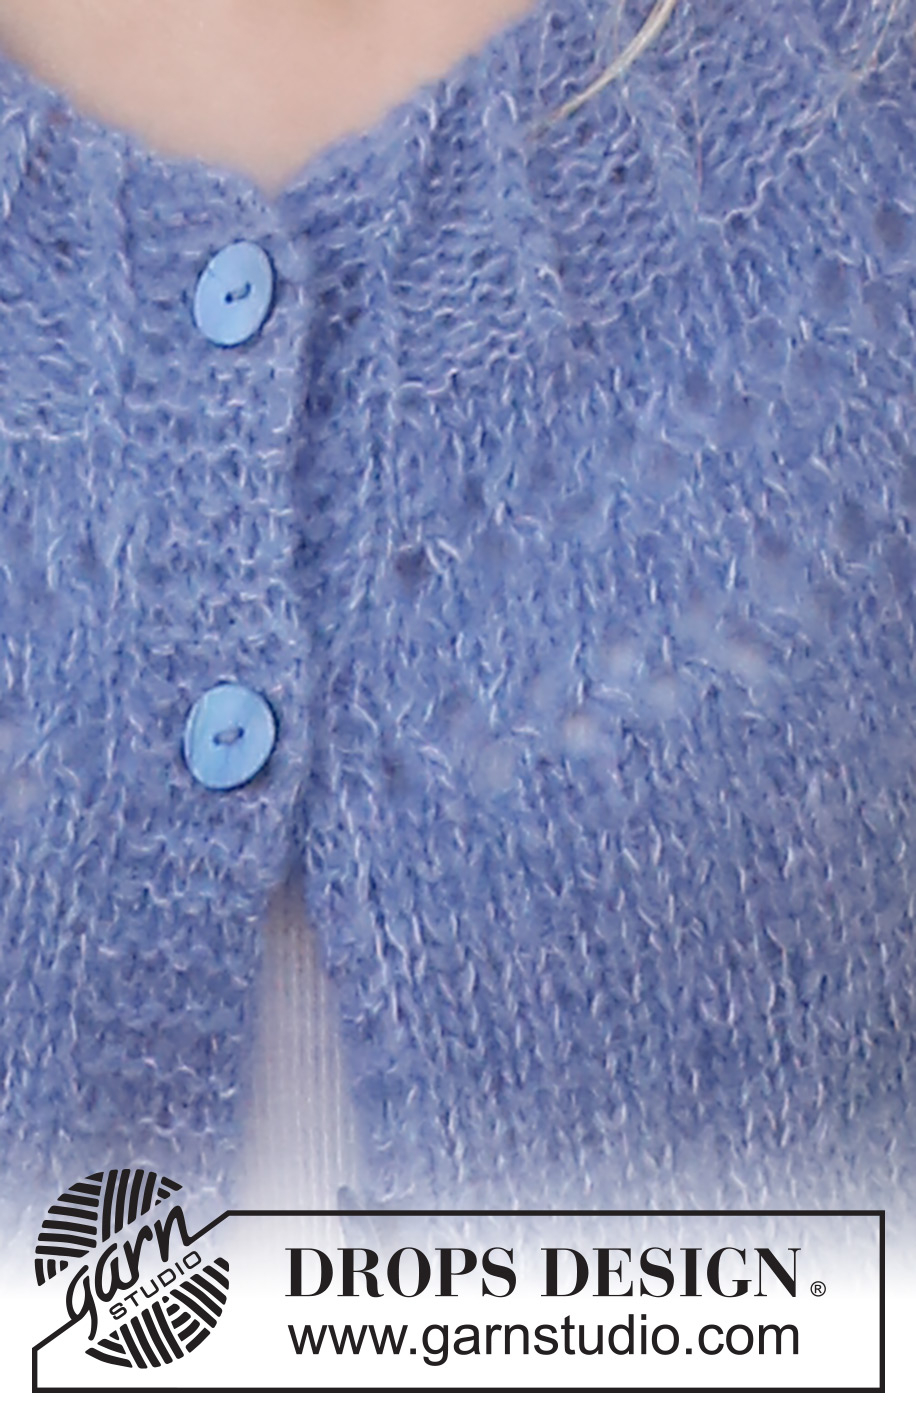
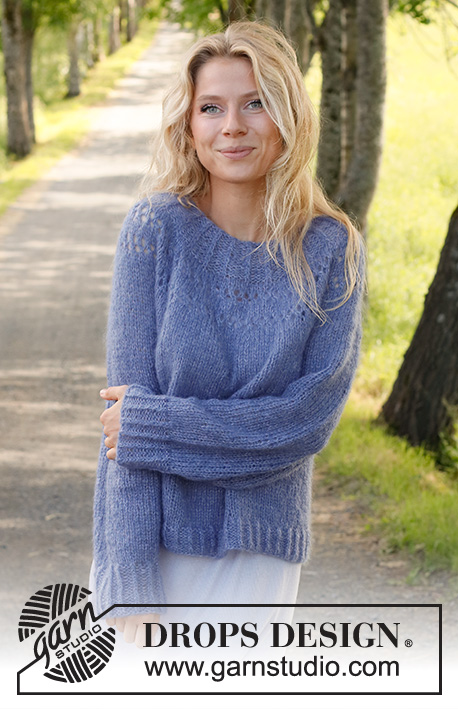
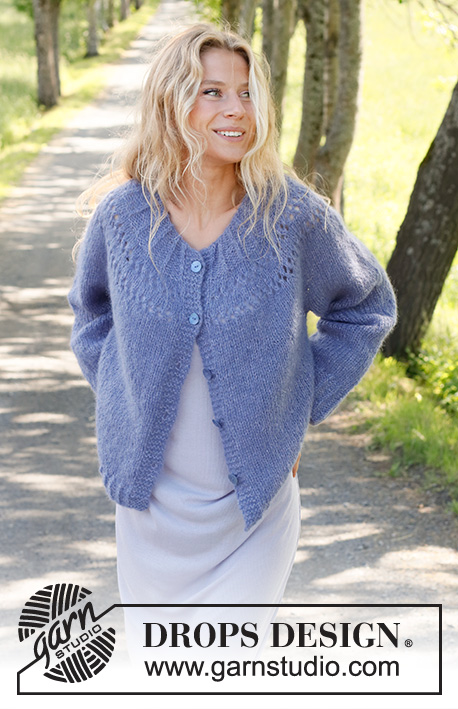
Knitted jacket in DROPS Brushed Alpaca Silk and DROPS Kid-Silk. The piece is worked top down with round yoke and lace pattern. Sizes S - XXXL.
DROPS 230-13 |
||||||||||||||||||||||
|
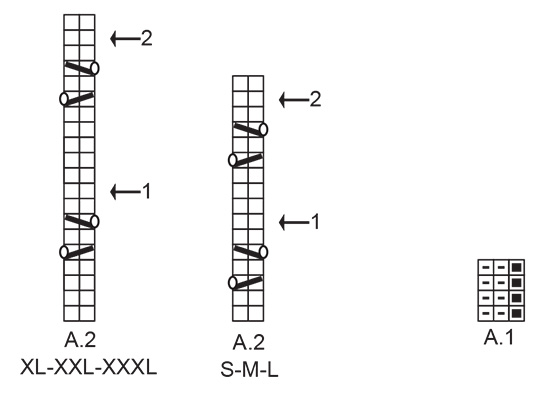
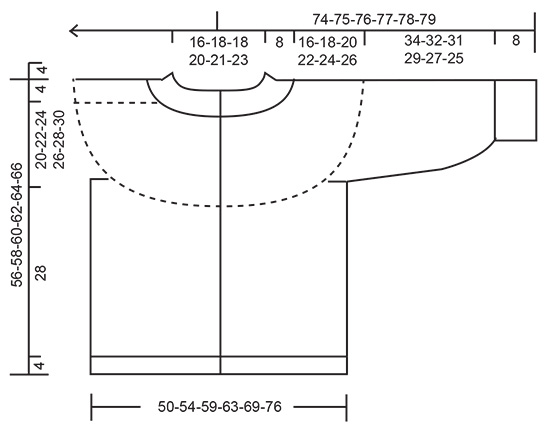
------------------------------------------------------- EXPLANATIONS FOR THE PATTERN: ------------------------------------------------------- RIDGE/GARTER STITCH (worked back and forth): Knit all rows. 1 ridge = knit 2 rows. PATTERN: See diagrams A.1 and A.2 (choose diagram for your size – applies to A.2). The diagrams show all rows in the pattern from the right side. INCREASE TIP (evenly spaced): To work out how to increase evenly, count the total number of stitches on the needle (e.g. 111 stitches) minus the bands (e.g. 10 stitches) and divide the remaining stitches by the number of increases to be made (e.g. 33) = 3. In this example, increase by making 1 yarn over after each 3rd stitch. Do not increase over the bands. On the next row work the yarn overs twisted to avoid holes. DECREASE TIP (for sleeves): Decrease 1 stitch on either side of the marker thread as follows: Work until there are 6 stitches left before the marker thread, knit 2 together, knit 8 (marker thread sits in the middle of these 8 stitches), slip 1 stitch as if to knit, knit 1 and pass the slipped stitch over the knitted stitch (2 stitches decreased). BUTTONHOLES: Work buttonholes on the right band (when the garment is worn). Work from the right side when there are 3 stitches left on the row as follows: Make 1 yarn over, knit 2 together and knit 1. On the next row (wrong side), knit the yarn over to leave a hole. The first buttonhole is worked when the neck measures 4 cm. Then work the other 4-4-5-5-5-5 buttonholes with approx. 10-10½-9-9½-9½-10 cm between each one. CASTING-OFF TIP: To avoid the cast-off edge being tight you can cast off with a larger size needle. If the edge is still tight, make 1 yarn over after approx. each 6th stitch at the same time as casting off; the yarn overs are cast off as normal stitches. ------------------------------------------------------- START THE PIECE HERE: ------------------------------------------------------- JACKET – SHORT OVERVIEW OF THE PIECE. The neck and yoke are worked back and forth with circular needle, from mid front and top down. The yoke is divided for body and sleeves and the body continued back and forth with circular needle. The sleeves are worked in the round with double pointed needles/short circular needle, top down. NECK: Cast on 86-92-92-98-101-107 stitches (including 5 band stitches on each side towards mid-front) with circular needle size 4.5 mm and 1 strand of each quality (= 2 strands). Purl 1 row from the wrong side. Then work the following rib from the right side: 5 band stitches in GARTER STITCH – read description above, A.1 until there are 6 stitches left, Work the first stitch in A.1 (so the pattern is symmetrical), 5 band stitches in garter stitch. Continue this rib back and forth for 4 cm. Remember the BUTTONHOLE on the right band – read description above. On the next row from the right side, increase 1 stitch in each purled section by making 1 yarn over between the 2 purled stitches (= 25-27-27-29-30-32 stitches increased) = 111-119-119-127-131-139 stitches. On the next row work the yarn overs twisted to avoid holes. Insert 1 marker after the band mid-front; the yoke is measured from this marker! YOKE: Continue working for 4 cm from the marker. Change to circular needle size 6 mm. OVERVIEW OF THE NEXT SECTION: You now work pattern AT THE SAME TIME as increasing on each row with an arrow in the diagram – read the next section before continuing. PATTERN: Work 5 band stitches in garter stitch, stocking stitch until there are 5 stitches left and increase 33-39-41-41-47-53 stitches evenly spaced – read INCREASE TIP, 5 band stitches in garter stitch = 144-158-160-168-178-192 stitches. Work back from the wrong side. REMEMBER THE KNITTING TENSION! Now work pattern as follows: 5 band stitches in garter stitch, 1 stitch in stocking stitch, work A.2 (choose diagram for your size) until there are 6 stitches left, 1 stitch in stocking stitch, 5 band stitches in garter stitch. INCREASES: ARROW-1: Increase 30-34-36-40-42-48 stitches evenly spaced = 174-192-196-208-220-240 stitches. ARROW-2: Increase 30-34-36-42-42-48 stitches evenly spaced = 204-226-232-250-262-288 stitches. When A.2 has been completed, continue with stocking stitch and 5 band stitches in garter stitch on each side. When the piece measures 18-19-20-22-23-24 cm, work the next row from the right side as follows: 5 band stitches in garter stitch, stocking stitch until there are 5 stitches left and increase 22-24-26-28-28-30 stitches evenly spaced, 5 band stitches in garter stitch = 226-250-258-278-290-318 stitches. When the yoke measures 20-22-24-26-28-30 cm from the marker, divide for the body and sleeves as follows: Work the first 37-40-42-45-48-53 stitches (= front piece), place the next 44-50-50-54-54-58 stitches on a thread for the sleeve, cast on 6-6-8-8-10-10 stitches (= in side under sleeve), work the next 64-70-74-80-86-96 stitches (= back piece), place the next 44-50-50-54-54-58 stitches on a thread for the sleeve, cast on 6-6-8-8-10-10 stitches (= in side under sleeve), work the last 37-40-42-45-48-53 stitches (= front piece). The body and sleeves are finished separately. THE PIECE IS NOW MEASURED FROM HERE. BODY: = 150-162-174-186-202-222 stitches. Continue back and forth with stocking stitch and 5 band stitches in garter stitch on each side for 28 cm. There is approx. 4 cm left; try the jacket on and work to desired length. To avoid the following rib being tight, work 1 row from the right side where you increase 26-26-26-32-31-35 stitches evenly spaced = 176-188-200-218-233-257 stitches. Change to circular needle size 4.5 mm. Work 1 row from the wrong side. Work rib as follows from the right side: 5 band stitches in garter stitch, A.1 until there are 6 stitches left, work the first stitch in A.1, 5 band stitches in garter stitch. Continue this rib for 4 cm. Cast off with knit over twisted-knit and purl over purl – read CASTING-OFF TIP. The jacket measures approx. 56-58-60-62-64-66 cm from the shoulder down. SLEEVES: Place the 44-50-50-54-54-58 stitches from the thread on the one side of the piece on double pointed needles size 6 mm and knit up 1 stitch in each of the 6-6-8-8-10-10 stitches cast on under the sleeve = 50-56-58-62-64-68 stitches. Insert a marker thread in the middle of the 6-6-8-8-10-10 stitches under the sleeve. Allow the thread to follow your work onwards; it will be used when decreasing under the sleeve. Start at the marker thread and work stocking stitch in the round for 4 cm. Now decrease 2 stitches under the sleeve – read DECREASE TIP. Decrease like this every 0-6½-6-3-2½-2 cm a total of 1-4-4-6-7-7 times = 48-48-50-50-50-54 stitches. Continue working until the sleeve measures 26-24-23-21-19-17 cm. Now decrease again in the same way on each side of the marker thread – remember DECREASE TIP. Decrease every 2 cm 4 times = 40-40-42-42-42-46 stitches. Continue working until the sleeve measures 34-32-31-29-27-25 cm (shorter measurements in larger sizes due to wider neck and longer yoke). There is approx. 8 cm left; try the jacket on and work to desired length. Knit 1 round where you decrease 1-1-0-0-0-1 stitch = 39-39-42-42-42-45 stitches Change to double pointed needles size 4.5 mm and work A.1 for 8 cm. Cast off with knit over knit and purl over purl – remember CASTING-OFF TIP! The sleeve measures approx. 42-40-39-37-35-33. Work the other sleeve in the same way. |
||||||||||||||||||||||
Diagram explanations |
||||||||||||||||||||||
|
||||||||||||||||||||||
 |
||||||||||||||||||||||
 |
||||||||||||||||||||||
Have you finished this pattern?Tag your pictures with #dropspattern #roundlakecardigan or submit them to the #dropsfan gallery. Do you need help with this pattern?You'll find 34 tutorial videos, a Comments/Questions area and more by visiting the pattern on garnstudio.com. © 1982-2026 DROPS Design A/S. We reserve all rights. This document, including all its sub-sections, has copyrights. Read more about what you can do with our patterns at the bottom of each pattern on our site. |
||||||||||||||||||||||


With over 40 years in knitting and crochet design, DROPS Design offers one of the most extensive collections of free patterns on the internet - translated to 17 languages. As of today we count 324 catalogues and 12290 patterns translated into English (UK/cm). 12290
We work hard to bring you the best knitting and crochet have to offer, inspiration and advice as well as great quality yarns at incredible prices! Would you like to use our patterns for other than personal use? You can read what you are allowed to do in the Copyright text at the bottom of all our patterns. Happy crafting!
Post a comment to pattern DROPS 230-13
We would love to hear what you have to say about this pattern!
If you want to leave a question, please make sure you select the correct category in the form below, to speed up the answering process. Required fields are marked *.