Comments / Questions (86)
![]() Petra Marienfeld wrote:
Petra Marienfeld wrote:
Wird das Rautenmuster auf Vorder- und Rückenteil den Zunahmen angepasst? Oder wird es an den Seiten gerade gestrickt? Leider kann man das auf den Fotos nicht erkennen. Liebe Grüße, Petra
25.01.2022 - 13:11DROPS Design answered:
Liebe Petra, ja diese Zunahmen werden glatt rechts gestrickt, die Maschenanzahl im Muster A.4 wird nicht zunehmen. Viel Spaß beim stricken!
25.01.2022 - 13:35
![]() Helene Karlsson wrote:
Helene Karlsson wrote:
När man kommer till okökning står det bara om ökningar man ska göra men jag antar att man samtidigt ska fortsätta med mönstret enligt diagrammet, dvs A2, A3, A4A, A4b och A4C? Tack för hjälpen!
01.01.2022 - 18:43DROPS Design answered:
Hej Helene, ja de nye masker strikkes i glatstrik men de andre masker fortsættes som før :)
05.01.2022 - 08:38
![]() Marit wrote:
Marit wrote:
A1 = 34 masker strikkes over maskene til sadelskulder. Fra starten (omgang nr. 3) er det 2 fletter. Er det riktig forstaatt at det skal väre fletter paa sadelskuldrene? Ser ikke ut som det paa modellbildene.
30.12.2021 - 14:20DROPS Design answered:
Bom dia, Deve escolher a bandeira da língua em que pretende obter a resposta. Bons tricôs!
04.01.2022 - 10:39
![]() Christine wrote:
Christine wrote:
Hallo, in der Anleitung für die Ärmel heißt es „ … in der Höhe zunehmen …“ - aber es müssen doch Abnahmen sein? Handelt es sich hier um einen Schreibfehler in der Beschreibung? Gruß, Christine
21.12.2021 - 22:27DROPS Design answered:
Liebe Christine, ja genau, danke für den Hinweis, "abnehmen" sollte es hier sein, deutsche Anleitung wird korrigiert. Viel Spaß beim stricken!
22.12.2021 - 07:22
![]() Nele wrote:
Nele wrote:
Bij het meerderen voor de mouwen, moet je na markeerdraad 1 en voor markeerdraad 2 meerderen. Maar dat is het tegenovergestelde van de meerderingen voor de zadelschouders. Zijn het hier dan gewone meerderingen of die waarbij je een steek onderaan opneemt zoals voor de schouders?
21.12.2021 - 15:08DROPS Design answered:
Dag Nele,
De steken die gemeerderd worden voor de zadelschouders komen er op de panden bij. Daarna worden er steken gemeerderd voor de mouwen en deze komen aan de kan van de mouw erbij. Deze meerderingen zitten nog steeds op de raglanlijnen en zijn dus geen 'gewone' meerderingen, maar je breit zoals beschreven staat bij 'TIP VOOR HET MEERDEREN-2'
23.12.2021 - 15:38
![]() Sandra wrote:
Sandra wrote:
Tere! Vaatan mustri kirjeldust inglise ja eesti keeles. Inglise keeles on kirjas, et raglaani kasvatusi tuleb teha igal ringil, eesti keeles on kirjas, et kasvatusi tuleb teha igal teisel ringil. Kumb on õige? (NB, viitan punktile "Kasvatused õlgade jaoks".)
11.12.2021 - 17:46DROPS Design answered:
Tere Sandra! Viga parandatud! Tänan!
23.12.2021 - 23:38
![]() Nicole wrote:
Nicole wrote:
Bij het verdelen van het werk voor lijf en mouwen krijg ik een asymetrisch resutaat: bij het voorpand zit de kabel van A2aan de linkerkant na 2 steken op de hulpnaald, en direct bij de 8 nieuw opgezette steken, maar rechts zit die kabel pas 10 steken verder op de hulpnaald. En dus ook verder van de 8 nieuw opgezette steken. Is dat correct? Zitten de nieuw opgezette steken links en rechts niet evenver van het A4 patroon?
02.12.2021 - 20:14DROPS Design answered:
Dag Nicole,
Dit zou wel symmetrisch moeten zijn. Bij het verdelen van het werk voor het lijf en de mouwen begin je 3-4-5-6-3-5 steken voor A.2 aan het begin van de naald en je zet de volgende 68-74-82-90-94-98 steken op een hulpdraad. Als het goed zijn dan de laatste steken die op die hulpdraad zitten, 3-4-5-6-3-5 steken na de volgende A.2.
11.02.2022 - 16:39
![]() Janka wrote:
Janka wrote:
Troszkę ponad miesiąc temu wydrukowałam opis swetra, z robótką doszłam do ściągacza przodu, który zrobiłam zgodnie z opisem tj. przerobiłam 1 rząd na prawo na lewej stronie robótki. Czytając opis tyłu okazało się, że 1 rząd ma być przerobiony na prawo na prawej stronie robótki. Dziś widzę, że została dokonana korekta wzoru, a w opisie nie ma informacji o takiej korekcie. Teraz muszę cały ściągacz spruć :(
23.11.2021 - 14:56DROPS Design answered:
Witaj Janko, bardzo przepraszamy, masz oczywiście rację. Korekta została naniesiona. Pozdrawiamy!
24.11.2021 - 11:29
![]() Sirih Manetsch wrote:
Sirih Manetsch wrote:
Ärmeltext: 3 x Fehler. 2x ist zunahme statt abnahme geschrieben. 1x wird Jacke statt Pullover geschrieben. Bitte korrigieren.
18.11.2021 - 16:12
![]() Dea wrote:
Dea wrote:
Bellissimo modello, complimenti, lo trovo molto elegante e delicato
10.11.2021 - 12:20
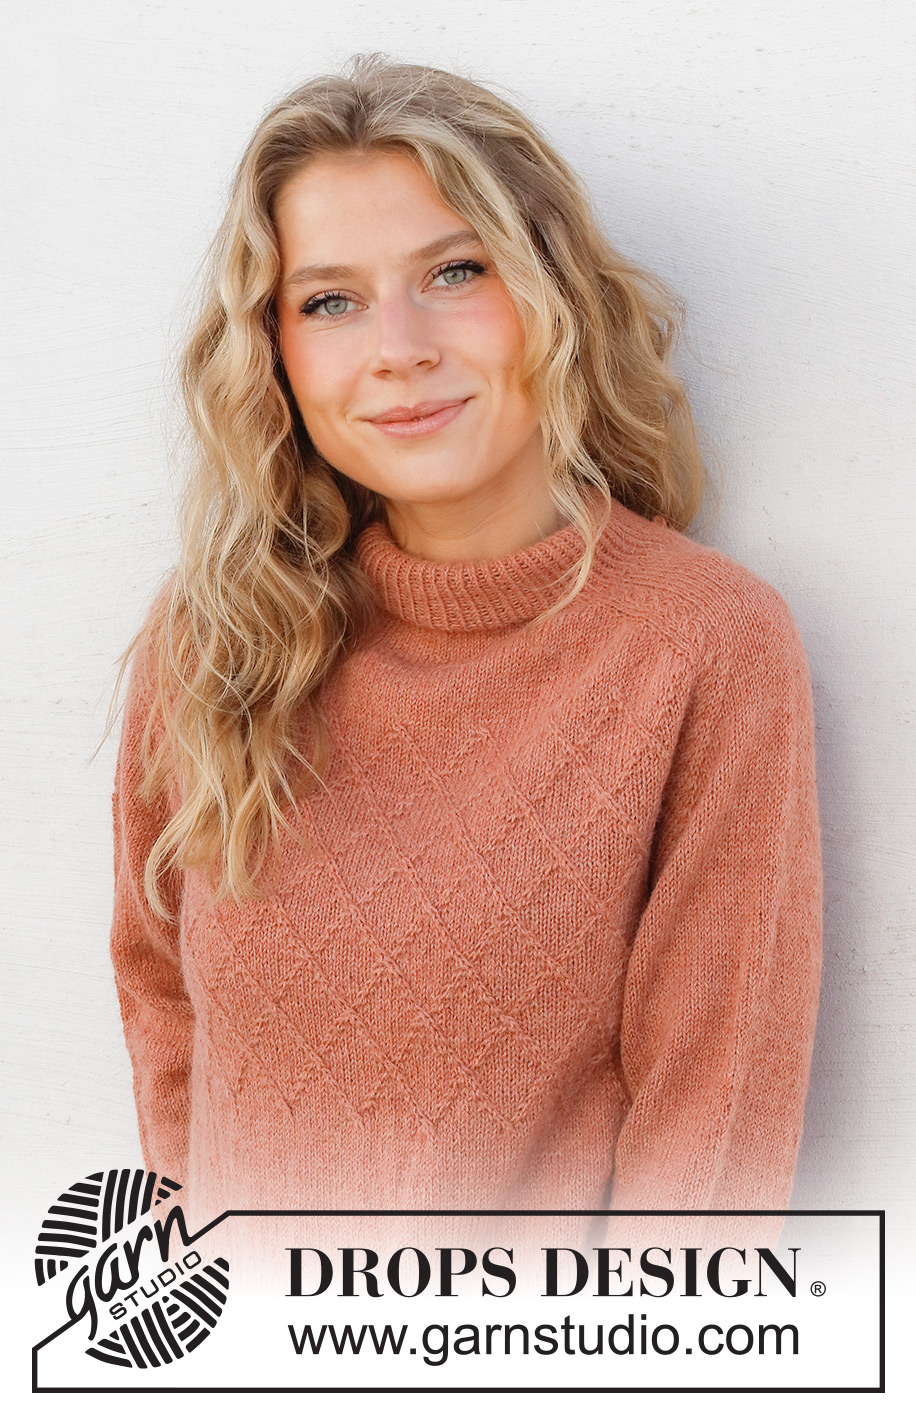
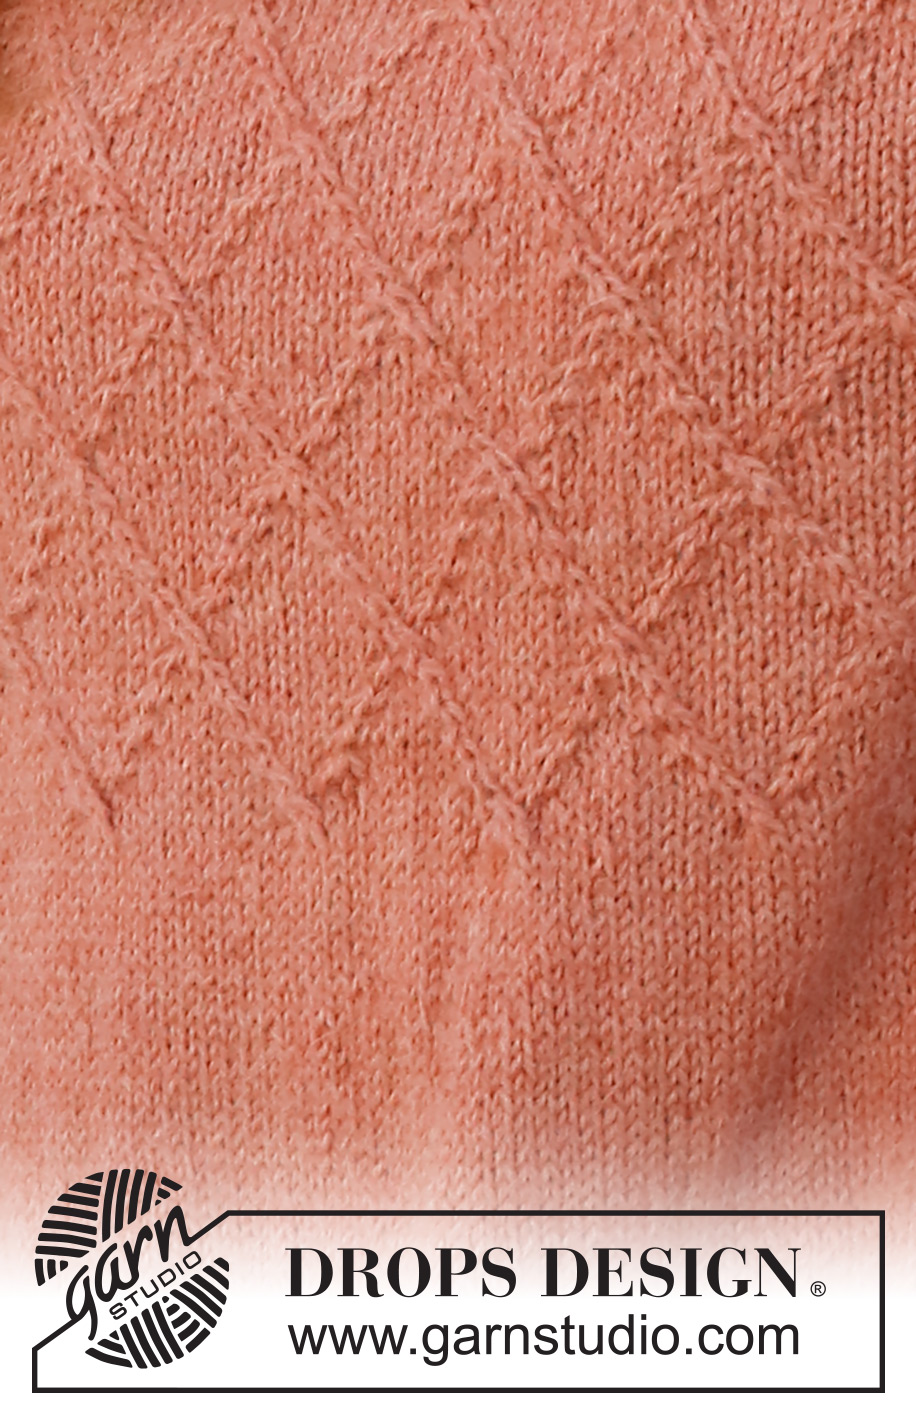
Diamond Fire#diamondfiresweater |
|||||||||||||||||||||||||||||||
 |
 |
||||||||||||||||||||||||||||||
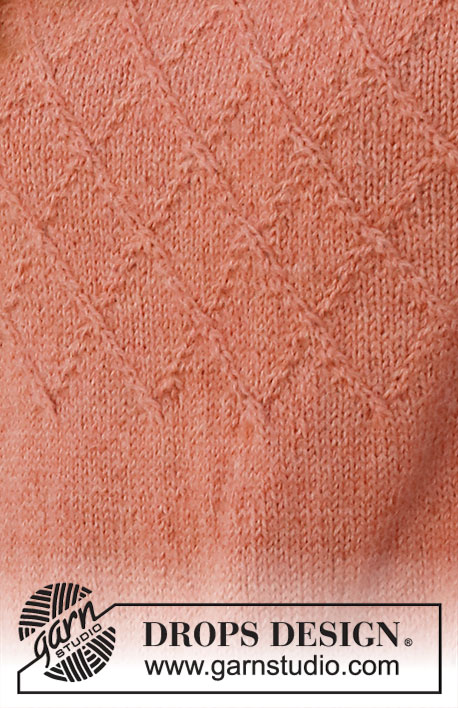
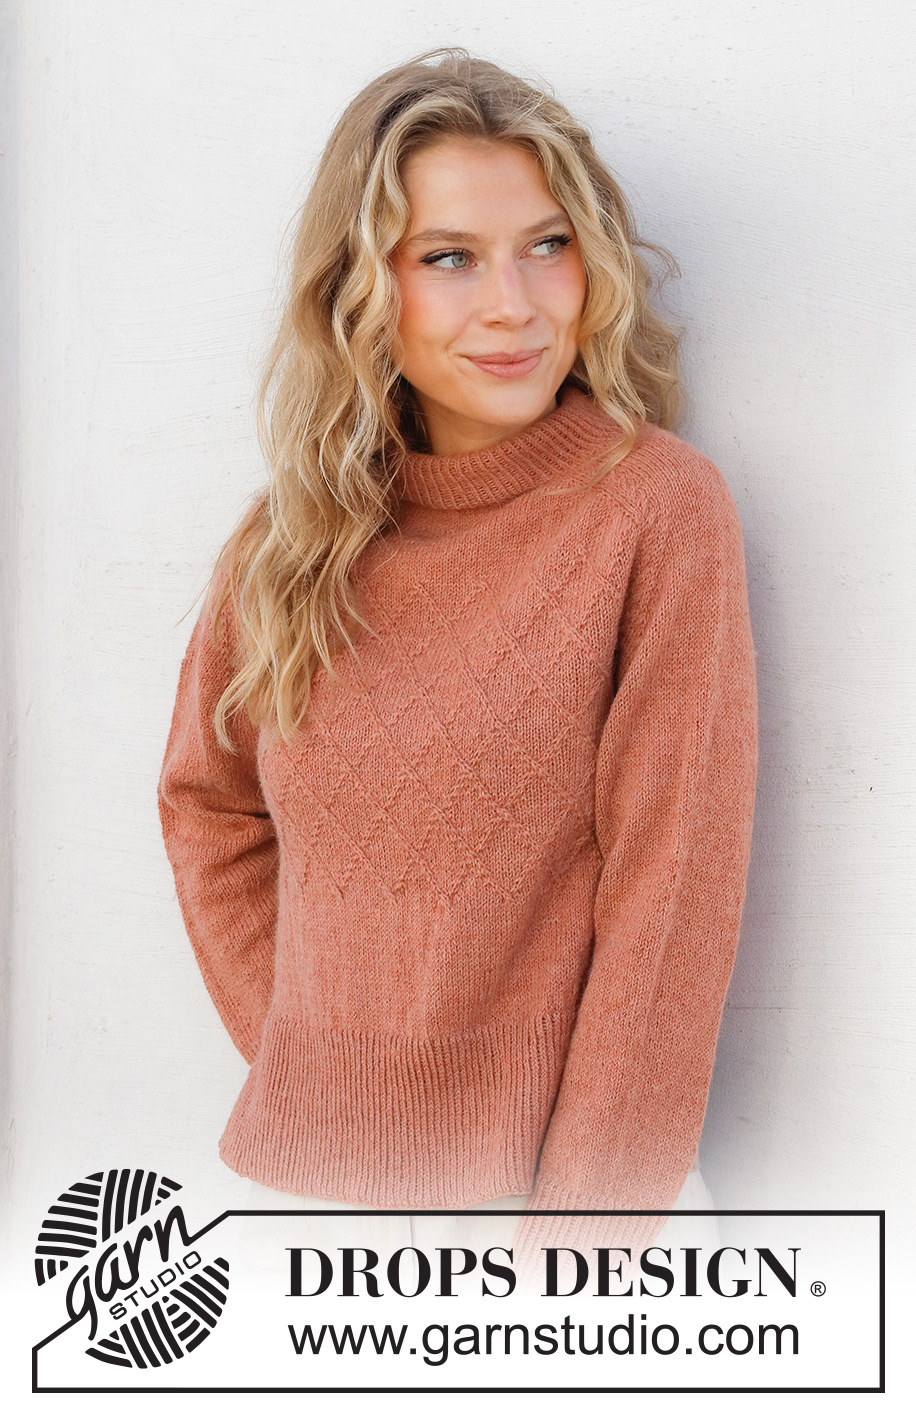
Knitted jumper in DROPS Alpaca or DROPS BabyMerino. The piece is worked top down with double neck, saddle shoulders, split in the sides and cables. Sizes S - XXXL.
DROPS 228-6 |
|||||||||||||||||||||||||||||||
|
------------------------------------------------------- EXPLANATIONS FOR THE PATTERN: ------------------------------------------------------- RIDGE/GARTER STITCH (worked back and forth): Knit all rows. 1 ridge = knit 2 rows. PATTERN: See diagrams A.1 to A.4. Choose diagram for your size (applies to A.1). INCREASE TIP-1 (evenly spaced): To work out how to increase evenly, count the total number of stitches on the needle (e.g. 120 stitches) and divide by the number of increases to be made (e.g. 26) = 4.6. In this example, increase by making 1 yarn over after alternately each 4th and 5th stitch. On the next round/row work the yarn overs twisted to avoid holes. INCREASE TIP-2: AFTER MARKER: The new stitch twists to the left. Use the left needle to pick up the strand between 2 stitches from the previous round, pick up the front strand and knit in the back loop. BEFORE MARKER: The new stitch twists to the right. Use the left needle to pick up the strand between 2 stitches from the previous round, pick up the back strand and knit in the front loop. DECREASE TIP (for sleeves): Decrease 1 stitch on either side of the marker thread as follows: Work until there are 3 stitches left before the marker thread, knit 2 together, knit 2 (marker thread sits between these 2 stitches), slip 1 stitch as if to knit, knit 1 and pass the slipped stitch over the knitted stitch (2 stitches decreased). CASTING-OFF TIP: To avoid the cast-off edge being tight you can cast off with a larger size needle. If the edge is still tight, make 1 yarn over after approx. each 6th stitch at the same time as casting off; the yarn overs are cast off as normal stitches. ------------------------------------------------------- START THE PIECE HERE: ------------------------------------------------------- JUMPER – SHORT OVERVIEW OF THE PIECE: The neck and yoke are worked in the round with circular needle, from the right shoulder and top down. The yoke is divided for body and sleeves and the body is continued in the round with circular needle as far as the split, then the front and back pieces are finished separately, back and forth. The sleeves are worked with double pointed needles/short circular needle, top down. DOUBLE NECK: Loosely cast on 120-124-130-134-138-146 stitches with short circular needle size 3 mm and DROPS Alpaca or DROPS Baby Merino. Knit 1 round. Change to short circular needle size 2.5 mm and work rib in the round (knit 1 twisted, purl 1) for 9 cm. When the rib is finished, knit 1 round where you increase 26-26-24-24-24-20 stitches evenly spaced – read INCREASE TIP-1 = 146-150-154-158-162-166 stitches. YOKE: Change to circular needle size 3 mm. Insert 4 markers as follows, without working the stitches and inserted between 2 stitches. These markers are used when increasing for the shoulders. Marker 1: Insert the marker in the beginning of the round, before the first stitch (= transition between back piece and right sleeve). All following rounds start by this marker. Marker 2: Count 30-30-30-34-34-34 stitches from marker 1 (= shoulder), insert the marker before the next stitch. Marker 3: Count 43-45-47-45-47-49 stitches from marker 2 (= front piece), insert the marker before the next stitch. Marker 4: Count 30-30-30-34-34-34 stitches from marker 3 (= shoulder), insert the marker before the next stitch. There are 43-45-47-45-47-49 stitches left on the back piece after marker 4. Allow these markers to follow your work onwards; they are used when increasing for the shoulders. INCREASES TO SADDLE SHOULDERS: You will now work pattern at the same time as increasing for the saddle shoulders. Read the whole section before continuing! REMEMBER THE KNITTING TENSION! FIRST ROUND: Work A.1 as far as marker 2 (= 30-30-30-34-34-34 stitches), increase AFTER marker 2– read INCREASE TIP-2, work stocking stitch as far as marker 3, increase BEFORE marker 3, work A.1 as far as marker 4 (= 30-30-30-34-34-34 stitches), increase AFTER marker 4, work stocking stitch as far as marker 1, increase BEFORE marker 1. 4 stitches have been increased for the shoulders – the increases are on the front and back pieces; the number of shoulder stitches remains the same. The increased stitches are worked in stocking stitch. Continue the pattern and increase like this every round a total of 24-26-28-32-34-36 times = 242-254-266-286-298-310 stitches. There are 91-97-103-109-115-121 stitches on the front and back pieces and 30-30-30-34-34-34 stitches on each shoulder. The piece measures approx. 8-8-9-10-11-11 cm from the marker on the neck. INCREASES TO SLEEVES: Move each marker so they sit between 2 stitches shown by the arrows in A.1 (= 2 markers on each shoulder). In addition, insert a marker thread at the beginning of the round; marks the beginning of the round since marker 1 has been moved. FIRST ROUND: Work A.2 (= 8 stitches – A.2 continues over the cable in A.1), increase AFTER marker 1, work stocking stitch as far as marker 2, increase BEFORE marker 2, work A.3 (= 8 stitches – A.3 continues over the cable in A.1), work 1-4-1-4-1-4 stitches in stocking stitch, A.4A (= 9 stitches), work A.4B over the next 72-72-84-84-96-96 stitches (= 6-6-7-7-8-8 repeats of 12 stitches), work A.4C (= 8 stitches), work 1-4-1-4-1-4 stitches in stocking stitch, work A.2 (= 8 stitches – A.2 continues over the cable in A.1), increase AFTER marker 3, work stocking stitch as far as marker 4, increase BEFORE marker 4, work A.3 (= 8 stitches – A.3 continues over the cable in A.1), work 1-4-1-4-1-4 stitches in stocking stitch, A.4A (= 9 stitches), A.4B over the next 72-72-84-84-96-96 stitches (= 6-6-7-7-8-8 repeats of 12 stitches), A.4C (= 8 stitches) and work 1-4-1-4-1-4 stitches in stocking stitch. You have increased 4 stitches for the sleeves; the number of stitches on the front and back pieces remains the same. The increased stitches are worked in stocking stitch. Continue the pattern and increase like this every round a total of 9-8-9-6-11-6 times = 278-286-302-310-342-334 stitches. The piece measures approx 10-11-12-12-14-13 cm from the marker on the neck. INCREASES TO YOKE: Move the 4 markers so they sit in the middle of each A.2 and A.3. On the next round increase 8 stitches as before, but just before and just after each A.2 and A.3 (increase 1 stitch when 4 stitches remain before each marker and increase 1 stitch 4 stitches after each marker). You are now increasing on the front and back pieces as well as the sleeves; the increased stitches are worked in stocking stitch. Increase like this every 2nd round a total of 9-12-14-18-18-23 times = 350-382-414-454-486-518 stitches. When all the increases are finished, the piece measures approx. 16-18-20-23-25-28 cm from the neck. Continue working without further increases until the piece measures 20-22-24-25-27-29 cm for the neck – AT THE SAME TIME, on the last round decrease 8 stitches on the round by decreasing 2 stitches in each A.2/A.3 (knit together the 4 stitches in the cable 2 and 2) = 342-374-406-446-478-510 stitches. Divide for the body and sleeves on the next round as follows: Start 3-4-5-6-3-5 stitches before A.2 at the beginning of the round, place the next 68-74-82-90-94-98 stitches on a thread for the sleeve, cast on 8-8-10-10-12-12 stitches (= in side under sleeve), work as before over the next 103-113-121-133-145-157 stitches (= front piece), place the next 68-74-82-90-94-98 stitches on a thread for the sleeve, cast on 8-8-10-10-12-12 stitches (= in side under sleeve) and work the last 103-113-121-133-145-157 stitches as before (= back piece). The body and sleeves are finished separately. THE PIECE IS NOW MEASURED FROM HERE! BODY: = 222-242-262-286-314-338 stitches. Insert 1 marker thread in the middle of the 8-8-10-10-12-12 new stitches cast on under each sleeve = 111-121-131-143-157-169 stitches between the threads. Allow the marker threads to follow your work onwards – they will later mark the split in each side. Work the first round as follows: 11-16-15-21-22-28 stitches in stocking stitch, continue A.4 over the next 89-89-101-101-113-113 stitches, 22-32-30-42-44-56 stitches in stocking stitch (marker thread sits in the middle of these stitches), continue A.4 over the next 89-89-101-101-113-113 stitches, 11-16-15-21-22-28 stitches in stocking stitch. Continue this pattern in the round until A.4 has been worked 4-4-4-4-4-5 times in height, then work the first round in A.4. The piece measures approx. 33-33-34-35-36-42 cm from after the neck. Continue with stocking stitch over all stitches until the piece measures 19 cm from the division. There is 10 cm left to finished length; try the jumper on and work to desired length. Now divide the piece for the split in each side. Keep the first 111-121-131-143-157-169 stitches on the needle (= front piece). Place the other stitches on a thread or extra needle. FRONT PIECE: = 111-121-131-143-157-169 stitches. To avoid the following rib being tight, knit 1 row from the right side where you increase 34-36-40-42-48-50 stitches evenly spaced – remember INCREASE TIP-1 = 145-157-171-185-205-219 stitches. Change to circular needle size 2.5 mm and work rib as follows: ROW 1 (wrong side): 3 edge stitches in GARTER STITCH – read description above, * purl 1 twisted, knit 1 *, work from *-* until there are 4 stitches left, purl 1 twisted and 3 edge stitches in garter stitch. ROW 2 (right side): 3 edge stitches in garter stitch, * knit 1 twisted, purl 1 *, work from *-* until there are 4 stitches left, knit 1 twisted and 3 edge stitches in garter stitch. Repeat rows 1 and 2 until the rib measures 10 cm. Cast off from the right side with garter stitch over garter stitch, knit over knit and purl over purl – read CASTING-OFF TIP! The jumper measures approx. 54-56-58-60-62-64 cm from the shoulder down. BACK PIECE: Place the 111-121-131-143-157-169 stitches from the thread/extra needle back on circular needle size 3 mm. Knit 1 row from the right side where you increase 34-36-40-42-48-50 stitches evenly spaced - remember INCREASE TIP-1 = 145-157-171-185-205-219 stitches. Change to circular needle size 2.5 mm and work rib as follows: ROW 1 (wrong side): 3 edge stitches in garter stitch, * purl 1 twisted, knit 1 *, work from *-* until there are 4 stitches left, purl 1 twisted and 3 edge stitches in garter stitch. ROW 2 (right side): 3 edge stitches in garter stitch, * knit 1 twisted, purl 1 *, work from *-* until there are 4 stitches left, knit 1 twisted and 3 edge stitches in garter stitch. Repeat rows 1 and 2 until the rib measures 10 cm. Cast off from the right side with garter stitch over garter stitch, knit over knit and purl over purl – remember CASTING-OFF TIP! SLEEVES: Place the 68-74-82-90-94-98 stitches from the thread on the one side of the piece on double pointed needles/short circular needle size 3 mm and knit up 1 stitch in each of the 8-8-10-10-12-12 stitches cast on under the sleeve = 76-82-92-100-106-110 stitches. Insert a marker thread in the middle of the new stitches under the sleeve. Allow the thread to follow your work onwards; it will be used when decreasing under the sleeve. Start at the marker thread and work stocking stitch in the round. When the piece measures 2 cm from the division, decrease 2 stitches under the sleeve – read DECREASE TIP. Decrease like this every 1½ cm a total of 3-5-8-12-15-18 times, then every 4th round 4-4-4-3-2-0 times = 62-64-68-70-72-74 stitches. Continue working until the sleeve measures 36-34-33-33-32-30 cm from the division. There is 8 cm left to finished length; try the jumper on and work to desired length. Change to double pointed needles size 2.5 mm and work rib (knit 1 twisted, purl 1) for 8 cm. Cast off with knit over knit and purl over purl – remember CASTING-OFF TIP! The sleeve measures approx. 44-42-41-41-40-38 cm from the division. Work the other sleeve in the same way. ASSEMBLY: Fold the neck double to the inside and sew down. To avoid the neck being tight and rolling outwards, it is important that the seam is elastic. |
|||||||||||||||||||||||||||||||
Diagram explanations |
|||||||||||||||||||||||||||||||
|
|||||||||||||||||||||||||||||||
 |
|||||||||||||||||||||||||||||||
 |
|||||||||||||||||||||||||||||||
 |
|||||||||||||||||||||||||||||||
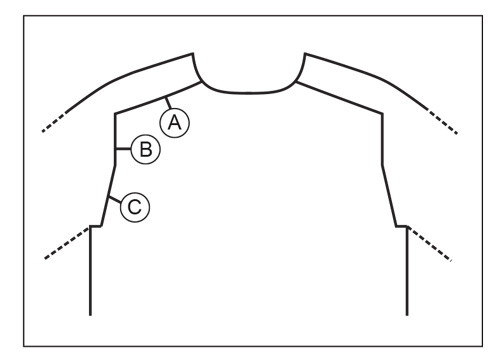 |
|||||||||||||||||||||||||||||||
Have you finished this pattern?Tag your pictures with #dropspattern #diamondfiresweater or submit them to the #dropsfan gallery. Do you need help with this pattern?You'll find 35 tutorial videos, a Comments/Questions area and more by visiting the pattern on garnstudio.com. © 1982-2025 DROPS Design A/S. We reserve all rights. This document, including all its sub-sections, has copyrights. Read more about what you can do with our patterns at the bottom of each pattern on our site. |
|||||||||||||||||||||||||||||||









Post a comment to pattern DROPS 228-6
We would love to hear what you have to say about this pattern!
If you want to leave a question, please make sure you select the correct category in the form below, to speed up the answering process. Required fields are marked *.