
Popular categories
Looking for a yarn?


Comments / Questions (24)
![]() Elke wrote:
Elke wrote:
Wie stricke ich das Muster bis zur Teilung( zum Ende der Passe )weiter, wenn keine Raglanzunahmen mehr erfolgen?
03.10.2025 - 20:15DROPS Design answered:
Liebe Elke, Sie stricken wie begonnen im Muster (an den Ärmeln) und glatt rechts weiter, die Raglanmaschen stricken Sie auch glatt rechts, nur nun ohne Raglanzunahmen. Gutes Gelingen weiterhin!
24.10.2025 - 11:01
![]() Céline wrote:
Céline wrote:
Bonjour, Je ne comprends pas comment tricoter la manche (taille L). Après avoir relevé les 12 mailles sous le bras et placé le marqueur à 6 mailles - je suppose que c’est ce qu’il faut faire mais vous ne le précisez pas - comment dois-je débuter le rang afin de garder le même motif ? 10.08.2025 - 07:53
10.08.2025 - 07:54DROPS Design answered:
Bonjour Céline, calculez où commencer le motif en fonction de la 1ère maille de la manche et des mailles montées sous la manche, ajustez le début du tour si besoin, vous commencerez en jersey et continuerez tout simplement le motif ajouré de l'empiècement, comme avant. Bon tricot!
11.08.2025 - 07:47
![]() Cėline wrote:
Cėline wrote:
Bonjour, Je ne comprends pas comment tricoter la manche (taille L). Après avoir relevé les 12 mailles sous le bras et placé le marqueur à 6 mailles - je suppose que c’est ce qu’il faut faire mais vous ne le précisez pas - comment dois-je débuter le rang afin de garder le même motif ?
10.08.2025 - 07:53DROPS Design answered:
Bonjour Céline, vous continuez le point ajouré sur le plus de mailles possible tout le tour, autrement dit, veillez à bien continuer le point ajouré de l'empiècement sans le décaler, mais tricotez en jersey les mailles au milieu sous la manche que vous ne pouvez pas tricoter dans le point ajouré. Bon tricot!
11.08.2025 - 07:46
![]() Céline wrote:
Céline wrote:
De même, pour les devants - toujours en taille L : 28 augmentations d'une maille de raglan + 12 augmentations de col V donnent 3 mailles de départ pour le devant + 28 mailles + 12 mailles = 43 mailles et vous indiquez 44 mailles comme nombre final après les augmentations. Si vous pouvez m'expliquer également comment vous parvenez à ce nombre et quelle est mon erreur, je vous remercie.
04.08.2025 - 09:41DROPS Design answered:
Bonjour Céline, comme la maille du raglan côté manche appartient au devant, vous avez donc 1 maille en plus pour le devant. Bon tricot!
04.08.2025 - 11:37
![]() Céline wrote:
Céline wrote:
Bonjour, Je réalise une taille L. Vous indiquez de tricoter 28 fois une augmentation de chaque côté des mailles raglan. Une manche étant composée au début de 19 mailles, 28 augmentations de 2 mailles donnent 56 mailles. 19 + 56 = 75 mailles, donc je ne comprends pas comment vous obtenez 73 mailles pour une manche à la dernière augmentation ? Merci pour votre aide.
04.08.2025 - 09:11DROPS Design answered:
Bonjour Céline, les 19 mailles des manches sont tricotées ainsi au début: 1 fil marqueur, 1 m endroit, (augmentations raglan), A.1, A.2, A.3, (augmentations raglan), 1 m end, 1 fil marqueur - autrement dit, la maille endroit après le fil marqueur et celle juste avant le fil marqueur est attribuée aux devants/ au dos lors de la division. Bon tricot!
04.08.2025 - 11:37
![]() Laila Møller wrote:
Laila Møller wrote:
Når der står at alle pinde i mønstret ses fra ret siden , hvad skal man så strikke på vrangen ?
08.07.2025 - 21:36DROPS Design answered:
Hei Laila. Diagrammet viser alle pinde, men alle pinde er vist fra retsiden. For eksempel strikkes en tom firkant ret, når man er på retsiden, men vrang, når man er på vrangen. Mvh DROPS Design
09.07.2025 - 14:11
![]() Margriet wrote:
Margriet wrote:
De omslag in het telpatroon moet in de teruggaande naald niet! gedraaid, maar gewoon averechts worden gebreid. Anders krijg je geen gaatje.
03.03.2025 - 11:36
![]() Dana Dehnke wrote:
Dana Dehnke wrote:
Die Jacke ist eigentlich gut gelungen. Beim Tragen rollen sich allerdings die Ärmel nach außen auf. Was kann man da noch machen?
04.10.2024 - 09:05DROPS Design answered:
Liebe Frau Dehnke, Sie können die Jacke mit Stecknadeln auf einer geeigneten Unterlage spannen, anfeuchten (z.B. mit einer Sprühflasche für Blumen) und trocknen lassen, danach entfernen Sie die Stecknadeln, dann sollte sich die Rände nicht mehr rollen.
04.10.2024 - 15:44
![]() La Souris wrote:
La Souris wrote:
Bonjour, je ne sais pas comment tricoter les manches sans qu'elles s'evasent. J'ai beaucoup plus de mailles au fur et à mesure, comment eviter ce problème s'il vous plaît. 🙏
13.09.2024 - 10:32DROPS Design answered:
Bonjour La Souris, votre nombre de mailles doit toujours rester le même, on n'augmente pas, autrement dit, continuez bien le point ajouré comme avant, mais tricotez en jersey les mailles sous la manche que vous ne pouvez pas tricoter en point ajouré (vous devez avoir 2 jetés pour chaque double diminution pour bien conserver le bon nombre de mailles). Bon tricot!
13.09.2024 - 16:32
![]() La Souris wrote:
La Souris wrote:
Bonjour, comment eviter que les bords des manches s'enroulent ? Merci pour l'aide 🙂
12.09.2024 - 10:48
|
||||||||||||||||
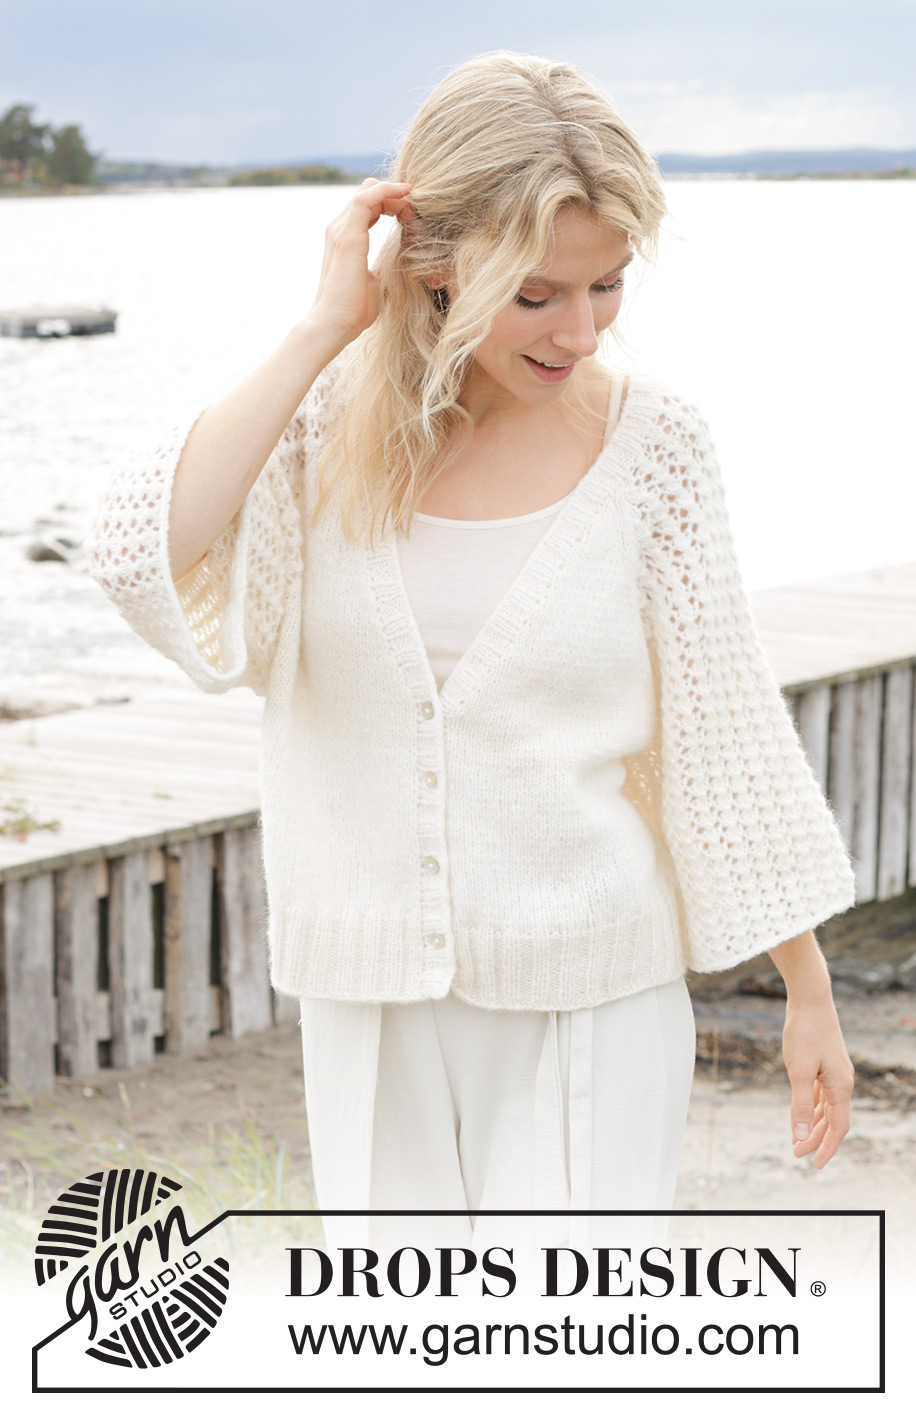
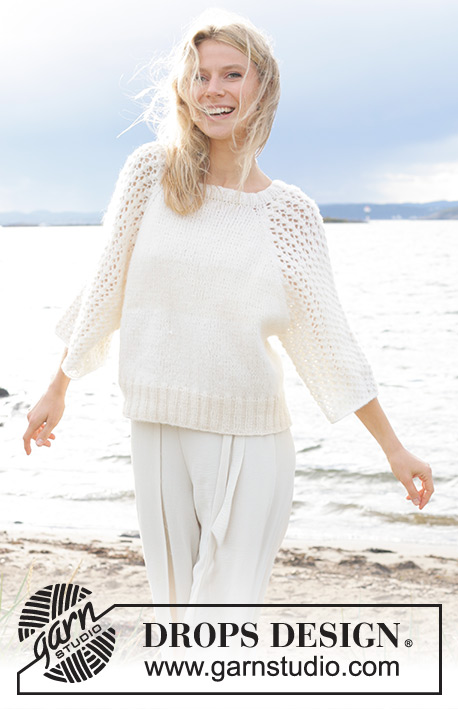
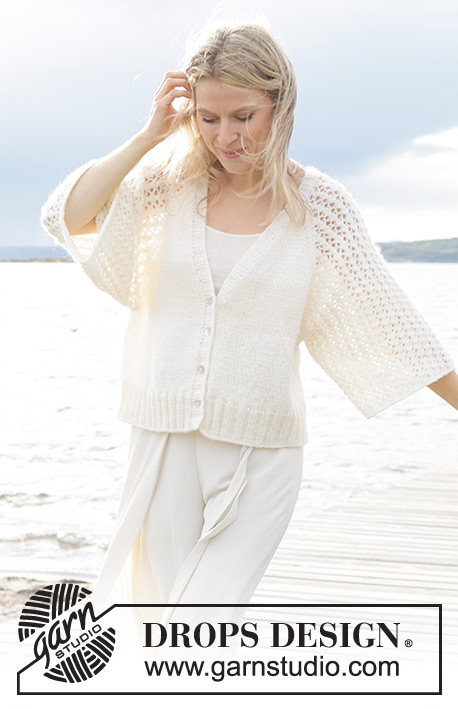
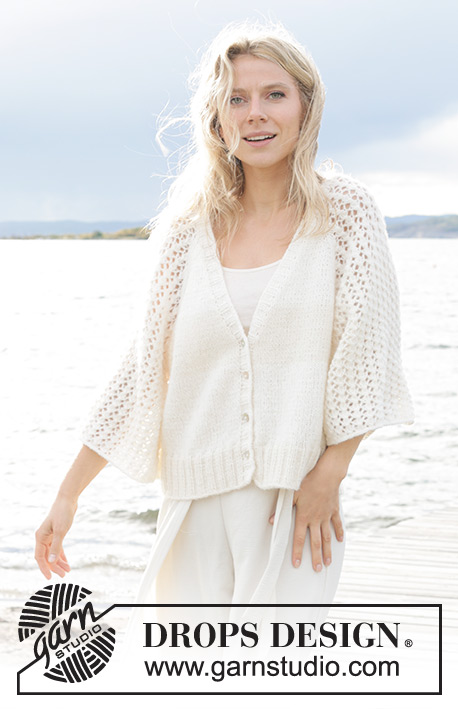
Morgenbris Cardigan#morgenbriscardigan |
||||||||||||||||
 |
 |
|||||||||||||||
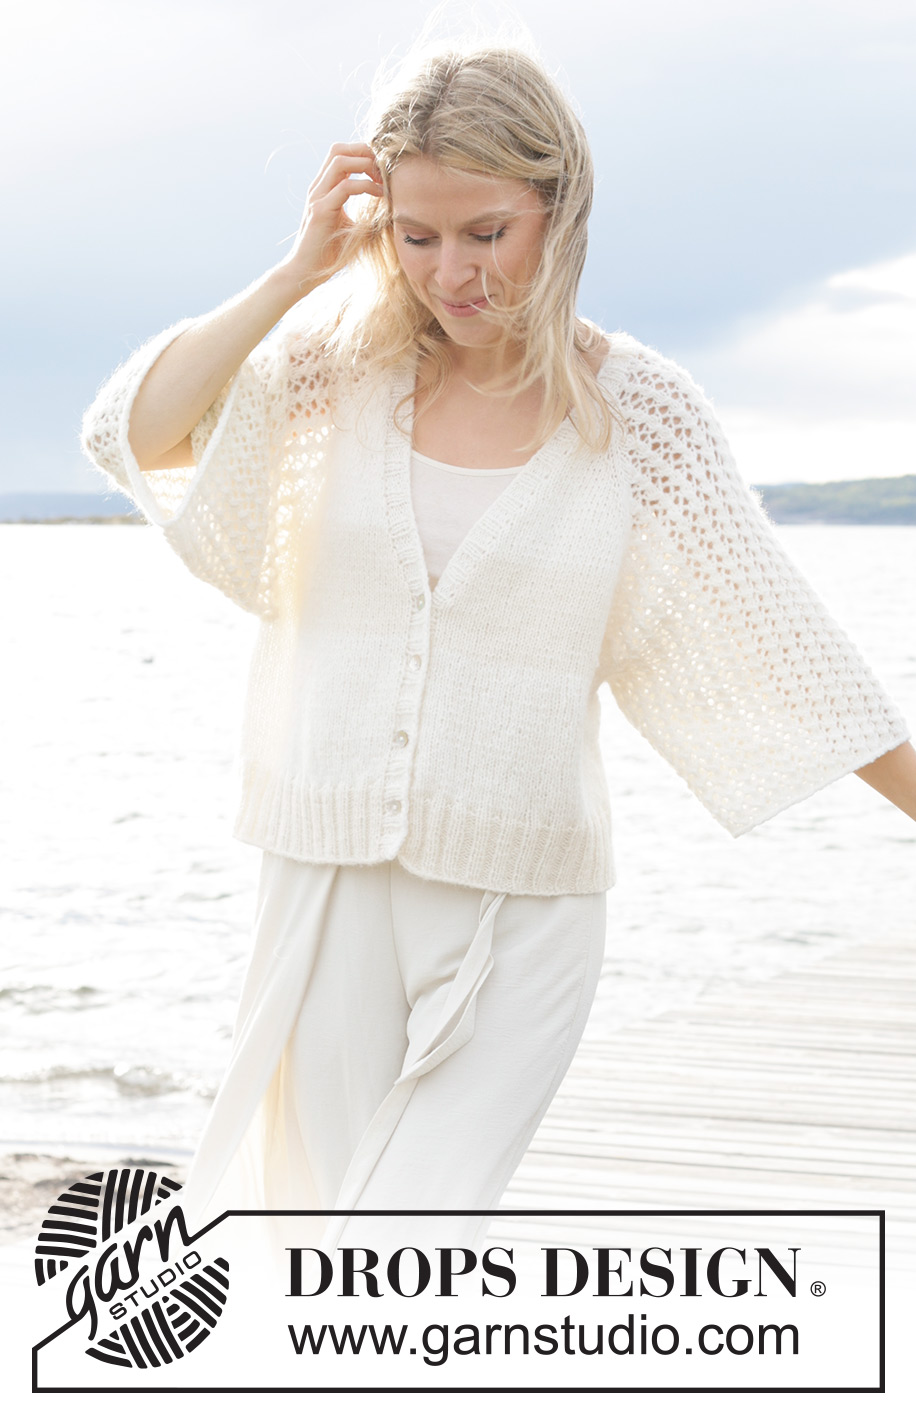
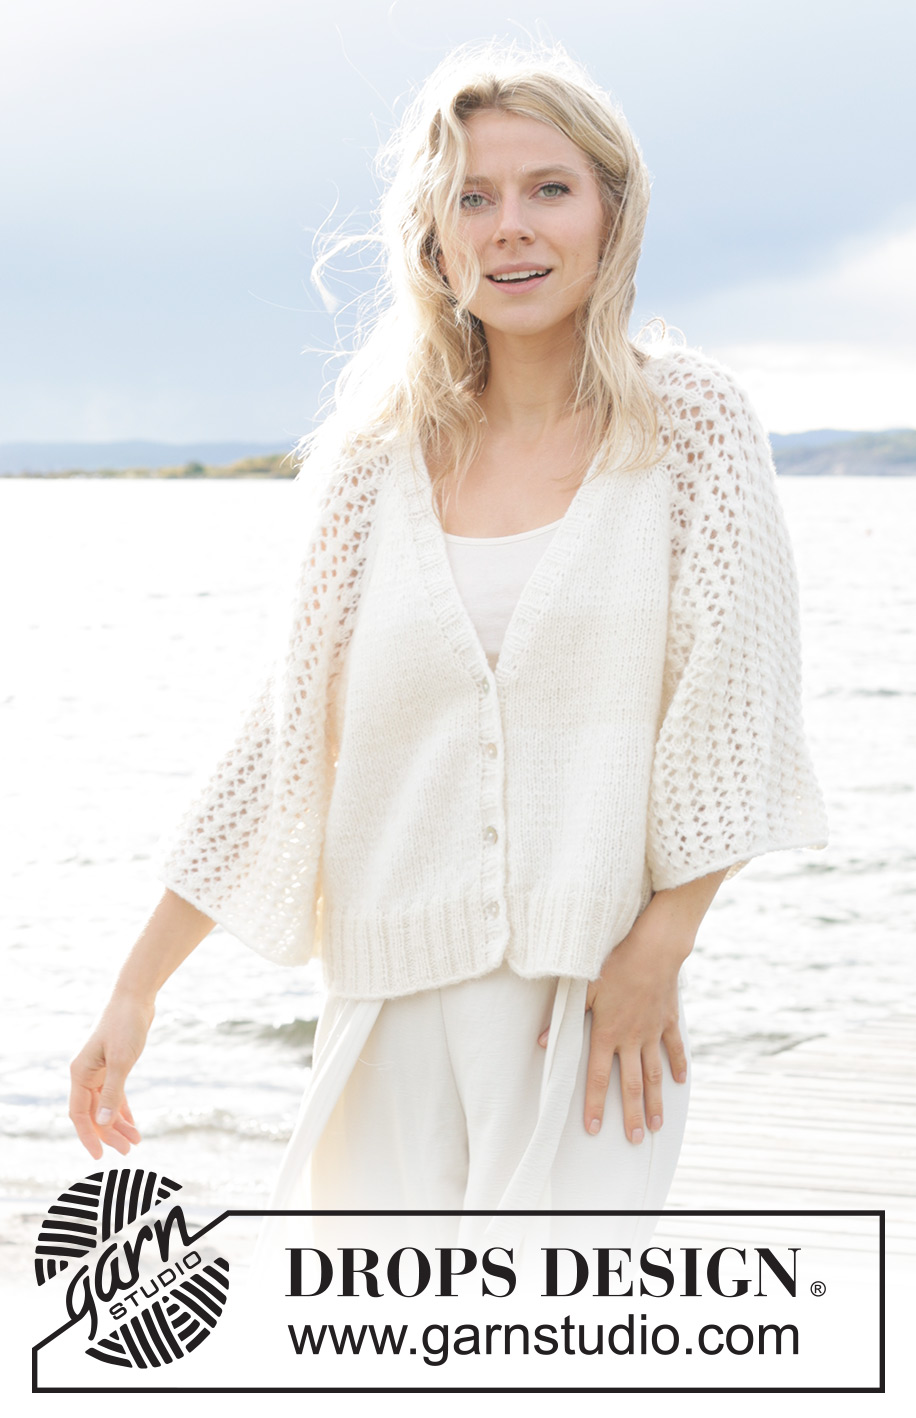
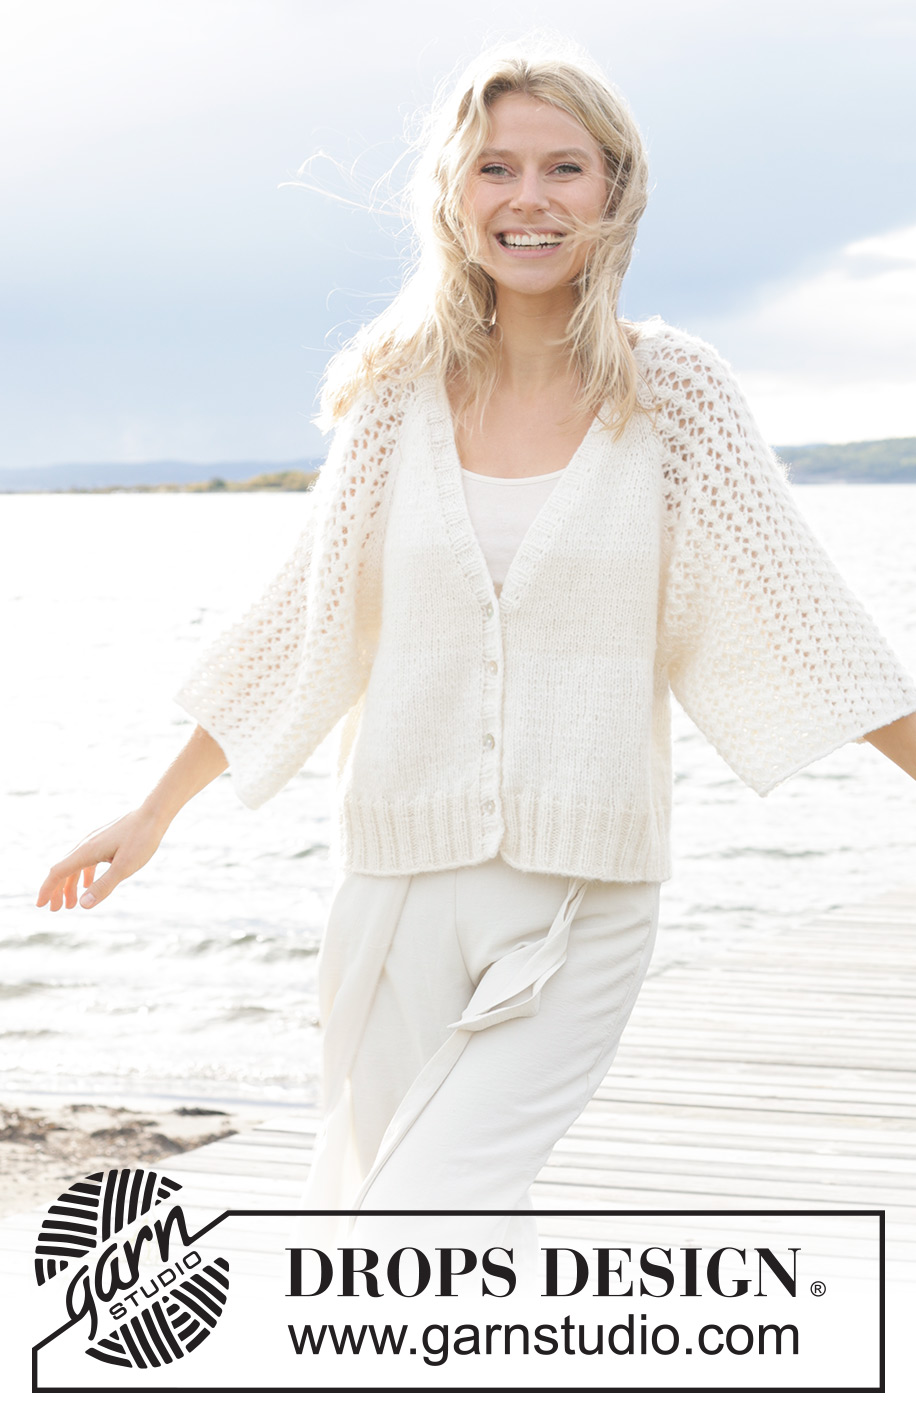
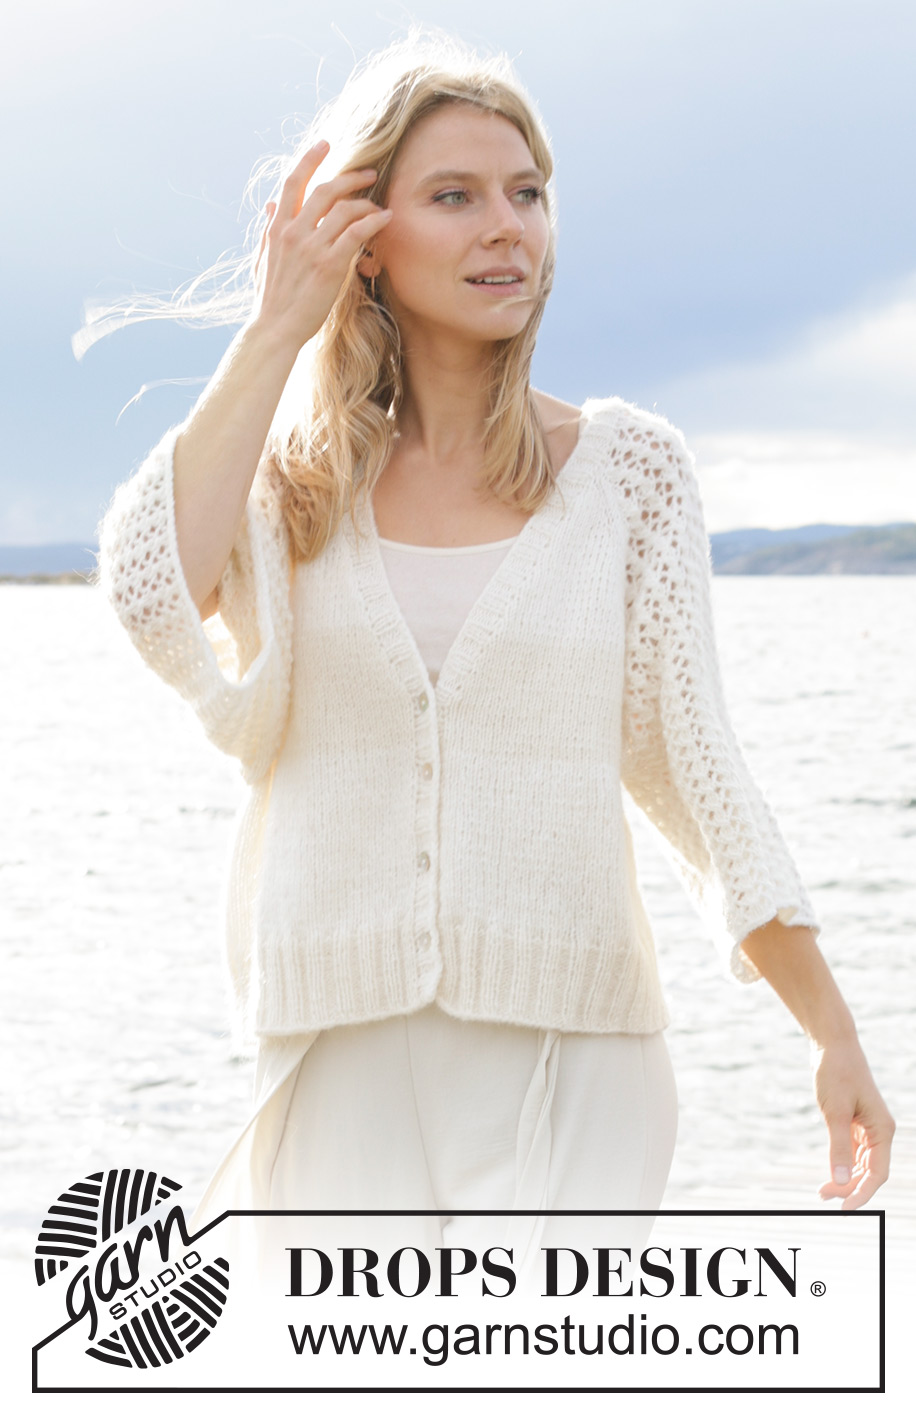
Knitted jacket in DROPS Air. The piece is worked top down with raglan, V-neck and lace pattern on the sleeves. Sizes S - XXXL.
DROPS 239-11 |
||||||||||||||||
|
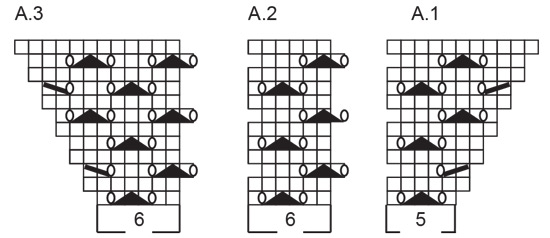
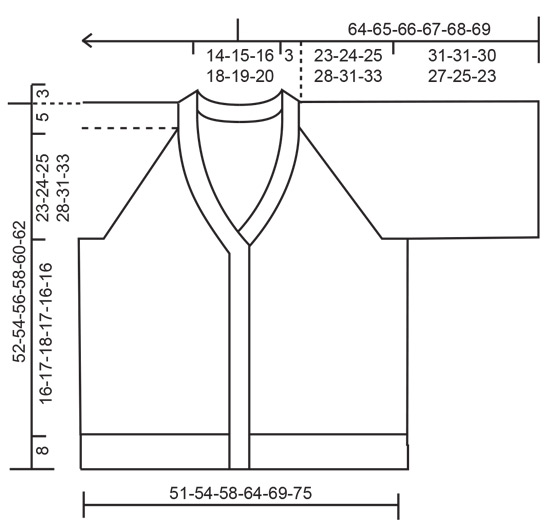
------------------------------------------------------- EXPLANATIONS FOR THE PATTERN: ------------------------------------------------------- RIDGE/GARTER STITCH (worked back and forth): Knit all rows. 1 ridge = knit 2 rows. PATTERN: See diagrams A.1 to A.3. The diagrams show all rows in the pattern from the right side. RAGLAN: Increase 1 stitch on each side of 2 stocking stitches (marker-thread sits between these 2 stitches) in each transition between body and sleeves (= 8 stitches increased on the row). Increase by making 1 yarn over. On the next row purl the yarn overs twisted to avoid holes. Then work the new stitches in stocking stitch on the body and into the pattern on the sleeves. V-NECK: All increases are worked from the right side! Make 1 yarn over inside the 1 edge stitch (= 1 stitch increased). On the next row (wrong side) purl the yarn overs twisted to avoid holes. Then work the new stitches in stocking stitch. Increase 2 stitches on each increase-row (1 stitch on each side). BUTTONHOLES (right band): Work 4 buttonholes. 1 buttonhole = knit 2 together and make 1 yarn over which is knitted on the next row to leave a hole. The bottom buttonhole is 6 cm from the bottom edge and the top buttonhole where the V-neck begins. The other 2 buttonholes are worked evenly between these first 2. ------------------------------------------------------- START THE PIECE HERE: ------------------------------------------------------- JACKET – SHORT OVERVIEW OF THE PIECE. The yoke is worked back and forth with circular needle, from mid front and top down. The sleeves are worked with lace pattern. Stitches are increased for the V-neck and raglan. The yoke is divided for body and sleeves and the body continued back and forth with circular needle. The sleeves are worked in the round with short circular needle, top down. The neck and bands are worked to finish. YOKE: Cast on 68-70-72-74-76-78 stitches with circular needle size 5 mm and DROPS Air. Purl 1 row from the wrong side. OVERVIEW OF THE NEXT SECTION: Start the pattern on the sleeves at the same time as increasing for raglan and for the V-neck – read the next section before continuing. Insert 4 marker-threads without working the stitches, inserted between 2 stitches. These are used when increasing for raglan. Count 3 stitches (= front piece), insert marker-thread, count 19 stitches (= sleeve), insert marker-thread, count 24-26-28-30-32-34 stitches (= back piece), insert marker-thread, count 19 stitches (= sleeve), insert marker-thread, there are 3 stitches left after the last marker-thread (= front piece). Work as follows from the right side: 1 edge stitch in GARTER STITCH – read description above, knit 1, increase 1 stitch for RAGLAN – read description above, knit 2, increase 1 stitch for raglan, work A.1, A.2, A.3, increase 1 stitch for raglan, knit 2, increase 1 stitch for raglan, knit 22-24-26-28-30-32, increase 1 stitch for raglan, knit 2, increase 1 stitch for raglan, work A.1, A.2, A.3, increase 1 stitch for raglan, knit 2, increase 1 stitch for raglan, knit 1 and 1 edge stitch in garter stitch. Continue with stocking stitch on the front and back pieces, lace pattern on the sleeves and increase for raglan every 2nd row (every row from the right side) a total of 25-26-28-31-34-36 times on each side of the marker-threads. Each time A.1 and A.3 are finished in height, there are 2 more repeats of A.2 in width. V-NECK: AT THE SAME TIME on row 6 (3rd row from the right side) increase for the V-NECK on each side towards mid-front – read description above, as follows: Increase every 4th row 6-7-8-9-10-11 times, then every 6th row 4 times. REMEMBER THE KNITTING TENSION! After the last increase for raglan continue working without further increases until the yoke measures 23-24-25-28-31-33 cm; the neck-increases should now be finished. There are now 288-300-320-348-376-396 stitches. Work the first 39-41-44-48-52-55 stitches (front piece), place the next 67-69-73-79-85-89 stitches on a thread for the sleeve, cast on 10-12-12-14-16-20 stitches (in side under sleeve), work 76-80-86-94-102-108 stitches (back piece), place the next 67-69-73-79-85-89 stitches on a thread for the sleeve, cast on 10-12-12-14-16-20 stitches (in side under sleeve), work the last 39-41-44-48-52-55 stitches (front piece). The piece is now measured from here! BODY: = 174-186-198-218-238-258 stitches. Continue with stocking stitch and 1 edge stitch in garter stitch on each side for a further 16-17-18-17-16-16 cm. Knit 1 row from the right side and increase 38-38-46-50-50-54 stitches evenly spaced = 212-224-244-268-288-312 stitches. Change to circular needle size 4 mm. Work as follows from the wrong side: 1 edge stitch in garter stitch, * purl 2, knit 2 *, work from *-* until there are 3 stitches left, purl 2 and 1 edge stitch in garter stitch. Continue this rib for 8 cm. Cast off a little loosely. The jacket measures approx. 52-54-56-58-60-62 cm from the shoulder. SLEEVES: Place the 67-69-73-79-85-89 stitches from the thread on the one side of the piece on short circular needle size 5 mm and knit up 1 stitch in each of the new stitches cast on under the sleeve = 77-81-85-93-101-109 stitches. Continue A.2; the stitches which do not fit into the pattern under the sleeve are worked in stocking stitch. Work until the sleeve measures 31-31-30-27-25-23 cm from the division. Cast off a little loosely. BANDS/NECK: Insert 1 marker mid-back of neck; this is used when knitting up stitches for the bands and neck. The bands are knitted up inside the 1 edge stitch on the front pieces and in the first row worked around the neck. Start from the right side, at the bottom of the right front piece and knit up 113-117-121-125-129-133 stitches as far as the marker mid-back, using circular needle size 4. Knit up 113-117-121-125-129-133 stitches down to the bottom of the left front piece; the stitch number should be divisible by 4 + 2 = 226-234-242-250-258-266 stitches. If you knit up too many stitches, the bands will be loose, knit up too few stitches and the bands will be tight. Work as follows from the wrong side: 2 stitches in garter stitch, * purl 2, knit 2 *, work from *-* until there are 4 stitches left, purl 2 and 2 stitches in garter stitch. When the bands measures 1 ½ cm work the BUTTONHOLES on the right band – read description above. Continue working until the rib measures 3 cm. Cast off a little loosely. Sew the buttons onto the left band. |
||||||||||||||||
Diagram explanations |
||||||||||||||||
|
||||||||||||||||
 |
||||||||||||||||
 |
||||||||||||||||
Have you finished this pattern?Tag your pictures with #dropspattern #morgenbriscardigan or submit them to the #dropsfan gallery. Do you need help with this pattern?You'll find 27 tutorial videos, a Comments/Questions area and more by visiting the pattern on garnstudio.com. © 1982-2026 DROPS Design A/S. We reserve all rights. This document, including all its sub-sections, has copyrights. Read more about what you can do with our patterns at the bottom of each pattern on our site. |
||||||||||||||||


With over 40 years in knitting and crochet design, DROPS Design offers one of the most extensive collections of free patterns on the internet - translated to 17 languages. As of today we count 324 catalogues and 12290 patterns translated into English (UK/cm). 12290
We work hard to bring you the best knitting and crochet have to offer, inspiration and advice as well as great quality yarns at incredible prices! Would you like to use our patterns for other than personal use? You can read what you are allowed to do in the Copyright text at the bottom of all our patterns. Happy crafting!
Post a comment to pattern DROPS 239-11
We would love to hear what you have to say about this pattern!
If you want to leave a question, please make sure you select the correct category in the form below, to speed up the answering process. Required fields are marked *.