
Popular categories
Looking for a yarn?


Comments / Questions (15)
![]() Timea wrote:
Timea wrote:
Eine Frage zur Blende: ich soll für XL 148+24 (172) Maschen aufnehmen. Nach den 3 Zunahmen am Anfang des V-Ausschnittes komme ich auf 175 M. WIE soll ich die restlichen Maschen so anpassen, dass ich insgesamt nur 159M für die Blende habe? 13 Abnahmen? Vielen dank für die Ergänzung zur Anleitung
02.04.2025 - 09:45DROPS Design answered:
Liebe Timea, bei der 1. Reihe wird man 5 Maschen am V-Halsausschnitt zunehmen und dann 18 Maschen regelmäßig verteilt abnehmen damit es nur noch 159 Maschen ürbig sind. Viel Spaß beim Stricken!
02.04.2025 - 14:15
![]() Timea wrote:
Timea wrote:
Auf den Fotos scheint der Cardigan glatt rechts gestrickt zu sein, was mir gut gefällt. (Aussenseite rechts, Innenseite links). Die Anleitung sagt aber "Kraus rechts, damit Krausrippen entstehen. Ist das ein Versehen?
26.02.2025 - 12:55DROPS Design answered:
Liebe Timea, die Jacke wird glattrechts gestrickt, aber am Anfang der Anleitung erklärt man nur wie man Krausrechts/krausrippen strickt. Viel Spaß beim Stricken!
26.02.2025 - 17:40
![]() Sandra Ring wrote:
Sandra Ring wrote:
Oh, danke, Sie haben aber schnell geantwortet. Es steht doch geschrieben, dass sich der Rüschen Rand sauber legt, müssen verkürzte Reihen gestrickt werden. Steht ganz oben in der Beschreibung. Rechtes Vorderteil: 7. Reihe des Musters. Danke für Ihre Bemühungen, kann man irgendwo was spenden für Ihren Aufwand? Ich habe Erfahrungen im Ayourstricken. Verstehe das nicht wo es hapert.
04.01.2024 - 17:55DROPS Design answered:
Liebe Frau Ring, oh ja sicher sorry; bei den verkürzten Reihen stricken Sie dann bei der 7. Reihe nur die Maschen von A.2 genauso wie bei der 7. Reihe im Diagram, und die 8. Reihe auch genauso, dh A.2 wird einfach wie zuvor gestrickt, als es keine verkürzten Reihe gäbe. Viel Spaß beim stricken!
05.01.2024 - 08:12
![]() Sandra Ring wrote:
Sandra Ring wrote:
Beim rechten Vorderteil fehlt mir in der 4. Reihe immer eine Masche (im Diagramm ist das eine rechts verschränkte Masche, genau da wo meine Bruchkante ist. Ignoriere ich dann diese rechts verschränkte und stricke diese Masche links, dass es eine Bruchkante bleibt? Mein Rüschen sieht auch nicht so aus, wie auf dem Bild. Wie genau sollten die beiden Maschen in der 4. Und 7. Reihe abgekettet werden? Das sieht so unordentlich aus. Habe schon X mal probiert.
04.01.2024 - 17:47
![]() Sandra Ring wrote:
Sandra Ring wrote:
Noch eine Frage zu der verkürzten Reihe. Ich stricke somit A1 bis zur Bruchkante Masche, drehe um und stricke A1 zurück und dann wieder zurück und dann stricke ich A2. Dh in der 7. Runde von A2, stricke ich zusätzlich zwei Reihen A1 und lasse A2 aus. Tut, mir leid, ist mein Debut mit verkürzten Reihen. Vielen Dank für Ihre Bemühungen.
04.01.2024 - 14:41DROPS Design answered:
Liebe Frau Ring, es gibt keine verkürzte Reihe, die Maschenanzahl in A.2 wechselt je nach den Zunahmen und die abgekettenen Maschen. Es kann vielleicht helfen, A.2 mit einer anderen Wolle extra zu stricken, um zu trainieren. Viel Spaß beim stricken!
04.01.2024 - 16:03
![]() Sandra Ring wrote:
Sandra Ring wrote:
Hallo, ich habe es gefunden, die erste Frage, bezüglich A2, in der Beschreibung. 🙄❣️ Ich hätte aber noch einige Fragen zu A2. Ich stricke gerade das rechte Vorderteil. Bei der 4. Reihe fehlt mir dann eine Masche (im Diagramm ist das eine rechts verschränkte Masche, genau da wo meine Bruchkante ist. Ignoriere ich dann diese rechts verschränkte und stricke diese Masche links, dass es eine Bruchkante bleibt?
04.01.2024 - 14:35DROPS Design answered:
Liebe Frau Ring, es wird bei der 1. Reihe A.2 2 Maschen zugenommen, so sind es 9 Maschen bei der 2. und 3. Reihe, bei der 4. Reihe ketten Sie die 2 ersten Maschen ab, dann stricken Sie die letzten Maschen wie beschrieben. Viel Spaß beim stricken!
04.01.2024 - 16:01
![]() Sandra Ring wrote:
Sandra Ring wrote:
Hallo, ich habe es gefunden, on der Beschreibung. 🙄❣️
03.01.2024 - 19:43
![]() Sandra Ring wrote:
Sandra Ring wrote:
Hallo, liebes Drops Team, Ich bin beim rechten Vorderteil am Anfang/Bund. Erste Reihe ist gestrickt und Rückrunde habe ich auch. (A2 in Pfeilrichtung??? Ist das korrekt??? Und die nächste Reihe darüber wird das Diagramm von links nach rechts gelesen und gestrickt? Vielen herzlichen Dank für Ihre Bemühungen.
03.01.2024 - 19:26
![]() Lone wrote:
Lone wrote:
I opskrift drops 232-48, ser det ud til at der er en hækletkant, men jeg kan ikke læse mig frem til det, eller er mig som ser forkert ??. H. Lone
19.06.2023 - 19:53DROPS Design answered:
Hej Lone, Flæsekanten strikkes på ifølge diagrammet, som du finder til højre for måleskitsen nederst i opskriften :)
22.06.2023 - 14:10
![]() Ingrid Ehret wrote:
Ingrid Ehret wrote:
Liebes Drops Team, dannke für diew schnelle dAntwort. Das heißt ich beginne beim rechten Vorderteil mit dem Ende der 1. Reihe (Reihe mit dem Pfeil). und beim linke fange ich die Reihe am Pfeil an. Habe ich es verstanden. Vielen Dank
09.01.2023 - 10:11DROPS Design answered:
Liebe Frau Ehret, A.2 beginnen Sie bei dem Pfeil an beiden Vorderteile, den die Maschen von A.2 am Ende der 1. Reihe (egal ob Hin- oder Rückreihe ist) gestrickt werden. Viel Spaß beim stricken!
09.01.2023 - 11:13
|
||||||||||||||||||||||||||||||||||
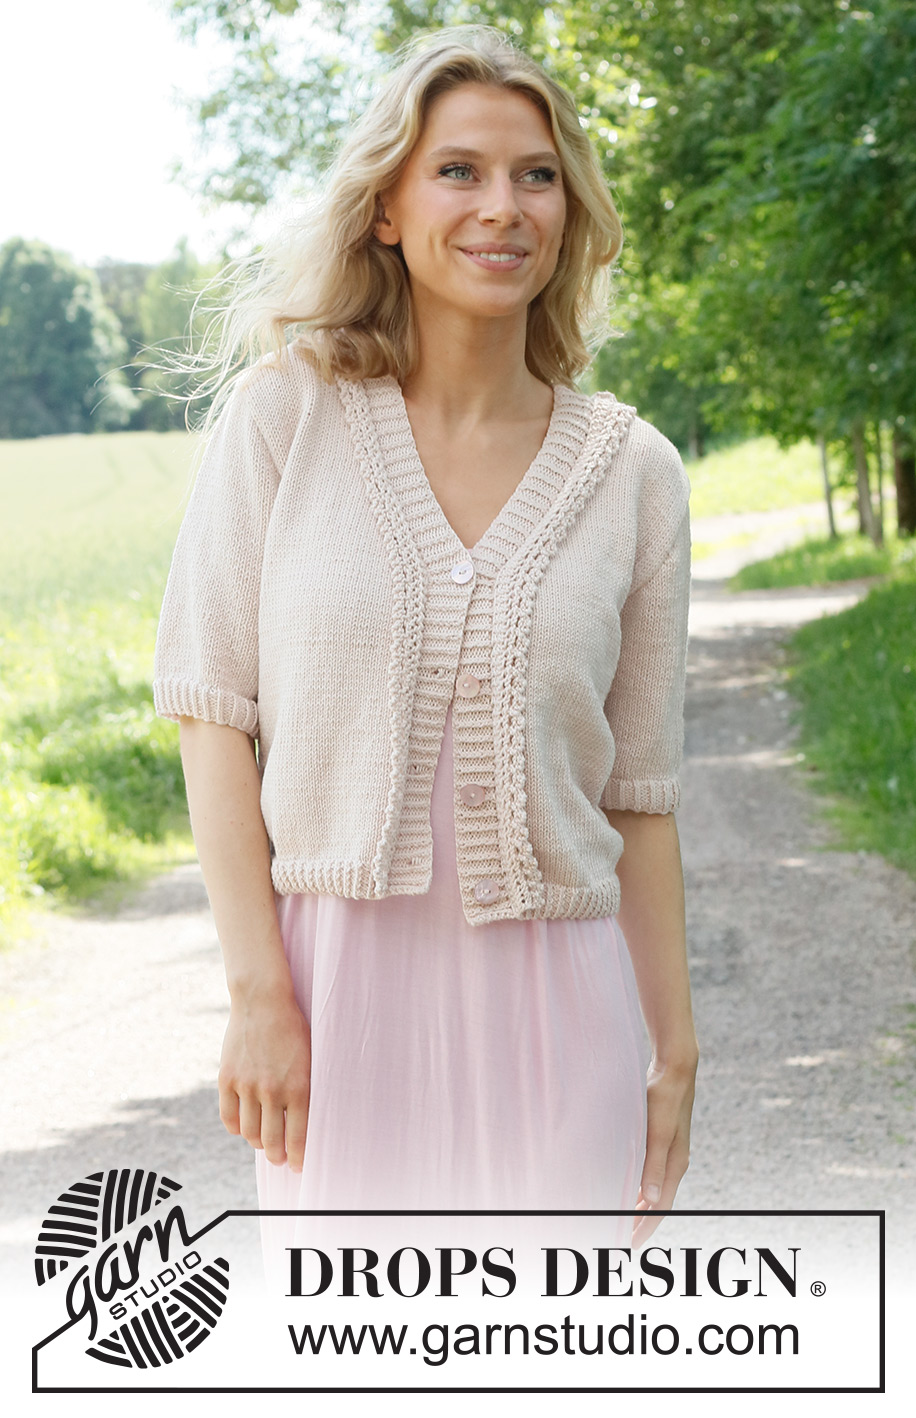
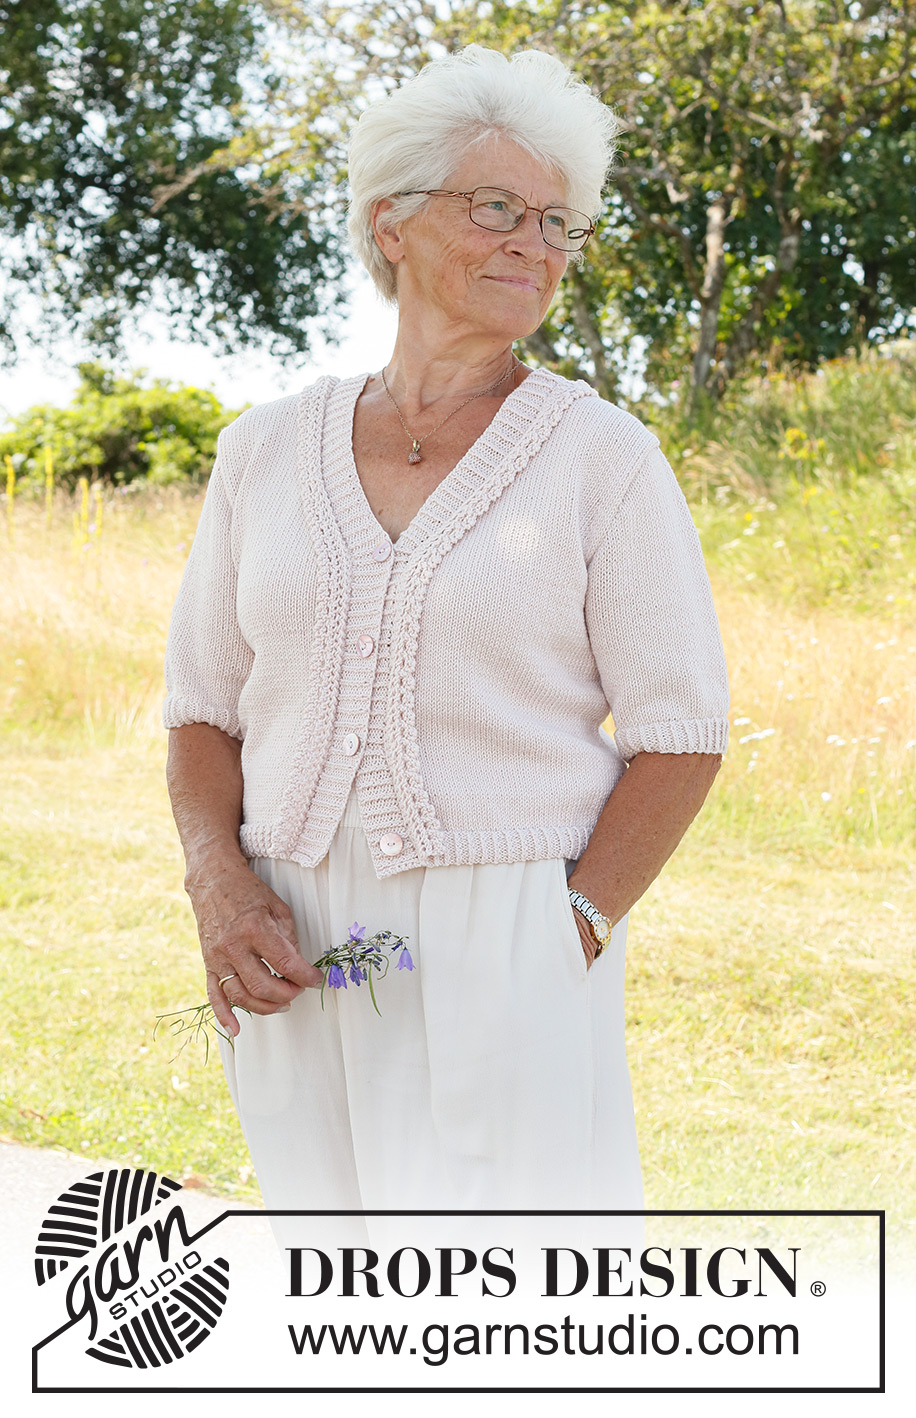
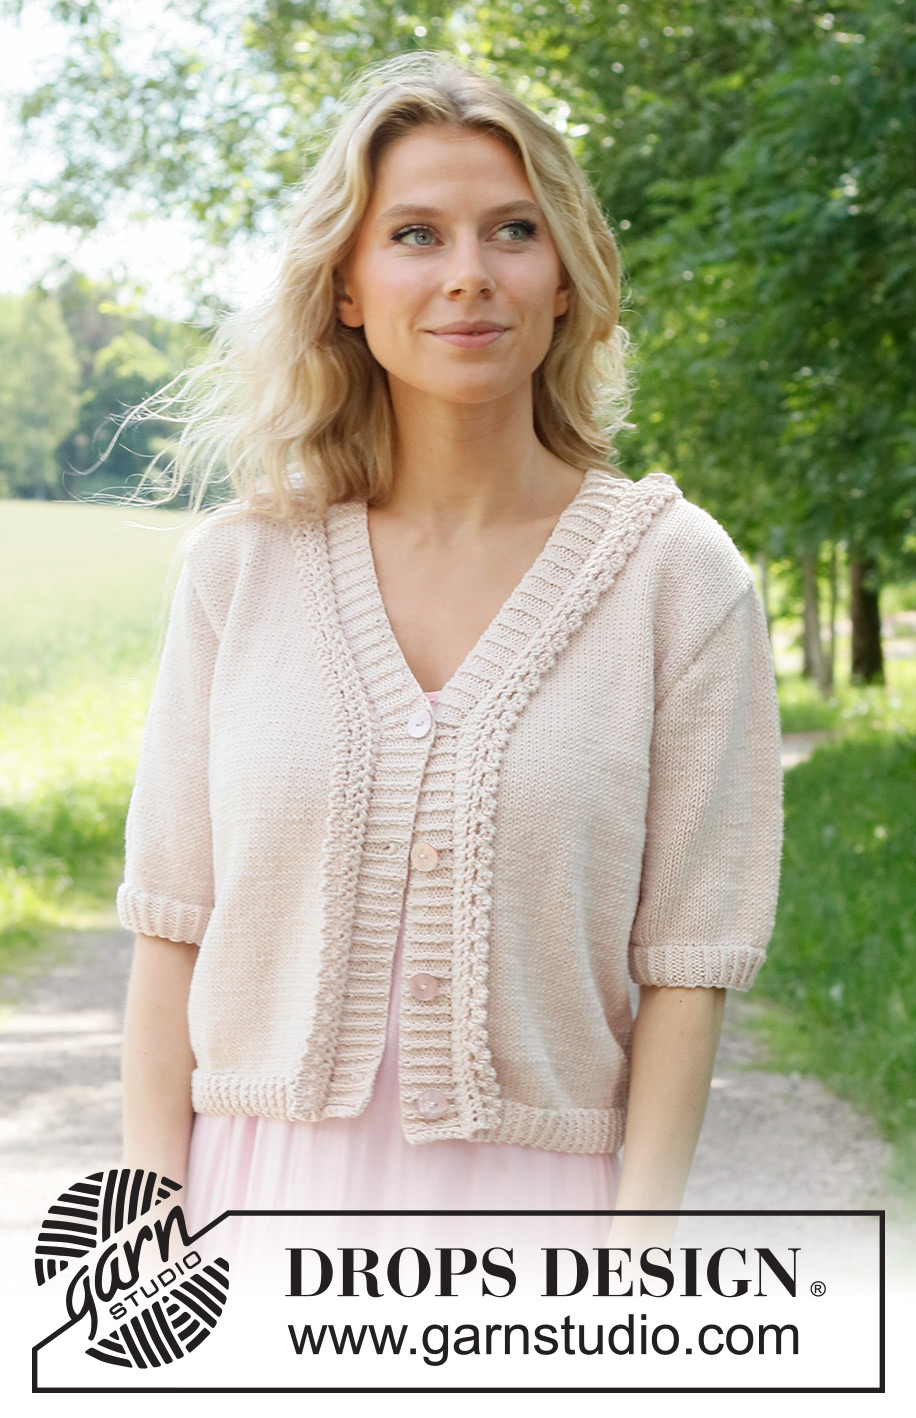
Evening Walk Cardigan#eveningwalkcardigan |
||||||||||||||||||||||||||||||||||
 |
 |
|||||||||||||||||||||||||||||||||
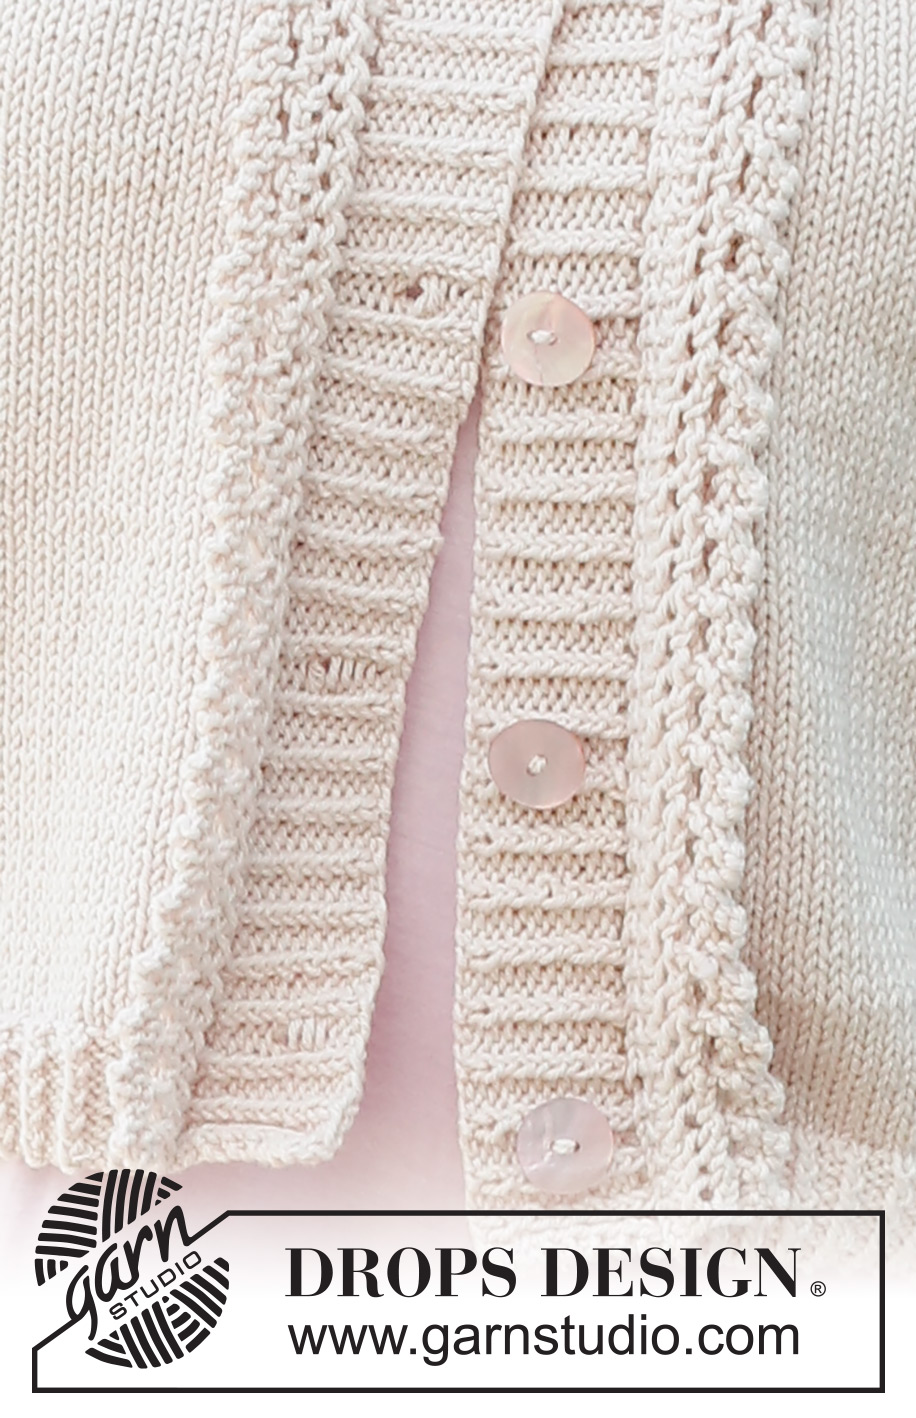
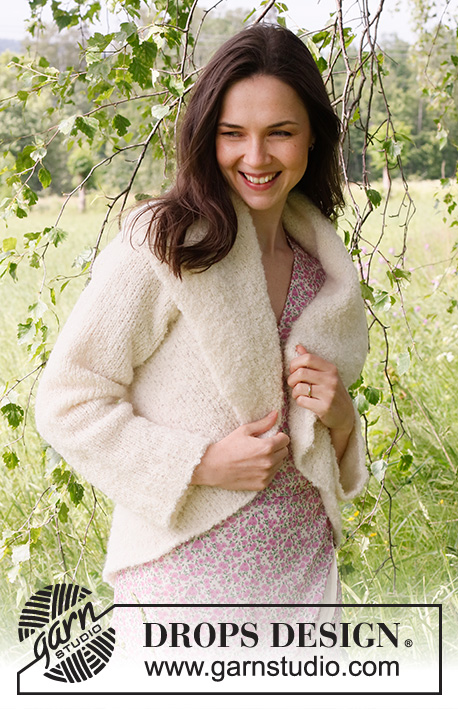
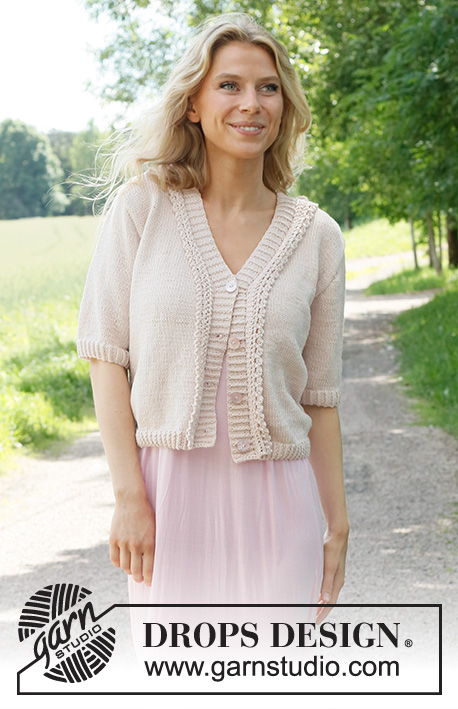
Knitted jacket in DROPS Cotton Merino. The piece is worked bottom up in stocking stitch with short sleeves and flounces. Sizes S - XXXL.
DROPS 232-48 |
||||||||||||||||||||||||||||||||||
|
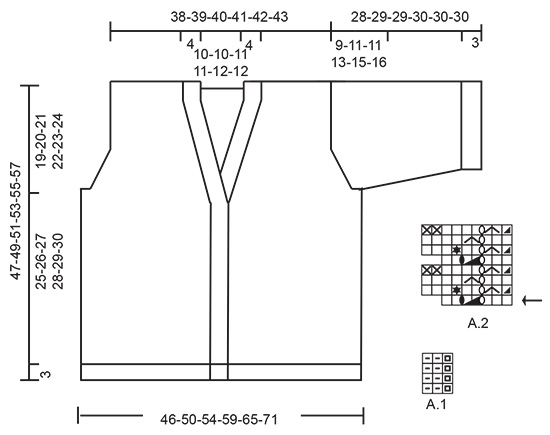
------------------------------------------------------- EXPLANATIONS FOR THE PATTERN: ------------------------------------------------------ RIDGE/GARTER STITCH (worked back and forth): Knit all rows. 1 ridge = knit 2 rows. PATTERN: See diagrams A.1 and A.2. The diagrams show all rows in the pattern from the right side. SHORT ROWS (for front pieces): To allow the flounces (A.2) to lie neatly, short rows are worked on the front pieces. Right front piece: Start on the 7th row of pattern and work from the wrong side: Work as far as the knitted stitch before A.2 (= folding edge), turn, tighten the strand and work back. Repeat every 12th row until the beginning of the V-neck. Left front piece: Start on the 7th row of pattern and work from the right side: Work as far as the purled stitch before A.2 (= folding edge), turn, tighten the strand and work back. Repeat every 12th row until the beginning of the V-neck. DECREASE TIP-1 (evenly spaced): To work out how to decrease evenly, count the total number of stitches on needle (e.g. 117 stitches) minus the edge stitches (e.g. 2 stitches) and divide the remaining stitches by the number of decreases to be made (e.g. 19) = 6. In this example decrease by knitting together each 5th and 6th stitch. DECREASE TIP-2: Decrease 1 stitch on each side as follows: Work 1 edge stitch in garter stitch, knit 3, slip 1 stitch as if to knit, knit 1 and pass the slipped stitch over the knitted stitch (= 1 stitch decreased), work until there are 6 stitches left, knit 2 together (= 1 stitch decreased), knit 3, 1 edge stitch in garter stitch. Decrease 2 stitches on each side as follows: Work 1 edge stitch in garter stitch, knit 3, slip 1 stitch as if to knit, knit 2 together and pass the slipped stitch over the knitted together stitches (= 2 stitches decreased), work until there are 7 stitches left, knit 3 together (= 2 stitches decreased), knit 3, 1 edge stitch in garter stitch. INCREASE TIP (for sleeves): Work until there are 2 stitches left before the marker thread, 1 yarn over, knit 4 (marker thread sits between these 4 stitches), 1 yarn over (2 stitches increased). On the next round knit the yarn overs twisted to avoid holes. Then work the new stitches in stocking stitch. CASTING-OFF TIP: To avoid the cast-off edge being tight you can cast off with a larger size needle. If the edge is still tight, make 1 yarn over after approx. each 4th stitch at the same time as casting off; the yarn overs are cast off as normal stitches. ------------------------------------------------------- START THE PIECE HERE: ------------------------------------------------------- JACKET – SHORT OVERVIEW OF THE PIECE: The back and front pieces are worked separately back and forth. The flounces are worked on the front pieces. The sleeves are worked in the round with double pointed needles/short circular needle as far as the sleeve cap, then finished back and forth. The piece is sewn together and the bands worked to finish. BACK PIECE: Cast on 117-126-138-150-165-183 stitches (including 1 edge stitch on each side) with circular needle size 3 mm and DROPS Cotton Merino. Work rib as follows: 1 edge stitch in GARTER STITCH – read description above, A.1 until there are 2 stitches left, work the first stitch in A.1 so the rib is symmetrical and 1 edge stitch in garter stitch. Continue this rib back and forth for 3 cm. Knit 1 row from the right side where you decrease 19-20-22-24-27-31 stitches evenly spaced – read DECREASE TIP-1 = 98-106-116-126-138-152 stitches. Change to circular needle size 4 mm. Purl 1 row with 1 edge stitch in garter stitch on each side. Continue with stocking stitch and 1 edge stitch in garter stitch on each side. REMEMBER THE KNITTING TENSION! When the piece measures 28-29-30-31-32-33 cm, cast off 4-4-5-6-7-8 stitches at the beginning of the next 2 rows for the armholes. Then start decreasing on both sides – read DECREASE TIP-2. Decrease 2 stitches every 2nd row (each row from the right side) 0-0-0-3-5-8 times, 1 stitch every 2nd row (each row from the right side) 3-6-9-6-6-5 times and 1 stitch every 4th row (every 2nd row from the right side) 2-2-2-2-2-2 times = 80-82-84-86-88-90 stitches. Continue working until the piece measures 45-47-49-51-53-55 cm. Now cast off the middle 36-36-38-38-40-40 stitches for the neck and finish each shoulder separately. Cast off 1 stitch on the next row from the neck = 21-22-22-23-23-24 stitches on the shoulder. Continue working until the piece measures 47-49-51-53-55-57 cm. Cast off. Work the other shoulder in the same way. RIGHT FRONT PIECE: Cast on 66-72-78-84-90-99 stitches (including 1 edge stitch towards the side and stitches for the flounce-edge towards mid-front) with circular needle size 3 mm and DROPS Cotton Merino. Work rib as follows: Knit 7, purl 1, A.1 until there is 1 stitch left, 1 edge stitch in garter stitch. The next row from the wrong side is worked as follows: 1 edge stitch in garter stitch, work rib as before over the next 57-63-69-75-81-90 stitches, knit 1 (= folding edge; this stitch is purled from the right side and knitted from the wrong side onwards) work A.2 over the last 7 stitches (= flounce-edge). The number of stitches in A.2 will vary, depending on which row you are working. Continue back and forth like this for 3 cm, then work the next row from the right side as follows: Work A.2 as before, purl 1 (= folding edge), knit until there is 1 stitch left and decrease 9-11-12-13-13-15 stitches evenly over these stitches – remember DECREASE TIP-1, 1 edge stitch in garter stitch = 57-61-66-71-77-84 stitches (when there are 7 stitches in A.2) Change to circular needle size 4 mm. Work as follows: 1 edge stitch in garter stitch, purl as far as the folding edge, knit 1 (= folding edge), work A.2 as before. Continue back and forth with stocking stitch, 1 edge stitch in garter stitch towards the side, the folding edge and A.2 towards mid-front, at the same time as you work SHORT ROWS – see description above. OVERVIEW OF THE NEXT SECTION: Now cast off for the armholes as well as working the V-neck. Read V-NECK and ARMHOLE before continuing. V-NECK: When the piece measures 26-27-28-29-30-31 cm, start to decrease for the V-neck on the next row from the right side: Work the edge, purl 1 (= folding edge), knit 1, slip 1 stitch as if to knit, knit 1 and pass the slipped stitch over the knitted stitch (= 1 stitch decreased), work to the end of the row. Decrease like this every 4th row 1-1-1-1-1-1 time, every 2nd row 12-12-13-13-14-14 times and every 4th row 5-5-5-5-5-5 times (= 18-18-19-19-20-20 stitches decreased for the V-neck). ARMHOLE: When the piece measures 28-29-30-31-32-33 cm, cast off 4-4-5-6-7-8 stitches at the beginning of the next row from the wrong side. Work to the end of the row. At the end of the next row from the right side, decrease for the armhole in the same way as on the back piece (i.e. 5-8-11-14-18-23 stitches + the 4-4-5-6-7-8 stitches cast off earlier). When all the decreases for the neck and armhole are finished there are 22-23-23-24-24-25 stitches on the shoulder + 8 stitches on the edge (= folding edge + A.2). Continue working until the piece measures 47-49-51-53-55-57 cm. Cast off. LEFT FRONT PIECE: Cast on 66-72-78-84-90-99 stitches (including 1 edge stitch towards the side and stitches for the flounce-edge towards mid-front) with circular needle size 3 mm and DROPS Cotton Merino. Work rib as follows: 1 edge stitch in garter stitch, work the last 2 stitches in A.1, work A.1 until there are 9 stitches left, the first stitch in A.1, purl 1 (= folding edge; this stitch is purled from the right side and knitted from the wrong side onwards) and A.2 over the last 7 stitches. The number of stitches in A.2 will vary depending on which row you are working. Continue back and forth like this for 3 cm, then work the next row from the right side as follows: 1 edge stitch in garter stitch, knit as far as the folding edge and decrease 9-11-12-13-13-15 stitches evenly over these stitches, purl 1 (= folding edge), work A.2 = 57-61-66-71-77-84 stitches (when there are 7 stitches in A.2) Change to circular needle size 4 mm. Work back as follows: A.2, knit 1 (= folding edge), purl until there is 1 stitch left and 1 edge stitch in garter stitch. Continue back and forth with stocking stitch, 1 edge stitch in garter stitch towards the side and the folding edge and A.2 towards mid front, at the same time as you work SHORT ROWS as on the right front piece. OVERVIEW OF THE NEXT SECTION: Now cast off for the armholes as well as working the V-neck. V-NECK: When the piece measures 26-27-28-29-30-31 cm, start to decrease for the V-neck on the next row from the right side: Work until there are 3 stitches left before the folding edge, knit 2 together (1 stitch decreased),work to the end of the row. Decrease like this every 4th row 1-1-1-1-1-1 time, every 2nd row 12-12-13-13-14-14 times and every 4th row 5-5-5-5-5-5 times (= 18-18-19-19-20-20 stitches decreased for the V-neck). ARMHOLE: When the piece measures 28-29-30-31-32-33 cm, cast off 4-4-5-6-7-8 stitches at the beginning of the next row from the right side then decrease for the armhole in the same way as on the back piece (i.e. 5-8-11-14-18-23 stitches + the 4-4-5-6-7-8 stitches cast off earlier). When all the decreases for the neck and armhole are finished there are 22-23-23-24-24-25 stitches on the shoulder + 8 stitches on the edge (= folding edge + A.2). Continue working until the piece measures 47-49-51-53-55-57 cm. Cast off. SLEEVES: Cast on 72-78-87-93-99-108 stitches with double pointed needles size 3 mm and DROPS Cotton Merino. Work A.1 in the round for 3 cm. Knit 1 round where you decrease 13-14-15-15-15-17 stitches evenly spaced – remember DECREASE TIP-1 = 59-64-72-78-84-91 stitches. Insert 1 marker thread at the beginning of the round (= mid-under the sleeve). Allow the thread to follow your work onwards; it is used when increasing under the sleeve. Change to double pointed needles size 4 mm and work stocking stitch. When the sleeve measures 6 cm, increase 1 stitch on each side of the marker thread – read INCREASE TIP. Increase like this every 1½-1½-2-2-1½-2 cm a total of 6-6-5-4-4-3 times = 71-76-82-86-92-97 stitches. Continue working until the sleeve measures 19-18-18-17-15-14 cm (shorter measurements in larger sizes due to wider shoulders and longer sleeve cap). Now cast off 8-8-10-12-14-16 stitches mid-under the sleeve = 63-68-72-74-78-81 stitches. Continue back and forth and cast off for the sleeve cap at the beginning of every row on each side as follows: 2 stitches 4-3-4-3-2-1 times, 1 stitch 2-7-6-11-16-20 times and 2 stitches 5-4-4-3-2-1 times = 23-26-28-28-30-33 stitches. Cast off the remaining stitches. The sleeve measures approx. 28-29-29-30-30-30 cm. Work the other sleeve in the same way. ASSEMBLY: Fold the flounces to the right side along the folding edge and sew the flounce-edge into the shoulder seam – the shoulder seam is sewn inside the cast-off edge. Sew the sleeves to the body inside the edge stitch on the body and the cast-off edge on the sleeves. Sew the side seams from the armhole down, inside the edge stitch. Insert a marker mid-back of neck. RIGHT BAND: Make sure the flounces are folded to the right side and knit up stitches as follows: Start at the bottom of the right front piece and knit up stitches in the knitted stitch (folding edge on the wrong side) as follows: 1 stitch in each stitch as far as the shoulder seam (= approx. 132-137-143-148-154-160 stitches), and 23-23-24-24-25-25 stitches inside 1 stitch to the marker mid-back. Work as follows: ROW 1 (wrong side): 1 edge stitch in garter stitch, purl until there is 1 stitch left at the same time as you increase with yarn overs at the bottom of the V-neck as follows: * knit 1, 1 yarn over *, work from *-* 3 times and the number of stitches is adjusted to a total of 141-147-153-159-165-171 stitches (including 1 edge stitch in garter stitch at the end of the row). ROW 2 (right side): 1 edge stitch in garter stitch, A.1 until there are 2 stitches left, work the first stitch in A.1, 1 edge stitch in garter stitch. Continue back and forth like this for 2 cm. Now work the buttonholes as follows (it is neatest if the buttonholes are worked where you have 2 purled stitches): 1 buttonhole: Purl 2 together and make 1 yarn over. The bottom buttonhole is 3 cm from the bottom edge and the top buttonhole where the V-neck starts. The other buttonholes are worked with approx. 7½-8-8-8½-9-9 cm between each one. Continue the rib until the band measures 4 cm. Cast off with knit over knit and purl over purl. LEFT BAND: Make sure the flounces are folded to the right side and knit up stitches as follows: Start mid-back of neck and knit up 23-23-24-24-25-25 stitches along the neck as far as the shoulder seam, then 1 stitch in each stitch down the folding edge (= approx. 132-137-143-148-154-160 stitches) Work as follows: ROW 1 (wrong side): 1 edge stitch in garter stitch, purl until there is 1 stitch left, at the same time as you increase with yarn overs at the bottom of the V-neck as follows: * knit 1, 1 yarn over *, work from *-* 3 times and the number of stitches is adjusted to a total of 141-147-153-159-165-171 stitches (including 1 edge stitch in garter stitch at the end of the row). ROW 2 (right side): 1 edge stitch in garter stitch, A.1 until there are 2 stitches left, work the first stitch in A.1, 1 edge stitch in garter stitch. Continue back and forth like this for 4 cm. Cast off with knit over knit and purl over purl. ASSEMBLY: Sew the bands together at the back of the neck, with the seam to the wrong side. Sew the buttons onto the left band. |
||||||||||||||||||||||||||||||||||
Diagram explanations |
||||||||||||||||||||||||||||||||||
|
||||||||||||||||||||||||||||||||||
 |
||||||||||||||||||||||||||||||||||
Have you finished this pattern?Tag your pictures with #dropspattern #eveningwalkcardigan or submit them to the #dropsfan gallery. Do you need help with this pattern?You'll find 39 tutorial videos, a Comments/Questions area and more by visiting the pattern on garnstudio.com. © 1982-2026 DROPS Design A/S. We reserve all rights. This document, including all its sub-sections, has copyrights. Read more about what you can do with our patterns at the bottom of each pattern on our site. |
||||||||||||||||||||||||||||||||||


With over 40 years in knitting and crochet design, DROPS Design offers one of the most extensive collections of free patterns on the internet - translated to 17 languages. As of today we count 325 catalogues and 12298 patterns translated into English (UK/cm). 12298
We work hard to bring you the best knitting and crochet have to offer, inspiration and advice as well as great quality yarns at incredible prices! Would you like to use our patterns for other than personal use? You can read what you are allowed to do in the Copyright text at the bottom of all our patterns. Happy crafting!
Post a comment to pattern DROPS 232-48
We would love to hear what you have to say about this pattern!
If you want to leave a question, please make sure you select the correct category in the form below, to speed up the answering process. Required fields are marked *.