
Popular categories
Looking for a yarn?


Comments / Questions (57)
![]() Petra Wartenberg wrote:
Petra Wartenberg wrote:
In der Ärmelanleitung steht 4 cm ab Teilung anfangen abzunehmen, ich verstehe nicht was mit Teilung gemeint ist
29.01.2025 - 20:39DROPS Design answered:
Liebe Frau Wartenberg, diese 4 cm messen Sie ab die 1. Runde über alle Maschen für den Ärmel. Viel Spaß beim Stricken!
30.01.2025 - 10:35
![]() Susie wrote:
Susie wrote:
What way of increasing do you recommend?
01.12.2024 - 23:41DROPS Design answered:
Hi Susie, We usually recommend making 1 yarn over to increase 1 stitch (which will need to be worked twisted on the next row to avoid a hole). Or you can work 2 stitches in one stitch if you prefer. Happy knitting!
02.12.2024 - 07:12
![]() Edith Pedersen wrote:
Edith Pedersen wrote:
Du skrive at jeg skal slutte med en omslag men jeg har en maske tilbage skal den strikkes ligesom den jeg begynder med
09.11.2024 - 09:04
![]() Edith Pedersen wrote:
Edith Pedersen wrote:
Undskyld det var forkeret skrevet jeg starte med en ret str tre maske slå om og så den hvor man løfte over så tre ret slå om og tre igen det gør jeg pinden ud og slutte men tre r slå om så er der to m i over skud
24.10.2024 - 18:24
![]() Edith Pedersen wrote:
Edith Pedersen wrote:
Jeg har to maske tilbage og har tre maske så slå jeg om så tre masker igen så strikke jeg den der skal løftes en maske over er det forkeret jeg syntes jeg hat to m formeget
24.10.2024 - 17:28
![]() Edith Pedersen wrote:
Edith Pedersen wrote:
Tak
24.10.2024 - 09:57
![]() Edith Pedersen wrote:
Edith Pedersen wrote:
Hvor Dan slutte man første pind i mønster
23.10.2024 - 20:23DROPS Design answered:
Hej Edith, du slutter første omgang med 1 omslag, og fortsætter næste omgang med 1 vrang ifølge diagrammet (du kan sætte 1 mærke imellem hver rapport, så bliver det lettere for dig at se hvor hver rapport starter :)
24.10.2024 - 09:27
![]() Framboizul wrote:
Framboizul wrote:
Merci beaucoup pour vos réponses! Quant au sens de lecture du tricot, je l'ai compris suite à votre première réponse. J'ai bien fait de poser la question, j'aurais fait n'importe quoi!!
16.10.2024 - 13:07
![]() Framboizul wrote:
Framboizul wrote:
Pour que je comprenne bien: sur l'endroit, je tricote 14 x A1 + 1 maille envers , puis sur l'envers 1 maille endroit + 14 x A1?
16.10.2024 - 11:38DROPS Design answered:
Bonjour Framboizul, tout à fait, et pensez à bien lire A.1 de gauche à droite sur l'envers. Bon tricot!
16.10.2024 - 12:38
![]() Framboizul wrote:
Framboizul wrote:
Bonjour, Je tricote ce cardigan en taille M. J'ai bien 151mailles. Est-il normal qu'à chaque rang de A1 j'ai 14 sections de A1 + 1 maille avant la bordure? Est-ce que cette maille est toujours à la fin du rang = un coup à gauche, un coup à droite? Cf " tricoter la première maille de A1 pour que le point fantaisie soit symétrique." Merci de votre réponse !
16.10.2024 - 08:33DROPS Design answered:
Bonjour Framboizul, vous terminez sur l'endroit par la 1ère maille de A.1 pour que le motif soit symétrique sur chaque devant, mais lorsque vous tricotez sur l'envers, tricotez cette maille (= la 1ère maille de A.1 vu sur l'endroit = la 1ère m à droite dans le diagramme) et continuez A.1 en lisant le diagramme de gauche à droite. Autrement dit, vous aurez 1 maille envers sur l'endroit (endroit sur l'envers) après/avant les mailles de bordure devant. Bon tricot!
16.10.2024 - 09:23
|
|||||||||||||
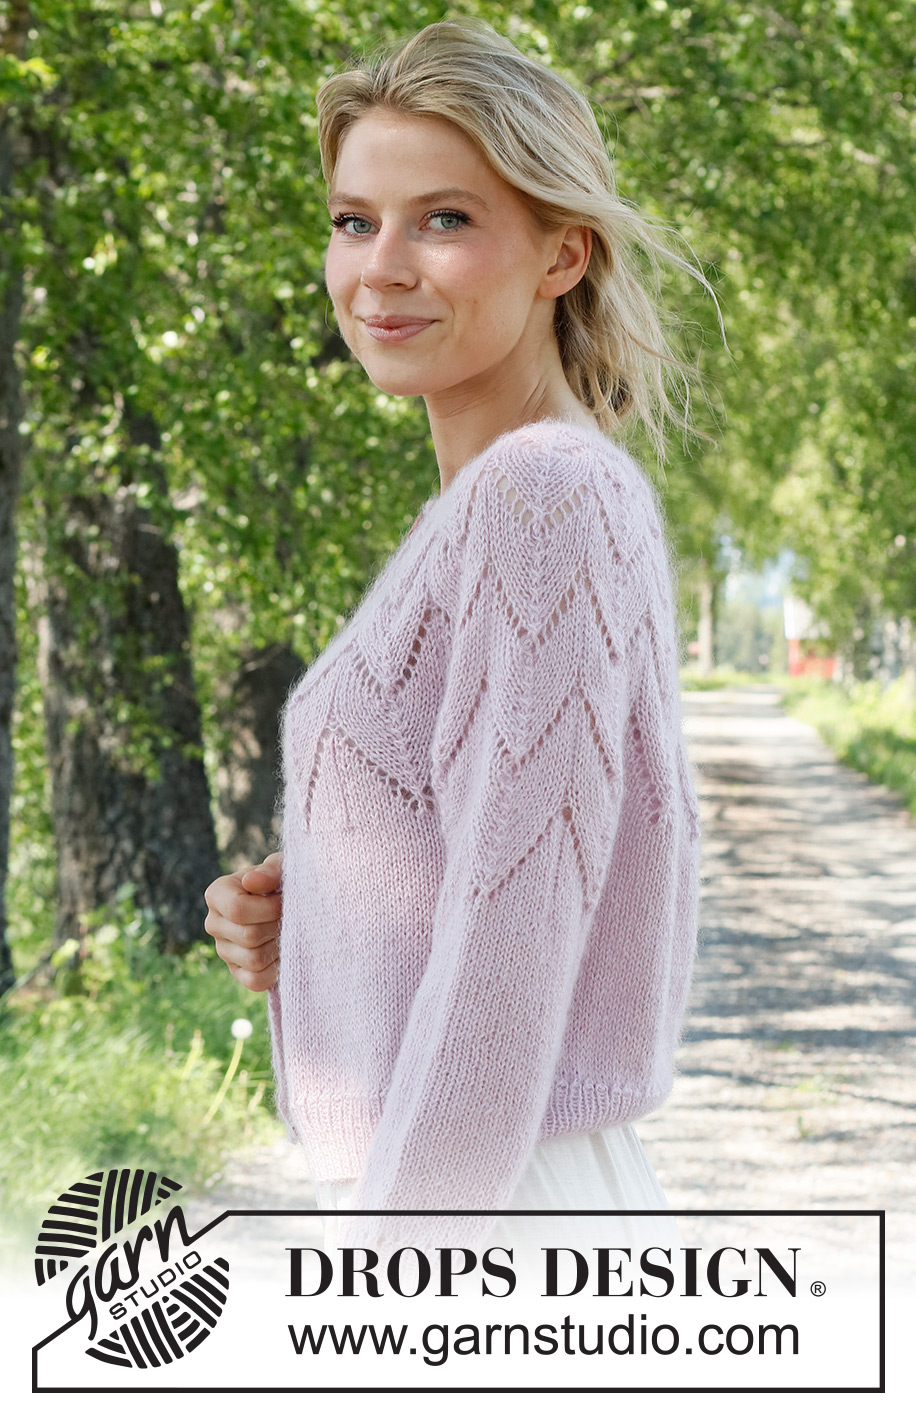
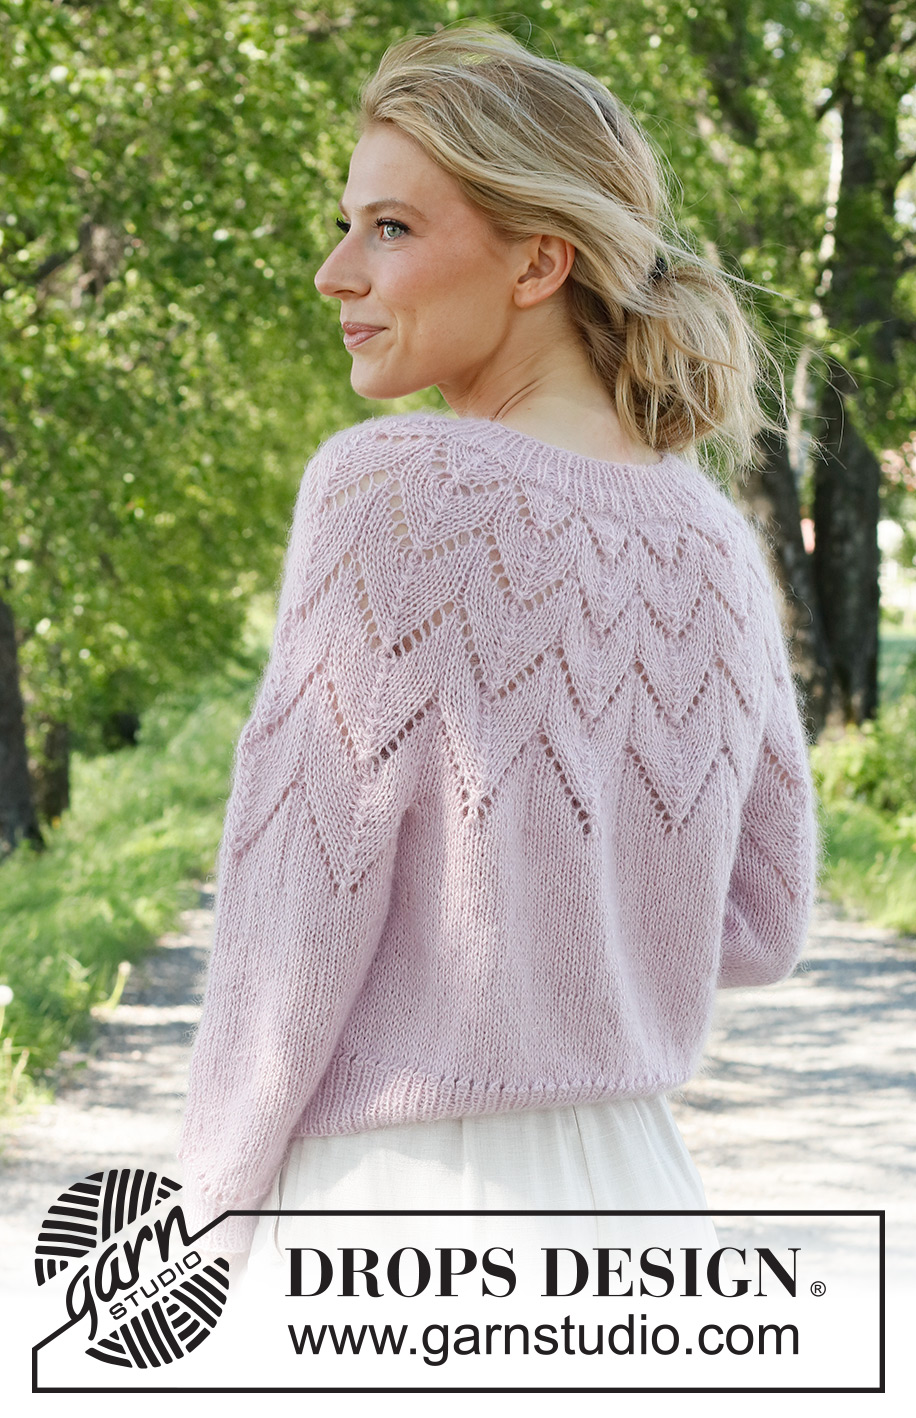
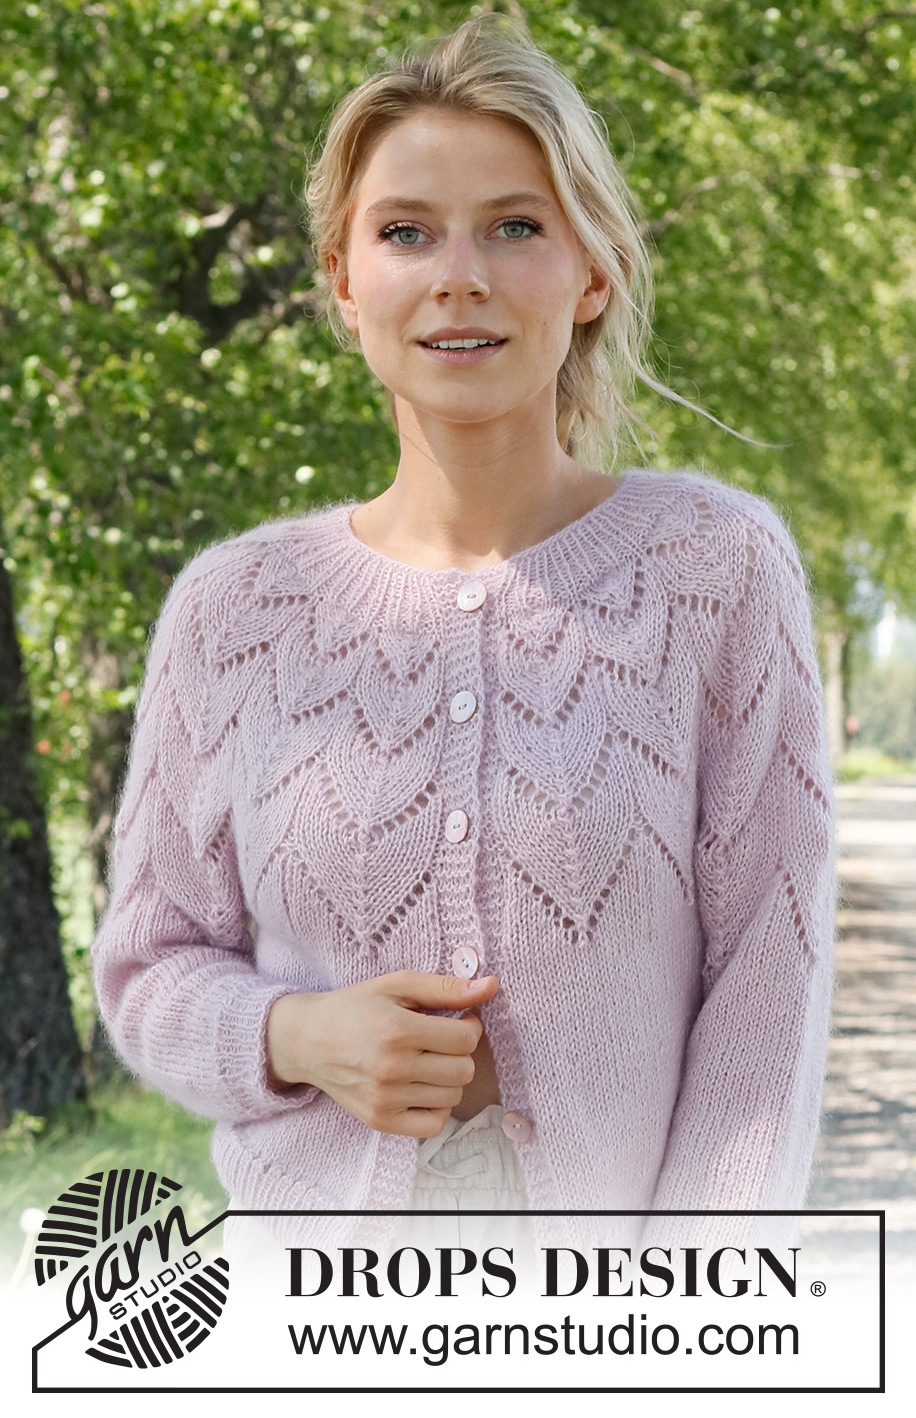
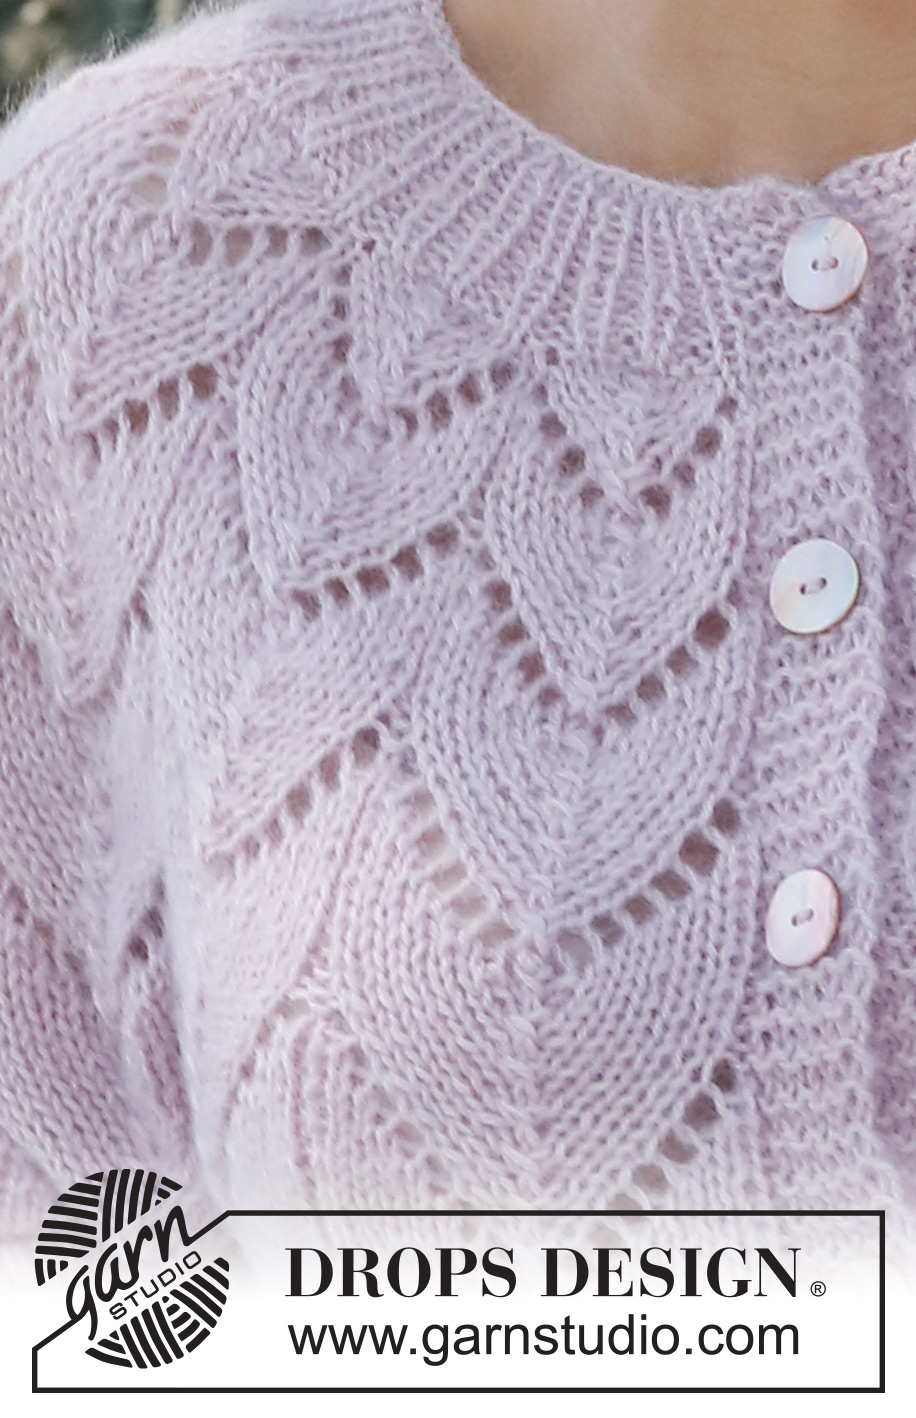
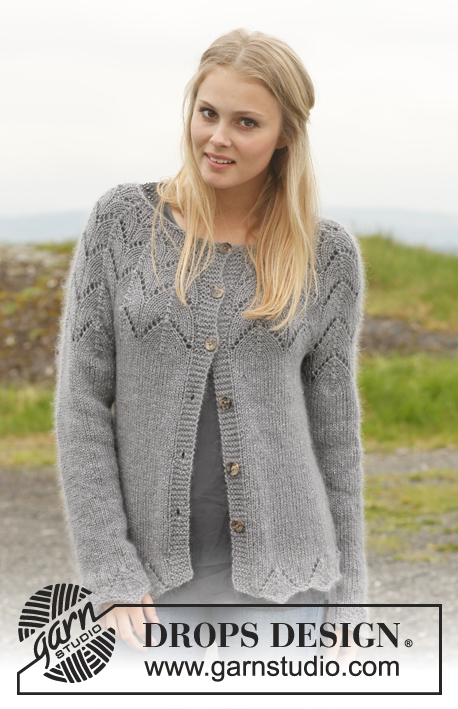
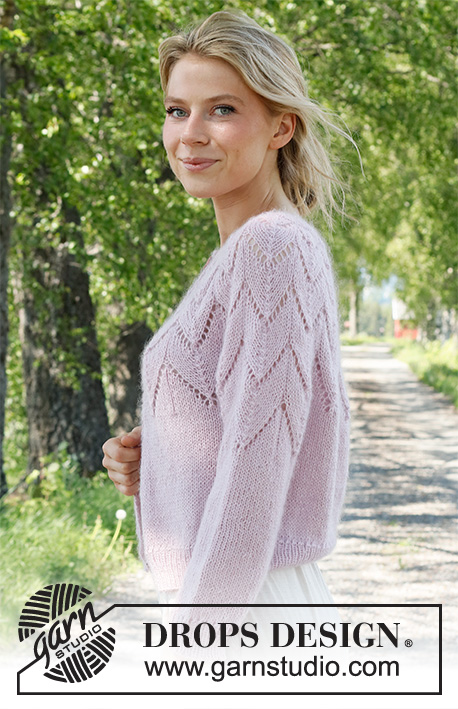
Wishing Well Cardigan#wishingwellcardigan |
|||||||||||||
 |
 |
||||||||||||
Knitted jacket in DROPS Alpaca and DROPS Kid-Silk. The piece is worked top down, with round yoke and lace pattern. Sizes S - XXXL.
DROPS 231-10 |
|||||||||||||
|
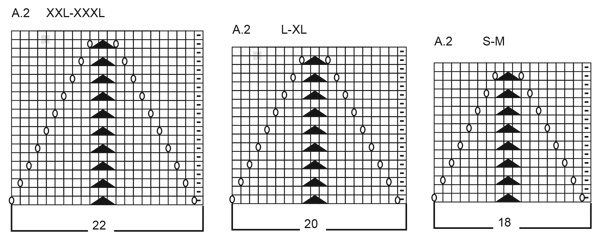
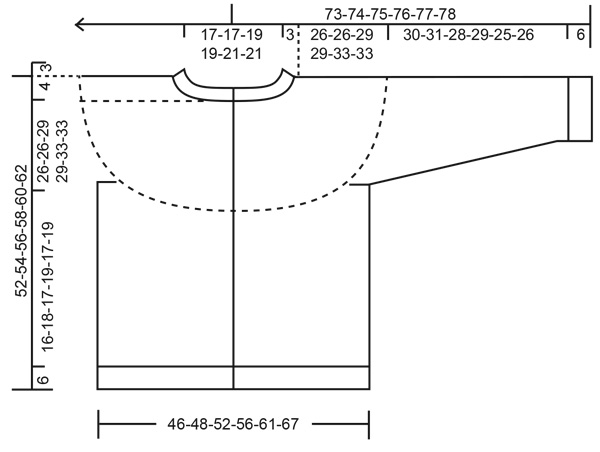
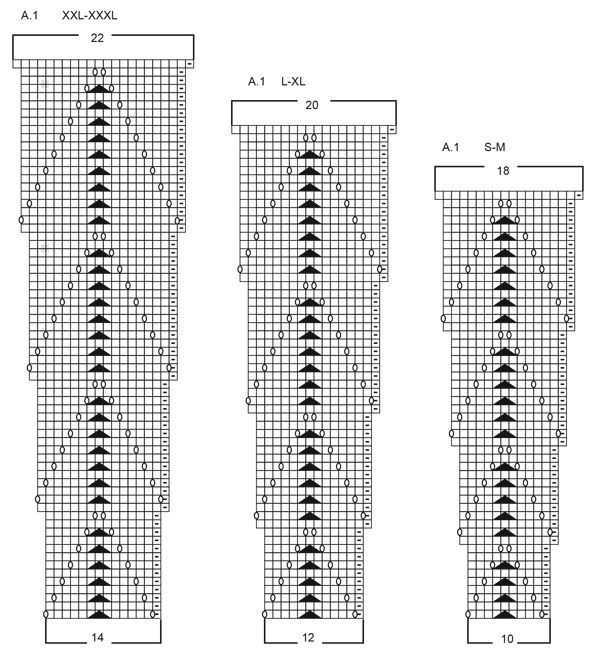
------------------------------------------------------- EXPLANATIONS FOR THE PATTERN: ------------------------------------------------------- RIDGE/GARTER STITCH (worked back and forth): Knit all rows. 1 ridge = knit 2 rows. PATTERN: See diagrams A.1 and A.2. The diagrams show all rows in the pattern from the right side. Choose diagram for your size. BUTTONHOLES: Work the buttonholes on the right band (when the garment is worn). 1 buttonhole: From the right side, work until there are 3 stitches left, make 1 yarn over, knit 2 together, knit 1. On the next row (wrong side) knit the yarn over to leave a hole. The first buttonhole is worked when the neck measures 3 cm, then the other 5-5-5-6-6-6 buttonholes with approx. 8½-9-9-8-8-9 cm between each one. DECREASE TIP (sleeves): Decrease 1 stitch on either side of the marker as follows: Work until there are 3 stitches left before the marker, knit 2 together, knit 2 (marker sits between these 2 stitches), slip 1 stitch as if to knit, knit 1 and pass the slipped stitch over the knitted stitch. ------------------------------------------------------- START THE PIECE HERE: ------------------------------------------------------- JACKET – SHORT OVERVIEW OF THE PIECE. The neck and yoke are worked back and forth with circular needle, from mid front and top down. The yoke is divided for body and sleeves and the body continued back and forth. The sleeves are worked in the round with double pointed needles/short circular needle, top down. NECK/YOKE: Cast on 95-95-101-101-107-107 stitches with circular needle size 4 mm and 1 strand DROPS Kid-Silk and 1 strand DROPS Alpaca. Purl 1 row (wrong side). The next row is worked as follows from the right side: 5 band stitches in GARTER STITCH – read description above, * knit 1, purl 1 *, work from *-* until there are 6 stitches left, knit 1 and 5 band stitches in garter stitch. Continue this rib for 3 cm. Work the first BUTTONHOLE on the right band – read description above. On the next row from the right side increase 1 stitch at the end of each purled section by making 1 yarn over. On the next row (wrong side) knit the yarn overs twisted = 137-137-146-146-155-155 stitches. Continue as follows from the right side: 5 band stitches in garter stitch, * knit 1, purl 2 *, work from *-* until there are 6 stitches left, knit 1 and 5 band stitches in garter stitch. Continue the new rib until the neck measures 5 cm; finish after a row from the wrong side. Knit 1 row from the right side where you increase 14-14-33-33-52-52 stitches evenly spaced = 151-151-179-179-207-207 stitches (do not increase over the bands). Change to circular needle size 5 mm. Purl 1 row from the wrong side (yarn overs purled twisted and bands knitted). The next row is worked as follows from the right side: 5 band stitches in garter stitch, A.1 over the next 140-140-168-168-196-196 stitches, work the first stitch in A.1 (so the pattern is symmetrical) and 5 band stitches in garter stitch. Work and increase according to A.1. When A.1 has been completed in height there are 263-263-291-291-319-319 stitches on the needle. The piece measures approx. 26-26-29-29-33-33 cm from the cast-on edge. Divide for the body on the next row as follows: Work the first 41-41-45-45-49-49 stitches (front piece), place the next 54-54-60-60-66-66 stitches on a thread for the sleeve, cast on 6-8-8-10-10-14 stitches (in side under sleeve), work 72-72-80-80-88-88 stitches (back piece), place the next 54-54-60-60-66-66 stitches on a thread for the sleeve, cast on 6-8-8-10-10-14 stitches (in side under sleeve), work the remaining 42-42-46-46-50-50 stitches (front piece). The body and sleeves are finished separately. BODY: = 167-171-187-191-207-215 stitches. Continue back and forth with stocking stitch and 5 band stitches in garter stitch on each side and on the first row increase 0-2-0-8-10-24 stitches evenly spaced = 167-173-187-199-217-239 stitches. When the piece measures 16-18-17-19-17-19 cm from the division work as follows from the right side: 5 band stitches in garter stitch, * knit 2 together, 1 yarn over *, work from *-* until there are 6 stitches left, knit 1 and 5 band stitches in garter stitch. Change to circular needle size 4 mm and work as follows from the wrong side: 5 band stitches in garter stitch, * purl 1, knit 1 *, work from *-* until there are 6 stitches left, purl 1 and 5 band stitches in garter stitch. Continue this rib for 6 cm. Cast off. The jacket measures approx. 52-54-56-58-60-62 cm from the shoulder down. SLEEVES: Place the 54-54-60-60-66-66 stitches from the thread on the one side of the piece on double pointed needles/short circular needle size 5 mm and knit up 1 stitch in each of the 6-8-8-10-10-14 stitches cast on under the sleeve = 60-62-68-70-76-80 stitches. Insert a marker in the middle of the 6-8-8-10-10-14 stitches under the sleeve. Allow the marker to follow your work onwards; it will be used when decreasing under the sleeve. Start at the marker and work 3-4-4-5-5-7 stitches in stocking stitch, A.2 over the next 54-54-60-66-66 stitches and 3-4-4-5-5-7 stitches in stocking stitch. When A.2 has been completed in height continue with stocking stitch over all stitches. When the sleeve measures 4 cm decrease 2 stitches under the sleeve – read DECREASE TIP. Decrease like this every 3½-3½-2½-2½-1½-1½ cm a total of 8-8-10-10-12-13 times = 44-46-48-50-52-54 stitches. Continue working until the sleeve measures 30-31-28-29-25-26 cm from the division. Work the next round as follows: * Knit 2 together, 1 yarn over *, work from *-* over all stitches. Change to double pointed needles size 4 mm. Work rib (knit 1, purl 1) for 6 cm. Cast off. The sleeve measures approx. 36-37-34-35-31-32 cm from the division. Work the other sleeve in the same way. ASSEMBLY: Sew the buttons onto the left band. |
|||||||||||||
Diagram explanations |
|||||||||||||
|
|||||||||||||
 |
|||||||||||||
 |
|||||||||||||
 |
|||||||||||||
Have you finished this pattern?Tag your pictures with #dropspattern #wishingwellcardigan or submit them to the #dropsfan gallery. Do you need help with this pattern?You'll find 33 tutorial videos, a Comments/Questions area and more by visiting the pattern on garnstudio.com. © 1982-2026 DROPS Design A/S. We reserve all rights. This document, including all its sub-sections, has copyrights. Read more about what you can do with our patterns at the bottom of each pattern on our site. |
|||||||||||||


With over 40 years in knitting and crochet design, DROPS Design offers one of the most extensive collections of free patterns on the internet - translated to 17 languages. As of today we count 324 catalogues and 12290 patterns translated into English (UK/cm). 12290
We work hard to bring you the best knitting and crochet have to offer, inspiration and advice as well as great quality yarns at incredible prices! Would you like to use our patterns for other than personal use? You can read what you are allowed to do in the Copyright text at the bottom of all our patterns. Happy crafting!
Post a comment to pattern DROPS 231-10
We would love to hear what you have to say about this pattern!
If you want to leave a question, please make sure you select the correct category in the form below, to speed up the answering process. Required fields are marked *.