
Popular categories
Looking for a yarn?


Comments / Questions (55)
![]() PAULET Hélène wrote:
PAULET Hélène wrote:
Bonjour, je suis actuellement dans la lecture et compréhension des explications. je n'ai jamais commencé un tricot par le haut, ça sera une grande première ! je souhaiterais tricoter ce modèle en Kid Silk mais avec 2 brins , je crains qu'en simple file la tenue soit médiocre. J'ai acheté 16 pelotes Qu'en pensez vous et avec quelle aiguille ? merci de votre réponse
24.05.2020 - 13:02DROPS Design answered:
Bonjour Mme Paulet, ce modèle se tricote avec 1 seul fil Kid-Silk et un échantillon de 23 m x 30 rangs = 10 x 10 cm; si vous tricotez avec le fil en double, vous n'aurez pas cette tension, il vous faudra alors soit tout recalculer soit trouver un modèle se tricotant avec 2 fils Kid-Silk (ou 2 fils du groupe A/1 fil du groupe C). Vous trouverez ici plus d'infos sur les alternatives 25.05.2020 - 09:48
![]() Gwenaëlle David wrote:
Gwenaëlle David wrote:
Pardon de prendre de votre temps. Je ne sais pas expliquer, j'ai présumé de mes compétences en tricot. Ne tenez pas compte de ces lignes . Pardon encore d'utiliser votre temps.
31.03.2020 - 13:34DROPS Design answered:
Bonjour Mme David, êtes-vous sûre? N'hésitez pas à indiquer votre taille et où vous en êtes exactement, si nous pouvons vous aider, ce sera avec plaisir. Vous pouvez également demander de l'aide à votre magasin DROPS ou dans notre groupe DROPS Workshop. Bon tricot!
31.03.2020 - 13:53
![]() Gwenaëlle David wrote:
Gwenaëlle David wrote:
Bonjour. Je n'ai pour l'instant que placé les différentes parties sur l'endroit puis réalisé les 1eres augmentations des devants et dos (pas les manches) sur l'envers et là je bloque complètement pour le rang suivant sur l'endroit, comment réaliser les différentes augmentations tout en suivant le décalage des raglans? Pourriez-vous me détailler ce rang motif par motif? Merci pour votre attention et votre aide.
31.03.2020 - 12:42DROPS Design answered:
Bonjour Mme David, je ne suis pas sûre de bien comprendre où vous en êtes, quelle taille tricotez-vous et qu'avez-vous fait exactement? De quelles augmentations parlez-vous? Celles du raglan? Elles se font en même temps sur le dos/les devants et les manches mais juste à un rythme différent. Vous tricotez en même temps les diagrammes comme indiqué. Les augmentations des raglans se tricotent en suivant A.1 sur le dos/les devants et A.3 sur les manches - cf RAGLAN. Merci pour toutes ces informations complémentaires indispensables pour bien comprendre où vous en êtes.
31.03.2020 - 12:56
![]() Eli wrote:
Eli wrote:
Jeg skjønner ikke økningen på denne...... Skal det økes på hver side av raport A2, slik at det blir i alt 8 økninger pr omg. det økes? Og skal det i tilegg økes til bol, eller når skal det økes til bol?
01.01.2020 - 22:47DROPS Design answered:
Hei Eli. Ja, det økes på hver side av A.2 (= 8 økninger) - les RAGLAN i oppskriften og det økes på bolen og ermene (det økes ulik på bol og ermer) - les BÆRESTK under oppskriften. God Fornøyelse!
27.01.2020 - 12:10
![]() Veronica Skaret wrote:
Veronica Skaret wrote:
DROPS Kid-Silk, stor M. Det høres lite ut med 6 nøster a 25 gram. Har dere fått tilbakemeldinger om at det blir for lite garn?
12.07.2019 - 11:51DROPS Design answered:
Hei Veronica. Garnmengden stemmer, 1 nøste på 25 gram har en løpelengde på 210 meter, dvs 50 gram tilsvarer 420 meter. Til sammenligning er det 167 meter i 50 gram Alpaca, og 175 meter i 50 gram Baby Merino. God fornøyelse
12.07.2019 - 12:55
![]() Christel Peters wrote:
Christel Peters wrote:
Hallo, ich habe eine Frage zum Raglan. Dort steht für die Zunahme:In jeder Reihe 10x, dann in jeder 2.Reihe 18x zunehmen. Heißt dass, ich muss sowohl in der Hin- als auch in der Rückreihe zunehmen? Danke für Ihre Hilfe.
17.01.2019 - 19:46DROPS Design answered:
Liebe Frau Peters, ja genau, am Anfang sollen Sie in Hin- sowie Rückreihen zunehmen (= 10 Mal in Ihre Grösse = 10 Reihe mit Zunahmen am Vorder- und Rückenteil - bei den Ärmeln nehmen Sie 33 Mal in jede 2. Reihe zu). Viel Spaß beim stricken!
18.01.2019 - 08:37
![]() Inger Nina Yndestad Eide wrote:
Inger Nina Yndestad Eide wrote:
Hei. Det står at dei økte maskene når vi øker til raglan strikkes i glattstrikk til dei går opp i A1, vil det seie at det må gå opp i heile mønsteret på 6 masker eller kan eg strikke halve mønsteret på 3 masker ? Synes det ser litt rart ut med så mykje glattstrikk.
09.10.2018 - 20:39DROPS Design answered:
Hei Inger. Det er ikke noe i veien for at du strikker dem inn i A.1 fortløpende så lenge det går opp med flettingen. God fornøyelse
16.10.2018 - 14:34
![]() Maria Johansson wrote:
Maria Johansson wrote:
Hej! Det är första gången jag stickar era mönster. Är storleken på kofta som syns längst ned exakt eller med rörelsemån (någon cm extra)?
01.09.2018 - 06:59DROPS Design answered:
Hej Maria, måtten på måttskissen är plaggets exakta mått, men du måske hålla stickfastheten (23m x 30v slätstickat på 10x10 cm) för att de skall bli exakt :)
03.09.2018 - 15:38
![]() María wrote:
María wrote:
Hola!! He empezado a hacer esta chaqueta y haciendo las cuentas de los aumentos en el canesú talla S, me resultan un total de 166 aumentos que sumados a los 130 con los que empecé son un total de 296 puntos y no 314 como indican las instrucciones. ¿Hay algún error? Gracias
20.05.2018 - 13:31DROPS Design answered:
Hola María, los aumentos del canesú con 110 + 20 (aumentos repartidos en la 1ª fila) + 18*4 (aumentos en el cuerpo cada 2 ª fila) + 6*4 (aumentos en el cuerpo cada 4ª fila) + 14*4 (aumentos en la manga cada 2ª fila) + 8*4 (aumentos en la manga cada 4ª fila) =314 para la talla S.
20.05.2018 - 19:38
![]() Suzanna Mårtensson wrote:
Suzanna Mårtensson wrote:
Någon som stickat denna kofta i ett annat garn. Funderar att sticka den men i Drops BabyAlpaca Silk men är osäker på garnåtgången.
14.02.2018 - 17:49DROPS Design answered:
Hei Suzanna. Du kan legge ut ditt spørsmål på vår Facebook gruppe eller andre strikkegrupper, kanskje noen har strikket den i et annet garn. Når det gjelder utregning av garnmengden, kan du bruke vår "garn konverter", som du finner til høyre for bildet eller litt under bildet. Da fyller du bare inn Kid-Silk og garnmenden i den størrelsen du ønsker, og så får du opp hvilken alternativer du kan bruke og hvor mye garn du trenger i det nye garnet. God Fornøyelse!
16.02.2018 - 08:33
|
||||||||||||||||||||||
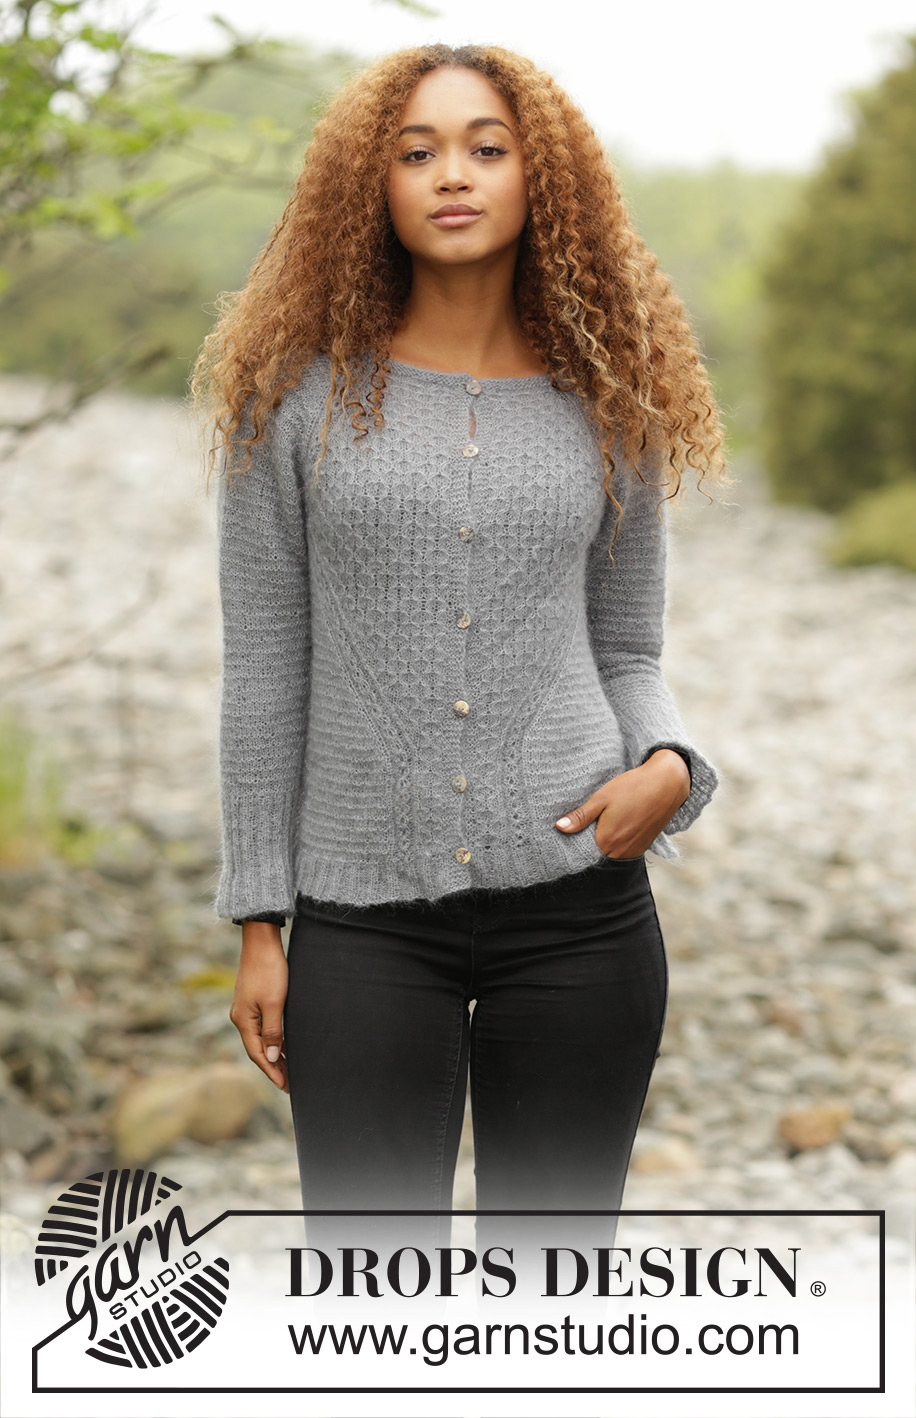
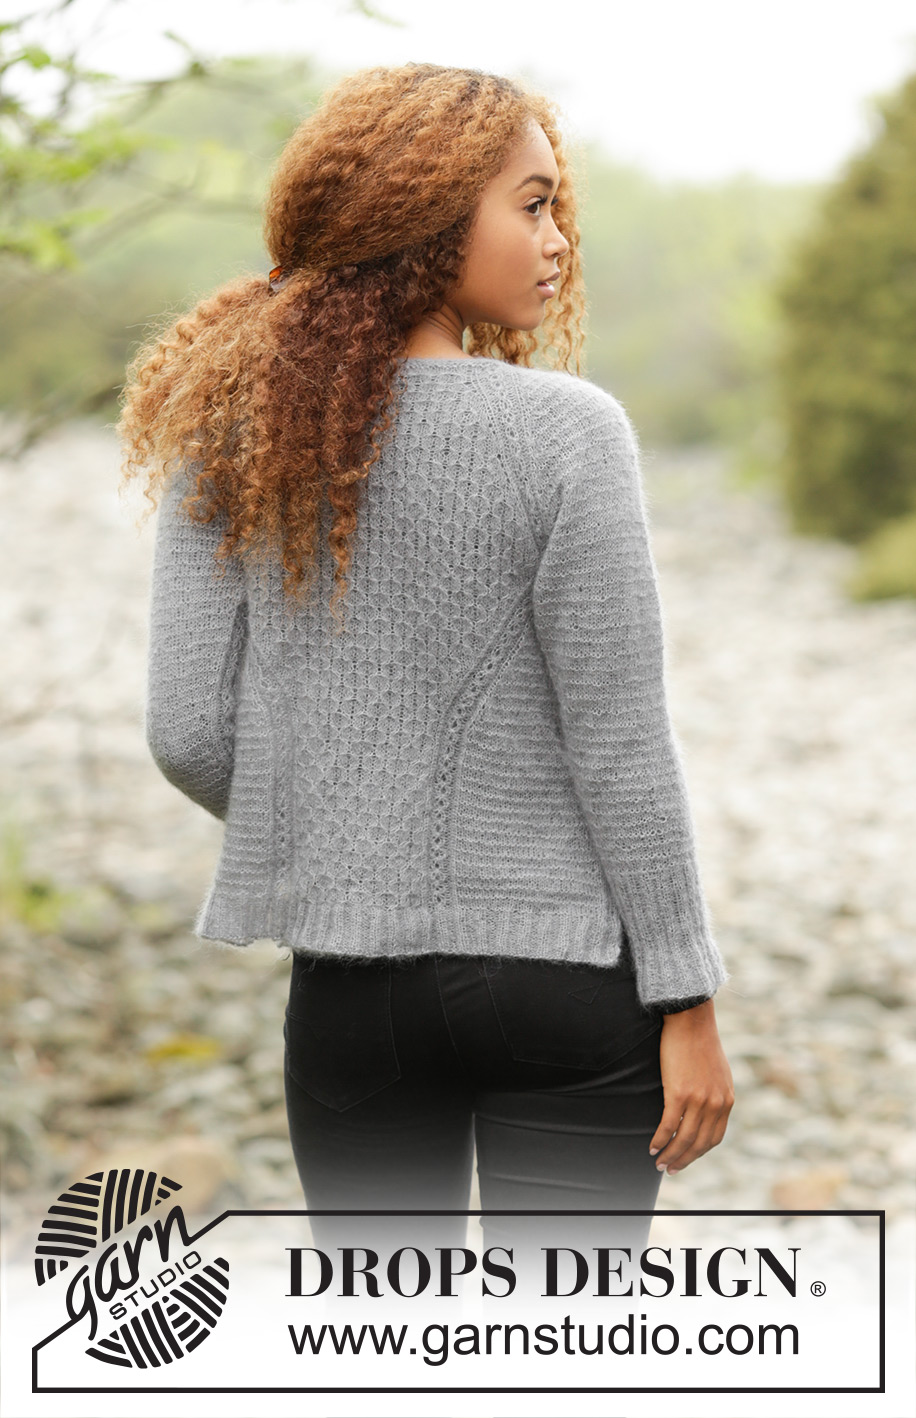
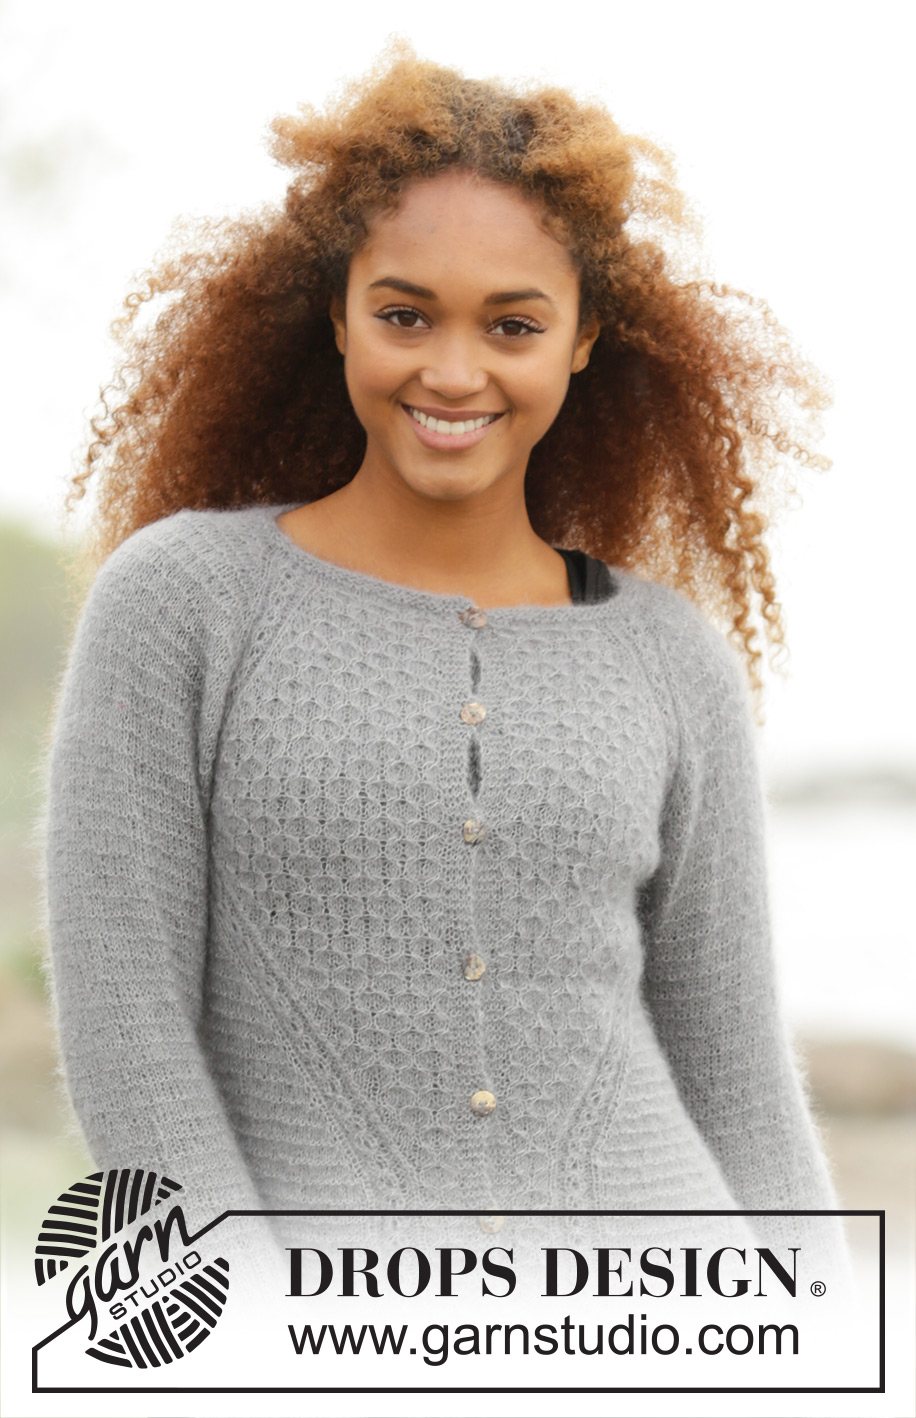
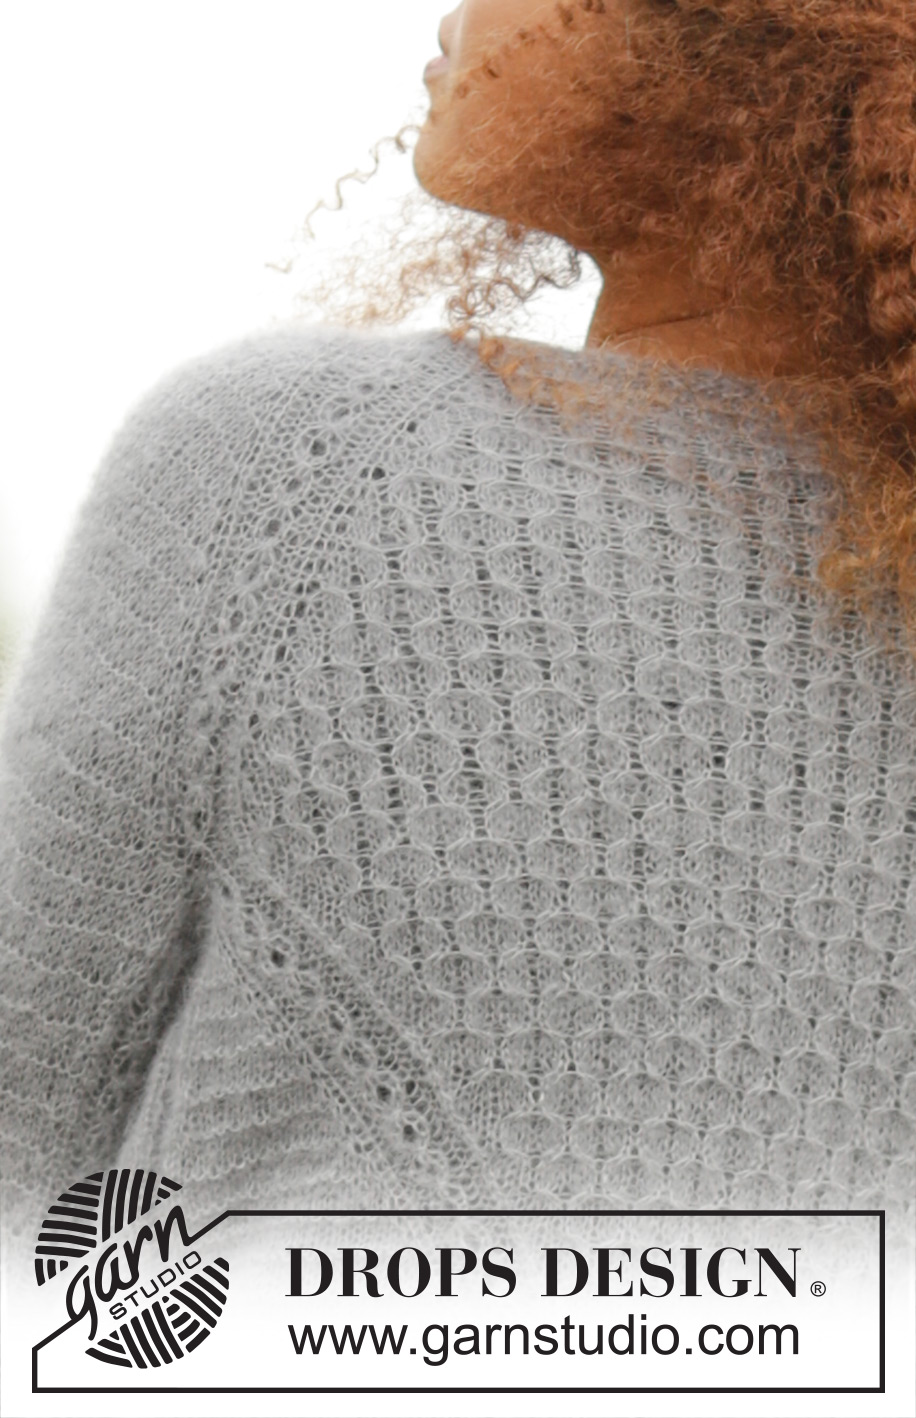
Misty Harbor Cardigan#mistyharborcardigan |
||||||||||||||||||||||
 |
 |
|||||||||||||||||||||
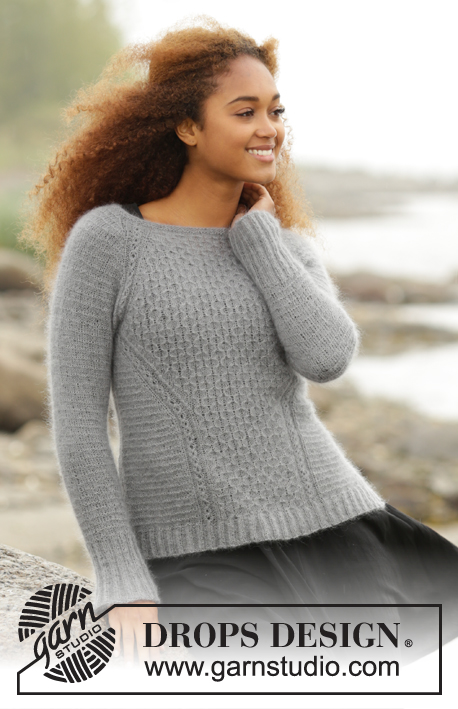
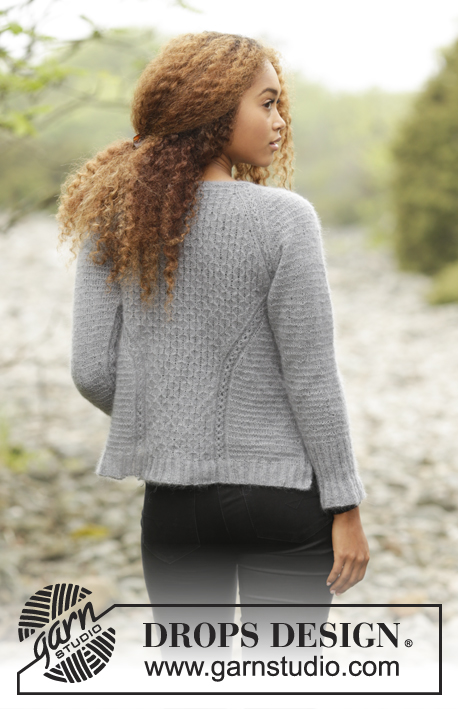
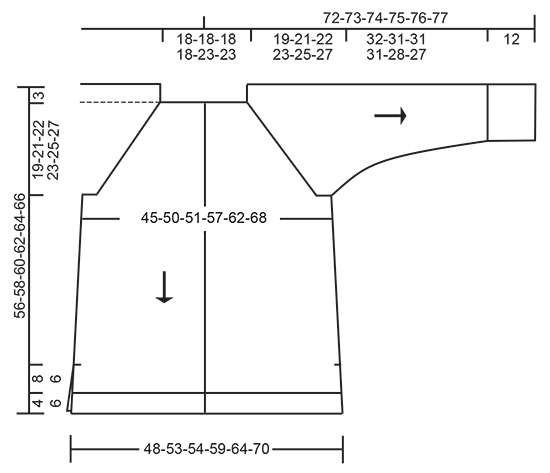
Knitted DROPS jacket, worked top down with raglan and textured pattern in “Kid-Silk”. Size: S - XXXL.
DROPS 171-23 |
||||||||||||||||||||||
|
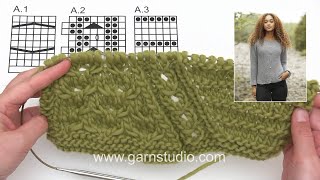
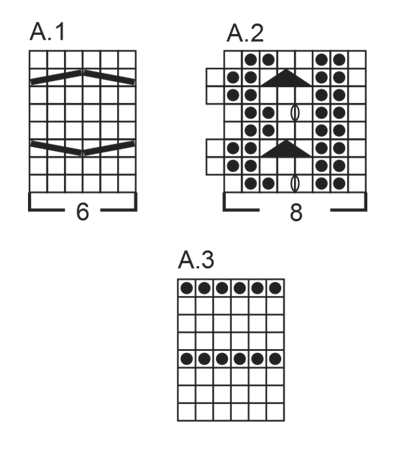
GARTER ST (back and forth): K all rows. 1 ridge = 2 rows K. PATTERN: See diagrams A.1 to A.3. The diagrams show all rows in pattern seen from RS. RAGLAN: Inc for raglan on each side of A.2 in every transition between sleeve and body. Inc 1 st by making 1 YO, on next row work YO twisted to avoid holes. Work the inc sts in stocking st until the fit A.1 on body and work them in A.3 on sleeves NOTE: Inc differently on body and sleeves as explained in pattern and on some round there will only be inc on front and back piece and not on sleeves. DISPLACEMENT IN A.2 (applies to front and back piece after armhole): A.2 should be displaced from the side under sleeve to mid front/mid back. Displacement is always done from RS as explained in pattern. On right front piece and right side of back piece this is done as follows: Work as before until A.2, make 1 YO, work A.2 as before but when last st in A.2 remains slip this st as if to K, K 1 and psso. Continue pattern as before. On next row work YO twisted to avoid holes - work new sts in A.3. On left front piece and left side of back piece this is done as follows: Work as before until 1 st remains before A.2, K next st tog with first st in A.2, work A.2 as before, make 1 YO and work the remaining sts as before. On next row work YO twisted to avoid holes - work new sts in A.3. INCREASE TIP (applies to sides of body): Inc 1 st by making 1 YO, on next row work YO twisted to avoid holes. Work the inc sts in A.3. DECREASE TIP (applies to sleeves): Dec 2 sts mid under sleeve as follows: Beg 2 sts before A.2, K 2 tog, work A.2 (= 8 sts), slip next st as if to K, K 1, psso (= 2 sts dec). BUTTONHOLES: Dec for buttonhole on right band (when garment is worn). All buttonholes are dec from WS as follows: K tog second and third st from edge and make 1 YO. On next row K the YO (= hole). Dec for buttonholes on first row from WS after neck edge, dec the next 6-7 buttonholes with approx. 8 cm between each. ---------------------------------------------------------- JACKET: Work back and forth on circular needle from mid front, work top down. YOKE: Cast on 110-110-110-110-134-134 sts (incl 5 band sts in each side towards mid front) on circular needle size 3 mm with Kid-Silk. Work 2 ridges in GARTER ST - see explanation above. K 1 row from RS while inc 20 sts evenly in all sizes (do not inc over bands) = 130-130-130-130-154-154 sts. Switch to circular needle size 3.5 mm and P 1 row from WS but K the 5 edge sts in each side (= bands) - remember BUTTONHOLES on right band - see explanation above. Work next row as follows from RS: 5 band sts in garter st, A.1 over the next 18-18-18-18-24-24 sts (= 3-3-3-3-4-4 repetitions of 6 sts on left front piece), A.2 (= 8 sts in raglan line), A.3 over the next 8 sts (= sleeve), A.2 (= 8 sts in raglan line), A.1 over the next 36-36-36-36-48-48 sts (= 6-6-6-6-8-8 repetitions of 6 sts on back piece), A.2 (= 8 sts in raglan line), A.3 over the next 8 sts (= sleeve), A.2 (= 8 sts in raglan line), A.1 over the next 18-18-18-18-24-24 sts (= 3-3-3-3-4-4 repetitions of 6 sts on right front piece and 5 band sts in garter st. Continue pattern like this. REMEMBER THE KNITTING TENSION AT THE SAME TIME on next row beg inc for RAGLAN – see explanation above! NOTE: Inc differently on body and sleeves: BODY: Inc on every row 0-6-5-12-10-16 times in total, then on every other row 18 times in total in all sizes and finally every 4th row 6-6-7-6-8-8 times in total. SLEEVES: Inc every other row a total of 14-19-27-30-33-32 times, and on every 4th row a total of 8-7-4-3-3-5 time. After all inc are done there are 314-354-374-406-442-470 sts on needle. Work next row as follows from WS (if last row was worked from WS, work 1 row from RS to beg on WS now): Work as before over the first 47-53-53-59-65-71 sts on right front piece, continue A.2 over the next 4 sts (= ½ repetition with A.2) and cast in addition on 6-6-7-7-7-8 new sts towards the side = 57-63-64-70-76-83 sts on right front piece. Insert 1 marker, NOW MEASURE PIECE FROM HERE! Slip the remaining sts on 1 stitch holder or on another needle. RIGHT FRONT PIECE: = 57-63-64-70-76-83 sts. READ ALL OF THE FOLLOWING SECTION BEFORE CONTINUING: Work next row as follows from RS: 2 edge sts in garter st, 0-0-1-1-1-2 sts pattern according to diagram A.3, continue with A.2 over the next 8 sts, continue A.1 as before until band and finish with 5 band sts as before. Continue pattern like this. AT THE SAME TIME on next row from RS beg DISPLACEMENT IN A.2 – see explanation above. Repeat displacement like this every other row (i.e. every row from RS) 36 times in total – NOTE: When displacing A.2, the total no of sts will be the same but there will be fewer sts in A.1 towards mid front and more sts in A.3 towards the side. Sts in A.1 that do not fit in pattern when displacing, is worked in stocking st until they fit pattern again. AT THE SAME TIME when piece measures 6 cm from marker, inc 1 st inside 2 edge st in garter st in the side - READ INCREASE TIP. Inc like this every 6 cm a total of 3 times = 60-66-67-73-79-86 sts. After last displacement there will be 1-2-2-3-4-5 repetitions of A.1 before band towards mid front. Continue pattern back and forth without displacement until piece measures 30-30-31-30-30-30 cm from marker (jacket measures approx. 52-54-56-56-58-60 cm from shoulder and down). P 1 row from WS while inc 5-3-6-4-2-3 sts evenly = 65-69-73-77-81-89 sts - NOTE: Continue the 2 edge sts in the side and the 5 band sts towards mid front in garter st and continue A.2 with K over K and P over P (i.e. do not inc over A.2 or sts in garter st). Switch to circular needle size 3 mm and work next row from RS as follows: 2 edge sts in garter st, * K 2, P 2 *, repeat from *-* until 7 sts remain on needle, finish with K 2 and 5 band sts in garter st (adjust so that rib fits rib in A.2). Continue rib like this but on next row from RS inc all 2 P sts to 3 P sts (inc 1 st by making 1 YO in transition between K and P, on next row K YO twisted to avoid holes) = 79-84-89-94-99-109 sts. When rib measures 4-4-4-6-6-6 cm, loosely cast off with garter st over garter st, K over K and P over P (to avoid a tight cast-off edge cast off with 2 strands Kid-Silk). Jacket measures now approx. 56-58-60-62-64-66 cm from shoulder and down. RIGHT SLEEVE: Worked in the round on a short circular needle/double pointed needles. Slip the next 60-68-78-82-88-90 sts from stitch holder or extra needle on a short circular needle size 3.5 mm and cast in addition on 12-12-14-14-14-16 new sts mid under sleeve = 72-80-92-96-102-106 sts. Insert 1 marker, NOW MEASURE PIECE FROM HERE! Continue A.3 in the round but now work A.2 only over the middle 8 sts under sleeve. When sleeve measures 1½ cm, dec 1 st on each side of A.2 - READ DECREASE TIP (= 2 sts dec). Dec a total of 13-16-21-22-23-24 times in Size S: On every 7th round, in size M: Alternately on every 5th and 6th round, in size L + XL: On every 4th round, in size XXL: Alternately on every 3rd and 4th round and in size XXXL: On every 3rd round = 46-48-50-52-56-58 sts. When sleeve measures 32-31-31-31-28-27 cm, K 1 round while inc 14-16-18-16-16-14 sts evenly = 60-64-68-68-72-72 sts. Switch to double pointed needles size 3 mm and work rib in the round over all sts (= K 2/P 2 but adjust to continue rib over A.2 mid under sleeve). When rib measures 8 cm, inc all P 2 to P 3 (inc as on right front piece) = 75-80-85-85-90-90 sts. When rib measures 12 cm (or desired length, sleeve measures now approx. 44-43-43-43-40-39 cm), cast off with K over K and P over P (to avoid a tight cast-off edge cast off with 2 strands Kid-Silk). BACK PIECE: Beg from WS, cast on 6-6-7-7-7-8 sts on circular needle size 3.5 mm, work the next 92-104-104-116-128-140 sts from stitch holder/extra needle and cast on 6-6-7-7-7-8 new sts at the end of row = 104-116-118-130-142-156 sts on needle. Insert 1 marker, NOW MEASURE PIECE FROM HERE! Work next row as follows from RS: 2 edge sts in garter st, 0-0-1-1-1-2 sts pattern according to diagram A.3, continue A.2 over the next 8 sts, continue A.1 over the next 84-96-96-108-120-132 sts, continue A.2 over the next 8 sts, work 0-0-1-1-1-2 sts pattern according to diagram A.3 and end with 2 edge sts in garter st. Continue pattern back and forth as follows: AT THE SAME TIME on next row from RS start DISPLACEMENT IN A.2. Continue the displacement on every 2nd row (i.e. on every row from RS) until 6-8-8-10-10-12 repetitions of A.1 remains in the middle (i.e. 36-48-48-60-60-72 sts of A.1). The continue pattern without displacements. AT THE SAME TIME when piece measures 6 cm from marker, inc 1 st inside 2 edge sts in garter st in each side - READ INCREASE TIP. Inc like this every 6 cm a total of 3 times = 110-122-124-136-148-162 sts. When piece measures 30-30-31-30-30-30 cm from marker (jacket measures now approx. 52-54-56-56-58-60 cm from shoulder) P 1 row from WS while inc 8-8-6-6-6-8 sts evenly – NOTE: Continue the 2 edge sts in each side in garter st and continue A.2 with K over K and P over P (i.e. do not inc over A.2 or sts in garter st) = 118-130-130-142-154-170 sts. Switch to circular needle size 3 mm and work next row from RS as follows: 2 edge sts in garter st, * K 2, P 2 *, repeat from *-* until 4 sts remain on needle, finish with K 2 and 2 edge sts in garter st (adjust so that rib fits rib in A.2). Continue rib like this but on next row from RS, inc all 2 P sts to 3 P sts = 146-161-161-176-191-211 sts. When rib measures 4-4-4-6-6-6 cm, loosely cast off with garter st over garter st, K over K and P over P (to avoid a tight cast-off edge cast off with 2 strands Kid-Silk). LEFT SLEEVE: Slip the next 60-68-78-82-88-90 sts from stitch holder/extra needle on a short circular needle size 3.5 mm and cast in addition on 12-12-14-14-14-16 new sts mid under sleeve = 72-80-92-96-102-106 sts. Then work in the round as on right sleeve. LEFT FRONT PIECE: Beg from WS, cast on 6-6-7-7-7-8 sts on circular needle 3.5 mm, continue A.2 over the next 4 sts (= ½ repetition of A.2) and work as before over the last 47-53-53-59-65-71 sts from stitch holder/extra needle = 57-63-64-70-76-83 sts on left front piece. Work next row as follows from RS: 5 band sts in garter st, continue A.1 over the next 42-48-48-54-60-66 sts, continue A.2 over the next 8 sts, work 0-0-1-1-1-2 sts pattern according to diagram A.3 and finish with 2 edge sts in garter st. Continue pattern like this and work the same way as on right front piece but reversed. When rib is worked at the bottom of front piece, work first row as follows from RS: 5 band sts in garter st, * K 2, P 2 *, repeat from *-* until 4 sts remain on needle, finish with K 2 and 2 edge sts in garter st. ASSEMBLY: Sew side seams from armhole and down – sew edge to edge in outer loops of edge sts to get a flat seam but stop when approx. 12 cm remain in each side (= vent). Sew the opening under the sleeves. Sew the buttons on to the left band. |
||||||||||||||||||||||
Diagram explanations |
||||||||||||||||||||||
|
||||||||||||||||||||||
 |
||||||||||||||||||||||
 |
||||||||||||||||||||||
Have you finished this pattern?Tag your pictures with #dropspattern #mistyharborcardigan or submit them to the #dropsfan gallery. Do you need help with this pattern?You'll find 25 tutorial videos, a Comments/Questions area and more by visiting the pattern on garnstudio.com. © 1982-2026 DROPS Design A/S. We reserve all rights. This document, including all its sub-sections, has copyrights. Read more about what you can do with our patterns at the bottom of each pattern on our site. |
||||||||||||||||||||||


With over 40 years in knitting and crochet design, DROPS Design offers one of the most extensive collections of free patterns on the internet - translated to 17 languages. As of today we count 324 catalogues and 12290 patterns translated into English (UK/cm). 12290
We work hard to bring you the best knitting and crochet have to offer, inspiration and advice as well as great quality yarns at incredible prices! Would you like to use our patterns for other than personal use? You can read what you are allowed to do in the Copyright text at the bottom of all our patterns. Happy crafting!
Post a comment to pattern DROPS 171-23
We would love to hear what you have to say about this pattern!
If you want to leave a question, please make sure you select the correct category in the form below, to speed up the answering process. Required fields are marked *.