
Popular categories
Looking for a yarn?


Comments / Questions (9)
![]() Tanya wrote:
Tanya wrote:
Thank you for your previous responses to my questions. Just one last thing - for the flounce I am confused on "pick up inside 3 stitches". Is it not pick up one stitch per row worked? I'm not sure where these 3 stitches come in
16.07.2025 - 21:58DROPS Design answered:
Hi Tanya, you pick up these stitches after the 2 band stitches but before the 3rd stitch. Happy knitting!
16.07.2025 - 22:22
![]() Tanya wrote:
Tanya wrote:
I'm confused where the icord goes? I just saw your response and you say to only make one but where does the icord go exactly? Is it not to be secured to the piece but rather floating inside by the bottom of the vneck? Confused if this would make it hard to put on and take off the piece
16.07.2025 - 02:54DROPS Design answered:
Hi Tanya, you make one I-cord reparately until tie measures approx. 45 cm. Cut and fasten the yarn. Thread yarn through purl stitch in the band at the bottom in each side of V-neck and tie together (= mid front). Make a one knot at each end of the tie. The I-cord is not secured to the piece but floating inside by the bottom of the vneck. Happy knitting!
16.07.2025 - 10:04
![]() Bettina wrote:
Bettina wrote:
Ich verstehe nicht so ganz, warum nach der Maschenaufnahme für die Rüschen der Faden abgeschnitten werden soll. Mit was stricke ich denn dann weiter?
14.07.2025 - 19:44DROPS Design answered:
Liebe Bettina, die Maschen sind innerhalb 3 Maschen aufgenommen, man muss den Faden schneiden befor man die 1. Reihe strickt, so wird man vermeiden daß der Faden um die Arbeit kommt. Viel Spaß beim Stricken!
24.07.2025 - 14:34
![]() Ellen wrote:
Ellen wrote:
When picking up stiches from the right and left fronts, the instructions say to pick up from the right side on the left front from the bottom edge to the middle of the back of the neck. I have always picked up stitches from the right to the left, but these instructions suggest picking up from left to right. How do I do this?
12.07.2025 - 18:13DROPS Design answered:
Dear Ellen, you are picking up from the wrong side, that's why you work from left to right. But it's worked as usual, just from the wrong side. Happy knitting!
14.07.2025 - 00:37
![]() Ellen wrote:
Ellen wrote:
I knitted the icord tie but it does not say to make 2 of them. Shouldn't there be two ties?
09.07.2025 - 16:54DROPS Design answered:
Dear Ellen, it's one tie for the whole neck; it's 45cm long so it should be long enough to cover both sides. Then you tie a knot on each end. Happy knitting!
14.07.2025 - 01:23
![]() Tanya wrote:
Tanya wrote:
Is it an increase after the 4 band stitches on each side? Confused on wording
15.06.2025 - 03:38DROPS Design answered:
Dear Tanya, that's right, you increase the stitch after the 4 band stitches but before the 5th stitch, in stocking stitch. Happy knitting!
15.06.2025 - 23:54
![]() Carol De Feo wrote:
Carol De Feo wrote:
Hallo Ich hätte Fragen: erstens zum Annähen der Blende an der Rückenmitte. Was passiert mit den Maschen der Ärmel? Müssen die dann mit den Rüschen aufgenommen werden? Wie viele Maschen für die Rüschen müssen etwa aufgenommen werden? Danke und frohe Ostern!
17.04.2025 - 17:37DROPS Design answered:
22.04.2025 - 10:50
![]() Belgin wrote:
Belgin wrote:
Hallo, RUCH , ik begrijp dit niet zo "knip de draad af en keer het werk" is dat waneer de linker kant helemaal af is daarna de draad afknippen en aan de linkerkant beginnen. Alvast bedankt.
16.04.2025 - 09:02DROPS Design answered:
Dag,
Volgens mij klopt het niet dat er staat dat je de draad af moet knippen. Je kunt gewoon steken opnemen en 1 naald averecht breien aan de verkeerde kant en daarna het telpatroon.
16.04.2025 - 19:57
![]() Lisa wrote:
Lisa wrote:
Hallo, danke für die tolle Anleitung 😍 eine Frage hab ich: warum müssen im Rumpfteil die Maschenmarkierer mitgeführt werden, wenn ich am Ende dann nur mehr 1 Masche abnehme, und das vor der Blende? Danke und LG Lisa
11.04.2025 - 08:56DROPS Design answered:
Liebe Lisa, Sie haben Recht, die Maschen am Rumpfteil müssen nicht markiert werden, da es keine Abnahmen an den Seiten des Rumpfteils gibt. Viel Spaß beim Weiterstricken und Tragen der Jacke, und vielen Dank für Ihr Lob! :-)
17.04.2025 - 10:00
|
||||||||||
Iris Romance Cardigan#irisromancecardigan |
||||||||||
 |
 |
|||||||||
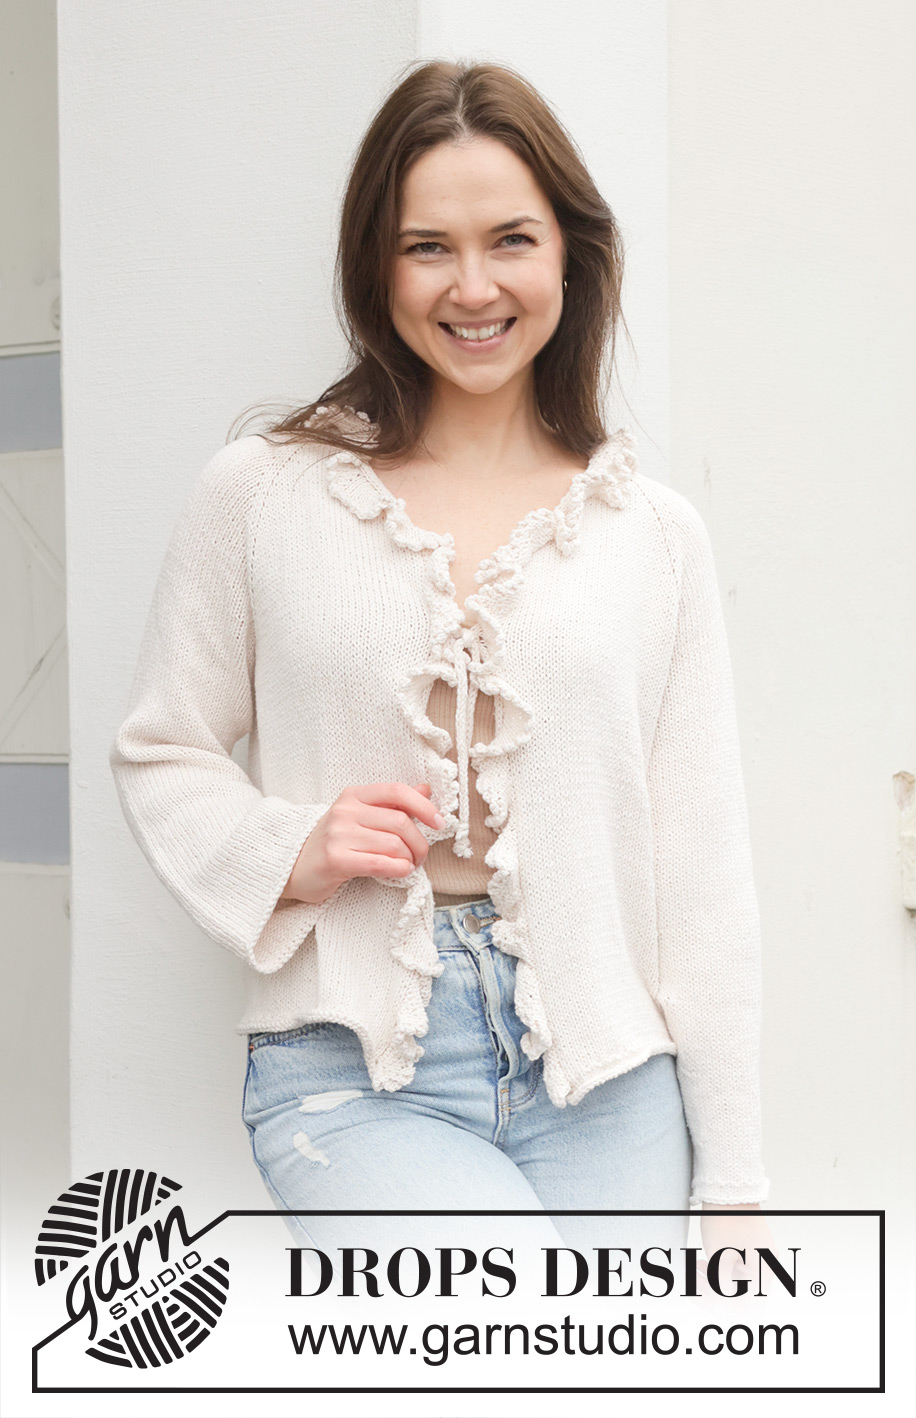
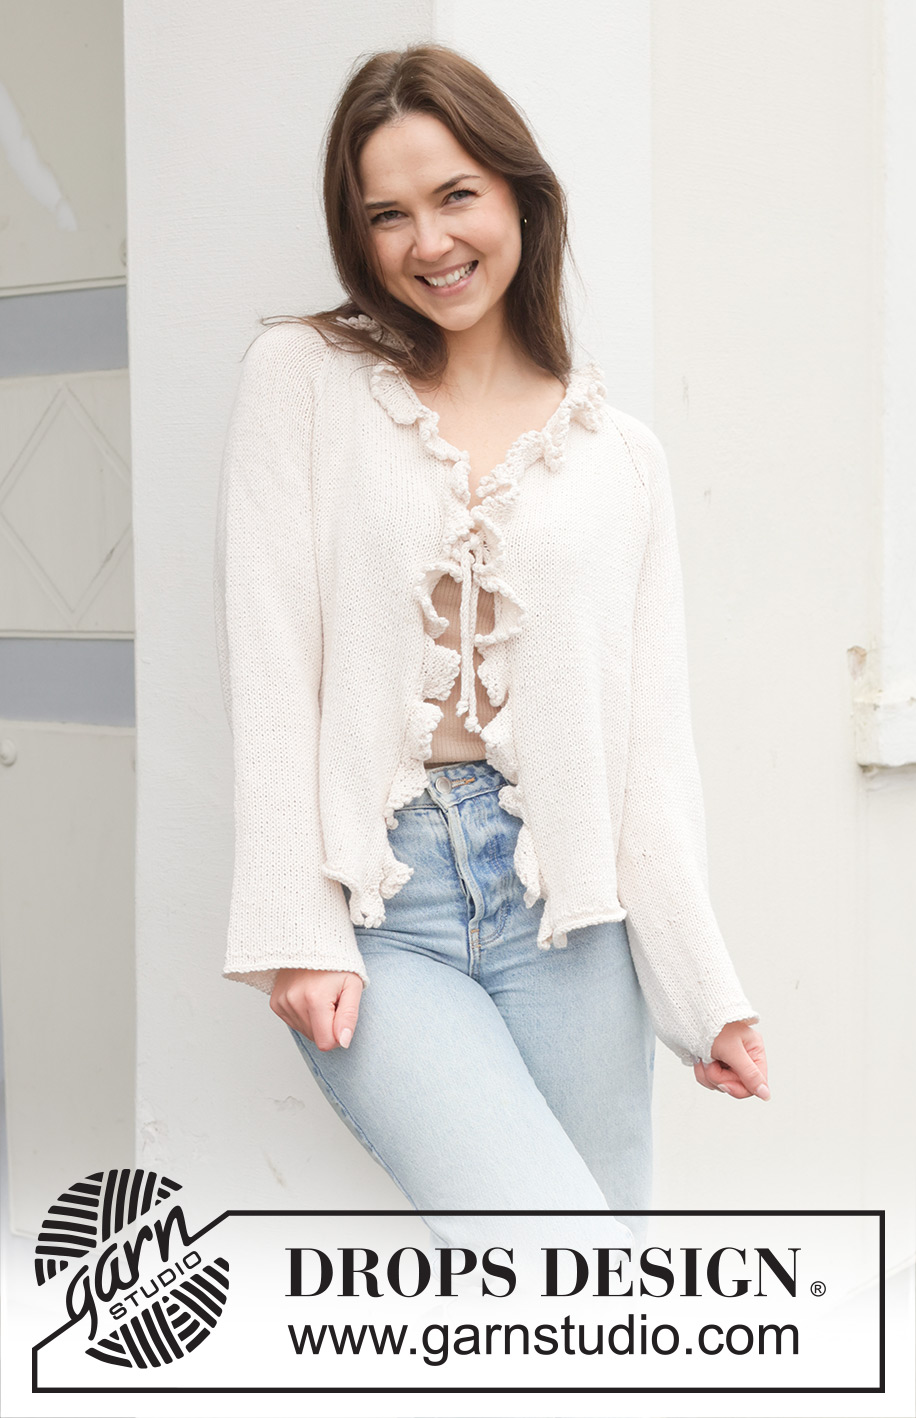
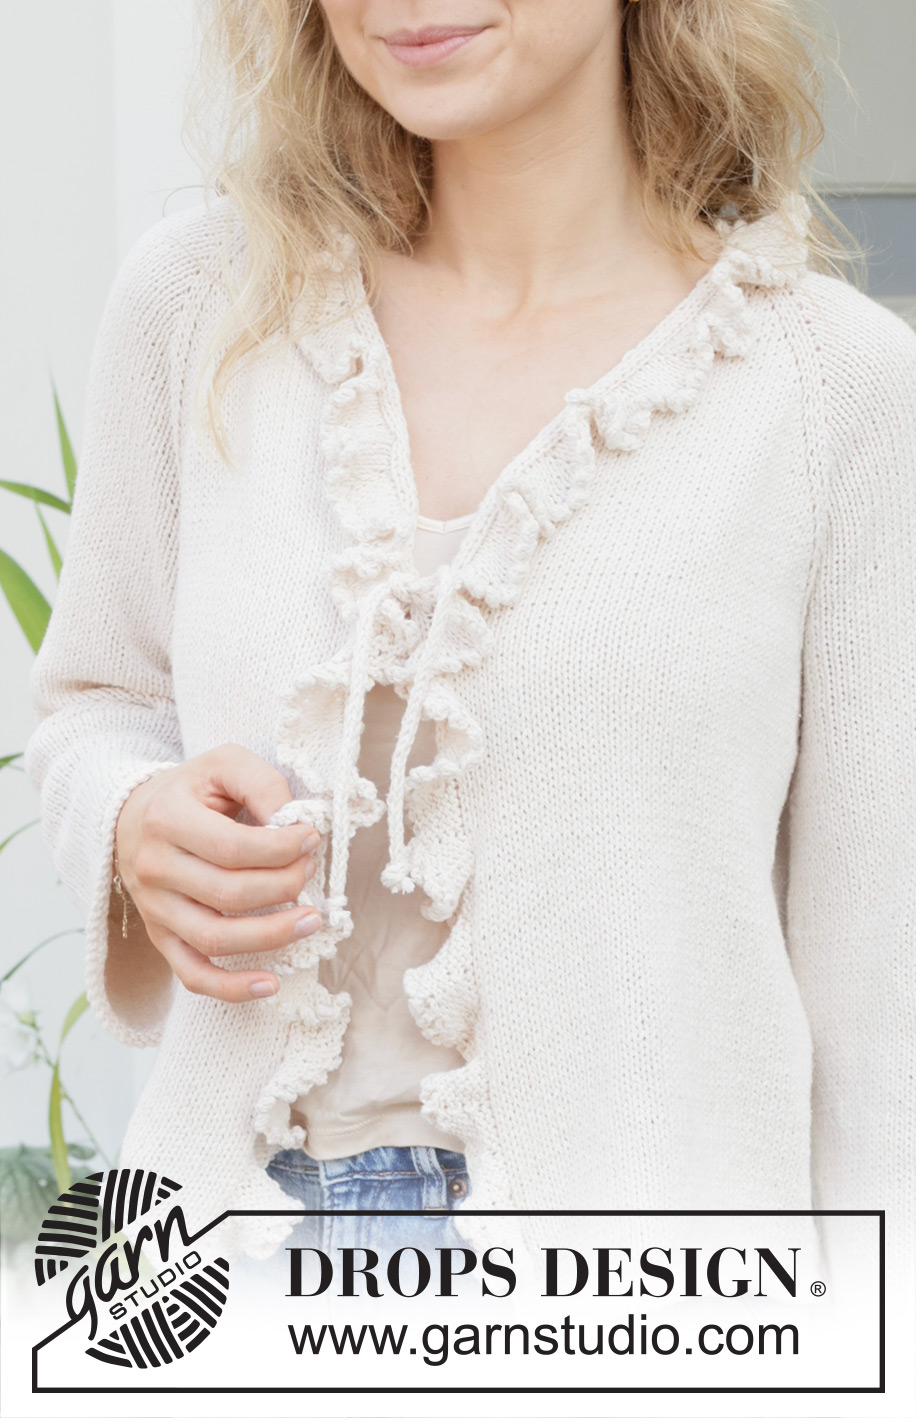
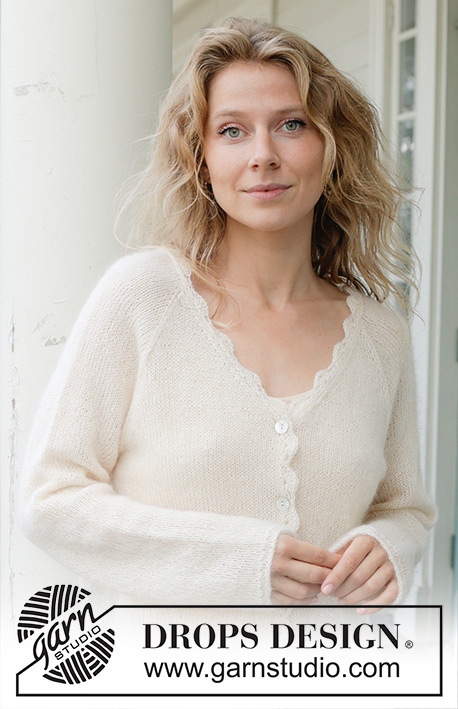
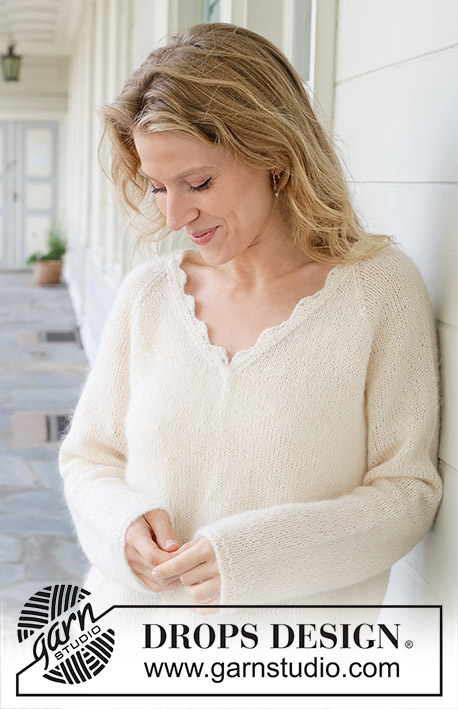
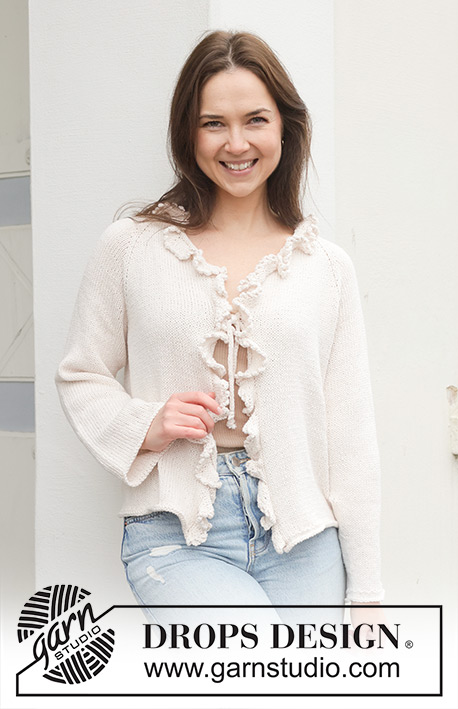
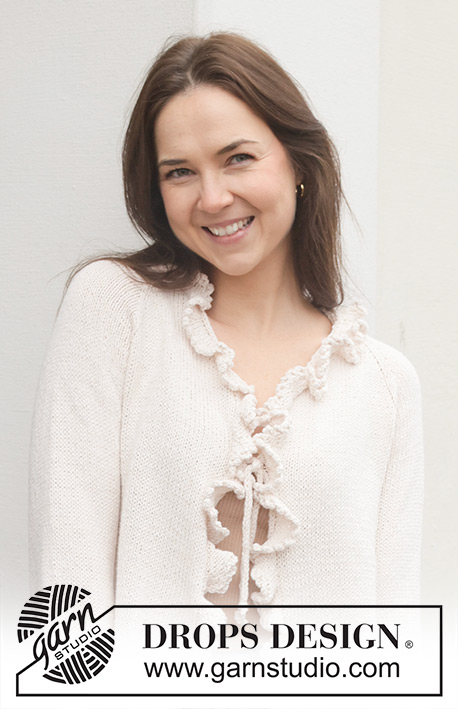
Knitted jacket in DROPS Belle. Piece is knitted top down in stocking stitch with raglan, V-neck, i-cord, rolling edges, tie and flounce with picot. Size: S - XXXL.
DROPS 258-33 |
||||||||||
|
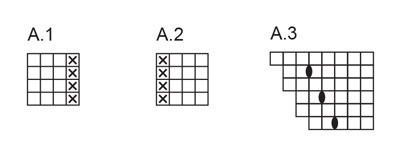
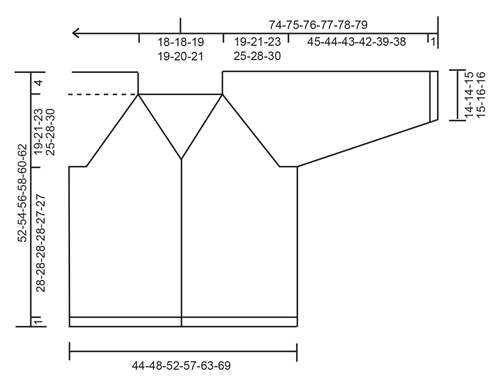
---------------------------------------------------------- EXPLANATION FOR THE PATTERN: ---------------------------------------------------------- PATTERN: See diagrams A.1 to A.3. Diagrams show all rows in pattern seen from the right side. RAGLAN: All increases are done from the right side. Increase 1 stitch by making 1 yarn over, on next row (= wrong side) work yarn overs as follows: BEFORE MARKER THREAD: Purl yarn overs in back loop of stitches to avoid holes. Then work the new stitches in stocking stitch. AFTER MARKER THREAD: Slip stitch off left needle and put it back on left needle but the opposite way (insert left needle in from behind when slipping it back on needle). Purl yarn overs in front loop of stitches to avoid holes. Then work the new stitches in stocking stitch. V-NECK: All increases are done from the right side. Increase 1 stitch by making 1 yarn over, on next row (= wrong side) work yarn overs as follows: AFTER RIGHT BAND: Slip stitch off left needle and put it back on left needle but the opposite way (insert left needle in from behind when slipping it back on needle). Purl yarn overs in front loop of stitches to avoid holes. Then work the new stitches in stocking stitch. BEFORE LEFT BAND: Purl yarn overs in back loop of stitches to avoid holes. Then work the new stitches in stocking stitch. SLEEVE TIP: When picking up stitches mid under sleeve, there will be a small hole in the transition between stitches on body and sleeves. The holes can be closed by picking up the strand between two stitches - work this strand twisted together with the first stitch between body and sleeve so that the holes closes. DECREASE TIP: Decrease 1 stitch on each side of marker thread as follows: Work until 4 stitches remain before marker thread and knit 2 together, knit 4 (marker thread is in the middle of these 4 stitches), slip 1 stitch knitwise, knit 1, pass slipped stitch over stitch worked (= 2 stitches decreased). PICOT: Loosely cast off from right side as follows: Knit 1, * insert right needle between the first 2 stitches on left needle (i.e. between stitches on needle, not through stitches), make 1 yarn over on right needle, pull yarn over forward between the stitches and slip yarn over on to left needle *, work from *-* 4 times in total (= 4 new stitches on left needle), knit and cast off at the same time off 6 stitches (= 1st stitch on right needle + 3 yarn overs+ 2 stitches). Now continue to work from *-* + cast off 6 stitches the same way along the entire cast-off until 1 stitch remains on row. Cut the yarn and pull it through the last stitch. ---------------------------------------------------------- START THE PIECE HERE: ---------------------------------------------------------- JACKET - SHORT OVERVIEW OF THE PIECE: In this pattern needles of different length have been used, begin with fitting length for number of stitches and switch as needed. First work two bands, then cast on stitches for yoke between bands. Work yoke back and forth on circular needle, work top down. When yoke is done, divide piece for body and sleeves. Work body downwards back and forth on circular needle while putting the sleeves aside. Then work sleeves downwards in the round on needle. Sew bands together, seam = mid back, then sew bands along yoke at the back of neck. Work a tie to close the jacket mid front. Then work a flounce edge along the band that are cast off with picot. If 0 stitches is given for the chosen size, it means that you skip the information and jump to next information. RIGHT BAND: Cast on 4 stitches on circular needle size 4 mm with DROPS Belle. Work A.1 back and forth for 17-17-17-17-18-18 cm, finish with a row from wrong side. Cut the yarn and slip stitches on a stitch holder, work over band when picking up stitches for yoke. LEFT BAND: Cast on 4 stitches on circular needle size 4 mm. Work A.2 back and forth for 17-17-17-17-18-18 cm, finish with a row from wrong side. Do not cut the yarn, work next row with this strand from right side as explained below. YOKE: Now cast on stitches for yoke between bands. Turn and work on circular needle size 4 mm from the right side as follows: Work left band as before from right side (= 4 stitches), cast on 76-76-78-78-80-82 new stitches on row, work right band as before from right side (= 4 stitches) = 84-84-86-86-88-90 stitches. Insert 1 marker on the inside of band in one side of piece (= at the front), measure piece from this marker. Now insert 4 new marker threads in the piece while AT THE SAME TIME working next row, insert marker threads on row between 2 stitches, and these 2 stitches are called raglan stitches. Work next row from wrong side as follows: Work 4 stitches band as before, purl 2 (= right front piece), insert 1 marker thread before next stitch, purl 18 stitches (= sleeve), insert 1 marker thread before next stitch, purl 36-36-38-38-40-42 (= back piece), insert 1 marker thread before next stitch, purl 18 (= sleeve), insert 1 marker thread before next stitch, purl 2 and finish with 4 stitches band as before (= left front piece). Now work stocking stitch and bands as before while AT THE SAME TIME increasing both for RAGLAN and V-NECK - read explanations above and read both sections before continuing. Remember to follow the knitting tension! V-NECK: Increase for V-neck from right side in both sides of piece inside 5 stitches, i.e. 4 stitches band and 1 stitch in stocking stitch (= 1 stitch increased in each side) - remember to increase for raglan at the same time. Increase every 4th row 2 times in all sizes, then every other row 14-14-15-15-16-17 times, and then every 4th row 2 times in all sizes. 18-18-19-19-20-21 increases have been done in total for V-neck. RAGLAN: Increase for raglan on each side of 2 raglan stitches (marker thread is between raglan stitches) as follows from right side - remember at the same time to increase for V-neck: ROW 1 (= right side): Work stocking stitch and bands as before, and increase for raglan on each side of raglan stitches (= 8 stitches increased). ROW 2 (= wrong side): Work stocking stitch and bands as before, work the new stitches in stocking stitch. Work 1st and 2nd ROW 22-26-29-34-35-36 times (= 44-52-58-68-70-72 rows have been worked) = 176-208-232-272-280-288 stitches increased for raglan. Remember to follow the knitting tension! Raglan increases are now done in size S to XL but continue and work as follows in XXL and XXXL: ROW 1 (= right side): Work stocking stitch and bands as before and increase for raglan only on front piece and back piece (= 4 stitches increased) - do not increase on sleeves. ROW 2 (= wrong side): Work stocking stitch and bands as before, work the new stitches in stocking stitch. Work 1st and 2nd ROW 0-0-0-0-3-6 times (= 0-0-0-0-6-12 rows have been worked) = 0-0-0-0-12-24 stitches increased for raglan. Remember to follow the knitting tension! All increases for raglan are done, you have increased 22-26-29-34-38-42 times in total on front piece/back piece and 22-26-29-34-35-36 times on sleeves. When all increases for both raglan and V-neck are done, there are 296-328-356-396-420-444 stitches. Work without increase until piece measures 19-21-23-25-28-30 cm measured straight down from marker at the front (i.e. do not measure diagonally along V-neck). Now divide yoke for body and sleeves. DIVIDING FOR BODY AND SLEEVES: AT THE SAME TIME as next row is worked divide yoke for body and sleeves as follows: Work 4 stitches band as before, work 43-47-51-56-61-66 stitches in stocking stitch (= front piece), slip the next 60-68-74-84-86-88 stitches on a thread for sleeve, cast on 10-10-12-12-14-16 new stitches on needle (= in the side mid under sleeve), work 82-90-98-108-118-128 stitches in stocking stitch (= back piece), slip the next 60-68-74-84-86-88 stitches on a thread for sleeve, cast on 10-10-12-12-14-16 new stitches on needle (= in the side mid under sleeve), work 43-47-51-56-61-66 stitches in stocking stitch, finish with 4 stitches band as before (= front piece). Finish body and sleeves separately. BODY: = 196-212-232-252-276-300 stitches. Work stocking stitch and bands as before until piece measures 28-28-28-28-27-27 cm from division. Piece measures approx. 47-49-51-53-55-57 cm from marker at the front, finish with a row from wrong side. Work 1 row rib from right side as follows: Work 4 stitches band as before, work rib (= knit 1/purl 1) at the same time decrease 1 stitch until 5 stitches remain on row, finish with knit 1 and 4 stitches band as before = 195-211-231-251-275-299 stitches. Work 3 rows stocking stitch over all stitches and loosely cast off. Jacket measures 48-50-52-54-56-58 cm from marker at the front and approx. 52-54-56-58-60-62 cm from the top of shoulder. SLEEVES: Slip 60-68-74-84-86-88 sleeve stitches from one thread on to circular needle size 4 mm and pick in addition up 1 stitch in each of the 10-10-12-12-14-16 stitches cast on under sleeve - read SLEEVE TIP = 70-78-86-96-100-104 stitches. Insert 1 marker thread in the middle of the 10-10-12-12-14-16 new stitches under sleeve - round begins at the marker thread. Work in stocking stitch in the round on needle - AT THE SAME TIME when sleeve measures 3-4-3-4-2-4 cm from division, decrease mid under sleeve – remember DECREASE TIP and decrease as follows: Decrease 2 stitches every 6-4-3-2-2-1½ cm 6-9-12-16-17-18 times in total = 58-60-62-64-66-68 stitches. Work until sleeve measures 45-44-43-42-39-38 cm from division. Work 1 round rib (knit = 1/purl 1). Knit 3 rounds. Loosely cast off. Sleeve measures approx. 46-45-44-43-40-39 cm from division. ASSEMBLY: Sew bands from each front piece together - seam = mid back, fasten band to stitches at the back of the neck. TIE: Cast on 3 stitches on double pointed needles size 4 mm. Knit 1 row. Then work as follows: * Move all stitches to the right side of double pointed needle without turning piece, tighten yarn and knit over all 3 stitches *, repeat from *-* until tie measures approx. 45 cm. Cut and fasten the yarn. Thread yarn through purl stitch in the band at the bottom in each side of V-neck and tie together (= mid front). Make a one knot at each end of the tie. FLOUNCE: Now pick up a flounce along the band. Work each side separately between bottom edge on jacket and mid back of neck, on left front piece, pick up stitches from bottom edge on jacket towards mid back and on right front piece pick up stitches from mid back towards bottom edge. Work flounce on each side of the jacket at follows: Use circular needle size 4 mm and pick up from right side 1 stitch in every row worked - pick up inside 3 stitches. Cut the thread and turn piece. Purl 1 row from wrong side. Work A.3 as far as possible on row. When A.3 has been worked vertically, cast off from right side with PICOT - read explanation above. |
||||||||||
Diagram explanations |
||||||||||
|
||||||||||
 |
||||||||||
 |
||||||||||
Have you finished this pattern?Tag your pictures with #dropspattern #irisromancecardigan or submit them to the #dropsfan gallery. Do you need help with this pattern?You'll find 32 tutorial videos, a Comments/Questions area and more by visiting the pattern on garnstudio.com. © 1982-2026 DROPS Design A/S. We reserve all rights. This document, including all its sub-sections, has copyrights. Read more about what you can do with our patterns at the bottom of each pattern on our site. |
||||||||||


With over 40 years in knitting and crochet design, DROPS Design offers one of the most extensive collections of free patterns on the internet - translated to 17 languages. As of today we count 325 catalogues and 12298 patterns translated into English (UK/cm). 12298
We work hard to bring you the best knitting and crochet have to offer, inspiration and advice as well as great quality yarns at incredible prices! Would you like to use our patterns for other than personal use? You can read what you are allowed to do in the Copyright text at the bottom of all our patterns. Happy crafting!
Post a comment to pattern DROPS 258-33
We would love to hear what you have to say about this pattern!
If you want to leave a question, please make sure you select the correct category in the form below, to speed up the answering process. Required fields are marked *.