
Popular categories
Looking for a yarn?


Comments / Questions (35)
![]() Brigitte wrote:
Brigitte wrote:
Ich habe eine grundsätzliche Frage zur Maschenzahl. Nach Strickmuster für Größe M: Breite des Vorder- und Rückenteils 48 cm. Anschlag jeweils 96 Maschen. Da die Maschenprobe mit 5er Nadeln 17 Maschen = 10 cm ergibt, kann ich nicht verstehen, wie es zu 96 Maschen kommt, um eine Weite von 48 cm zu erreichen. 17 x 4.8 = 81,6, also 82 Maschen oder vielleicht ein paar mehr, aber doch nicht 14 extra = ca. 8cm? Verstehe ich etwas falsch? Danke für eine Erklärung
02.02.2024 - 17:37DROPS Design answered:
Liebe Brigitte, für dieselbe Breite braucht man mehr Maschen für Bündchen mit den Nadeln Nr 4 als mit für Glattrechts mit den Nadeln Nr 5 , deshalb werden zuerst mehr Maschen für das Bündchen angeschlagen, dann Maschen abgenommen für die Nadeln Nr 5 = 82 Maschen mit 17 Maschenproben sind ca 48 cm breit. Viel Spaß beim stricken!
05.02.2024 - 07:55
![]() Mona wrote:
Mona wrote:
Hej. Under “forklaring til opskriften” står der, at der skal strikkes i retstrik (ret på alle pinde). Længere nede står der så glatstrik. Ud fra opskriften lyder det som om, det er glatstrik hele vejen (på nær ved ribstrik). Er det en fejl?
30.01.2024 - 18:18DROPS Design answered:
Hei Mona. Det er bare kantmaskene som skal strikkes i RETSTRIKK. Altså når du strikker vrangborden skal den strikkes slik: 1 maske RETSTRIK, strik rib (2 ret / 2 vrang) til der er 3 masker tilbage, strik 2 ret, 1 maske RETSTRIK. Selve vesten strikkes i glattstrikk, slik du ser på bildet. mvh DROPS Design
05.02.2024 - 14:10
![]() Madeleine wrote:
Madeleine wrote:
Jag har maskat av de mittersta 26 maskorna och har nu axlarna kvar på stickorna som jag ska börja med. Förstår inte riktigt vad som menas med ”Minska 1 maska till hals i början av nästa varv från halsen”. Är det från avigsidan på ena axeln?
01.01.2024 - 23:09DROPS Design answered:
Hej Madeleine, ja på ditt högra framstycke minskar du från rätsidan och vänster framstycke minskar du från avigsidan vid att sticka ihop de 2 första maskorna :)
03.01.2024 - 08:01
![]() Marielle Benningen wrote:
Marielle Benningen wrote:
I am having difficulty understanding the diagonal shoulder. Is it possible to knit to knit plain shoulder straps?
21.11.2023 - 03:47DROPS Design answered:
Dear Mrs Benningen, you could but your measurements might be then different as the one in the chart; diagonal shoulders are just short rows: you slip the first stitches at the beg of a row from shoulder towards neck on a thread on every other row until all stitches are slipped aside (at the same time bind off for neck as explained for your size), then work all stitches and bind off on net row. Happy knitting!
21.11.2023 - 08:59
![]() Virginie wrote:
Virginie wrote:
Bonjour , Je ne comprends pas ce passage « COL: En commençant sur l’endroit à une des épaules, relever, avec la petite aiguille circulaire 4, 80 à 100 mailles (y compris les mailles en attente) autour de l’encolure. » ? : En commençant la relève des mailles à une épaule avec un nouveau fil, que faire de ce fil lorsque j’arrive aux 14 mailles qui sont en attente ? Merci d’avance pour votre réponse :)
04.11.2023 - 00:15DROPS Design answered:
Bonjour Virginie, effectivement, vous commencez à relever les mailles au niveau de la couture d l'une des épaules, puis vous relevez des mailles jusqu'à vos 14 mailles en attente, vous tricotez ces 14 mailles à l'endroit et vous continuez à relever les mailles autour de l'encolure jusqu'au début du tour. Si votre. nombre de mailles n'est pas divisible par 4 lorsque vous relevez les mailles, diminuez/augmentez à intervalles réguliers au 1er tour de côtes. Bon tricot!
06.11.2023 - 08:06
![]() Juliette wrote:
Juliette wrote:
Bonjour, je ne comprends pas ce que signifie tricoter “ une maille au point mousse” au tout début du tricot. Il ne faut pas juste faire des côtes 2/2 sur 4 cm ?
23.10.2023 - 15:38DROPS Design answered:
Bonjour Juliette, vous tricotez bien en côtes pour le bas du dos/devant mais avec 1 maille lisière au point mousse de chaque côté, autrement dit, tricotez à l'endroit la 1ère maille et la dernière maille de chaque rang (sur l'endroit mais aussi sur l'envers). Bon tricot!
24.10.2023 - 08:47
![]() Juliette wrote:
Juliette wrote:
Bonjour, - j’ai une question concernant ce passage «Placer en attente 3 fois 4 mailles puis les 5 dernières mailles ». Pourquoi il faut les placer séparément ? je peux mettre mes 17 mailles sur un arrête maille directement non? - je ne comprends pas ce qu’il faut faire ici non plus : « relever le fil entre 2 mailles et le tricoter ensemble torse à l’envers » Merci bcp !
20.10.2023 - 15:09DROPS Design answered:
BonjourJuliette, on tricote des rangs raccourcis pour former un biais au niveau des épaules: on a ainsi plus de rangs côté encolure que côté emmanchure - dans cette vidéo, on montre (pour un autre modèle) comment procéder. Pour éviter des trous entre les mailles en attente, relevez le fil au niveau où vous avez tourné, et tricotez le torse avec la maille suivante pour éviter un trou. Bon tricot!
20.10.2023 - 16:03
![]() Juliette wrote:
Juliette wrote:
Et ducoup il faut rabattre 2 fois, cad une m au niveau de chaque épaule? et il y a écrit qu'il faut 'finir les épaules séparément' mais je ne comprends pas comment faire parceque après avoir fait l'étape de l'encolure ça veut dire qu'on reste sur une épaule et on continu de tricoter et après on fait pareil sur l'autre je suppose ? et après il y a écrit 'rabattre souplement' ça veut dire qu'il faut rabattre toutes les mailles sur les 2 chaque épaule pour les finir quoi ?
20.10.2023 - 13:15DROPS Design answered:
Bonjour Juliette, quand vous avez rabattu les mailles de l'encolure dos, vous terminez les 2 épaules l'une après l'autre, rabattez sur l'endroit, mettez les mailles de l'épaule droite en attente et terminez l'épaule gauche: en début de rang sur l'envers, tricotez les premières mailles pour les mettre en attente, et rabattez 1 maille au début du 1er rang à partir de l'encolure (=sur l'endroit pour l'épaule gauche du dos), terminez l'épaule gauche comme indiqué, puis coupez le fil, et tricotez l'épaule droite de la même façon. Bon tricot!
20.10.2023 - 14:20
![]() Juliette wrote:
Juliette wrote:
Bonjour, je ne comprends pas ce passage: POUR le dos il y a écrit "au rang suivant, rabattre les 26m centrales pour l’encolure" et après pour l'encolure il faut "rabattre une maille au début du rang suivant". Ça veut dire qu'après avoir rabattu les 26m centrales, il faut finir le rang (donc l'épaule) et ensuite refaire un rang (que l'épaule) et rabattre une maille dans ce nouveau rang ? et si c'est le cas c'est à quelle m qu'on rabat ? à la dernièrère du rang ? (1)
20.10.2023 - 13:01DROPS Design answered:
Bonjour Juliette, c'est tout à fait ça, on doit rabattre 1 maille pour l'encolure et on ne peut rabattre qu'en début de rang, donc on va rabattre 1 maille en début de rang sur l'endroit pour l'épaule gauche du dos et 1 maille en début de rang sur l'envers pour l'épaule droite du dos. Bon tricot!
20.10.2023 - 14:14
![]() Lara wrote:
Lara wrote:
Buongiorno, è possibile fare il gilet usando i ferri classico, non circolari? Grazie!
18.02.2023 - 10:07DROPS Design answered:
Buonasera Lara, il gilet è lavorato in parti separate, quindi può lavorarlo con i ferri normali. Buon lavoro!
20.02.2023 - 18:53
|
|
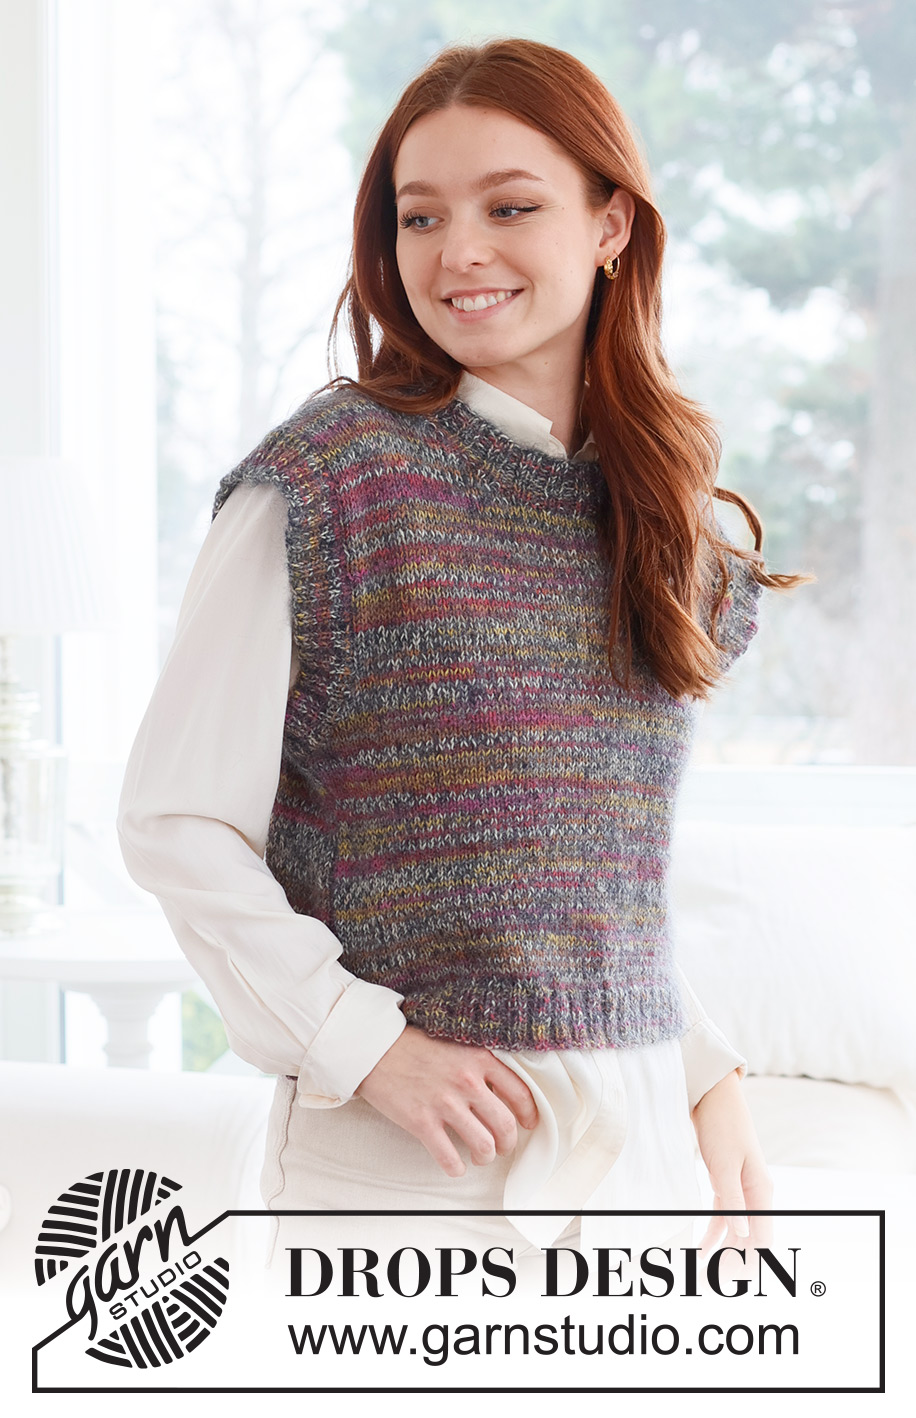
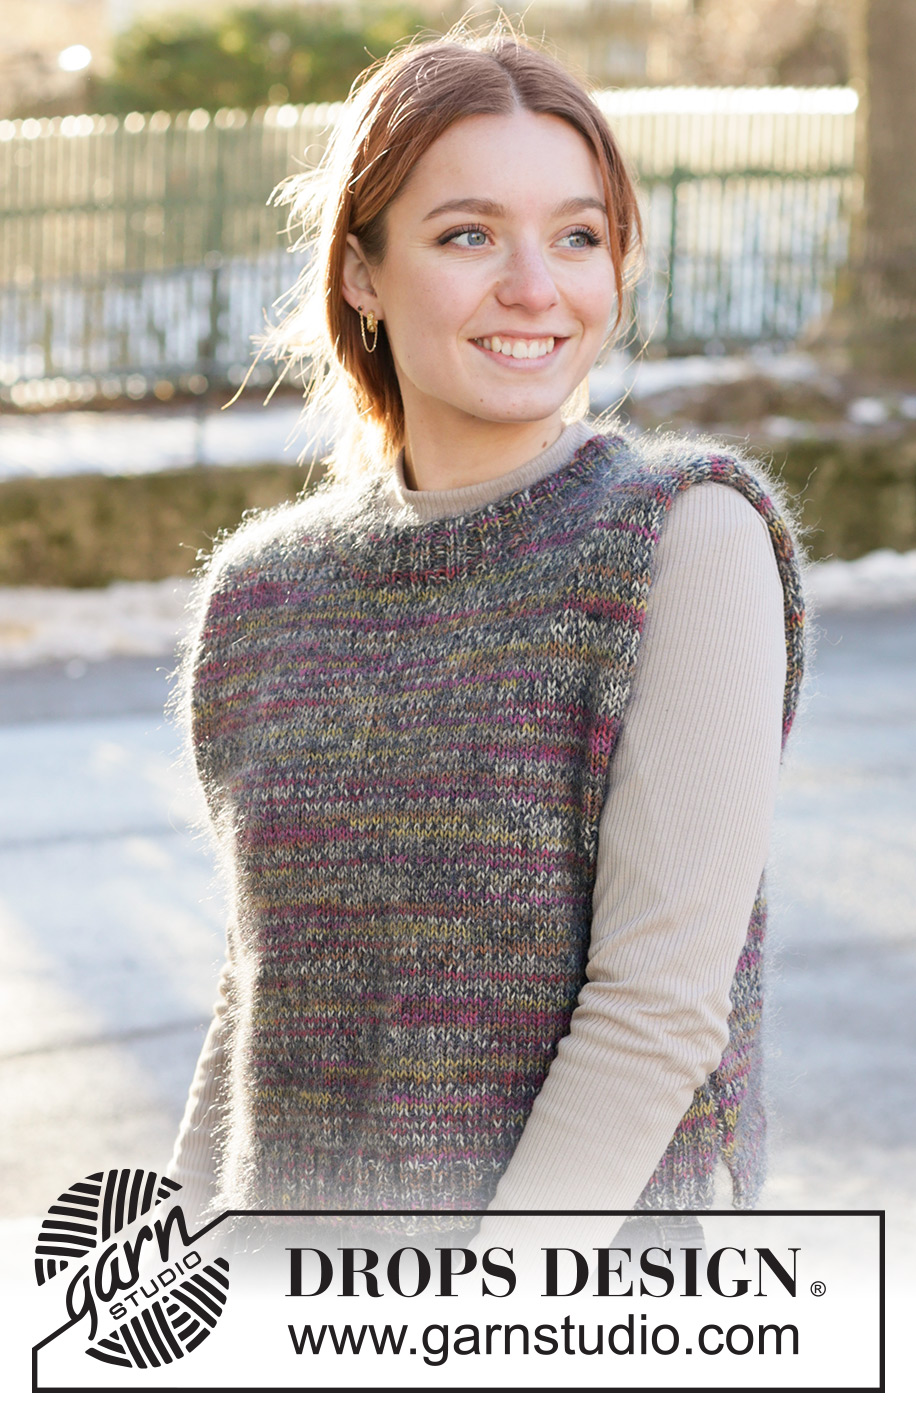
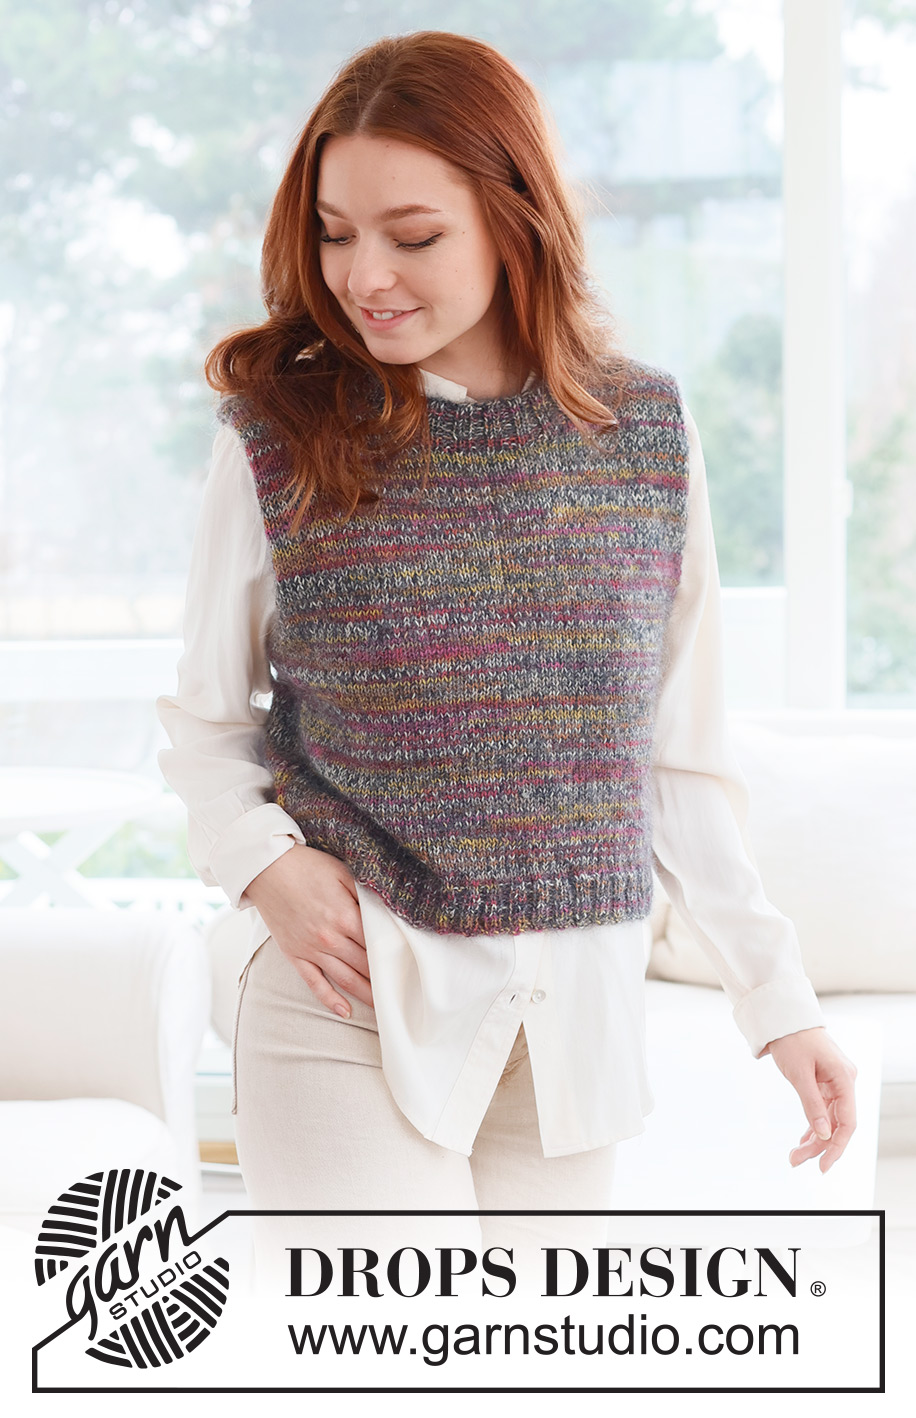
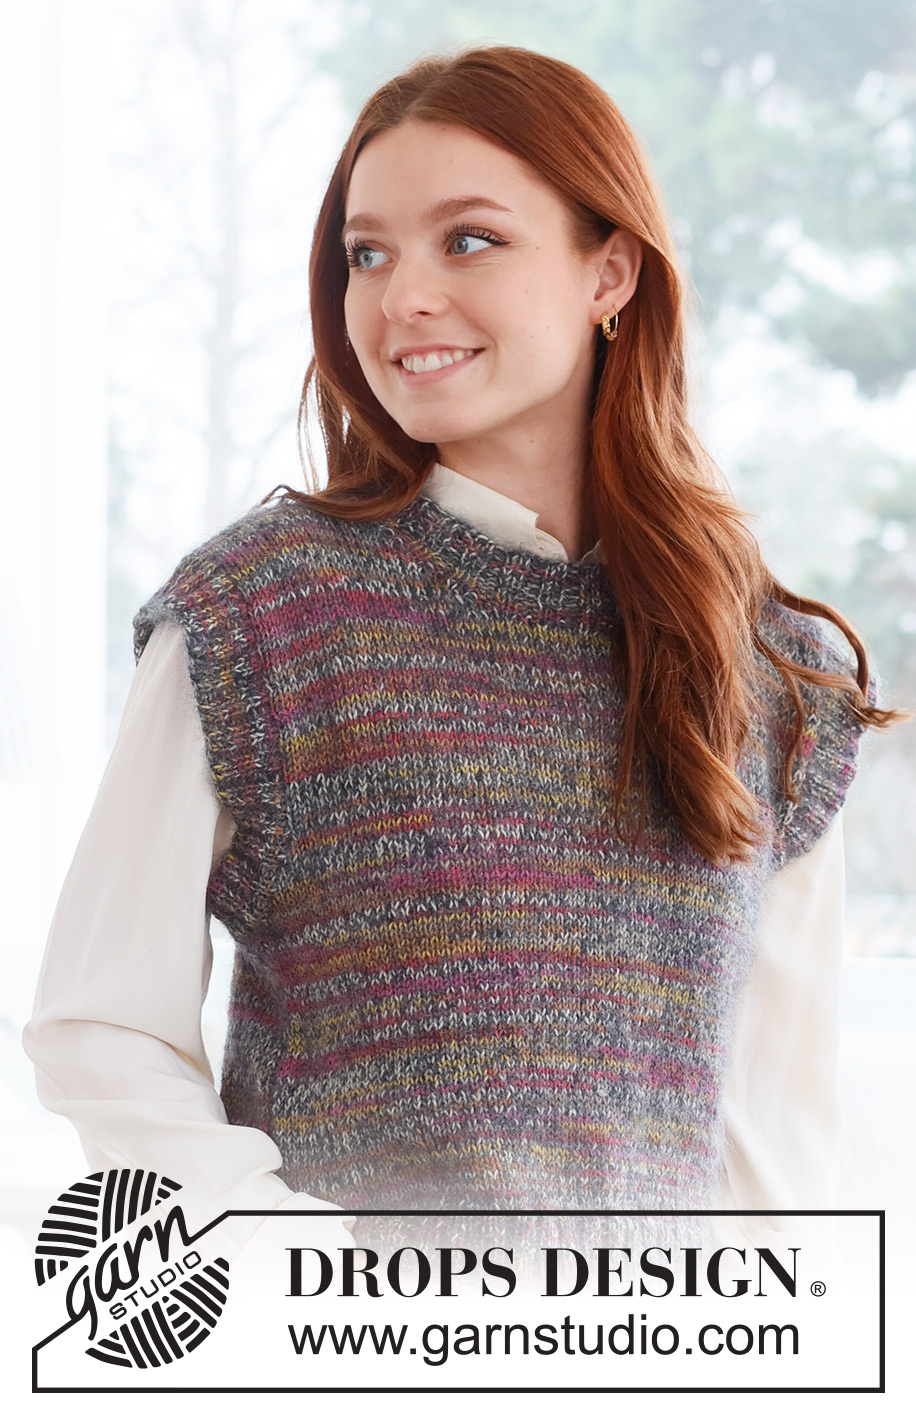
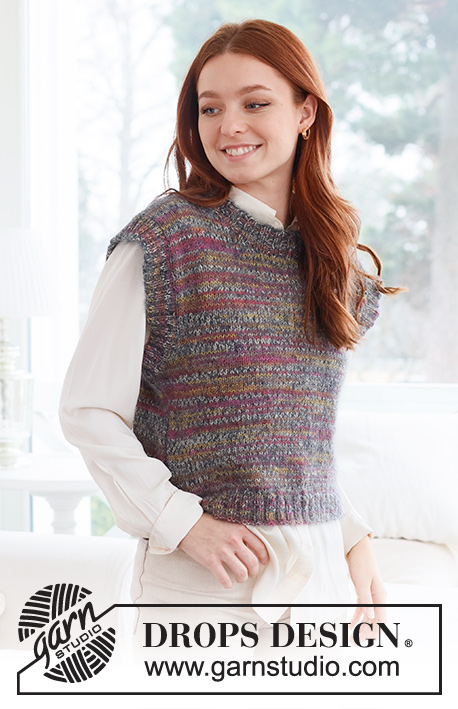
Fairytale#fairytalevest |
|
 |
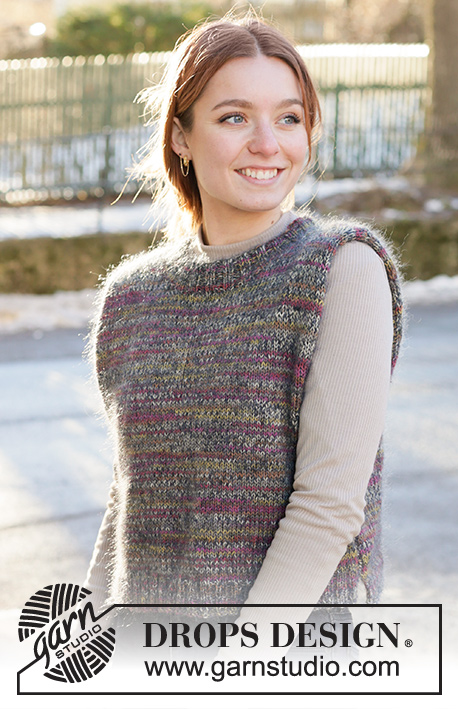 |
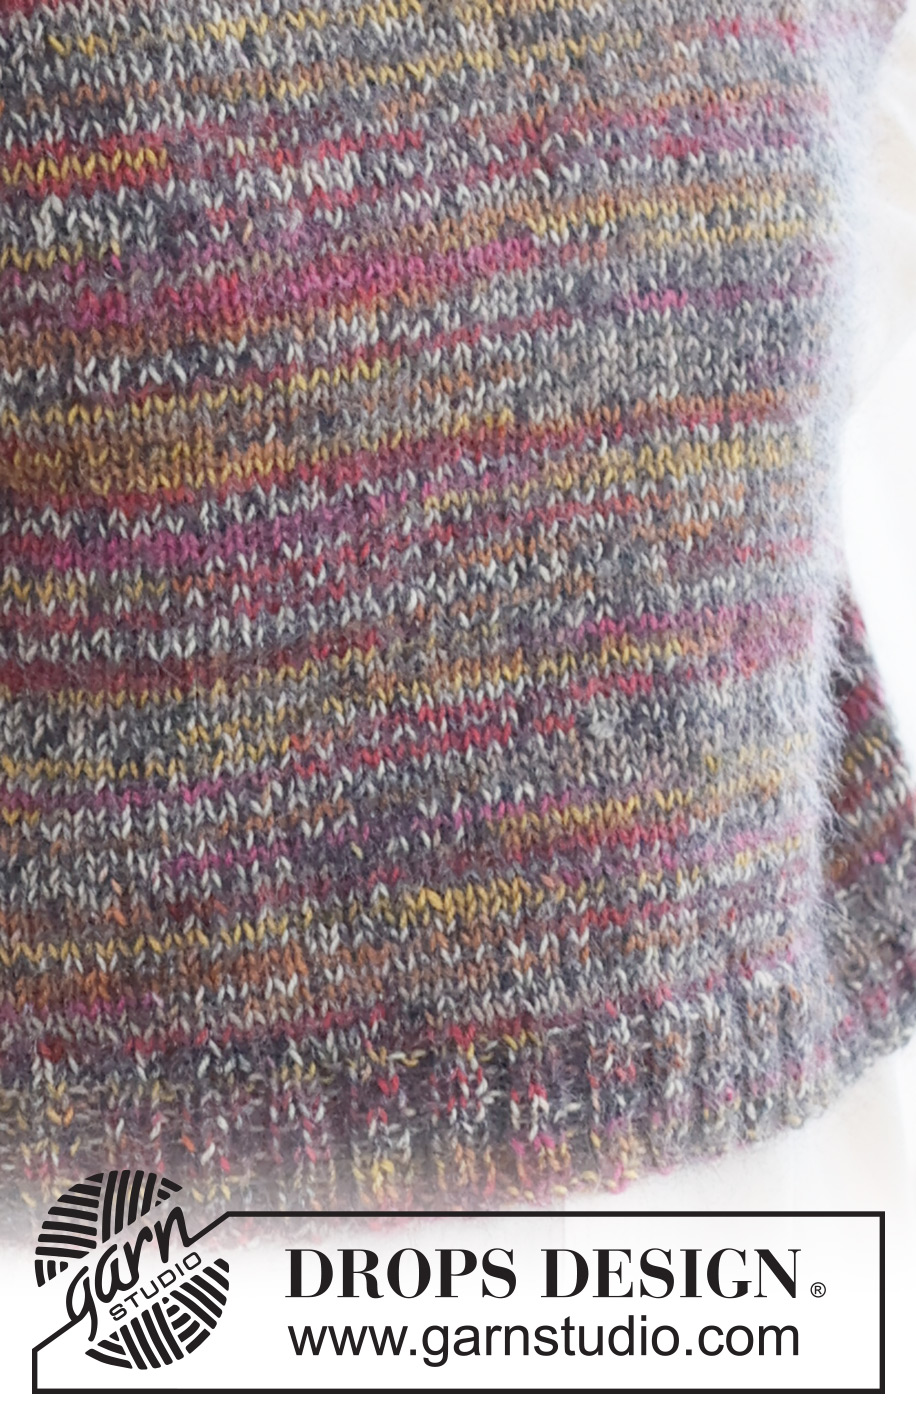
Knitted vest in 1 strand DROPS Fabel and 1 strand Kid-Silk. The piece is worked bottom up with diagonal shoulders. Sizes S - XXXL.
DROPS 237-42 |
|
|
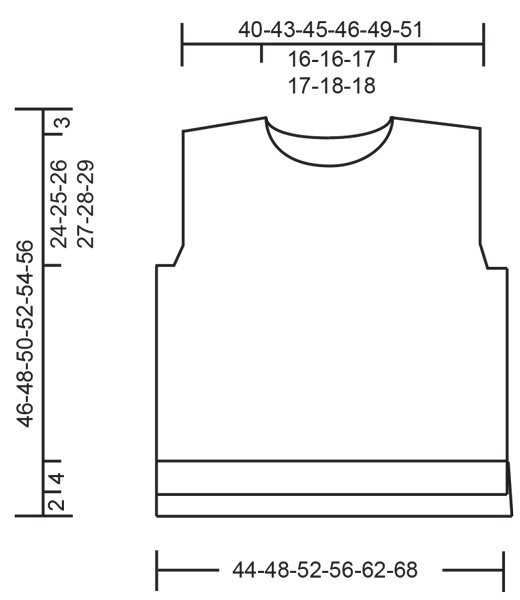
------------------------------------------------------- EXPLANATIONS FOR THE PATTERN: ------------------------------------------------------- RIDGE/GARTER STITCH (worked back and forth): Knit all rows. 1 ridge = knit 2 rows. ------------------------------------------------------- START THE PIECE HERE: ------------------------------------------------------- VEST – SHORT OVERVIEW OF THE PIECE: The front and back pieces are worked separately back and forth, bottom up. The back piece is 2 cm longer than the front. The sleeve-edges and neck are worked in the round to finish. BACK PIECE: Cast on 88-96-104-112-120-132 stitches with circular needle size 4 mm and 1 strand DROPS Fabel and 1 strand DROPS Kid-Silk (2 strands). Purl 1 row from the wrong side. Work rib from the right side as follows: 1 stitch in GARTER STITCH – read description above, work rib (knit 2, purl 2) until there are 3 stitches left, knit 2 and 1 stitch in garter stitch. Continue this rib for 4 cm. Change to circular needle size 5 mm. Continue with stocking stitch; on the first row decrease 14-14-16-16-14-16 stitches evenly spaced = 74-82-88-96-106-116 stitches. Work until the piece measures 19-20-21-22-23-24 cm. REMEMBER THE KNITTING TENSION! On the next row begin to cast off for the armholes on both sides: 3-3-3-4-4-4 stitches 1 time, 2 stitches 1 time and 1 stitch 1-3-4-6-9-12 times = 62-66-70-72-76-80 stitches. Continue working until the piece measures 42-44-46-48-50-52 cm (4 cm left to finished length). On the next row cast off the middle 26-26-28-28-30-30 stitches for the neck and finish each shoulder separately. OVERVIEW OF THE NEXT SECTION: You now cast off for the neck and place stitches on a thread for the diagonal shoulder. Read NECK and DIAGONAL SHOULDER before continuing. NECK: Cast off 1 stitch at the beginning of the next row from the neck. DIAGONAL SHOULDER: Place the stitches towards the armhole on a thread; to avoid having to cut the strand, work the stitches first. Place 4-5-5-5-6-6 stitches on the thread 3 times then the remaining 5-4-5-6-4-6 stitches. All stitches are now either cast off or on the thread. Place the 17-19-20-21-22-24 stitches from the thread back on circular needle size 5 mm. Purl 1 row from the wrong side. To avoid holes where you turned, pick up the strand between 2 stitches and purl it twisted together with the next stitch on the left needle. Cast off with knit, a little loosely, from the right side. The piece measures approx. 46-48-50-52-54-56 cm from the cast-on edge to the highest point on the shoulder. Work the other shoulder in the same way. FRONT PIECE: Cast on and work as the back until the front piece measures 17-18-19-20-21-22 cm. On the next row begin to cast off for the armholes on both sides: 3-3-3-4-4-4 stitches 1 time, 2 stitches 1 time and 1 stitch 1-3-4-6-9-12 times = 62-66-70-72-76-80 stitches. Continue working until the piece measures 34-36-36-38-38-40 cm (approx. 10-10-12-12-14-14 cm left to finished length). On the next row from the right side place the middle 12-12-14-14-16-16 stitches on a thread for the neck and finish each shoulder separately. OVERVIEW OF THE NEXT SECTION: You now cast off for the neck and place stitches on a thread for the diagonal shoulder. Read NECK and DIAGONAL SHOULDER before continuing. NECK: Cast off from the neck 2 stitches 2 times and 1 stitch 4 times. DIAGONAL SHOULDER: AT THE SAME TIME, when the piece measures 41-43-45-47-49-51 cm place the stitches towards the armhole on a thread in the same way as on the back piece. When all the stitches are either cast off or on the thread, place the 17-19-20-21-22-24 stitches from the thread back on circular needle size 5 mm. Purl 1 row from the wrong side in the same way as on the back. Cast off a little loosely with knit from the right side. The piece measures approx. 44-46-48-50-52-54 cm from the cast-on edge to the highest point on the shoulder. Work the other shoulder in the same way. ASSEMBLY: Sew the shoulder seams edge to edge. Sew the side seams edge to edge, starting from the armholes and sewing to 1 cm after the beginning of the rib, leaving a split; the back piece is longer than the front. NECK: Start from the right side on one shoulder, with 1 strand Fabel and 1 strand Kid-Silk. Using short circular needle size 4 mm knit up 80 to 100 stitches (including the stitches on the thread) around the neck. Stich-number should be divisible by 4. Work rib in the round (knit 2, purl 2) for 4 cm. Cast off with knit over knit and purl over purl. SLEEVE-EDGES: Start from the right side at the bottom of the armhole with 1 strand Fabel and 1 strand Kid-Silk. Using short circular needle size 4 mm knit up 112 to 136 stitches around the armhole (Stich-number should be divisible by 4). Work rib in the round (knit 2, purl 2) for 4 cm. Cast off with knit over knit and purl over purl. Work the other sleeve-edge in the same way. The edge can be folded double to the inside for a narrower but thicker sleeve-edge. |
|
 |
|
Have you finished this pattern?Tag your pictures with #dropspattern #fairytalevest or submit them to the #dropsfan gallery. Do you need help with this pattern?You'll find 25 tutorial videos, a Comments/Questions area and more by visiting the pattern on garnstudio.com. © 1982-2026 DROPS Design A/S. We reserve all rights. This document, including all its sub-sections, has copyrights. Read more about what you can do with our patterns at the bottom of each pattern on our site. |
|


With over 40 years in knitting and crochet design, DROPS Design offers one of the most extensive collections of free patterns on the internet - translated to 17 languages. As of today we count 324 catalogues and 12290 patterns translated into English (UK/cm). 12290
We work hard to bring you the best knitting and crochet have to offer, inspiration and advice as well as great quality yarns at incredible prices! Would you like to use our patterns for other than personal use? You can read what you are allowed to do in the Copyright text at the bottom of all our patterns. Happy crafting!
Post a comment to pattern DROPS 237-42
We would love to hear what you have to say about this pattern!
If you want to leave a question, please make sure you select the correct category in the form below, to speed up the answering process. Required fields are marked *.