
Popular categories
Looking for a yarn?


Comments / Questions (103)
![]() Ahimsa wrote:
Ahimsa wrote:
Buenas , yo tengo muchos lios, :-), el q me tiene paradda es el de los surcos, que no se como se hace, porque mirando videos no me aclaro, los surcos son hileras todo del derecho?que por más que busco me pone punto santa clara o bobo, gracias de antemano. soy autodidacta y así me va .:-(
23.05.2024 - 21:24
![]() Marine Mazelier wrote:
Marine Mazelier wrote:
Bonjour, je ne comprends pas les côtes mousse. Il est marqué qu'1 côte mousse =tricoter 2 rangs endroits, je comprends donc que c'est un rang entier. Mais quand on tricote on nous demande de tricoter 2 côtes mousse au-dessus de 6 mailles (taille S) et donc cela veut dire que ce n'est pas sur tout un rang mais seulement sur un nombre de mailles spécifiques. Qu'est-ce donc que les côtes mousse et comment les réaliser? Merci
12.05.2024 - 20:04DROPS Design answered:
Bonjour Mme Mazelier, pour tricoter 1 côte mousse, il faut tricoter 2 rangs: 1 rang endroit sur l'endroit et 1 rang endroit sur l'envers. Quand on doit tricoter 2 côtes mousse, on va tricoter 4 rangs au total avec (en taille S) 6 mailles point mousse de chaque côté et les autres mailles en jersey. Bon tricot!
13.05.2024 - 08:35
![]() Emanuela wrote:
Emanuela wrote:
Ciao, non capisco come interpretare il simbolo tutto nero del diagramma A.1 che dice nessuna maglia; passare direttamente al simbolo successivo del diagramma. Significa che devo passare la maglia senza lavorarla? Grazie
11.04.2024 - 21:41DROPS Design answered:
Buonasera Emanuela, significa che in quel punto la maglia non c'è e deve lavorare il simbolo successivo. Buon lavoro!
11.04.2024 - 22:21
![]() Corina Avram wrote:
Corina Avram wrote:
Hello! I want to knit this top, but I am not sure what size to make it. I have 88cm in bust measurements, would this mean that I should knit size L or M? In Size M the circumference of the item is exactly 88 cm, but it seems too tight. Thanks
01.02.2024 - 10:33DROPS Design answered:
Dear Mrs Avram, measure a similar garment you have and like the shape and compare these measurements to the chart, this is the best way to find out the matching size; read more here. Happy knitting!
01.02.2024 - 15:43
![]() Maika wrote:
Maika wrote:
Hola! En la parte donde dice que hay que * Rematar 5-7-9-11-13-15 puntos para la sisa, tejer 42-45-48-52-57-62 puntos en punto jersey, colocar los 2 puntos siguientes en una aguja auxiliar en el frente de la pieza, tejer los 3 puntos siguientes juntos de derecho y colocar estos 43-46-49-53-58-63 puntos en un hilo o en una aguja suplementaria = PARTE-1.* , no me quedan 43 puntos tengo 46 puntos. Porqué?
21.01.2024 - 20:46DROPS Design answered:
Hola Maika, trabaja la fila como sigue: cerrar 5 pts para la sisa, el último pt rematado cuenta como el 1º pt en pt jersey, trabajar 41 pts más en pt jersey, colocar los 2 pts en una aguja para trenzar delante de la labor, trabajar 3 puntos juntos de derecho (disminuyes a 1 pt) y colocar los 42 pts en pt jersey + el pt disminuido (= 43 pts) en un gancho auxiliar para trabajar la Parte -1 después. Ahora trabajas como sigue sobre los 47 pts restantes de la fila (Parte-2): trabajar juntos de derecho retorcido los pts desde la aguja para trenzar, trabajar 41 pts en pt jersey y 6 pts en pt musgo.
22.01.2024 - 23:51
![]() Claudia wrote:
Claudia wrote:
Favor de no hacer caso a mi pregunta anterior, Mi pregunta es sí es correcto que se tejan 3 puntos juntos Cómo dice el párrafo siguiente:” Rematar 5-7-9-11-13-15 puntos para la sisa, tejer 42-45-48-52-57-62 puntos en punto jersey, colocar los 2 puntos siguientes en una aguja auxiliar en el frente de la pieza, tejer los 3 puntos siguientes juntos de derecho y colocar estos 43-46-49-53-58” Ya que no me quedan los mismos puntos de cada lado.
25.08.2023 - 07:44DROPS Design answered:
Hola Claudia, tienes 42 pts + los 3 pts juntos (= 1 pt) que son los 43 que vas a deslizar. En el otro lado, tienes los 2 puntos de la aguja auxiliar de la parte 1 que se trabajan juntos (= 1 punto) + 41 pts en pt jersey + 1 pt después de cerrar 5 pts de la sisa.
28.08.2023 - 00:05
![]() Claudia wrote:
Claudia wrote:
En este párrafo: “ Después de los 2 surcos tejer la hilera siguiente por el lado derecho de la manera siguiente: Rematar 5-7-9-11-13-15 puntos para la sisa, tejer 42-45-48-52-57-62 puntos en punto jersey, colocar los 2 puntos siguientes en una aguja auxiliar en el frente de la pieza, tejer los 3 puntos siguientes juntos …. = PARTE-1.”. Es correcto la tener 3 puntos junto?, porque no me checando las cuentas.
25.08.2023 - 07:36DROPS Design answered:
Hola Claudia, tienes 42 pts + los 3 pts juntos (= 1 pt) que son los 43 que vas a deslizar. En el otro lado, tienes los 2 puntos de la aguja auxiliar de la parte 1 que se trabajan juntos (= 1 punto) + 41 pts en pt jersey + 1 pt después de cerrar 5 pts de la sisa.
28.08.2023 - 00:05
![]() Hilde wrote:
Hilde wrote:
Sorry, ik heb mijn vraag te vroeg gesteld. Ik heb intussen de oplossing gevonden. Ik moest gewoon overschakelen op naalden zonder stop, met punten aan beide zijden. Nu gaat het prima.
09.07.2023 - 02:34
![]() Hilde wrote:
Hilde wrote:
Hallo, Mijn topje is bijna af maar bij de bandjes gekomen, begrijp ik dit niet : "Brei 1 naald recht aan de goede kant * duw de steken terug naar het begin van de naald, trek de draad aan en brei de 5-5-5-7-7-7 steken aan de goede kant opnieuw recht *, brei van *-* tot...." Kan iemand me helpen?
07.07.2023 - 21:43
![]() Ute Burrage wrote:
Ute Burrage wrote:
Hi, first of all, thanks for all the patterns! Secondly, can this be knit in the round? I just don’t like seaming…thank you!
02.07.2023 - 13:27DROPS Design answered:
Dear Mrs Burrage, yes probably, you can remove the edge stitches, make sure the number of stitches fit for the ribbing edge and then increase on each side of piece and read diagrams, seen from RS (until you divide piece for each side). Happy knitting!
03.07.2023 - 10:34
|
||||||||||||||||
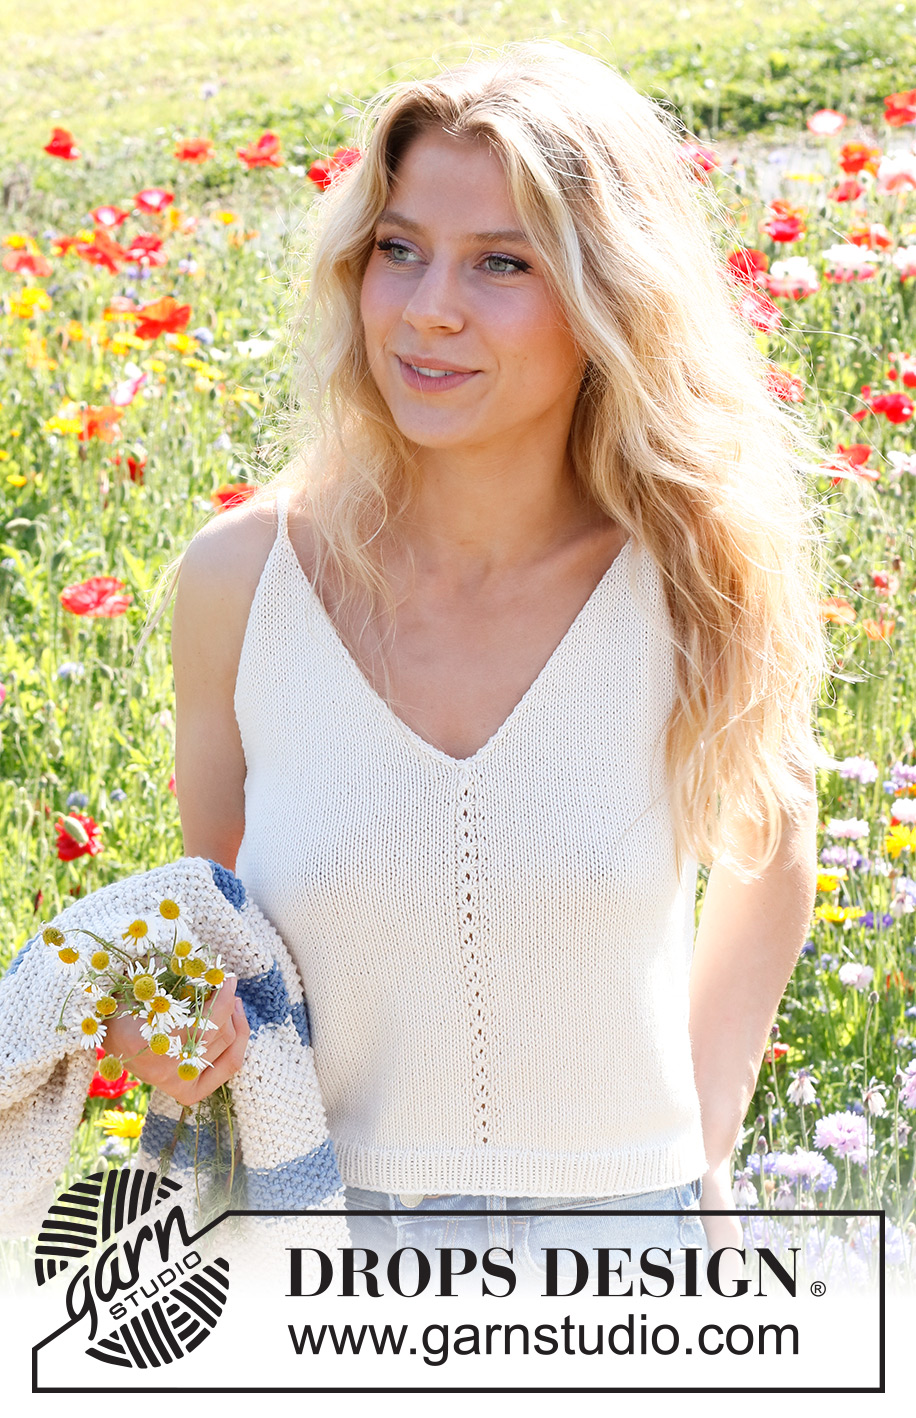
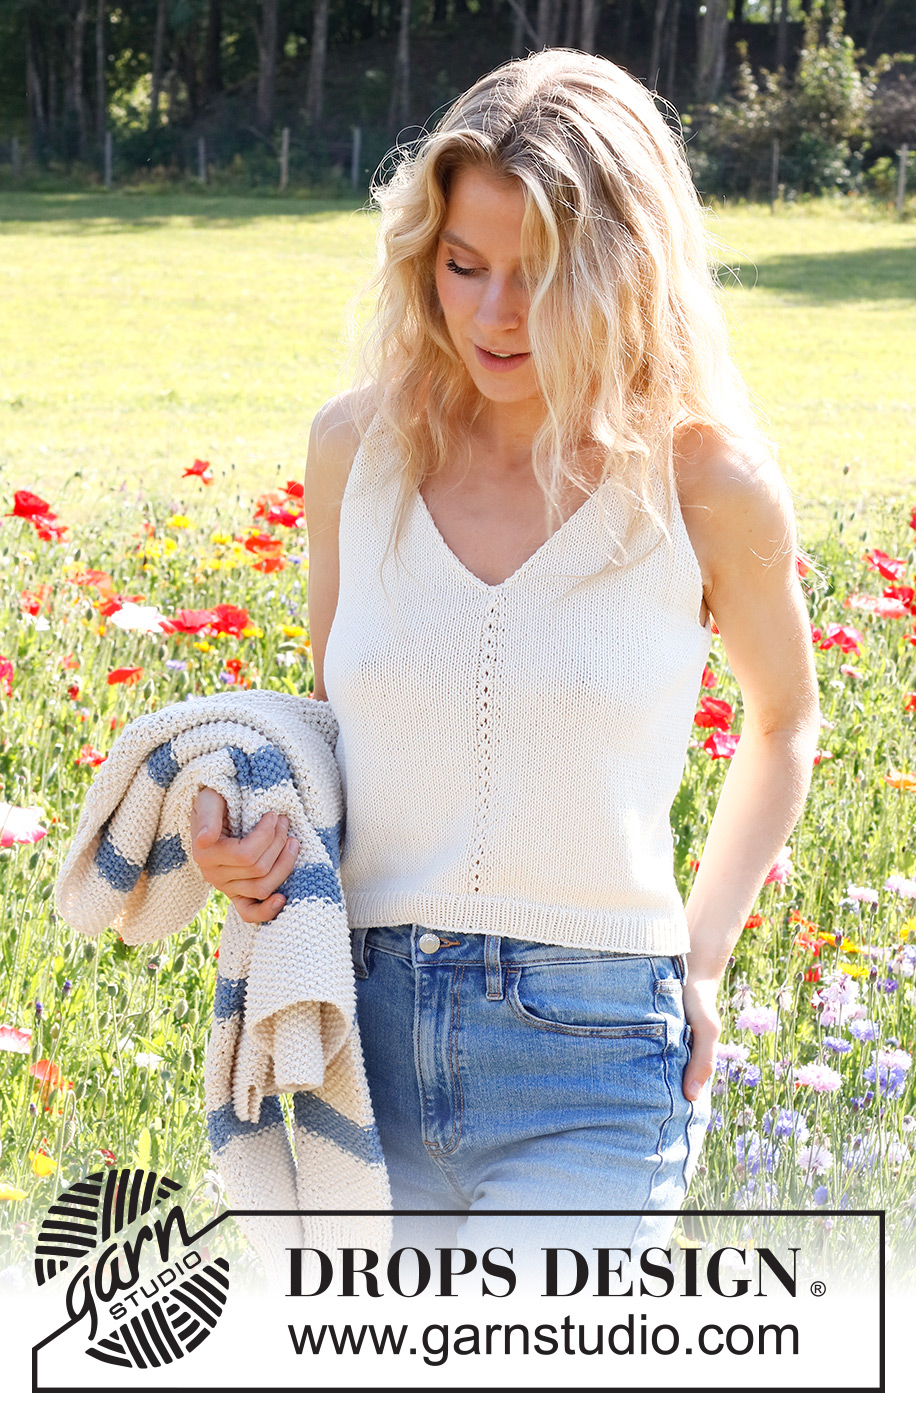
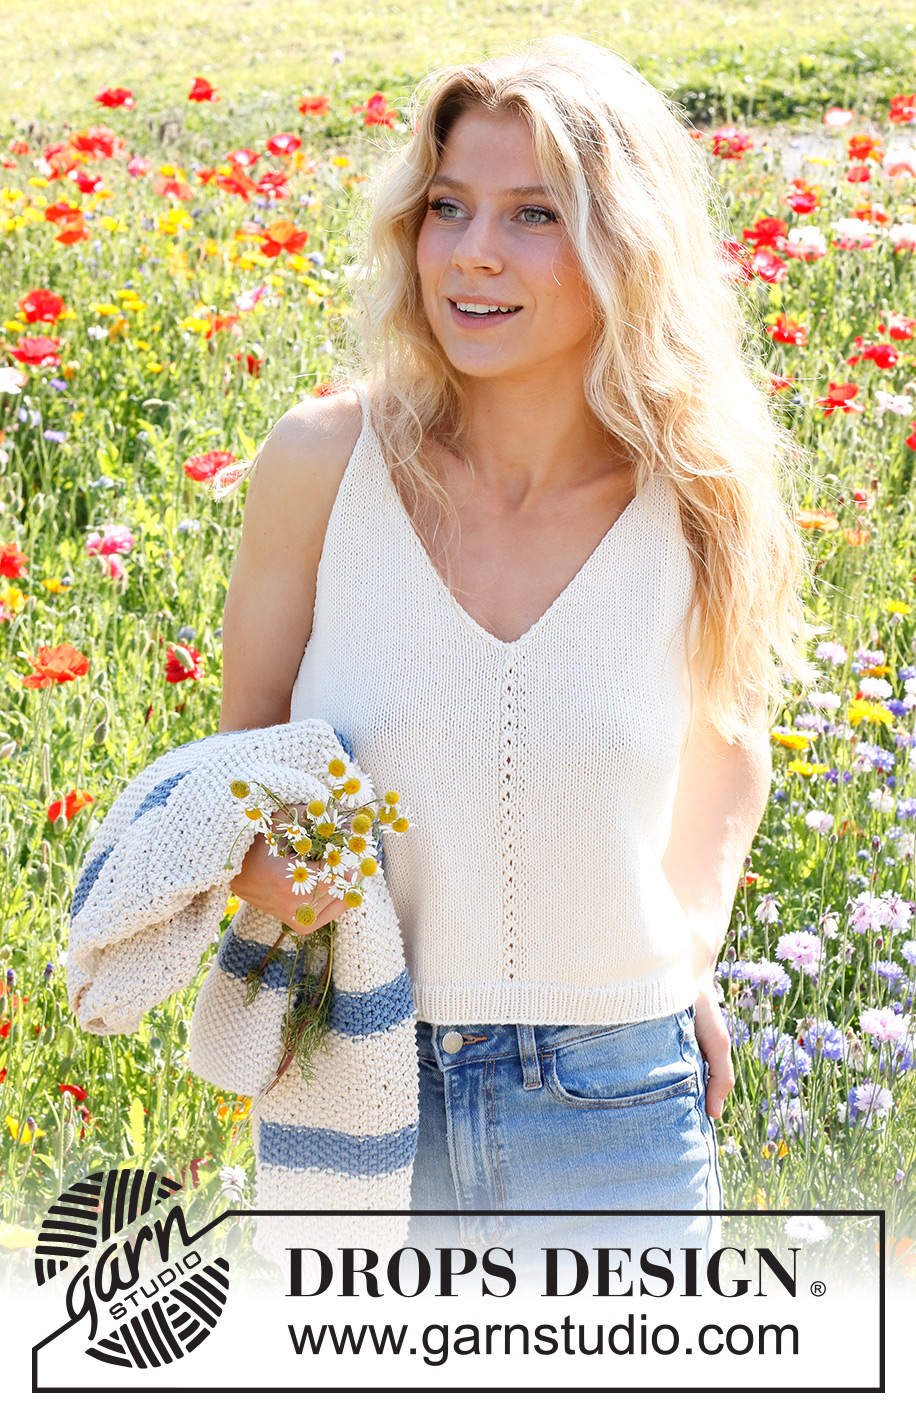
White Sails#whitesailstop |
||||||||||||||||
 |
 |
|||||||||||||||
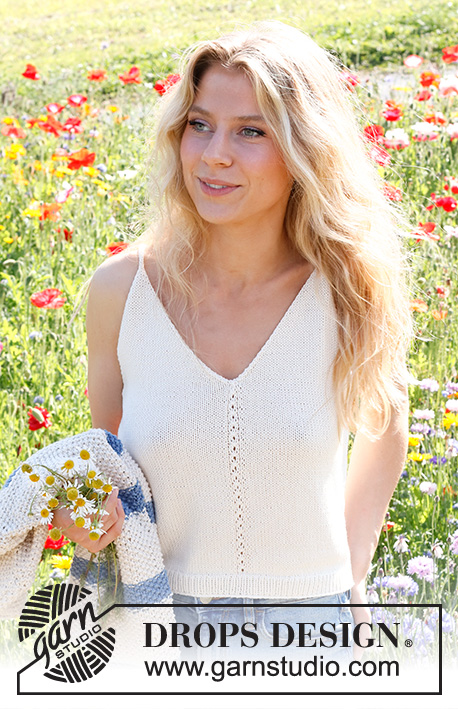
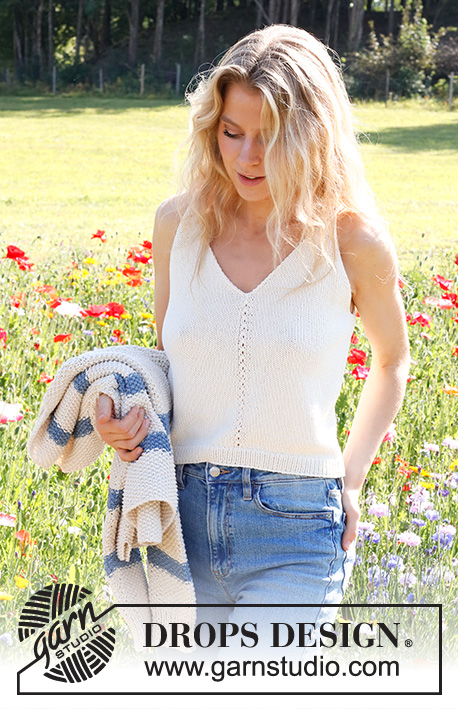
Knitted top in DROPS Safran. The piece if worked bottom up in stocking stitch. Sizes S - XXXL.
DROPS 230-1 |
||||||||||||||||
|
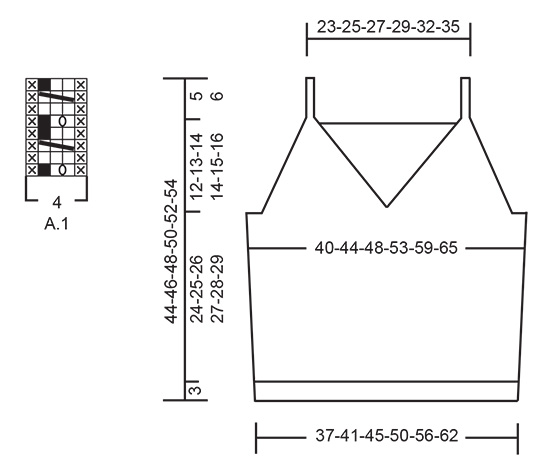
------------------------------------------------------- EXPLANATIONS FOR THE PATTERN: ------------------------------------------------------- RIDGE/GARTER STITCH (worked back and forth): Knit all rows. 1 ridge = knit 2 rows. PATTERN: See diagram A.1. The diagram shows all rows in the pattern from the right side. INCREASE TIP (sides): All increases are worked from the right side. Increase 1 stitch inside the 2 outermost stitches by making 1 yarn over. On the next row purl the yarn over twisted to avoid a hole. Then work the new stitch in stocking stitch. DECREASE TIP (for the armholes and V-neck): FROM THE RIGHT SIDE: After the 1 edge stitch: Slip 1 stitch as if to knit, knit 1 and pass the slipped stitch over the knitted stitch (= 1 stitch decreased). Before the 1 edge stitch: Work until there are 3 stitches left, knit 2 together, 1 edge stitch in garter stitch (= 1 stitch decreased). FROM THE WRONG SIDE: After the 1 edge stitch: Purl 2 together (= 1 stitch decreased). Before the 1 edge stitch: Work until there are 3 stitches left, purl 2 twisted together, edge stitch in garter stitch (= 1 stitch decreased). ------------------------------------------------------- START THE PIECE HERE: ------------------------------------------------------- TOP – SHORT OVERVIEW OF THE PIECE: The back and front pieces are worked separately, back and forth and bottom up. Straps are worked on the front piece, then sewn onto the back piece. BACK PIECE: Cast on 100-112-122-136-150-166 stitches with needle size 2.5 mm and DROPS Safran. Purl 1 row from the wrong side, then work rib (knit 1, purl 1), with 1 edge stitch in GARTER STITCH on each side – read description above. When the rib measures 3 cm, knit 1 row from the right side where you decrease 10-12-12-14-14-16 stitches evenly spaced = 90-100-110-122-136-150 stitches. Change to needle size 3 mm. Work stocking stitch back and forth with 1 edge stitch in garter stitch on each side. REMEMBER THE KNITTING TENSION! When the piece measures 6 cm, increase 1 stitch on each side – read INCREASE TIP. Increase like this every 6 cm a total of 4 times on each side = 98-108-118-130-144-158 stitches. When the piece measures 26-27-28-29-30-31 cm, work 2 ridges over the outermost 6-8-10-12-14-16 stitches on each side (the other stitches are continued in stocking stitch). After the 2 ridges, cast off 5-7-9-11-13-15 stitches at the beginning of the next 2 rows for the armholes = 88-94-100-108-118-128 stitches. Continue with stocking stitch and 1 edge stitch in garter stitch on each side. AT THE SAME TIME on the first row from the right side decrease 1 stitch on each side for the armholes – read DECREASE TIP. Decrease like this every 2nd row (each row from the right side) a total of 16-17-18-19-21-22 times = 56-60-64-70-76-84 stitches. Knit 1 row from the right side where you increase 7-7-7-7-9-9 stitches evenly spaced = 63-67-71-77-85-93 stitches. Change to needle size 2.5 mm. Work rib as follows from the wrong side: 1 edge stitch in garter stitch, * purl 1, knit 1 *, work from *-* until there are 2 stitches left, purl 1 and1 edge stitch in garter stitch. Continue this rib for 3 cm. Cast off a little loosely. FRONT PIECE: Cast on 100-112-122-136-150-166 stitches with needle size 2.5 mm and DROPS Safran. Purl 1 row from the wrong side, then work rib (knit 1, purl 1) with 1 edge stitch in garter stitch on each side. When the rib measures 3 cm, knit 1 row from the right side where you decrease 10-12-12-14-14-16 stitches evenly spaced = 90-100-110-122-136-150 stitches. Change to needle size 3 mm. Work stocking stitch back and forth with 1 edge stitch in garter stitch on each side. Purl 1 row from the wrong side with 1 edge stitch in garter stitch on each side. The next row is worked as follows from the right side: 1 edge stitch in garter stitch, 42-47-52-58-65-72 stitches in stocking stitch, A.1, 42-47-52-58-65-72 stitches in stocking stitch and 1 edge stitch in garter stitch. Continue this pattern. When the piece measures 6 cm, increase 1 stitch on each side. Increase like this every 6 cm a total of 4 times on each side = 98-108-118-130-144-158 stitches. When the piece measures 26-27-28-29-30-31 cm (adjust so the next row is either row 3 or 7 in A.1), work 2 ridges over the outermost 6-8-10-12-14-16 stitches on each side (the other stitches are continued in stocking stitch and pattern as before). After the 2 ridges work the next row from the right side as follows: Cast off 5-7-9-11-13-15 stitches for the armhole, work 42-45-48-52-57-62 stitches in stocking stitch, place the next 2 stitches on a cable needle in front of the piece, knit the next 3 stitches together and place these 43-46-49-53-58-63 stitches on a thread or extra needle = PART-1. PART-2: Knit twisted together the 2 stitches from the cable needle, work 41-44-47-51-56-61 stitches in stocking stitch and 6-8-10-12-14-16 stitches in garter stitch. Turn, cast off 5-7-9-11-13-15 stitches for the armhole, work stocking stitch until there is 1 stitch left and 1 stitch in garter stitch = 43-46-49-53-58-63 stitches. OVERVIEW OF THE NEXT SECTION: Continue with stocking stitch and 1 edge stitch in garter stitch on each side. AT THE SAME TIME on the first row from the right side, begin to decrease for the armhole and V-neck. Decrease inside the 1 edge stitch – read DECREASE TIP; the decreases are different for the armhole and neck - read ARMHOLE and V-NECK before continuing. ARMHOLE: Decrease every 2nd row (each row from the right side) a total of 16-17-18-19-21-22 times. V-NECK: Decrease every row (both right side and wrong side) a total of 7-7-9-9-13-17 times, then every 2nd row (each row from the right side) 15-17-17-18-17-17 times. After all the decreases there are 5-5-5-7-7-7 stitches left for the strap. STRAP: = 5-5-5-7-7-7 stitches. Knit 1 row from the right side, * push the stitches back to the beginning of the needle, tighten the strand and knit the 5-5-5-7-7-7 stitches from the right side again *, work from *-* until the strap measures 9-9-10-11-11-11 cm – work to desired length; the strap is sewn to the back piece later. Cut the strand, pull it through the 5-5-5-7-7-7 stitches, tighten and fasten well. PART-1: Place the 43-46-49-53-58-63 stitches from PART-1 back on needle size 3 mm. Work stocking stitch back and forth with 1 edge stitch in garter stitch on each side. AT THE SAME TIME on the first row from the right side, begin to decrease for the armhole and V-neck in the same way as on PART-2 = 5-5-5-7-7-7 stitches left for the strap. Work the strap in the same way as on part-2. ASSEMBLY: Sew the straps to the back piece – outermost on each side. Sew the side seams inside the 1 edge stitch. |
||||||||||||||||
Diagram explanations |
||||||||||||||||
|
||||||||||||||||
 |
||||||||||||||||
Have you finished this pattern?Tag your pictures with #dropspattern #whitesailstop or submit them to the #dropsfan gallery. Do you need help with this pattern?You'll find 27 tutorial videos, a Comments/Questions area and more by visiting the pattern on garnstudio.com. © 1982-2026 DROPS Design A/S. We reserve all rights. This document, including all its sub-sections, has copyrights. Read more about what you can do with our patterns at the bottom of each pattern on our site. |
||||||||||||||||


With over 40 years in knitting and crochet design, DROPS Design offers one of the most extensive collections of free patterns on the internet - translated to 17 languages. As of today we count 324 catalogues and 12290 patterns translated into English (UK/cm). 12290
We work hard to bring you the best knitting and crochet have to offer, inspiration and advice as well as great quality yarns at incredible prices! Would you like to use our patterns for other than personal use? You can read what you are allowed to do in the Copyright text at the bottom of all our patterns. Happy crafting!
Post a comment to pattern DROPS 230-1
We would love to hear what you have to say about this pattern!
If you want to leave a question, please make sure you select the correct category in the form below, to speed up the answering process. Required fields are marked *.