
Popular categories
Looking for a yarn?


Comments / Questions (103)
![]() JB wrote:
JB wrote:
Love this pattern. I knitted it in ‘ Chalk’ Safran, it turned out perfect! Your video tutorials are just brilliant! I cannot wait to tackle my next project from you guys!
13.08.2024 - 15:20
![]() Anna wrote:
Anna wrote:
Witam. Mam pytanie do tego modelu bo nie rozumiem : Robię rozmiar XXL Przy zamykaniu oczek na podkroje rękawów po przerobieniu 2uch ściagaczy francuskich mam zamknąć 13 o. Na początku dwuch kolejnych rzedów bo ma zostac z 144 o . 118. To mam zamyknąć w pierwszym rzędzie 7 o. Z prawej strony a potem 6 oczek. Po lewej sttonie ? Chodzi o część tyłu. Proszę o pomoc Dzuekuję Anna
28.06.2024 - 21:08DROPS Design answered:
Witaj Aniu, zamykasz na początku rzędu na prawej stronie 13 oczek i tyle samo oczek zamykasz na początku rzędu na lewej stronie: 144-26=118 oczek. Pozdrawiamy!
01.07.2024 - 08:41
![]() Lise wrote:
Lise wrote:
Ah - beklager. Jeg havde glemt kantmaskerne. Nu går det op! 🤗
16.06.2024 - 16:26
![]() Lise wrote:
Lise wrote:
Jeg forstår ikke helt 1. Pind af mønsteret - der står jeg skal strikke 42 masker A1 og 42 masker. Men der er kun 5 masker i A1 og den ene skal springes over? Måske har jeg misforstået, men jeg strikker fra retten 42, 1 vrang, 1 ret, 1 slå om 1 ret. Så er jeg ved midten og skal i følge mønsteret springe 1 over og 1 vrang. Så bliver det jo skævt for midten for der er 44 masker tilbage
16.06.2024 - 16:12DROPS Design answered:
Hei Lise. Så flott at du fant ut av det. God strikke fornøyelse. mvh DROPS Design
24.06.2024 - 13:24
![]() Paulina wrote:
Paulina wrote:
W części tyłu „ Po przerobieniu tych 2 ściągaczy francuskich, zamknąć na podkroje rękawów 5-7-9-11-13-15 oczek na początku 2 kolejnych rzędów = 88-94-100-108-118-128 oczek.” Powinno być napisane, że pierwsze oczko brzegowe jest do zamknięcia również, ponieważ wskazówki dotyczące zamykania oczek nie biorą go pod uwagę. Zwłaszcza na początku rzędu.
10.06.2024 - 08:45DROPS Design answered:
Witaj Paulino, jeśli w opisie nie ma odnośnika do instrukcji, która znajduje się w części przed opisem właściwym (tutaj mówimy o ZAMYKANIE OCZEK (podkroje rękawów i dekolt V), to należy przerabiać dany fragment jak jest napisane we wzorze. Instrukcje te są stosowane, gdy jest to wyraźnie zaznaczone w opisie, w tym przypadku 2 zdania niżej). Pozdrawiamy!
10.06.2024 - 09:02
![]() Teresa Magalhaes wrote:
Teresa Magalhaes wrote:
Habitualmente uso M No entanto nas instruções para obter os 55/60 cm de anca necessito de montar o número de pontos para um XXXL Ou seja 166 em vez das 112
30.05.2024 - 19:02DROPS Design answered:
Bom dia, Este modelo é amplo (oversized). Se preferir um modelo mais cingido, opte por um tamanho abaixo para que fique mais cingido, usando as medidas em comprimento para o tamanho M. Bons tricôs!.
31.05.2024 - 12:19
![]() Doria Costa wrote:
Doria Costa wrote:
Neste modelo está indicado para fazer “, tricotar 2 barras jarreteira por cima das 6-8-10-12-14-16 malhas de cada lado da peça .” Posso ter uma instrução mais clara do que é para fazer? Um torcido ? Mas nesse caso as primeiras malhas a trabalhar são as que serão cavalgadas. E assim? Obrigada
30.05.2024 - 17:45DROPS Design answered:
Bom dia, Deve tricotar 2 voltas em meia (criando, assim, uma "barra" jarreteira) nas malhsa de cada lado da peça. O torcido é feito apenas no meio do top. Bons tricôs!
31.05.2024 - 12:20
![]() Paulina wrote:
Paulina wrote:
W części „ Gdy długość robótki wynosi 6 cm, dodać 1 oczko z każdej strony. Dodawać tak samo w sumie 4 razy z każdej strony co 6 cm = 98-108-118-130-144-158 oczek.” powinno być napisane, np. (Rozmiar L): 118/119 oczek, ponieważ ilość oczek zależna jest od tego, w jakim momencie schematu A1 jesteśmy w momencie dodania ostatnich oczek.
26.05.2024 - 19:15DROPS Design answered:
Witaj Paulino, bardzo dziękujemy za Twoją uwagę. Zweryfikujemy to i jeśli będzie konieczne, zostanie naniesiona korekta do wzoru. Pozdrawiamy!
27.05.2024 - 07:41
![]() MARGHERITA PETAZZO wrote:
MARGHERITA PETAZZO wrote:
Forse le spalline vanno lavorate in Icord? con i ferri a doppia punta?
24.05.2024 - 23:16DROPS Design answered:
Buonasera Margherita, è un bordo che assomiglia all'icord, deve lavorare come indicato. Buon lavoro!
28.05.2024 - 18:30
![]() MARGHERITA PETAZZO wrote:
MARGHERITA PETAZZO wrote:
Quando rimangono 5 maglie per le spalline è scritto: "far scorrere le maglie all'inizio del ferro, " significa rimettere le 5 maglie sul ferro di sinistra e ogni volta lavorarle di nuovo fino a che non misura 9 cm. Ho interpretato giusto?
24.05.2024 - 23:06DROPS Design answered:
Buonasera Margherita, esatto, deve procedere in quel modo. Buon lavoro!
28.05.2024 - 18:31
|
||||||||||||||||
White Sails#whitesailstop |
||||||||||||||||
 |
 |
|||||||||||||||
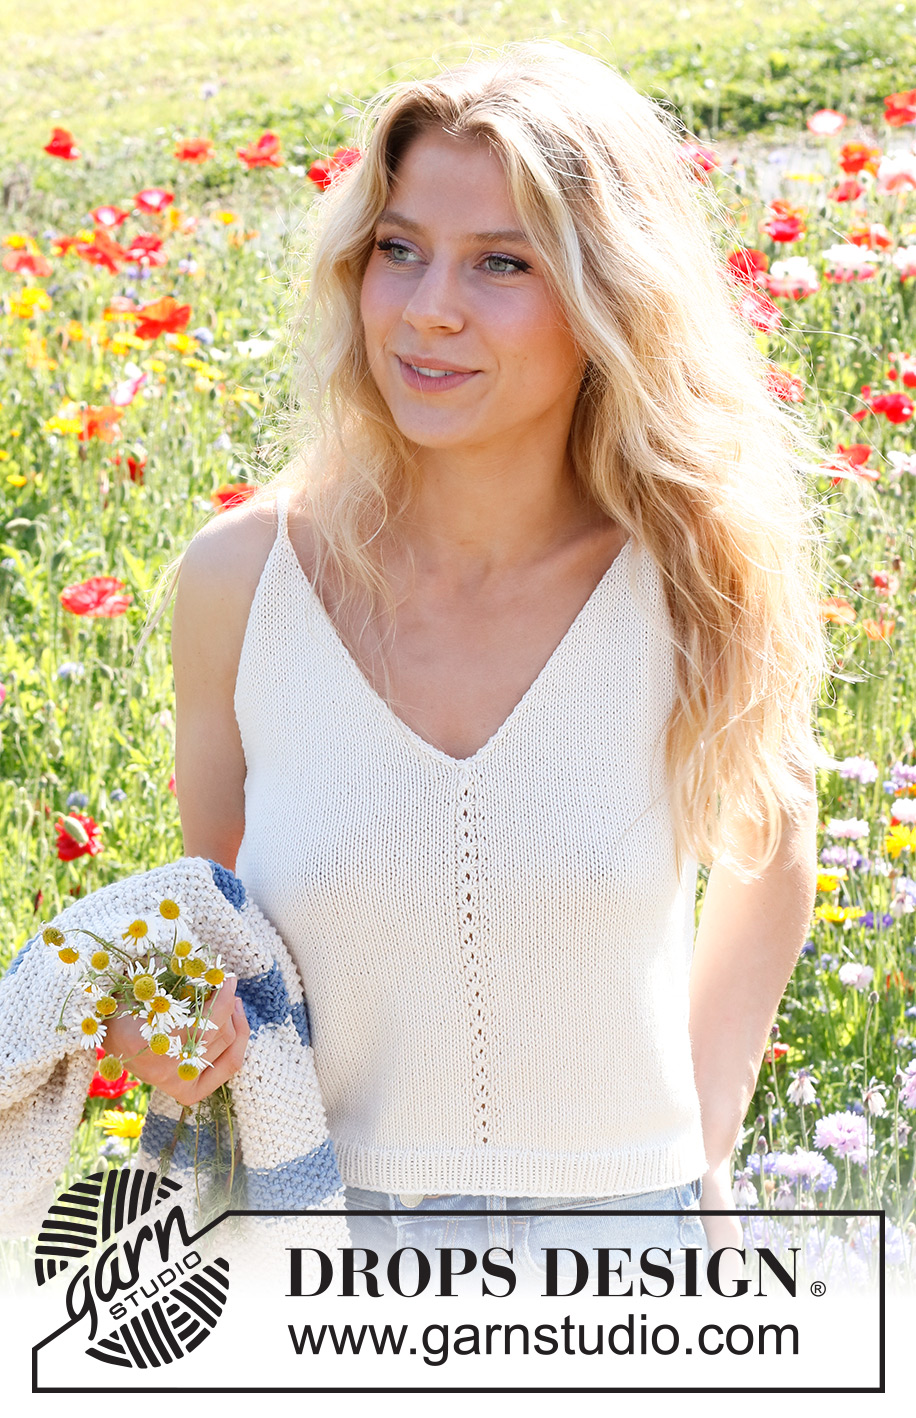
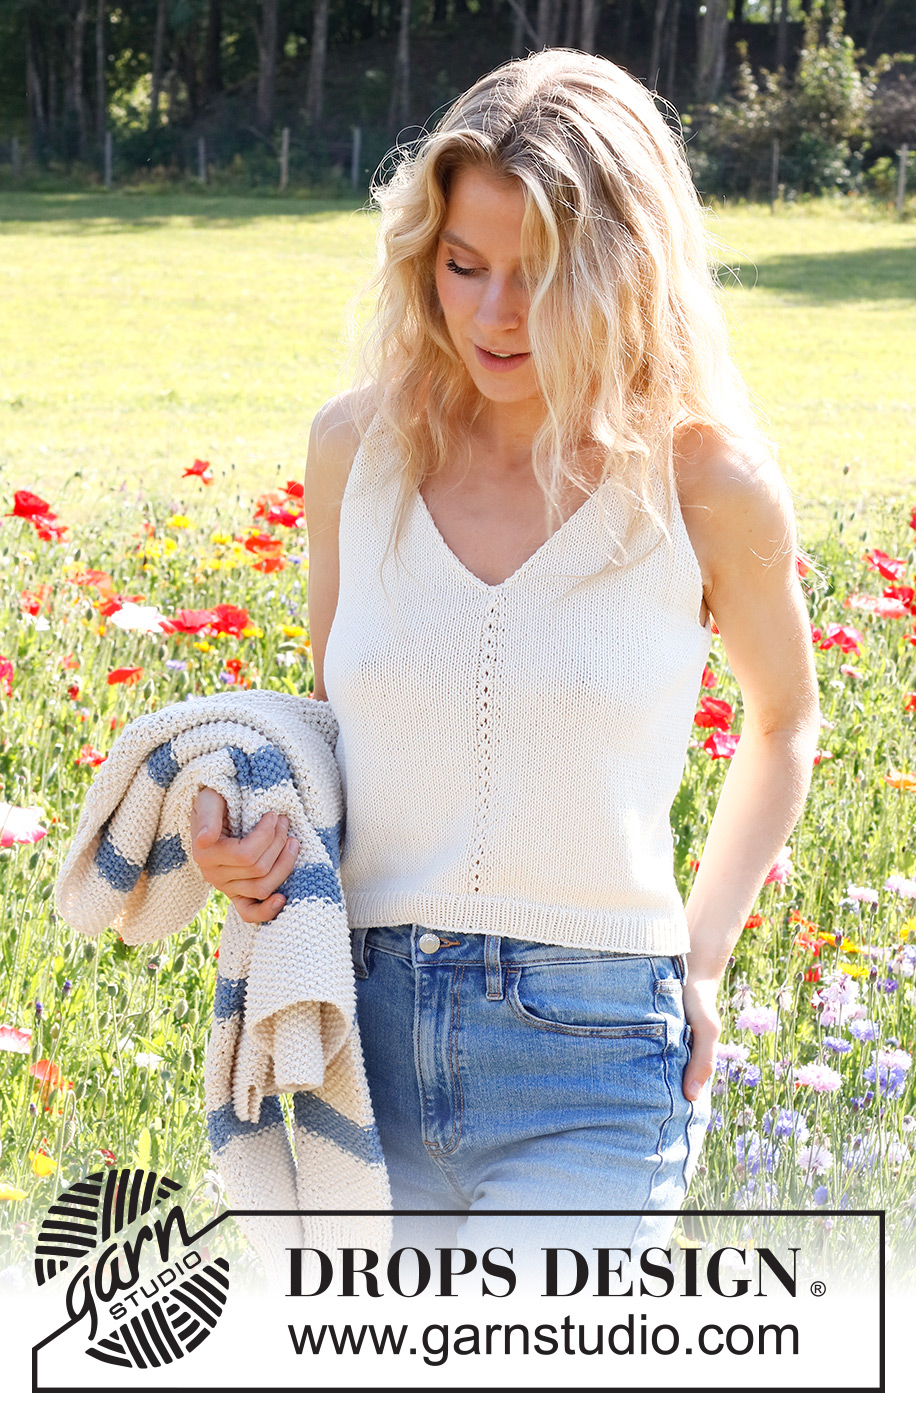
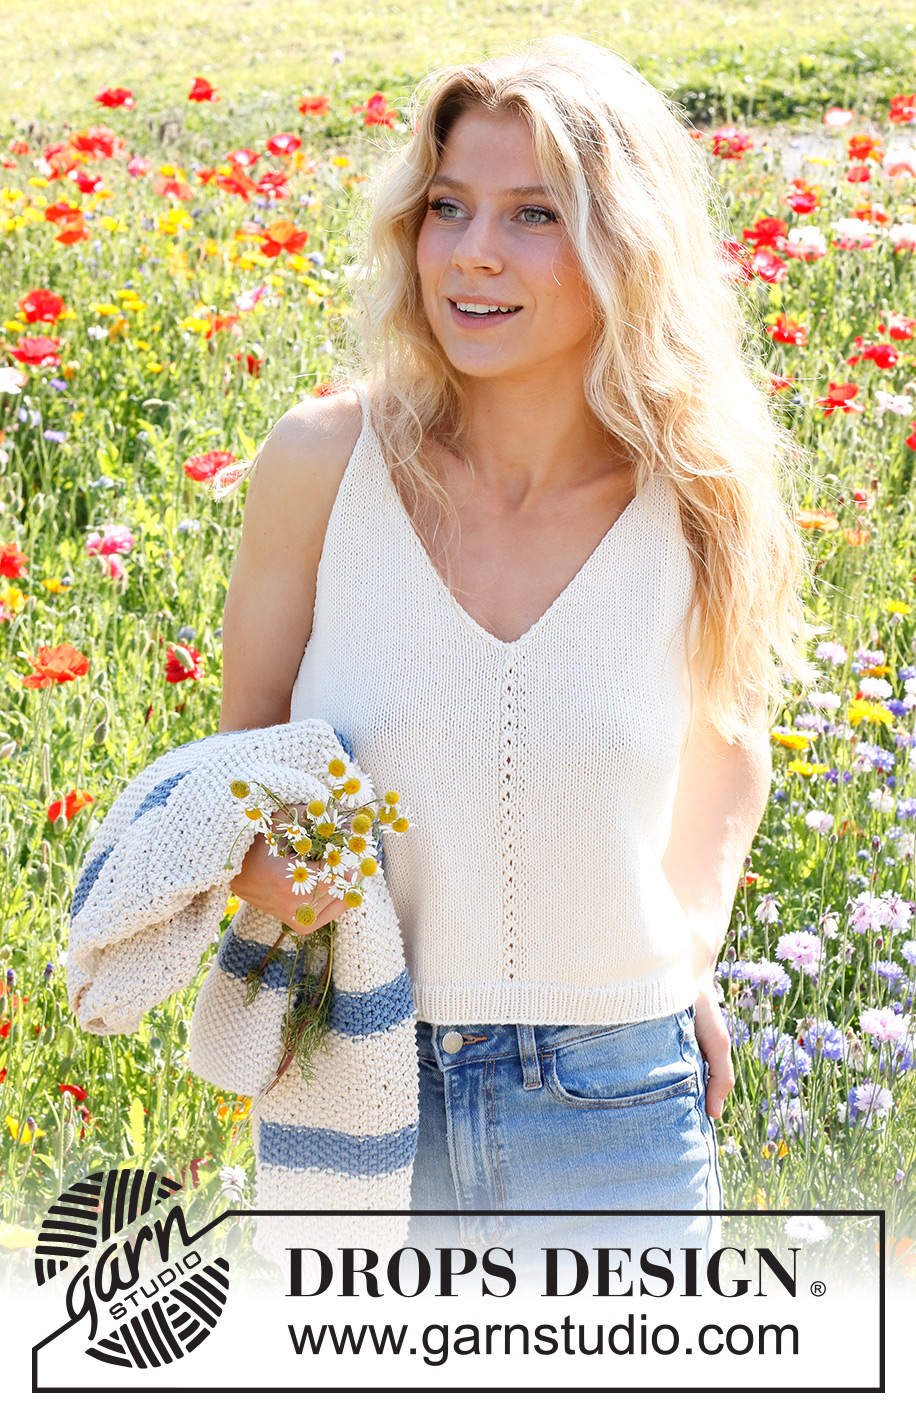
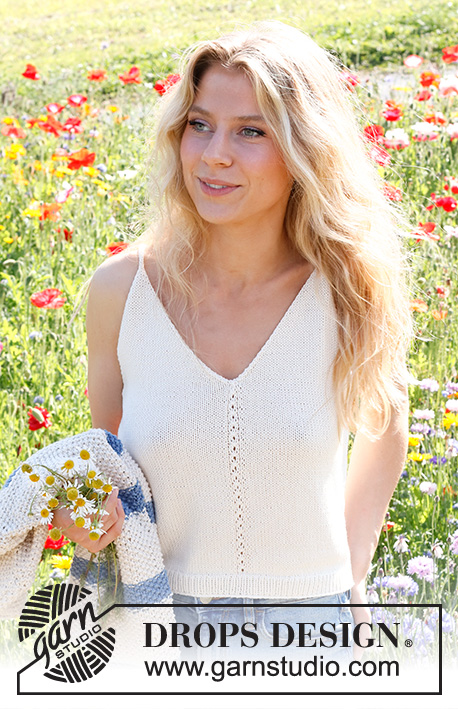
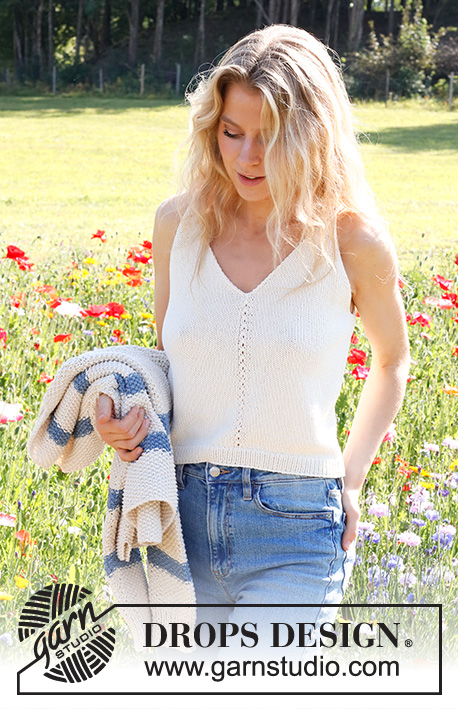
Knitted top in DROPS Safran. The piece if worked bottom up in stocking stitch. Sizes S - XXXL.
DROPS 230-1 |
||||||||||||||||
|
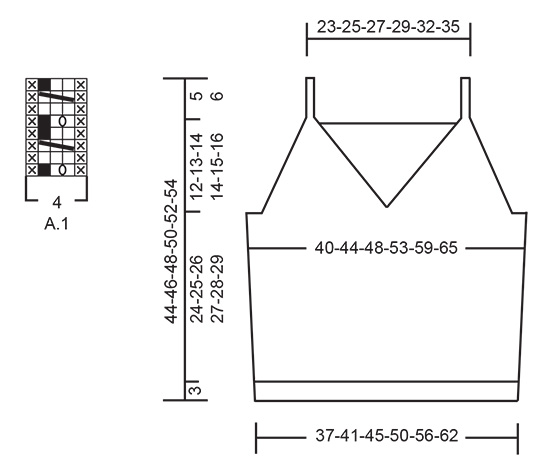
------------------------------------------------------- EXPLANATIONS FOR THE PATTERN: ------------------------------------------------------- RIDGE/GARTER STITCH (worked back and forth): Knit all rows. 1 ridge = knit 2 rows. PATTERN: See diagram A.1. The diagram shows all rows in the pattern from the right side. INCREASE TIP (sides): All increases are worked from the right side. Increase 1 stitch inside the 2 outermost stitches by making 1 yarn over. On the next row purl the yarn over twisted to avoid a hole. Then work the new stitch in stocking stitch. DECREASE TIP (for the armholes and V-neck): FROM THE RIGHT SIDE: After the 1 edge stitch: Slip 1 stitch as if to knit, knit 1 and pass the slipped stitch over the knitted stitch (= 1 stitch decreased). Before the 1 edge stitch: Work until there are 3 stitches left, knit 2 together, 1 edge stitch in garter stitch (= 1 stitch decreased). FROM THE WRONG SIDE: After the 1 edge stitch: Purl 2 together (= 1 stitch decreased). Before the 1 edge stitch: Work until there are 3 stitches left, purl 2 twisted together, edge stitch in garter stitch (= 1 stitch decreased). ------------------------------------------------------- START THE PIECE HERE: ------------------------------------------------------- TOP – SHORT OVERVIEW OF THE PIECE: The back and front pieces are worked separately, back and forth and bottom up. Straps are worked on the front piece, then sewn onto the back piece. BACK PIECE: Cast on 100-112-122-136-150-166 stitches with needle size 2.5 mm and DROPS Safran. Purl 1 row from the wrong side, then work rib (knit 1, purl 1), with 1 edge stitch in GARTER STITCH on each side – read description above. When the rib measures 3 cm, knit 1 row from the right side where you decrease 10-12-12-14-14-16 stitches evenly spaced = 90-100-110-122-136-150 stitches. Change to needle size 3 mm. Work stocking stitch back and forth with 1 edge stitch in garter stitch on each side. REMEMBER THE KNITTING TENSION! When the piece measures 6 cm, increase 1 stitch on each side – read INCREASE TIP. Increase like this every 6 cm a total of 4 times on each side = 98-108-118-130-144-158 stitches. When the piece measures 26-27-28-29-30-31 cm, work 2 ridges over the outermost 6-8-10-12-14-16 stitches on each side (the other stitches are continued in stocking stitch). After the 2 ridges, cast off 5-7-9-11-13-15 stitches at the beginning of the next 2 rows for the armholes = 88-94-100-108-118-128 stitches. Continue with stocking stitch and 1 edge stitch in garter stitch on each side. AT THE SAME TIME on the first row from the right side decrease 1 stitch on each side for the armholes – read DECREASE TIP. Decrease like this every 2nd row (each row from the right side) a total of 16-17-18-19-21-22 times = 56-60-64-70-76-84 stitches. Knit 1 row from the right side where you increase 7-7-7-7-9-9 stitches evenly spaced = 63-67-71-77-85-93 stitches. Change to needle size 2.5 mm. Work rib as follows from the wrong side: 1 edge stitch in garter stitch, * purl 1, knit 1 *, work from *-* until there are 2 stitches left, purl 1 and1 edge stitch in garter stitch. Continue this rib for 3 cm. Cast off a little loosely. FRONT PIECE: Cast on 100-112-122-136-150-166 stitches with needle size 2.5 mm and DROPS Safran. Purl 1 row from the wrong side, then work rib (knit 1, purl 1) with 1 edge stitch in garter stitch on each side. When the rib measures 3 cm, knit 1 row from the right side where you decrease 10-12-12-14-14-16 stitches evenly spaced = 90-100-110-122-136-150 stitches. Change to needle size 3 mm. Work stocking stitch back and forth with 1 edge stitch in garter stitch on each side. Purl 1 row from the wrong side with 1 edge stitch in garter stitch on each side. The next row is worked as follows from the right side: 1 edge stitch in garter stitch, 42-47-52-58-65-72 stitches in stocking stitch, A.1, 42-47-52-58-65-72 stitches in stocking stitch and 1 edge stitch in garter stitch. Continue this pattern. When the piece measures 6 cm, increase 1 stitch on each side. Increase like this every 6 cm a total of 4 times on each side = 98-108-118-130-144-158 stitches. When the piece measures 26-27-28-29-30-31 cm (adjust so the next row is either row 3 or 7 in A.1), work 2 ridges over the outermost 6-8-10-12-14-16 stitches on each side (the other stitches are continued in stocking stitch and pattern as before). After the 2 ridges work the next row from the right side as follows: Cast off 5-7-9-11-13-15 stitches for the armhole, work 42-45-48-52-57-62 stitches in stocking stitch, place the next 2 stitches on a cable needle in front of the piece, knit the next 3 stitches together and place these 43-46-49-53-58-63 stitches on a thread or extra needle = PART-1. PART-2: Knit twisted together the 2 stitches from the cable needle, work 41-44-47-51-56-61 stitches in stocking stitch and 6-8-10-12-14-16 stitches in garter stitch. Turn, cast off 5-7-9-11-13-15 stitches for the armhole, work stocking stitch until there is 1 stitch left and 1 stitch in garter stitch = 43-46-49-53-58-63 stitches. OVERVIEW OF THE NEXT SECTION: Continue with stocking stitch and 1 edge stitch in garter stitch on each side. AT THE SAME TIME on the first row from the right side, begin to decrease for the armhole and V-neck. Decrease inside the 1 edge stitch – read DECREASE TIP; the decreases are different for the armhole and neck - read ARMHOLE and V-NECK before continuing. ARMHOLE: Decrease every 2nd row (each row from the right side) a total of 16-17-18-19-21-22 times. V-NECK: Decrease every row (both right side and wrong side) a total of 7-7-9-9-13-17 times, then every 2nd row (each row from the right side) 15-17-17-18-17-17 times. After all the decreases there are 5-5-5-7-7-7 stitches left for the strap. STRAP: = 5-5-5-7-7-7 stitches. Knit 1 row from the right side, * push the stitches back to the beginning of the needle, tighten the strand and knit the 5-5-5-7-7-7 stitches from the right side again *, work from *-* until the strap measures 9-9-10-11-11-11 cm – work to desired length; the strap is sewn to the back piece later. Cut the strand, pull it through the 5-5-5-7-7-7 stitches, tighten and fasten well. PART-1: Place the 43-46-49-53-58-63 stitches from PART-1 back on needle size 3 mm. Work stocking stitch back and forth with 1 edge stitch in garter stitch on each side. AT THE SAME TIME on the first row from the right side, begin to decrease for the armhole and V-neck in the same way as on PART-2 = 5-5-5-7-7-7 stitches left for the strap. Work the strap in the same way as on part-2. ASSEMBLY: Sew the straps to the back piece – outermost on each side. Sew the side seams inside the 1 edge stitch. |
||||||||||||||||
Diagram explanations |
||||||||||||||||
|
||||||||||||||||
 |
||||||||||||||||
Have you finished this pattern?Tag your pictures with #dropspattern #whitesailstop or submit them to the #dropsfan gallery. Do you need help with this pattern?You'll find 27 tutorial videos, a Comments/Questions area and more by visiting the pattern on garnstudio.com. © 1982-2026 DROPS Design A/S. We reserve all rights. This document, including all its sub-sections, has copyrights. Read more about what you can do with our patterns at the bottom of each pattern on our site. |
||||||||||||||||


With over 40 years in knitting and crochet design, DROPS Design offers one of the most extensive collections of free patterns on the internet - translated to 17 languages. As of today we count 324 catalogues and 12290 patterns translated into English (UK/cm). 12290
We work hard to bring you the best knitting and crochet have to offer, inspiration and advice as well as great quality yarns at incredible prices! Would you like to use our patterns for other than personal use? You can read what you are allowed to do in the Copyright text at the bottom of all our patterns. Happy crafting!
Post a comment to pattern DROPS 230-1
We would love to hear what you have to say about this pattern!
If you want to leave a question, please make sure you select the correct category in the form below, to speed up the answering process. Required fields are marked *.