
Popular categories
Looking for a yarn?


Comments / Questions (103)
![]() Joan Lyngby Jepsen wrote:
Joan Lyngby Jepsen wrote:
Vedr model 230-1. Er denne i glatstrik eller retstrik? På billedet ligner det retstrik men i opskriften står der glatstrik.
21.05.2025 - 12:24DROPS Design answered:
Hej Joan. Den er i glatstrik. Mvh DROPS Design
21.05.2025 - 13:13
![]() Mette wrote:
Mette wrote:
Jeg er på forstykke og skal begynne med mønsteret, som jeg ikke skjønner. 1 vrang, 1 rett, så kast om pinnen mellom 2 masker, så strikkes 3 masker sammen, men jeg har bare 2 masker siden siste masken strikkes vrangt… Please help me :)
20.05.2025 - 20:36DROPS Design answered:
Hej Mette. Du ska ikke strikke 3 masker sammen. Pinne 1 på diagram A.1 stickar du såhär: 1 vrang, 1 rett, kast om pinnen, 1 rett, 1 vrang. Mvh DROPS Design
21.05.2025 - 12:20
![]() Lilit wrote:
Lilit wrote:
Hello! I\'m knitting in size S, I\'ve reached the length of 26cm, 98 stitches, and now I should cast off 5 stitches, knit 42, place 2 on cable needle, knit 3 together and place 43 on a thread. I did that but there\'s more than 43 left, could you please help me understand what I\'m doing wrong? I started the cast-off on row 3 of A.1.
17.05.2025 - 20:47DROPS Design answered:
Dear Lillit, you cast off 5 = 93 sts remain, you work 42 (the first of these sts is already on right needle), then slip the next 2 sts on a cable needle, knit together the next 3 sts = 42+1=43 sts on needle, slip these 43 sts on a thread. Work now the 2 sts from cable needle, knit 41 + 6, turn, cast off 5 = 43 sts remain. Thee are 43 sts for each side. Happy knitting!
19.05.2025 - 10:03
![]() Mette wrote:
Mette wrote:
Jeg skal avslutte bakstykket og det står «fell løst av». Skal det felles av i vrangbord masker (1 R og 1 Vr) eller felles av med rette masker?
15.05.2025 - 19:37DROPS Design answered:
Hei Mette, Det er best å felle av i vrangbord. Uansett, pass på at avfellingskanten ikke blir stram. Hilsen Drops Team.
16.05.2025 - 06:52
![]() TJ wrote:
TJ wrote:
Is the gauge for both sizes or the bigger needles only?
30.04.2025 - 19:40DROPS Design answered:
Hi TJ, The gauge is for the larger needles. Regards, Drops Team.
01.05.2025 - 07:21
![]() Elke wrote:
Elke wrote:
Hallo, beim Vorderteil steht: Bei einer Länge von 6 cm zunehmen. Sind das 6 cm Gesamtlänge inklusive 3 cm Bündchen? Oder ohne Bündchen ? Danke
24.03.2025 - 15:09DROPS Design answered:
Liebe Elke, messen Sie diese 6 cm ab Anschlagskante, dh die sind die gesamte Höhe mit Bündchen. Viel Spaß beim Stricken!
25.03.2025 - 08:48
![]() Людмила Тищенко wrote:
Людмила Тищенко wrote:
Дякую, це чудовий проект, дуже технологічний опис, у мене все вийшло!
28.02.2025 - 11:44
![]() Claudia wrote:
Claudia wrote:
Ich verstehe die Anleitung für die Träger nicht. Was bedeutet es, die Maschen an den Anfang der Nadel zurückschieben, den Faden anziehen und die 5 Maschen wieder in der Hinreihe rechts stricken? Kann mir hier jemand helfen? 😔
28.09.2024 - 11:51DROPS Design answered:
Liebe Claudia, die Träger strickt man wie für eine I-Cord, siehe dieses Video aber hier mit 5 Maschen. Viel Spaß beim Stricken!
30.09.2024 - 07:54
![]() María Jaudenes wrote:
María Jaudenes wrote:
Buenas tardes, y muchas gracias por compartir sus diseños y por su excelente contenido. No entiendo muy bien cómo tejer el tirante. No sé si sería posible ver una imagen de cómo se tejen las dos primeras vueltas del tirante. Muchísimas gracias
01.09.2024 - 00:02DROPS Design answered:
Hola María, puedes ver un vídeo sobre cómo trabajar esto aquí: https://www.garnstudio.com/video.php?id=57&lang=es
08.09.2024 - 20:19
![]() Elwira wrote:
Elwira wrote:
W schemacie w 3 rzędzie jest „3 oczka prawe, przełożyć pierwsze przerobione oczko ponad 2 pozostałymi”. W 4 rzędzie z tych 3 oczek są już tylko dwa. Kiedy przerabiać 2 oczka razem? Co to znaczy „przełożyć pierwsze przerobione oczko ponad 2 pozostałymi”?
15.08.2024 - 18:20DROPS Design answered:
Witaj Elwiro, zobacz video TUTAJ. Jak wykonać to przełożenie będzie na 1:55, ale obejrzyj cały filmik. Pozdrawiamy!
16.08.2024 - 16:05
|
||||||||||||||||
White Sails#whitesailstop |
||||||||||||||||
 |
 |
|||||||||||||||
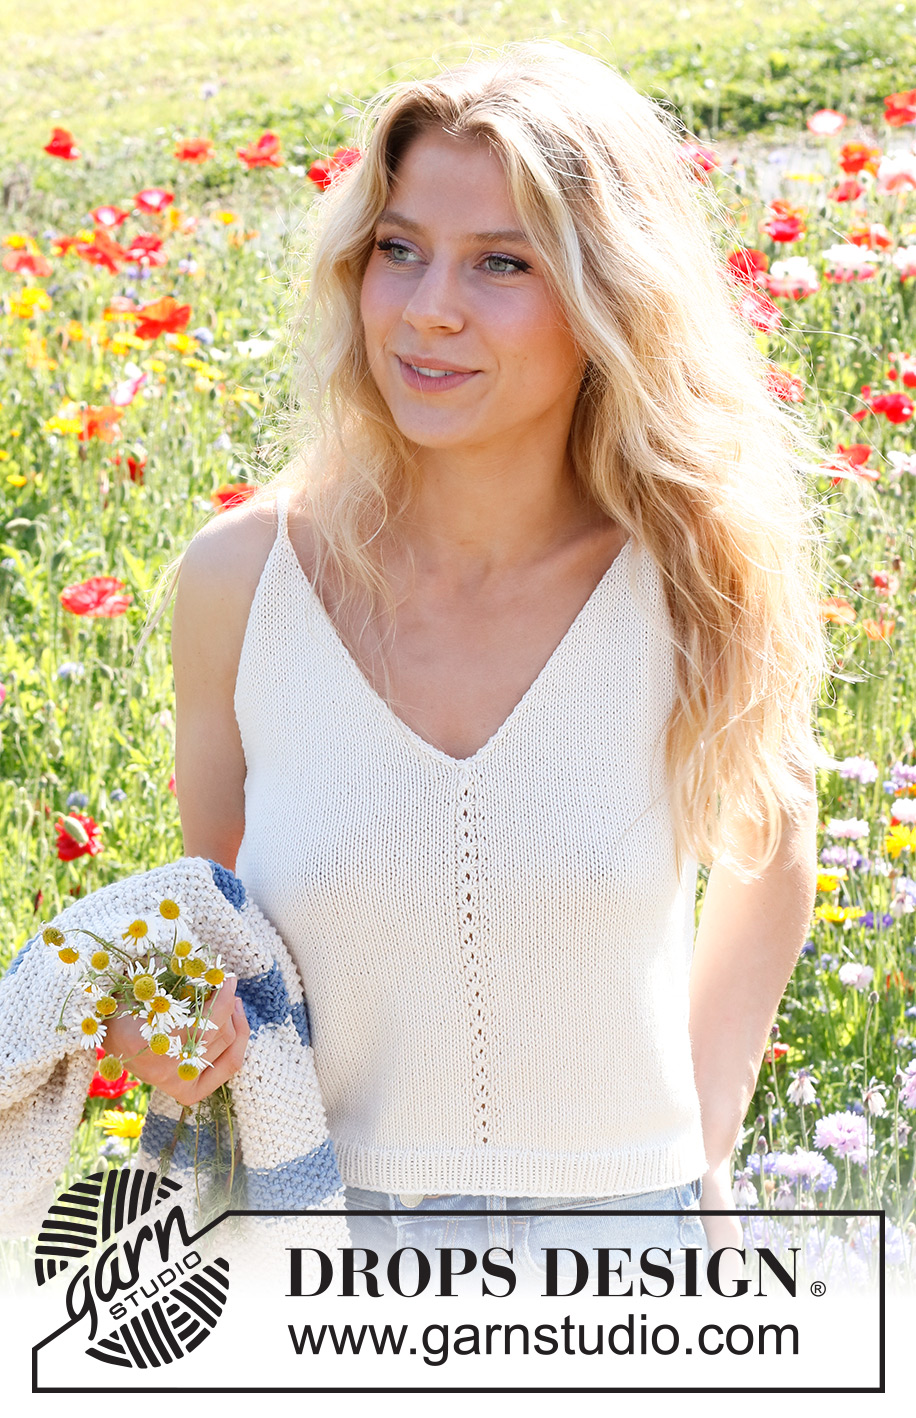
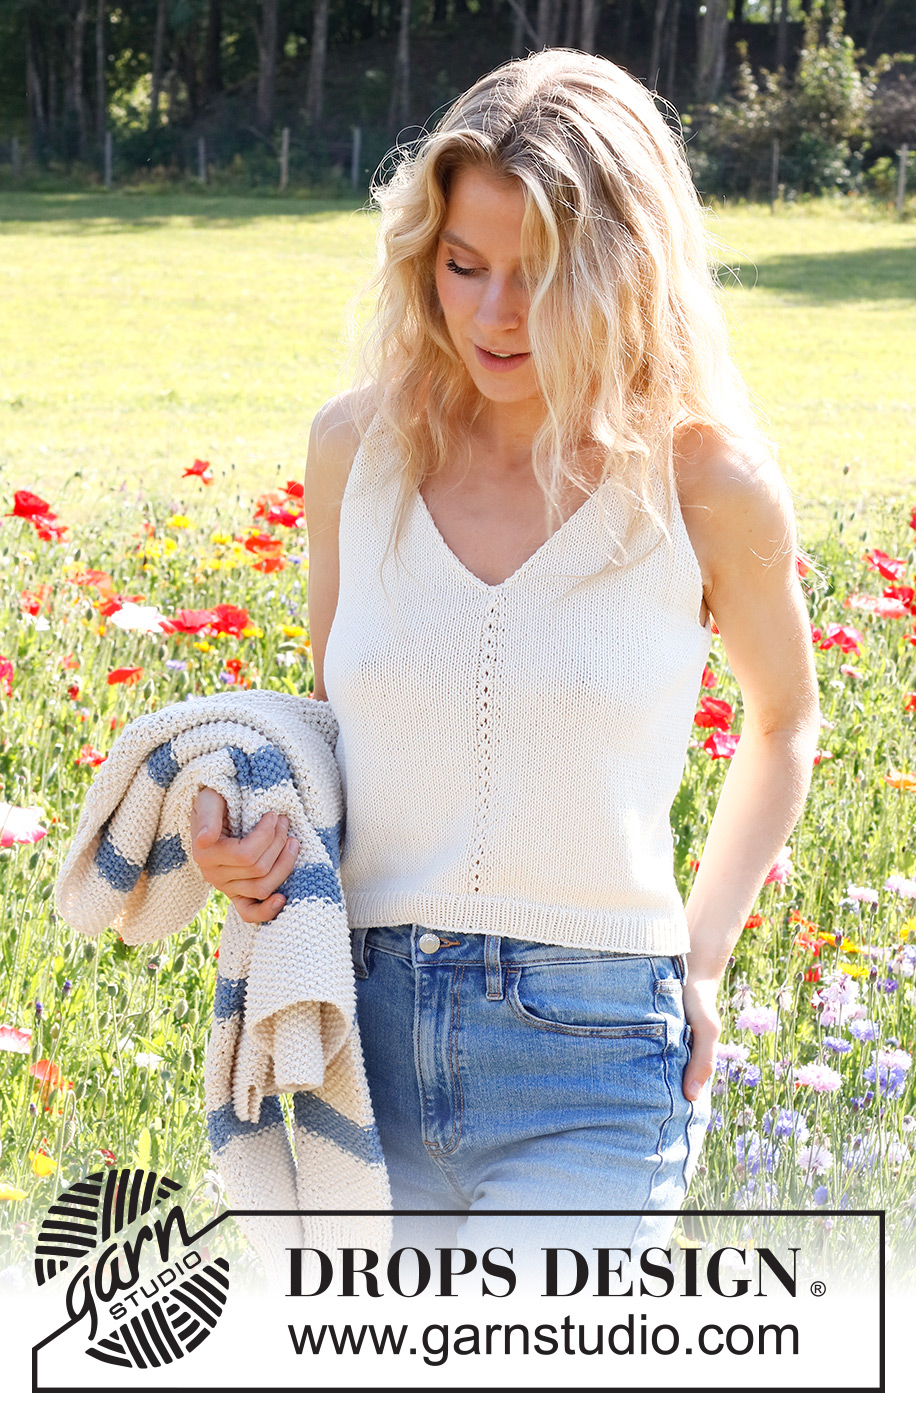
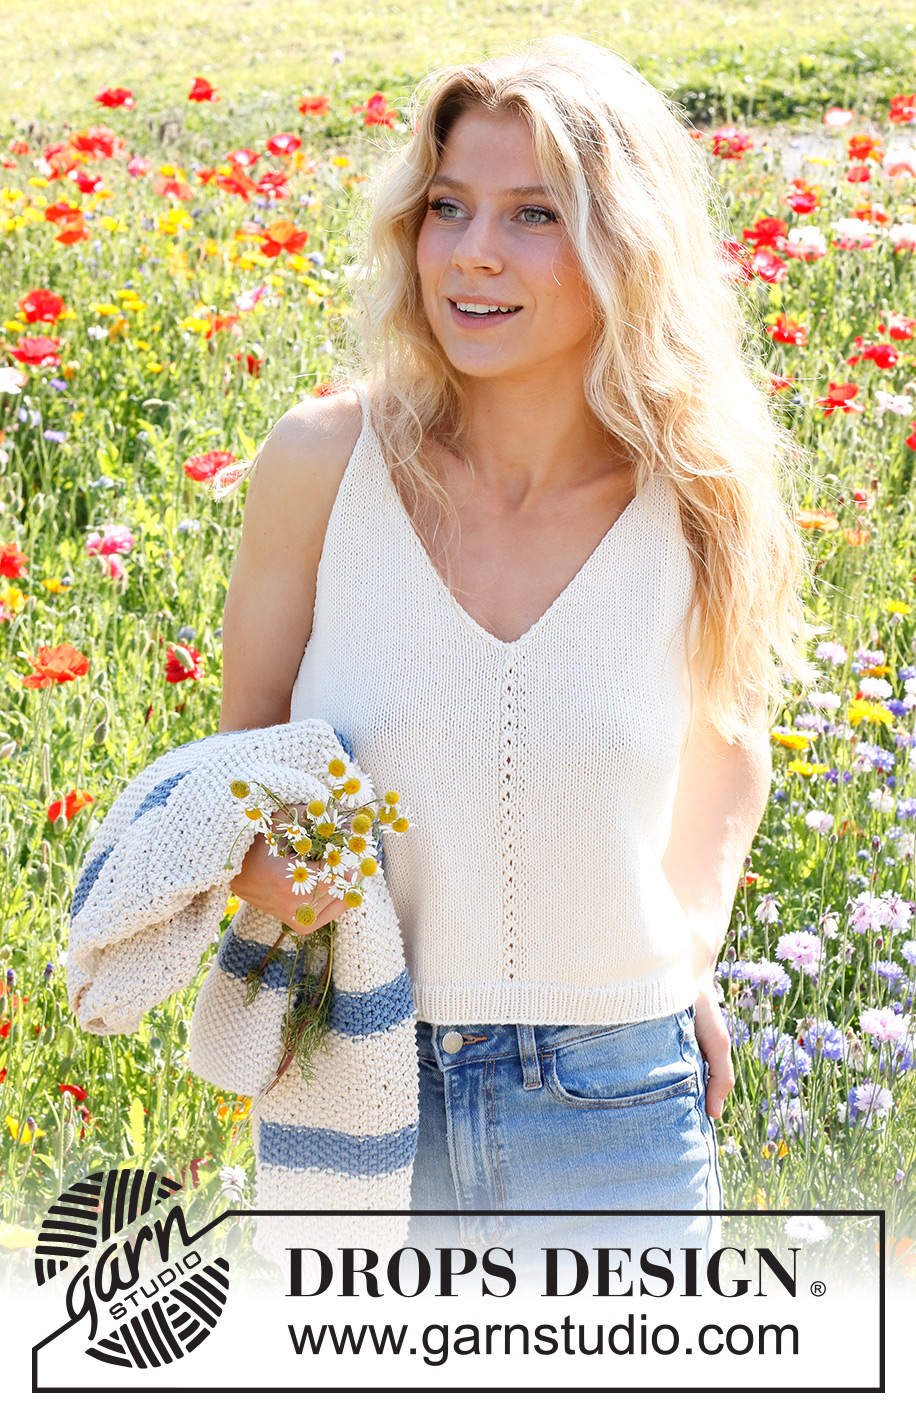
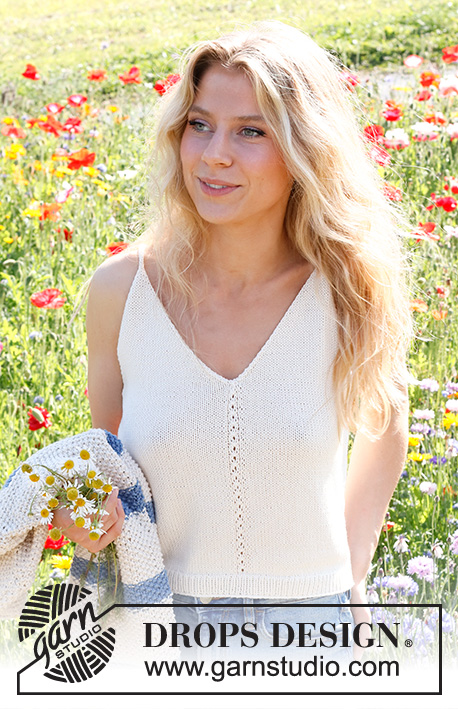
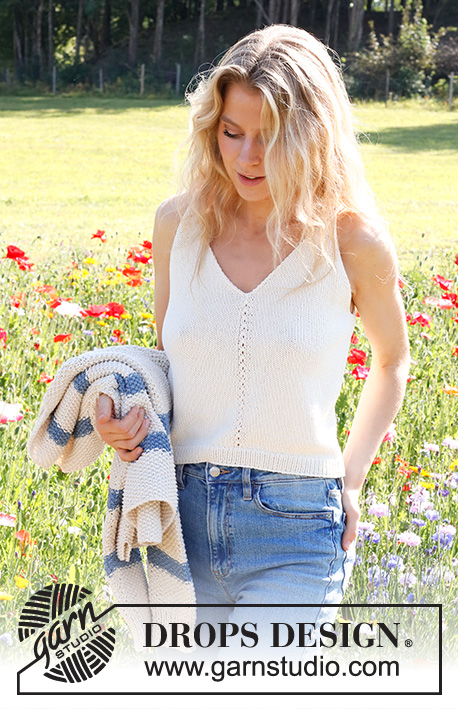
Knitted top in DROPS Safran. The piece if worked bottom up in stocking stitch. Sizes S - XXXL.
DROPS 230-1 |
||||||||||||||||
|
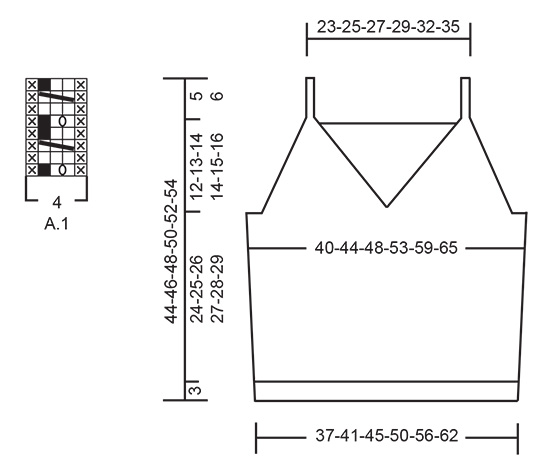
------------------------------------------------------- EXPLANATIONS FOR THE PATTERN: ------------------------------------------------------- RIDGE/GARTER STITCH (worked back and forth): Knit all rows. 1 ridge = knit 2 rows. PATTERN: See diagram A.1. The diagram shows all rows in the pattern from the right side. INCREASE TIP (sides): All increases are worked from the right side. Increase 1 stitch inside the 2 outermost stitches by making 1 yarn over. On the next row purl the yarn over twisted to avoid a hole. Then work the new stitch in stocking stitch. DECREASE TIP (for the armholes and V-neck): FROM THE RIGHT SIDE: After the 1 edge stitch: Slip 1 stitch as if to knit, knit 1 and pass the slipped stitch over the knitted stitch (= 1 stitch decreased). Before the 1 edge stitch: Work until there are 3 stitches left, knit 2 together, 1 edge stitch in garter stitch (= 1 stitch decreased). FROM THE WRONG SIDE: After the 1 edge stitch: Purl 2 together (= 1 stitch decreased). Before the 1 edge stitch: Work until there are 3 stitches left, purl 2 twisted together, edge stitch in garter stitch (= 1 stitch decreased). ------------------------------------------------------- START THE PIECE HERE: ------------------------------------------------------- TOP – SHORT OVERVIEW OF THE PIECE: The back and front pieces are worked separately, back and forth and bottom up. Straps are worked on the front piece, then sewn onto the back piece. BACK PIECE: Cast on 100-112-122-136-150-166 stitches with needle size 2.5 mm and DROPS Safran. Purl 1 row from the wrong side, then work rib (knit 1, purl 1), with 1 edge stitch in GARTER STITCH on each side – read description above. When the rib measures 3 cm, knit 1 row from the right side where you decrease 10-12-12-14-14-16 stitches evenly spaced = 90-100-110-122-136-150 stitches. Change to needle size 3 mm. Work stocking stitch back and forth with 1 edge stitch in garter stitch on each side. REMEMBER THE KNITTING TENSION! When the piece measures 6 cm, increase 1 stitch on each side – read INCREASE TIP. Increase like this every 6 cm a total of 4 times on each side = 98-108-118-130-144-158 stitches. When the piece measures 26-27-28-29-30-31 cm, work 2 ridges over the outermost 6-8-10-12-14-16 stitches on each side (the other stitches are continued in stocking stitch). After the 2 ridges, cast off 5-7-9-11-13-15 stitches at the beginning of the next 2 rows for the armholes = 88-94-100-108-118-128 stitches. Continue with stocking stitch and 1 edge stitch in garter stitch on each side. AT THE SAME TIME on the first row from the right side decrease 1 stitch on each side for the armholes – read DECREASE TIP. Decrease like this every 2nd row (each row from the right side) a total of 16-17-18-19-21-22 times = 56-60-64-70-76-84 stitches. Knit 1 row from the right side where you increase 7-7-7-7-9-9 stitches evenly spaced = 63-67-71-77-85-93 stitches. Change to needle size 2.5 mm. Work rib as follows from the wrong side: 1 edge stitch in garter stitch, * purl 1, knit 1 *, work from *-* until there are 2 stitches left, purl 1 and1 edge stitch in garter stitch. Continue this rib for 3 cm. Cast off a little loosely. FRONT PIECE: Cast on 100-112-122-136-150-166 stitches with needle size 2.5 mm and DROPS Safran. Purl 1 row from the wrong side, then work rib (knit 1, purl 1) with 1 edge stitch in garter stitch on each side. When the rib measures 3 cm, knit 1 row from the right side where you decrease 10-12-12-14-14-16 stitches evenly spaced = 90-100-110-122-136-150 stitches. Change to needle size 3 mm. Work stocking stitch back and forth with 1 edge stitch in garter stitch on each side. Purl 1 row from the wrong side with 1 edge stitch in garter stitch on each side. The next row is worked as follows from the right side: 1 edge stitch in garter stitch, 42-47-52-58-65-72 stitches in stocking stitch, A.1, 42-47-52-58-65-72 stitches in stocking stitch and 1 edge stitch in garter stitch. Continue this pattern. When the piece measures 6 cm, increase 1 stitch on each side. Increase like this every 6 cm a total of 4 times on each side = 98-108-118-130-144-158 stitches. When the piece measures 26-27-28-29-30-31 cm (adjust so the next row is either row 3 or 7 in A.1), work 2 ridges over the outermost 6-8-10-12-14-16 stitches on each side (the other stitches are continued in stocking stitch and pattern as before). After the 2 ridges work the next row from the right side as follows: Cast off 5-7-9-11-13-15 stitches for the armhole, work 42-45-48-52-57-62 stitches in stocking stitch, place the next 2 stitches on a cable needle in front of the piece, knit the next 3 stitches together and place these 43-46-49-53-58-63 stitches on a thread or extra needle = PART-1. PART-2: Knit twisted together the 2 stitches from the cable needle, work 41-44-47-51-56-61 stitches in stocking stitch and 6-8-10-12-14-16 stitches in garter stitch. Turn, cast off 5-7-9-11-13-15 stitches for the armhole, work stocking stitch until there is 1 stitch left and 1 stitch in garter stitch = 43-46-49-53-58-63 stitches. OVERVIEW OF THE NEXT SECTION: Continue with stocking stitch and 1 edge stitch in garter stitch on each side. AT THE SAME TIME on the first row from the right side, begin to decrease for the armhole and V-neck. Decrease inside the 1 edge stitch – read DECREASE TIP; the decreases are different for the armhole and neck - read ARMHOLE and V-NECK before continuing. ARMHOLE: Decrease every 2nd row (each row from the right side) a total of 16-17-18-19-21-22 times. V-NECK: Decrease every row (both right side and wrong side) a total of 7-7-9-9-13-17 times, then every 2nd row (each row from the right side) 15-17-17-18-17-17 times. After all the decreases there are 5-5-5-7-7-7 stitches left for the strap. STRAP: = 5-5-5-7-7-7 stitches. Knit 1 row from the right side, * push the stitches back to the beginning of the needle, tighten the strand and knit the 5-5-5-7-7-7 stitches from the right side again *, work from *-* until the strap measures 9-9-10-11-11-11 cm – work to desired length; the strap is sewn to the back piece later. Cut the strand, pull it through the 5-5-5-7-7-7 stitches, tighten and fasten well. PART-1: Place the 43-46-49-53-58-63 stitches from PART-1 back on needle size 3 mm. Work stocking stitch back and forth with 1 edge stitch in garter stitch on each side. AT THE SAME TIME on the first row from the right side, begin to decrease for the armhole and V-neck in the same way as on PART-2 = 5-5-5-7-7-7 stitches left for the strap. Work the strap in the same way as on part-2. ASSEMBLY: Sew the straps to the back piece – outermost on each side. Sew the side seams inside the 1 edge stitch. |
||||||||||||||||
Diagram explanations |
||||||||||||||||
|
||||||||||||||||
 |
||||||||||||||||
Have you finished this pattern?Tag your pictures with #dropspattern #whitesailstop or submit them to the #dropsfan gallery. Do you need help with this pattern?You'll find 27 tutorial videos, a Comments/Questions area and more by visiting the pattern on garnstudio.com. © 1982-2026 DROPS Design A/S. We reserve all rights. This document, including all its sub-sections, has copyrights. Read more about what you can do with our patterns at the bottom of each pattern on our site. |
||||||||||||||||


With over 40 years in knitting and crochet design, DROPS Design offers one of the most extensive collections of free patterns on the internet - translated to 17 languages. As of today we count 324 catalogues and 12290 patterns translated into English (UK/cm). 12290
We work hard to bring you the best knitting and crochet have to offer, inspiration and advice as well as great quality yarns at incredible prices! Would you like to use our patterns for other than personal use? You can read what you are allowed to do in the Copyright text at the bottom of all our patterns. Happy crafting!
Post a comment to pattern DROPS 230-1
We would love to hear what you have to say about this pattern!
If you want to leave a question, please make sure you select the correct category in the form below, to speed up the answering process. Required fields are marked *.