
Popular categories
Looking for a yarn?


































Comments / Questions (287)
 Kari Haugan Engberg wrote:
Hej drops jeg har tre gange pillet op fordi jeg laver kludder i mønster på ærme. Hvordan skal jeg få raglanudtag med, jeg er helt lost! Mvh Kari,
18.07.2026 - 12:07
 Françoise COLTIER wrote:
J'ai terminé le diagramme mais les manches ne sont pas finies et je ne comprends pas comment continuer. Pouvez vous m'aider ? Merci , cordialement . F.Coltier
14.07.2026 - 22:17DROPS Design answered:
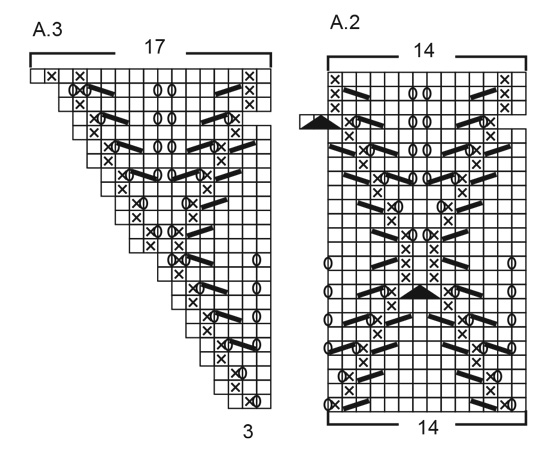
Bonjour Mme Coltier, lorsque vous avez terminé les diagrammes A.1-A.3, vous répétez le motif sur désormais davantage de mailles ainsi: commencez la manche par A.1, répétez A.2 jusqu'à ce qu'il reste 3 m et terminez par A.3; vous avez maintenant tricoté 2 fois A.2 en plus entre A.1 et A.3. Bon tricot!
03.08.2026 - 08:05
 Merle Orelove wrote:
How do i navigate the charts. There are no row numbers. Do i start from the top or bottom?
03.07.2026 - 22:52DROPS Design answered:
Hi Merle, All the charts are read bottom up and from right to left. Regards, Drops Team.
04.07.2026 - 06:05
Merle Orelove wrote:
Please tell me how to navigate the charts. From the top or the bottom? How do i know what row I am on?
03.07.2026 - 22:50
 Sigrid wrote:
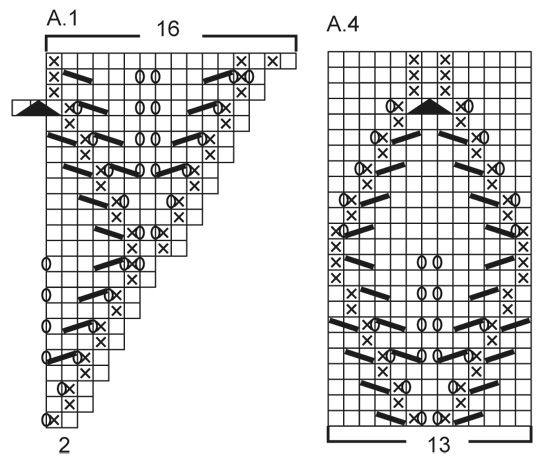
Guten Abend! Wenn ich bei A. 1 in der ersten Runde direkt nach der markierten Masche 1 M rechts, 1 M links und dann den Umschlag stricke, wo kommt dann in der 2. Reihe die weitere rechte Masche direkt nach der markierten Masche her? Ich habe doch nicht in der 1. Reihe direkt nach der markierten Masche einen Umschlag gemacht und daher auf der rechten Seite von A. 1 auch keine zusätzliche Masche, diese ist jedoch im Diagramm in Runde 2 eingezeichnet. Ich habe einen Knoten im Kopf...
29.06.2026 - 20:44DROPS Design answered:
Liebe Sigrid, der Umschlag vor der 1. Markierung ist die Zunahme für 2. Halbes Rückenteil, die Zunahmen in A.1 sind für die Ärmel und kommen dazu, so nach dem Umschlag, stricken Sie die Masche mir der Markierung, dann stricken Sie A.1 (mit der Zunahme), dann A.2 usw. Kann das helfen?
30.06.2026 - 08:18
 Kjersti wrote:
I forklaringen til raglan økning står det at maskene man øker skal strikkes rett så det blir hull. Lenger nede i avsnittet om bærestykket som starter med SAMTIDIG, står det at de nye maskene på for- og bakstykket skal strikkes i glattstrikk og de på ermene i hullmønster etter diagrammet. Da oppfatter jeg at kastene på for- og bakstykket skal strikkes vridd så det ikke blir hull, men glattstrikk? Får det ikke til å stemme med forklaringen ang raglan økning.
28.06.2026 - 18:21DROPS Design answered:
Hei Kjersti, Etter du har økt til raglan blir kastene strikket rett slik at du får hull langs raglanlinjene. Deretter har du økte masker på bærestykket som skal strikkes i glattstrikk videre. Hilsen Drops Team.
29.06.2026 - 05:01
Kjersti wrote:
De to rettelsene i diagram A4 - må man selv endre de i diagrammet eller er diagrammet oppdatert i henhold til rettelsene?
28.06.2026 - 18:13DROPS Design answered:
Hi Kjersti, Rettelsene er inkludert i diagrammet. God sommer!
29.06.2026 - 05:04
Karin wrote:
Hallo ich habe diese schöne Anleitung fertig und jetzt rollt sich der Saum nach außen. Gibt es einen Trick, dies zu ändern? Liebe Grüße Karin
26.06.2026 - 18:53DROPS Design answered:
Liebe Karin, Sie können das Top mit Stecknadeln auf einer geeigneten Unterlage spannen, anfeuchten (z.B. mit einer Sprühflasche für Blumen) und trocknen lassen, danach entfernen Sie die Stecknadeln, dann sollte sich der Rand nicht mehr rollen. Viel Spaß beim Tragen!
29.06.2026 - 07:13
Erika wrote:
Kann es sein, dass Muster A4 falsch herum abgebildet ist?
18.06.2026 - 09:01DROPS Design answered:
Liebe Erika, A.4 liest man von unten nach oben, wie anderen Diagrammen, so sind alle Blätter gleich (inkl. die von den Ärmeln). Viel Spaß beim Stricken!
18.06.2026 - 11:40
Pia wrote:
Ang a1 og a3 kan jeg ikke få rk. 12 til at passe med rk 11.. jeg har ikke 4 m på rk 12 hvis det skal passe med rk 11.
06.06.2026 - 10:25
|
|||||||||||||||||||
Catch the Wind#catchthewindtop |
|||||||||||||||||||
 |
 |
||||||||||||||||||
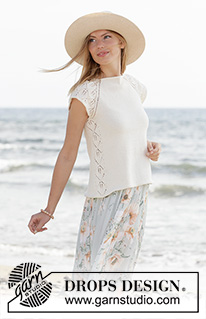
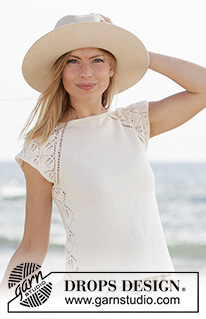
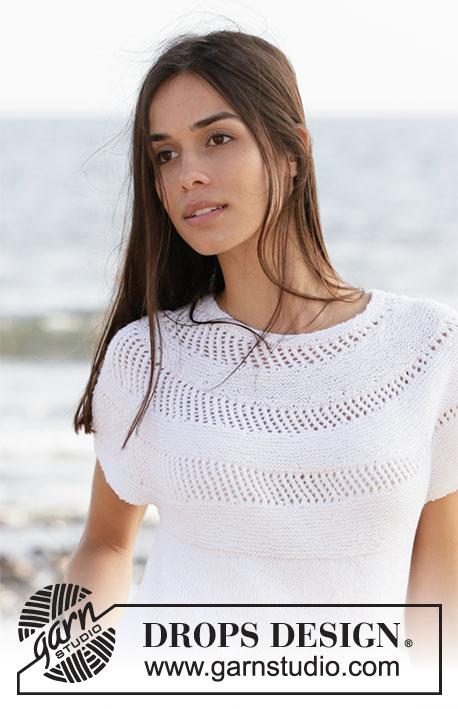
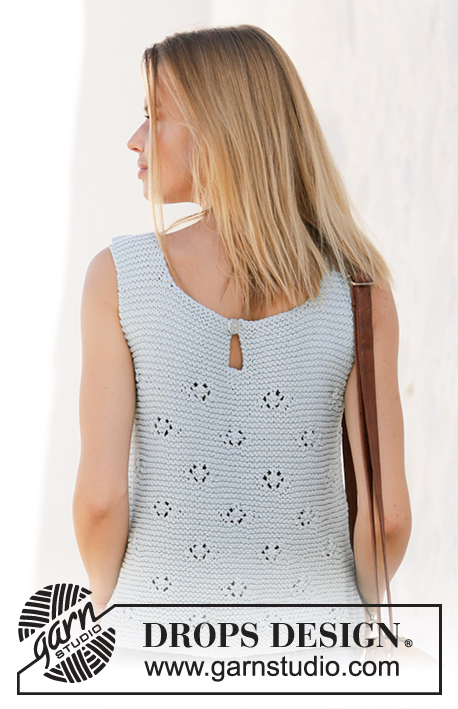
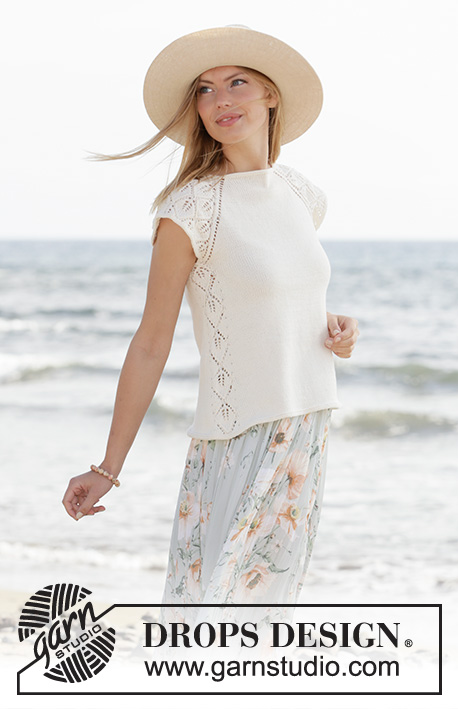
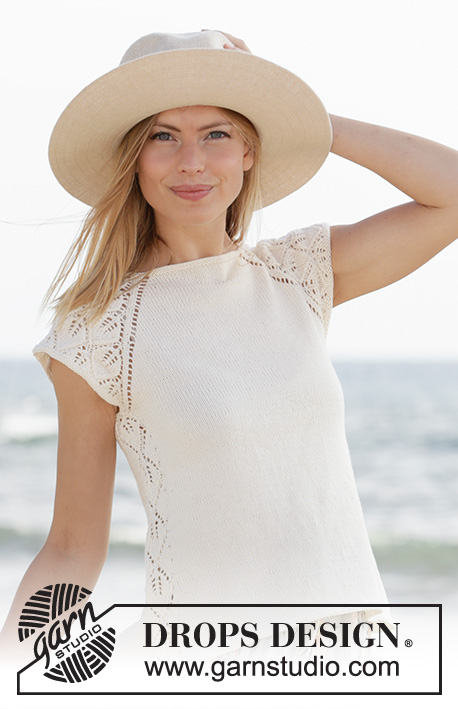
Knitted top with raglan and short sleeves in DROPS Safran or DROPS Magic. The piece is worked top down with lace pattern. Sizes XS - XXL.
DROPS 211-5 |
|||||||||||||||||||
|
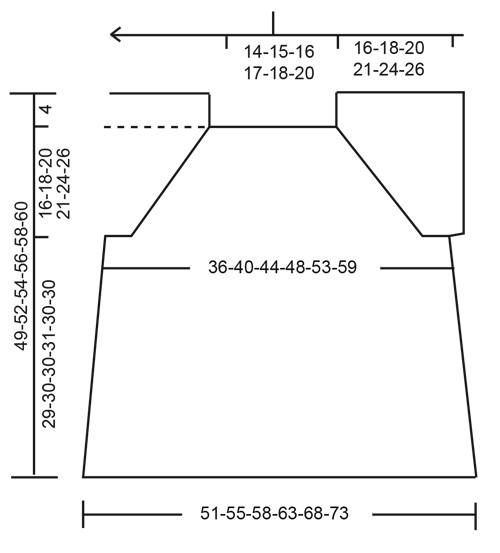
------------------------------------------------------- EXPLANATIONS FOR THE PATTERN: ------------------------------------------------------- RIDGE/GARTER STITCH (worked in the round): 1 ridge in height = 2 rounds; Knit 1 round and purl 1 round. PATTERN: See diagrams A.1 to A.4. RAGLAN: Increase to raglan on each side of the back piece and each side of the front piece (towards the sleeves). Increase by making 1 yarn over before/after the stitch with the marker thread; on the next round knit the yarn overs to leave holes. The increases on the sleeves are drawn into patterns A.1 and A.3. ------------------------------------------------------- START THE PIECE HERE: ------------------------------------------------------- TOP – SHORT OVERVIEW OF THE PIECE: The neck and yoke are worked in the round with circular needle, top down. The yoke is divided for body and sleeves and the body continued in the round. A small edge is worked around the armholes. NECK: Cast on 106-110-116-120-124-132 stitches with circular needle size 3 mm and Safran or Magic. Work 2 RIDGES – read description above. Then work the yoke as described below. YOKE: Insert 4 marker threads in the piece as described below (without working the stitches). The threads will be used when increasing to raglan. Count 16-17-18-19-20-22 stitches (= half back piece), insert 1 marker thread in the next stitch, count 19 stitches (= sleeve), insert 1 marker thread in the next stitch, count 32-34-37-39-41-45 stitches (= front piece), insert 1 marker thread in the next stitch, count 19 stitches (= sleeve), insert 1 marker thread in the next stitch. There are 16-17-19-20-21-23 stitches after the last marker thread (half back piece). The first round is worked as follows: Work stocking stitch as far as the first marker-stitch, make 1 yarn over (first increase to RAGLAN – see description above), work the marker-stitch in stocking stitch, A.1 (= 2 stitches), A.2 (= 14 stitches) and A.3 ( = 3 stitches) (= 19 stitches on the sleeve), work the marker-stitch in stocking stitch, 1 yarn over, work stocking stitch as far as the next marker-stitch (= front piece), 1 yarn over, work the marker-stitch in stocking stitch, A.1 (= 2 stitches), A.2 (= 14 stitches) and A.3 (= 3 stitches) (= 19 stitches on the sleeve), work the marker-stitch in stocking stitch, 1 yarn over, work stocking stitch over the remaining stitches (= half back piece). Continue this pattern with stocking stitch on the front and back pieces and A.1, A.2 and A.3 on the sleeves. Each time A.1, A.2 and A.3 are worked 1 time in height, you work 2 more repeats of A.2 between A.1 and A.3. REMEMBER THE KNITTING TENSION! AT THE SAME TIME continue to increase to raglan every 2nd round a total of 22-26-28-31-35-39 times at each marker thread (including the first increase described above). The new stitches are worked in stocking stitch on the front and back pieces and in lace pattern as shown in the diagrams on the sleeves. When the increases to raglan are finished there are 294-334-356-388-424-468 stitches on the needle. The next round is worked as follows: Work 39-44-47-51-56-62 stitches (= half the back piece), place the next 69-79-83-91-99-109 stitches on 1 thread for the sleeve, cast on 9-9-9-11-13-15 new stitches on the needle (= in side under sleeve), work 78-88-95-103-113-125 stitches (= front piece), place the next 69-79-83-91-99-109 stitches on 1 thread for the sleeve, cast on 9-9-9-11-13-15 new stitches on the needle (= in side under sleeve), work the last 39-44-48-52-57-63 stitches (= half back piece). Body and sleeves are finished separately. THE PIECE IS NOW MEASURED FROM HERE! BODY: = 174-194-208-228-252-280 stitches. Insert 1 marker thread in the middle of the 9-9-9-11-13-15 stitches cast on under each sleeve. Cut the strand and begin the round 6 stitches before 1 of the stitches with marker thread. Work A.4 (= 13 stitches), work 74-84-91-101-113-127 stitches in stocking stitch, work A.4 and then stocking stitch over the last 74-84-91-101-113-127 stitches. Continue this pattern, AT THE SAME TIME, when the piece measures 2 cm, increase by making 1 yarn over on each side of A.4, on the next round knit the yarn overs twisted to avoid holes (= 4 increased stitches). Repeat the increase every 1 ½ cm a total of 18 times; the increased stitches are worked in stocking stitch = 246-266-280-300-324-352 stitches. When the piece measures 28-29-29-30-29-29 cm from the division work 2 ridges over all stitches, then cast off. SLEEVE-EDGE: Place the 69-79-83-91-99-109 stitches on one of the threads on short circular needle size 3 mm and knit up 1 stitch in each of the 9-9-9-11-13-15 new stitches under the sleeve = 78-88-92-102-112-124 stitches. Work 2 ridges over all stitches, then cast off. Work the other sleeve-edge in the same way. |
|||||||||||||||||||
Diagram explanations |
|||||||||||||||||||
|
|||||||||||||||||||
 |
|||||||||||||||||||
 |
|||||||||||||||||||
 |
|||||||||||||||||||
Have you finished this pattern?Tag your pictures with #dropspattern #catchthewindtop or submit them to the #dropsfan gallery. Do you need help with this pattern?You'll find 16 tutorial videos, a Comments/Questions area and more by visiting the pattern on garnstudio.com. © 1982-2026 DROPS Design A/S. We reserve all rights. This document, including all its sub-sections, has copyrights. Read more about what you can do with our patterns at the bottom of each pattern on our site. |
|||||||||||||||||||






With over 40 years in knitting and crochet design, DROPS Design offers one of the most extensive collections of free patterns on the internet - translated to 17 languages. As of today we count 333 catalogues and 12525 patterns translated into English (UK/cm).
We work hard to bring you the best knitting and crochet have to offer, inspiration and advice as well as great quality yarns at incredible prices! Would you like to use our patterns for other than personal use? You can read what you are allowed to do in the Copyright text at the bottom of all our patterns. Happy crafting!
Post a comment to pattern DROPS 211-5
We would love to hear what you have to say about this pattern!
If you want to leave a question, please make sure you select the correct category in the form below, to speed up the answering process. Required fields are marked *.