
Popular categories
Looking for a yarn?




































Comments / Questions (233)
 Janet wrote:
Hallo. Ich möchte Odeta in Gr.68/74 arbeiten. Ich passe die Maschenzahl nach dem Bündchen auf 158 Maschen an. Laut Diagramm brauche ich 2x2 Maschen für die Blende, 19x8 für das Muster plus eine Masche für A2. Macht zusammen 157. Jetzt kommt meine Frage: Warum soll ich die Maschenzahl auf 158 anpassen? Und werden nicht auch noch 2 Randmaschen benötigt? Freue mich auf eine Antwort.
19.06.2026 - 23:24DROPS Design answered:
Liebe Janet, die Maschenanzahl bei A.1 und A.2 wird bei der letzten Reihe angepasst, nicht am Anfang, so stricken Sie 2 Krausrechte Maschen, 19 Mal A.1 (= 152 M insgesamt die 8 Maschen A.1), 1 Masche A.2 und 2 krausrechte Maschen = 157 M. Bei der letzten Reihen vom Diagram nehmen Sie 1 Masche zu = 158 M, dann stricken Sie diese 158 M krausrechts. Viel Spaß beim Stricken!
22.06.2026 - 07:50
 Mimi wrote:
Hello I just started this project and did the first 10 rows. I noticed on drops picture that the right front side has about 4 stitches in garter stitch between the two band stitches and the start of A1 motif. It’s not in the instructions nor in the chart. Some other knitters seem to have it and others did like me. What am I missing? Thanks
12.06.2026 - 16:08DROPS Design answered:
Dear Mimi, the stitches in garter stitch for the band depends on the size. In some sizes you have 4 stitches, while in others you may have 2, which may make the garter stitches more visible, specially after working the crochet edge afterwards. Happy knitting!
15.06.2026 - 00:45
 Estela wrote:
Me gustaría hacerlo en agujas rectas, como podría modificar patrones.
11.06.2026 - 13:52DROPS Design answered:
Hola Estela, el patrón se trabaja de ida y vuelta, por lo que se puede trabajar directamente con agujas rectas. Pero como la chaqueta se trabaja todo junto el número de puntos es demasiado elevado como para caber en unas agujas rectas. Por eso usamos agujas circulares. Las zapatillas se pueden trabajar con agujas rectas sin problema.
15.06.2026 - 00:25
 Christina Ingmarsson wrote:
Tack snälla för svaret . Ett tips : skriv ut att alla aviga varv i hålmönstret stickas aviga !! Jag är ju inte den enda som inte kunna tyda detta ! Nu sätter jag fart och stickar denna söta kofta . Trevlig sommar
09.06.2026 - 12:38
Christina Ingmarsson wrote:
Hejsan ! Har problem med mönster 31-3 ) babykofta). I mönstret står att alla varv i diagrammet visar räta varv . Det går att föla tills man kommer till varvet med hoptagning mm . Det står inget om hur man stickar de aviga varven . Jag har varit i kontakt med återförsäljaren men hon är lika frågande som jag . Är jag helt knäpp som inte förstår? Snälla hjälp mig för snart kommer barnbarnsbarnet.
08.06.2026 - 21:04DROPS Design answered:
Hej Christina, Nej inte bara räta varv! Det står att alla varv SES från rätsidan. Det betyder att du börjar nederst i diagrammet från rätsidan, stickar nästa varv i diagrammet från avigsidan osv. När du stickar hålmönster, stickas det från rätsidan, varvet tillbaka från avigsidan stickas avig (så det blir rät (slät) från rätsidan) :)
09.06.2026 - 10:10
 Sara wrote:
Salve, è possibile realizzare il coprifasce utilizzando i ferri lineari anziche quelli circolari e se si come fare ? Grazie in anticipo se mi risponderete.
25.05.2026 - 10:14DROPS Design answered:
Buonasera Sara, il modello è lavorato in piano, per cui può utilizzare i ferri lineari. Buon lavoro!
26.05.2026 - 22:29
Lili wrote:
Wie soll man das verstehen? Ich habe 205 Maschen für die Größe 104 angeschlagen und muss dann auf 204 kommen? „In der letzten Reihe von A.1 die Maschenzahl so anpassen, dass (112) 124-146-158-172 (182-204) Maschen.“ Danke im Voraus Lili
18.05.2026 - 16:57DROPS Design answered:
Liebe Lili, bei der letzen Reihe A.1 nehmen Sie in die letzte Größe 1 Masche ab, so sind es nur noch 204 Maschen. Viel Spaß beim Stricken!
19.05.2026 - 08:25
 Claudette wrote:
How can y print this patern
25.04.2026 - 23:13DROPS Design answered:
Dear Claudette, you can find the print button next to the pattern's title and heading. Happy knitting!
27.04.2026 - 01:59
 Jytte wrote:
Drops baby 31-3. Findes video der viser hvordan kanten hækles om jakken ? Vh Jytte
12.04.2026 - 22:10DROPS Design answered:
Hei Jytte. Beklager, det har vi ikke. mvh DROPS Design
13.04.2026 - 14:45
 Annet wrote:
Heeft het patroon een video op YouTube?
11.04.2026 - 23:27DROPS Design answered:
Dag Annet,
De video's die bij dit patroon horen, kun je vinden via de link 'video's' bovenaan de beschrijving van het patroon.
12.04.2026 - 10:14
|
|||||||||||||||||||
Odeta#odetajacket |
|||||||||||||||||||
 |
 |
||||||||||||||||||
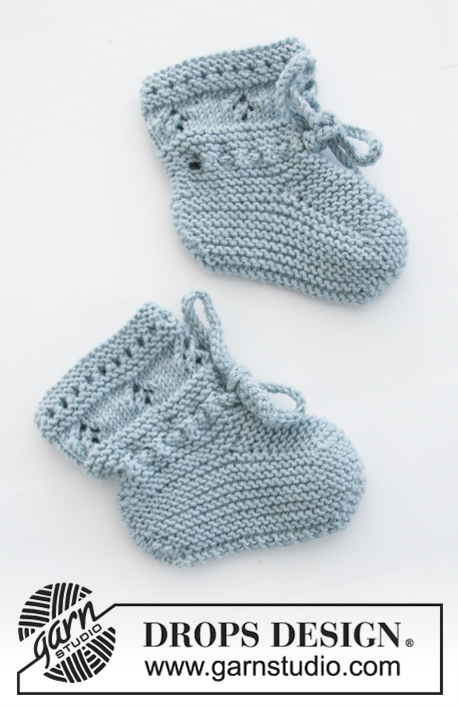
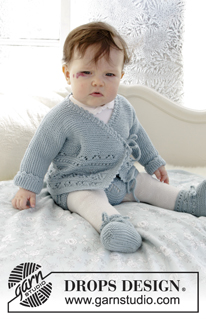
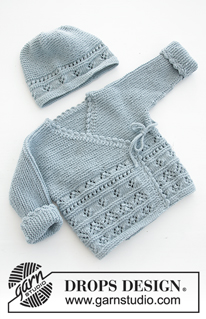
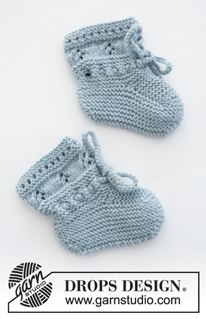
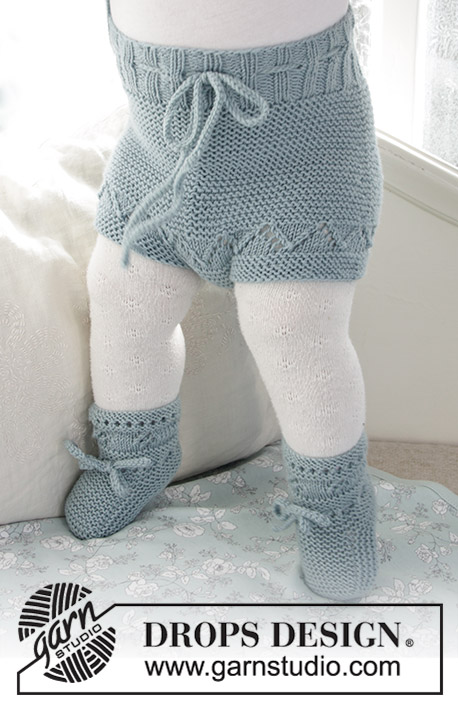
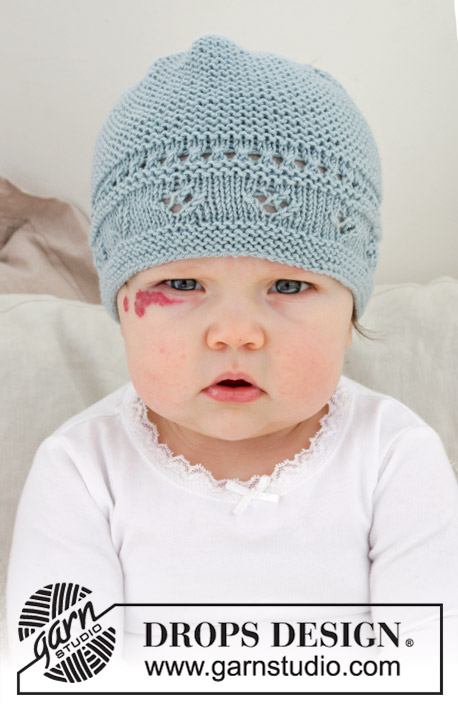
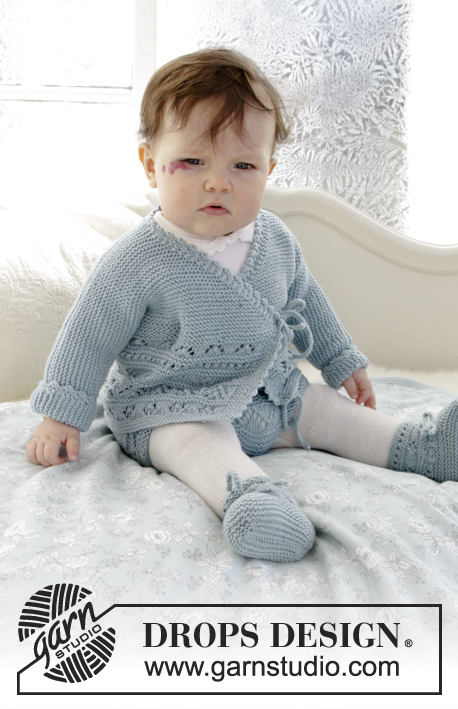
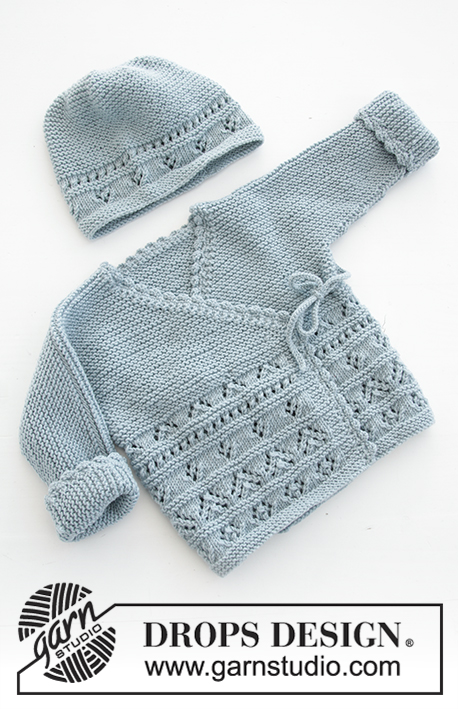
The set consists of: Knitted baby jacket and slippers with lace pattern and garter stitch. Sizes premature - 4 years. The set is worked in DROPS BabyMerino.
DROPS Baby 31-3 |
|||||||||||||||||||
|
INFORMATION FOR THE PATTERN: RIDGE/GARTER STITCH (worked back and forth): 1 ridge = Knit 2 rows. PATTERN: Jacket: See diagrams A.1 and A.2. Choose diagram for your size. Slippers: See diagrams A.3 and A.4. The diagrams show all the rows in the pattern seen from the right side. DECREASE TIP (for jacket): Decrease inside the 1 band stitch in garter stitch. All decreases are made from the right side! Decrease as follows after the 1 band stitch: Slip 1 stitch as if to knit, knit 1, pass the slipped stitch over. Decrease as follows before the 1 band stitch: Knit 2 together. ---------------------------------------------------------- JACKET: The piece is worked back and forth with circular needle. The body is worked first, then stitches are cast on for sleeves and the front and back pieces are finished separately. BODY: Cast on (111) 125-145-157-173 (181-205) stitches with circular needle size 3 mm and BabyMerino. Work as follows from the right side: Work (3) 2-4-2-2 (2-2) stitches GARTER STITCH – see description above – (= band), work A.1 (= 8 stitches) over the next (104) 120-136-152-168 (176-200) stitches (= (13) 15-17-19-21 (22-25) times in width), work A.2 (= 1 stitch) and finish with (3) 2-4-2-2 (2-2) stitches garter stitch. REMEMBER THE KNITTING TENSION! On the last row in A.1 adjust the number of stitches to (112) 124-146-158-172 (182-204) stitches. When A.1 has been worked 1 time in height, continue in garter stitch to finished length. The piece measures approx. (10) 12-16-16-16 (19-19) cm. Insert 1 marker (34) 37-44-48-52 (55-62) stitches in from each side. Allow the markers to follow your work onwards, they mark the front and back pieces = (44) 50-58-62-68 (72-80) stitches on back piece. READ THE WHOLE OF THE NEXT SECTION BEFORE CONTINUING! DECREASE FOR NECK INSIDE 1 BAND STITCH IN EACH SIDE OF THE PIECE AT THE SAME TIME AS THE PIECE IS DIVIDED AND STITCHES ARE CAST ON FOR SLEEVES. DECREASE MID FRONT AS FOLLOWS: When the piece measures (10) 12-16-16-17 (20-23) cm – adjust so that the next row is worked from the right side, decrease 1 stitch for the neck inside the 1 band stitch in each side of the piece (= 2 stitches decreased) – read DECREASE TIP. Decrease like this every 2nd row a total of (18) 18-22-24-26 (28-32) times, then every 4th row a total of 2 times. THE PIECE IS NOW DIVIDED AND STITCHES ARE CAST ON FOR THE SLEEVES AS FOLLOWS: RIGHT FRONT PIECE: When the piece measures (12) 15-19-20-21 (24-27) cm, divide the piece at the 2 markers and the front and back pieces are finished separately. Adjust so that the next row is from the right side. Now work over all the stitches as far as the first marker (= right front piece). Place the remaining stitches on a thread. Cast on new stitches at the end of each row from the right side (= towards the side) for the sleeve as follows: Cast on (3) 4-6-6-6 (6-6) stitches a total of (4) 4-4-5-6 (7-8) times and then (16) 19-19-18-19 (23-26) stitches 1 time. When all the stitches are cast on for the sleeve and the decreases to neck are finished, there are (42) 52-63-70-79 (90-102) stitches on the needle for shoulder/sleeve. Work garter stitch until the piece measures (20) 24-28-30-32 (36-40) cm. Cast off. LEFT FRONT PIECE: Work over the last stitches which were placed on the thread, as far as the marker in the side. Work as for the right front piece, but in reverse. In other words, cast on stitches for the shoulder/sleeve at the end of each row from the wrong side. Continue to decrease inside the 1 band stitch at the end of each row from the right side as before (towards neck). BACK PIECE: = (44) 50-58-62-68 (72-80) stitches. Cast on new stitches at the end of each row in each side of the piece for the sleeves as follows: Cast on (3) 4-6-6-6 (6-6) stitches a total of (4) 4-4-5-6 (7-8) times and then (16) 19-19-18-19 (23-26) stitches 1 time = (100) 120-144-158-178 (202-228) stitches. When the piece measures (19) 23-27-29-31 (35-39) cm cast off the middle (16) 16-18-18-20 (22-24) stitches for neck and each shoulder/sleeve is finished separately = (42) 52-63-70-79 (90-102) stitches left on each shoulder/sleeve. Work until the piece measures (20) 24-28-30-32 (36-40) cm, adjust to match the front pieces. Cast off. Work the other shoulder/sleeve in the same way. ASSEMBLY: Sew the seams on top of sleeve with grafting stitches from the right side. Sew the seams under the sleeves edge to edge in the outermost loop of the outermost stitch. CROCHET EDGE: Crochet with hook size 2.5 mm and BabyMerino around the whole jacket opening (i.e. work from the right front piece, up along the jacket opening, around the neck and down the opening to the cast on edge on the left front piece) as follows: ROW 1: Work 1 slip stitch in the cast on edge on the right front piece, * 1 chain stitch, skip approx. 2 stitches/rows, 1 double crochet in the next stitch/row *, work from *-* to the corner where the decreases for neck started. Work the cord as follows: 1 double crochet in the tip, then work chain stitches for approx. 20-25 cm, turn and work back with 1 slip stitch in each chain stitch, then work 1 double crochet in the tip of the front piece again, continue the crochet edge around the jacket and neck to the tip on the left front piece, work cord as on the right front piece, continue working down the left front piece and finish with 1 slip stitch in the cast on edge. ROW 2: Work 1 chain stitch, 1 double crochet around the first chain stitch on the previous row, * 4 chain stitches, 1 treble crochet in the 4th chain stitch from the hook, skip 1 double crochet + 1 chain stitch + 1 double crochet, work 1 double crochet around the next chain stitch *, work from *-* (make sure you work over the cords so the cords lie underneath), finish with 1 slip stitch in the last stitch. Work rows 1 and 2 in the same way around the bottom of both sleeves (the rounds start with 1 chain stitch and finish with 1 slip stitch in the first chain stitch). Work 2 loose cords: Work chain stitches for approx. 20-25 cm, turn and work back with 1 slip stitch in each chain stitch. Cut the strand and work 1 more cord in the same way. Sew 1 cord to the inside of the right side in the side and 1 cord on the outside of the left side in the side. Make sure the two cords are at the same height on each side. ---------------------------------------------------------- SLIPPER: The slipper is worked back and forth with circular needle from mid back, top down; i.e. you first work the leg then the foot. Cast on (36) 38-40-44-48 (52-56) stitches with circular needle size 2.5 mm and BabyMerino. Work 1 stitch in GARTER STITCH – see above, A.3 (= 2 stitches) until 1 stitch remains, work 1 stitch in garter stitch . When A.3 has been worked 1 time in height, work the next row from the right side as follows: Work (2) 3-0-2-0 (2-0) stitches stocking stitch, A.4 (= 8 stitches) a total of (4) 4-5-5-6 (6-7) times in width and finish with (2) 3-0-2-0 (2-0) stitches stocking stitch. REMEMBER THE KNITTING TENSION! When A.4 has been completed 1 time in height continue with A.3 as follows: work 1 stitch in garter stitch, A.3 until 1 stitch remains, and work 1 stitch in garter stitch (the cord is later thread through this row of holes). When A.3 has been completed in height, work 2 RIDGES – see description above and decrease (6) 8-6-6-6- (10-14) stitches evenly on the last row from the right side = (30) 30-34-38-38 (42-42) stitches. Cut the strand. Now place the first (11) 11-12-13-13 (15-15) stitches and the last (11) 11-12-13-13 (15-15) stitches on two separate threads. The piece is now worked in garter stitch to finished length. Work (3) 3½-4-4½-5½ (6½-8) cm, over the middle (8) 8-10-12-12 (12-12) stitches (= mid top of slipper), cut the strand. The next row is worked as follows from the right side: Work the stitches from the one thread in the one side back onto the double pointed needles, knit up (7) 9-10-11-13 (16-21) stitches in the outermost loop of the outermost stitch along the side of the middle piece, work the (8) 8-10-12-12 (12-12) stitches on the needle (= front), knit up (7) 9-10-11-13 (16-21) stitches in the outermost loop of the outermost stitch along the other side of the middle piece and work the stitches from the other thread back onto the double pointed needles = (44) 48-54-60-64 (74-84) stitches on the needles. THE PIECE IS NOW MEASURED FROM HERE! Work a total of (2½) 3-3-4-5 (5-5) cm garter stitch over all stitches AT THE SAME TIME when you have worked approx. (1) 1½-1½-2-3 (3-3) cm, insert 1 marker (22) 24-27-30-32 (37-42) stitches in (= middle of slipper). Now decrease every 2nd row to finished length as follows: Knit 1 stitch, knit the next 2 stitches together (= 1 stitch decreased), knit until there are 2 stitches left before the marker, knit together the next 4 stitches, 2 and 2 (= 2 stitches decreased), knit until there are 3 stitches left, knit the next 2 stitches together (= 1 stitch decreased), knit 1 stitch (= 4 stitches decreased every 2nd row) = approx. (32) 36-42-48-52 (62-72) stitches. Cast off and sew the seam under the foot and up mid back in the outermost loop of the outermost stitch so the seam is flat. Work 1 more slipper in the same way. CORD: Work a cord as follows: Work chain stitches with hook size 2.5 mm and BabyMerino for approx. 30-40 cm, turn and work back with 1 slip stitch in each chain stitch. Cut and fasten the strand. Thread the cord in and out of the row of holes on the slipper (start and finish mid front of slipper). ---------------------------------------------------------- For shorts see DROPS number 31-4. ---------------------------------------------------------- |
|||||||||||||||||||
Diagram explanations |
|||||||||||||||||||
|
|||||||||||||||||||
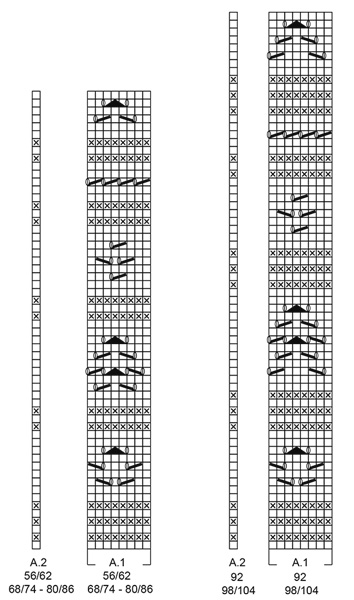 |
|||||||||||||||||||
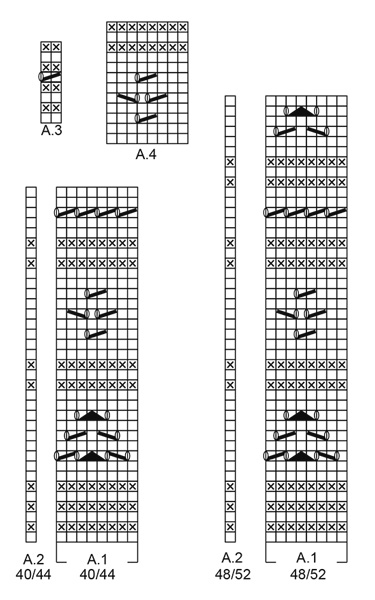 |
|||||||||||||||||||
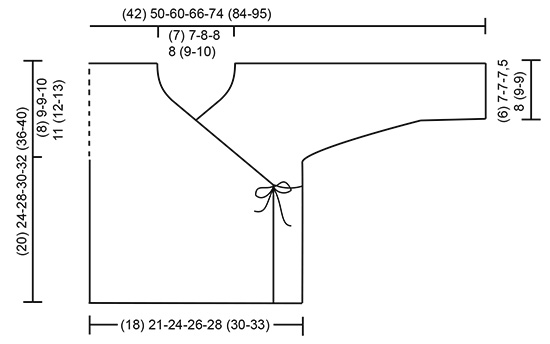 |
|||||||||||||||||||
Have you finished this pattern?Tag your pictures with #dropspattern #odetajacket or submit them to the #dropsfan gallery. Do you need help with this pattern?You'll find 22 tutorial videos, a Comments/Questions area and more by visiting the pattern on garnstudio.com. © 1982-2026 DROPS Design A/S. We reserve all rights. This document, including all its sub-sections, has copyrights. Read more about what you can do with our patterns at the bottom of each pattern on our site. |
|||||||||||||||||||






With over 40 years in knitting and crochet design, DROPS Design offers one of the most extensive collections of free patterns on the internet - translated to 17 languages. As of today we count 333 catalogues and 12532 patterns translated into English (UK/cm).
We work hard to bring you the best knitting and crochet have to offer, inspiration and advice as well as great quality yarns at incredible prices! Would you like to use our patterns for other than personal use? You can read what you are allowed to do in the Copyright text at the bottom of all our patterns. Happy crafting!
Post a comment to pattern DROPS Baby 31-3
We would love to hear what you have to say about this pattern!
If you want to leave a question, please make sure you select the correct category in the form below, to speed up the answering process. Required fields are marked *.