
Popular categories
Looking for a yarn?


Comments / Questions (22)
![]() SOULIER Christine wrote:
SOULIER Christine wrote:
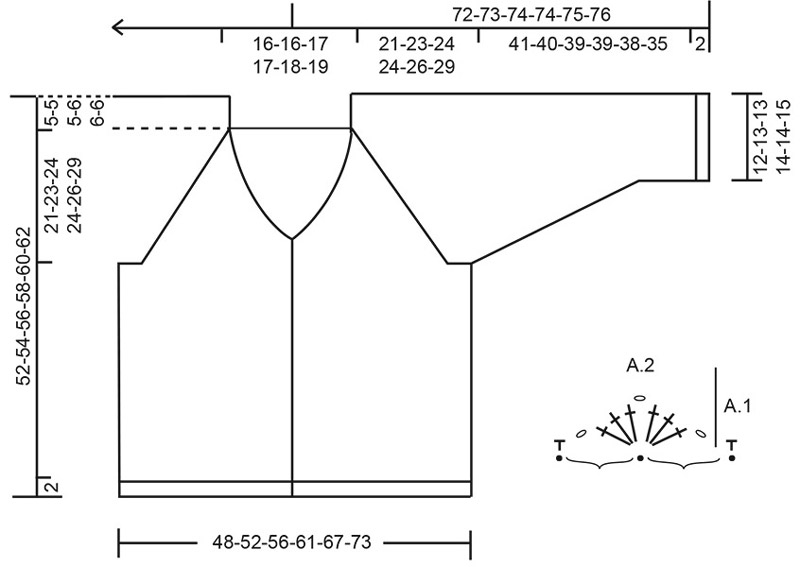
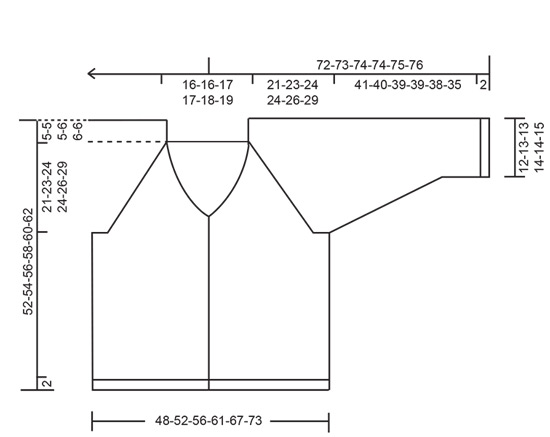
Bonjour, Sur votre schéma de l'adorable Cardigan Sweet Harmonie, il semblerait qu'il y ait une erreur sur les mesures intermédiaires de la manche. En effet, les mesures par tailles, sont dégressives. Elles vont de 41 cm à 35 cm. Or logiquement on passe de la taille S à la taille XXL. Il y a une inversion. Je ne l'ai pas vu tout de suite. ?? 🤣 Ma calculatrice a chauffé 🤣
27.03.2025 - 14:39DROPS Design answered:
Bonjour Mme Soulier, en fait, les manches sont toujours plus courtes dans les grandes tailles car l'empiècement est plus long, ainsi, si vous regardez les mesures du schéma, en S vous avez 21 cm d'empiècement + 41+2 cm pour la manche = soit 64 cm de longueur totale (à partir de l'encolure) et en taille XXXL, vous avez 29 cm d'empiècement + 35 cm + 2 cm pour la manche = 66 cm de longueur totale et si vous ajoutez la moitié de l'encolure vous aurez 72 cm du milieu dos au bord de la manche en S et 76 cm pour cette même longueur en XXXL. Vous pouvez toutefois volontiers ajuster la longueur en la personnalisant à vos besoins. Bon tricot!
27.03.2025 - 15:48
![]() Kirsten wrote:
Kirsten wrote:
Hallo liebes Drops- Team, habe ich das richtig verstanden, dass ich an den Vorderteilkanten nach den Zunahmen gerade nach unten weiterstricke und mit den Knopflöchern anfange, während ich noch weiter am Raglan -Ärmel und - Rücken zunehme ?? Vielen Dank und ein riesiges Lob für die vielen tollen Anleitungen!
20.03.2025 - 18:27DROPS Design answered:
Liebe Kirsten, ja genau, wenn die Zunahmen für den V-Halsausschnitt fertig sind, striken Sie weiter bis die Raglanzunahmen fertig sind, dann beginnen die Knopflöcher (bei der 1. Hinreihe nach der letzen Zunahme). Viel Spaß beim Stricken!
21.03.2025 - 07:53
![]() Jenny Bergqvist wrote:
Jenny Bergqvist wrote:
Jag undrar över varven på v-halsen. Ökningen ska ske varannat varv. Är rätsidan ett varv och avigsidan ett varv? Eller är ett varv rät + avig? tacksam för svar
14.03.2025 - 19:14DROPS Design answered:
Hei Jenny. Rätsidan ett varv och avigsidan ett varv. Det ökas till v-hals från rätsidan i båda sidor av arbetet innanför 2 maskor. mvh DROPS Design
17.03.2025 - 13:11
![]() Janneke wrote:
Janneke wrote:
Hoi! Hoe kom ik achter de moeilijkheidsgraad van de breipatronen? Met vriendelijke groet Janneke
05.03.2025 - 13:53DROPS Design answered:
Dag Janneke,
We hebben geen moeilijkheidsgraad in de vorm van punten of iets dergelijks, omdat het heel individueel is welke technieken je beheerst. Wel hebben we video's en lessen bij elk patroon geplaatst om je te helpen het patroon te maken. Verder hebben we een categorie met basispatronen, waar relatief makkelijke patronen onder vallen.
06.03.2025 - 19:39
![]() Lena wrote:
Lena wrote:
Hej\\r\\nJag stickar storlek L och får inte ihop antalet maskor.Tex ärmen startar med 18 maskor,det ska ökas för raglan 22 gånger alltså 44 maskor.44+18=62! I mönstret står ärmens 58 maskor?Tror inte att dom andra siffrorna heller stämmer,eller gör jag något fel.Tacksam för ett svar……….
27.02.2025 - 19:59DROPS Design answered:
Hej Lena, ja når du følger opskriften og sætter de 58 masker på tråd til ærme, så bruger du de resterende masker på hver side af ærmet til selve ryg og forstykker :)
06.03.2025 - 11:36
![]() Lena wrote:
Lena wrote:
Arbetet vid halsringningen börjar med st.4,5. Sen står det byt till st. 4,5?Är det en felskrivning,ska man börja med st.3,5?
20.02.2025 - 20:08DROPS Design answered:
Hej Lena, du fortsætter med st 4,5 (vi har fjernet "byt till st 4,5) tack för info :)
05.03.2025 - 14:09
![]() Nynke wrote:
Nynke wrote:
De 4 markeerdraden tbv raglan worden tussen de 3e en 4e steek, de 21e en 22e, de 59e en 50e steek etc geplaatst. Maar naast welke rechte steek wordt links en rechts gemeerderd? Naast de 3e of de 4e en daarna naast de 22e? En dan? Alvast dank!
20.02.2025 - 15:59DROPS Design answered:
Dag Nynke,
Je meerdert steeds voor en na de 2 raglan steken, dus je meerdert vóór de raglan zoals bij de uitleg bovenaan het patroon beschreven (MEERDER 1 STEEK RICHTING RECHTS VOOR DE MARKEERDRAAD), dan brei je 1 steek recht, dan heb je de markeerdraad, dan weer 1 steek recht, dan zoals bovenaan beschreven (MEERDER 1 STEEK RICHTING LINKS NA DE MARKEERDRAAD.)
19.04.2025 - 09:58
![]() Azucena Roldán Garcia-Ochoa wrote:
Azucena Roldán Garcia-Ochoa wrote:
Me gustaría hacer este patrón pero SOLO con el hilo Kid Silk. - ¿Que cantidad de lana necesito? - ¿Puedo seguir el patrón con los mismos puntos? Gracias por vuestra respuesta.
16.02.2025 - 09:46DROPS Design answered:
Hola Azucena, puedes trabajar con doble hilo de Kid-Silk; si la tensión se mantiene puedes seguir las instrucciones con los mismos puntos. Ten en cuenta que la labor será mucho más ligera y no tendrá caída. Como trabajarás con doble hilo de Kid-Silk necesitarás el doble de lana (el doble de ovillos).
17.02.2025 - 01:37
![]() Nicole De Weerdt wrote:
Nicole De Weerdt wrote:
Wat spijtig dat de klassieke manier van breien ook niet kan toegepast worden! Ik zou er nog zo blij mee zijn geweest!
14.02.2025 - 07:21
![]() Biny wrote:
Biny wrote:
Brei je dit vest met Flora 1 draads? Kan evt Bomul Linn ook 1 draads?
12.02.2025 - 08:20DROPS Design answered:
Dag Biny,
Dit vest brei je met 2 draden uit garencateogrie A of met 1 draad uit garencategorie C. Bomul-Lin valt in categorie C, dus hiervan heb je dan 1 draad nodig. Via deze link vind je informatie over hoe je garens vervangt en hoe je dit om kunt rekenen met de looplengte.
15.02.2025 - 10:59
|
||||||||||||||||
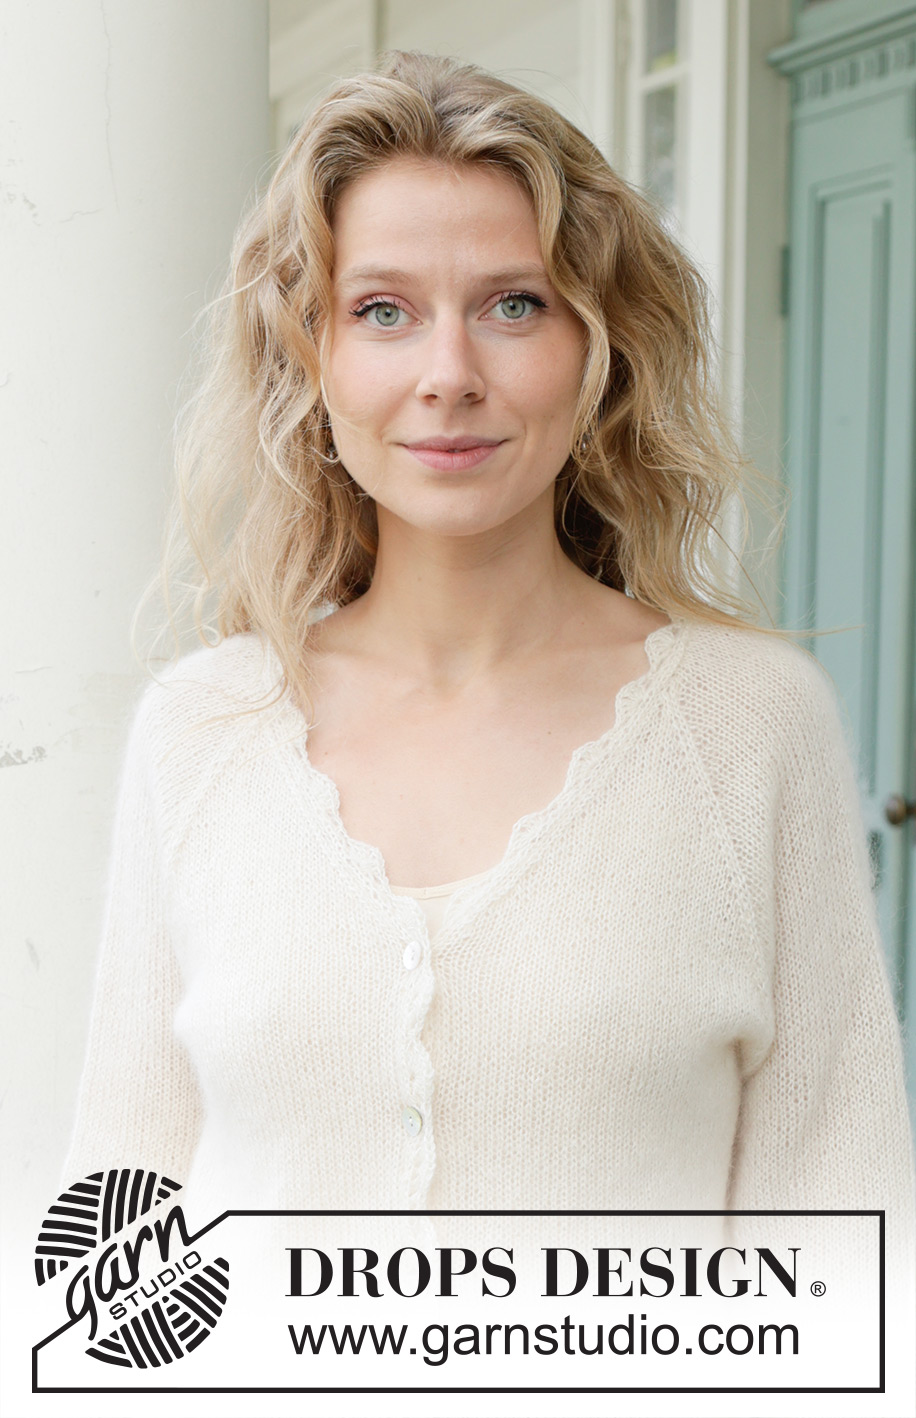
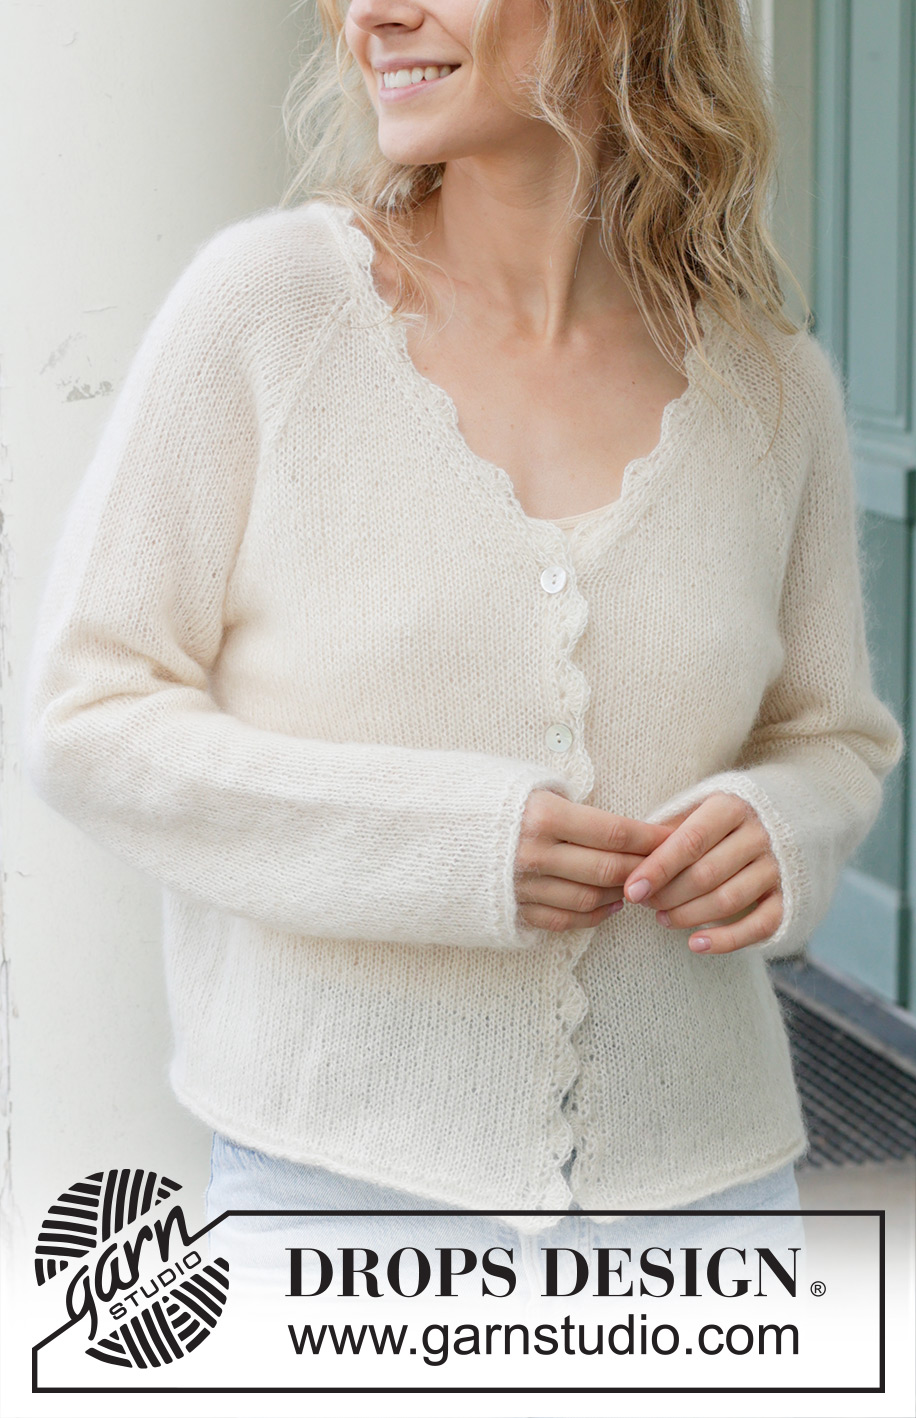
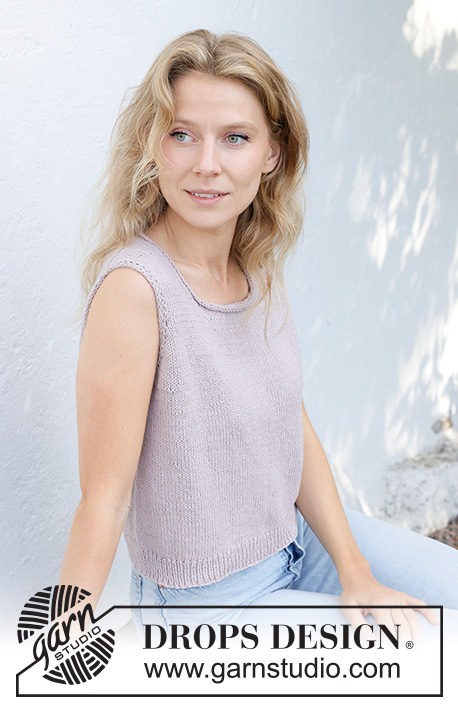
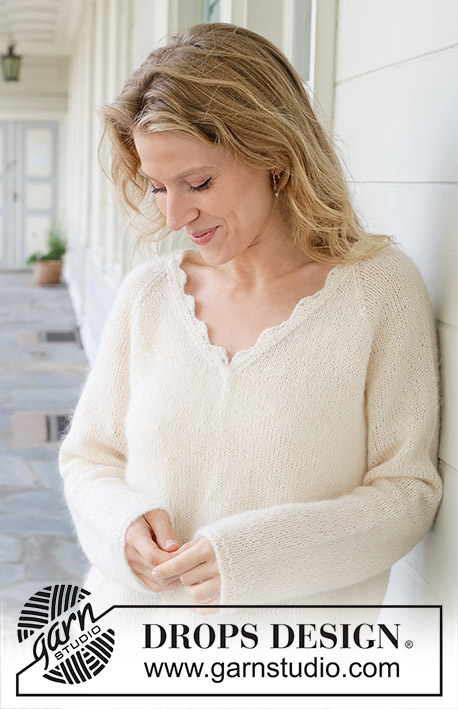
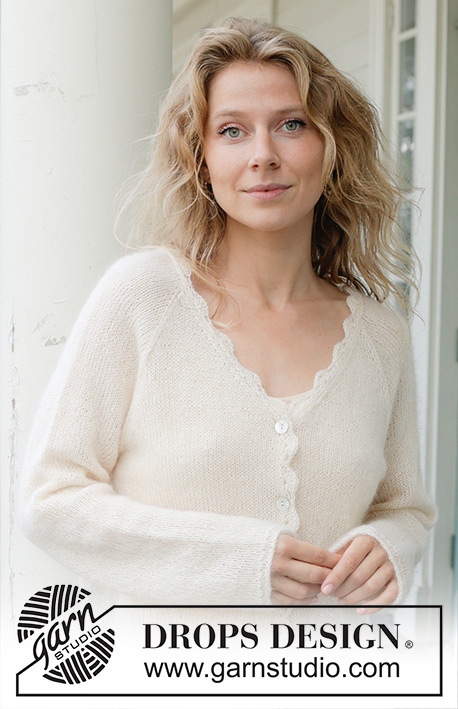
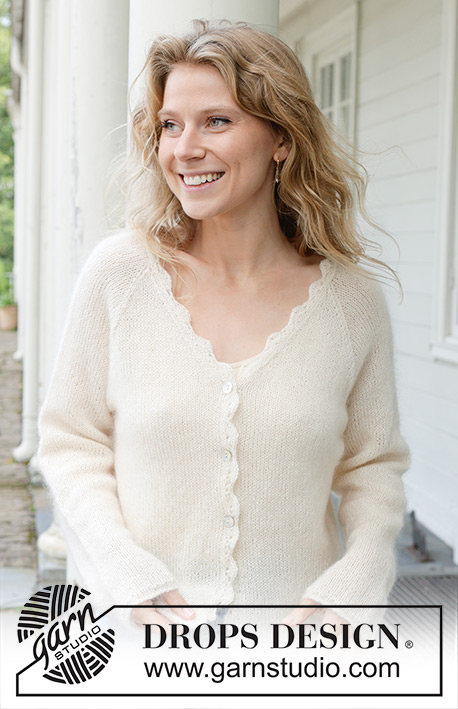
Sweet Harmony Cardigan#sweetharmonycardigan |
||||||||||||||||
 |
 |
|||||||||||||||
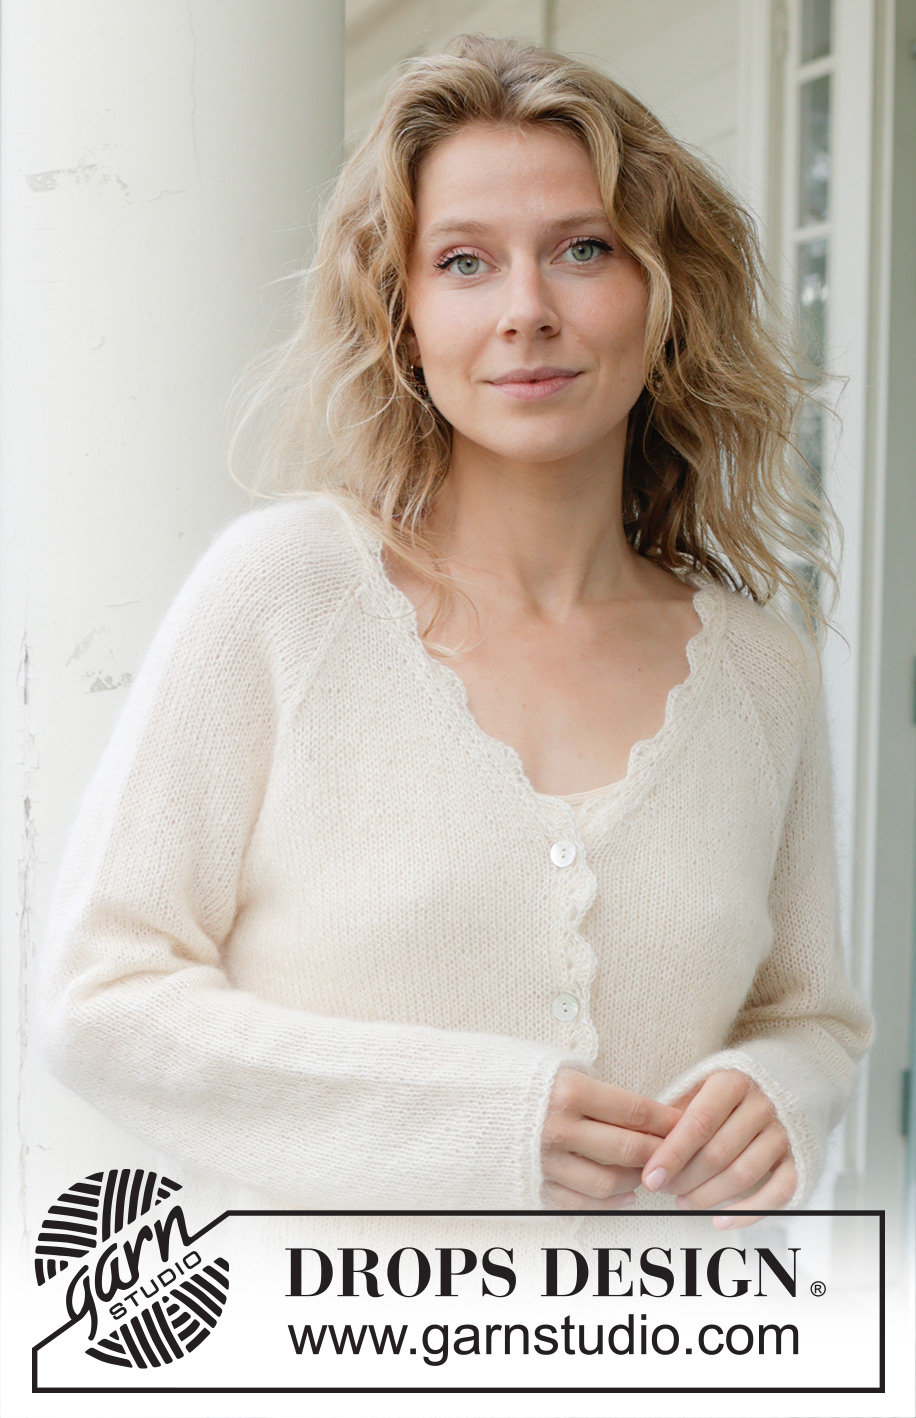
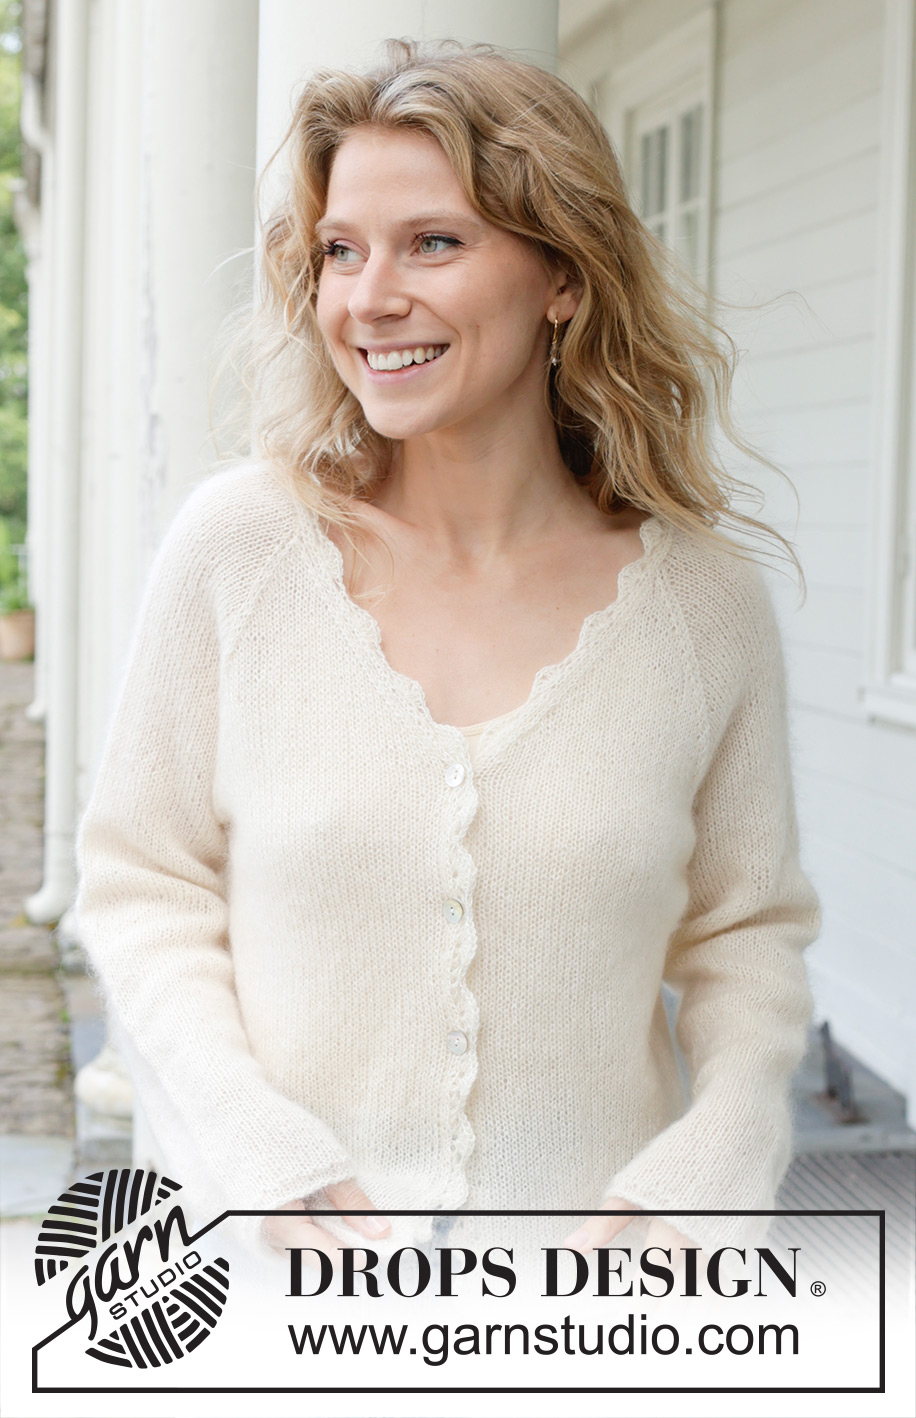
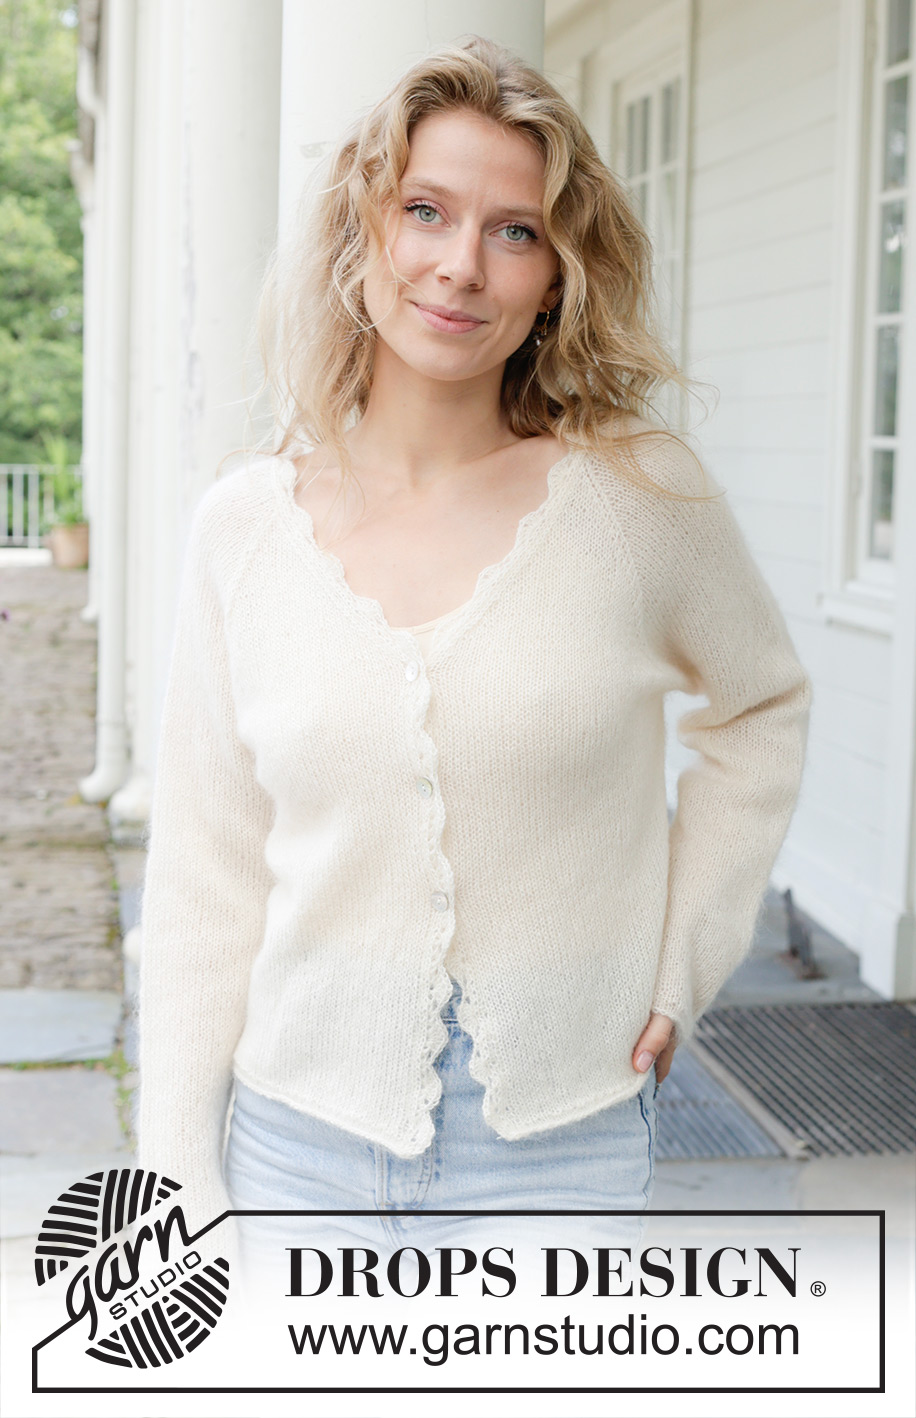
Knitted jacket in 1 strand DROPS Flora or DROPS Alpaca and 1 strand DROPS Kid-Silk. The piece is worked top down, with stocking stitch, raglan, V-neck, rolled edges and crocheted edges. Sizes S - XXXL.
DROPS 257-2 |
||||||||||||||||
|
------------------------------------------------------- EXPLANATIONS FOR THE PATTERN: ------------------------------------------------------- 2 EDGE STITCHES: FROM RIGHT SIDE, BEGINNING OF ROW: Slip 1 stitch knit-wise, knit 1. FROM RIGHT SIDE, END OF ROW: Work until there are 2 stitches left on row, knit 2. FROM WRONG SIDE, BEGINNING OF ROW: Slip 1 stitch purl-wise, purl 1. FROM WRONG SIDE, END OF ROW: Work until there are 2 stitches left on row, purl 2. RAGLAN: All increases are worked from the right side! Increase 1 stitch as described below: INCREASE 1 STITCH TOWARDS THE RIGHT BEFORE MARKER: Make 1 yarn over by taking the strand from the back, over the right needle to the front. On the next row, purl the front loop of the yarn over, then work the new stitch in stocking stitch. INCREASE 1 STITCH TOWARDS THE LEFT AFTER MARKER: Make 1 yarn over by taking the strand in front of the needle, then back. On the next row, purl the back loop of the yarn over, then work the new stitch in stocking stitch. V-NECK: All increases are worked from the right side. Increase 1 stitch as described below: LEFT FRONT PIECE: Work 2 edge stitches as before, make 1 yarn over by taking the strand in front of the needle, then back. On the next row, purl the back loop of the yarn over, then work the new stitch in stocking stitch. RIGHT FRONT PIECE: Work until there are 2 stitches left on the row, make 1 yarn over by taking the strand from the back, over the right needle to the front, work the 2 edge stitches. On the next row, purl the front loop of the yarn over, then work the new stitch in stocking stitch. BUTTONHOLES: Work the buttonholes from the right side, when there are 5 stitches left on the row. ROW 1 (right side): Make 1 yarn over, knit 2 together, knit 3. ROW 2 (wrong side): Work the band as before, purl the yarn over to leave a hole. The first buttonhole is worked on the first row after the V-neck is finished. Then work the other 2 buttonholes with 8-8-8½-8½-9-9 cm between each one. DECREASE TIP: Decrease 1 stitch on each side of the marker-thread as follows: Work until there are 3 stitches left before the marker-thread, knit 2 together, knit 2 (marker-thread sits between these 2 stitches), slip 1 stitch knit-wise, knit 1 and pass the slipped stitch over the knitted stitch (2 stitches decreased). KNITTING TIP: When knitting up stitches under the sleeve, small holes can be left in the transitions between body and sleeve. These holes can be closed by picking up the strand between 2 stitches and working it twisted together with the next stitch. PATTERN: See diagrams A.1 and A.2 (crocheted edge). ------------------------------------------------------- START THE PIECE HERE: ------------------------------------------------------- JACKET – SHORT OVERVIEW OF THE PIECE. The pattern uses both long and short needles; start with the length which fits the number of stitches and change when necessary. The yoke is worked back and forth with circular needle, from mid front and top down. When the yoke is finished, it is divided for body and sleeves and the body continued back and forth, while the sleeves wait. The sleeves are worked in the round, top down. A crocheted edge is worked along each front piece and round the neckline. NECKLINE: Cast on 70-70-72-80-82-84 stitches with circular needle size 4.5, 1 strand DROPS Flora or 1 strand DROPS Alpaca and 1 strand DROPS Kid-Silk (2 strands). Purl 1 row from the wrong side. Insert 1 marker inside 2 edge stitches on one side; the piece is measured from here. YOKE: Insert 4 marker-threads, without working the stitches, each marker-thread inserted between 2 stitches (these 2 stitches are called raglan-stitches and are worked in stocking stitch): Count 3 stitches (= left front piece), insert marker-thread 1 before the next stitch, count 18-18-18-22-22-22 stitches (= sleeve), insert marker-thread 2 before the next stitch, count 28-28-30-30-32-34 stitches (= back piece), insert marker-thread 3 before the next stitch, count 18-18-18-22-22-22 stitches (= sleeve), insert marker-thread 4 before the next stitch, there are 3 stitches left after the last marker-thread (= right front piece). You now work stocking stitch back and forth with 2 EDGE STITCHES on each side, increasing for RAGLAN and V-NECK at the same time – read all descriptions above. Read both paragraphs below before continuing. Remember to maintain the knitting tension. RAGLAN: Increase for raglan on each side of the 2 raglan-stitches by each marker-thread (= 8 increased stitches) every 2nd row, 9-8-15-21-23-21 times. Then increase for raglan every 2nd row on the front and back pieces but only every 4th row on the sleeves (alternately 4 and 8 increased stitches). Repeat these increases a total of 16-20-14-8-8-14 times on the front and back pieces (8-10-7-4-4-7 times on the sleeves). You have increased a total of 25-28-29-29-31-35 times on the front and back pieces and 17-18-22-25-27-28 times on the sleeves. V-NECK: After you have increased 2 times for raglan, begin to increase for the V-neck. Increase from the right side on both front pieces, inside the 2 edge stitches (1 stitch increased each side), every 4th row 1-2-2-2-2-2 times, then every 2nd row 10-9-10-10-11-12 times and finally every 4th row 2-2-2-2-2-2 times. A total of 13-13-14-14-15-16 increases for the V-neck on each side. After all the increases for raglan and V-neck, there are 264-280-304-324-344-368 stitches. Remember the BUTTONHOLES – read description above. Continue working without further increases, until the yoke measures 21-23-24-24-26-29 cm, measured straight down from the marker (not along the V-neck). Now divide for the body and sleeves. DIVIDE FOR BODY AND SLEEVES: Work 42-45-48-51-55-60 stitches as before (= front piece), place the next 50-52-58-62-64-66 stitches on 1 thread for the sleeve, cast on 6-8-8-12-14-16 stitches (under sleeve), work 80-86-92-98-106-116 stitches (= back piece), place the next 50-52-58-62-64-66 stitches on 1 thread for the sleeve, cast on 6-8-8-12-14-16 stitches (under sleeve), work the last 42-45-48-51-55-60 stitches as before (= front piece). The body and sleeves are finished separately. BODY: = 176-192-204-224-244-268 stitches. Continue the edge stitches and stocking stitch until the piece measures 45-47-49-50-52-54 cm from the marker, increasing 1 stitch on the last row = 177-193-205-225-245-269 stitches. Change to circular needle size 3.5 mm and work as follows from the right side: 2 edge stitches as before, rib (knit 1, purl 1) until there are 3 stitches left, knit 1 and 2 edge stitches as before. Then work 4 rows of stocking stitch (starting with purl from the wrong side), with 2 edge stitches on each side. Change to circular needle size 4.5 mm. Cast off a little loosely with purl from the wrong side. The jacket measures approx. 47-49-51-52-54-56 cm from the marker and 52-54-56-58-60-62 cm from the top of the shoulder. SLEEVES: Place the 50-52-58-62-64-66 sleeve-stitches from one thread on circular needle size 4.5 mm and knit up 1 stitch in each of the 6-8-8-12-14-16 stitches cast on under the sleeve – read SLEEVE TIP = 56-60-66-74-78-82 stitches. Insert a marker-thread in the middle of the 6-8-8-12-14-16 stitches under the sleeve. Start at the marker-thread and work stocking stitch in the round. When the sleeve measures 3-3-3-2-2-2 cm, decrease 2 stitches under the sleeve – read DECREASE TIP. Decrease like this every 6-5-3½-2½-2½-2 cm a total of 6-7-9-12-13-14 times = 44-46-48-50-52-54 stitches. Continue working until the sleeve measures 41-40-39-39-38-35 cm from the division. Change to double pointed needles size 3.5 mm. Work 1 round of rib (knit 1, purl 1). Then knit 4 rounds. Change to double pointed needles size 4.5 mm and cast off a little loosely with knit. The sleeve measures approx. 43-42-41-41-40-37 cm. CROCHETED EDGE: Use crochet hook size 3.5 mm and 1 strand of each quality (2 strands). Start from the right side at the bottom of the right front piece. Work diagram A.1 in the first stitch, then diagram A.2 up the front piece, along the neckline and down the left front piece. Make sure A.2 finishes with a double crochet in the last stitch at the bottom of the left front piece. Cut and fasten the strand. ASSEMBLY: Sew the buttons onto the left front piece. |
||||||||||||||||
Diagram explanations |
||||||||||||||||
|
||||||||||||||||
 |
||||||||||||||||
 |
||||||||||||||||
Have you finished this pattern?Tag your pictures with #dropspattern #sweetharmonycardigan or submit them to the #dropsfan gallery. Do you need help with this pattern?You'll find 32 tutorial videos, a Comments/Questions area and more by visiting the pattern on garnstudio.com. © 1982-2026 DROPS Design A/S. We reserve all rights. This document, including all its sub-sections, has copyrights. Read more about what you can do with our patterns at the bottom of each pattern on our site. |
||||||||||||||||


With over 40 years in knitting and crochet design, DROPS Design offers one of the most extensive collections of free patterns on the internet - translated to 17 languages. As of today we count 325 catalogues and 12298 patterns translated into English (UK/cm).
We work hard to bring you the best knitting and crochet have to offer, inspiration and advice as well as great quality yarns at incredible prices! Would you like to use our patterns for other than personal use? You can read what you are allowed to do in the Copyright text at the bottom of all our patterns. Happy crafting!
Post a comment to pattern DROPS 257-2
We would love to hear what you have to say about this pattern!
If you want to leave a question, please make sure you select the correct category in the form below, to speed up the answering process. Required fields are marked *.