
Popular categories
Looking for a yarn?


Comments / Questions (23)
![]() Esther wrote:
Esther wrote:
Habt ihr einen Tipp für mich, wie es sich vermeiden lässt, die Fäden beim Streifenwechsel immer abzuschneiden?
22.12.2025 - 23:22
![]() Anna wrote:
Anna wrote:
Hei, Kumpi kokotaulukko on oikea: Ohjeessa lueteltu koot XS-XXL, mutta ”Merkitse koko” antaa vaihtoehdot S-XXXL
08.10.2025 - 18:01DROPS Design answered:
Hei, jakussa on koot XS-XXL.
10.10.2025 - 17:56
![]() Lilianne wrote:
Lilianne wrote:
Hello , I am just finishing the left Front part and its supposed to match the back part how ? The Model shows that the shoulder is actually at the back and the Front in my case is 30 cm ,which is Not the same with the back.
10.01.2025 - 03:46DROPS Design answered:
Dear Liliane, front pieces will be longer than back pieces as the shoulders are diagonally down towards back piece, so in XXXL, back piece is 18 cm, front piece 30 cm = 48/2= 24 cm armhole (see chart) - find videos/lessons showing how to work this kind of jacket/jumper with European shoulders. Happy knitting!
10.01.2025 - 09:42
![]() Silvia P wrote:
Silvia P wrote:
Sto lavorando questo modello ma non sono sicura di aver capito esattamente come riprendere le maglie per fare i lati destro e sinistro. Io sto lavorando una maglia a dritto ad ogni nuovo ferro tirando su la maglia dal bordo dopo aver lavorato i core e le maglie rimanenti da come è scritto sembra invece che le maglie debbano essere tirate su tutte insieme perché dice poi di misurare la lunghezza a partire da quel ferro. Qual è la versione corretta? Grazie mille!
15.10.2024 - 20:10DROPS Design answered:
Buonasera Silvia, le maglie si riprendono tutte in una volta, su un ferro solo, dopo aver lavorato le maglie del bordo. Buon lavoro!
02.11.2024 - 23:57
![]() MARIE JOSE GALERAND wrote:
MARIE JOSE GALERAND wrote:
Je ne comprends pas comment on débute le devant gauche, j’ai tricoté la bordure gauche mais ensuite je ne sais pas quoi faire. Merci de votre aide
24.09.2024 - 18:39DROPS Design answered:
Bonjour Mme Galerand, vous trouverez ici, en vidéo et là, en leçon comment tricoter le devant gauche, la seule différence ici étant la bordure devant, pour le devant gauche, vous allez d'abord tricoter les mailles de bordure devant sur l'endroit puis relever les mailles comme dans la vidéo/la leçon; pour le devant droit, vous devrez couper le fil de la bordure devant pour les tricoter de nouveau quand les mailles du devant droit sont relevées. Bon tricot!
25.09.2024 - 08:20
![]() Jasmin wrote:
Jasmin wrote:
Hi, ich stricke die Jacke in Gr L, habe den oberen Part des Rückenteils nach 17cm inkl der Zunahmen für die Armausschnitte fertig & bin nun dem linken Vorderteil. Hier steht aber, dass man mit den Zunahmen der Armausschnitte erst nach 23cm Länge beginnen soll. Kann das stimmen? Die Schultern sind ja nicht nach hinten versetzt, oder??
23.09.2024 - 18:30DROPS Design answered:
Liebe Jasmin, die Schulter sind etwas nach hinten versetzt - siehe Tab "Videos" / "Lektion", dort finden Sie Videos und Lektion wie solche Modelle mit europäischen Schultern gestrickt werden. Viel Spaß beim Stricken!
24.09.2024 - 08:54
![]() Agnieszka wrote:
Agnieszka wrote:
Dzień dobry :) W schemacie / opisie nie zostały uwzględnione oczka brzegowe. Czy należy je przerabiać, doliczyć do ogólnej liczby oczek? Nie wiem jak przerabiać rzędy, zwłaszcza te gdzie dodawane są oczka. Dziękuję za odpowiedź :)
23.09.2024 - 14:14DROPS Design answered:
Witaj Agnieszko, oczko brzegowe jest każdorazowo wliczone do podanej liczby oczek, nie należy nic doliczać. Pozdrawiamy!
24.09.2024 - 08:33
![]() Emi wrote:
Emi wrote:
Hallo, ich stricke gerade die Anleitung. Ich habe die linke Vorderseite fertig und jetzt die rechte Blende gestrickt. Wenn ich diese aber, wie in der Anleitung beschrieben stricke, entsteht der I-Cord Rand auf der falschen Seite. So kann die Blende nicht an die Schulter angestrickt werden. Wie geht das richtig?
15.09.2024 - 13:44DROPS Design answered:
Liebe Emi, bei der rechten Blende wird der I-Cord am Ende der Hin-Reihe sein, so wenn man die Maschen für die Schulter aufnimmt, dann enden die Hin-Reihe mit der Blende. Dh wenn die rechte Blende gestrickt wird, wird man den Faden abschneiden, dann die Maschen der rechten Schulter aufnehmen, dann die Blende stricken. Viel Spaß beim Stricken!
16.09.2024 - 09:05
![]() Elena Magomadova wrote:
Elena Magomadova wrote:
Oppskrift
13.09.2024 - 19:59
![]() Lilian wrote:
Lilian wrote:
Next project please,blue is my new black.
11.09.2024 - 21:27
|
|
Blue Moon Halo Cardigan#bluemoonhalocardigan |
|
 |
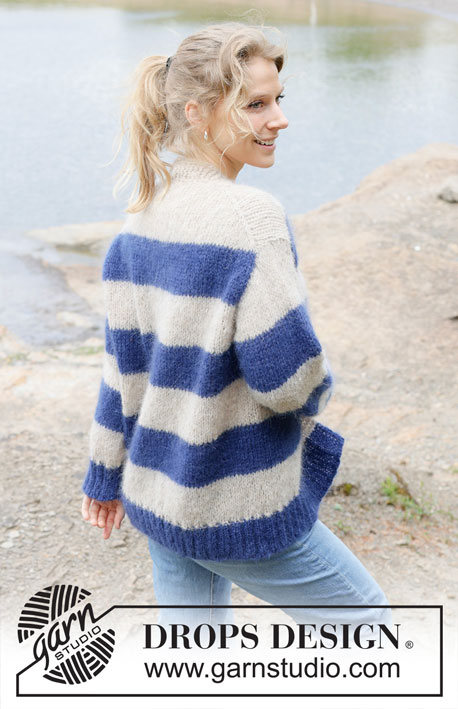 |
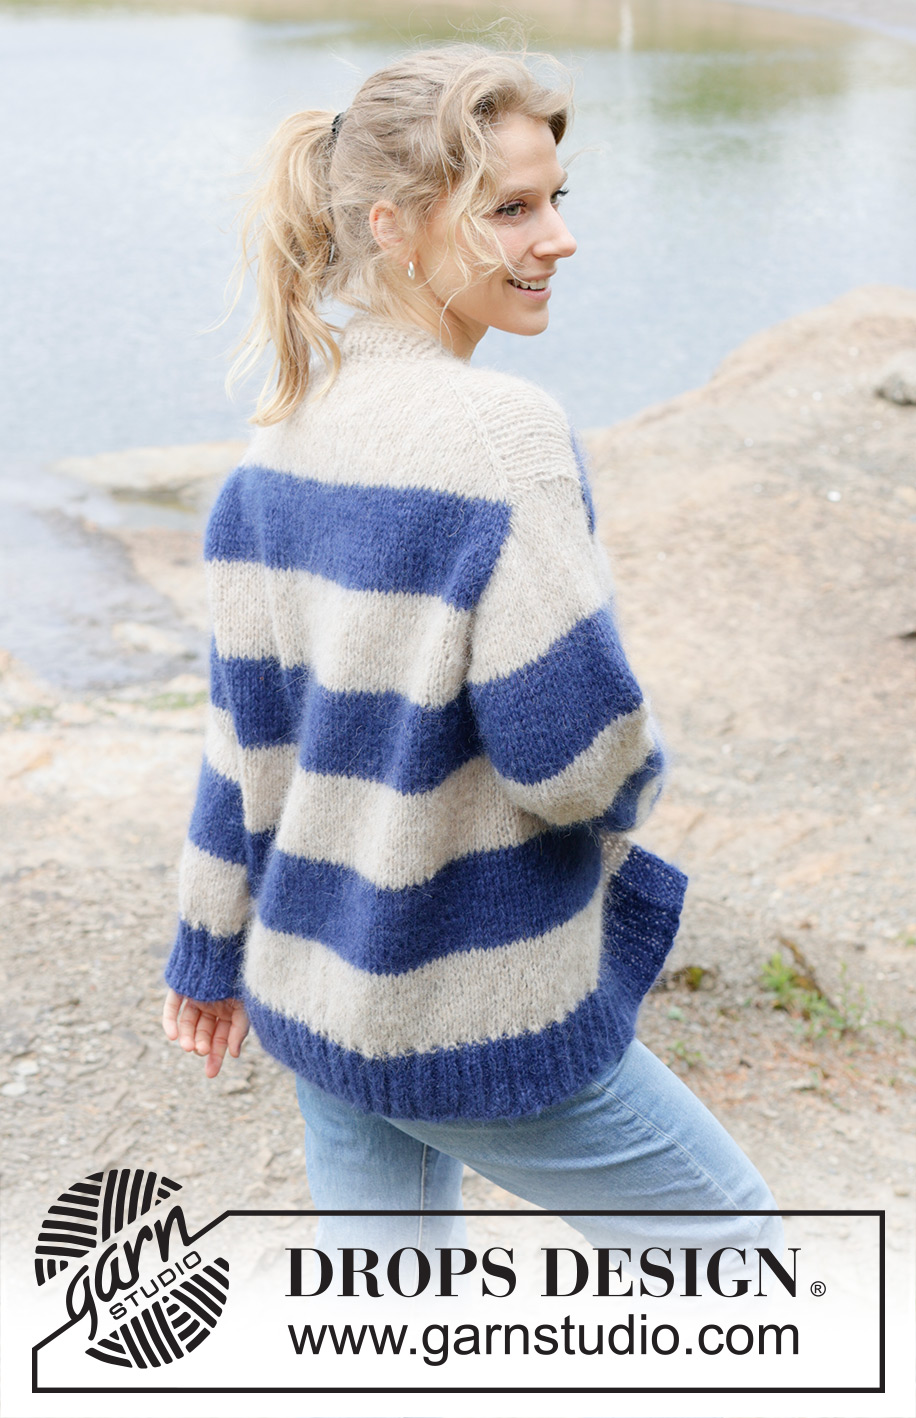
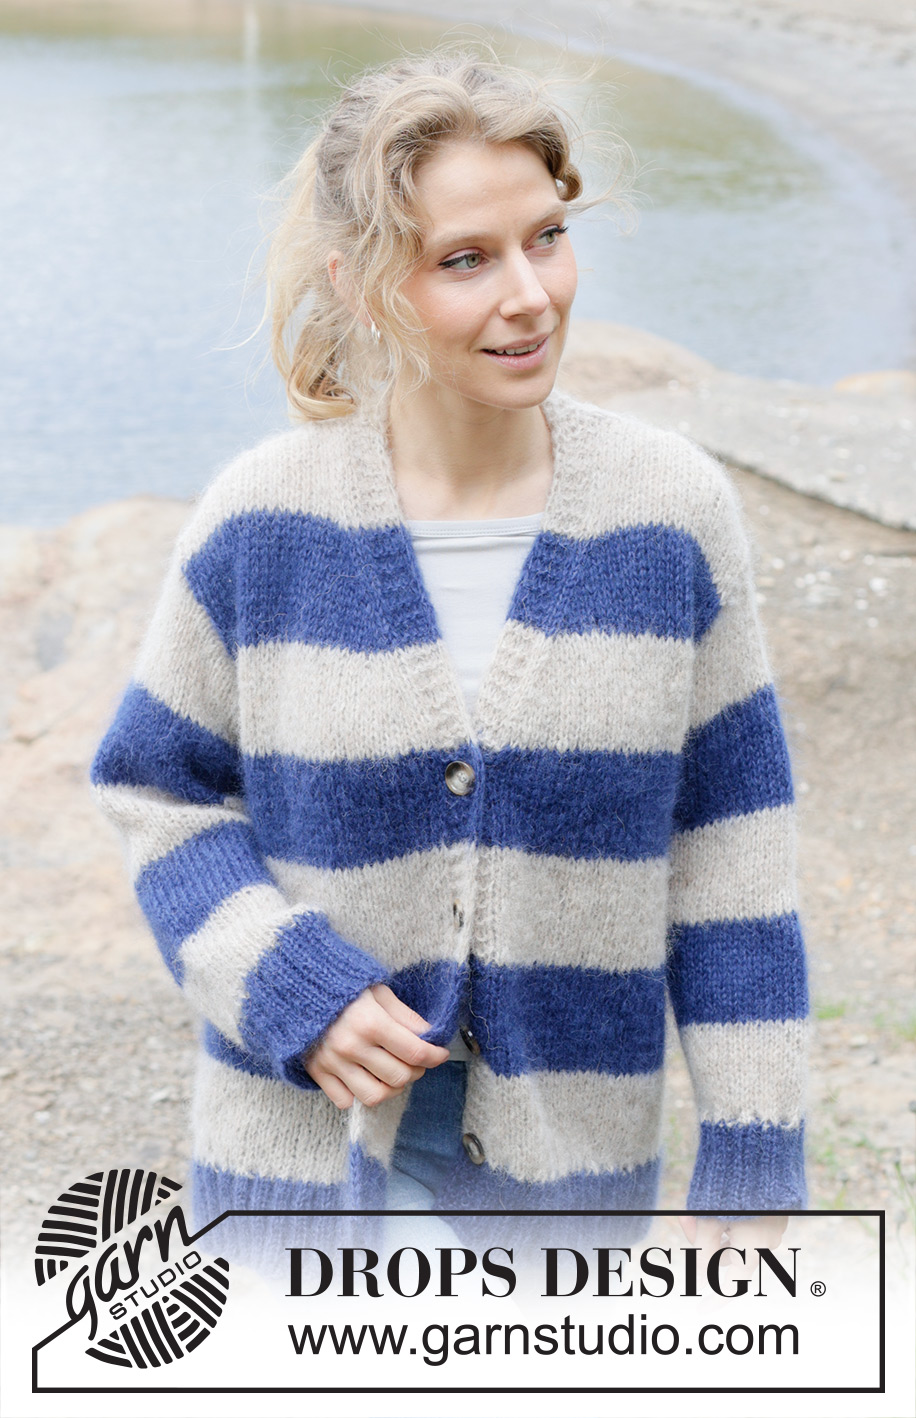
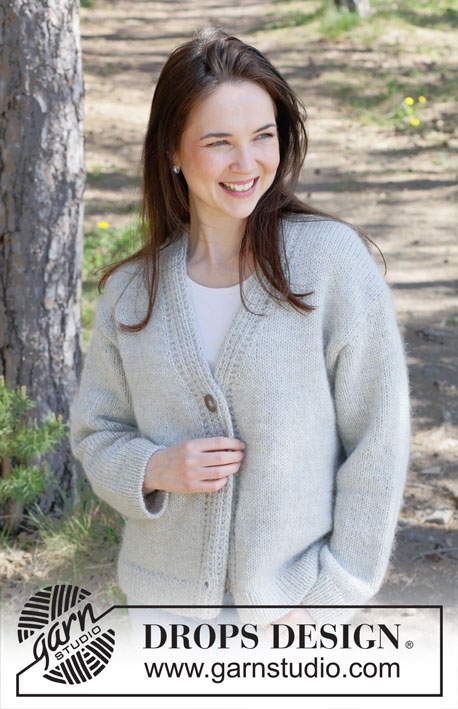
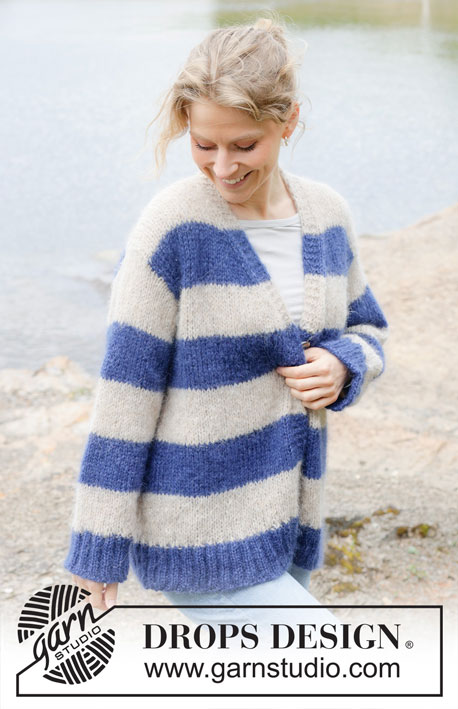
Knitted over-sized jacket in 2 strands DROPS Brushed Alpaca Silk or 1 strand DROPS Melody. The piece is worked top down with diagonal/European shoulders, V-neck, I-cord and stripes. Sizes XS - XXL.
DROPS 254-19 |
|
|
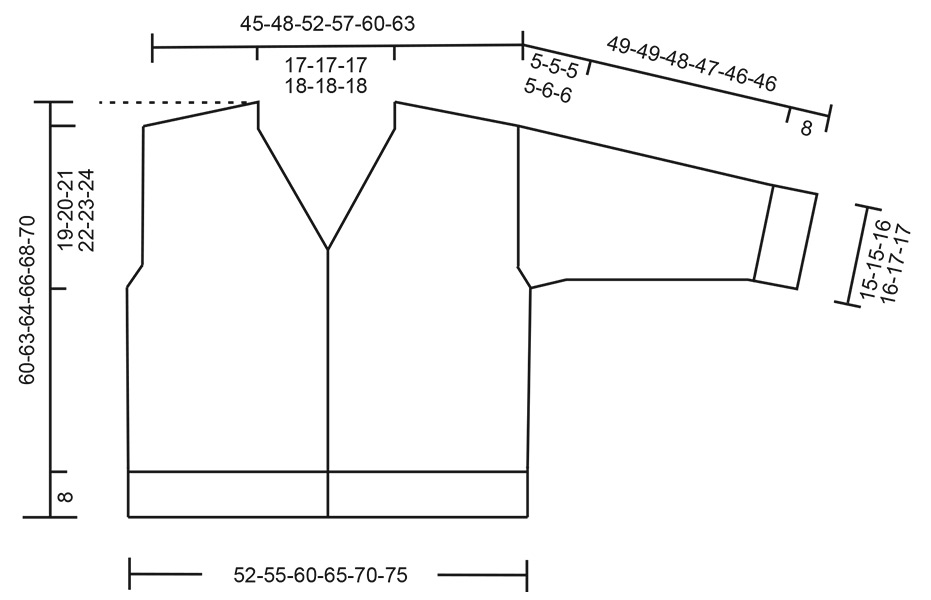
------------------------------------------------------- EXPLANATIONS FOR THE PATTERN: ------------------------------------------------------- GARTER STITCH (worked back and forth): Knit all rows, from both the right and wrong side. 1 ridge in height = knit 2 rows. INCREASE TIP-1: INCREASE 1 STITCH TOWARDS THE LEFT - from RIGHT SIDE: Use left needle to pick up yarn between 2 stitches from row below, pick up yarn from the front and knit in the stitch loop that is on the back of the needle. INCREASE 1 STITCH TOWARDS THE RIGHT - from RIGHT SIDE: Use left needle to pick up yarn between 2 stitches from row below, pick up yarn from the back and knit in the stitch loop that is on the front side of the needle. INCREASE TIP-2: INCREASE 1 STITCH TOWARDS THE RIGHT - from WRONG SIDE: Use left needle to pick up yarn between 2 stitches from row below, pick up yarn from the back and purl in the stitch loop that is on the front side of the needle. INCREASE 1 STITCH TOWARDS THE LEFT - from WRONG SIDE: Use left needle to pick up yarn between 2 stitches from row below, pick up yarn from the front and purl in the stitch loop that is on the back side of the needle. STRIPES BODY: Work as follows: Colour navy blue: 7½-8-8-8-8-8 cm. Colour light beige / beige: 7½-8-8-8-8-8 cm. Continue these stripes as far as the rib, which starts after a completed stripe of colour light beige/beige. The rib is worked in colour navy blue for 8 cm in all sizes. LEFT BAND WITH I-CORD: RIGHT SIDE: Slip 1 stitch purl-wise with strand in front, knit 1, work 4 garter stitches. WRONG SIDE: Work 4 garter stitches, slip 1 stitch purl-wise with strand in front, knit 1. RIGHT BAND WITH I-CORD: RIGHT SIDE: Work 4 garter stitches, slip 1 stitch purl-wise with strand in front, knit 1. WRONG SIDE: Slip 1 stitch purl-wise with strand in front, knit 1, 4 garter stitches. BUTTONHOLES: Work the buttonholes from the right side, when there are 5 stitches left on the row. ROW 1 (right side): Make 1 yarn over, knit 2 together, knit 1, slip 1 purl-wise with strand in front, knit 1. ROW 2 (wrong side): Work the band as before, knit the yarn over to leave a hole. The first buttonhole is worked on the first row from the right side after the increases for the V-neck are finished. Then work the other 3 buttonholes with 11-12-12-12-13-13 cm between each one. The bottom buttonhole is worked in the transition between the stocking stitch and rib. KNITTING TIP: When working short rows, there will be a small hole after each turn. This hole can be closed by tightening the strand or using the technique German Short Rows as follows: Slip the first stitch purl-wise, take the strand over the right needle and tighten well from the back (2 loops on the needle). These loops are worked together on the next row. STRIPES SLEEVES: Colour navy blue: 8-8-8-8-8-8 cm. Colour light beige/beige: 8-8-8-8-8-8 cm. Continue these stripes as far as the cuff-rib, which starts after a completed stripe of colour light beige/beige. The rib is worked in colour navy blue for 8 cm in all sizes. DECREASE TIP: Decrease 1 stitch on each side of the marker-thread as follows: Work until there are 4 stitches left before the marker-thread, knit 2 together, knit 4 (marker-thread sits in the middle of these 4 stitches), slip 1 stitch knit-wise, knit 1 and pass the slipped stitch over the knitted stitch (2 stitches decreased). ------------------------------------------------------- START THE PIECE HERE: ------------------------------------------------------- JACKET – SHORT OVERVIEW OF THE PIECE: The pattern uses both long and short needles; start with the length which fits the number of stitches and change when necessary. The piece is started by casting on stitches at the back of the neck and working the back piece top down, while increasing stitches on each side for the shoulders which become slightly diagonal. The back piece is worked as far as the armholes. Each front piece begins by working the band, then knitting up stitches along 1 back shoulder, working top down as far as the armholes, increasing for the V-neck. The front and back pieces are joined on the same circular needle and the body is continued back and forth Stitches are knitted up around the armholes for the sleeves, which are started with short rows back and forth for the sleeve cap, then finished in the round. The bands are sewn together mid-back and sewn to the neckline. If there is a «0» in your chosen size, skip the information and go straight to the next instruction. BACK PIECE: Cast on 22-22-22-24-24-24 stitches with circular needle size 7 mm and 2 strands colour light beige DROPS Brushed Alpaca Silk or 1 strand colour beige DROPS Melody. ROW 1 (wrong side): Purl. ROW 2 (right side): Read INCREASE TIP-1, knit 2, increase 1 stitch towards the left, knit until there are 2 stitches left, increase 1 stitch towards the right, knit 2. ROW 3 (wrong side): Read INCREASE TIP-2, purl 2, increase 1 stitch towards the right, purl until there are 2 stitches left, increase 1 stitch towards the left, purl 2. Work ROWS 2 and 3 a total of 8-9-10-11-12-13 times (16-18-20-22-24-26 rows worked). There are 54-58-62-68-72-76 stitches. Insert 1 marker outermost on one side. The piece is now measured from here! Continue with stocking stitch back and forth. When the piece measures 0-0-0-2-2-4 cm from the marker, begin STRIPES BODY – read description above. Remember to maintain the knitting tension. Continue the stripes. When the piece measures 12-13-12-13-13-14 cm from the marker, measured along the edge, begin increasing for the armholes. INCREASE FOR ARMHOLES: ROW 1 (right side): Remember INCREASE TIP-1. Knit 3, increase 1 stitch towards the left, knit until there are 3 stitches left, increase 1 stitch towards the right, knit 3. ROW 2 (wrong side): Purl. Work ROWS 1 and 2 a total of 2-2-3-3-3-3 times (4-4-6-6-6-6 rows worked) = 58-62-68-74-78-82 stitches. Work until the piece measures 15-16-16-17-17-18 cm, measured from the marker along the armhole and finishing with a row from the right side – Make a note of where the stripes finish so the front pieces match the back before all sections are joined together. Cut the strand, place the stitches on a stitch holder and work the left front piece along the left back shoulder as described below. LEFT BAND: Cast on 6 stitches with circular needle size 7 mm and 2 strands colour light beige DROPS Brushed Alpaca Silk or 1 strand colour beige DROPS Melody. Work LEFT BAND WITH I-CORD – read description above for 7-7-7-8-8-8 cm, finishing with a row from the wrong side. LEFT FRONT PIECE: Find the left back shoulder as follows: Lay the back piece flat, right side up, with the stitch holder towards you; left side of piece = left shoulder. Stitches are now knitted up along the left back shoulder, starting from the right side by the neck and working to the shoulder: ROW 1 (right side): Work the 6 band-stitches, then knit up 1 stitch in each knitted row, inside the outermost stitch (16-18-20-22-24-26 knitted-up stitches) = 22-24-26-28-30-32 stitches. All measurements on the front piece are taken from this knitted-up row. ROW 2 (wrong side): Purl until there are 6 stitches left, work the band as before. ROW 3 (right side): Work the 6 band-stitches as before, knit to end of row. ROW 4 (wrong side): Purl until there are 6 stitches left, work the band as before. Work ROWS 3 and 4 until the piece measures 5-6-8-8-9-10 cm. OVERVIEW OF NEXT SECTIONS: You now increase for the V-neck, then work stripes and increase for the armholes a little later. Read the 3 next sections before continuing, so you have an overview of when the stripes and increases for armhole begin. INCREASE FOR V-NECK: ROW 1 (right side): Work the 6 band-stitches as before, knit 2, increase 1 stitch towards the left - remember INCREASE TIP-1, knit to end of row. ROW 2 (wrong side): Purl until there are 6 stitches left, work the band as before. Work ROWS 1 and 2 a total of 11-11-11-12-12-12 times (22-22-22-24-24-24 rows worked) = 33-35-37-40-42-44 stitches. The front piece measures approx. 19-20-22-23-24-25 cm from the knitted-up row. Continue with stocking stitch, bands and stripes (when they have started). STRIPES: When the piece measures 8-8-10-12-14-16 cm from the knitted-up row, begin STRIPES BODY – remember description above. INCREASE FOR ARMHOLE: When the piece measures 21-21-22-23-25-26 cm, increase for the armhole as follows: ROW 1 (right side): Work 6 band-stitches, knit until there are 3 stitches left, increase 1 stitch towards the right - remember INCREASE TIP-1, knit 3. ROW 2 (wrong side): Purl until there are 6 stitches left, work the band as before. Work ROWS 1 and 2 a total of 2-2-3-3-3-3 times (4-4-6-6-6-6 rows worked). When all the increases for the V-neck and armhole are finished, there are 35-37-40-43-45-47 stitches. Work until the piece measures 23-24-26-27-29-30 cm, measured from the knitted-up row, finishing with a row from the right side – NOTE! Make sure the last row matches the last row on the back piece. Cut the strand, place the stitches on a stitch holder and work the right front piece along the right back shoulder as described below. RIGHT BAND: Cast on 6 stitches with circular needle size 7 mm and 2 strands colour light beige DROPS Brushed Alpaca Silk or 1 strand colour beige DROPS Melody. Work RIGHT BAND WITH I-CORD – read description above for 7-7-7-8-8-8 cm, finishing with a row from the wrong side. Cut the strand, place the stitches on a stitch holder. You now knit up stitches along the right back shoulder then continue the band. RIGHT FRONT PIECE: Start on the right side by the shoulder, on the right back shoulder, and work towards the neck: Knit up 1 stitch in each knitted row, inside the outermost stitch (16-18-20-22-24-26 knitted-up stitches), work the 6 band-stitches = 22-24-26-28-30-32 stitches. All measurements on the front piece are taken from this knitted-up row. ROW 1 (wrong side): Work the 6 band-stitches, purl to end of row. ROW 2 (right side): Knit until there are 6 stitches left, work the 6 band-stitches. Work ROWS 1 and 2 until the piece measures 5-6-8-8-9-10 cm. OVERVIEW OF NEXT SECTIONS: You now increase for the V-neck, then work stripes and increase for the armhole little later. Read the 3 next sections before continuing, so you have an overview of when the stripes and increases for armhole begin. INCREASE FOR V-NECK: ROW 1 (right side): Knit until there are 8 stitches left, increase 1 stitch towards the right- remember INCREASE TIP-1, knit 2, work the 6 band-stitches as before. ROW 2 (wrong side): Work 6 band-stitches, purl to end of row. Work ROWS 1 and 2 a total of 11-11-11-12-12-12 times (22-22-22-24-24-24 rows worked) = 33-35-37-40-42-44 stitches. The piece measures approx. 19-20-22-23-24-25 cm from the knitted-up row. Continue with stocking stitch and the bands – remember the BUTTONHOLES, read explanation above. STRIPES: When the piece measures 8-8-10-12-14-16 cm from the knitted-up row, begin STRIPES BODY, making sure the start matches the left front piece. INCREASE FOR ARMHOLE: When the piece measures 21-21-22-23-25-26 cm, increase for the armhole as follows: ROW 1 (right side): Knit 3, increase 1 stitch towards the left – remember INCREASE TIP-1, knit until there are 6 stitches left, work the 6 band stitches. ROW 2 (wrong side): Work the 6 band-stitches, purl to end of row. Work ROWS 1 and 2 a total of 2-2-3-3-3-3 times (4-4-6-6-6-6 rows worked). When all the increases for the V-neck and armhole are finished, there are 35-37-40-43-45-47 stitches. Work until the piece measures 23-24-26-27-29-30 cm, measured from the knitted-up row, finishing with a row from the right side and making sure the last row matches the last row on the left front piece. The pieces are now joined for the body; all further measurements are taken from here. BODY: Continue the stripes, working the first row from the wrong side as follows: Work the 35-37-40-43-45-47 stitches from the right front piece as before, cast on 4-4-4-4-6-8 stitches (in side mid-under sleeve), work the 58-62-68-74-78-82 stitches from the back piece, cast on 4-4-4-4-6-8 stitches (in side mid-under sleeve), work the 35-37-40-43-45-47 stitches from the left front piece = 136-144-156-168-180-192 stitches. Continue back and forth with bands, stocking stitch and stripes until the body measures approx. 30-32-32-33-33-34 cm from the join – the last stripe with colour light beige/beige should be finished. On the next row from the right side begin the rib AT THE SAME TIME as increasing 50-54-58-62-66-70 stitches evenly on this row (do not increase across the bands) = 186-198-214-230-246-262 stitches as follows: Change to circular needle size 5.5 mm and colour navy blue, work the band as before, rib (knit 2, purl 2 – remember to increase) until there are 8 stitches left, knit 2 and work the band as before. When the rib measures 8 cm, cast off with knit over knit and purl over purl. The front piece measures 61-64-66-68-70-72 cm from the knitted-up row and is approx. 1-1-2-2-2-2 cm longer than the finished length as the knitted-up row is a little way down the back piece. The jacket measures approx. 60-63-64-66-68-70 cm. SLEEVES: The sleeves are worked top down. Lay the piece flat and insert 1 marker at the top of the armholes – mid-top of shoulder (NOTE! Mid-top of shoulder is not the knitted-up row but 4 to 6 cm down the front piece). Use circular needle size 7 mm and 2 strands colour light beige DROPS Brushed Alpaca Silk or 1 strand colour beige DROPS Melody. Start in the middle of the cast-on stitches under the sleeve, from the right side and knit up 48-50-54-56-60-66 stitches, making sure there are equal numbers of stitches on both sides of the marker. Work stocking stitch and short rows, back and forth for the sleeve cap and a better fit as follows: ROW 1 (right side): Knit to 5-5-6-6-5-6 stitches past the marker on the shoulder, turn – read KNITTING TIP. ROW 2 (wrong side): Purl to 5-5-6-6-5-6 stitches past the marker, turn. ROW 3 (right side): Knit to 5-5-6-6-5-6 stitches past the previous turn, turn. ROW 4 (wrong side): Purl to 5-5-6-6-5-6 stitches past the previous turn, turn. Work ROWS 3 and 4 until you have turned a total of 8-8-8-8-10-10 times (4-4-4-4-5-5 times on each side and the last row was from the wrong side). AFTER THE LAST TURN: Turn and knit back to the beginning of the round (mid-under sleeve). Insert 1 marker-thread here, which is used when decreasing under the sleeve. Allow the thread to follow your work onwards. The sleeve is measured from the shoulder-marker. Continue with stocking stitch in the round. AT THE SAME TIME. when the sleeve measures 9-9-8-7-6-6 cm from the marker, begin STRIPES SLEEVE – read description above (i.e., in sizes XL and XXL you start the stripes on round 1). Read DECREASE TIP and decrease 1 stitch on each side of the marker-thread every 2nd round 2-2-2-2-3-4 times, then decrease 1 stitch on each side of the marker-thread every 6½-5½-4½-4-3½-2½ cm 4-5-6-7-7-9 times = 36-36-38-38-40-40 stitches. Continue working until the sleeve measures 41-41-40-39-38-38 cm from the shoulder-marker; the last stripe in colour light beige/beige should be finished. Change to circular needle size 5.5 mm and colour navy blue, work rib (knit 2, purl 2) AT THE SAME TIME as increasing 12-12-14-14-16-16 stitches evenly on round 1 = 48-48-52-52-56-56 stitches. When the rib measures 8 cm, cast off with knit over knit and purl over purl. The sleeve measures approx. 49-49-48-47-46-46 cm from the marker. ASSEMBLY: Sew the buttons onto the left band. Sew the 2 bands together mid-back and sew them to the neckline. |
|
 |
|
Have you finished this pattern?Tag your pictures with #dropspattern #bluemoonhalocardigan or submit them to the #dropsfan gallery. Do you need help with this pattern?You'll find 38 tutorial videos, a Comments/Questions area and more by visiting the pattern on garnstudio.com. © 1982-2026 DROPS Design A/S. We reserve all rights. This document, including all its sub-sections, has copyrights. Read more about what you can do with our patterns at the bottom of each pattern on our site. |
|


With over 40 years in knitting and crochet design, DROPS Design offers one of the most extensive collections of free patterns on the internet - translated to 17 languages. As of today we count 324 catalogues and 12290 patterns translated into English (UK/cm).
We work hard to bring you the best knitting and crochet have to offer, inspiration and advice as well as great quality yarns at incredible prices! Would you like to use our patterns for other than personal use? You can read what you are allowed to do in the Copyright text at the bottom of all our patterns. Happy crafting!
Post a comment to pattern DROPS 254-19
We would love to hear what you have to say about this pattern!
If you want to leave a question, please make sure you select the correct category in the form below, to speed up the answering process. Required fields are marked *.