Comments / Questions (14)
![]() Sylvie Bérard wrote:
Sylvie Bérard wrote:
Dans les augmentations pour le col en V quand on en fait 13 fois pour un médium il n’y en a plus à faire quand on place le dos et devants sur la même aiguille alors que dans le paragraphe DOS ET DEVANT on dit de continuer les augmentations pour l’encolure en V; c’est une erreur?
24.06.2025 - 14:29DROPS Design answered:
Bonjour Mme Bérard, en fonction de la taille et votre tension, il est possible que les augmentations de l'encolure soient terminées avant de réunir le dos et les devants. Toutefois, les 32+10 rangs des augmentations d'encolure + les 8 cm avant de commencer à augmenter mesurent au total 28 cm, vous devrez réunir les devants et le dos à 27 cm, soit 1 cm avant la fin des augmentations. Bon tricot!
24.06.2025 - 18:39
![]() Michaela wrote:
Michaela wrote:
Guten Tag! Wenn ich die Ärmel an das Rupfteil anstricke entstehen so große Maschen, durch das Wenden. Was mache ich falsch?
15.03.2025 - 13:55
![]() Tuula Paappanen wrote:
Tuula Paappanen wrote:
Miten viimeistellään kun työ on valmis, esim pitääkö kastella muotoon vai miten? Kiitos
11.02.2025 - 13:36DROPS Design answered:
Hei, viimeistele neule siten, että kostutat sen kevyesti ja asetat sen muotoonsa kuivumaan.
11.02.2025 - 19:27
![]() Patricia TARBOURIECH wrote:
Patricia TARBOURIECH wrote:
Bonjour, Merci beaucoup pour la correction. Très cordialement. Patricia
27.11.2024 - 16:37
![]() Maria wrote:
Maria wrote:
Solution for sleeve size M: decrease 10 times 2 stitches, every 7th manche.
17.11.2024 - 19:39
![]() Maria wrote:
Maria wrote:
I have the same problem described by Catherine et Stephane. The count doesn’t add up in the sleeve: from 66 to 46 stitches would take 10 times 2 decreases, instead of the described 5 (or 6) for size M. Looking forward to hear from you!
17.11.2024 - 16:44DROPS Design answered:
Dear Maria, as indicated to Catherine and Stephanie, our designers are checking the pattern right now and will correct any errors found. Once we have an answer from them we will correct the online pattern. Thank you for your patience.
17.11.2024 - 23:39
![]() Catherine wrote:
Catherine wrote:
Bonjour, j'ai le même problème que Stéphanie : avec 66 mailles pour les manches au départ, je diminue 2x5 mailles(-10 m), il me reste donc 56 m... et pas 46 m, pouvez-vous me répondre?
09.11.2024 - 23:05DROPS Design answered:
Comme indiqué précédemment, cette question a été transmise à nos stylistes, merci d'avance pour votre patience.
11.11.2024 - 08:50
![]() Stéphanie wrote:
Stéphanie wrote:
Bonjour Oui je parle bien des manches mais si on diminue 5x2 mailles ça fait une diminution de 10 mailles. Si on a 64 m relevées on doit avoir 54 mailles après les diminutions et non 44 !?
04.11.2024 - 13:14DROPS Design answered:
Effectivement, j'ai transmis à nos stylistes qui vont vérifier, merci d'avance pour votre patience.
04.11.2024 - 14:43
![]() Stéphanie wrote:
Stéphanie wrote:
Bonjour Il faut monter 64 m (taille dans laquelle je tricote) et diminuer 2 mailles 5 fois Il est noté = 44 mailles. Je ne comprends pas comment on obtient ça si on diminue 10 mailles ?
03.11.2024 - 18:51DROPS Design answered:
Bonjour Stéphanie, vous parlez des manches, exact? En taille M, vous relevez 64 mailles autour de l'emmanchure, vous tricotez les rangs raccourcis puis, quand la manche mesure 2 cm à partir du début, mesuré sous la manche, vous diminuez 5 x 2 mailles tous les 7 cm, vous avez ainsi 44 mailles quand toutes les diminutions sont faites. Bon tricot!
04.11.2024 - 09:42
![]() Maria wrote:
Maria wrote:
Hallo, bei den Ärmelabnahmen (bei Größe M) werden 5x 2 Maschen abgenommen =46 Maschen. Wenn ursprünglich 66 Maschen sind, wären es dann nicht 56 nach den Abnahmen? Danke für ihre Hilfe
28.10.2024 - 20:35DROPS Design answered:
Liebe Maria, eine Korrektur erfolgt, danke für den Hinweis. Viel Spaß beim Stricken!
25.11.2024 - 14:34
Eirin Cardigan#eirincardigan |
|
 |
 |
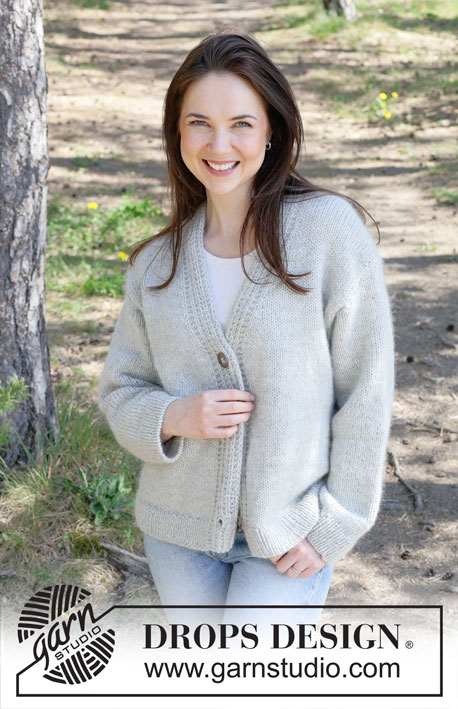
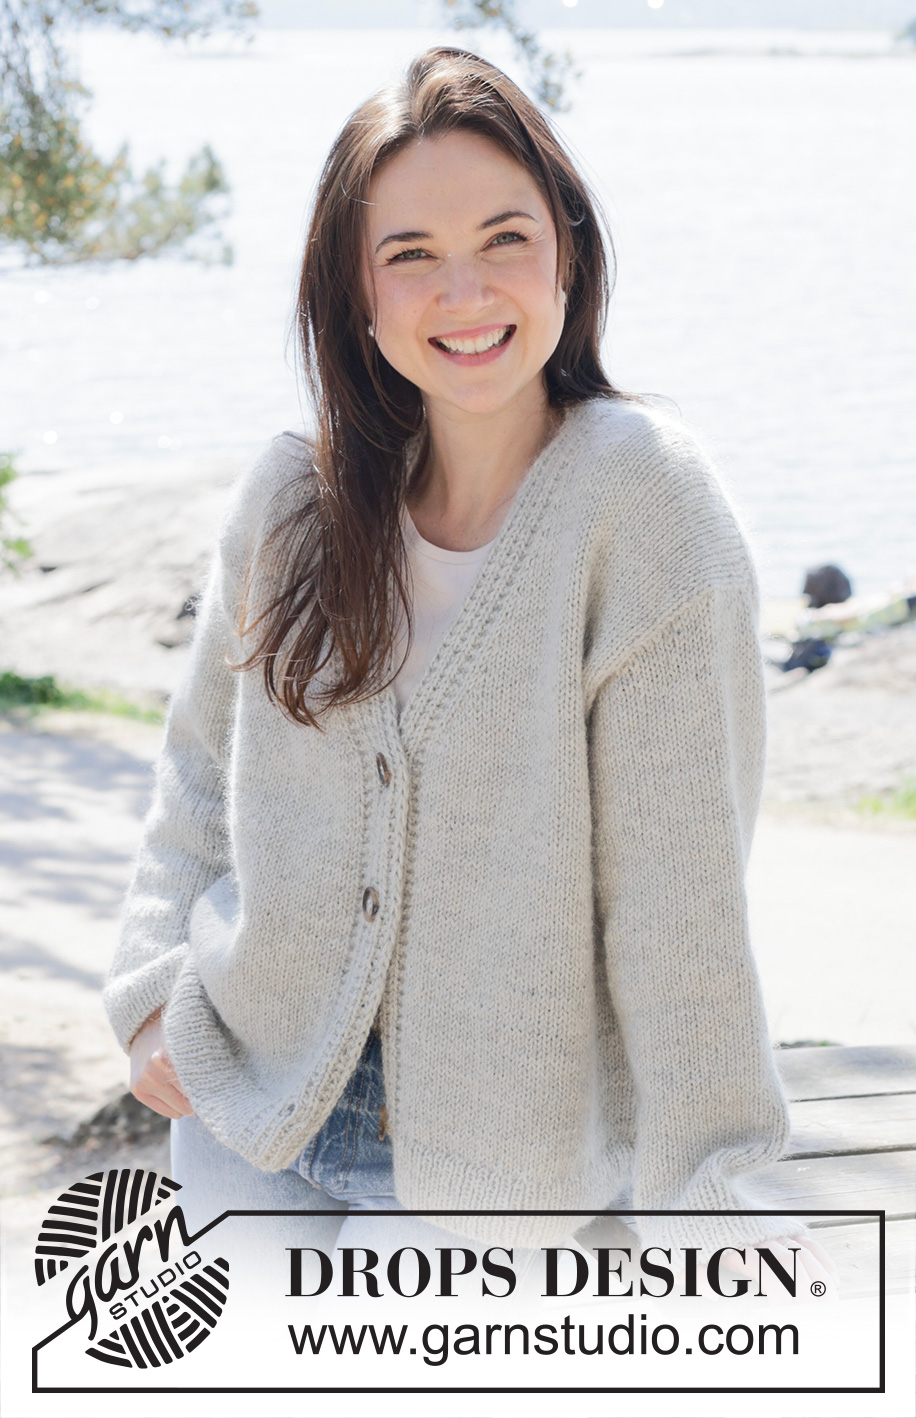
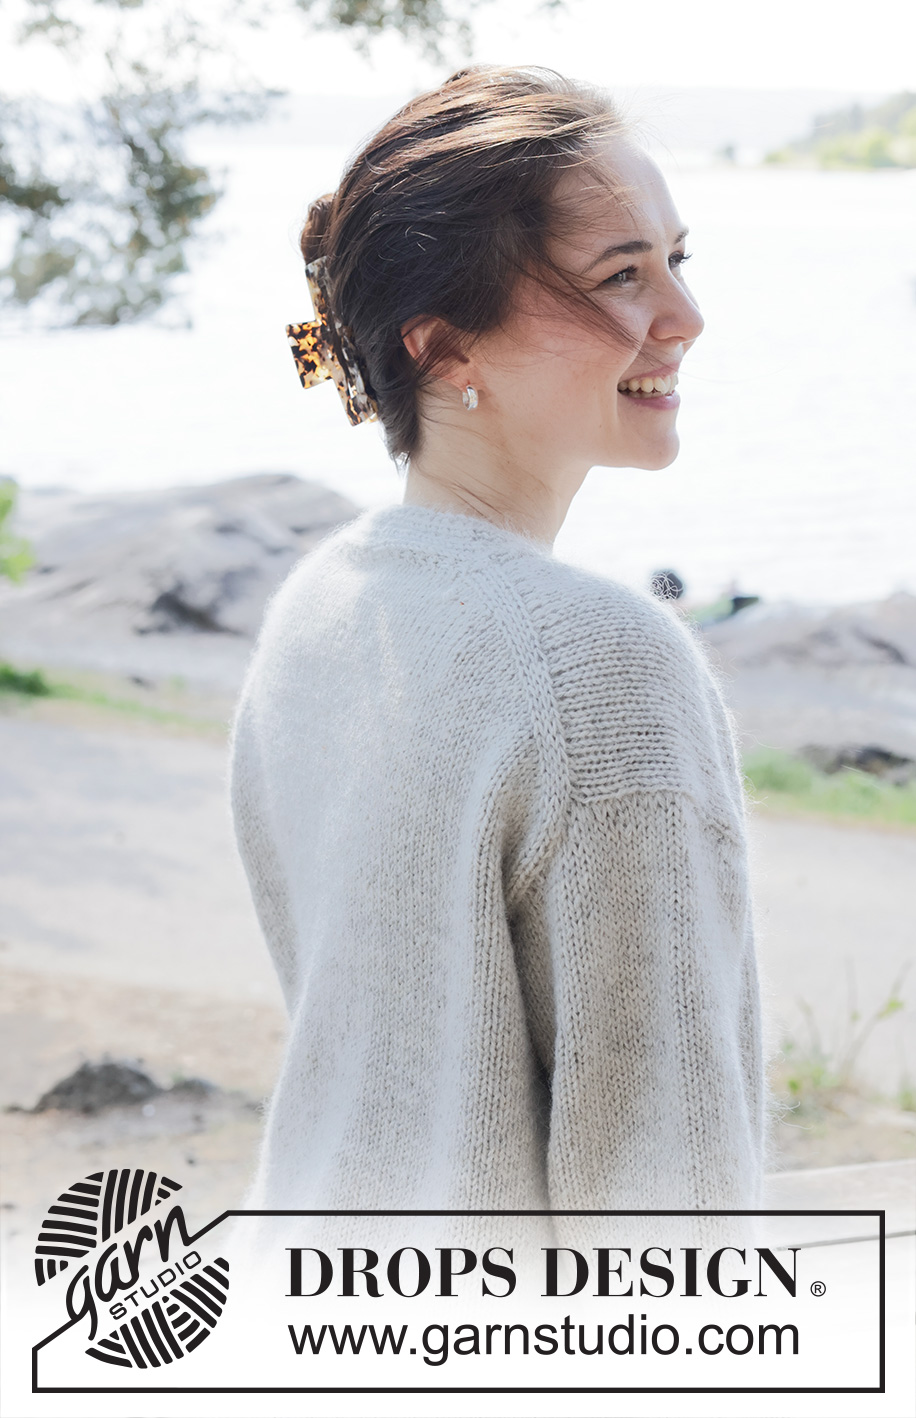
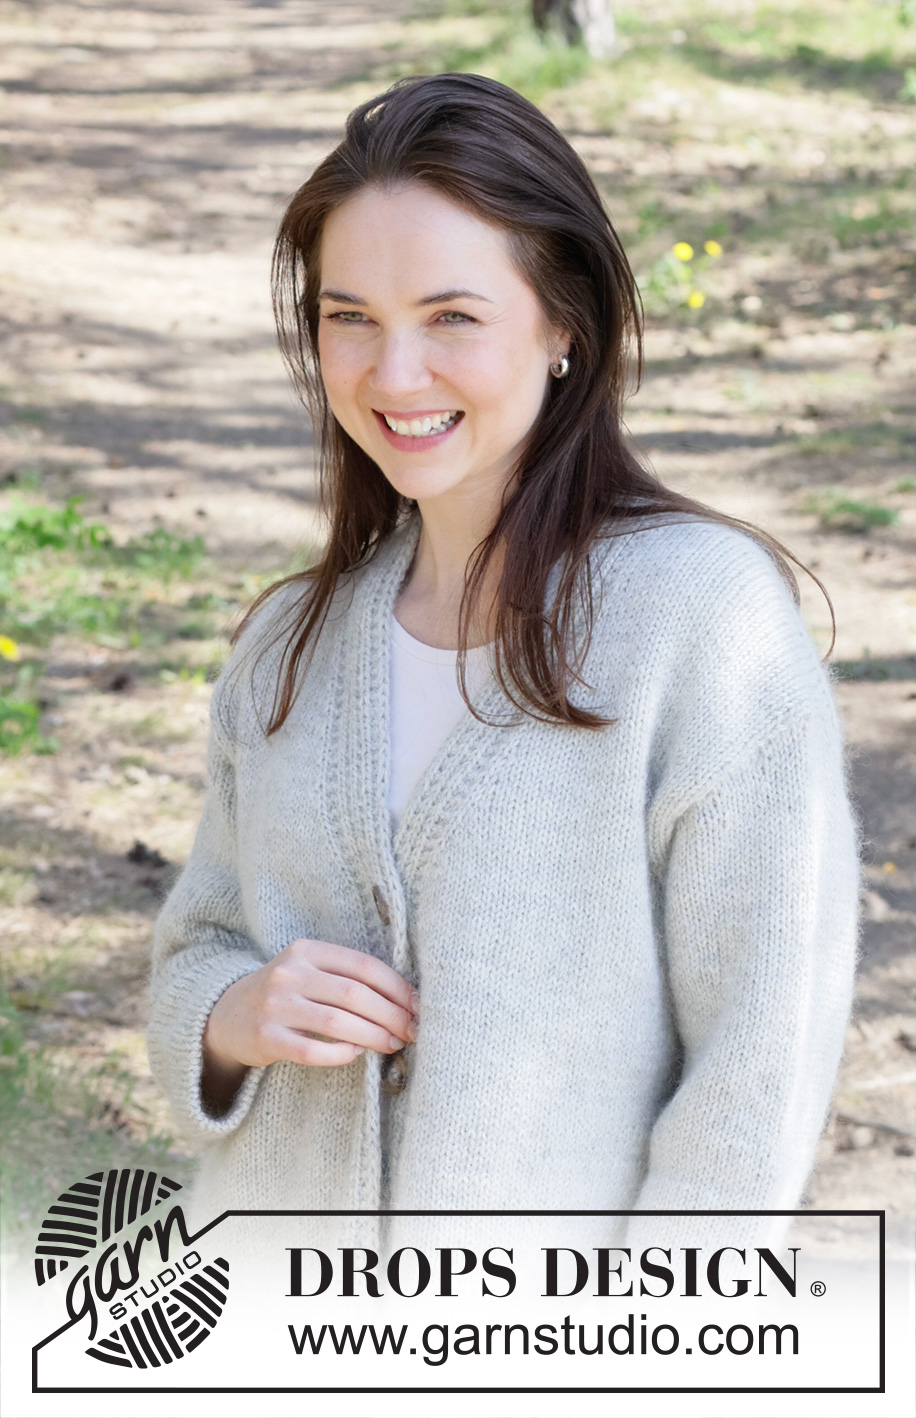
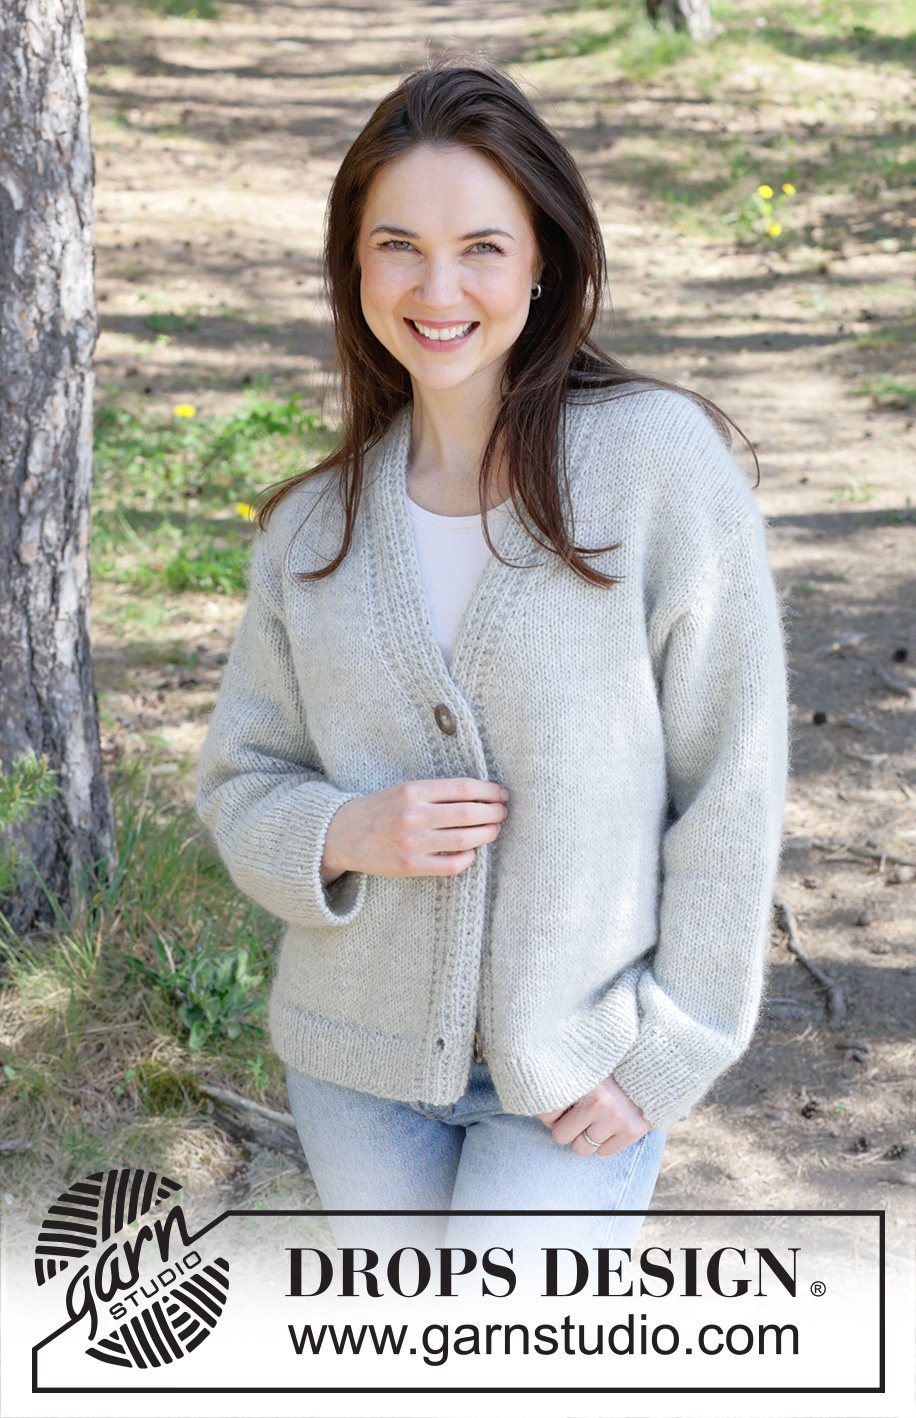
Knitted jacket in DROPS Lima and DROPS Kid-Silk. The piece is worked top down with European/diagonal shoulders, V-neck and I-cord. Sizes XS - XXL.
DROPS 252-15 |
|
|
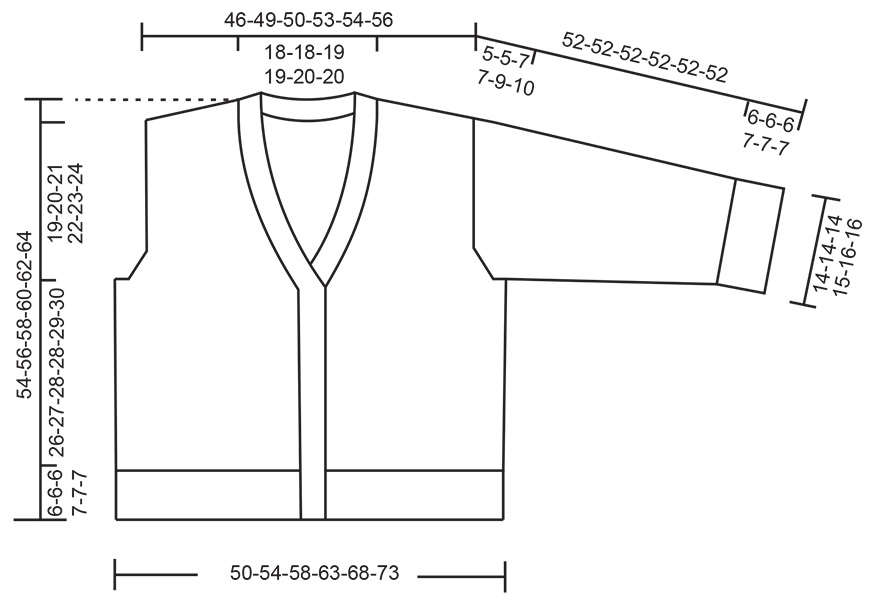
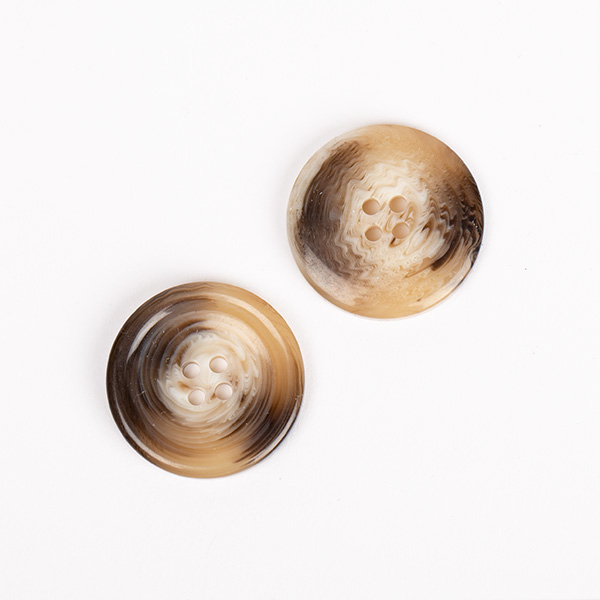
------------------------------------------------------- EXPLANATIONS FOR THE PATTERN: ------------------------------------------------------- INCREASE TIP-1: INCREASE 1 STITCH TOWARDS LEFT from right side: Use the left needle to pick up the strand between 2 stitches from the previous row, pick up strand from the front and knit the back loop. INCREASE 1 STITCH TOWARDS RIGHT from right side: Use the left needle to pick up the strand between 2 stitches from the previous row, pick up strand from the back and knit the front loop. INCREASE TIP -2: INCREASE 1 STITCH TOWARDS LEFT from wrong side: Use the left needle to pick up the strand between 2 stitches from the previous row, pick up strand from the back and purl the front loop. INCREASE 1 STITCH TOWARDS RIGHT from wrong side: Use the left needle to pick up the strand between 2 stitches from the previous row, pick up strand from the front and purl the back loop. INCREASE TIP -3: Increase 1 stitch by making 1 yarn over, which is knitted/purled twisted on the next round/row to avoid a hole. DECREASE TIP: Decrease 1 stitch on each side of the marker-thread as follows: Work until there are 3 stitches left before the marker-thread, knit 2 together, knit 2 (marker-thread sits between these 2 stitches), slip 1 stitch knit-wise, knit 1 and pass the slipped stitch over the knitted stitch (2 stitches decreased). KNITTING TIP: When working short rows, there will be a small hole after each turn. This hole can be closed by tightening the strand or by using the technique German Short Rows as follows: Slip the first stitch as if to purl, take the strand over the right needle and tighten well from the back (2 loops on the needle). These loops are worked together on the next row. LEFT BAND WITH I-CORD RIGHT SIDE: Slip 1 stitch purl-wise with strand in front, knit 9. WRONG SIDE: Knit 2, purl 1, knit 1, purl 1, knit 1, purl 1, knit 1, slip 1 stitch purl-wise with strand in front, knit 1. RIGHT BAND WITH I-CORD: RIGHT SIDE: Knit 8, slip 1 stitch purl-wise with strand in front, knit 1. WRONG SIDE: Slip 1 stitch purl-wise with strand in front, knit 2, purl 1, knit 1, purl 1, knit 1, purl 1, knit 2. BUTTONHOLES: Work the buttonholes from the right side, when there are 7 stitches left on the row. ROW 1 (right side): Make 1 yarn over, knit 2 together, knit 3, slip 1 purl-wise with strand in front, knit 1. ROW 2 (wrong side): Work the band as before, knit the yarn over to leave a hole. The first buttonhole is worked approx. 1 cm after the increases for neck are finished. The 3 buttonholes with 8-8½-9-9-9½-10 cm between each one. The bottom buttonhole is worked in the transition between the stocking stitch and rib. ------------------------------------------------------- START THE PIECE HERE: ------------------------------------------------------- JACKET – SHORT OVERVIEW OF THE PIECE. The pattern uses both long and short needles; start with the length which fits the number of stitches and change when necessary. The piece is started back and forth, casting on stitches at the back of the neck and working the back piece top down, while increasing stitches on each side for the shoulders (which are slightly diagonal). The back piece is worked as far as the armholes. The 2 front pieces are then worked separately. First the band then the front piece, knitting up stitches along the back shoulder and working top down, increasing AT THE SAME TIME for the neck, then the armhole and working until the armhole is finished. This is repeated on the other front piece. The front and back pieces are joined on the same circular needle and the body worked back and forth. Stitches are knitted up around the armholes for the sleeves, which are started back and forth with short rows for the sleeve cap, then finished in the round. The bands from each front piece are sewn together mid-back, then sewn to the neckline. If there is a «0» in your chosen size, skip the information and go straight to the next instruction. BACK PIECE: The piece is worked back and forth. Cast on 30-30-32-32-34-34 stitches with circular needle size 5.5 mm, 1 strand DROPS Lima and 1 strand DROPS Kid-Silk (= 2 strands). ROW 1 (wrong side): Purl. ROW 2 (right side): Read INCREASE TIP-1, knit 4, increase 1 stitch towards the left, knit until there are 4 stitches left, increase 1 stitch towards the right, knit 4. ROW 3 (wrong side): Read INCREASE TIP-2, purl 4, increase 1 stitch towards the left, purl until there are 4 stitches left, increase 1 stitch towards the right, purl 4. AFTER ROW 3: Work ROWS 2 and 3 a total of 11-12-12-13-13-14 times (= 22-24-24-26-26-28 rows worked), after the last increase, there are 74-78-80-84-86-90 stitches. Insert 1 marker outermost on one side. The piece is now measured from here! Continue with stocking stitch until the piece measures 11-12-11-12-11-10 cm from the marker, measured outermost along the armhole. Remember to maintain the knitting tension. Now increase for the armholes. INCREASE FOR ARMHOLES: ROW 1 (right side): Remember INCREASE TIP-1. Knit 4, increase 1 stitch towards the left, knit until there are 4 stitches left, increase 1 stitch towards the right, knit 4. ROW 2 (wrong side): Purl. Work ROWS 1 and 2 a total of 2-2-4-4-6-8 times (= 4-4-8-8-12-16 rows worked) = 78-82-88-92-98-106 stitches. Continue working until the piece measures 13-14-15-16-17-18 cm, from the marker, measured outermost along the armhole and finishing after a row from the right side. Cut the strand, place the stitches on a stitch holder. Work the left front piece as follows. LEFT BAND: Cast on 10 stitches with circular needle size 5.5 mm and 1 strand of each quality (= 2 strands). Work LEFT BAND WITH I-CORD – see description above, until the band measures 9-9-9½-9½-10-10 cm, finishing after a row from the wrong side. Now work the left front piece. LEFT FRONT PIECE: Find the left back shoulder as follows: Lay the back piece flat, right side up, with the stitch holder towards you; left side of piece = left shoulder. Knit up stitches along the left shoulder as follows, starting from the right side by the neck: ROW 1 (right side): Work the 10 band-stitches as before, knit up 1 stitch in each knitted row, inside 1 stitch (= 22-24-24-26-26-28 stitches along the shoulder and 32-34-34-36-36-38 stitches in total. All length measurements on the front piece are taken from this knitted-up row. ROW 2 (wrong side): Purl until there are 10 stitches left, work the 10 band-stitches as before. ROW 3 (right side): Work the 10 band-stitches, knit to end of row. ROW 4 (wrong side): Purl until there are 10 stitches left, work the 10 band-stitches. Repeat ROWS 3 and 4 until the piece measures 8-9-8-9-8-9 cm. OVERVIEW OF NEXT SECTIONS: You now increase, first for the V-neck then for the armhole. The armhole-increases are started before the neck-increases are finished; therefore, read the next 2 sections before continuing. INCREASE FOR V-NECK: ROW 1 (right side): Work the 10 band-stitches, knit 1, increase 1 stitch towards the left -remember INCREASE TIP-1, knit to end of row. ROW 2 (wrong side): Purl until there are 10 stitches left, work the 10 band-stitches. ROW 3 (right side): Work the 10 band-stitches, knit to end of row. ROW 4 (wrong side): Purl until there are 10 stitches left, work the 10 band-stitches. Work ROWS 1 to 4 a total of 7-7-8-8-9-9 times (= 28-28-32-32-36-36 rows worked). Then increase as follows: ROW 1 (right side): Work the 10 band-stitches, knit 1, increase 1 stitch towards the left - remember INCREASE TIP-1, knit to end of row. ROW 2 (wrong side): Purl until there are 10 stitches left, work the 10 band-stitches. Work ROWS 1 and 2 a total of 5-5-5-5-5-5 times (= 10-10-10-10-10-10 rows worked). You have increased a total of 12-12-13-13-14-14 times for the V-neck. Continue working stocking stitch and the band without further increases. INCREASE FOR ARMHOLE: When the piece measures 23-24-23-24-23-22 cm, increase for the armhole as follows: ROW 1 (right side): Work 10 band stitches, knit until there are 4 stitches left, increase 1 stitch towards the right – remember INCREASE TIP-1, knit 4. ROW 2 (wrong side): Purl until there are 10 stitches left, work 10 band stitches Work ROWS 1 and 2 a total of 2-2-4-4-6-8 times (= 4-4-8-8-12-16 rows worked). Continue working until the piece measures 25-26-27-28-29-30 cm, measured from the knitted-up row and finishing with a row from the right side. Cut the strand, place the stitches on a stitch holder and work the right front piece as follows. RIGHT BAND: Cast on 10 stitches with circular needle size 5.5 mm and 1 strand of each quality (= 2 strands). Work RIGHT BAND WITH I-CORD – see description above, until the band measures 9-9-9½-9½-10-10 cm, finishing after a row from the wrong side. Now work the right front piece. RIGHT FRONT PIECE: Knit up stitches along the right back shoulder as follows, starting from the right side by the shoulder: Knit up 1 stitch in each knitted row, inside 1 stitch (= 22-24-24-26-26-28 stitches), work the 10 band-stitches as before = 32-34-34-36-36-38 stitches in total. All length measurements on the front piece are taken from this knitted-up row. Continue as follows: ROW 1 (wrong side): Work the 10 band-stitches as before, purl to end of row. ROW 2 (right side): Knit until there are 10 stitches left, work the 10 band-stitches as before, Repeat ROWS 1 and 2 until the piece measures 8-9-8-9-8-9 cm. OVERVIEW OF NEXT SECTIONS: You now increase for the V-neck, then for the armhole. The armhole-increases are started before the neck-increases are finished; therefore, read both next 2 sections before continuing. INCREASE FOR V-NECK: ROW 1 (right side): Work until there are 11 stitches left, increase 1 stitch towards the right, knit 1, work the 10 band-stitches as before. ROW 2 (wrong side): Work the 10 band-stitches as before, purl to end of row. ROW 3 (right side): Knit until there are 10 stitches left, work the 10 band-stitches. ROW 4 (wrong side): Work the 10 band-stitches, purl to end of row. Work ROWS 1 to 4 a total of 7-7-8-8-9-9 times (= 28-28-32-32-36-36 rows worked). Then increase as follows: ROW 1 (right side): Knit until there are 11 stitches left, increase 1 stitch towards the right, knit 1 and 10 band-stitches. ROW 2 (wrong side): Work the 10 band-stitches, purl to end of row. Work ROWS 1 and 2 a total of 5-5-5-5-5-5 times (= 10-10-10-10-10-10 rows worked). You have increased a total of 12-12-13-13-14-14 times for the V-neck. Continue working stocking stitch and the band without further increases. INCREASE FOR ARMHOLE: When the piece measures 23-24-23-24-23-22 cm, increase for the armhole as follows: ROW 1 (right side): Knit 4, increase 1 stitch towards the left, knit until there are 10 stitches left, 10 band-stitches. ROW 2 (wrong side): Work the 10 band-stitches, purl to end of row. Work ROWS 1 and 2 a total of 2-2-4-4-6-8 times (= 4-4-8-8-12-16 rows worked). Continue working until the piece measures 25-26-27-28-29-30 cm, measured from the knitted-up row and finishing with a row from the right side. Place the back and front pieces on the same circular needle as follows. The piece is now measured from here! BODY: Working from the wrong side, work the stitches from the right front piece, cast on 2-4-4-8-10-10 stitches (in side mid-under sleeve), work the 78-82-88-92-98-106 stitches from the back piece, cast on 2-4-4-8-10-10 stitches (in side mid-under sleeve), work the stitches from the left front piece. Work back and forth from mid-front, with stocking stitch and the bands as before, continuing the increases for the V-neck. When the increases for the V-neck are finished, there are 174-186-198-214-230-246 stitches. To allow the bands to lie neatly at the bottom of the V-neck, work short rows as follows: ROW 1 (right side): Work the 10 band-stitches as before, turn. ROW 2 (wrong side): Tighten the strand and work the 10 band-stitches. ROW 3 (right side): Work as before across the whole row. ROW 4 (wrong side): Work the 10 band-stitches as before, turn. ROW 5 (right side): Tighten the strand and work the 10 band-stitches. ROW 6 (wrong side): Work as before across the whole row. Continue the body back and forth, with stocking stitch and the bands – remember the BUTTONHOLES – read description above, until the piece measures 26-27-28-28-29-30 cm from the join. On the next row from the right side, begin the rib, AT THE SAME TIME increase 37-39-43-45-49-51 stitches evenly on the first row as follows (do not increase across the bands) – read INCREASE TIP-3 = 211-225-241-259-279-297 stitches: Change to circular needle size 4 mm, work the band as before, work rib (knit 1, purl 1 – remember to increase) until there are 11 stitches left, knit 1 and work the band as before. When the rib measures 6-6-6-7-7-7 cm, cast off with Italian cast off or slightly loosely with rib. The front pieces measures approx. 57-59-61-63-65-67 cm from the knitted-up row, the jacket measures 54-56-58-60-62-64 cm (front pieces longer than back piece because the front pieces go a short way down the back piece). SLEEVES: The sleeves are worked top down. Lay the piece flat and insert 1 marker at the top of the armhole/shoulder (NOTE! Mid-top of armhole/shoulder is not the knitted-up row from the front piece but approx. 6 cm down the front piece). Use circular needle size 5.5 mm. Start in the middle of the new stitches cast on under the sleeve – knit up 58-64-66-76-80-84 stitches around the armhole, with equal numbers of stitches on each side of the marker. Work back and forth, with short rows for the sleeve cap (gives the sleeve a better fit), starting mid-under the sleeve as follows: ROW 1 (right side): Work to 5-6-4-5-5-4 stitches past the marker on top of the shoulder, turn – read KNITTING TIP. ROW 2 (wrong side): Work to 5-6-4-5-5-4 stitches past the marker, turn. ROW 3 (right side): Work to 5-5-4-4-3-3 stitches past the previous turn, turn. ROW 4 (wrong side): Work to 5-5-4-4-3-3 stitches past the previous turn, turn. Repeat ROWS 3 and 4 until you have turned a total of 10-10-14-14-18-20 times (= 5-5-7-7-9-10 times on each side, with the last row from the wrong side). AFTER THE LAST TURN: After the turn, work to mid-under the sleeve (beginning of the round). Insert 1 marker-thread mid-under the sleeve and allow it to follow your work onwards; it is used when decreasing under the sleeve. Work stocking stitch in the round. When the sleeve measures 4-4-4-3-3-3 cm measured mid-under the sleeve, decrease 2 stitches – read DECREASE TIP above. Decrease like this every 5-3½-3½-2½-2-2 cm, 7-10-10-14-15-16 times = 44-44-46-48-50-52 stitches. Continue working until the sleeve measures 46-46-46-45-45-45 cm from the marker mid on top of shoulder. Change to double pointed needles size 4 mm and work rib (knit 1, purl 1), AT THE SAME TIME increase 8-10-10-10-8-8 stitches evenly on the first round = 52-54-56-58-58-60 stitches. When the rib measures 6-6-6-7-7-7 cm cast off with Italian cast off or slightly loosely with rib. The sleeve measures approx. 52-52-52-52-52-52 cm from mid-top of shoulder. ASSEMBLY: Sew the buttons onto the left band. Sew the bands together mid-back of neck and sew them to the neckline. |
|
|
|
Have you finished this pattern?Tag your pictures with #dropspattern #eirincardigan or submit them to the #dropsfan gallery. Do you need help with this pattern?You'll find 38 tutorial videos, a Comments/Questions area and more by visiting the pattern on garnstudio.com. © 1982-2025 DROPS Design A/S. We reserve all rights. This document, including all its sub-sections, has copyrights. Read more about what you can do with our patterns at the bottom of each pattern on our site. |
|








Post a comment to pattern DROPS 252-15
We would love to hear what you have to say about this pattern!
If you want to leave a question, please make sure you select the correct category in the form below, to speed up the answering process. Required fields are marked *.