
Popular categories
Looking for a yarn?


Comments / Questions (4)
![]() Lena wrote:
Lena wrote:
Hallo, übersehe ich etwas oder fehlt die Anleitung, wo die Knopflöcher gestrickt werden sollen? Vielen Dank
01.02.2025 - 14:27DROPS Design answered:
Liebe Lena, die Knopflöcher werden unter dem Abszat KNOPFLÖCHER am 1. Teil der Anleitung beschrieben. Viel Spaß beim Stricken!
03.02.2025 - 08:29
![]() Carla Von Ahn wrote:
Carla Von Ahn wrote:
Hallo. Teil: Rumpfteil. Zu Beginn des Rumpfteils sollen die Maschen des rechten Vorderteils gestrickt werden, dann sollen Maschen angeschlagen werden. Ich verstehe nicht ganz, was das für Maschen sind die angeschlagen werden sollen. Sind die dann später unter der Achsel? Soll ich die an einem bestimmten Teil anschlagen oder sollen die frei hängen? Über eine Antwort würde ich mich sehr freuen. LG Carla :)
31.10.2024 - 13:11DROPS Design answered:
Liebe Frau Von Ahn, diese neuen Maschen (6, 10 oder 12 je nach der Größe) sind für die Seiten (Mitte under die Ärmel) - siehe diese Lektion, wo man für einen Pullover je 6 Maschen zwischen Vorder- under Rückenteil anschlägt. Viel Spaßb eim Stricken!
31.10.2024 - 15:53
![]() Yvonne wrote:
Yvonne wrote:
Wenn ich der Anleitung folge und das Rückenteil stricke, wird der Armausschnitt ab Markierer auf der Schulter für Gr. Xl 15 cm lang bis die Maschen stillgelegt werden. Laut strickschrift sollte er aber für Grösse Xl 23 cm lang werden….\r\nÜberseh ich irgendwie etwas?\r\nDanke für die Hilfe🌸
20.10.2024 - 20:48DROPS Design answered:
Liebe Yvonne, bei solchen Modellen mit europäischen Schulter sind die Armausschnitt beim Rückenteil kürzer als beim Vorderteil, so hat man hier in XL 15 cm beim Rückenteil + 31 cm bei den Vorderteile = 46 cm/2 = 23 cm. Schauen Sie unter Tab "Videos" und "Lektion" oben im Kopfteil, so finden Sie passende Videos/Letkionnen wo diese Technik schön erklärt wird. Viel Spaß beim Stricken!
21.10.2024 - 09:21
![]() PORTAL Odile wrote:
PORTAL Odile wrote:
J'aimerai vraiment tricoter vos modèles mais je n'arrive pas à adoptervotre méthode de tricot "haut en bas". Ne pourriez-vous pas nous en donner les explications ? Merci, je suis une tricoteuse normale mais je pense que mon handicap vient du fait de mon âge : 75 ans. C'est difficile de me lancer et très perturbant.
13.10.2024 - 07:25DROPS Design answered:
Bonjour Mme Portal, cette constructions avec épaules européennes est effectivement particulière et pour vous permettre de bien comprendre comment on doit faire, nous avons réalisé plusieurs vidéos et leçons que vous retrouverez dans les onglets Vidéos/Leçons (à droite de l'onglet Explications) en haut de page. Vous pouvez également retrouver tous nos gilets et vestes tricotés de bas en haut ici. Bon tricot!
14.10.2024 - 08:32
|
|
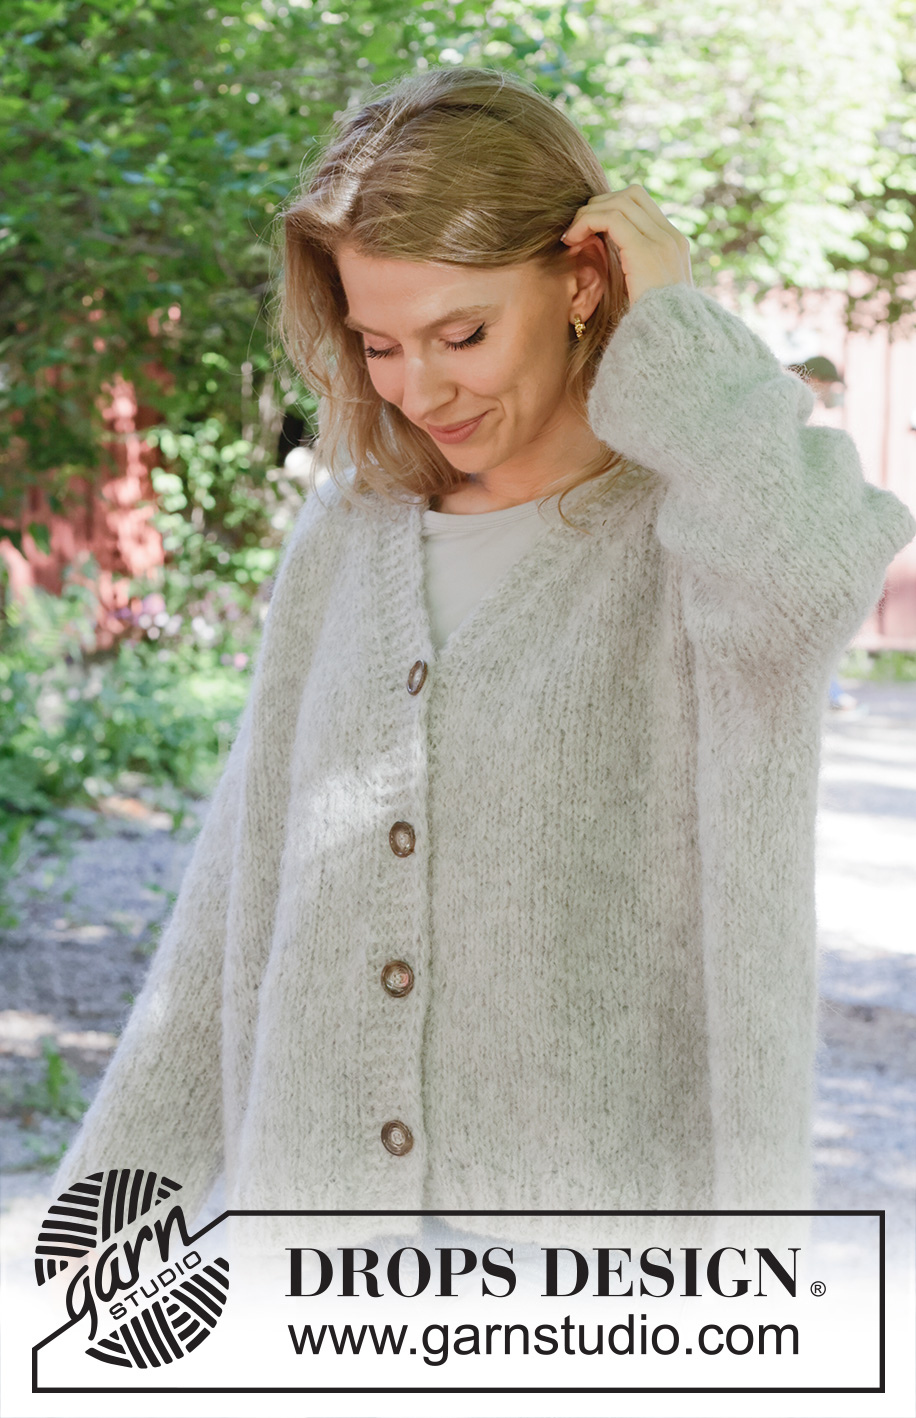
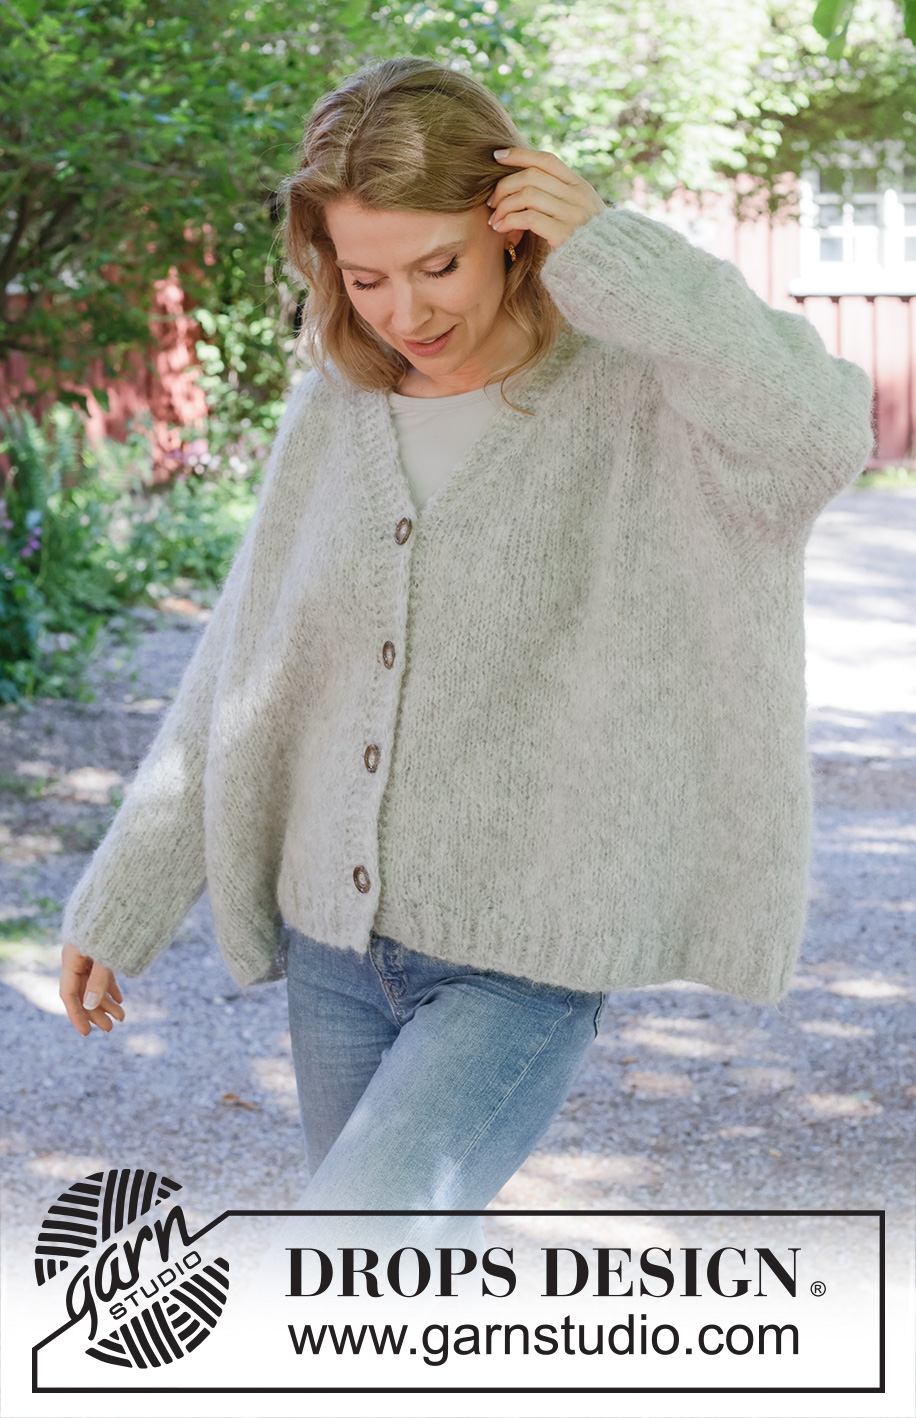
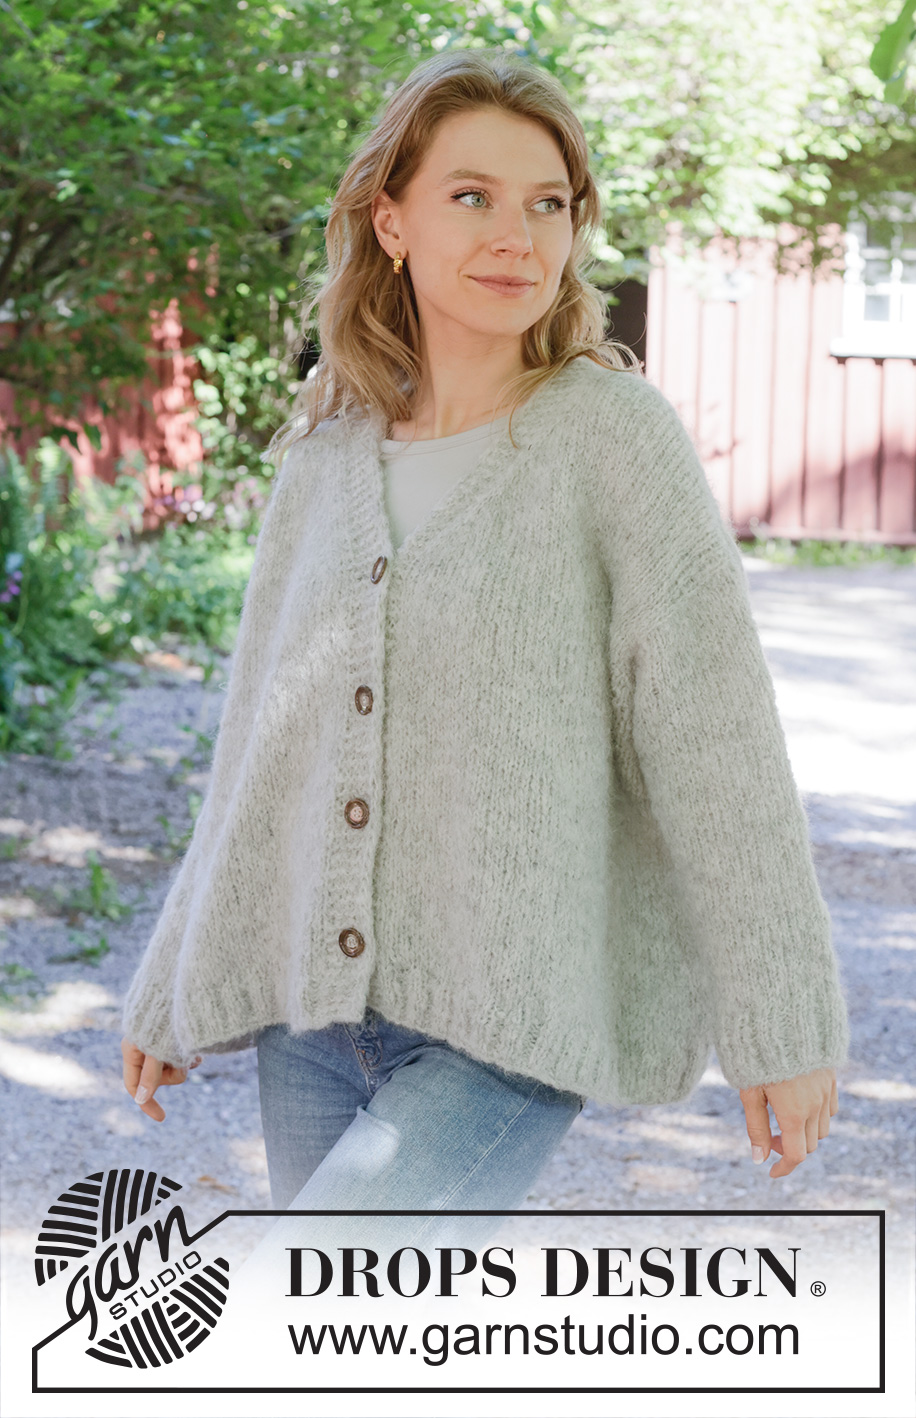
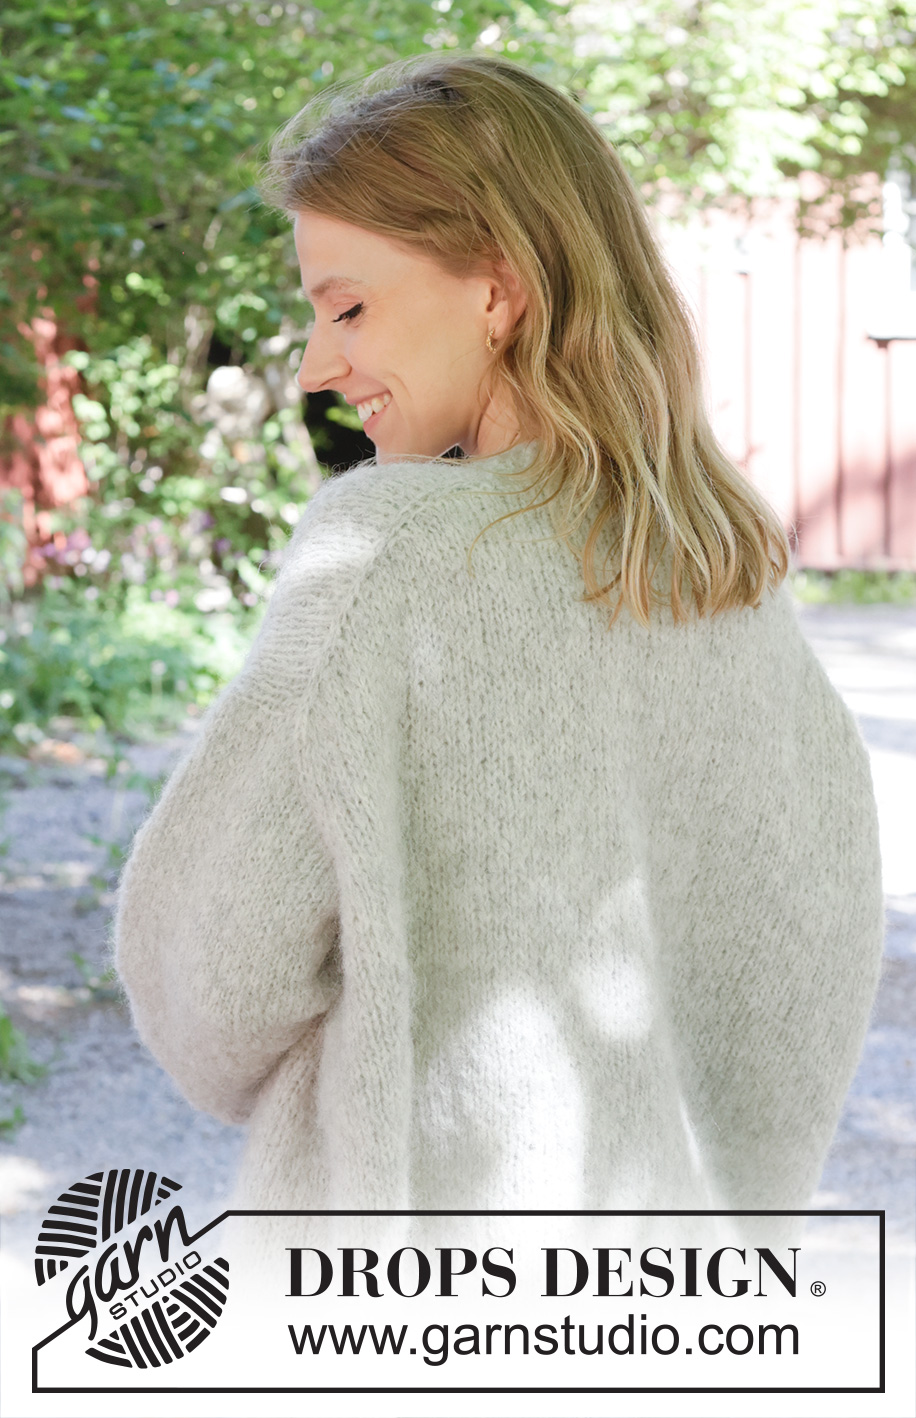
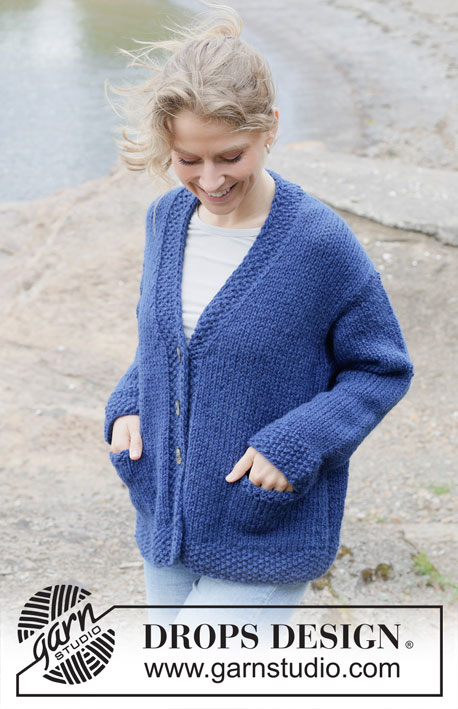
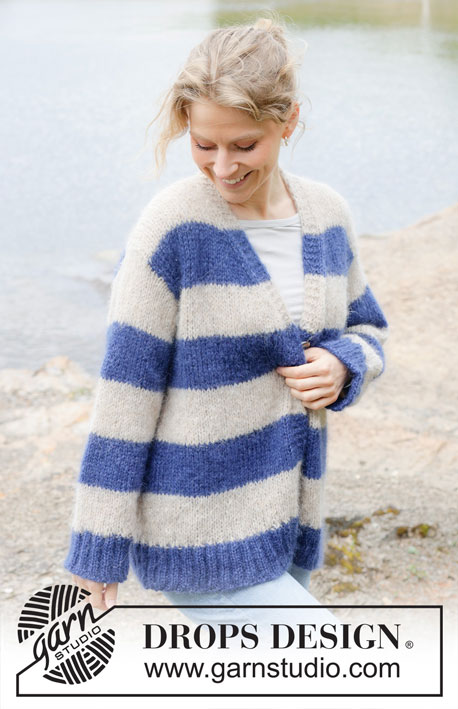
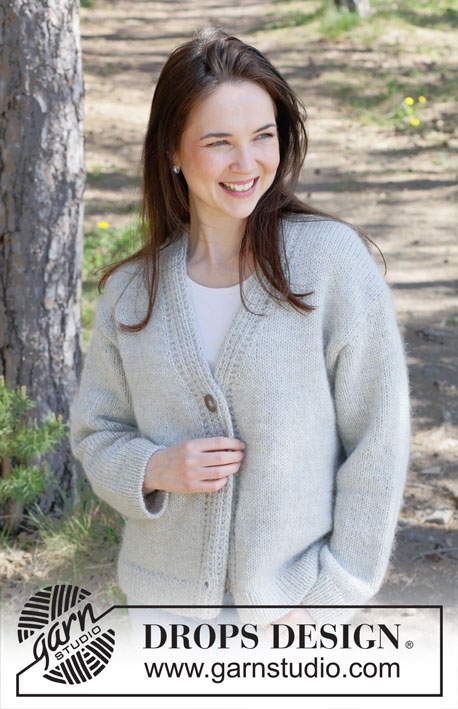
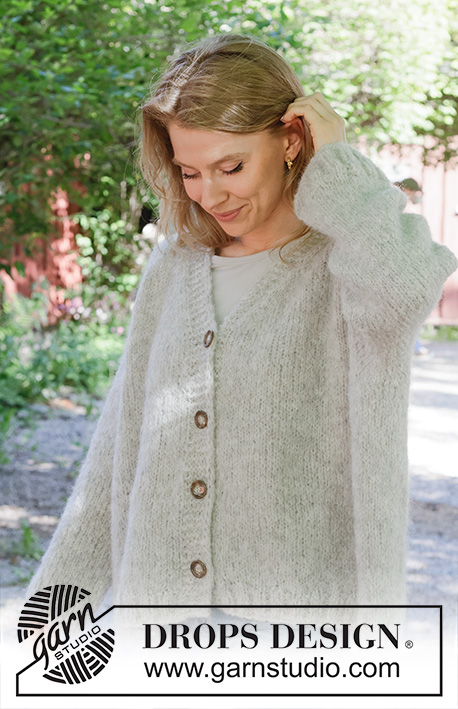
Crossed Path Cardigan#crossedpathcardigan |
|
 |
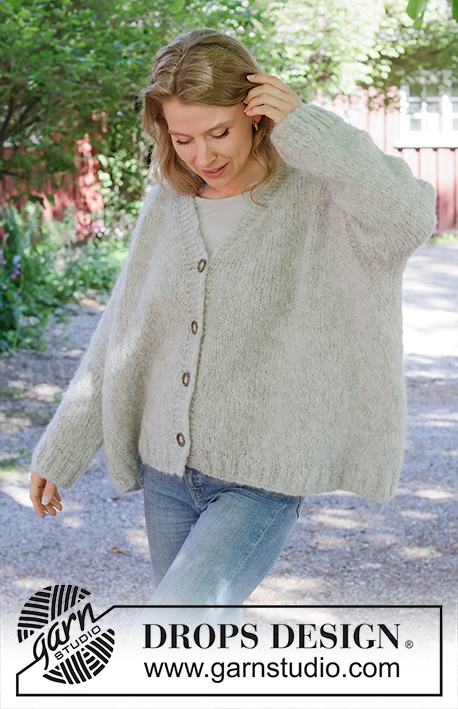 |
Knitted oversized jacket in DROPS Melody. Piece is knitted top down with diagonal / European shoulder, V-neck and I-cord. Size XS – XXL.
DROPS 252-18 |
|
|
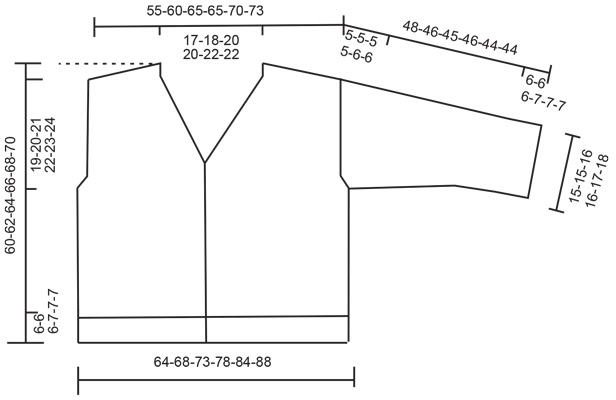
---------------------------------------------------------- EXPLANATION FOR THE PATTERN: ---------------------------------------------------------- GARTER STITCH (when working back and forth): Knit on all rows, i.e. knit from right side and knit from wrong side. 1 ridge vertically = knit 2 rows. INCREASE TIP-1: INCREASE 1 STITCH TOWARDS THE LEFT - from right side: Use left needle to pick up yarn between 2 stitches from row below, pick up yarn from the front and knit stitch in back loop of stitch. INCREASE 1 STITCH TOWARDS THE RIGHT - from right side: Use left needle to pick up yarn between 2 stitches from row below, pick up yarn from the back and knit stitch in front loop of stitch. INCREASE TIP-2: INCREASE 1 STITCH TOWARDS THE LEFT - from wrong side: Use left needle to pick up yarn between 2 stitches from row below, pick up yarn from the back and purl stitch in front loop of stitch. INCREASE 1 STITCH TOWARDS THE RIGHT - from wrong side: Use left needle to pick up yarn between 2 stitches from row below, pick up yarn from the front and purl stitch in back loop of stitch. LEFT BAND WITH I-CORD: RIGHT SIDE: Slip 1 stitch purlwise with strand in front of piece, knit 1 and work 5 stitches in garter stitch. WRONG SIDE: 5 stitches in garter stitch, slip 1 stitch purlwise with strand in front of piece, knit 1. RIGHT BAND WITH I-CORD: RIGHT SIDE: Work 5 stitches in garter stitch, slip 1 stitch purlwise with strand in front of piece, knit 1. WRONG SIDE: Slip 1 stitch purlwise with strand in front of piece, knit 1, work 5 stitches in garter stitch. BUTTONHOLES: Decrease for buttonholes on right band (when garment is worn). Decrease from right side when 5 stitches remain on row as follows: Make 1 yarn over, knit 2 together, work the rest of row as before. On next row (wrong side) knit the yarn over to make a hole. Decrease for first buttonhole 1 cm after last increase for V-neck, then decrease for the next 3 buttonholes approx. 10½-10½-11-11-11-11½ cm apart. Decrease for last buttonhole in transition between body and rib. KNITTING TIP: When working short row there will be a small hole when turning the piece - the hole can be closed by tightening the yarn or using the technique German Short Rows as follows: Slip first stitch purlwise. Place strand over right needle , and tighten well at the back (should lead to two loops on needle). Work these loops together on next row. DECREASE TIP (applies to mid under sleeves): Decrease 1 stitch on each side of marker thread as follows: Work until 3 stitches remain before marker thread and knit 2 together, knit 2 (marker thread is between these 2 stitches), slip 1 stitch knitwise, knit 1, pass slipped stitch over stitch worked. ---------------------------------------------------------- START THE PIECE HERE: ---------------------------------------------------------- JACKET - SHORT OVERVIEW OF THE PIECE: In this pattern needles of different length have been used, begin with fitting length for number of stitches and switch as needed. Begin by casting on stitches in the back of neck. Then work back piece downwards while AT THE SAME TIME increasing in each side of piece until number of stitches for shoulder width is reached. Back piece has a slight diagonal shoulder. Then work down to armholes. Now put back piece aside and work the front pieces. On front pieces work first a band that is sewn to neck during assembly, then for front piece by picking up stitches along one shoulder from back piece. Work downwards to armhole while at the same time increasing towards the neck. Repeat on the other shoulder. At the armholes slip front pieces and back piece on to same circular needle and work body downwards back and forth on circular needle. Pick up stitches for sleeves around the armholes and work sleeves downwards. First work back and forth with short rows to form a sleeve cap, then work sleeves downwards in the round on needle. Sew bands from each front piece together, seam = mid back, fasten band to stitches around the neck. BACK PIECE: Work piece back and forth on circular needle. Cast on 22-24-26-26-28-28 stitches on circular needle size 8 mm with DROPS Melody. ROW 1 (= wrong side): Purl all stitches. ROW 2 (= right side): Read INCREASE TIP-1 and knit 3, increase 1 stitch towards the left, knit until 3 stitches remain, increase 1 stitch towards the right, knit 3. ROW 3 (= wrong side): Read INCREASE TIP-2 and purl 3, increase 1 stitch towards the left, purl until 3 stitches remain, increase 1 stitch towards the right, purl 3. AFTER 3RD ROW: Work 2nd and 3rd ROW 11-12-13-13-14-15 times in total (= 22-24-26-26-28-30 rows have been worked), after increase there are = 66-72-78-78-84-88 stitches on needle. Insert 1 marker in the side. Now measure piece from here! Continue in stocking stitch - remember to follow the knitting tension - until piece measures 9-10-11-11-11-12 cm measured from marker along armhole. Now increase in each side for armholes. INCREASE FOR ARMHOLES: ROW 1 (= right side): Remember INCREASE TIP-1 and knit 3, increase 1 stitch towards the left, knit until 3 stitches remain, increase 1 stitch towards the right, knit 3. ROW 2 (= wrong side): Purl all stitches. Work 1st. and 2nd ROW 2-2-2-3-3-3 times in total (= 4-4-4-6-6-6 rows have been worked) = 70-76-82-86-90-94 stitches on needle. Work until piece measures 12-13-14-15-15-16 cm, measured from marker along armhole, finish with a row from right side. Cut the yarn, slip stitches on a thread or stitch holder, now work left front piece along the left shoulder from back piece - read explanation below. LEFT BAND: Cast on 7 stitches on circular needle size 8 mm. Work LEFT BAND WITH I-CORD - read explanation above. Continue until band measures 8-9-10-10-11-11 cm, finish with a row from wrong side, then continue as explained below left front piece. LEFT FRONT PIECE: Find left shoulder on back piece as follows: Place back piece flat with right side up, place back piece so that stitches on thread/stitch holder is towards you, left side of piece = left shoulder. Now pick up stitches along left diagonal shoulder on back piece - begin from right side at the neck and pick up stitches out towards the shoulder as follows: ROW 1 (= right side): First work the 7 stitches from band, then pick up 1 stitch in every worked row inside outermost stitch (pick up 22-24-26-26-28-30 stitches from back piece) = 29-31-33-33-35-37 stitches. All length measurements on front piece are done from pick up edge. ROW 2 (= wrong side): Purl until 7 stitches remain, 7 band stitches as before. ROW 3 (= right side): Work 7 band stitches as before, knit the rest of row. ROW 4 (= wrong side): Purl until 7 stitches remain, 7 band stitches. Work 3rd and 4th ROW until piece measures 8 cm. OVERVIEW OF NEXT SECTION: Now increase for V-neck, increase also in the side towards the armhole. Increases in the side begins before increases for V-neck are done, thus read both of the next 2 sections before continuing to get an overview of when the increase for armholes begin. INCREASE FOR V-NECK: ROW 1 (= right side): Work 7 band stitches as before, knit 2, increase 1 stitch towards the left - remember INCREASE TIP-1, and knit the rest of row. ROW 2 (= wrong side): Purl until 7 stitches remain, 7 band stitches. Work 1st and 2nd ROW 11-12-13-13-14-14 times in total (= 22-24-26-26-28-28 rows worked). 11-12-13-13-14-14 increases have been done in total for V-neck. Then continue with stocking stitch and band stitches as before. INCREASE FOR ARMHOLES: When piece measures 23-24-25-25-27-28 cm, increase in the side as towards armhole follows: ROW 1 (= right side): Work 7 band stitches, work until 3 stitches remain, increase 1 stitch towards the right - read INCREASE-TIP-1, knit 3. ROW 2 (= wrong side): Purl until 7 stitches remain, 7 band stitches. Work 1st and 2nd ROW 2-2-2-3-3-3 times in total (= 4-4-4-6-6-6 rows worked). When all increases for V-neck and armhole are done, there are 42-45-48-49-52-54 stitches on needle. Work until piece measures 26-27-28-29-31-32 cm, measured from pick up-edge at the top of front piece, finish with a row from right side. Cut the yarn, slip stitches on a thread or stitch holder, now work right front piece along the right shoulder from back piece - read explanation below. RIGHT BAND: Cast on 7 stitches on circular needle size 8 mm. Work RIGHT BAND WITH I-CORD - read explanation above. Continue until band measures 8-9-10-10-11-11 cm, finish with a row from wrong side. Cut the yarn and slip stitches on a stitch holder, first work over band when picking up stitches for right front piece. RIGHT FRONT PIECE: Now pick up stitches along right diagonal shoulder on back piece - begin from right side at the shoulder and pick up stitches out towards the neck as follows: Pick up 1 stitch in every worked row inside outermost stitch (pick up 22-24-26-26-28-30 stitches from back piece) then work the 7 stitches from band on to needle = 29-31-33-33-35-37 stitches on row. All length measurements on front piece are done from pick up edge. ROW 1 (= wrong side): Work 7 band stitches as before, purl the rest of row. ROW 2 (= right side): Knit until 7 stitches remain, 7 band stitches as before. Work 1st and 2nd ROW until piece measures 8 cm. OVERVIEW OF NEXT SECTION: Now increase for V-neck, also increase in the side towards armhole, thus read both of the next 2 sections before continuing to get an overview of when increase for armhole begins. INCREASE FOR V-NECK: ROW 1 (= right side): Knit until 9 stitches remain, increase 1 stitch towards the right - read INCREASE TIP-1, knit 2, work 7 band stitches as before. ROW 2 (= wrong side): Work 7 band stitches, purl the rest of row. Work 1st and 2nd ROW 11-12-13-13-14-14 times in total (= 22-24-26-26-28-28 rows worked). 11-12-13-13-14-14 increases have been done in total for V-neck. Then continue with stocking stitch and band stitches. INCREASE FOR ARMHOLES: When piece measures 23-24-25-25-27-28 cm, increase in the side as towards armhole follows: ROW 1 (= right side): Work 3 stitches, increase 1 stitches towards the left - remember INCREASE TIP-1, work until 7 stitches remain, work 7 band stitches. ROW 2 (= wrong side): Work 7 band stitches, purl the rest of row. Work 1st and 2nd ROW 2-2-2-3-3-3 times in total (= 4-4-4-6-6-6 rows worked). When all increases for V-neck and armhole are done, there are 42-45-48-49-52-54 stitches on needle. Work until piece measures 26-27-28-29-31-32 cm, measured from pick up-edge at the top of front piece, finish with a row from right side. Now put front piece and back piece together for body as explained below. Now measure the piece from here. BODY: Work 1st row from wrong side - begin with stitches over right front piece and work the row as follows: Work the 42-45-48-49-52-54 stitches from right front piece, cast on 6-6-6-10-10-12 new stitches at the end of this row (= in the side mid under sleeve), work the 70-76-82-84-90-94 stitches on back piece, cast on 6-6-6-10-10-12 new stitches (= in the side mid under sleeve), work the 42-45-48-49-52-54 stitches from left front piece = 166-178-190-202-214-226 stitches on needle. Work back and forth from mid front over all stitches with stocking stitch and band as before. Work until piece measures approx. 28-29-29-30-30-32 cm from armhole. On next row from right side begin rib while AT THE SAME TIME increasing 18-18-18-22-22-22 stitches evenly on row (do not increase over bands) = 184-196-208-224-236-248 stitches, work as follows: Switch to circular needle size 6 mm, work band as before, work rib (= knit 2/purl 2 - remember increase) until 7 stitches remain, knit 2 and band as before. When rib measures 6-6-6-7-7-7 cm cast off. Front piece measures 63-65-67-69-71-73 cm measured from pick up edge, front piece approx. 3 cm longer than finished measurements because the pick up edge is not mid on top of shoulder but somewhat down on back piece, jacket measures 60-62-64-66-68-70 cm. SLEEVES: Sleeve is worked from the armhole and down. Place piece flat and insert 1 marker at the top of armhole = mid on top shoulder (NOTE! Mid on top shoulder is not same place as stitches were picked up for front piece but approx. 7 cm down on front piece). Pick up stitches around armhole, use circular needle size 6 mm, begin in the middle of the new stitches cast on under sleeve - pick up 48-52-54-62-64-68 stitches - adjust to pick up same number of stitches on each side of marker along armhole. Switch to circular needle size 8 mm. Now work in stocking stitch back and forth with short rows over sleeve cap to get a better shape on sleeve, begin round mid under sleeve as follows: ROW 1 (= right side): Work 6-6-7-8-8-9 stitches past marker on top of shoulder, turn piece – read KNITTING TIP. ROW 2 (= wrong side): Work 6-6-7-8-8-9 stitches past marker, turn piece. ROW 3 (= right side): Work 4-4-4-4-5-5 stitches past where the previous turn was, turn piece. ROW 4 (= wrong side): Work 4-4-4-4-5-5 stitches past where the previous turn was, turn piece. Repeat ROWS 3 and 4. Work until 8-8-8-8-10-10 turns have been done in total (= 4-4-4-4-5-5 times in each side and last row is worked from wrong side). AFTER LAST TURN: On the last turn finish row by turning piece, then work from right side until beginning of round (mid under sleeve). Insert 1 marker thread mid under sleeve, this is used when decreasing stitches under sleeve. Move marker thread upwards when working. Now work in the round in stocking stitch over all stitches while AT THE SAME TIME decreasing under sleeve, read DECREASE TIP and decrease like this: When sleeve measures 1-1-1-1-1-1 cm mid under sleeve decrease 2 stitches 3 times on every other round, then decrease 2 stitches every 6-4-4-3-2½-2½ cm 3-5-5-8-8-9 times in total = 36-36-38-40-42-44 stitches on row. Work until sleeve measures 42-40-39-39-37-37 cm from shoulder. Switch to circular needles size 6 mm, work rib (= knit 2/purl 2) while AT THE SAME TIME increasing 4-4-6-8-6-8 stitches evenly on 1st round = 40-40-44-48-48-52 stitches. When rib measures 6-6-6-7-7-7 cm cast off. Sleeve measures approx. 48-46-45-46-44-44 cm from mid on top of shoulder. ASSEMBLY: Sew the bands together, and sew them to the neckline at the back. Sew the buttons on to the left band. |
|
|
|
Have you finished this pattern?Tag your pictures with #dropspattern #crossedpathcardigan or submit them to the #dropsfan gallery. Do you need help with this pattern?You'll find 34 tutorial videos, a Comments/Questions area and more by visiting the pattern on garnstudio.com. © 1982-2025 DROPS Design A/S. We reserve all rights. This document, including all its sub-sections, has copyrights. Read more about what you can do with our patterns at the bottom of each pattern on our site. |
|


With over 40 years in knitting and crochet design, DROPS Design offers one of the most extensive collections of free patterns on the internet - translated to 17 languages. As of today we count 314 catalogues and 11821 patterns translated into English (UK/cm).
We work hard to bring you the best knitting and crochet have to offer, inspiration and advice as well as great quality yarns at incredible prices! Would you like to use our patterns for other than personal use? You can read what you are allowed to do in the Copyright text at the bottom of all our patterns. Happy crafting!
Post a comment to pattern DROPS 252-18
We would love to hear what you have to say about this pattern!
If you want to leave a question, please make sure you select the correct category in the form below, to speed up the answering process. Required fields are marked *.