Comments / Questions (4)
![]() Annemieke wrote:
Annemieke wrote:
Bij MEERDEREN VOOR ARMSGATEN staat: eindig met een naald aan de goede kant. Wordt er dan bedoeld dat je de naald aan de goede kant breit of moet je juist stoppen voor je de naald aan de goede kant gaat breien?
14.11.2024 - 16:05DROPS Design answered:
Dag Annemieke,
Je breit de laatste naald aan de goede kant.
16.11.2024 - 18:05
![]() Sonja wrote:
Sonja wrote:
Hej! Jag hittar mönstret men det finns ingen information om hur många maskor man skall lägga upp eller hur den ska stickas. Kan ni bifoga det? Tack!
18.09.2024 - 08:25DROPS Design answered:
Hej Sonja. Nu ska hela mönstret finnas tillgängligt här även på svenska. Mvh DROPS Design
25.09.2024 - 15:01
![]() Sonja wrote:
Sonja wrote:
Hej! Jag skulle gärna sticka denna kofta men var finns beskrivningen?
11.09.2024 - 09:03DROPS Design answered:
Hej, du hittar beskrivningen genom att klikka på länken Höst & Vinter 2024/25 under GRATIS MÖNSTER.
11.09.2024 - 18:52
![]() Elisabeth Bäcklin wrote:
Elisabeth Bäcklin wrote:
Det finns ingen beskrivning på den här modellen.
30.08.2024 - 23:18
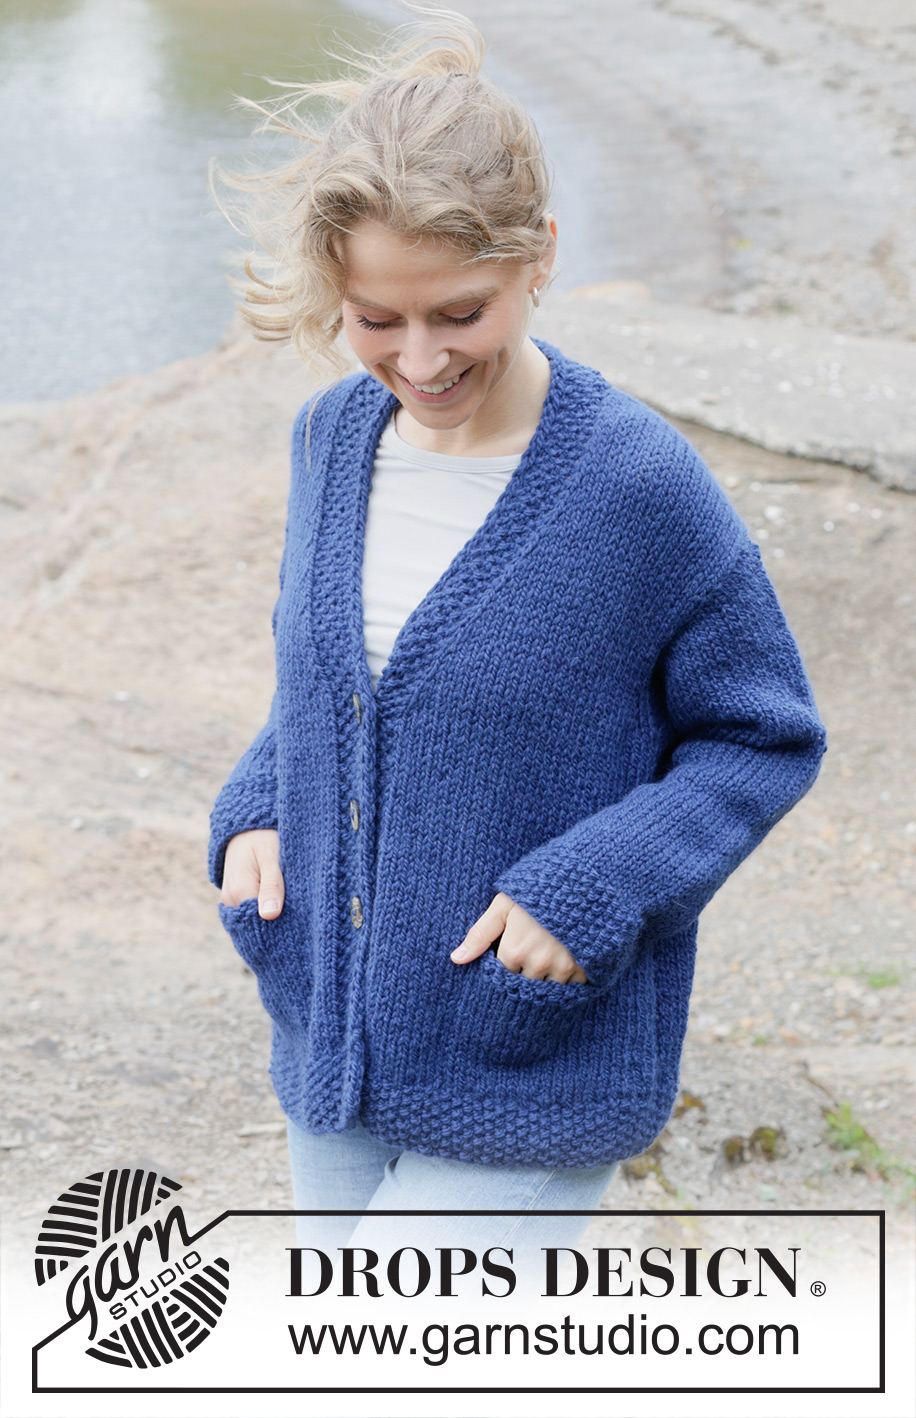
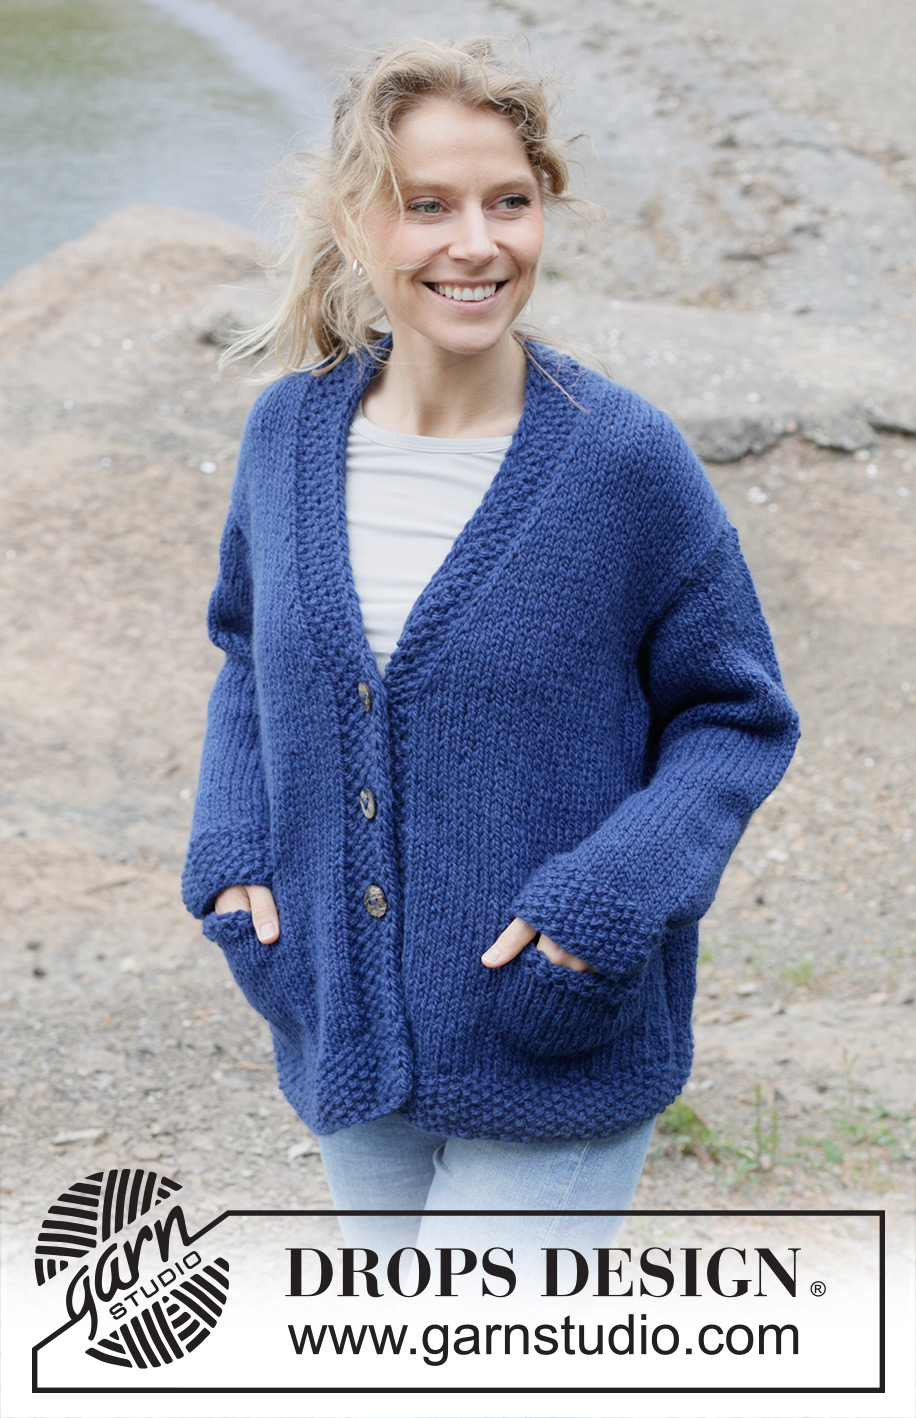
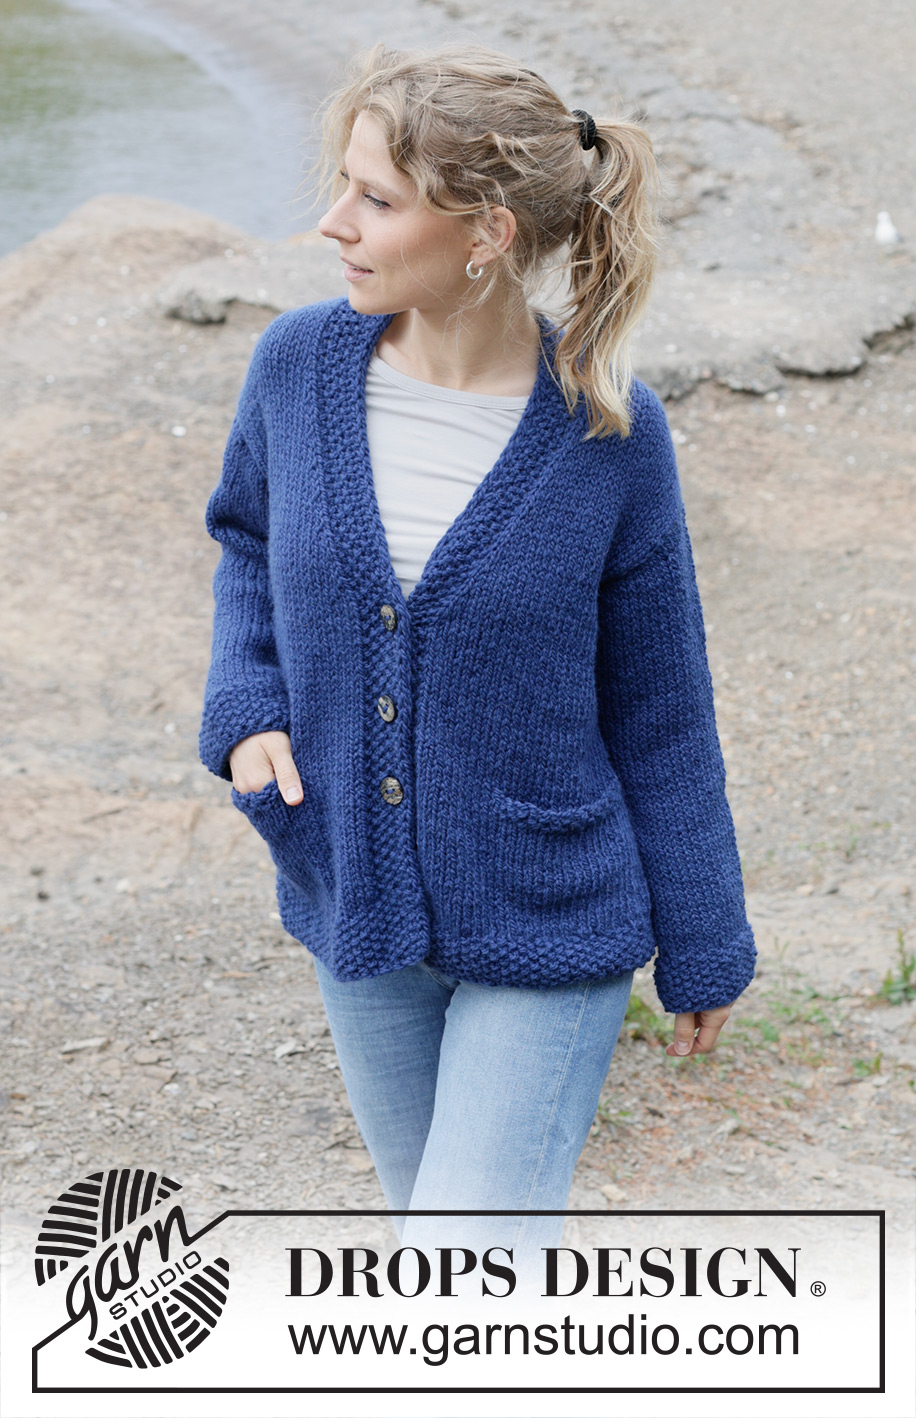
Changing Seasons Cardigan#changingseasonscardigan |
|||||||
 |
 |
||||||
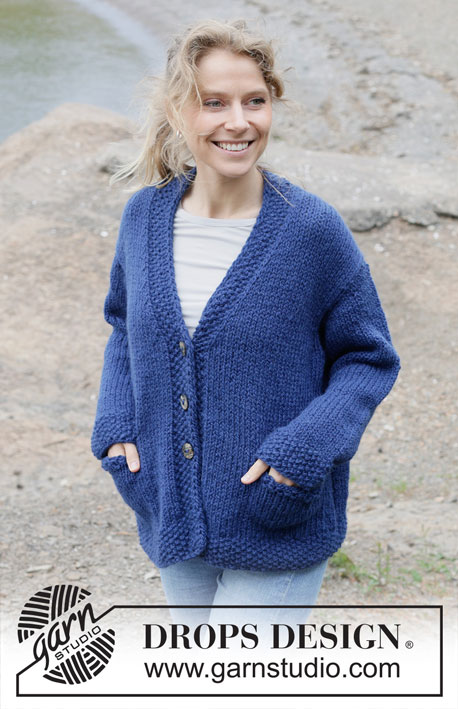
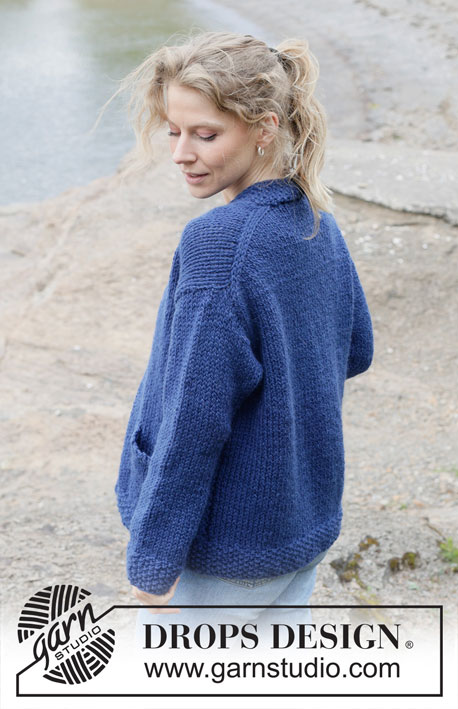
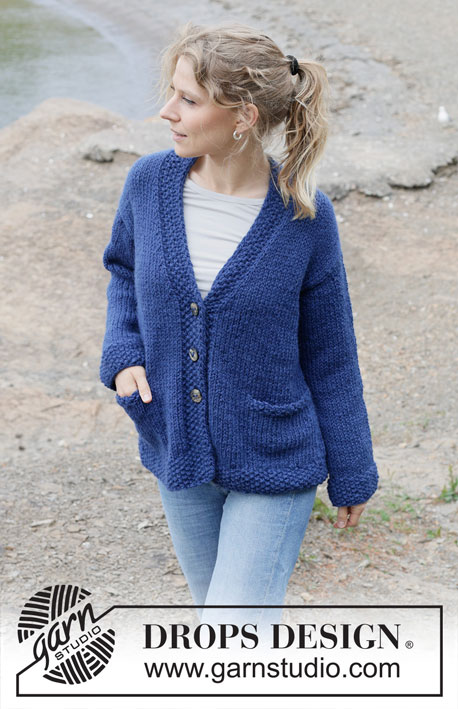
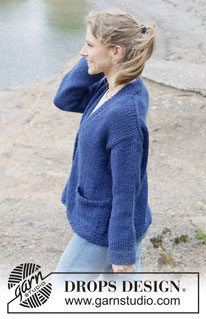
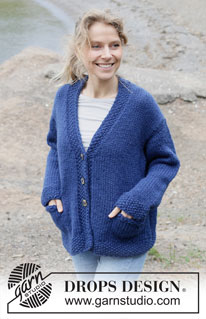
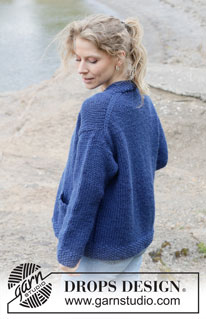
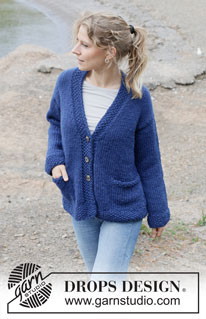
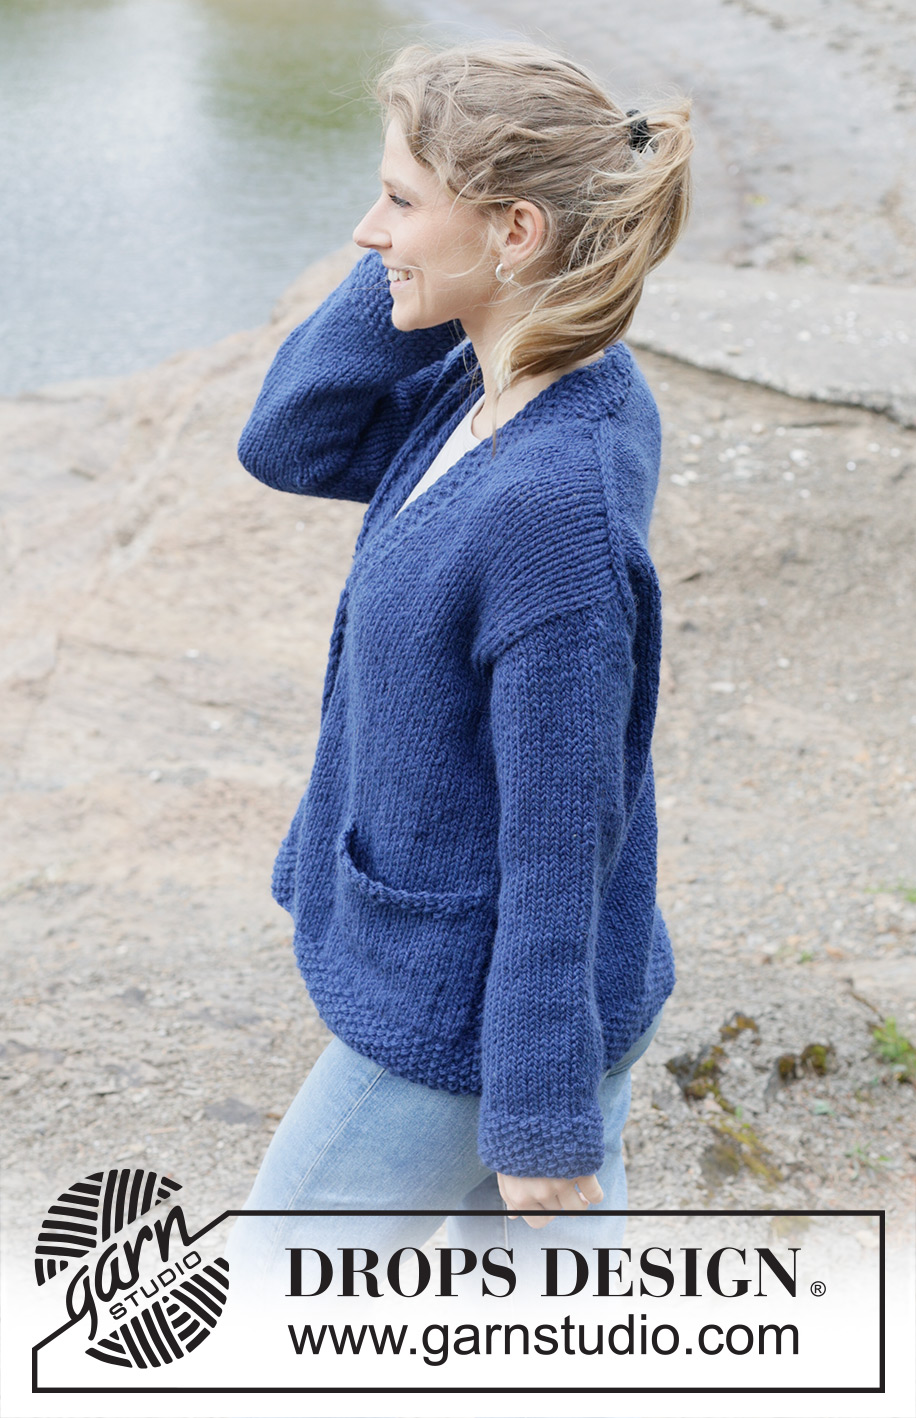
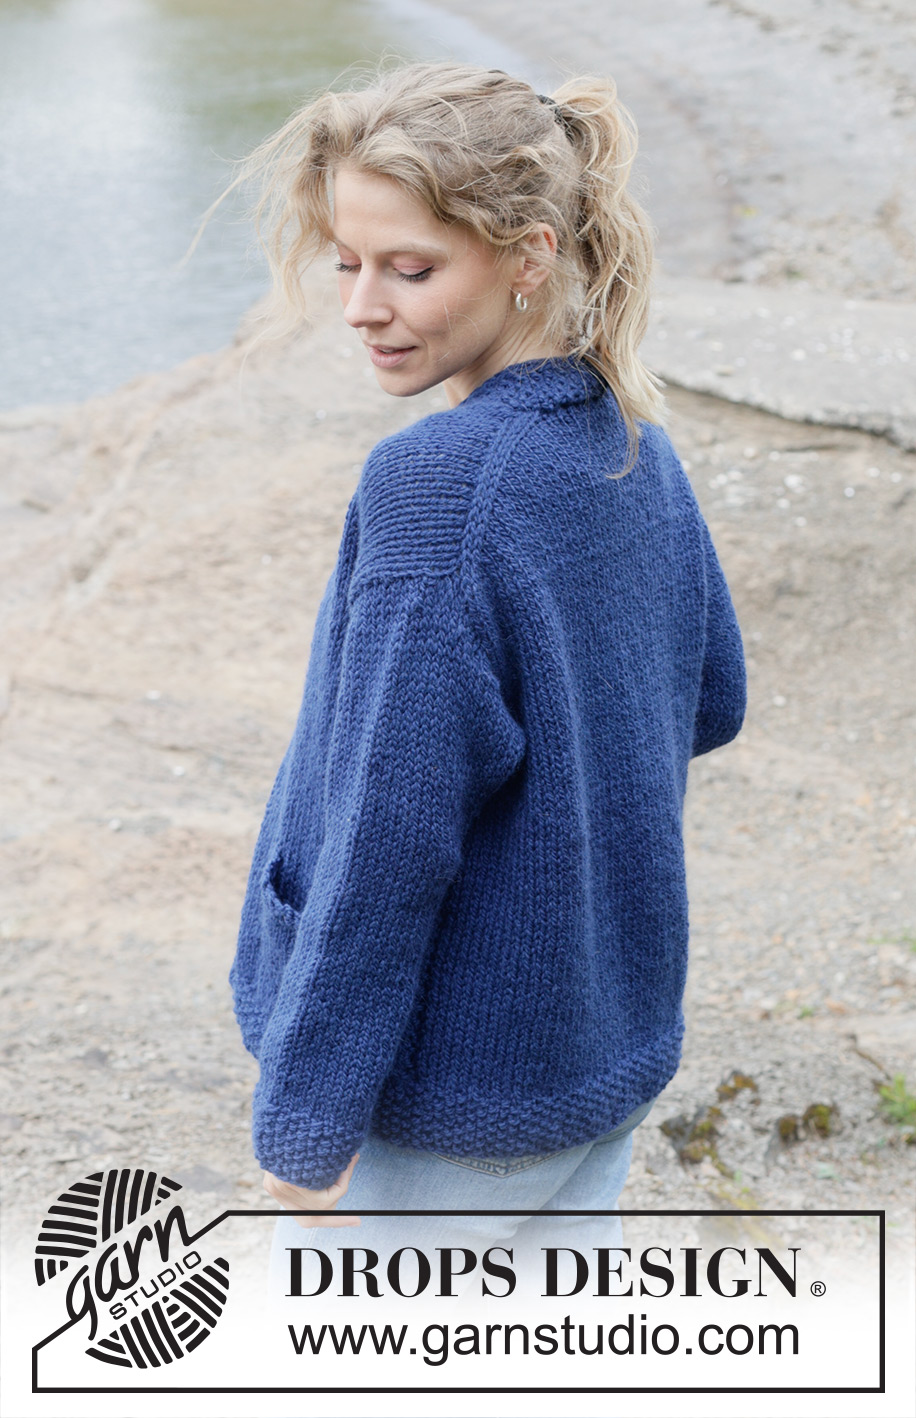
Knitted jacket in DROPS Andes. The piece is worked top down with stocking stitch, European/diagonal shoulders, V-neck, I-cord and pockets. Sizes S - XXXL.
DROPS 254-42 |
|||||||
|
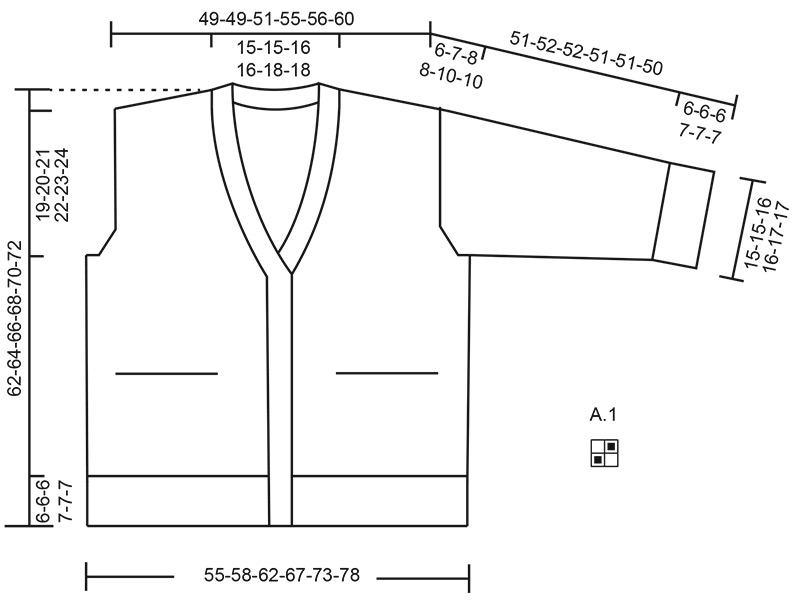
------------------------------------------------------- EXPLANATIONS FOR THE PATTERN: ------------------------------------------------------- PATTERN: See diagram A.1. The diagram shows all rows in the pattern, seen from the right side. INCREASE TIP-1: INCREASE 1 STITCH TOWARDS THE LEFT – from the right side: Use the left needle to pick up the strand between 2 stitches from the previous row, pick up strand from the front and knit the back loop. INCREASE 1 STITCH TOWARDS THE RIGHT – from the right side: Use the left needle to pick up the strand between 2 stitches from the previous row, pick up strand from the back and knit the front loop. INCREASE TIP -2: INCREASE 1 STITCH TOWARDS THE LEFT – from the wrong side: Use the left needle to pick up the strand between 2 stitches from the previous row, pick up strand from the back and purl the front loop. INCREASE 1 STITCH TOWARDS THE RIGHT – from the wrong side: Use the left needle to pick up the strand between 2 stitches from the previous row, pick up strand from the front and purl the back loop. DECREASE TIP: Decrease 1 stitch on each side of the marker-thread as follows: Work until there are 3 stitches left before the marker-thread, knit 2 together, knit 2 (marker-thread sits between these 2 stitches), slip 1 stitch knit-wise, knit 1 and pass the slipped stitch over the knitted stitch (2 stitches decreased). KNITTING TIP: When working short rows, there will be a small hole after each turn – this hole can be closed by tightening the strand or using the technique German Short Rows as follows: Slip the first stitch purl-wise, lay the strand over the right needle and tighten well from the back. There are now 2 loops on the needle, which are worked together on the next row. LEFT BAND WITH I-CORD RIGHT SIDE: Slip 1 stitch purl-wise with strand in front, knit 1, work A.1 over the next 5 stitches. WRONG SIDE: Work A.1 over the first 5 stitches, slip 1 stitch purl-wise with strand in front, knit 1. RIGHT BAND WITH I-CORD RIGHT SIDE: Work A.1 over the first 5 stitches, slip 1 stitch purl-wise with strand in front, knit 1. WRONG SIDE: Slip 1 stitch purl-wise with strand in front, knit 1, work A.1 over the next 5 stitches. BUTTONHOLES: Work the buttonholes from the right side and on the right band (when the garment is worn), when there are 5 stitches left on the row as follows: ROW 1 (right side): Make 1 yarn over, knit 2 together, knit 1, slip 1 stitch purl-wise with strand in front, knit 1. ROW 2 (wrong side): Work the band as before and knit the yarn over to leave a hole. The first buttonhole is worked 1 cm after the last increase for the V-neck. Then work the other 3-3-3-3-4-4 buttonholes with 10-10½-11-11-8½-9 cm between each one. The bottom buttonhole is worked in the transition between the stocking stitch and moss stitch edge. ------------------------------------------------------- START THE PIECE HERE: ------------------------------------------------------- JACKET – SHORT OVERVIEW OF THE PIECE. The pattern uses both long and short needles; start with the length which fits the number of stitches and change when necessary. The piece is started by casting on stitches at the back of the neck and working the back piece top down, while increasing stitches on each side for the shoulders, which become slightly diagonal. The back piece is worked as far as the armholes. The front pieces are started by working button-bands which are later sewn to the neckline. Then each front piece is worked by knitting up stitches along the back shoulders, working downwards while increasing for the V-neck and working until the armholes are finished. The front and back pieces are joined on the same circular needle and the body finished, working back and forth. Stitches are knitted up around the armholes for the sleeves, which are started back and forth for the sleeve cap, then finished in the round. The bands from each front piece are sewn together (seam = mid-back), then sewn to the neckline. BACK PIECE: The piece is worked back and forth. Cast on 18-18-20-20-22-22 stitches with circular needle size 8 mm and DROPS Andes. ROW 1 (= wrong side): Purl. ROW 2 (= right side): Read INCREASE TIP-1, knit 3, increase 1 stitch towards the left, knit until there are 3 stitches left, increase 1 stitch towards the right, knit 3. ROW 3 (= wrong side): Read INCREASE TIP-2, purl 3, increase 1 stitch towards the left, purl until there are 3 stitches left, increase 1 stitch towards the right, purl 3. AFTER ROW 3: Work ROWS 2 and 3 a total of 9-9-9-10-10-11 times (= 18-18-18-20-20-22 rows), after the last increase there are 54-54-56-60-62-66 stitches. Remember to maintain the knitting tension. Insert 1 marker outermost on one side; the piece is now measured from here! Continue with stocking stitch until the piece measures 10-10-10-11-9-9 cm, measured outermost along the armhole. Now increase for the armholes. INCREASE FOR ARMHOLES: ROW 1 (= right side): Remember INCREASE TIP-1, knit 3, increase 1 stitch towards the left, knit until there are 3 stitches left, increase 1 stitch towards the right, knit 3. ROW 2 (= wrong side): Purl. Work ROWS 1 and 2 a total of 2-3-4-4-6-6 times (= 4-6-8-8-12-12 rows) = 58-60-64-68-74-78 stitches. Continue working until the piece measures 13-14-15-16-17-17 cm, measured from the marker outermost along the armhole, finishing with a row from the right side. Cut the strand, place the stitches on a stitch holder. Work the left band and front piece as follows: LEFT BAND: Cast on 7 stitches with circular needle size 8 mm and DROPS Andes. Work LEFT BAND WITH I-CORD – read description above, until the band measures 7½-7½-8-8-9-9 cm, finishing with a row from the wrong side. LEFT FRONT PIECE: Find the left shoulder on the back piece as follows: Lay the piece flat, right side up, with the stitch holder towards you; left side of piece = left shoulder. Starting from the right side, knit up stitches along the left back shoulder, from the neck to the shoulder as follows: ROW 1 (= right side): Work the 7 band-stitches as before, then knit up 1 stitch in each row, inside the outermost stitch (18-18-18-20-20-22 stitches along the shoulder) = 25-25-25-27-27-29 stitches. All measurements for the piece are taken from this knitted-up row. ROW 2 (= wrong side): Purl until there are 7 stitches left, work the 7 band-stitches as before. ROW 3 (= right side): Work the 7 band-stitches, knit to end of row. ROW 4 (= wrong side): Purl until there are 7 stitches left, work the 7 band-stitches. Work ROWS 3 and 4 until the piece measures 10-11-10-11-10-11 cm. OVERVIEW OF NEXT SECTION: Now you increase for the V-neck, then subsequently for the armhole. The armhole increases begin before the increases for the V-neck are finished. Read the next 2 sections before continuing. INCREASE FOR V-NECK: ROW 1 (= right side): Work the 7 band-stitches, knit 1, increase 1 stitch towards the left - remember INCREASE TIP-1, knit to end of row. ROW 2 (= wrong side): Purl until there are 7 stitches left, work the 7 band-stitches. Work ROWS 1 and 2 a total of 5-5-6-6-6-6 times (= 10-10-12-12-12-12 rows). Then increase as follows: ROW 1 (= right side): Work the 7 band-stitches, knit 1, increase 1 stitch towards the left, knit to end of row. ROW 2 (= wrong side): Purl until there are 7 stitches left, work the 7 band-stitches. ROW 3 (= right side): Work the 7 band-stitches, knit to end of row. ROW 4 (= wrong side): Purl until there are 7 stitches left, work the 7 band-stitches. Work ROWS 1 to 4 a total of 4-4-4-4-5-5 times (= 16-16-16-16-20-20 rows). You have increased 9-9-10-10-11-11 times for the V-neck. Continue with stocking stitch and the band-stitches. INCREASE FOR ARMHOLE: When the piece measures 22-22-22-23-21-23 cm, increase towards the side as follows: ROW 1 (= right side): Work 7 band-stitches, knit until there are 3 stitches left, increase 1 stitch towards the right, knit 3. ROW 2 (= wrong side): Purl until there are 7 stitches left, work 7 band-stitches. Work ROWS 1 and 2 a total of 2-3-4-4-6-6 times (= 4-6-8-8-12-12 rows). Continue working until the piece measures 25-26-27-28-29-31 cm, measured from the knitted-up row: finish with a row from the right side. Cut the strand, place the stitches on a stitch holder. Work the right band and front piece as follows: RIGHT BAND: Cast on 7 stitches with circular needle size 8 mm and DROPS Andes. Work RIGHT BAND WITH I-CORD – read description above, until the band measures 7½-7½-8-8-9-9 cm, finishing with a row from the wrong side. Cut the strand and place the stitches on a stitch holder – the band is continued when knitting up stitches for the right front piece. RIGHT FRONT PIECE: Starting from the right side, knit up stitches along the right back shoulder from the armhole to the neck as follows: Knit up 1 stitch in each row, inside the outermost stitch (18-18-18-20-20-22 stitches along the shoulder) and work the 7 band-stitches = 25-25-25-27-27-29 stitches. All measurements for the piece are taken from this knitted-up row. ROW 1 (= wrong side): Work the 7 band-stitches as before, purl to end of row. ROW 2 (= right side): Knit until there are 7 stitches left, work the 7 band-stitches as before. Work ROWS 1 and 2 until the piece measures 10-11-10-11-10-11 cm. OVERVIEW OF NEXT SECTION: Now you increase for the V-neck, then subsequently for the armhole. The armhole increases begin before the increases for the V-neck are finished. Read the next 2 sections before continuing. INCREASE FOR V-NECK: ROW 1 (= right side): Knit until there are 8 stitches left, increase 1 stitch towards the right - remember INCREASE TIP-1, knit 1 and 7 band-stitches. ROW 2 (= wrong side): Work 7 band-stitches, purl until to end of row. Work ROWS 1 and 2 a total of 5-5-6-6-6-6 times (= 10-10-12-12-12-12 rows). Then increase as follows: ROW 1 (= right side): Purl until there are 8 stitches left, increase 1 stitch towards the right, knit 1, work the 7 band-stitches ROW 2 (= wrong side): Work the 7 band-stitches, purl to end of row. ROW 3 (= right side): Knit until there are 7 stitches left, work the 7 band-stitches. ROW 4 (= wrong side): Work the 7 band-stitches, purl to end of row. Work ROWS 1 to 4 a total of 4-4-4-4-5-5 times (= 16-16-16-16-20-20 rows). You have increased 9-9-10-10-11-11 times for the V-neck. Continue with stocking stitch and the band-stitches. INCREASE FOR ARMHOLE: When the piece measures 22-22-22-23-21-23 cm, increase towards the side as follows: ROW 1 (= right side): Knit 3, increase 1 stitch towards the left, knit until there are 7 stitches left, work 7 band-stitches. ROW 2 (= wrong side): Work 7 band-stitches, purl to end of row. Work ROWS 1 and 2 a total of 2-3-4-4-6-6 times (= 4-6-8-8-12-12 rows). Continue working until the piece measures 25-26-27-28-29-31 cm, measured from the knitted-up row: Finish with a row from the right side. The front and back pieces are joined for the body. The piece is now measured from here! BODY: Work as follows from the wrong side, starting with the right front piece: Work the right front piece, cast on 2-4-4-6-6-8 stitches (= in side mid-under the sleeve), work the 58-60-64-68-74-78 back piece stitches, cast on 2-4-4-6-6-8 stitches (= in side mid-under the sleeve), work the left front piece stitches. Work back and forth, with stocking stitch and the bands as before, continuing to increase for the V-neck. When the increases for the V-neck are finished, there are 134-142-150-162-174-186 stitches. Continue with stocking stitch and the bands as before – remember the BUTTONHOLES – read description above. Work until the body measures 15-16-17-18-19-19 cm from the armhole – with the next row from the right side. Now work pocket openings as follows: ROW 1 (= right side): Work 7 band-stitches, knit 10-10-10-11-12-13, place the next 17-17-19-19-21-21 stitches on a thread for the pocket, cast on 17-17-19-19-21-21 stitches, knit 66-74-78-88-94-104, place the next 17-17-19-19-21-21 stitches on a thread for the pocket, cast on 17-17-19-19-21-21 stitches, knit 10-10-10-11-12-13 and 7 band-stitches = 134-142-150-162-174-186 stitches. ROW 2 (= wrong side): Work 7 band-stitches, purl 10-10-10-11-12-13, work A.1 over the next 17-17-19-19-21-21 stitches, purl 66-74-78-88-94-104, work A.1 over the next 17-17-19-19-21-21 stitches, purl 10-10-10-11-12-13 and 7 band-stitches. ROW 3 (= right side): Work 7 band-stitches, knit 10-10-10-11-12-13, work A.1 over the next 17-17-19-19-21-21 stitches, knit 66-74-78-88-94-104, A.1 over the next 17-17-19-19-21-21 stitches, knit 10-10-10-11-12-13 and 7 band-stitches. ROW 4 (= wrong side): Work 7 band-stitches, purl 10-10-10-11-12-13, work A.1 over the next 17-17-19-19-21-21 stitches, purl 66-74-78-88-94-104, A.1 over the next 17-17-19-19-21-21 stitches, purl 10-10-10-11-12-13 and 7 band-stitches. After row 4 continue with stocking stitch and the band-stitches as before. When the piece measures 34-35-36-36-37-37 cm from the armhole, with the next row from the wrong side, work the pockets as described below. POCKETS: Place the 17-17-19-19-21-21 stitches from one thread on needle size 8 mm. Work stocking stitch back and forth for 19-19-19-18-18-18 cm, i.e., the pocket reaches down to the bottom stitches on the body, place the pocket-stitches on a stitch holder. Work the other pocket in the same way. The stitches from the pockets are now worked together with the body stitches from the right side as follows: Work the 7 band-stitches, knit 10-10-10-11-12-13, knit together the next 17-17-19-19-21-21 stitches from the body with the 17-17-19-19-21-21 stitches from the pocket (each stitch from the pocket is knitted together with 1 stitch from the body), knit 66-74-78-88-94-104, knit together the next 17-17-19-19-21-21 stitches from the body with the 17-17-19-19-21-21 stitches from the pocket, knit 10-10-10-11-12-13 and 7 band-stitches = 134-142-150-162-174-186 stitches. Now work an edge at the bottom of the body. EDGE: On the next row from the wrong side, work an edge as follows: Change to circular needle size 6 mm, work the band-stitches as before, work A.1 until there are 7 stitches left, work the 7 band-stitches as before. When the edge measures 6-6-6-7-7-7 cm, cast off with knit over knit and purl over purl. The front piece measures 65-67-69-71-73-75 cm from the knitted-up row. The front piece is approx. 3 cm longer than the back piece because the knitted-up row is not on top of the shoulder but slightly down the back piece. The jacket measures approx. 62-64-66-68-70-72 cm. SLEEVES: The sleeves are worked in the round, top down. Lay the piece flat and insert 1 marker at the top of the armhole = mid-top of shoulder (NOTE! Mid-top of shoulder is not the same place as the knitted up row for the front piece but approx. 6-6-6-6-6-7 cm down the front piece). Using circular needle size 8 mm and starting in the middle of the cast-on stitches under the sleeve, knit up 40-46-48-52-54-60 stitches around the armhole, making sure you knit up equal numbers of stitches on each side of the marker. Work stocking stitch back and forth, with short rows across the sleeve cap to give the sleeve a better fit, starting mid-under the sleeve: ROW 1 (= right side): Knit to 4-5-4-5-4-4 stitches past the marker on top of the shoulder, turn – read KNITTING TIP. ROW 2 (= wrong side): Purl to 4-5-4-5-4-4 stitches past the marker, turn. ROW 3 (= right side): Knit to 4-3-3-3-3-3 stitches past the previous turn, turn. ROW 4 (= wrong side): Purl to 4-3-3-3-3-3 stitches past the previous turn, turn. Repeat ROWS 3 and 4 until you have turned 8-10-12-12-14-14 times (= 4-5-6-6-7-7 times on each side and the last row is from the wrong side). AFTER THE FINAL TURN: On the last repeat of row 4, turn and work back from the right side to the beginning of the round (mid-under the sleeve). Insert 1 marker-thread mid-under the sleeve, which is used when decreasing. Allow the thread to follow your work onwards. Work stocking stitch in the round, AT THE SAME TIME as you decrease as follows - read DECREASE TIP: When the sleeve measures 1-1-1-1-1-1 cm measured under the sleeve, decrease 2 stitches 2-2-2-3-3-5 times, every 2nd round, then decrease 2 stitches every 8-6-6-4½-4-3 cm 2-5-5-6-6-7 times = 32-32-34-34-36-36 stitches. Continue working until the sleeve measures 45-46-46-44-44-43 cm from mid-top of shoulder. Change to double pointed needles size 6 mm and work A.1 over all stitches for 6-6-6-7-7-7 cm. Cast off with knit over knit and purl over purl. The sleeve measures approx. 51-52-52-51-51-50 cm from mid-top of shoulder. ASSEMBLY: Sew the buttons onto the left band. Sew the bands together mid-back of neck and sew them to the neckline. Sew the side seams on the pockets, from the wrong side – make sure the seam is not tight. |
|||||||
Diagram explanations |
|||||||
|
|||||||
|
|||||||
Have you finished this pattern?Tag your pictures with #dropspattern #changingseasonscardigan or submit them to the #dropsfan gallery. Do you need help with this pattern?You'll find 31 tutorial videos, a Comments/Questions area and more by visiting the pattern on garnstudio.com. © 1982-2025 DROPS Design A/S. We reserve all rights. This document, including all its sub-sections, has copyrights. Read more about what you can do with our patterns at the bottom of each pattern on our site. |
|||||||






Post a comment to pattern DROPS 254-42
We would love to hear what you have to say about this pattern!
If you want to leave a question, please make sure you select the correct category in the form below, to speed up the answering process. Required fields are marked *.