
Popular categories
Looking for a yarn?


Comments / Questions (30)
![]() Margot Heinzel wrote:
Margot Heinzel wrote:
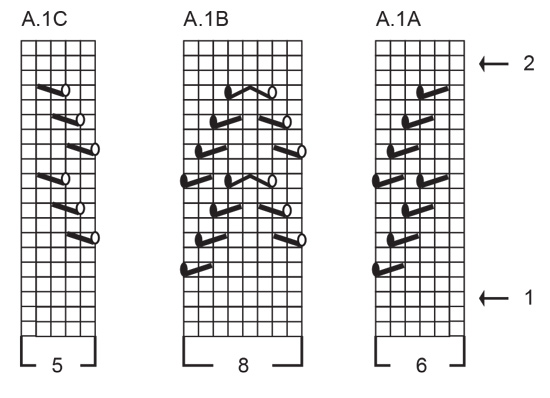
Hallo, ich stricke das Modell in Größe S, habe jetzt die beschriebenen 207 Maschen auf der Nadel und wollte mit dem Mustersatz A1 beginnen. Dabei habe ich festgestellt, dass das Muster nicht aufgeht. Nach der beschriebenen Weise sind am Ende nicht 11 sondern 19 Maschen übrig . Habe ich einen Denk-/Strickfehler oder stimmt die Strickbeschreibung nicht? Für eine baldige Antwort wäre ich dankbar.
30.09.2022 - 20:58DROPS Design answered:
Liebe Frau Heinzel, so stricken Sie die 207 Maschen: 6 Blenden-Maschen, A.1A (= 6 M), A.1B (= 8 M) x 23 Mal wiederholen (=über die nächsten 184 Maschne), A.1C (= 5 M) und 6 Blenden-Maschen = 6+6+184+5+6=207 Maschen. Viel Spaß beim stricken!
03.10.2022 - 08:20
![]() Nelly Lafon wrote:
Nelly Lafon wrote:
Bonjour, je pense qu'il y a une erreur dans le diagramme A.1B concernant le symbole pour les 3 mailles en fait il faut glisser une maille ,tricoter les deux suivantes ensemble et passer la maille glissée par dessus et le symbole qui est représenté est celui des 3 mailles tricotées ensemble à l'envers, à l'endroit, à l'envers pour obtenir un noeud c'est mon avis car j'ai du recommencer l'ouvrage car je me suis retrouvée avec des mailles en trop cordialement
17.09.2022 - 22:38
![]() Kirsten Asmussen wrote:
Kirsten Asmussen wrote:
Hej. I diagram A.1B strikker man en knude af tre masker og ender med tre masker. Desuden tager man en maske ud før og efter knuden. I forvejen er der på andre pinde markeret udtagningsrunder med pil. Hvis man også tager to masker ud ved hver knude, bliver det så ikke alt for mange masker? MVh Kirsten Asmussen
09.09.2022 - 20:29DROPS Design answered:
Hei Kristen. Her ser det ut som om det er feil diagram ikon i A.1B. Oppskriften er oversendt til design avd, slik at vi kan få en rettelse. Bruk teksten til 7. diagramtekst, da skal hullmønstret og maskeantallet bli riktig. Se evnt diagram A.1 og diagramteksten til genseren i 236-23. Takk for at du gjorde oss oppmerksom på dette. mvh DROPS Design
12.09.2022 - 10:41
![]() Ingrid Ehret wrote:
Ingrid Ehret wrote:
Hallo, muss mich nochmals melden. Das Zusammenstricken habe ich schon verstanden, aber vor dem Zusammenstricken für eine Noppe ist jeweils ein Umschlag. Dann habe ich am Schluß zuviele Maschen. Es sollen ja 223 Maschen sein und erst in der 19, Reihe werden wieder Maschen zugenommen., sind die Umschläge vorher und nachher zuvile ?Ich warte auf Antwort, Danke.
01.09.2022 - 17:06
![]() Ingrid Ehret wrote:
Ingrid Ehret wrote:
Hallo, muss mich nochmals melden. Das Zusammenstricken habe ich schon verstanden, aber vor dem Zusammenstricken für eine Noppe ist jeweils ein Umschlag. Dann habe ich am Schluß zuviele Maschen. Es sollen ja 223 Maschen sein und erst in der 19, Reihe werden wieder Maschen zugenommen., sind die Umschläge vorher und nachher zuvile ?Ich warte auf Antwort, Danke.
01.09.2022 - 16:36Ingrid Ehret answered:
Hallo, ich habe den Fehler entdeckt. Es darf kein Umschlag vor der Noppe gearbeitet werden. Das ist in der Strickschrift verkehrt. Liebe Grüsse Ingrid Ehret
01.09.2022 - 17:08
![]() Ingrid Ehret wrote:
Ingrid Ehret wrote:
Hallo, durch das zusammenstricken der drei Maschen, (linkgs, rechts, links) entstehern ja mehr Maschen und vorher und nachher nochmal ein Umschlag. Am Schluß habe ich zuvile Maschen. Wie stricke ich dann die Rückseite . LG Grüße Ingrid Ehret
01.09.2022 - 16:24DROPS Design answered:
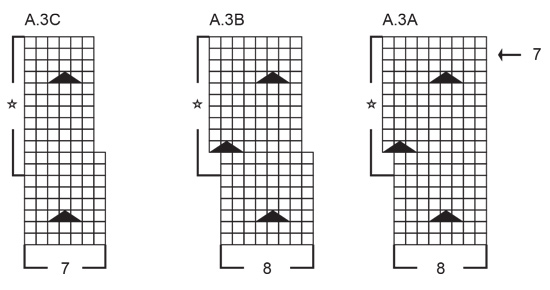
Liebe Frau Ehret, Sie meinen in A.3A-B-C, richtig? Haben Sie die vorrige Antwort gelesen oder misverstehe ich Ihre Frage ? Siehe Video in vorrigen Antwort: man strickt die 3 nächsten Maschen zusammen (links, rechts, links), so sind es immer noch 3 Maschen auf der rechten Nadel = Maschenanzahl ist derselbe. Diese 3 Maschen stricken Sie glatt rechts = links bei der nächsten Rückreihe. Kann das Ihnen helfen?
01.09.2022 - 16:27
![]() Ingrid Ehret wrote:
Ingrid Ehret wrote:
Liebes Drops Team, in der m11. Reihe werden die mittleren drei zusammengestrickt, einmal links, dann rechts und wieder links. Wie werden die drei entstandenen Maschen in der Rückreihe gestrickt. Wieder zusammen. Ansonsten entstehen zuviele Maschen auf der Nadel. Bitte um baldige Antwort. LG Ingrid Ehret
01.09.2022 - 14:03DROPS Design answered:
Liebe Frau Ehret, Sie meinen in A.3A-B-C, richtig? Diese Maschen werden glatt rechts gestrickt, dh diese kleine Noppe stricken Sie bei einer Hinreihe, dann stricken Sie die 3 Maschen links bei der Rückreihe - siehe auch dieses Video. Viel Spaß beim stricken!
01.09.2022 - 15:55
![]() Ingrid Ehret wrote:
Ingrid Ehret wrote:
Liebes Drops Team, mir ist in der Zeichenerklärung unklar das ausgefüllte O und das leere O in der Strickschrift A1A bis A3A soll beim keinem der Zeichen ein Loch entstehen. Verstehe ich das richtig . Für baldige Antwort wäre ich dankbar.
31.08.2022 - 16:00DROPS Design answered:
Liebe Frau Ehret, richtig, die Umschläge im Diagram sollen kein Loch entstehen - dieses Video zeigt, wie man diese Umschläge (bei Raglanzunahmen, dh nur bei Hinreihen) strickt, es kann Ihnen vielleicht helfen. Viel Spaß beim stricken!
01.09.2022 - 09:51
![]() Giulia wrote:
Giulia wrote:
Beehive pearls
05.08.2022 - 00:09
![]() Line Klestrup Larsen wrote:
Line Klestrup Larsen wrote:
Den er fin
04.08.2022 - 13:13
|
|||||||||||||||||||||||||||||||||||||
Miss Summerbee Cardigan#misssummerbeecardigan |
|||||||||||||||||||||||||||||||||||||
 |
 |
||||||||||||||||||||||||||||||||||||
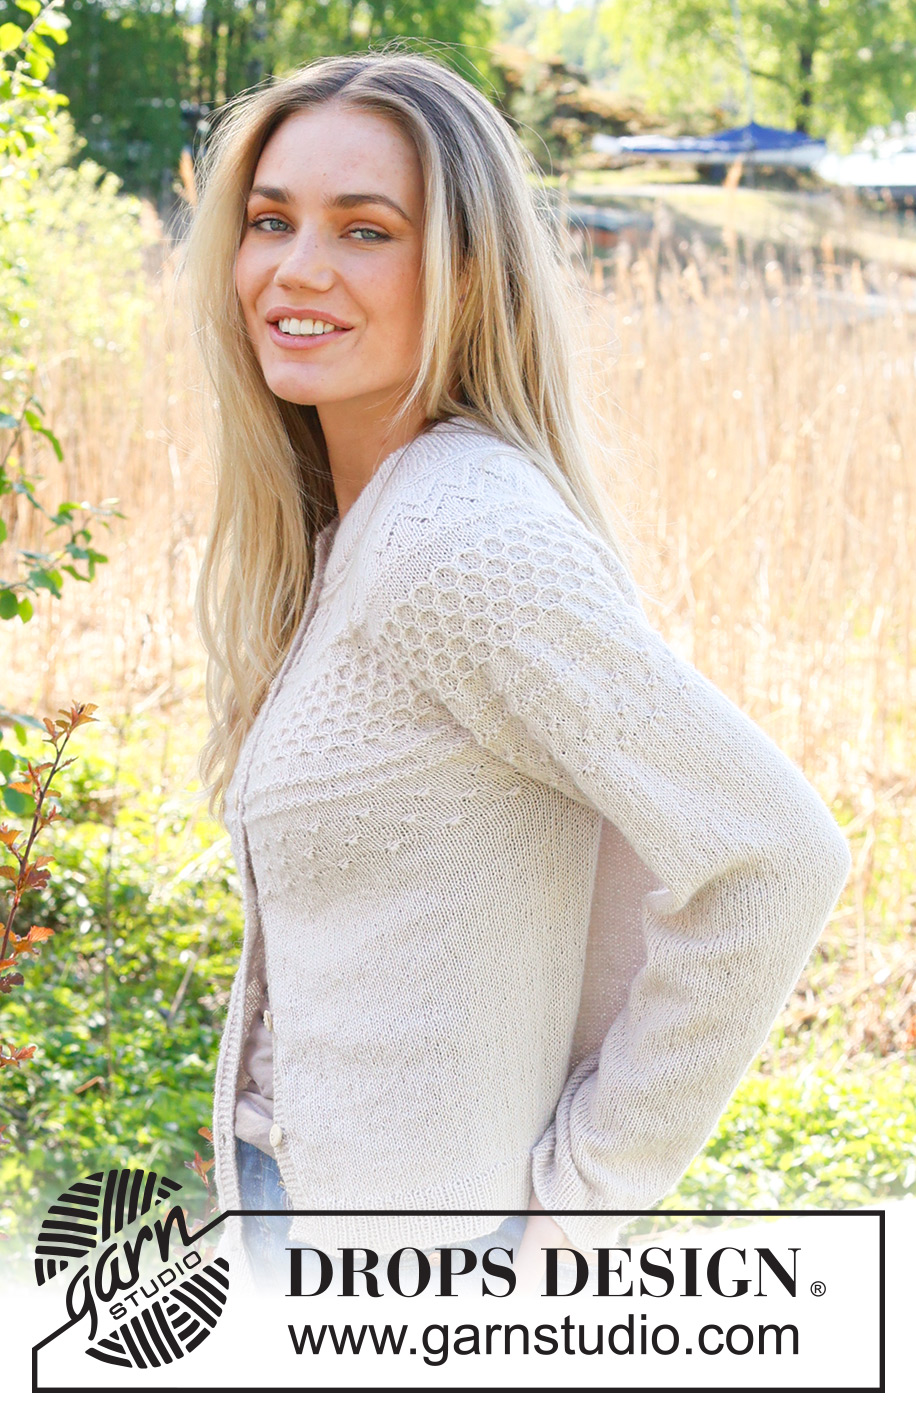
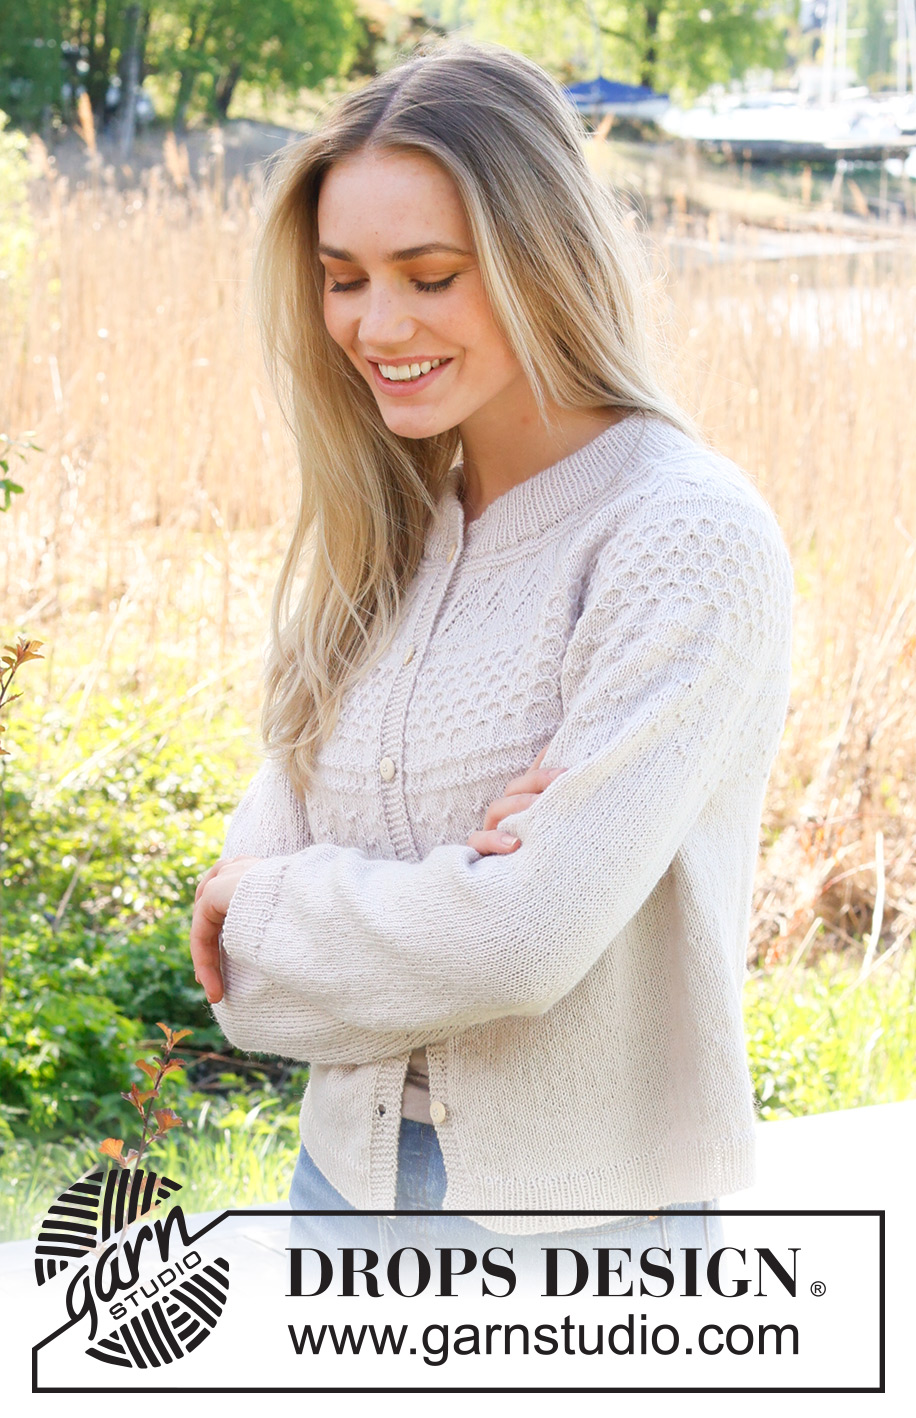
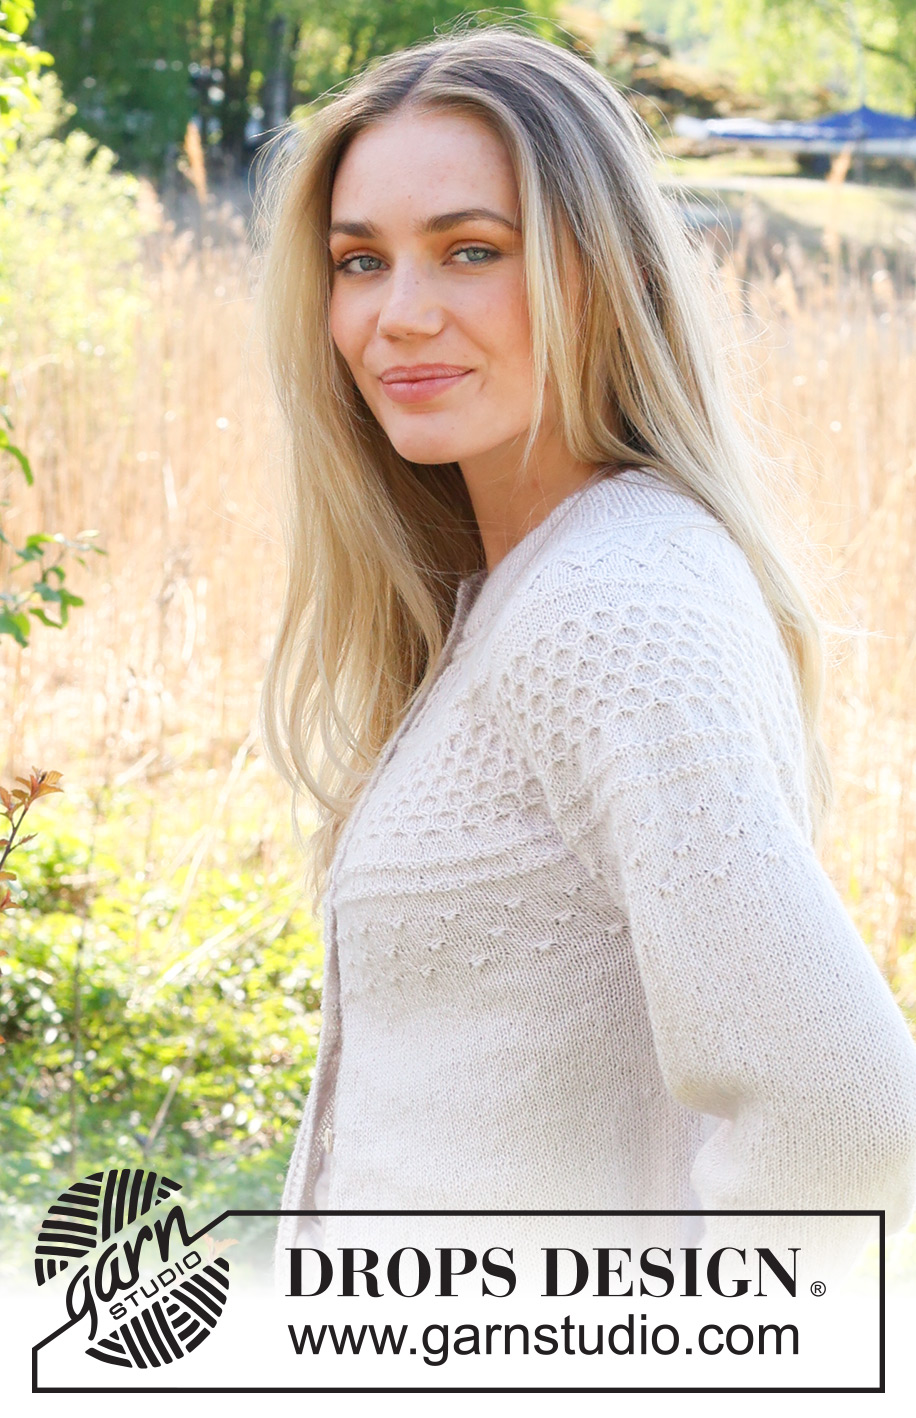
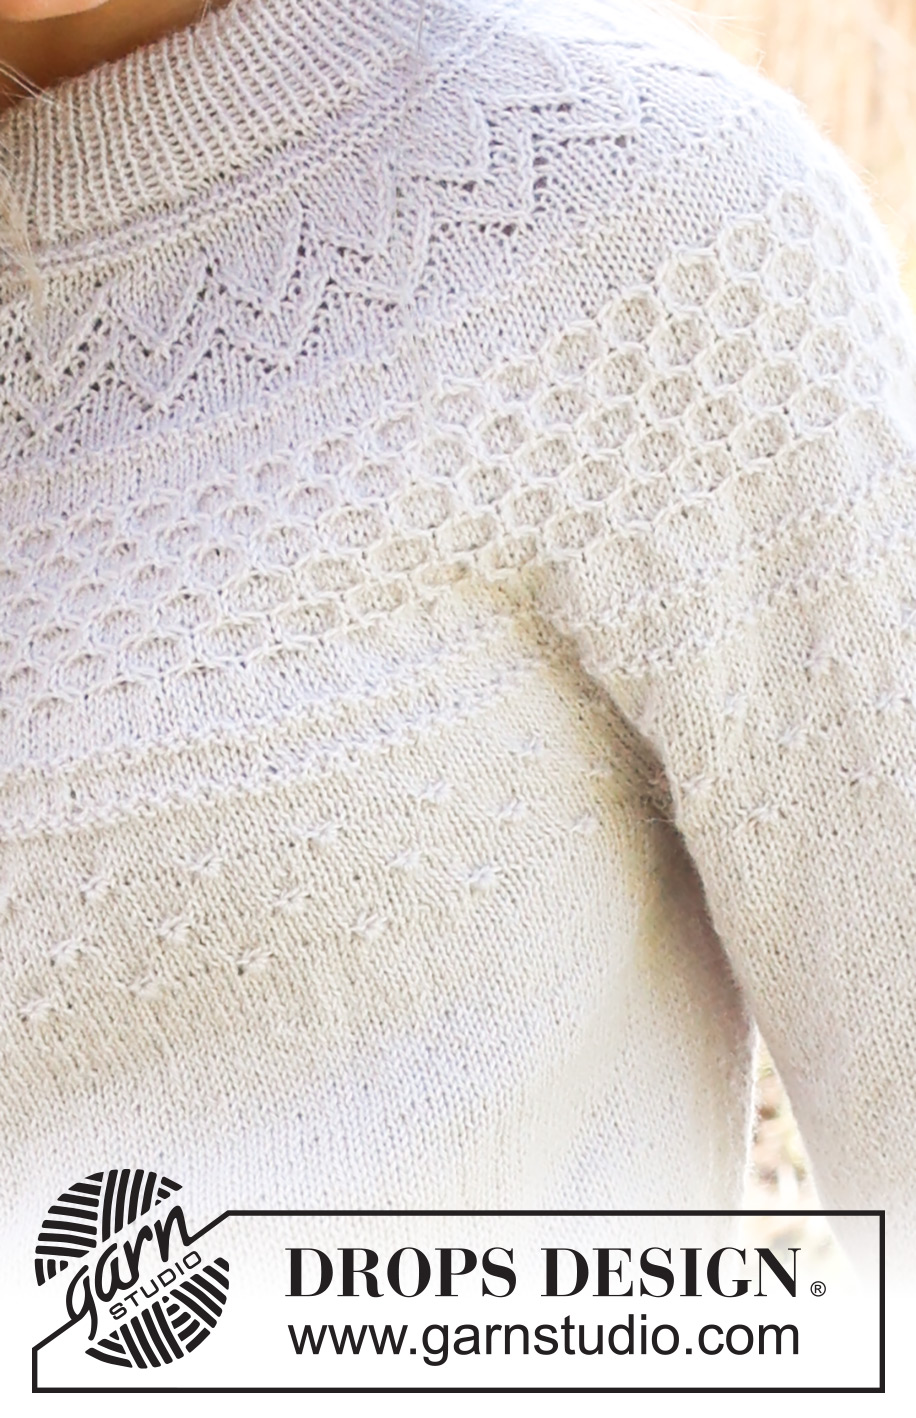
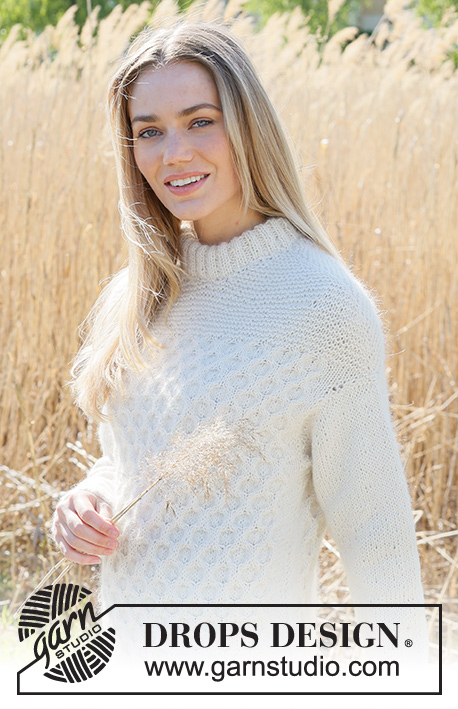
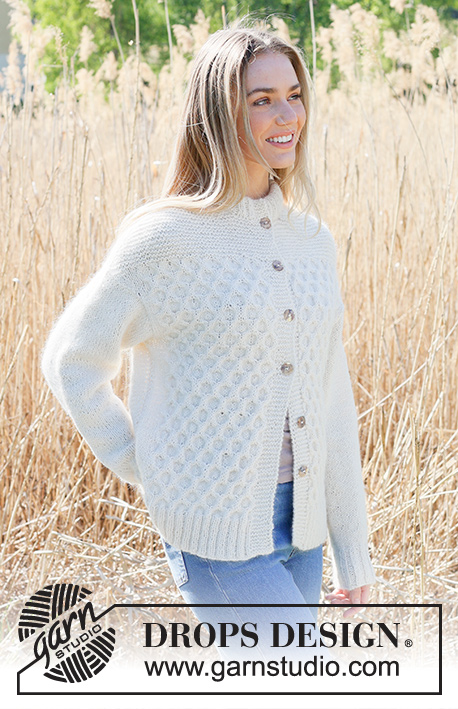
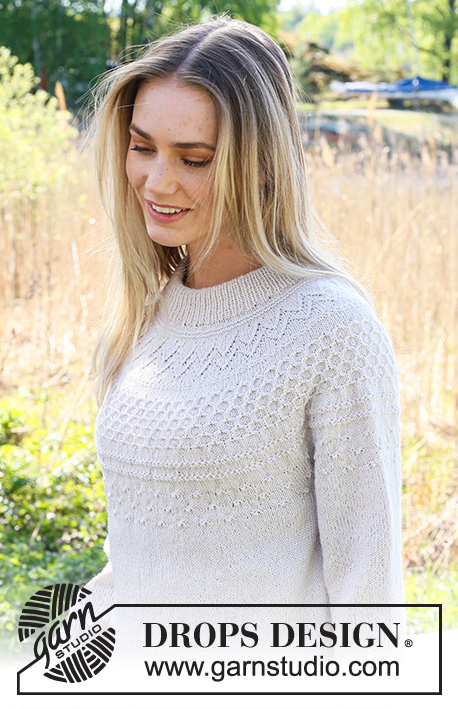
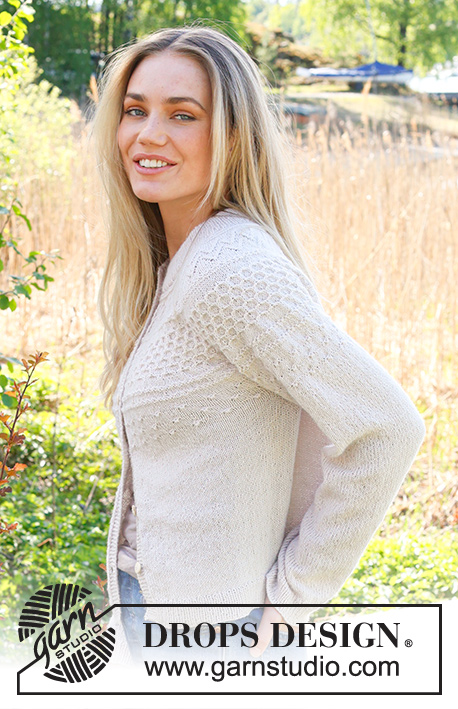
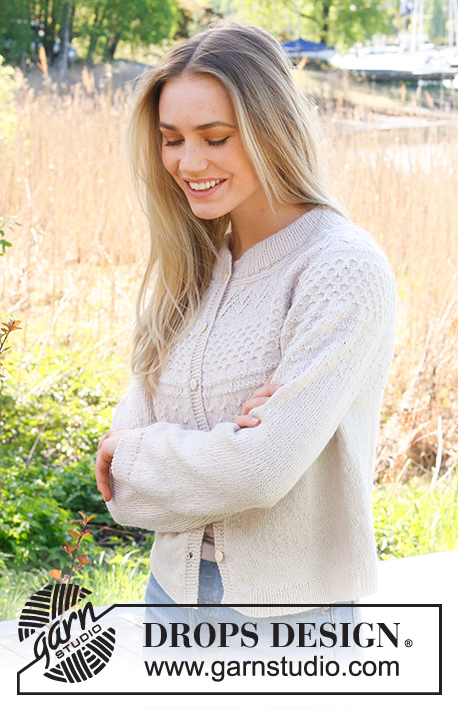
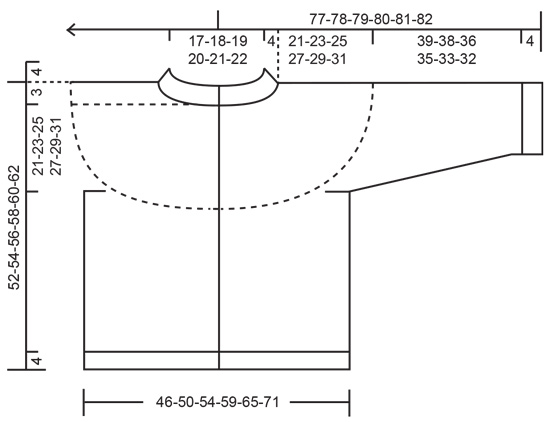
Knitted jacket in DROPS Flora. The piece is worked top down with double neck, round yoke and relief-pattern on the yoke. Sizes S - XXXL.
DROPS 236-11 |
|||||||||||||||||||||||||||||||||||||
|
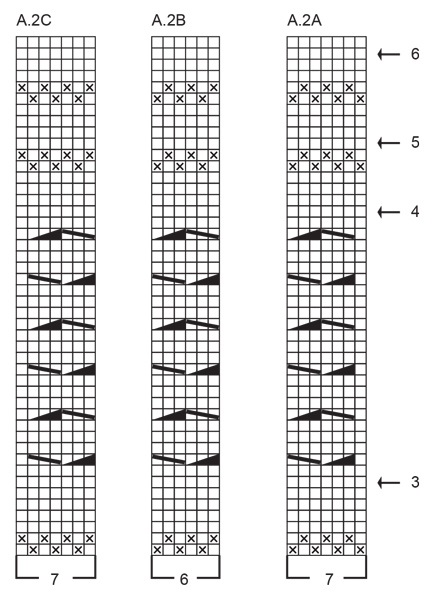
------------------------------------------------------- EXPLANATIONS FOR THE PATTERN: ------------------------------------------------------- RIDGE/GARTER STITCH (worked back and forth): Knit all rows. 1 ridge = knit 2 rows. BUTTONHOLES: Work buttonholes on the right band (when the garment is worn). Work from the right side when there are 5 stitches left on the row as follows: Make 1 yarn over, knit 2 together and knit 3. On the next row (wrong side), knit the yarn over to leave a hole. The first buttonhole is worked when the neck is finished (the piece measures approx. 4 cm after the neck has been folded double). Then work the other 5-5-5-6-6-6 buttonholes with approx. 8-8½-9-8-8½-8½ cm between each one. ELEVATION (back of neck): To make the back of the neck slightly higher when working the yoke, you can work an elevation as described here. Skip this section if you do not want an elevation. Insert 1 marker in the middle stitch on the row. Start from the right side and knit 14-15-16-16-17-18 stitches past the marker-stitch, turn, tighten strand and purl 29-31-33-33-35-37 stitches back. Turn, tighten strand and knit 43-46-49-49-52-55 stitches, turn, tighten strand and purl 57-61-65-65-69-73 stitches back. Turn, tighten strand and knit 71-76-81-81-86-91 stitches, turn, tighten strand and purl 85-91-97-97-103-109 stitches back. Turn, tighten strand and knit 99-106-113-113-120-127 stitches, turn, tighten strand and purl 113-121-129-129-137-145 stitches back. Turn, tighten the strand and knit to the end of the row. Purl 1 row (the bands are knitted). Then work YOKE as described in the text. PATTERN: See diagrams A.1 to A.3. The diagrams show all rows in the pattern from the right side. INCREASE/DECREASE TIP (evenly spaced): To work out how to increase/decrease evenly, count the total number of stitches on needle (e.g. 121 stitches), and divide by the number of increases/decreases to be made (e.g. 34) = 3.6. In this example, increase by making 1 yarn over after alternately each 3rd and 4th stitch (do not increase the bands). On the next row work the yarn overs twisted to avoid holes. When decreasing, knit together alternately each 2nd and 3rd stitch and each 3rd and 4th stitch. DECREASE TIP (for sleeves): Start 3 stitches before the marker, knit 2 together, knit 2 (marker sits between these 2 stitches), slip 1 stitch as if to knit, knit 1 and pass the slipped stitch over the knitted stitch. ------------------------------------------------------- START THE PIECE HERE: ------------------------------------------------------- JACKET – SHORT OVERVIEW OF THE PIECE. The neck and yoke are worked back and forth with circular needle, from mid front and top down. The yoke is divided for body and sleeves and the body continued back and forth with circular needle. The sleeves are worked in the round with double pointed needles/short circular needle, top down. DOUBLE NECK: Cast on 121-125-129-133-139-143 stitches with DROPS Flora using 2 short circular needles size 2.5 mm and 3 mm held together. Remove the needle size 3 mm (doing this gives you an elastic cast-on edge) and keep stitches on circular needle size 2.5 mm. Work the first row as follows from the right side: 1 stitch in GARTER STITCH – see description above, * knit 1, purl 1*, work from *-* until there are 2 stitches left, knit 1 and 1 stitch in garter stitch. Work this rib back and forth for 4 cm. Cast on 6 stitches at the end of the next 2 rows = 133-137-141-145-151-155 stitches. Continue the rib as before with 6 stitches in garter stitch on each side (bands) until the rib measures 8 cm from the cast-on edge – adjust so the next row is worked from the right side. Fold the neck double to the inside and work as follows from the right side: 6 stitches in garter stitch, work rib as before, working every 2nd stitch together with its corresponding stitch on the cast-on edge and until there are 7 stitches left on the row, knit 1 and 6 stitches in garter stitch. Change to circular needle size 3 mm. Work the next row as follows from the wrong side: 6 stitches in garter stitch, purl until there are 6 stitches left and increase 34-38-34-38-40-44 stitches evenly spaced – read INCREASE/DECREASE TIP, 6 stitches in garter stitch = 167-175-175-183-191-199 stitches. Insert 1 marker inside the band at the beginning of the row – this is used to measure the yoke. You can now work an ELEVATION at the back – read description above. If you do not want an elevation go straight to YOKE. YOKE: Work 2-2-6-6-8-10 rows of stocking stitch with 6 stitches in garter stitch on each side – remember the BUTTONHOLES on the right band – read description above. REMEMBER THE KNITTING TENSION! Work 2 ridges back and forth over all stitches. Work the next row from the right side as follows: 6 stitches in garter stitch, A.1A, work A.1B until there are 11 stitches left, A.1C, 6 stitches in garter stitch. Continue this pattern, increasing as follows at each arrow: Arrow-1: Increase 40-40-48-56-64-64 stitches evenly spaced = 207-215-223-239-255-263 stitches. Arrow-2: Increase 47-51-61-69-65-75 stitches evenly spaced = 254-266-284-308-320-338 stitches. When A.1 is finished work A.2 as follows from the right side: 6 stitches in garter stitch, A.2A, work A.2B until there are 13 stitches left, A.2C, 6 stitches in garter stitch. Continue this pattern, increasing as follows at each arrow: Arrow-3: Increase 102-108-114-126-126-138 stitches evenly spaced = 356-374-398-434-446-476 stitches (you increase more stitches here as the next pattern tightens the piece slightly). Arrow-4: Decrease 6-6-6-12-12-12 stitches evenly spaced – remember INCREASE/DECREASE TIP = 350-368-392-422-434-464 stitches. Arrow-5: Increase 24-30-30-30-36-42 stitches evenly spaced = 374-398-422-452-470-506 stitches. Arrow-6: Increase 13-21-29-31-37-41 stitches evenly spaced = 387-419-451-483-507-547 stitches. The increases are finished in sizes S, M and L. When A.2 is finished work A.3 as follows from the right side: 6 stitches in garter stitch, A.3A, work A.3B until there are 13 stitches left, A.3C, 6 stitches in garter stitch. Continue this pattern, increasing as follows at the arrow (applies only to sizes XL, XXL and XXXL): Arrow-7: Increase 16-24-24 stitches evenly spaced = 499-531-571 stitches. OVERVIEW OF THE NEXT SECTION: Continue with A.3 as described below. In addition the yoke is divided for the body and sleeves. Read PATTERN and DIVIDING FOR BODY AND SLEEVES before continuing. PATTERN: S and M: When A.3 is finished (a total of 3 rows of knots), continue with stocking stitch with 6 stitches in garter stitch on each side. NOTE: The yoke is divided for the body and sleeves before A.3 is finished. L: When A.3 is finished, work the first 6 rows in the repeat marked with a star (a total of 4 rows of knots), then continue with stocking stitch with 6 stitches in garter stitch on each side. NOTE: The yoke is divided for the body and sleeves before A.3 is finished. XL, XXL and XXXL: When A.3 is finished, work the repeat marked with a star until you have a total of 5-6-6 rows of knots, then continue with stocking stitch with 6 stitches in garter stitch on each side. NOTE: The yoke is divided for the body and sleeves before A.3 is finished. DIVIDING FOR BODY AND SLEEVES: When the yoke measures 21-23-25-27-29-31 cm from the marker, divide for the body and sleeves as follows: Work 61-67-71-77-84-92 stitches as before (front piece), place the next 77-81-89-101-103-107 stitches on a thread for the sleeve, cast on 8-8-10-10-12-12 stitches (in side under sleeve), work 111-123-131-143-157-173 stitches (back piece), place the next 77-81-89-101-103-107 stitches on a thread for the sleeve, cast on 8-8-10-10-12-12 stitches (in side under sleeve), work the last 61-67-71-77-84-92 stitches (front piece). The body and sleeves are finished separately. The piece is now measured from here! BODY: = 249-273-293-317-349-381 stitches. Finish A.3 as described above – NOTE: After the division, the pattern will not fit under the sleeves; work pattern as far as possible with the remaining stitches under the sleeve in stocking stitch (the pattern is continued neatly from the yoke on the front and back pieces). When A.3 is finished (a total of 3-3-4-5-6-6 rows of knots), continue with stocking stitch with 6 stitches in garter stitch on each side until the body measures 24 cm from the division. Knit 1 row from the right side and increase 48-54-58-62-68-76 stitches evenly spaced (do not increase the bands) = 297-327-351-379-417-457 stitches. Change to circular needle size 2.5 mm and work the next row from the wrong side as follows: 6 stitches in garter stitch, * purl 1, knit 1 *, work from *-* until there are 7 stitches left, purl 1 and 6 stitches in garter stitch. Continue this rib for 4 cm. Cast off a little loosely. The jacket measures approx. 52-54-56-58-60-62 cm from the shoulder down. SLEEVES: Place the 77-81-89-101-103-107 stitches from the thread on the one side of the piece on short circular needle/double pointed needles size 3 mm and knit up 1 stitch in each of the new stitches cast on under the sleeve = 85-89-99-111-115-119 stitches. Insert a marker in the middle of the new stitches under the sleeve. Finish A.3 in the round as described above. NOTE: After the division, the pattern will not fit under the sleeve; work pattern as far as possible and then the stitches under the sleeve in stocking stitch. When A.3 is finished continue with stocking stitch. When the sleeve measures 3 cm from the division, decrease 2 stitches under the sleeve – read DECREASE TIP. Decrease like this every 4-4-2½-1½-1½-1½ cm a total of 9-9-13-18-19-19 times = 67-71-73-75-77-81 stitches. Continue working until the sleeve measures 39-38-36-35-33-32 cm from the division. There is 4 cm left to finished length; try the jacket on and work to desired length.. Knit 1 round where you increase 13-13-13-15-15-15 stitches evenly spaced = 80-84-86-90-92-96 stitches. Change to double pointed needles size 2.5 mm and work rib (knit 1, purl 1) for 4 cm. Cast off a little loosely. The sleeve measures approx. 43-42-40-39-37-36 cm from the division. Work the other sleeve in the same way. ASSEMBLY: Sew together the openings mid-front by the neck with small stitches. Sew the buttons onto the left band. |
|||||||||||||||||||||||||||||||||||||
Diagram explanations |
|||||||||||||||||||||||||||||||||||||
|
|||||||||||||||||||||||||||||||||||||
 |
|||||||||||||||||||||||||||||||||||||
 |
|||||||||||||||||||||||||||||||||||||
 |
|||||||||||||||||||||||||||||||||||||
 |
|||||||||||||||||||||||||||||||||||||
Have you finished this pattern?Tag your pictures with #dropspattern #misssummerbeecardigan or submit them to the #dropsfan gallery. Do you need help with this pattern?You'll find 34 tutorial videos, a Comments/Questions area and more by visiting the pattern on garnstudio.com. © 1982-2026 DROPS Design A/S. We reserve all rights. This document, including all its sub-sections, has copyrights. Read more about what you can do with our patterns at the bottom of each pattern on our site. |
|||||||||||||||||||||||||||||||||||||


With over 40 years in knitting and crochet design, DROPS Design offers one of the most extensive collections of free patterns on the internet - translated to 17 languages. As of today we count 324 catalogues and 12290 patterns translated into English (UK/cm).
We work hard to bring you the best knitting and crochet have to offer, inspiration and advice as well as great quality yarns at incredible prices! Would you like to use our patterns for other than personal use? You can read what you are allowed to do in the Copyright text at the bottom of all our patterns. Happy crafting!
Post a comment to pattern DROPS 236-11
We would love to hear what you have to say about this pattern!
If you want to leave a question, please make sure you select the correct category in the form below, to speed up the answering process. Required fields are marked *.