
Popular categories
Looking for a yarn?


Comments / Questions (54)
![]() Berit wrote:
Berit wrote:
Hej I forhold til Hals, hvad menes der med: Luk 1 maske af 4 gange Mvh Berit
13.04.2026 - 13:17DROPS Design answered:
Hej Berit, Du lukker 1. maske af fra halsen, strikker pinden ud, vender, strikker de første antal masker som skal på tråden, sætter dem på tråden, strikker pinden ud, vender, lukker 1. maske af, strikker frem til maskerne på tråden, vender, strikker næste antal som skal på tråden, sætter dem på tråden, strikker pinden ud, vender, lukker 1. maske af osv :)
14.04.2026 - 12:14
![]() Berit wrote:
Berit wrote:
Hej I forhold til Hals, hvad menes der med: Luk 1 maske af 4 gange Mvh Berit
12.04.2026 - 15:43
![]() Rozelynn wrote:
Rozelynn wrote:
I've had my eye on this Cherry Sorbet pattern for a long time. Finally got it and worked it. Directions were sketchy through shoulders and neck, but I've been knitting for 50 years and finally deciphered the idea needed to accomplish it. I used Drops Melody in "Petrol." Would love to show my photo as it turned out PERFECT!
31.12.2025 - 21:12
![]() Rasa wrote:
Rasa wrote:
Hvorfor skal den første og den sidste maske strilkes ret på hver pind? Og efter jeg tager masker ind til ærmgæb, skal jeg fodsate med den første og den sidste ret på hver pind ind til jeg når halsen?
24.11.2025 - 15:13DROPS Design answered:
Hej, Det er for at få en kant at strikke op i, i hver side. Men du kan selvfølgelig strikke kantmaskerne som du vil :)
25.11.2025 - 14:03
![]() Susanna wrote:
Susanna wrote:
Hello, I do not understand the shoulder part at all. What to knit and what to cast-off? please help.
09.10.2025 - 11:17DROPS Design answered:
Hi Susanna, you can see this technique HERE. Please note that on the video the numbers of stitches are different than in your pattern. Happy knitting!
10.10.2025 - 09:01
![]() Rabaté Bernadette wrote:
Rabaté Bernadette wrote:
Bonjour. Comment faire ce modèle qu\'avec des aiguilles classiques , sans faire l\'emmanchure avec une aiguille circulaire. Cordialement
08.10.2025 - 07:40DROPS Design answered:
Bonjour Mme Rabaté, retrouvez ici quelques astuces pour vous adapter un modèle sur aiguilles droites; ici, vous pouvez juste tricoter le dos et le devant exactement comme indiqué; avant de faire le col, faites la couture d'une seule des épaules, tricotez le col et terminez par la couture de la 2ème épaule et du col. Bon tricot!
08.10.2025 - 07:54
![]() Dominique Joie wrote:
Dominique Joie wrote:
Bonjour,je ne comprends pas la façon de biaiser les èpaules ,quand faut-il rabattre,quand doit-on laisser les mailles en attente? Merci
17.09.2025 - 12:16DROPS Design answered:
Bonjour Mme Joie, les mailles du biais des épaules sont mises en attente en début de rang à partir de l'emmanchure: tricotez ces mailles (à l'endroit sur l'endroit = épaule droite du dos/gauche du devant / à l'envers sur l'envers = épaule gauche du dos/droite du devant), mettez les en attente et terminez le rang, tournez; au début du rang suivant, rabattez les mailles de l'encolure (si besoin), et terminez le rang, et répétez ces 2 rangs. Bon tricot!
18.09.2025 - 18:08
![]() Mona Nørgaard wrote:
Mona Nørgaard wrote:
..................
11.09.2025 - 18:57
![]() Anna-Lena Wideen wrote:
Anna-Lena Wideen wrote:
Jag förstår inte beskrivningen sned axel, hur ska maskorna sättas på tråd. Annan färg? Hur ska det stickas? Jag är ingen van stickare.
05.09.2025 - 14:50DROPS Design answered:
Hei Anna-Lena. Ta en titt på hjelpevidoene til DROPS 218-21 og videoen: Hur man stickar sista varvet på en sned axel och maskar av. Den viser hvoran man setter masker på en tråd og man kan få en viss forståelse på hva som gjøres, MEN husk å lese teksten til 231-59 slik at du får riktig maskeantall og hvilken teknikk det skal brukes når det snus og lign. mvh DROPS Design
22.09.2025 - 09:39
![]() Lena Gustavsson wrote:
Lena Gustavsson wrote:
Snygg
21.08.2025 - 17:17
|
|
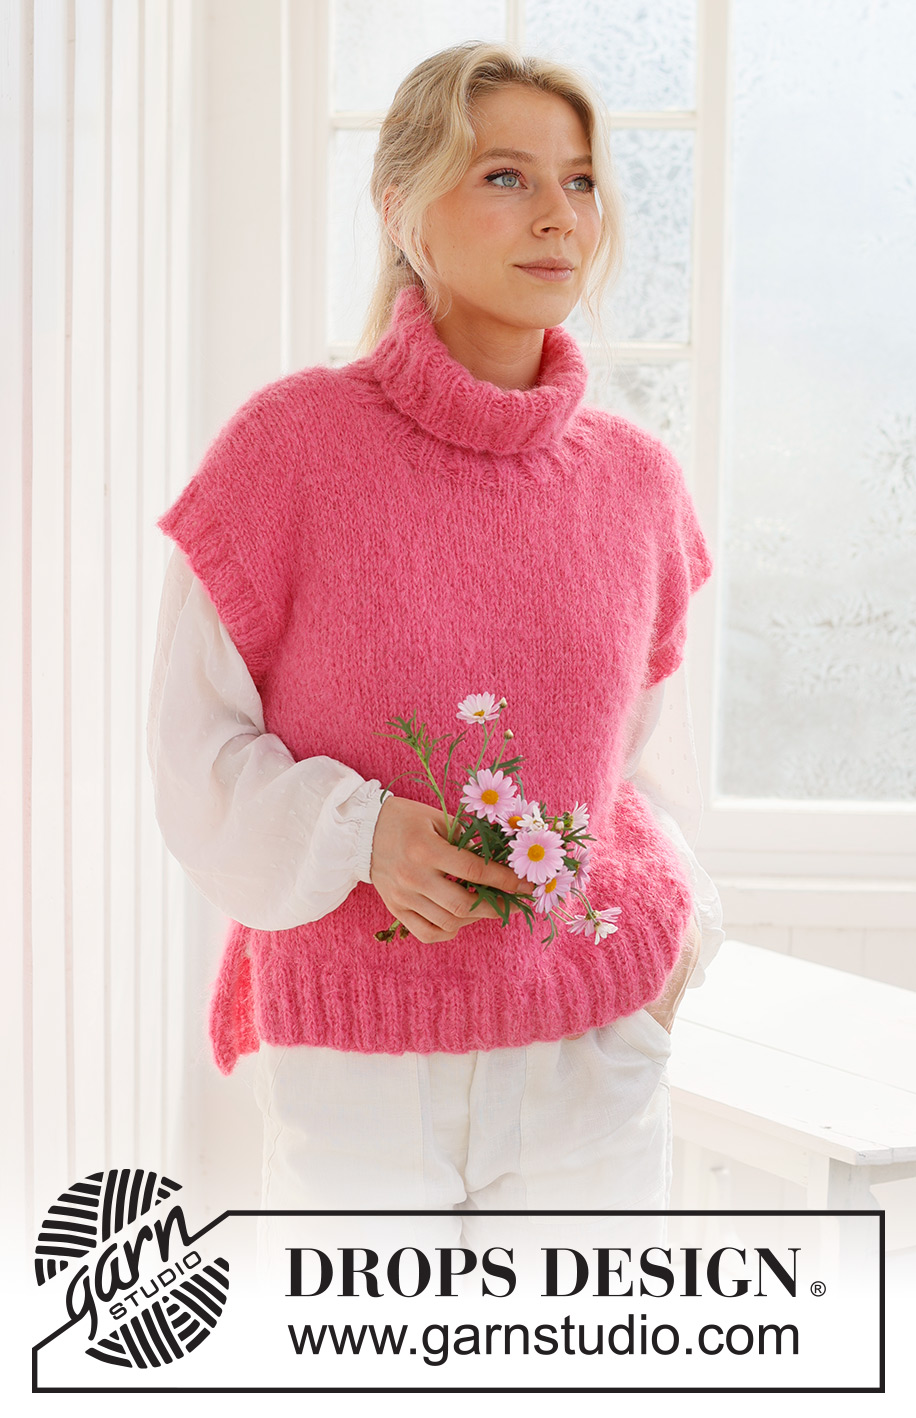
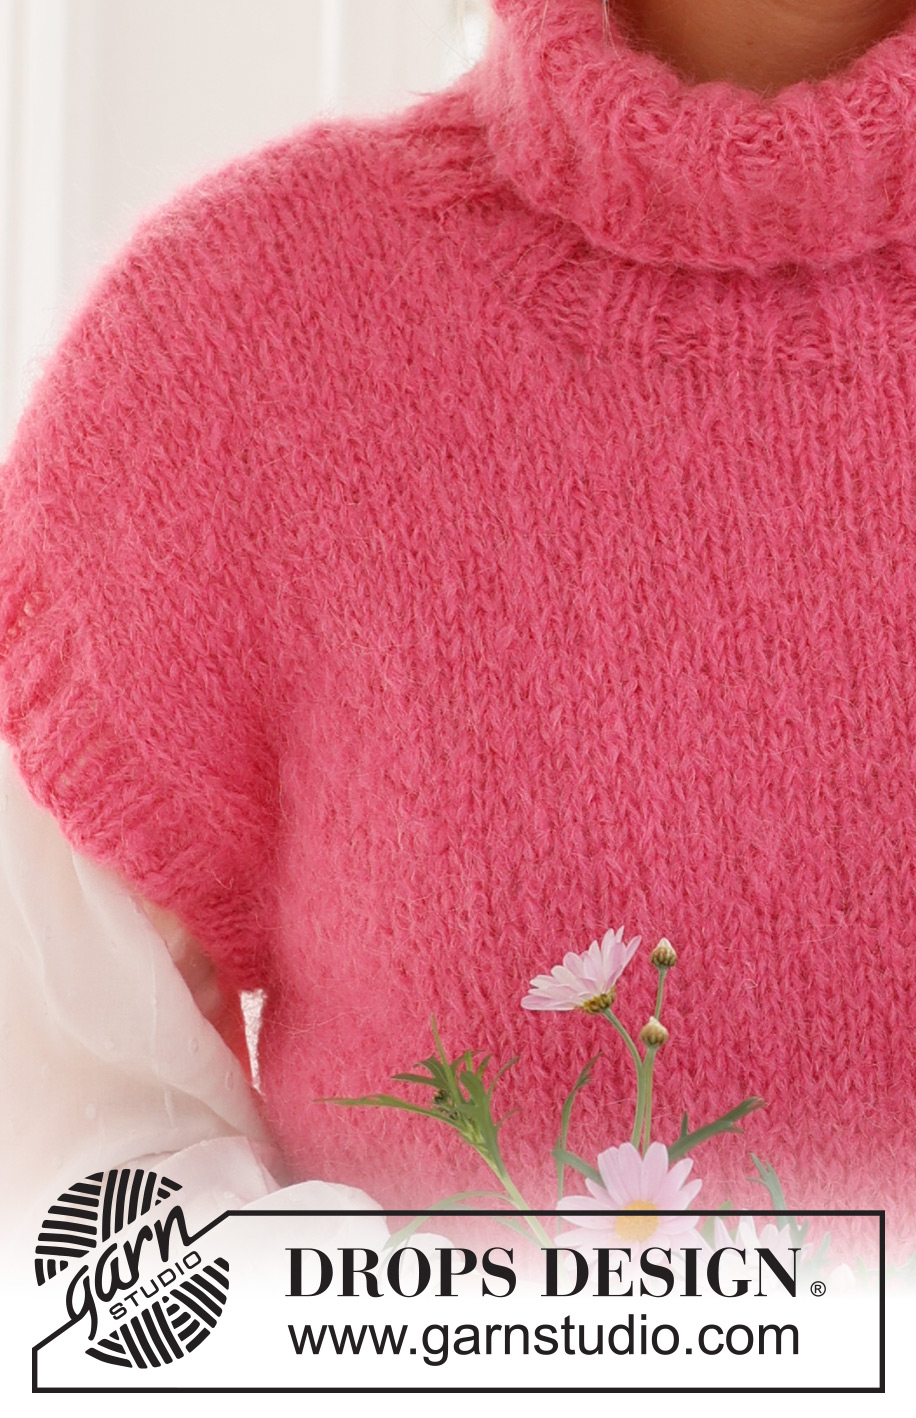
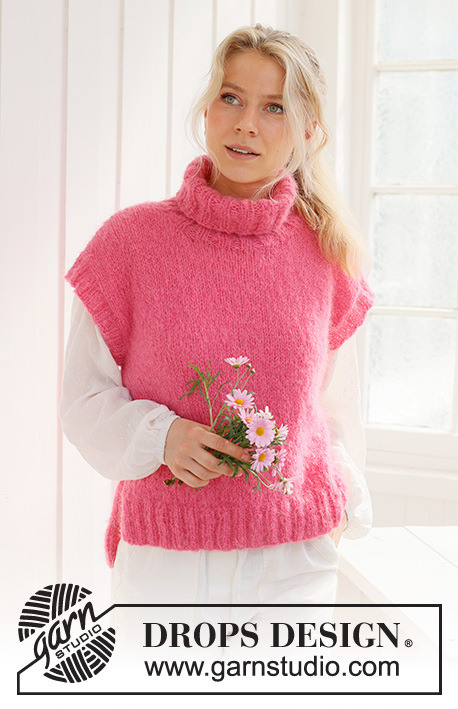
Cherry Sorbet Vest#cherrysorbetvest |
|
 |
 |
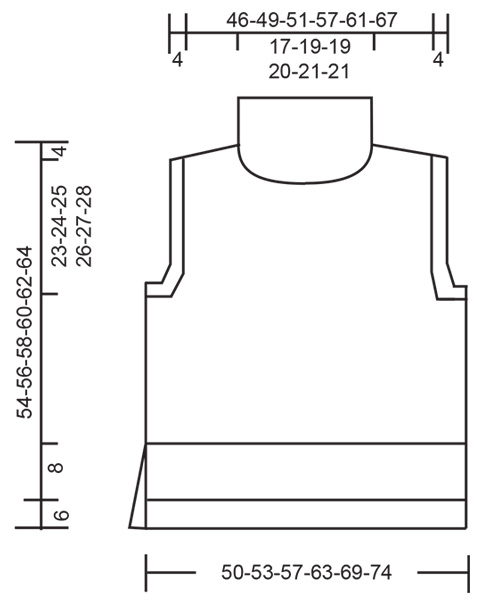
Knitted vest in DROPS Melody. The piece is worked bottom up, in stocking stitch, with high neck and split in the sides. Sizes S – XXXL.
DROPS 231-59 |
|
|
------------------------------------------------------- EXPLANATIONS FOR THE PATTERN: ------------------------------------------------------- RIDGE/GARTER STITCH (worked back and forth): Knit all rows. 1 ridge = knit 2 rows. ------------------------------------------------------- START THE PIECE HERE: ------------------------------------------------------- VEST - SHORT OVERVIEW OF THE PIECE: The front and back pieces are worked separately, back and forth and bottom up. The sleeve-edges and neck are worked to finish. The back piece is 6 cm longer than the front piece. BACK PIECE: Cast on 82-86-94-102-110-118 stitches with circular needle size 4.5 mm and DROPS Melody. Work as follows from the right side: 2 stitches in GARTER STITCH – read description above, work rib (knit 2, purl 2) until there are 4 stitches left, knit 2 and 2 stitches in garter stitch. Continue this rib for 8 cm, with the next row from the right side. Work as follows: 1 stitch in garter stitch, knit 80-84-92-100-108-116 and decrease 12-12-14-14-14-14 stitches evenly over these stitches, 1 edge stitch in garter stitch = 70-74-80-88-96-104 stitches. Change to circular needle size 6 mm and work stocking stitch with 1 stitch in garter stitch on each side. REMEMBER THE KNITTING TENSION! When the piece measures 33-34-35-36-37-38 cm, cast off 3-3-4-4-5-5 stitches at the beginning of the next 2 rows for the armholes = 64-68-72-80-86-94 stitches. Continue with stocking stitch. When the piece measures 56-58-60-62-64-66 cm, cast off the middle 24-26-26-28-30-30 stitches for the neck and finish each shoulder separately. DIAGONAL SHOULDERS: Place the outermost stitches towards armhole on a thread for the diagonal shoulders, but to avoid cutting the strand work them first. Place 7-7-8-9-9-11 stitches on a thread two times, then the last 6-7-7-8-10-10 stitches. All stitches have now been cast off or placed on the thread. Place the 20-21-23-26-28-32 stitches from the thread back on circular needle size 6 mm. Purl 1 row from the wrong side; to avoid holes where you turned in the middle of the row, pick up the strand between 2 stitches and purl it twisted together with the first stitch on the left needle. Then cast off with knit a little loosely from the right side. The piece measures approx. 60-62-64-66-68-70 cm from the cast-on edge to the highest point on the shoulder. Work the other shoulder in the same way. FRONT PIECE: Cast on and work in the same way as the back until the front piece measures 27-28-29-30-31-32 cm. Now cast off 3-3-4-4-5-5 stitches at the beginning of the next 2 rows for the armholes = 64-68-72-80-86-94 stitches. Continue working until the piece measures 48-50-52-53-55-57 cm. Place the middle 16-18-18-20-22-22 stitches on a thread for the neck and finish each shoulder separately. OVERVIEW OF THE NEXT SECTION: Work the neck and the diagonal shoulders as described below. Read NECK and DIAGONAL SHOULDERS before continuing. NECK: Cast off 1 stitch 4 times. DIAGONAL SHOULDERS: AT THE SAME TIME when the piece measures 50-52-54-56-58-60 cm, place the outermost stitches towards armhole on a thread for the diagonal shoulder in the same way as on the back piece. When all the stitches are cast off or placed on a thread, place the 20-21-23-26-28-32 stitches from the thread back on circular needle size 6 mm. Purl 1 row from the wrong side in the same way as on the back piece. Cast off with knit a little loosely from the right side. The piece measures approx. 54-56-58-60-62-64 cm from the cast-on edge to the highest point on the shoulder. Work the other shoulder in the same way. ASSEMBLY: Sew the shoulder seams. Sew the side seams in the outermost loop of the outermost stitch so the seams are flat, leaving 14 cm at the bottom (= split). SLEEVE-EDGES: Using short circular needle size 4.5 mm, start at the bottom of the armhole and knit up from the right side (inside 1 stitch) 64 to 80 stitches around the armhole (the number of stitches must be divisible by 4). Work rib in the round (knit 2, purl 2) for 4 cm. Cast off with knit over knit and purl over purl. Work a similar edge around the other armhole. NECK: Using short circular needle size 4.5 mm, start on the top of one shoulder and knit up from the right side (inside 1 stitch) 60 to 68 stitches around the neck (including the stitches from the thread and with the number of stitches divisible by 4). Work rib in the round (knit 2, purl 2) for 20-20-22-22-24-24 cm. Cast off with knit over knit and purl over purl. |
|
 |
|
Have you finished this pattern?Tag your pictures with #dropspattern #cherrysorbetvest or submit them to the #dropsfan gallery. Do you need help with this pattern?You'll find 25 tutorial videos, a Comments/Questions area and more by visiting the pattern on garnstudio.com. © 1982-2026 DROPS Design A/S. We reserve all rights. This document, including all its sub-sections, has copyrights. Read more about what you can do with our patterns at the bottom of each pattern on our site. |
|


With over 40 years in knitting and crochet design, DROPS Design offers one of the most extensive collections of free patterns on the internet - translated to 17 languages. As of today we count 324 catalogues and 12291 patterns translated into English (UK/cm).
We work hard to bring you the best knitting and crochet have to offer, inspiration and advice as well as great quality yarns at incredible prices! Would you like to use our patterns for other than personal use? You can read what you are allowed to do in the Copyright text at the bottom of all our patterns. Happy crafting!
Post a comment to pattern DROPS 231-59
We would love to hear what you have to say about this pattern!
If you want to leave a question, please make sure you select the correct category in the form below, to speed up the answering process. Required fields are marked *.