
Popular categories
Looking for a yarn?


Comments / Questions (13)
![]() Francine wrote:
Francine wrote:
Bonjour, Je voudrais m’assurer que j’ai bien compris.Pour le bandeau,lorsque je suis sur l’envers,je tricote le A-2 en fin de rang (avant la lisière)? Merci!
28.07.2022 - 00:43DROPS Design answered:
Bonjour Francine, vous devrez suivre le diagramme dans le sens opposé sur l'envers, on lit le rang de gauche à droite, donc apres 1 maille lis, vous auriez le diagramme A.2 (c'est-a dire au debut du rang sur l'envers). Regardez aussi la video ICI. Bon tricot!
28.07.2022 - 08:58
![]() Carla wrote:
Carla wrote:
Fijne hoofdband geworden! Dank voor het mooie patroon! Het is niet symmetrisch maar met simpele aanpassing symmetrisch te maken (met 7 rechte lijnen) door de laatste 2 steken altijd in ribbelsteek te breien (recht). Dus: 1e toer: 1 kantsteek ribbel - 2 re 1 li (7x) - 1 ribbel - 1 kantsteek ribbel 2e toer: 1 kantsteek ribbel - 2 re 1 li (7x) - 1 ribbel - 1 kantsteek ribbel Dit herhalen.
06.05.2022 - 10:03
![]() Magdalena wrote:
Magdalena wrote:
Zum muster a1: anscheinend sind die hinreihen (von rechts nach links zu lesen?) und rückreihen (von links nach rechts?) notiert. aber warum die bemerkung, dass die zeichen in der rückreihe verkehrt gelesen werden? es sind ja alle reihen notiert, oder? heisst das konkret in hinreihe: rechts rechts links und in rückreihe auch rechts rechts links? weil ich die zeichen ja umdeuten soll? ergibt für mich keinen sinn. muss ich die rückmaschen so stricken wie sie erscheinen?
14.09.2021 - 16:27DROPS Design answered:
Liebe Magdalena, bei A.1 wird es genau so gestrickt, dh bei den Rückreihen stricken Sie nicht wie die Maschen erscheinen aber wie im Diagram gezeigt: rechts, rechts links (damit die Maschen bei den Hinreihen: rechts, links, links aussehen), so haben Sie (Vorderseite): 1 M glatt rechts, 1 Masche kraus rechts, 1 M glatt links. Viel Spaß beim stricken!
15.09.2021 - 07:20
![]() Mo wrote:
Mo wrote:
Zeigt die Strickschrift Hin- und Rückreihen oder nur die Hinreihen?
10.02.2021 - 15:59DROPS Design answered:
Liebe Mo, die Diagramme zeigen alle Reihen die Hin- sowie die Rückreihen, < a href="https://www.garnstudio.com/lesson.php?id=68&cid=9">hier lesen Sie mehr über Diagramme. Viel Spaß beim stricken!
10.02.2021 - 16:06
![]() Anna Léonora Støle wrote:
Anna Léonora Støle wrote:
Hei :) Jeg ser etter et strikkemønster for pannebånd, som søstra mi skal strikke til meg. Hun har nylig begynt å strikke og jeg lurer på hvilket av mønstrene som er enkle/ for nybegynnere. Står det "vanskelighetsgrad" på strikkemønstrene noe sted? :-) Mvh anna léonora
29.10.2020 - 15:24DROPS Design answered:
Hej Anna, Hvis i vælger en opskrift med tilhørende video, så kan det ikke gå galt :) Pandebånd
29.10.2020 - 15:47
![]() Emilie wrote:
Emilie wrote:
Hva menes med en kantmaske rille? Skal den bare strikkes rett hele veien, eller skal også tas løst av i begynnelsen?
20.10.2020 - 16:52DROPS Design answered:
Hei Emilie, Du strikker den kantmasken rett hele veien. God fornøyelse!
21.10.2020 - 07:55
![]() Lexa wrote:
Lexa wrote:
Es wird nicht gesagt, dass das Stirnband (siehe Foto) der linken Seite der Anleitung entspricht, nicht der rechten . Auf dem Foto sind es 8 Rippen mit re Maschen, in der Anleitung nur 7 und das Ganze ist nicht symmetrisc!. Ich habe es so geändert: RM re , A.1 : 1 m re, 2 M li, das 7 x, dann A. 2 1 M li und eine RM re. Dann kommt ist es auch symmetrisch hin und entspricht dem Stirnband auf dem Foto. Alles andere muss dann angepasst werden.
03.12.2019 - 08:45
![]() Shirley Yost wrote:
Shirley Yost wrote:
Do the charts show right side rows only?
02.03.2019 - 05:17DROPS Design answered:
Hello Shirley. Charts show rows on both sides of work. Happy knitting!
02.03.2019 - 08:32
![]() Hanna wrote:
Hanna wrote:
Hei! Skal A2 alltid strikkes rett før siste maske, eller skal den strikkes rett etter første maske på vrangen?
27.01.2019 - 23:14DROPS Design answered:
Hei Hanna. Diagrammene viser mønsteret sett fra rettsiden. De skal strikke på samme sted oppover, så når du strikker fra vrangen må diagrammene strikkes i motsatt rekkefølge, og motsatt vei (fra venstre mot høyre). God fornøyelse
30.01.2019 - 09:43
![]() Helle wrote:
Helle wrote:
Spørgsmål til maske antal. 7x3=21+ 2 kantmasker, en i hver side. Det giver 23 m, men opskriften siger 24 m.
16.01.2019 - 14:31DROPS Design answered:
Hej Helle, husk A.2 (1 maske) inden den sidste kantmaske :)
17.01.2019 - 08:48
|
|||||||
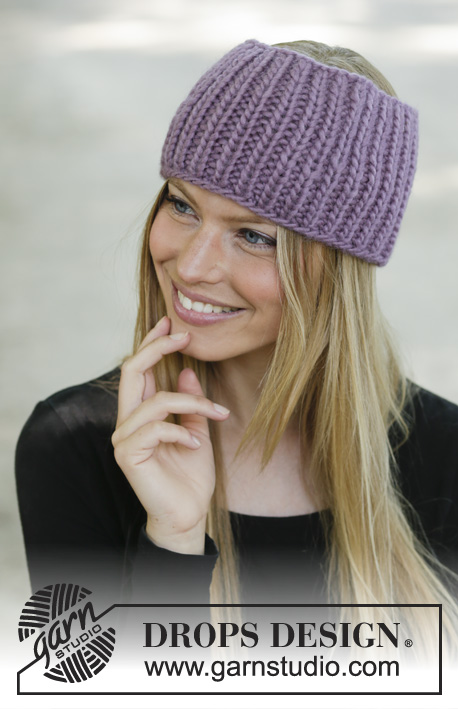
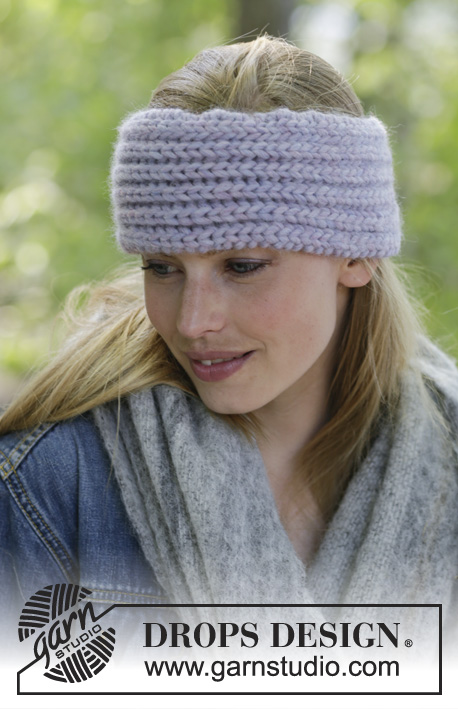
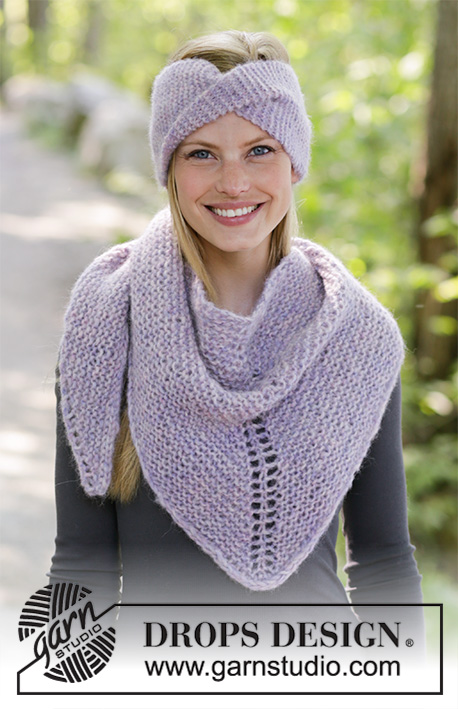
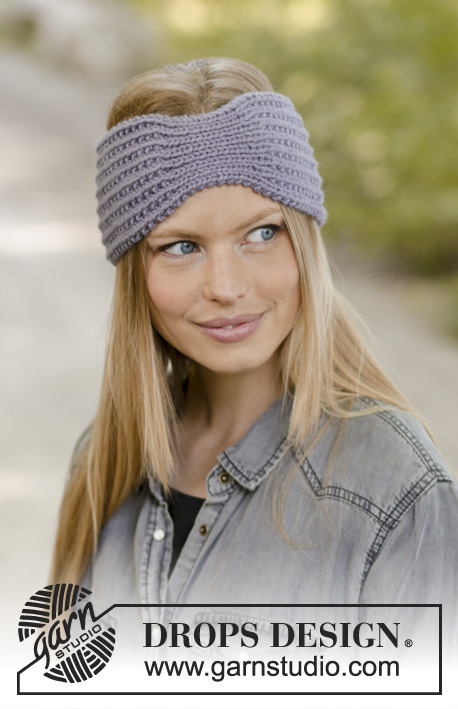
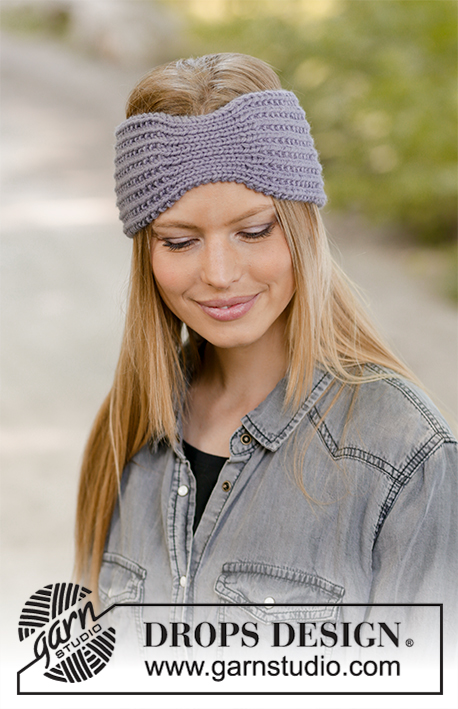
Lavender Meeting#lavendermeetingheadband |
|||||||
 |
 |
||||||
Knitted head band in DROPS Nepal. Piece is knitted back and forth with texture.
DROPS 192-58 |
|||||||
|
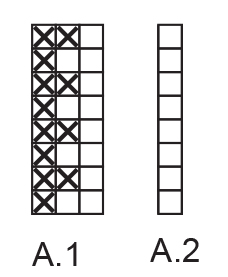
---------------------------------------------------------- EXPLANATION FOR THE PATTERN: ---------------------------------------------------------- GARTER STITCH (back and forth): 1 ridge = knit 2 rows. PATTERN: See diagrams A.1 and A.2. ---------------------------------------------------------- START THE PIECE HERE: ---------------------------------------------------------- HEAD BAND - SHORT OVERVIEW OF THE GARMENT: Work head band back and forth on double pointed needles and sew together mid back. HEAD BAND: Cast on 24 stitches on double pointed needles size 5 mm = US 8 with Nepal. Work 1 ridge in GARTER STITCH - read explanation above. Now work pattern as follows: 1 edge stitch in garter stitch, A.1 (= 3 stitches) 7 times in total, A.2 (= 1 stitch), 1 edge stitch in garter stitch. Continue back and forth like this until piece measures 21 cm = 8¼", adjust so that next row is worked from right side. REMEMBER THE KNITTING GAUGE! Work 1 edge stitch in garter stitch * knit 1, purl 2 stitch together *, work from *-* 7 times in total, knit 1, 1 edge stitch in garter stitch = 17 stitches. Insert a marker thread here! NOW MEASURE PIECE FROM HERE! Switch to double pointed needles size 3.5 mm = US 4. Continue back and forth with knit over knit and purl over purl until piece measures 5 cm = 2" - adjust so that next row is worked from right side. Switch back to double pointed needles size 5 mm = US 8. Work next row as follows: 1 edge stitch in garter stitch, knit 1, * 1 yarn over, purl 1, knit 1 *, work from *-* 7 times in total = 24 stitches. On next row knit yarn overs twisted to avoid holes. Continue with pattern as follows: 1 edge stitch in garter stitch, A.1 (= 3 stitches) 7 times in total, A.2 (= 1 stitch), 1 edge stitch in garter stitch. Continue back and forth like this until piece measures 48 cm = 19" in total from cast-on edge (or desired length). Work 1 ridge. Bind off. Sew together head band mid back inside cast-on and bind-off edge. Fasten off. |
|||||||
Diagram explanations |
|||||||
|
|||||||
 |
|||||||
Have you finished this pattern?Tag your pictures with #dropspattern #lavendermeetingheadband or submit them to the #dropsfan gallery. Do you need help with this pattern?You'll find 15 tutorial videos, a Comments/Questions area and more by visiting the pattern on garnstudio.com. © 1982-2026 DROPS Design A/S. We reserve all rights. This document, including all its sub-sections, has copyrights. Read more about what you can do with our patterns at the bottom of each pattern on our site. |
|||||||


With over 40 years in knitting and crochet design, DROPS Design offers one of the most extensive collections of free patterns on the internet - translated to 17 languages. As of today we count 324 catalogs and 12290 patterns - 12280 of which are translated into English (US/in).
We work hard to bring you the best knitting and crochet have to offer, inspiration and advice as well as great quality yarns at incredible prices! Would you like to use our patterns for other than personal use? You can read what you are allowed to do in the Copyright text at the bottom of all our patterns. Happy crafting!
Post a comment to pattern DROPS 192-58
We would love to hear what you have to say about this pattern!
If you want to leave a question, please make sure you select the correct category in the form below, to speed up the answering process. Required fields are marked *.