
Popular categories
Looking for a yarn?


Comments / Questions (24)
![]() VU wrote:
VU wrote:
Bonsoir madame, Pourriez vous m'indiquer quand on doit faire les rangs pour les raccourcis pour la pointe. Merci
13.12.2024 - 21:37DROPS Design answered:
Bonjour Mme Vu, tous les 2 rangs sur l'endroit, autrement dit, tricotez 2 rangs sur toutes les mailles, puis au rang sur l'endroit suivant, tricotez jusqu'à ce qu'il reste 6,8 ou 10 mailles sur l'aiguille gauche, tournez et tricotez le rang retour sur l'envers; répétez ces 4 rangs ainsi tout du long. Bon tricot!
16.12.2024 - 09:46
![]() Lilou wrote:
Lilou wrote:
J'ai choisi ce modèle sur 2 aiguilles, ne m'en sortant absolument pas avec les doubles pointes, ce qui est la majorité des explications de vos chaussettes, mais je m'aperçois que ce n'est pas plus simple sur 2 aiguilles!!... je crois que je vais définitivement abandonner de faire des chaussettes avec lesexplications des modèles drops. Mais merci quand même pour tous les autres
08.10.2020 - 09:22DROPS Design answered:
Bonjour Lilou, nous sommes désolés que vous rencontriez autant de souci avec nos modèles de chaussettes, avez-vous pensé à consulter les différentes vidéos et leçons? Rappelez-vous que pour toute assistance personnalisée et individuelle, vous pouvez vous adresser à votre magasin, même par mail ou téléphone on saura vous aider; Bon tricot!
08.10.2020 - 10:59
![]() LILOU wrote:
LILOU wrote:
Bonjour. je ne comprends absolument pas dans l'explication : toutes les tailles "tricoter 4 rgs sur toutes les mailles (ne pas oublier les rangs raccourcis .... coté opposé...."????je trouve que tout est mélangé je n'ai rien compris. Merci de m'éclairer.
08.10.2020 - 09:07DROPS Design answered:
Bonjour Lilou, pour former la pointe du chausson, vous devez tricoter des rangs raccourcis: 2 rangs sur toutes les mailles, 2 rangs en laissant les 6-8-10 m côté pointe non tricotées. Ainsi, on a moins de rangs côté pointe = à gauche de l'ouvrage vu sur l'endroit; Bon tricot!
08.10.2020 - 10:57
![]() Selam wrote:
Selam wrote:
I mean what happens to the st. On helping thread?
14.02.2020 - 15:50DROPS Design answered:
Dear Selam, the stitches from the stitch holder at the end of the socks are sewn together to the cast on edge - see ASSEMBLY. Happy knitting!
14.02.2020 - 16:21
![]() Selam wrote:
Selam wrote:
I get that but what happens to the 68 st. Before the 10 new cast ons ? Bottom of the socks?
14.02.2020 - 13:52DROPS Design answered:
Dear Selam, do you mean under LEG part? These 10 stitches are for the flap on the leg part, ie cast on these 10 stitches, pick up 40 to 50 sts along the sock, work garter stitch for 10 cm, cast off. Then sew buttons throught the 10 stitch-section and in the other side of leg part - see picture. Hope this helps. Happy knitting!
14.02.2020 - 14:11
![]() Selam Belay wrote:
Selam Belay wrote:
Do I cast of the 68 before the new 10 sts?
13.02.2020 - 23:38DROPS Design answered:
Dear Mrs Belay, in 2nd size you cast on 67 stitches then work short rows starting with 10 sts. Happy knitting!
14.02.2020 - 08:36
![]() Jette Simonsen wrote:
Jette Simonsen wrote:
Hej, jeg har brug for hjælp til at forstå denne opskrift. Jeg har slået 60 m op på p 5, så langt så godt, men hvad skal jeg så - skal der startes med vende pinde med det samme ?
26.01.2016 - 11:51DROPS Design answered:
Hej Jette, ja du fortsætte ifølge opskriften; Strik 10 m vend osv... God fornøjelse!
26.01.2016 - 16:10
![]() Selam wrote:
Selam wrote:
Thanks for the previous response. Im not sure how the leg is worked, could you please explain 10 new St and pick up 40( for example) Not sure where these 40 st are coming from? Thanks
16.12.2014 - 22:04DROPS Design answered:
Dear Selam, the text under "leg" refers to the edge worked around the top of the sock, ie you first cast on 10 sts, then pick up 40 sts (in 1st size) along the upper edge of socks (side where you previously worked the first and last short rows for elevation on back) and work 10 cm garter sts over these 50 sts (in 1st size). The 10 sts are the flap that will be sewn with buttons. Happy knitting!
17.12.2014 - 08:42
![]() Selam wrote:
Selam wrote:
Hi when do i start with ..."remember short rows towards the toe - i.e. in the opposite side of elevation"? thanks
14.12.2014 - 14:15DROPS Design answered:
Dear Selam, that's correct, the short rows towards the toe are on the opposite side of short rows worked at very beg of sock (and worked again at the end of socks). Happy knitting!
14.12.2014 - 16:38
![]() Petra Gröger wrote:
Petra Gröger wrote:
Liebes Drops-Team, diese Socke gefällt mir sehr gut, würde Sie aber gerne in einem Sockenwollgarn stricken und mit dünneren Nadeln. Habt Ihr eine Anleitung für z.B. Drops Delight ? Oder wie kann ich es mir selbst umrechnen ? Liebe Grüße von einem großen Garnstudio - Drops Fan Petra aus Dresden
23.11.2013 - 15:31DROPS Design answered:
Liebe Petra, das Modell ist nicht ganz einfach umzurechnen. Alle Anleitungen für dünnere Sockenwolle (DROPS Fabel oder Delight) finden Sie in unserer Musterdatenbank.
25.11.2013 - 07:49
|
|
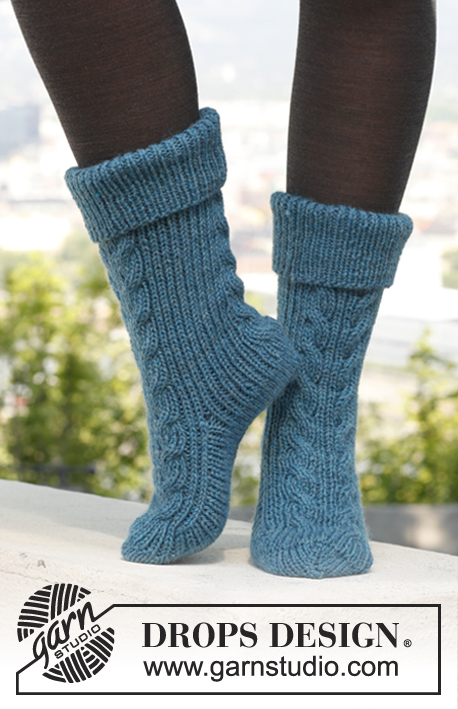
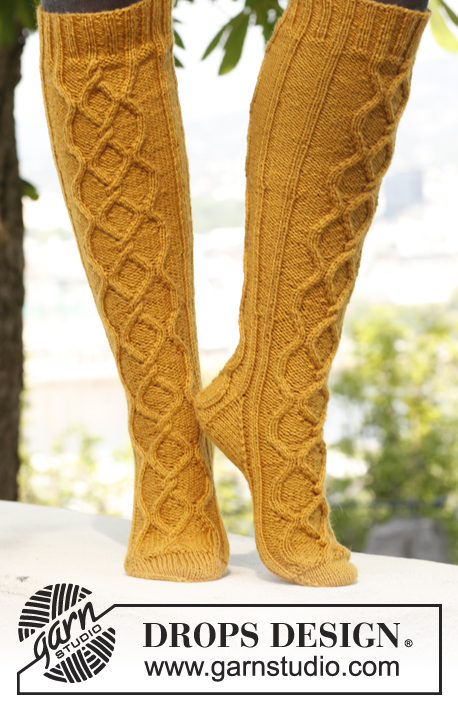
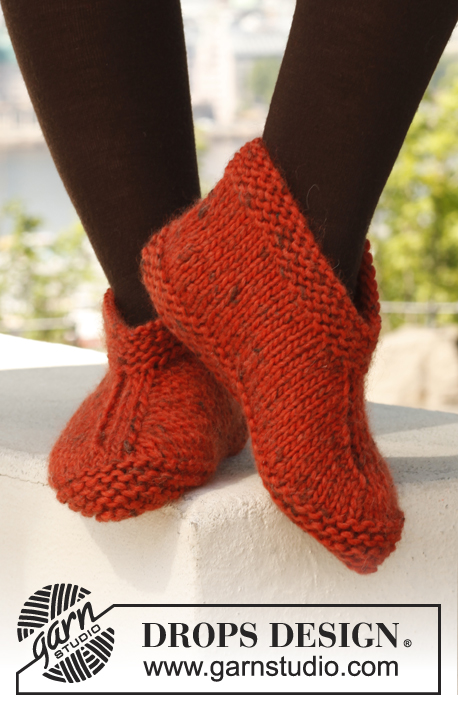
Nightfall#nightfallsocks |
|
|
|
|
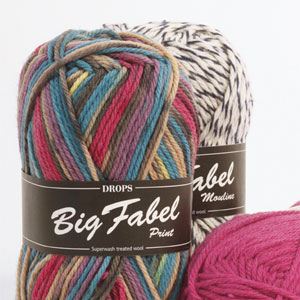
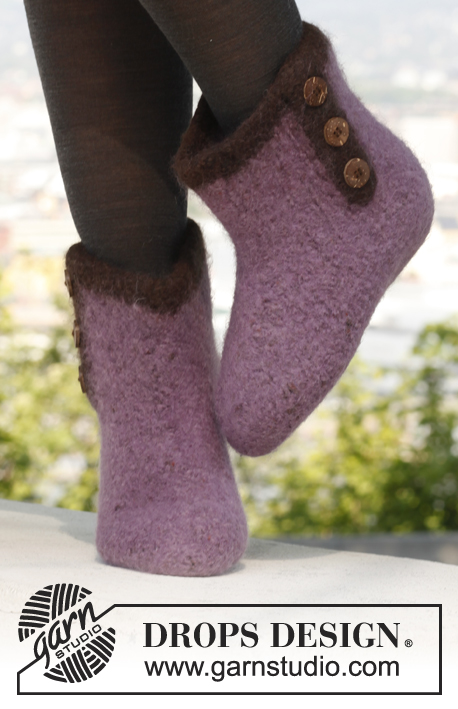
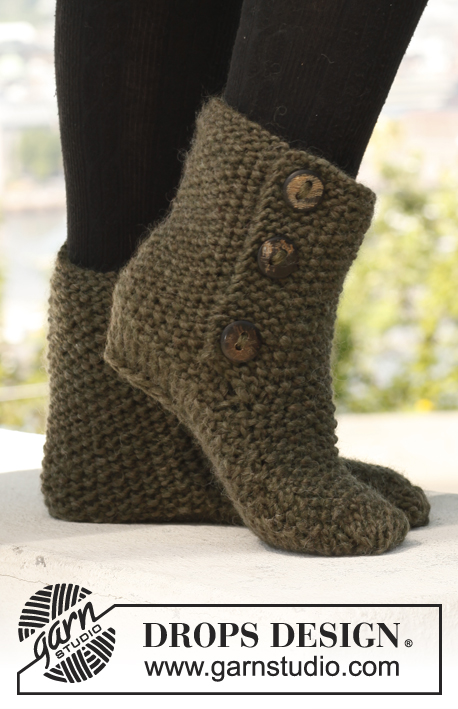
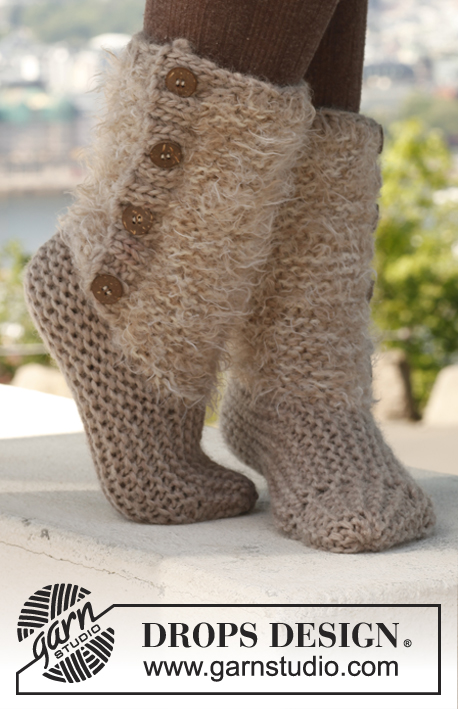
Knitted DROPS socks in 1 thread \"Big Fabel\" or 2 threads \"Fabel\".
DROPS 142-34 |
|
|
GARTER ST (back and forth on needle): K sts on all rows. KNITTING TIP: When turning mid piece, slip first st. Tighten thread and continue as before. This is done to avoid holes in the transitions. ASSEMBLY TIP: The toes is tightened tog, therefore insert 1 thread in front loop of outermost st towards the toe and let this follows upwards when working. Use this thread to tighten the toe tog at the end. ---------------------------------------------------------- SOCK: REMEMBER THE GAUGE! The sock is worked back and forth from mid under foot, over the instep and finished mid under foot. The entire sock is worked in GARTER ST - see explanation above. The sock is worked with short rows over the toe as follows: Row 1: Work all sts. Row 2: Work all sts. Row 3: Work until 6-8-10 sts remain, turn - READ KNITTING TIP. Row 4: Work back. Repeat these 4 rows until finished measurements. Cast on 60-67-74 sts on needles size 5 mm / US 8 with 1 thread Big Fabel or 2 threads Fabel. First work an elevation in the back as follows: Work 10 sts, turn, slip 1 st as if to K, work 9 sts. Work 15 sts, turn, slip 1 st as if to K, work 14 sts. Work 20 sts, turn, slip 1 st as if to K, work 19 sts. Size 9/10: Work 25 sts, turn, slip 1 st as if to K, work 24 sts. All sizes: Work 4 rows over all sts (remember short rows towards the toe - i.e. in the opposite side of elevation). READ ASSEMBLY TIP! Now dec for heel as follows: Insert a marker in the 23rd-27th-30th st (from the side with elevation). Dec 1 st on each side of st with marker every other row a total of 7 times = 46-53-60 sts. Work in garter st until piece measures 8-10-12 cm / 3"-4"-4 3/4" from last dec. Then inc for heel as follows: Insert a marker in the 16th-20th-23rd st (from the side with elevation). Inc 1 st on each side of st with marker every other row a total of 7 times = 60-67-74 sts. Work 4 rows over all sts. Then work an elevation in the back as follows: Size 9/10: Work 25 sts, turn, slip 1 st as if to K, work 24 sts. All sizes: Work 20 sts, turn, slip 1 st as if to K, work 19 sts. Work 15 sts, turn, slip 1 st as if to K, work 14 sts. Work 10 sts, turn, slip 1 st as if to K, work 9 sts. Slip all sts on a stitch holder. Knit another sock. LEG: Cast on 10 new sts on row and knit up 40-44-50 sts from RS along the upper edge of sock (short side with elevations) = 50-54-60 sts. Work in garter st for 10 cm / 4'', bind off. On the other sock work as follows: Pick up 40-44-50 sts from RS along upper edge of sock (short side with elevations) and cast on 10 sts at the end of row = 50-54-60 sts. Work in garter st for 10 cm / 4'', bind off. ASSEMBLY: Graft/sew sts from stitch holder and cast on edge tog. The seam will go under foot and up along the back of leg. Tighten the toe tog. Sew on two buttons on each flap, sew through both layers. |
|
Have you finished this pattern?Tag your pictures with #dropspattern #nightfallsocks or submit them to the #dropsfan gallery. Do you need help with this pattern?You'll find 8 tutorial videos, a Comments/Questions area and more by visiting the pattern on garnstudio.com. © 1982-2026 DROPS Design A/S. We reserve all rights. This document, including all its sub-sections, has copyrights. Read more about what you can do with our patterns at the bottom of each pattern on our site. |


With over 40 years in knitting and crochet design, DROPS Design offers one of the most extensive collections of free patterns on the internet - translated to 17 languages. As of today we count 324 catalogs and 12290 patterns - 12280 of which are translated into English (US/in).
We work hard to bring you the best knitting and crochet have to offer, inspiration and advice as well as great quality yarns at incredible prices! Would you like to use our patterns for other than personal use? You can read what you are allowed to do in the Copyright text at the bottom of all our patterns. Happy crafting!
Post a comment to pattern DROPS 142-34
We would love to hear what you have to say about this pattern!
If you want to leave a question, please make sure you select the correct category in the form below, to speed up the answering process. Required fields are marked *.