
Popular categories
Looking for a yarn?


Comments / Questions (106)
![]() Marja Sluis wrote:
Marja Sluis wrote:
Op dit patroon 14-25 babydrops, zie ik nergens de beschrijving vd mouwen staan. hEb vandaag de wol binnengekregen, hoe moet ik nu verder? Ik hoop snel iets te horen! Vriendelijke groet, Marja
19.07.2014 - 17:27DROPS Design answered:
Hoi Marja. Je haakt de mouwen in verlenging van de panden (niet apart), dit staat ook beschreven in het patroon voor de panden (Achterpand): "Meerder vanaf een hoogte van ca 20-23-23 (27-30) cm voor de mouwen aan beide kanten als volgt: Knip eerst de draad af. Haak 16-19-19 (25-28) l, haak over het rugpand zoals eerst en haak nog 16-19-19 (25-28) l aan aan het eind van de tr..."
21.07.2014 - 14:16
![]() Jacqui wrote:
Jacqui wrote:
Hello, I was also having trouble with the sleeves on the back piece. When I tried to 'crochet as before over back piece' , the chain at the beginning of the row was lower than the chain at the end. I found that if you do 3 chains an the end of the back piece before you cast off and then attach the new chain to the top of this then it will be in line with the new row.
28.05.2014 - 08:13
![]() Marion wrote:
Marion wrote:
In de kop van het patroon is achter maat (2e regel) de n van in weggevallen.
18.12.2013 - 15:42Virka wrote:
Hej Carina! Kolla vad jag skrev redan 12.6.2012!
23.10.2013 - 12:38
![]() Carina Abrahamsson wrote:
Carina Abrahamsson wrote:
Jag har nu börjat på armarna. Jag virkar 19 luftmaskor, virkar 11 grupper över ryggen, sen 19 lm till. Där vänder jag och börjar i 4:e lm från nålen.... de e här jag inte får ihop de. Den ena armen blir ju kortare än den andra, eller tänker jag helt fel?
22.10.2013 - 18:29DROPS Design answered:
Men om du virkar 1 st av 3 extra lm i början på varveet enligt virkinfo-1 bör det stämma... eller tänker jag helt fel ;)
24.10.2013 - 12:37
![]() Bosch Nadege wrote:
Bosch Nadege wrote:
Bonjour pourriez vous m expliquer pour les manches .J ai bien fait une chainette et apres j ai du mal a comprendre .merci par avance
19.06.2013 - 23:19DROPS Design answered:
Bonjour Nadège, pour que les 2 manches soient au même niveau, on coupe le fil et on commence par une chaînette de 16-19-19(25-28) ml, on crochète le rang suivant sur les mailles du dos, comme on faisait avant, et on monte une chaînette de 16-19-19(25-28) ml, puis on tourne, et on continue comme avant sur les chaînettes (manches) et sur le dos :1 B (3ml) + 20-23-25 (30-33) groupes de B. (cf taille). Bon crochet!
19.06.2013 - 23:48Cassie wrote:
What ply is the wool ?
28.05.2013 - 02:00DROPS Design answered:
Deear Cassie, Drops Eskimo belongs to group E our yarns and is a chunky yarn. You'll find all informations under link "See deals and shadcard for DROPS Eskimo". Happy crocheting!
28.05.2013 - 09:25
![]() Hanna wrote:
Hanna wrote:
Jeg gentager lige, da jeg ikke havde fået kategoriseret min kommentar som et spørgsmål...... Rigtig fin trøje! :) Jeg kan se der er en del der spørger til ærmerne, og det er desværre også der jeg sidder fast..... Jeg er med på at man bryder garnet, og så hækler de 19 lm med den nye tråd, men jeg forstår ikke hvordan man hækler hen over bagstykket derfra? Det skal vel være stangmasker, men hvordan kommer jeg fra lm til stm? Og hvor hæfter jeg fast? Og er det med den lyse farve?
31.03.2013 - 23:32DROPS Design answered:
Du har altid en maske på nålen, det har du også efter at du har hæklet snoren. Du finder flere hækle-videoer som kan hjælpe dig at komme videre.
03.04.2013 - 11:02
![]() Hanna wrote:
Hanna wrote:
Rigtig fin trøje! :) Jeg kan se der er en del der spørger til ærmerne, og det er desværre også der jeg sidder fast..... Jeg er med på at man bryder garnet, og så hækler de 19 lm med den nye tråd, men jeg forstår ikke hvordan man hækler hen over bagstykket derfra? Det skal vel være stangmasker, men hvordan kommer jeg fra lm til stm? Og hvor hæfter jeg fast? Og er det med den lyse farve?
22.03.2013 - 12:56
![]() Muriel wrote:
Muriel wrote:
Bonjour, Je souhaite réaliser ce modèle en une couleur, combien de pelotes dois-je acheter pour du 6/9 mois ? Par avance, merci.
20.03.2013 - 15:43DROPS Design answered:
Bonjour Muriel, vous pouvez additionner le nombre de pelotes dans les différentes couleurs, mais il en faudra probablement un peu moins. Bon crochet !
20.03.2013 - 16:23
|
||||||||||||||||||||||
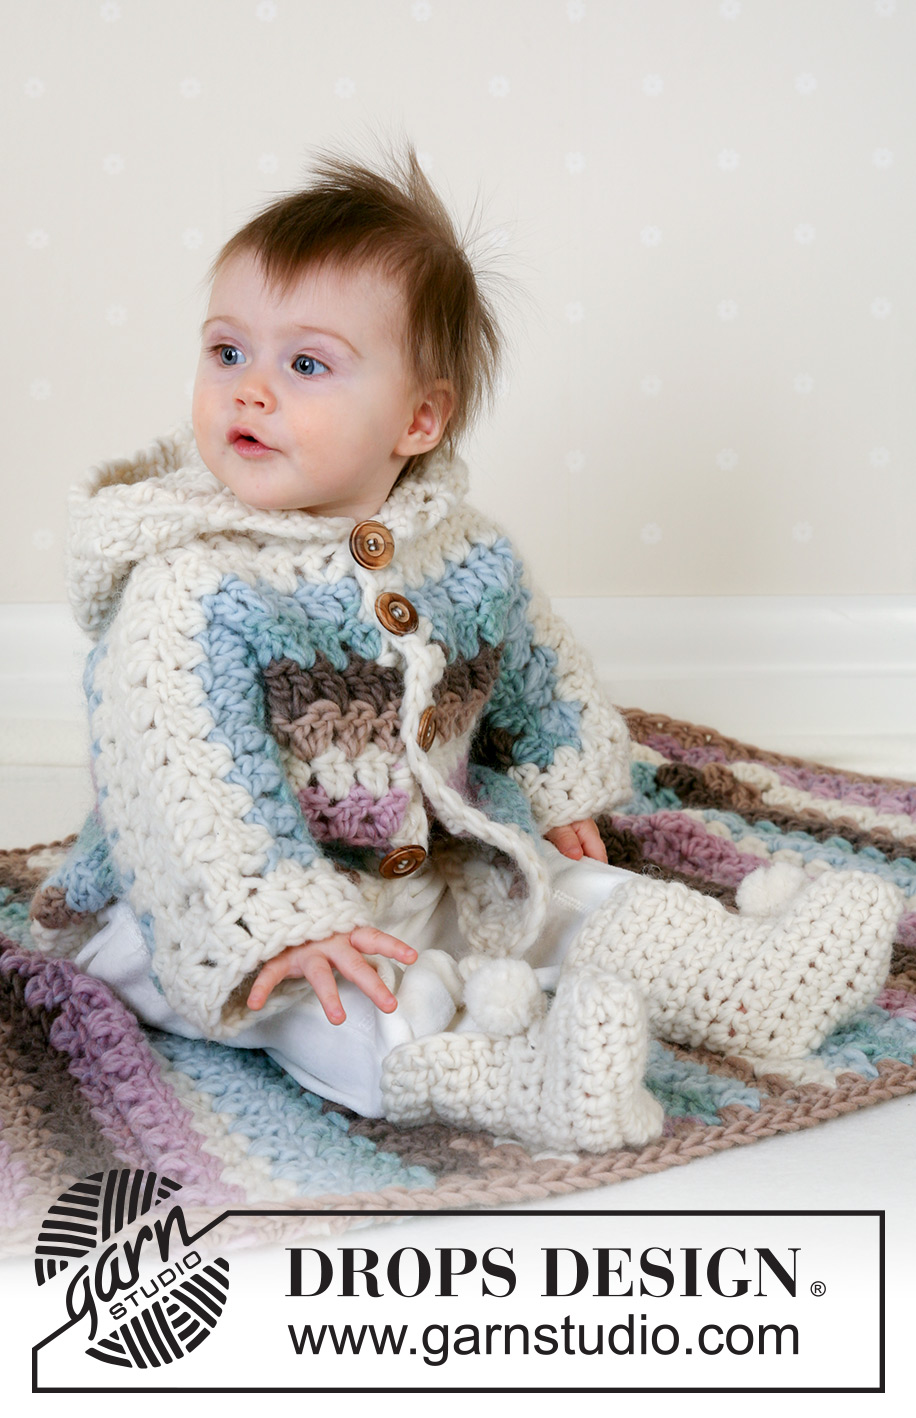
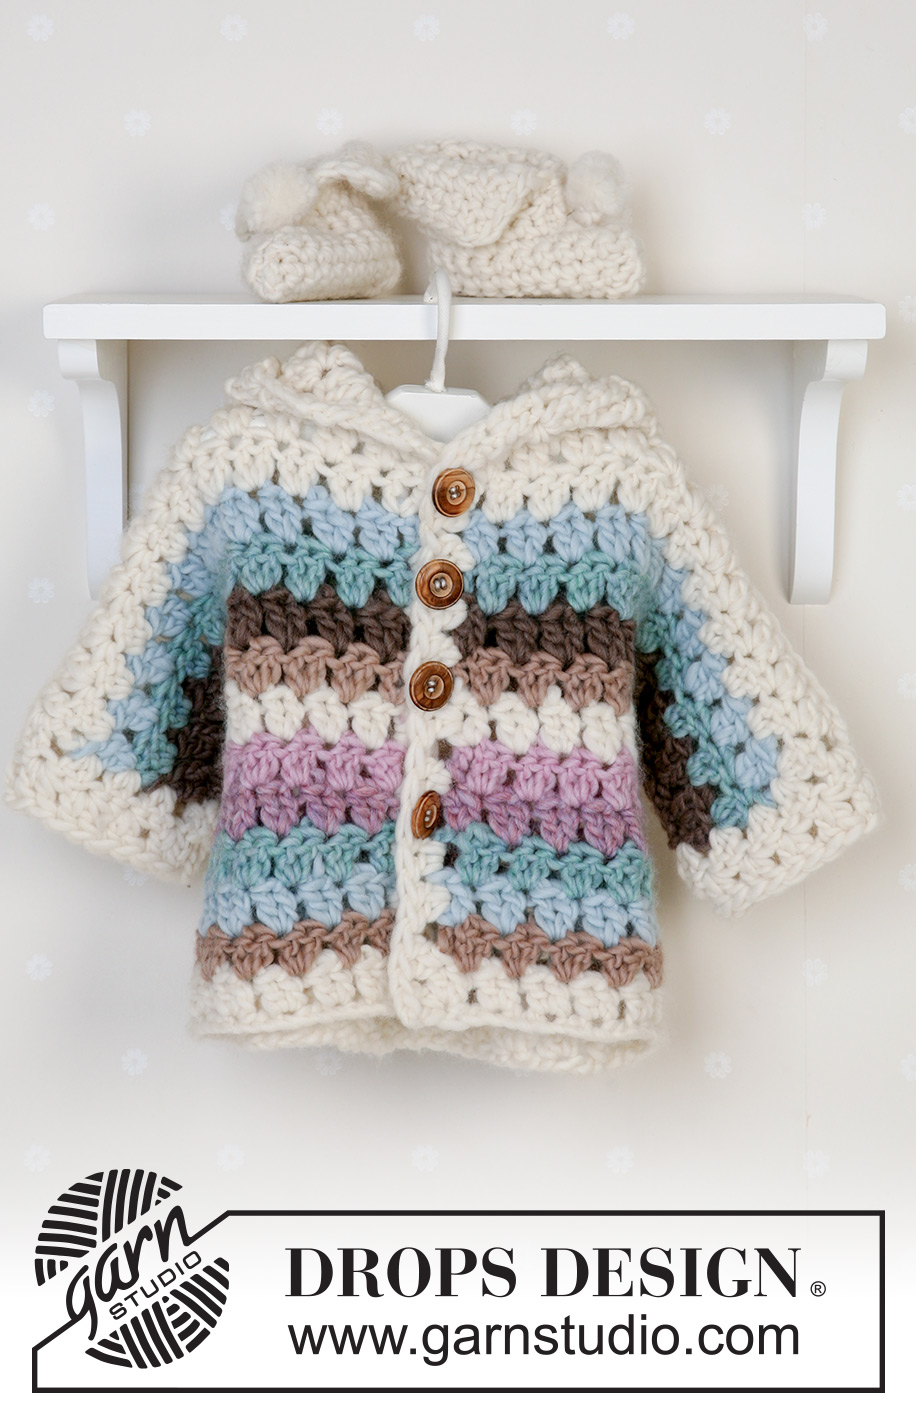
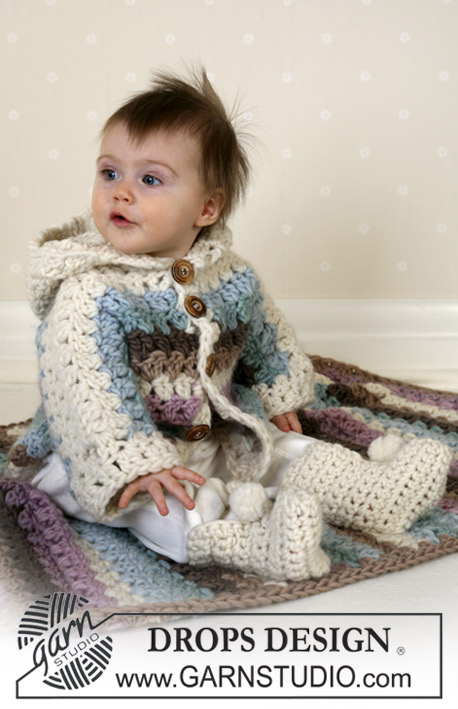
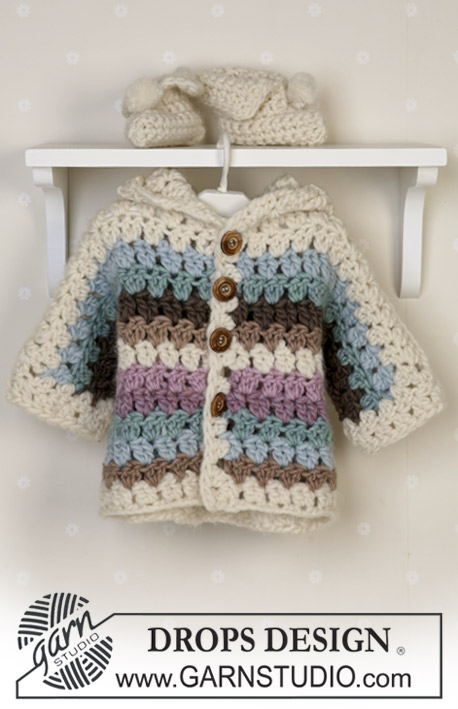
Cozy Cuddle Jacket#cozycuddlejacket |
||||||||||||||||||||||
 |
 |
|||||||||||||||||||||
Crochet set of striped jacket and slippers in DROPS Snow. Sizes baby and children from 1 month to 4 years.
DROPS Baby 14-25 |
||||||||||||||||||||||
|
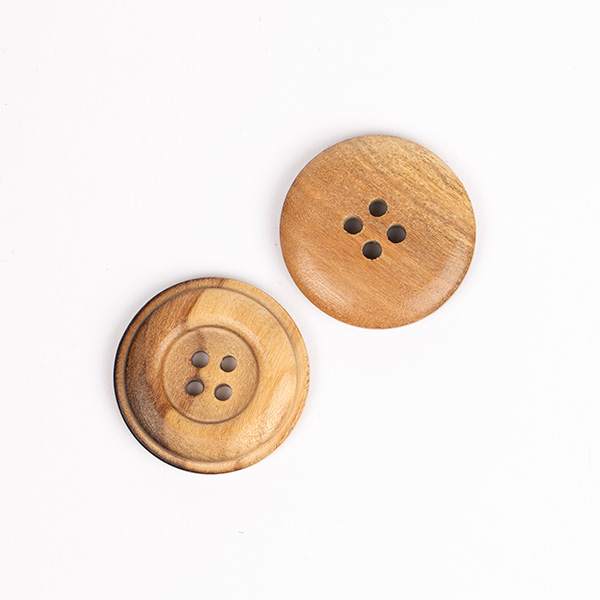
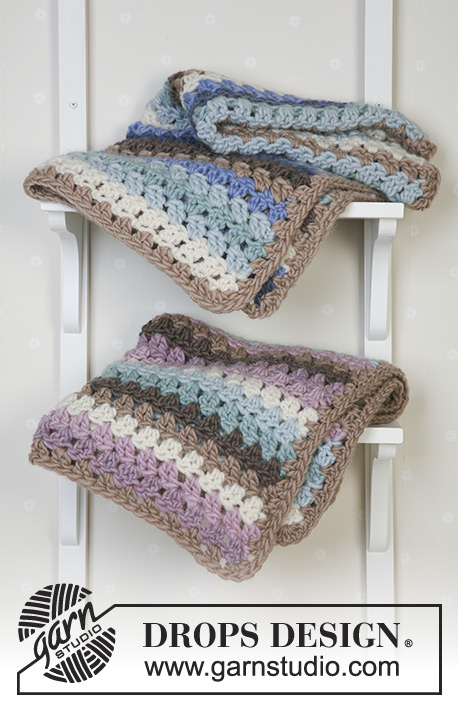
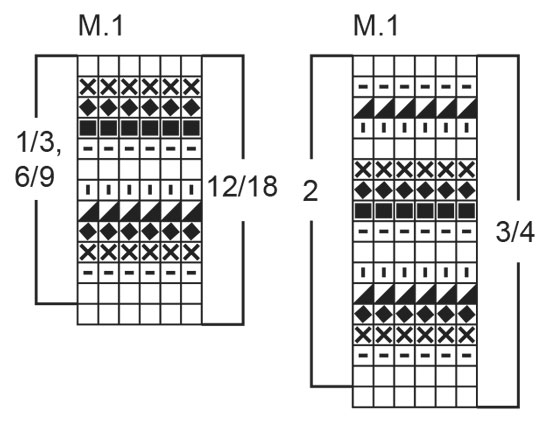
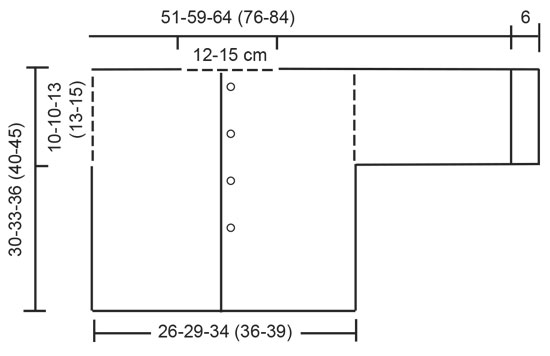
JACKET: GAUGE Width of 4 dc-groups and 4 rows in height = 4 x 4 inches STRIPES See rows below - or chart 1 for right size. Each row = 1 row of dc’s. 1/3+6/9 months: work row 2-13 below. 12/18 months: work row 1-13 below. 2 years: work row 2-17 below. 3/4 years: work row 1-17 below. 1st row: off white 2nd row: off white 3rd row: camel 4th row: light mint 5th row: mint-mix 6th row: rose-mix 7th row: baby pink 8th row: off white 9th row: camel 10th row: dark beige 11th row: mint-mix 12th row: light mint 13th row: off white 14th row: baby pink 15th row: rose-mix 16th row: camel 17th row: off white CROCHET INFO 1 At the beginning of each row of dc’s replace the 1st dc with 3 ch, and finish each row with 1 dc in 3rd ch from beginning of previous row. CROCHET INFO 2 1 dc-group = 2 dc in same st. ½ dc-group = 3 ch (equals 1 dc) BACK PIECE Read Crochet info 1. With Snow #01, ch 31-34-40 (43-46). Crochet stripes as described above as follows: 1st row: 1 dc in 4th ch from hook, *skip 2 ch, 2 dc in next ch*, repeat from *-* = 10-11-13 (14-15) dc-groups on row, turn the piece. 2nd row: 3 ch (= 1 dc), 2 dc between the first 2 dc-groups from previous row (crochet at top of st and not round the whole st), *2 dc between the next 2 dc-groups*, repeat from *-* and finish with 2 dc at the top of the last dc = 1 dc (3 ch) + 10-11-13 (14-15) dc-groups on row – read Crochet info 2. Repeat 2nd row. When piece measures approx 8"-9"-9" (10⅝"-11¾") cast on new sts for sleeves each side as follows: Cut the yarn. Ch 16-19-19 (25-28), crochet as before over back piece, at the end of row ch 16-19-19 (25-28). Turn the piece and crochet as explained for 1st row so that the pattern continues as before = 1 dc (3 ch) + 20-23-25 (30-33) dc-groups on row. When piece measures 11¾"-13"-14¼" (15¾"-17¾") fasten off. LEFT FRONT PIECE With Snow #01, ch 16-16-19 (22-22). Crochet following explanation for stripes above and dc-groups as described for back piece = 1 dc (3 ch) +5-5-6 (7-7) dc-groups after 2nd row. When piece measures approx 8"-9"-9" (10⅝"-11¾") cast on new sts for sleeve at side as described for back piece. Continue pattern as before = 1 dc (3 ch) + 10-11-12 (15-16) dc-groups on row. When piece measures 11¾"-13"-14¼" (15¾"-17¾") fasten off. RIGHT FRONT PIECE Crochet as left front piece, but mirrored. CUFFS With Snow #01 crochet 2 rows of dc along sleeve edge = approx 1 dc (3 ch) + 8-8-10 (10-11) dc on row. FRONT EDGES With Snow #01 crochet 1 row of dc-groups along the front edge of both front pieces = approx 12-13-14 (16-18) dc-groups. ASSEMBLY Sew shoulder/sleeve seams – start at sleeve edge and work towards neckline – leave 5-5 dc-groups mid back for neck opening. Sew underarm and side seams. HOOD With Snow #01 crochet 1 sc in 1st st, ch 3, then approx 13-14-15 (16-17) dc-groups around neckline as described on 1sr row for jacket. Continue with dc-groups until hood measures approx 8¾"-9½"-10¼" (11½"-11¾"), fasten off. Fold hood double and sew top seam with neat sts. BUTTONS Sew on buttons on left front piece – the top one approx ½"-¾" from neckline and the bottom one approx 4"-4¾" from lower edge. ___________________________________________________________________________ BOOTIES: To fit foot length: 4-4½-4¾ (5½-6) inches GAUGE Width of 10 sc and 11 rows in height = 4 x 4 inches. CROCHET INFO At the beginning of each row of sc’s replace the 1st sc with 1 ch, and finish each row with 1 sc in ch from beginning of previous row. BOOTIE Crochet the bootie in one piece and sew seams mid front and mid back. With Snow #01, ch 7-8-9 (10-11). Crochet back and forth with sc - read Crochet Info – start in 2nd ch from hook. = 7-8-9 (10-11) sc on row. When piece measures 2¾"-3⅛"-3½" (4"-4") inc at one side for foot by ch 3-3-3 (4-4), turn and continue with sc in all sts = 10-11-12 (14-15) sc. When piece measures 6"-7"-8¼" (9½"-10¼") bind off the 3-3-3 (4-4) foot sts by turning the piece just before these sts. Continue with sc over the remaining 7-8-9 (10-11) sc until piece measures 8¾"-10¼"-11¾" (13⅜"-14¼"). Fasten off ASSEMBLY Fold bootie double and sew seam mid back and mid front with neat sts – leave an opening of approx 2"-2½"-2¾" (3"-3⅛") at the top mid front. Crochet the other bootie. POMPOM Make 2 small pompons with a diameter of approx 1 inch and attach to top of each bootie. ___________________________________________________________________________ BLANKET See pattern b14-21 |
||||||||||||||||||||||
Diagram explanations |
||||||||||||||||||||||
|
||||||||||||||||||||||
 |
||||||||||||||||||||||
 |
||||||||||||||||||||||
Have you finished this pattern?Tag your pictures with #dropspattern #cozycuddlejacket or submit them to the #dropsfan gallery. Do you need help with this pattern?You'll find 7 tutorial videos, a Comments/Questions area and more by visiting the pattern on garnstudio.com. © 1982-2026 DROPS Design A/S. We reserve all rights. This document, including all its sub-sections, has copyrights. Read more about what you can do with our patterns at the bottom of each pattern on our site. |
||||||||||||||||||||||


With over 40 years in knitting and crochet design, DROPS Design offers one of the most extensive collections of free patterns on the internet - translated to 17 languages. As of today we count 324 catalogs and 12278 patterns - 12268 of which are translated into English (US/in).
We work hard to bring you the best knitting and crochet have to offer, inspiration and advice as well as great quality yarns at incredible prices! Would you like to use our patterns for other than personal use? You can read what you are allowed to do in the Copyright text at the bottom of all our patterns. Happy crafting!
Post a comment to pattern DROPS Baby 14-25
We would love to hear what you have to say about this pattern!
If you want to leave a question, please make sure you select the correct category in the form below, to speed up the answering process. Required fields are marked *.