
Popular categories
Looking for a yarn?


Comments / Questions (13)
![]() Benita wrote:
Benita wrote:
Na dole swetra jest ściągacz 1/1, czy wzór angielski?
11.10.2025 - 15:44DROPS Design answered:
Witaj, na dole swetra jest ścieg angielski. Pozdrawiamy!
14.10.2025 - 10:44
![]() Tanya wrote:
Tanya wrote:
I have completed round 1 of the yoke, and I am trying to commence round 2 but I do not understand the instructions at all. Is there a stitch by stitch, row by row, instruction available instead of the diagrams?
22.07.2025 - 05:53DROPS Design answered:
Dear Tanya, after 1st row has been worked, continue working as established pattern with diagrams A.1 and A.2; Read diagrams from the right towards the left on every round. At the same time, increase as shown in pattern for both front and back piece and as explained under SLEEVE INCREASES: for sleeves - until you have increased the number of times for your size. Happy knitting!
25.07.2025 - 16:11
![]() Nellie wrote:
Nellie wrote:
Väldigt förvirrad när jag ska sticka A.1. Är det avig, rät under, avig rät? Eller är det ett varv rät under och nästa varv rät (normal)? Om alla rät under stickad i varandra blir det jättelöst och helt omöjligt att jobba med.
07.11.2024 - 08:42DROPS Design answered:
Hej Nellie. Vartannat varv i A.1 stickas rätmaskan normalt och vartannat stickas den i maskan under. Mvh DROPS Design
08.11.2024 - 12:18
![]() Jacquie Williams wrote:
Jacquie Williams wrote:
I love the look of this sweater but when I read the instructions, I have never read anything so confusing in my life.
01.09.2024 - 01:41
![]() Nurket wrote:
Nurket wrote:
Nå har dere falt en GOD del i verdi! Null tips og hjelp til oppskriftene, og et helvete å finne fram i menyen! Enten får jeg null resultat eller en haug andre forslag og ting som ikke er tips og hjelp i det hele tatt!!!
12.03.2024 - 09:57
![]() Izabela wrote:
Izabela wrote:
Ile trzeba kupić motków na sweter w rozmiarze XL -XXL
19.10.2023 - 13:00DROPS Design answered:
Witaj Izo, na sweter w rozmiarze XL musisz kupić 800 g włóczki DROPS Puna, czyli 16 motków. Na sweter w rozmiarze XXL będziesz potrzebować 900 g włóczki Puna (18 motków). Pozdrawiamy!
19.10.2023 - 16:14
![]() Liz Perkins wrote:
Liz Perkins wrote:
For anyone making this design, note that approximate tension for English rib is 36 rows measuring 10cm, so 4cm before shaping of underarm ( sizes L, XL, XXL and XXXL) would be 14 rows. This is dependent on individual knitting tension. I hope this helps
10.04.2023 - 22:52
![]() Annie wrote:
Annie wrote:
Les 40 mailles représentent le dos et le devant où elles sont pour les manches Les explications de partage de l empiècement sont pour moi pas très clair. Je suis désolée mais je ne comprends pas trop bien merci pour votre aide
31.03.2022 - 11:42DROPS Design answered:
Bonjour Annie, les manches se tricotent sur 41 mailles: 40 mailles (soit 20 fois les 2 mailles de A.1) + la 1ère maille de A.1 pour que le motif soit symétrique; mettez ensuite un marqueur au milieu de ces 41 mailles soit: 20 m, 1 m avec 1 marqueur, 20 m. Bon tricot!
31.03.2022 - 11:56
![]() Annie wrote:
Annie wrote:
Bonjour Je ne comprends pas du tout les explications de l empiècement pouvez vous me donner quelques conseils supplémentaires svp merci dans l’attente de vous lire
31.03.2022 - 10:40DROPS Design answered:
Bonjour Annie, vous tricotez l'empiècement en rond en commençant au milieu dos, le dos et le devant vont se tricoter en jersey en augmentant à la fin du dos/du devant (A.2) au début du devant/du dos (A.3); en même temps, vous tricotez A.1 sur les manches (nombre impair pour que le motif soit symétrique). Vous avez 4 fils marqueurs (cf ci-dessous) pour bien repérer chaque pièce. Vous augmentez ensuite pour le devant & le dos comme indiqué dans A.2/A.3 et en même temps, augmenter pour les manches dans la maille avec le marqueur (= au milieu de chaque manche) en tricotant 5 fois cette maille. Bon tricot!
31.03.2022 - 11:54
![]() Annie wrote:
Annie wrote:
Modèle stone island Que voulez vous dire par A2 au dessus de la maille suivante placer un marqueur svp
31.03.2022 - 10:34DROPS Design answered:
Bonjour Annie, le 1er rang du diagramme A.2 se tricote sur 1 maille, vous allez donc tricoter la maille suivante en suivant A.2 (soit 1 m end, 1 jeté). Vous placerez ensuite fil marqueur juste après A.2 - les fils marqueurs placés tout le tour vont vous permettre de visualiser chaque partie: devant/dos/manches. Bon tricot!
31.03.2022 - 11:48
|
|||||||||||||
Stone Island#stoneislandsweater |
|||||||||||||
 |
 |
||||||||||||
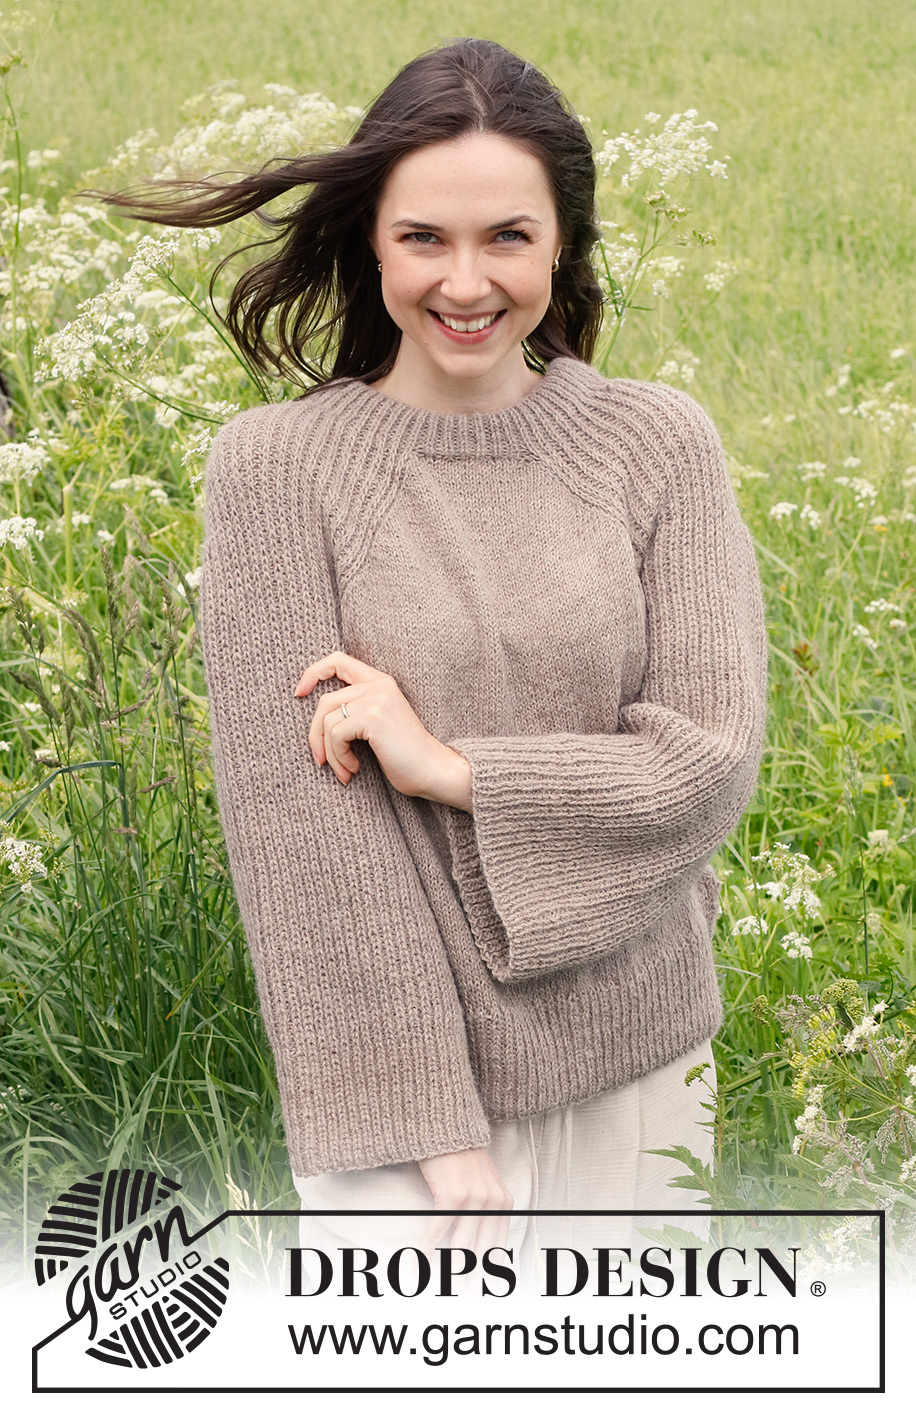
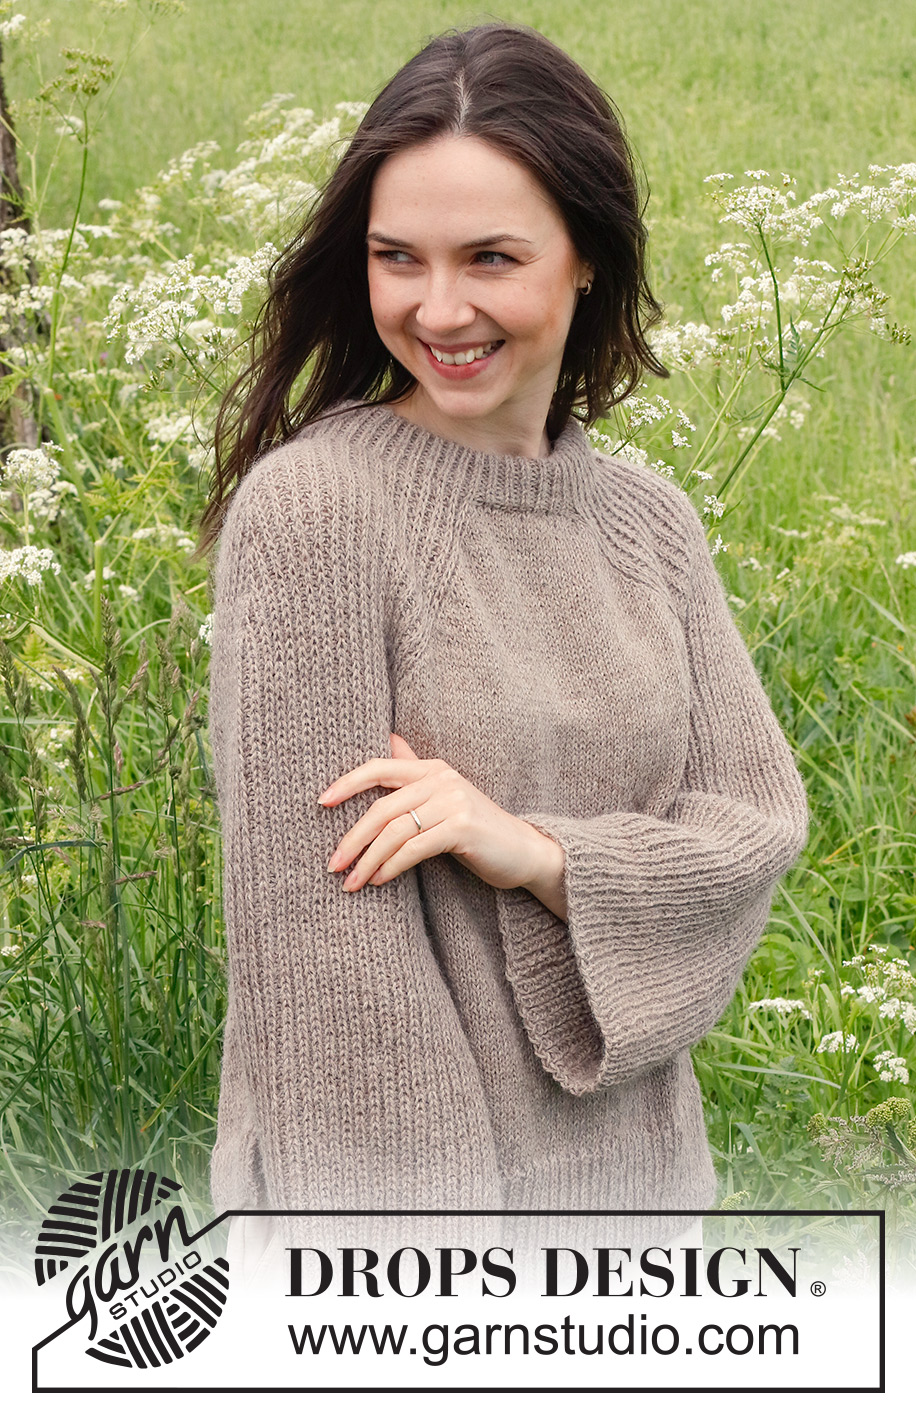
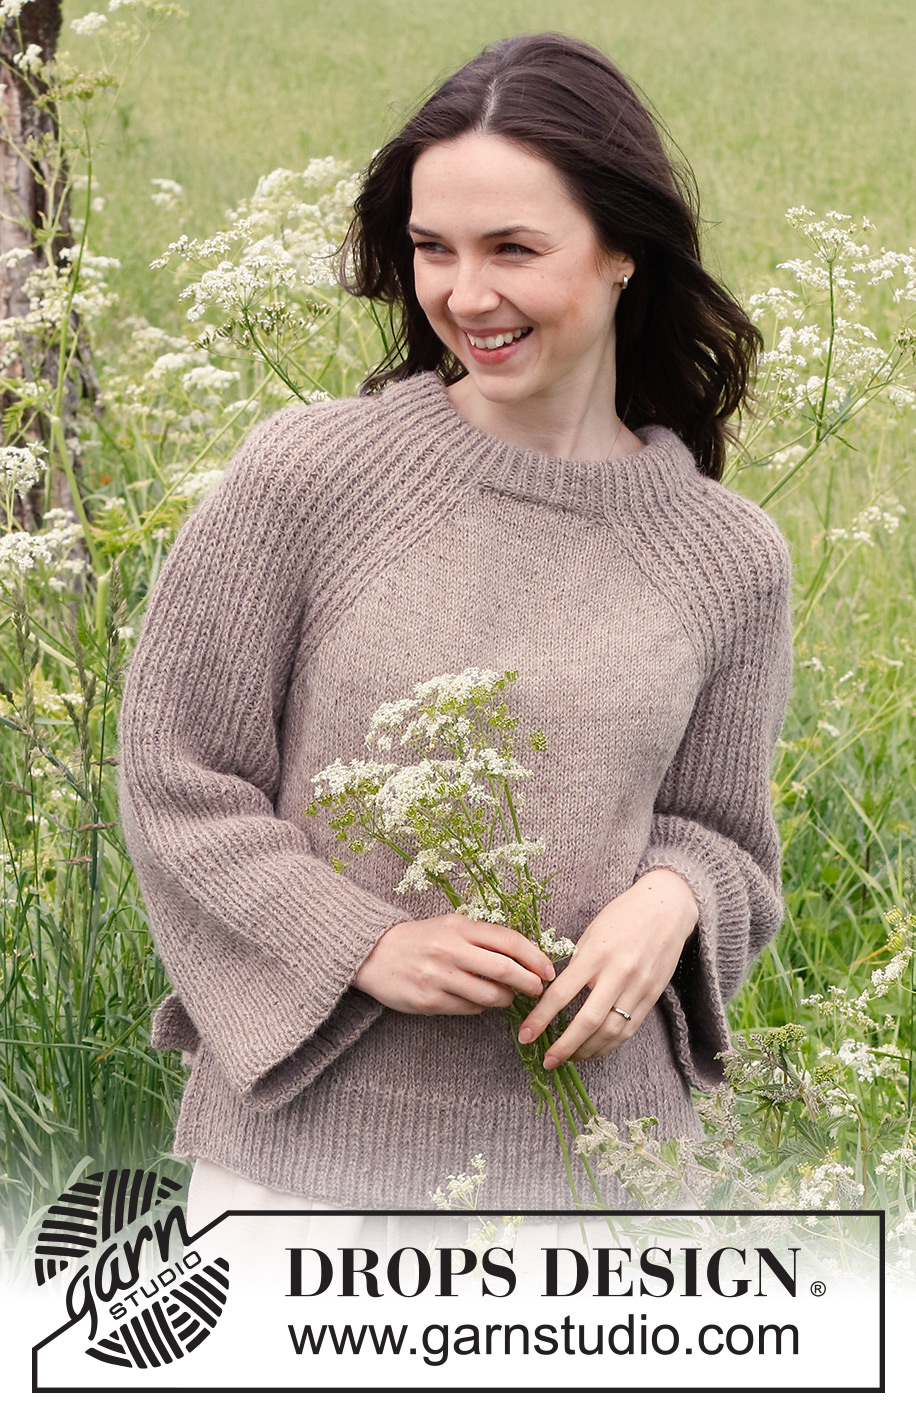
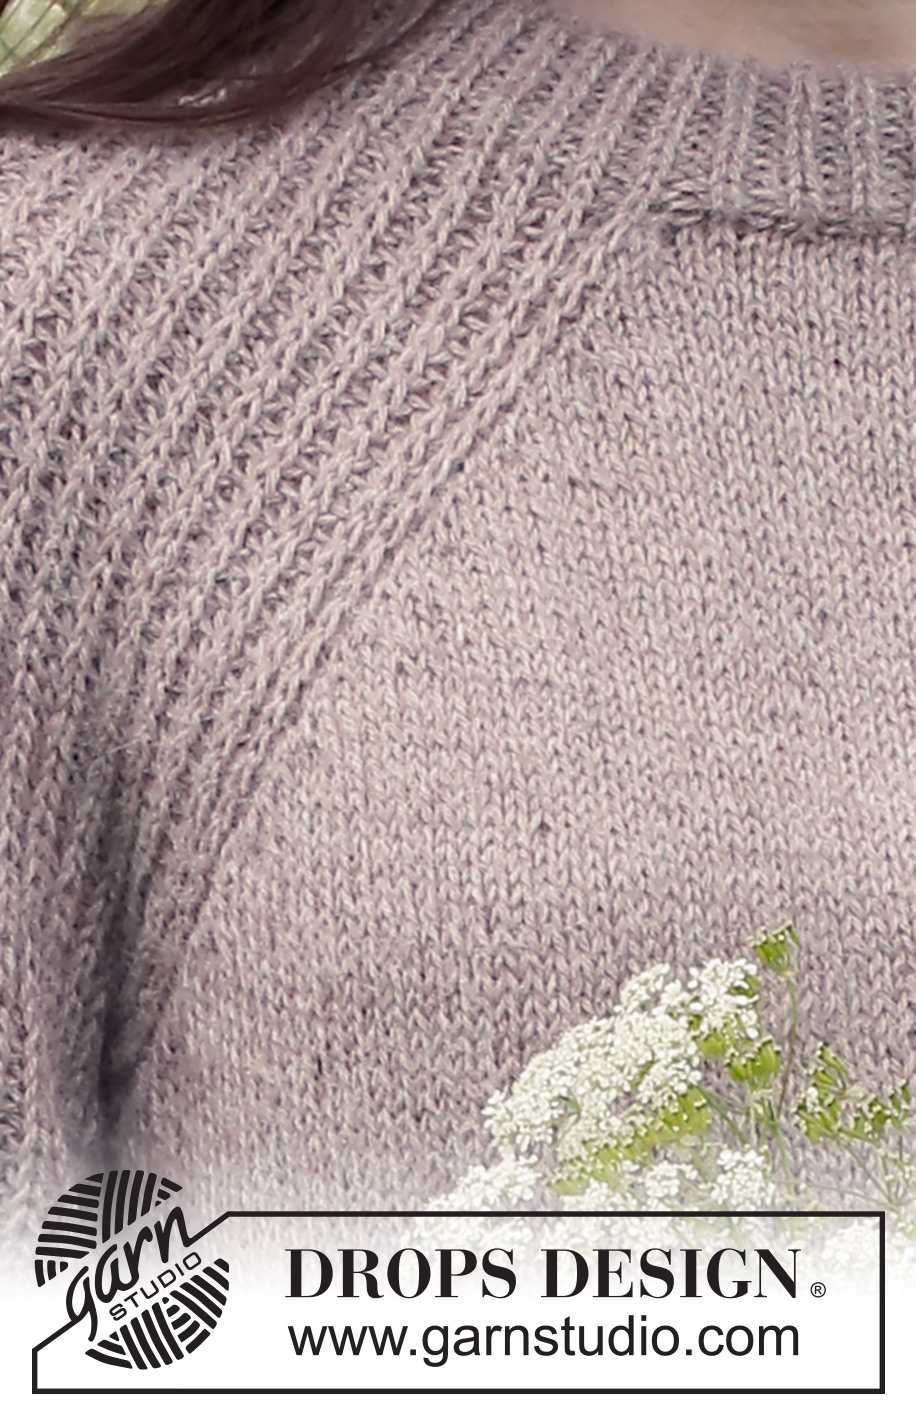
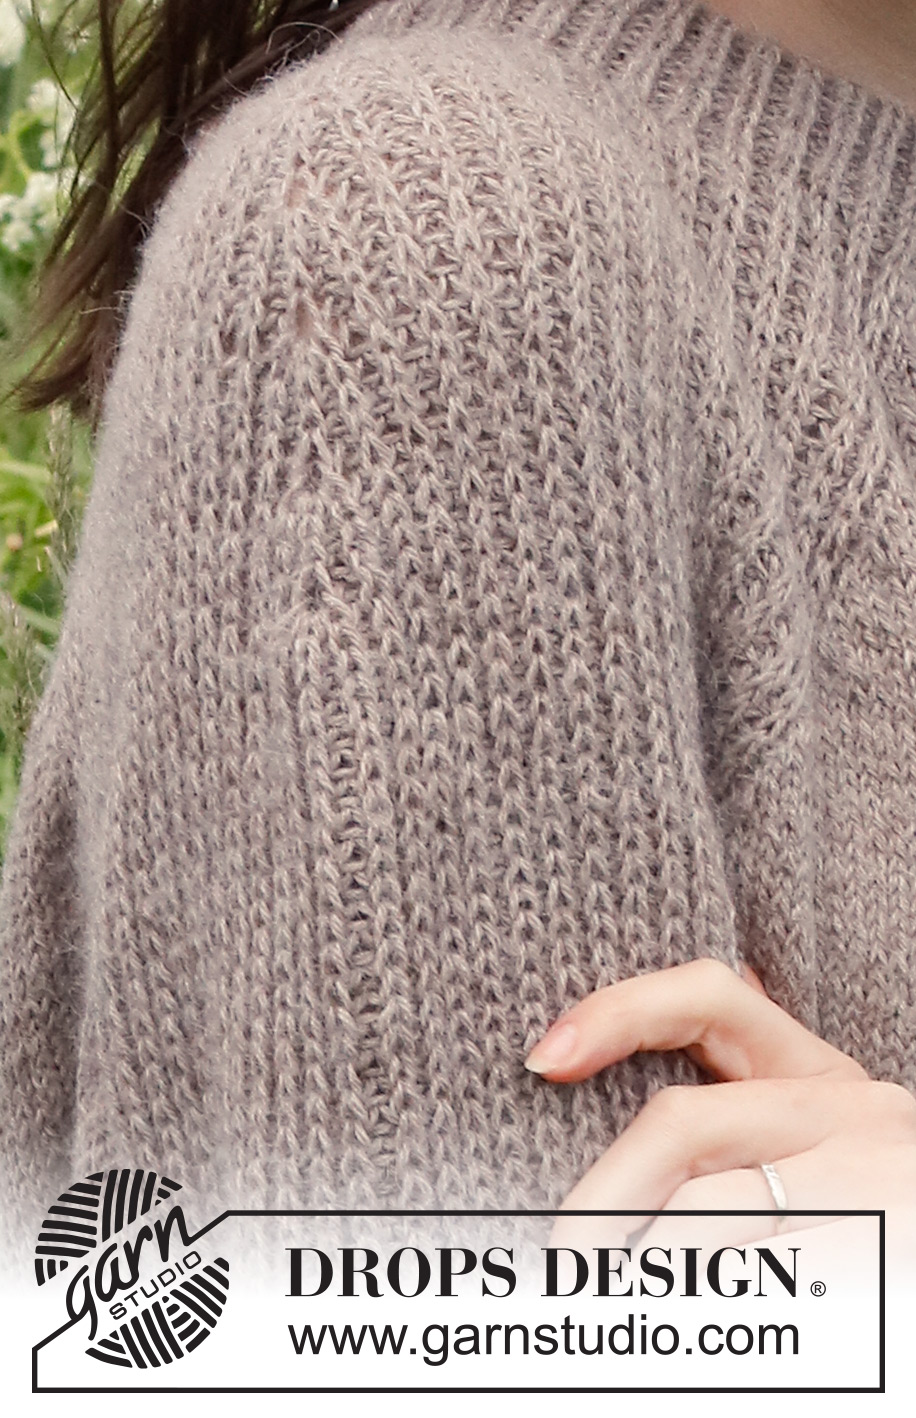
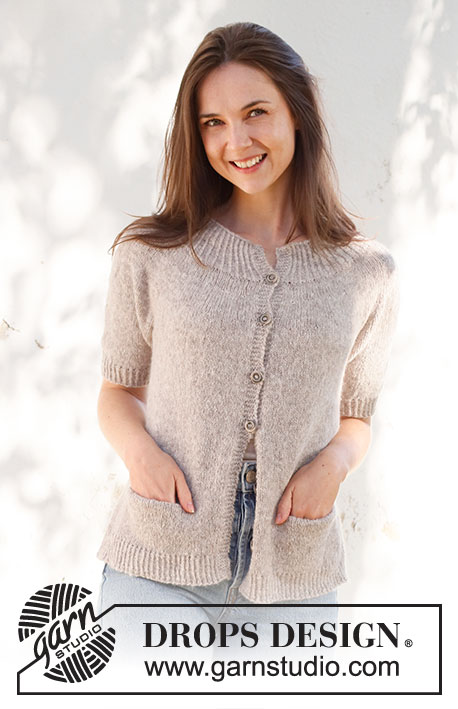
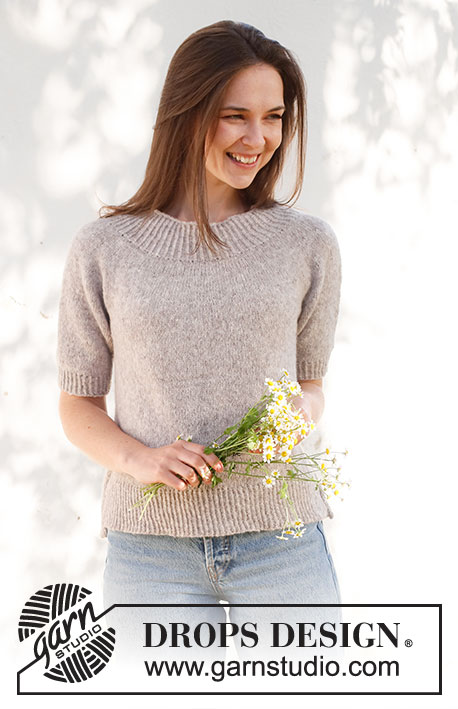
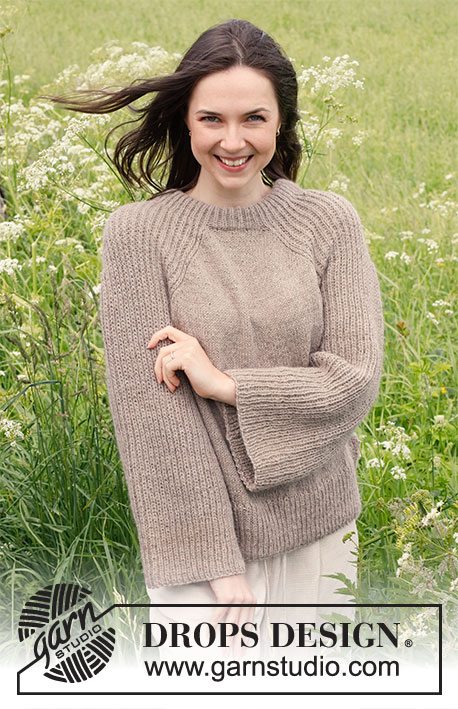
Knitted sweater in DROPS Puna. The piece is worked top down with raglan, Fisherman’s rib stitches on the sleeves, split in the sides and double neck. Sizes S - XXXL.
DROPS 231-51 |
|||||||||||||
|
------------------------------------------------------- EXPLANATIONS FOR THE PATTERN: ------------------------------------------------------- PATTERN: See diagrams A.1 to A.3. INCREASE TIP (evenly spaced): To work out how to increase evenly, count the number of stitches to be increased over (e.g. 4 stitches) and divide by the number of increases to be made (e.g. 3) = 1.3. In this example, increase by making 1 yarn over after alternately each 1st and 2nd stitch (approx.). On the next round work the yarn overs twisted to avoid holes. SLEEVE INCREASES: Increases are worked on either round 2 or round 4 in A.1. Work as far as the marker-stitch, * knit 1 in the stitch under next stitch but do not slip the stitch from the needle, make 1 yarn over *, work from *-* 1 more time in the same stitch, knit 1 in the same stitch (= 4 stitches increased), slip the stitch off the left needle. Repeat on the other sleeve. The new stitches are worked into A.1. DECREASE TIP (sleeves in sizes L, XL, XXL and XXXL): Work as follows in the different sizes: L and XXXL: Work until there are 2 stitches left before the marker-stitch, knit 2 together, purl 1 (= marker-stitch), slip 1 stitch as if to knit, knit 1 and pass the slipped stitch over (= 2 stitches decreased). XL and XXL: Work until there are 3 stitches left before the marker-stitch, knit 2 together, work the next 3 stitches (marker-stitch is the middle of these 3 stitches), slip 1 stitch as if to knit, knit 1 and pass the slipped stitch over (= 2 stitches decreased). ------------------------------------------------------- START THE PIECE HERE: ------------------------------------------------------- SWEATER – SHORT OVERVIEW OF THE PIECE: The neck and yoke are worked in the round with circular needle, from mid back and top down. The yoke is divided for body and sleeves and the body is continued in the round with circular needle. The sleeves are worked in the round with short circular needle/double pointed needles, top down. The front and back pieces are worked with stockinette stitch, the sleeves with textured pattern and Fisherman’s rib stitches. DOUBLE NECK: Cast on 100-108-108-116-116-124 stitches with short circular needle size 4.5 MM = US 7 and DROPS Puna. Knit 1 round. Change to short circular needle size 3.5 MM = US 4 and work A.1 in the round for 9 cm = 3½". Insert a marker. THE PIECE IS NOW MEASURED FROM HERE! YOKE: Change to circular needle size 4.5 MM = US 7 and work pattern as follows: Knit 4-6-6-8-8-10 and increase 3-1-3-1-4-3 stitches evenly over these stitches – read INCREASE TIP, work A.2 over the next stitch, insert a marker thread here (transition between back piece and right sleeve), A.1 over de next 40 stitches, work the first stitch in A.1, insert a marker thread here (transition between right sleeve and front piece), A.3 over the next stitch, knit 7-11-11-15-15-19 and increase 5-2-5-1-7-5 stitches evenly over these stitches, A.2 over the next stitch, insert a marker thread here (transition between front piece and left sleeve), work A.1 over the next 40 stitches, work the first stitch in A.1, insert a marker thread here (transition between left sleeve and back piece), work A.3 over the next stitch, knit 3-5-5-7-7-9 stitches and increase 2-1-2-0-3-2 stitches evenly over these stitches =114-116-122-122-134-138 stitches. There is 1 marker thread in each transition between body and sleeves (= 4 marker threads). Insert a marker in the middle stitch on each sleeve (a knitted stitch). REMEMBER THE KNITTING GAUGE! Continue with A.1 on the sleeves and A.2/A.3 + stockinette stitch on the front and back pieces – AT THE SAME TIME on round 2 begin SLEEVE INCREASES – read description above (= 4 stitches increased on each sleeve). Increase like this every 8th-8th-6th-6th-4th-4th round a total of 6-7-10-11-13-14 times. When A.2 and A.3 have been completed, repeat the diagrams towards each raglan line 7-8-9-10-11-12 more times (a total of 8-9-10-11-12-13 times), then work the first 3-3-1-1-0-0 rounds in the diagrams. When all the increases on the front/back pieces and on the sleeves are finished there are 302-328-366-390-430-458 stitches (increased 24-28-40-44-52-56 stitches on each sleeve and 35-39-41-45-48-52 stitches on each side of the front and back pieces). The piece measures approx. 20-22-24-26-28-30 cm = 8"-8¾"-9½"-10¼"-11"-11¾" from the marker on the neck. If the piece is shorter than this, continue with A.1 on the sleeves and stockinette stitch on the body to the correct length. Work the next round as follows: Work the first 44-48-52-56-62-67 stitches (half back piece), place the next 65-69-81-85-93-97 stitches on a thread for the sleeve, cast on 9-9-9-11-11-13 stitches (in side under sleeve), work the next 86-95-102-110-122-132 stitches (front piece), place the next 65-69-81-85-93-97 stitches on a thread for the sleeve, cast on 9-9-9-11-11-13 stitches (in side under sleeve), work the last 42-47-50-54-60-65 stitches (half back piece). The body and sleeves are finished separately. THE PIECE IS NOW MEASURED FROM HERE! BODY: There are 190-208-222-242-266-290 stitches on needle for body. Continue with stockinette stitch in the round for 22 cm = 8¾". There is approx. 9 cm = 3½" left; work to desired length. To avoid the following rib being tight, knit 1 round where you increase 20-22-24-28-28-32 stitches evenly spaced – remember INCREASE TIP = 210-230-246-270-294-322 stitches. Divide the piece in each side with 105-115-123-135-147-161 stitches on both the front and the back piece. Change to circular needle size 3.5 MM = US 4. Finish each piece separately. FRONT PIECE: Work rib back and forth, starting from the right side as follows: 1 edge stitch in garter stitch, A.1 until there are 2 stitches left, work the first stitch in A.1, 1 edge stitch in garter stitch. Continue this rib back and forth for 9 cm = 3½". Bind off with knit over the Fisherman’s rib stitches and garter stitches and purl over purl. The sweater measures approx. 56-58-60-62-64-66 cm = 22"-22¾"-23⅝"-24⅜"-25¼"-26" from the shoulder down. BACK PIECE: Work rib back and forth, starting from the right side as follows: 1 edge stitch in garter stitch, A.1 until there are 2 stitches left, work the first stitch in A.1, 1 edge stitch in garter stitch. Continue this rib back and forth for 9 cm = 3½". Bind off with knit over the Fisherman’s rib stitches and garter stitches and purl over purl. The sweater measures approx. 56-58-60-62-64-66 cm = 22"-22¾"-23⅝"-24⅜"-25¼"-26" from the shoulder down. SLEEVES: Place the 65-69-81-85-93-97 stitches from the thread on the one side of the piece on short circular needle/double pointed needles size 4.5 MM = US 7 and knit up 1 stitch in each of the 9-9-9-11-11-13 stitches cast on under the sleeve = 74-78-90-96-104-110 stitches. Continue A.1 in the round The pattern should fit into the round. Work in the different sizes as follows: S and M: Work textured pattern in the round for 42-40 cm = 16½"-15¾". Bind off with knit over knit and purl over purl. L, XL, XXL and XXXL: Work textured pattern in the round for 4 cm = 1½". Insert a marker in the middle stitch under the sleeve. On the next round begin to decrease – read DECREASE TIP. Decrease like this every 2nd round a total of 4-4-4-4 times = 82-88-96-102 stitches. Continue textured pattern until the sleeve measures 39-37-36-34 cm = 15¼"-14½"-14¼"-13⅜". Bind off with knit over knit and purl over purl. ASSEMBLY: Fold the neck double to the inside and sew down. To avoid the neck being tight and rolling outwards, it is important that the seam is elastic. |
|||||||||||||
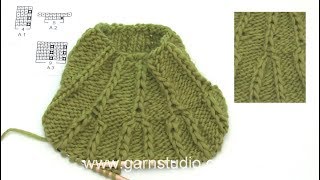
Diagram explanations |
|||||||||||||
|
|||||||||||||
 |
|||||||||||||
Have you finished this pattern?Tag your pictures with #dropspattern #stoneislandsweater or submit them to the #dropsfan gallery. Do you need help with this pattern?You'll find 30 tutorial videos, a Comments/Questions area and more by visiting the pattern on garnstudio.com. © 1982-2026 DROPS Design A/S. We reserve all rights. This document, including all its sub-sections, has copyrights. Read more about what you can do with our patterns at the bottom of each pattern on our site. |
|||||||||||||


With over 40 years in knitting and crochet design, DROPS Design offers one of the most extensive collections of free patterns on the internet - translated to 17 languages. As of today we count 325 catalogs and 12291 patterns - 12281 of which are translated into English (US/in).
We work hard to bring you the best knitting and crochet have to offer, inspiration and advice as well as great quality yarns at incredible prices! Would you like to use our patterns for other than personal use? You can read what you are allowed to do in the Copyright text at the bottom of all our patterns. Happy crafting!
Post a comment to pattern DROPS 231-51
We would love to hear what you have to say about this pattern!
If you want to leave a question, please make sure you select the correct category in the form below, to speed up the answering process. Required fields are marked *.