
Popular categories
Looking for a yarn?


Comments / Questions (9)
![]() Gaby Möller wrote:
Gaby Möller wrote:
Hallo Drops, ich möchte diese Anleitung mit einem Faden Drops Puna plus 1 Faden Drops Brushed Alpaka Silk stricken in Größe L. Wieviel Garn brauche ich von jeder Sorte? Vielen Dank, Gaby Möller
27.03.2026 - 08:01DROPS Design answered:
Liebe Frau Möller, am besten benutzen Sie anstatt 2 Fäden Garngruppe B (wie Puna) oder 1 Faden Grangruppe A + 1 Faden Garngruppe C - hier lesen Sie, wie man die neue Garnmenge kalkuliert. Gerne wird Ihnen Ihr Geschäft auch damit helfen, auch per E-Mail oder Telefon. Viel Spaß beim Stricken!
27.03.2026 - 15:31
![]() Edith wrote:
Edith wrote:
Hallo, meine Frage betrifft das Knopfloch. Die Blende ist insgesamt 6 Maschen breit. Die Knopflöcher werden zwischen der 5. und 6. Masche gestrickt und liegen somit nicht in der Mitte der Blende. Ist das Absicht - oder sollen sie zwischen der 4. und 5. Masche gestrickt werden? Danke und Grüße
18.03.2026 - 15:22DROPS Design answered:
Liebe Edith, wenn Sie das Knopfloch etwas näher vom I-Cord, können Sie anstatt zuerst die Abnahme dann den Umschlag stricken. Versuchen Sie mit einer Probelappen welche Möglichkeit Ihnen am besten passt. Viel Spaß beim Stricken!
18.03.2026 - 16:47
![]() Githa wrote:
Githa wrote:
Hvorfor skal man sætte et mærke ved halsen? Der står i opskriften, at man skal bruge dette mærke til at måle ud fra i resten af opskriften. Men det bliver aldrig nævnt under opbygning af bærestykket og ærmer. Det er ærgerligt, da det havde været mere præcist end at man skal folde bærestykket for at måle længden langs ærmegabet
07.03.2026 - 18:43DROPS Design answered:
Hei Githa. Jo, under HØYRE FORSTYKKE og noen linjer under man skal ha satt 1 merke står det: Når arbeidet måler 5-5-5-6-7-7-8 cm, økes det masker mot halsen slik: .... Lengre ned står det: Arbeidet måler ca 10-11-11-12-14-14-15 cm fra merket. Og på slutten av avsnittet står det: Strikk glattstrikk med stolpe som forklart over til høyre forstykke måler 11-12-12-13-15-16-16 cm fra merket. Samme under VENSTRE FORSTYKKE. mvh DROPS Design
09.03.2026 - 14:19
![]() Petra wrote:
Petra wrote:
Stricke gerade das Model 263-32 und verstehe die Strickschrift ab 1 Rück-Reihe Blende mit I Cord Stricken „die Arbeit hat eine Länge von“ bezieht sich die Länge nach unten? Oder die Länge der Reihe oder Ende die Reihe und geht weiter auf der anderen Seite? Hänge voll fest.
15.02.2026 - 23:24DROPS Design answered:
Liebe Petra, bei den Längenangaben ist immer die Länge nach unten gemeint, also sozusagen die Gesamthöhe der Reihen. Sie messen ab dem Markierer, den Sie angebracht haben, gerade nach unten. Viel Spaß beim Weiterstricken!
18.02.2026 - 15:07
![]() Juud wrote:
Juud wrote:
Wat moet hier staan? TIP VOOR HET MEERDEREN-1: MEERDER 1 STEEK RICHTING LINKS - aan de goede kant: Gebruik de linker naald om de draad tussen 2 steken van de naald eronder op te nemen, neem de draad op van de . . . Brei recht in de lus aan de achterkant van de naald.
26.01.2026 - 09:17DROPS Design answered:
Dag Juud,
Er is waarschijnlijk iets mis gegaan bij het plaatsen van de tekst op de site. Het is aangepast en zou nu goed moeten zijn.
26.01.2026 - 20:48
![]() Juud wrote:
Juud wrote:
Er mist een iets, wat moet hier staan? (tip 1 van de beschrijving) TIP VOOR HET MEERDEREN-1: MEERDER 1 STEEK RICHTING LINKS - aan de goede kant: Gebruik de linker naald om de draad tussen 2 steken van de naald eronder op te nemen, neem de draad op van de ... Brei recht in de lus aan de achterkant van de naald. bedankt!
26.01.2026 - 09:16
![]() Lea wrote:
Lea wrote:
Hello! Roughly how many balls of yarn should I buy to make this project?
13.01.2026 - 12:49DROPS Design answered:
Dera Lea, you will find the total amount of yarn required for each size under tab "Pattern" at the top of the page, ex. in XS and in S you need 250 g DROPS Melody/50 g a ball = 5 balls Melody are required in XS (and in S). Happy knitting!
14.01.2026 - 10:14
![]() Madeleine wrote:
Madeleine wrote:
Hallo, Wenn ich beim Rückenteil 30 Maschen anschlage und dann in der 2. und 3. Reihe insgesamt 4 Maschen zunehme und das dann 8x wiederhole, habe ich dann nicht 66 Maschen auf der Nadel und nicht 62 (30+4+32)?
19.12.2025 - 20:23DROPS Design answered:
Hi, Madeleine, you should increase a total of 8 times, including the first increase (30 + 32 = 62). Happy knitting!
22.12.2025 - 13:39
![]() Miranda wrote:
Miranda wrote:
Achterpand naald 3(=verkeerde kant) brei 4 averecht, meerder 1 steek richting rechts. Moet dat niet richting links zijn? Als ik de video bekijk van meerder steek richting rechts (verkeerde kant) is het breiwerk namelijk gespiegeld.
31.10.2025 - 12:31DROPS Design answered:
Dag Miranda,
Nee, dit moet rechts zijn. Er zijn overigens onlangs aanpassingen geweest in de beschrijving van de meerderingen voor de raglan bovenaan bij de instructies, misschien dat het nu iets duidelijker is
05.11.2025 - 19:37
|
|
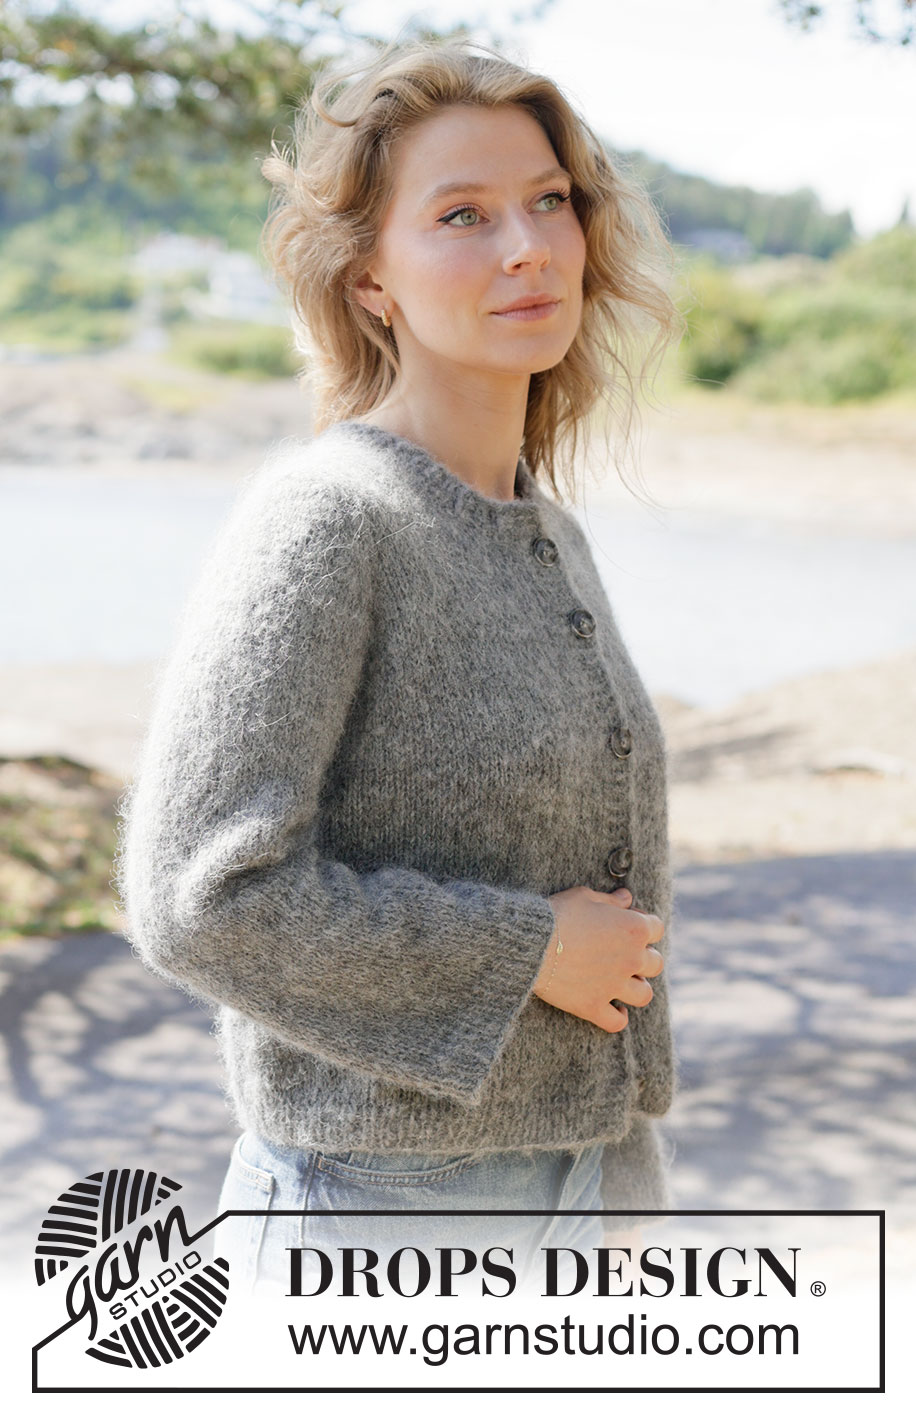
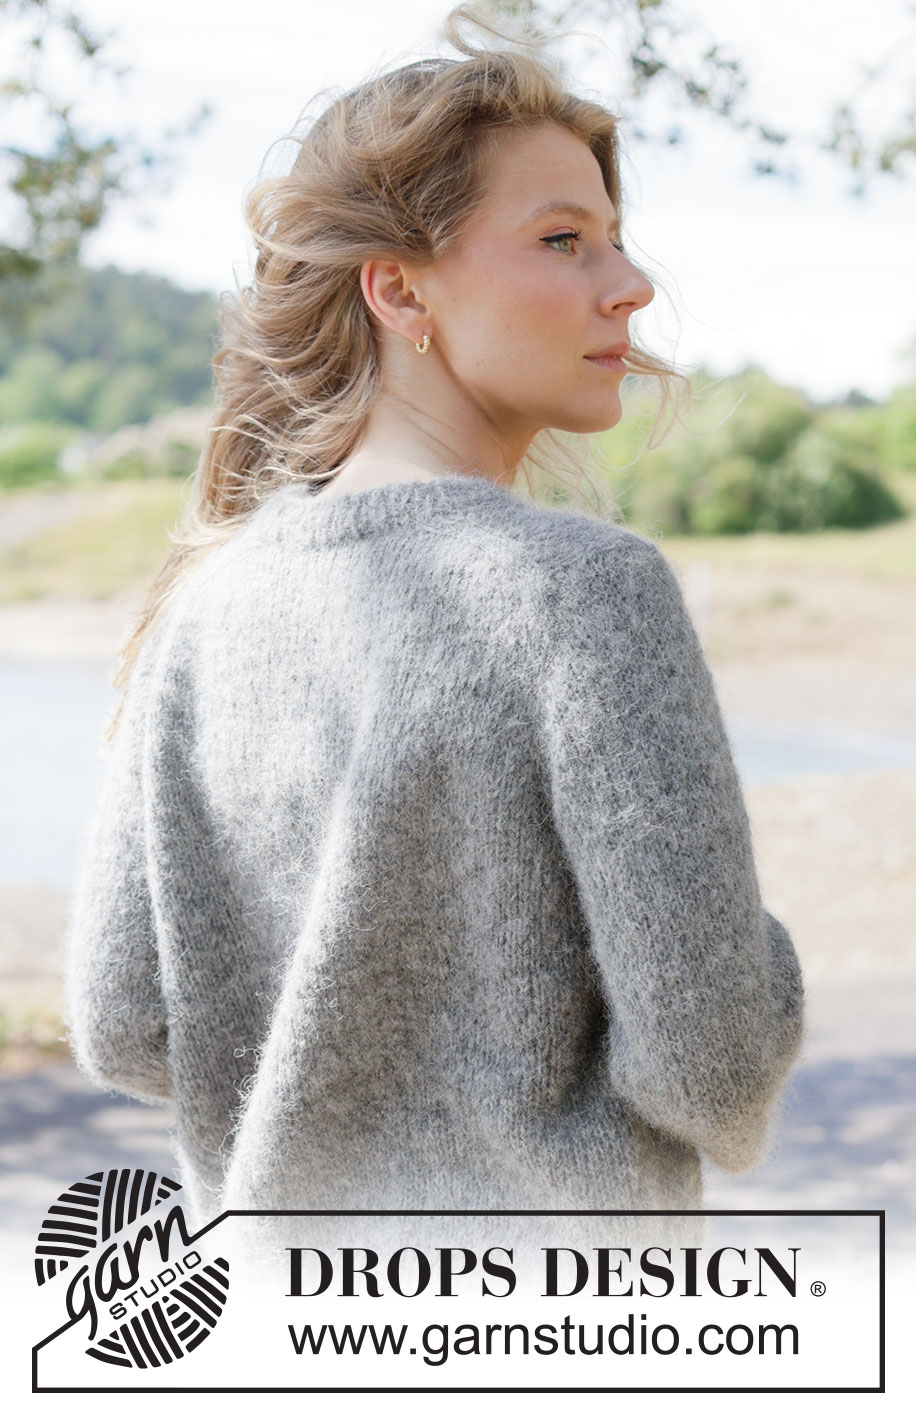
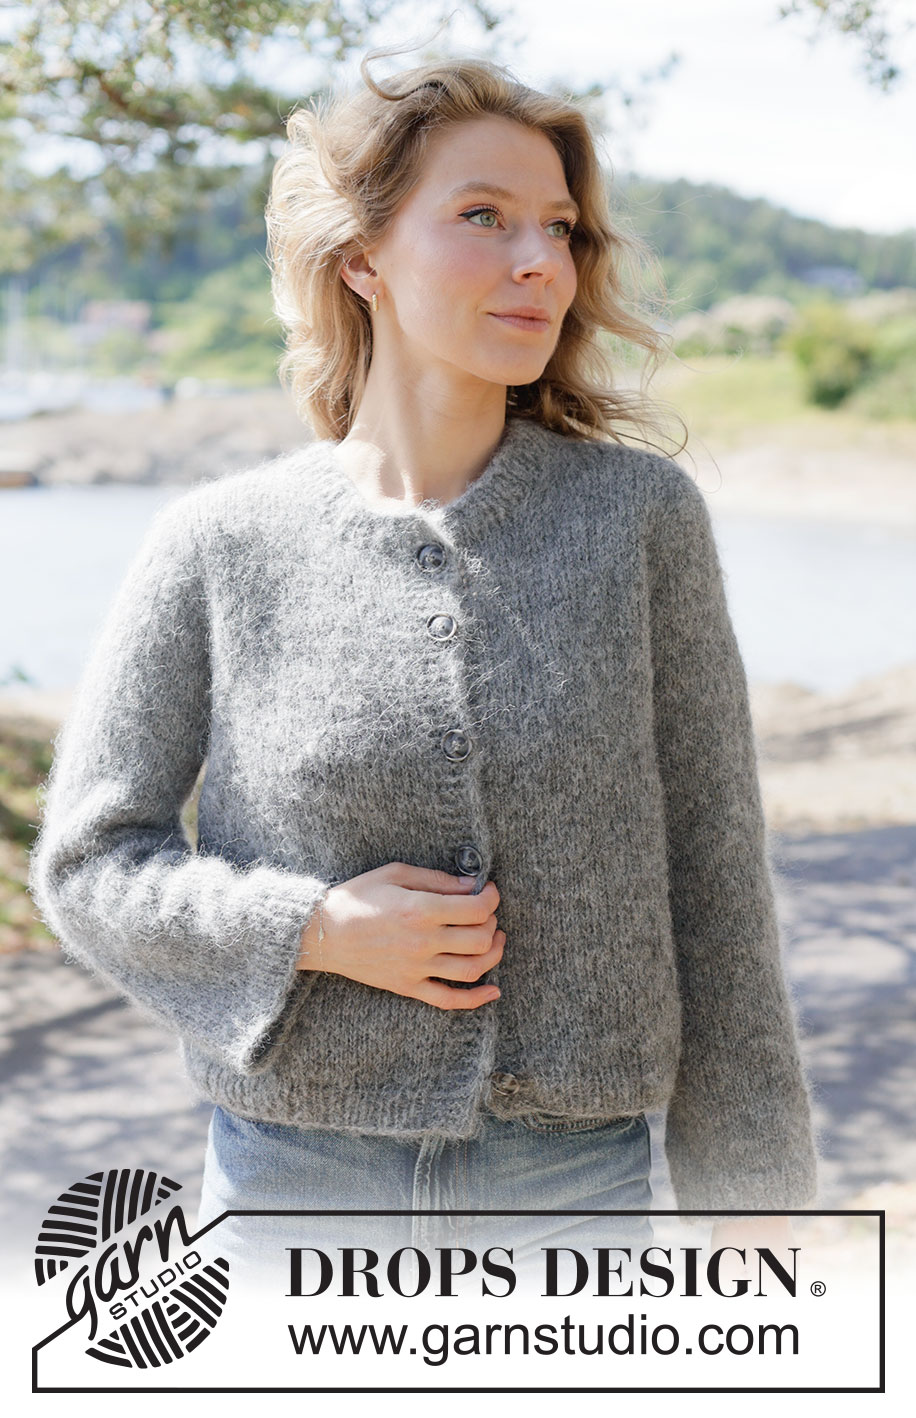
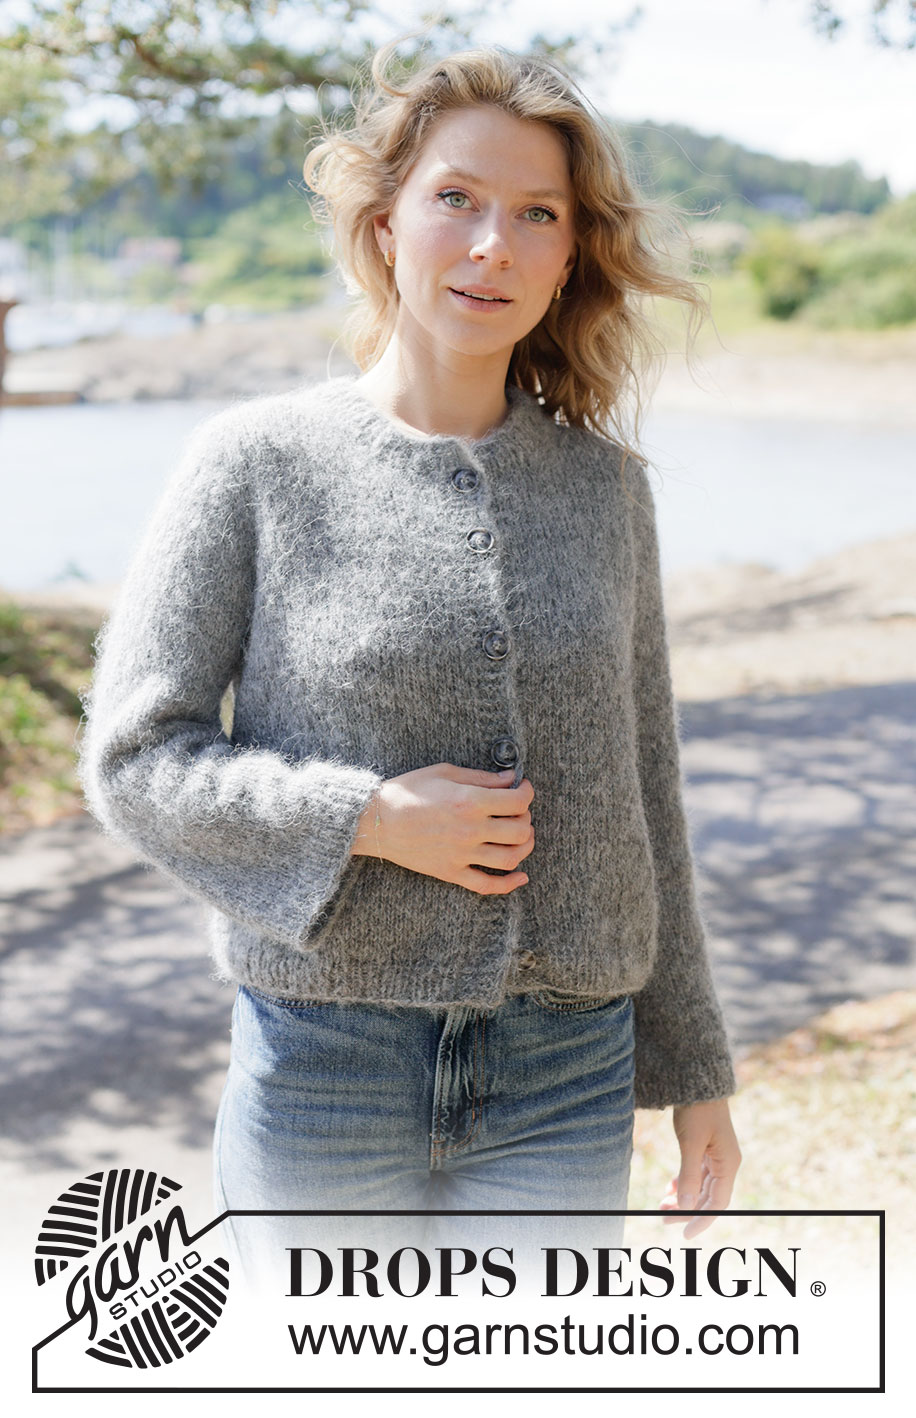
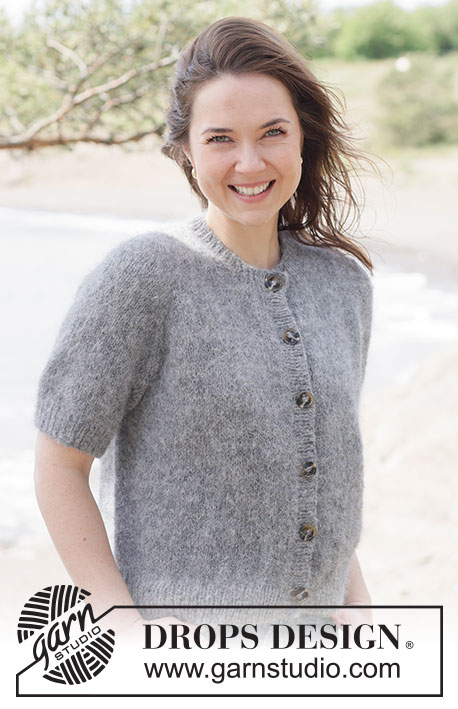
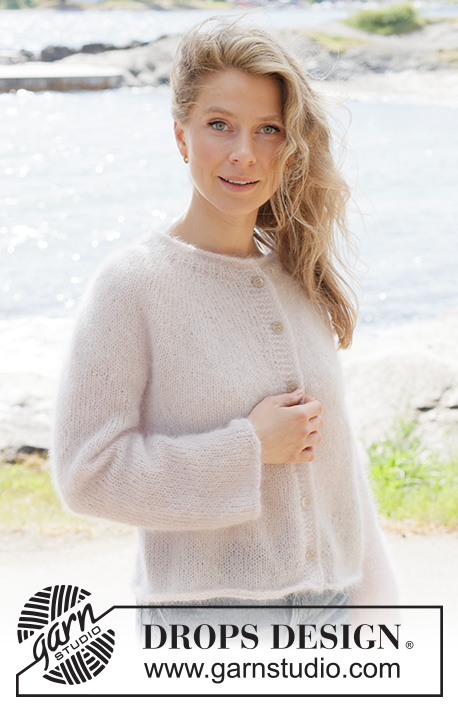
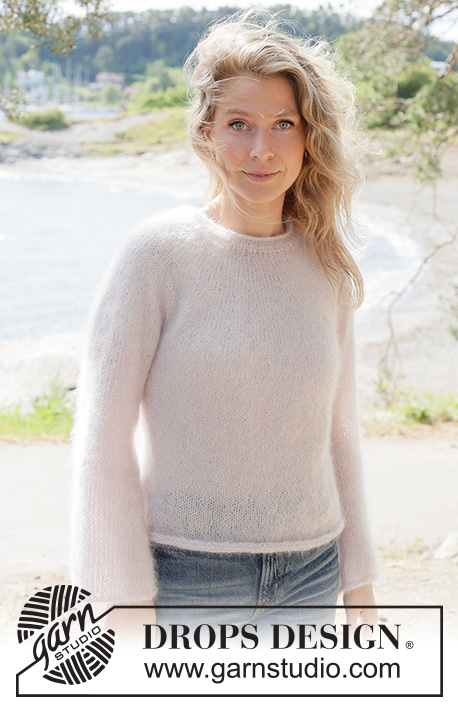
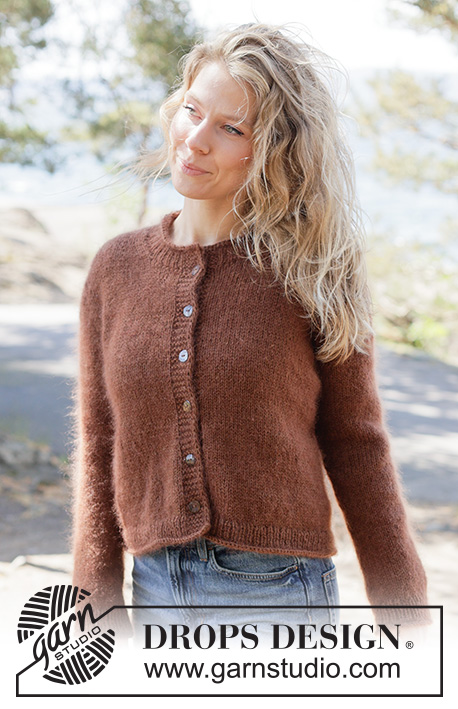
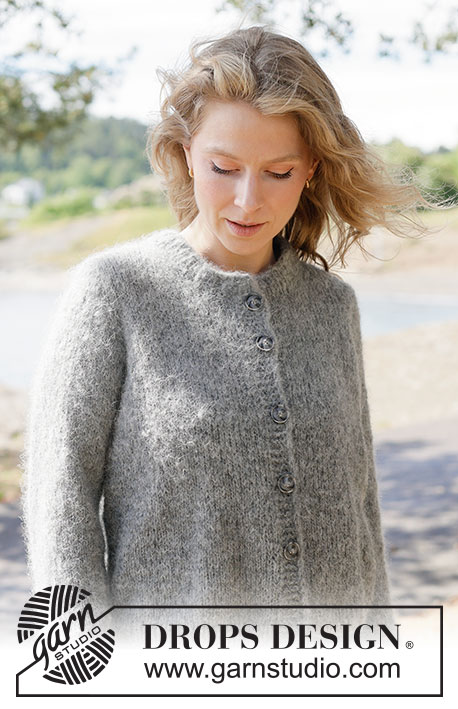
Cloud Drift Cardigan#clouddriftcardigan |
|
 |
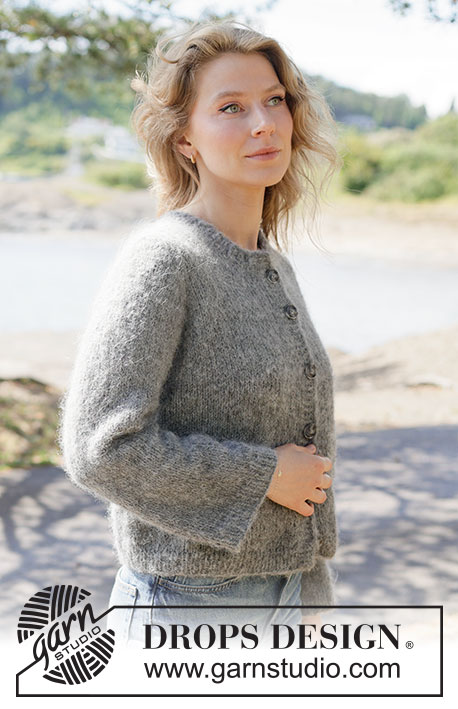 |
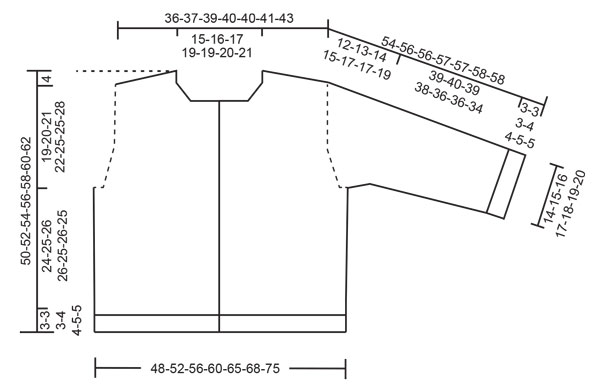
Knitted jacket in 1 strand DROPS Melody or 2 strands DROPS Brushed Alpaca Silk. Piece is knitted top down in stockinette stitch with European yoke, rolling edge and i-cord. Size XS – XXXL.
DROPS 263-32 |
|
|
---------------------------------------------------------- EXPLANATION FOR THE PATTERN: ---------------------------------------------------------- INCREASE TIP-1: INCREASE 1 STITCH TOWARDS THE LEFT - from RIGHT SIDE: Use left needle to pick up yarn between 2 stitches from row below, pick up yarn from the front and knit in the stitch loop that is on the back of the needle. INCREASE 1 STITCH TOWARDS THE RIGHT - from RIGHT SIDE: Use left needle to pick up yarn between 2 stitches from row below, pick up yarn from the back and knit in the stitch loop that is on the front side of the needle. INCREASE TIP-2: INCREASE 1 STITCH TOWARDS THE RIGHT - from WRONG SIDE: Use left needle to pick up yarn between 2 stitches from row below, pick up yarn from the back and purl in the stitch loop that is on the front side of the needle. INCREASE 1 STITCH TOWARDS THE LEFT - from WRONG SIDE: Use left needle to pick up yarn between 2 stitches from row below, pick up yarn from the front and purl in the stitch loop that is on the back side of the needle. GARTER STITCH (when working back and forth): Knit on all rows, i.e. knit from right side and knit from wrong side. 1 ridge vertically = knit 2 rows. BAND WITH I-CORD: BEGINNING OF ROW: Work band as follows: Slip 1 stitch purlwise with strand in front of piece, knit 1 and work 4 stitches in garter stitch. END OF ROW: Work band as follows: Work until 6 stitches remain on row, work 4 stitches in garter stitch, slip 1 stitch purlwise with strand in front of piece, knit 1. Work the same way both from right side and wrong side. BUTTONHOLES: Decrease for buttonholes on right band (when garment is worn). Decrease from right side when 5 stitches remain on row as follows: ROW 1 (= right side): Make 1 yarn over, knit 2 together, knit 1, slip 1 stitch purlwise with strand in front of piece, knit 1. ROW 2 (= wrong side): Work band as before and knit yarn over to make a buttonhole. Decrease for first buttonhole on first row from right side after neck edge has been worked. Then decrease the next 5-5-5-5-5-6-6 buttonholes, approx. 8-8-8½-8½-9-7½-8 cm = 3⅛"-3⅛"-3¼"-3¼"-3½"-2⅞"-3⅛" apart. Adjust so that bottom buttonhole is placed in the transition between stockinette stitch and rib on body. SLEEVE TIP: When picking up stitches mid under sleeve, there will be a small hole in the transition between stitches on body and sleeves. The holes can be closed by picking up the strand between two stitches - work this strand twisted together with the first stitch between body and sleeve to close the hole. DECREASE TIP: Decrease 1 stitch on each side of marker thread as follows: Work until 3 stitches remain before marker thread, knit 2 together, knit 2 (marker thread is between these 2 stitches), slip 1 stitch knitwise, knit 1, pass slipped stitch over stitch worked (= 2 stitches decreased). ---------------------------------------------------------- START THE PIECE HERE: ---------------------------------------------------------- JACKET - SHORT OVERVIEW OF THE PIECE: In this pattern needles of different length have been used, begin with fitting length for number of stitches and switch as needed. Garment is worked as point 1 - 5. 1 BACK PIECE: Cast on stitches in the back of neck and work back piece back and forth downwards while at the same time increasing in each side of piece until number of stitches for shoulder width is reached. Back piece has a slight diagonal shoulder. 2 FRONT PIECE: Begin by picking up stitches along one shoulder from back piece, work front piece downwards while increasing towards the neck. Repeat on the other shoulder. 3 YOKE: On next row work all stitches on to same circular needle - work as follows: Work one front piece, pick up stitches for sleeve along the side on front piece, work stitches on back piece, pick up stitches for sleeve along the side on the other front piece and work stitches on last front piece = work yoke over all stitches back and forth from mid front. 4 INCREASES FOR BODY AND SLEEVES: When working the yoke, increase stitches for body and sleeves, first increase for sleeves and then increase for both body and sleeves. 5 BODY AND SLEEVES: When all stitches have been increased and yoke is knitted to desired measurements, divide the piece for body and sleeves. Work body downwards back and forth on circular needle while putting the sleeves aside. Then work sleeves downwards in the round on needle. Finish by picking up stitches around the neck and work the neck edge back and forth. If 0 is given for the chosen size, it means that you skip the information until next information. BACK PIECE: Work piece back and forth on circular needle. Cast on 24-26-28-30-30-32-34 stitches on circular needle size 5.5 MM = US 9 with 1 strand DROPS Melody or 2 strands DROPS Brushed Alpaca Silk. ROW 1 (= wrong side): Purl all stitches. ROW 2 (= right side): Read INCREASE TIP-1 and knit 4, increase 1 stitch towards the left, knit until 4 stitches remain, increase 1 stitch towards the right, knit 4. ROW 3 (= wrong side): Read INCREASE TIP-2 and purl 4, increase 1 stitch towards the right, purl until 4 stitches remain, increase 1 stitch towards the left, purl 4. AFTER 3RD ROW: Work 2nd and 3rd ROW 8-8-8-8-8-8-8 times in total (= 16-16-16-16-16-16-16 rows have been worked), after increase there are = 56-58-60-62-62-64-66 stitches on needle. Remember to follow the knitting gauge! Cut the yarn, slip stitches on a thread or an stitch holder. RIGHT FRONT PIECE: Find right shoulder on back piece as follows: Place back piece flat with right side up, place back piece so that stitches on thread/stitch holder is towards you, right side of piece = right shoulder. Now pick up stitches along right diagonal shoulder on back piece - begin from right side at the armhole and pick up stitches in towards the neck as follows: Begin by picking up 1 stitch at the outermost corner of shoulder (= edge stitch), then pick up 1 stitch in every row worked inside edge stitch (= 16-16-16-16-16-16-16 stitches) = 17-17-17-17-17-17-17 stitches. Insert 1 marker in piece in towards the neck. All length measurements are done from this marker, measured in stitch direction. Work in stockinette stitch (work first row from wrong side). When piece measures 5-5-5-6-7-7-8 cm = 2"-2"-2"-2⅜"-2¾"-2¾"-3⅛", increase stitches towards the neck as follows: ROW 1 (= right side): Knit until 4 stitches remain, increase 1 stitch towards the right, knit 4 – remember INCREASE TIP-1. ROW 2 (= wrong side): Purl all stitches. Work 1st and 2nd ROW 4-5-5-5-6-6-6 times (= 8-10-10-10-12-12-12 rows have been worked) = 21-22-22-22-23-23-23 stitches. At the end of next row from right side cast on 12-12-13-14-13-14-15 new stitches = 33-34-35-36-36-37-38 stitches. Work 1 row from wrong side, work the first 6 stitches as BAND WITH I-CORD - read explanation above. Piece measures approx. 10-11-11-12-14-14-15 cm = 4"-4⅜"-4⅜"-4¾"-5½"-5½"-6" from marker. Some of the neck depth will be over on back piece. Neck depth at the front = 8-9-9-9-10-10-11 cm = 3⅛"-3½"-3½"-3½"-4"-4"-4⅜". Neck depth at the back = 2-2-2-3-4-4-4 cm = ¾"-¾"-¾"-1⅛"-1½"-1½"-1½". Continue with stockinette stitch with band as explained above until right front piece measures 11-12-12-13-15-16-16 cm = 4⅜"-4¾"-4¾"-5⅛"-6"-6¼"-6¼" from marker. Cut the yarn, slip stitches on a thread or stitch holder, now work left shoulder along the left diagonal shoulder on back piece as explained below. LEFT FRONT PIECE: Pick up stitches along left diagonal shoulder on back piece - begin from right side at the neck and pick up stitches out towards the armhole as follows: Pick up 1 stitch in every row worked inside edge stitch (= 16-16-16-16-16-16-16 stitches), finish by picking up 1 stitch at the outermost corner of the shoulder (edge stitch) = 17-17-17-17-17-17-17 stitches. Insert 1 marker in piece in towards the neck. All length measurements are done from this marker, measured in stitch direction. Work in stockinette stitch (work first row from wrong side). When piece measures 5-5-5-6-7-7-8 cm = 2"-2"-2"-2⅜"-2¾"-2¾"-3⅛", increase stitches towards the neck as follows: ROW 1 (= right side): Remember INCREASE TIP-1 and knit 4, increase 1 stitch towards the left, knit the rest of row. ROW 2 (= wrong side): Purl all stitches. Work 1st and 2nd ROW 4-5-5-5-6-6-6 times (= 8-10-10-10-12-12-12 rows have been worked) = 21-22-22-22-23-23-23 stitches. At the end of next row from wrong side cast on 12-12-13-14-13-14-15 new stitches = 33-34-35-36-36-37-38 stitches. Increases for neck are now done. Piece measures approx. 10-11-11-12-14-14-15 cm = 4"-4⅜"-4⅜"-4¾"-5½"-5½"-6" from marker. Some of the neck depth will be over on back piece. Neck depth at the front = 8-9-9-9-10-10-11 cm = 3⅛"-3½"-3½"-3½"-4"-4"-4⅜". Neck depth at the back = 2-2-2-3-4-4-4 cm = ¾"-¾"-¾"-1⅛"-1½"-1½"-1½". Work in stockinette stitch with 6 stitches BAND WITH I-CORD - remember explanation above until left front piece measures 11-12-12-13-15-16-16 cm = 4⅜"-4¾"-4¾"-5⅛"-6"-6¼"-6¼" from marker (finish after a row from wrong side). Now slip front pieces and back piece together, and pick up stitches for sleeve as explained below. ROW 1 (= right side): Begin from right side with stitches from left front piece: Work band as before, knit until 2 stitches remain on front piece, slip 1 stitch, knit 1, pass slipped stitch over (= 1 stitch decreased), insert 1 marker, pick up 16-18-18-20-22-24-24 stitches along the side on left front piece (= stitches for sleeve - pick up stitches inside outermost stitch), insert 1 marker, knit the first 2 stitches from back piece together (= 1 stitch decreased), knit until 2 stitches remain on back piece, slip 1 stitch, knit 1, pass slipped stitch over (= 1 stitch decreased), insert 1 marker, pick up 16-18-18-20-22-24-24 stitches along the side on right piece (= stitches for sleeve - pick up stitches inside outermost stitch), insert 1 marker, work stitches from right front piece back on needle, knit the first 2 stitches together (= 1 stitch decreased), knit until 6 stitches remain, work band as before - remember BUTTONHOLES read explanation above = 150-158-162-170-174-182-186 stitches. ROW 2 (= wrong side): Purl and work band as before until first marker, move marker on to right needle, increase 1 stitch towards the left, purl until next marker, increase 1 stitch towards the right, move marker on to right needle, purl until next marker, move marker on to right needle, increase 1 stitch towards the left, purl until next marker, increase 1 stitch towards the right, purl until 6 stitches remain, work band as before = 154-162-166-174-178-186-190 stitches. ROW 3 (= right side): Work as before until first marker, move marker on to right needle, increase 1 stitch towards the left, work until next marker, increase 1 stitch towards the right, move marker on to right needle, work until next marker, move marker on to right needle, increase 1 stitch towards the left, work until next marker, increase 1 stitch towards the right, move marker on to right needle, work the rest of row as before = 158-166-170-178-182-190-194 stitches. ROW 4 (= wrong side): Work as before until first marker, move marker on to right needle, increase 1 stitch towards the left, purl until next marker, increase 1 stitch towards the right, move marker on to right needle, purl until next marker, move marker on to right needle, increase 1 stitch towards the left, purl until next marker, increase 1 stitch towards the right, move marker on to right needle, work the rest of row as before = 162-170-174-182-186-194-198 stitches. ROW 5 (= right side): Work as before until first marker, move marker on to right needle, increase 1 stitch towards the left, knit until next marker, increase 1 stitch towards the right, move marker on to right needle, knit until next marker, move marker on to right needle, increase 1 stitch towards the left, knit until next marker, increase 1 stitch towards the right, move marker on to right needle, work the rest of row as before = 166-174-178-186-190-198-202 stitches. ROW 6 (= wrong side): Purl with 6 stitches band in each side as before without increasing. AFTER 6TH ROW: Work 5th and 6th row 3-3-2-2-0-0-0 more times (= 6-6-4-4-0-0-0 rows worked). 7-7-6-6-4-4-4 increases have been done in total for sleeves = 30-32-30-32-30-32-32 stitches on each sleeve, 32-33-34-35-35-36-37 stitches on each front piece and 54-56-58-60-60-62-64 stitches on back piece = 178-186-186-194-190-198-202 stitches. Then increase on both sleeves and body, increase on body 2 stitches inside marker so that there are 2 stitches between increase for body and increase for sleeve - work next row as follows: ROW 1 (= right side): Work band and stockinette stitch until 2 stitches remain on front piece before first marker, increase 1 stitch towards the right, knit 2, move marker on to right needle, increase 1 stitch towards the left, knit until next marker, increase 1 stitch towards the right, move the marker on to right needle, knit 2, increase 1 stitch towards the left, knit until 2 stitches on back piece remain before next marker, increase 1 stitch towards the right, knit 2, move marker on to right needle, increase 1 stitch towards the left, knit until next marker, increase 1 stitch towards the right, move marker on to right needle, knit 2, increase 1 stitch towards the left, knit until 6 stitches remain, work band as before (= 8 stitches increased, i.e. 1 stitch increased on each side of 2 stitches in every transition between body and sleeve). ROW 2 (= wrong side): Purl with 6 stitches band in each side as before. Work 1st and 2nd ROW 6-7-9-10-14-14-16 times (= 12-14-18-20-28-28-32 rows worked). 13-14-15-16-18-18-20 increases have been done in total on sleeves and 6-7-9-10-14-14-16 increases on body = 42-46-48-52-58-60-64 stitches on each sleeve, 38-40-43-45-49-50-53 stitches on each front piece and 66-70-76-80-88-90-96 stitches on back piece = 226-242-258-274-302-310-330 stitches. Sleeve measures approx. 12-13-14-15-17-17-19 cm = 4¾"-5⅛"-5½"-6"-6¾"-6¾"-7½" from where stitches were picked up for sleeve - NOTE: When the jacket is folded double at the shoulder, piece should measure approx. 18-19-20-22-25-25-27 cm = 7"-7½"-8"-8¾"-9¾"-9¾"-10⅝" from the top of shoulder and down along the armhole. Work without increasing until piece measures 19-20-21-22-25-25-28 cm = 7½"-8"-8¼"-8¾"-9¾"-9¾"-11" from the top of shoulder and down along the armhole. Now divide yoke for body and sleeves. DIVIDING FOR BODY AND SLEEVES: AT THE SAME TIME as next row is worked divide yoke for body and sleeves as follows: Work 38-40-43-45-49-50-53 stitches as before (= front piece), slip the next 42-46-48-52-58-60-64 stitches on a thread for sleeve, cast on 6-8-8-10-10-12-16 new stitches on row (= in the side mid under sleeve), and work the next 66-70-76-80-88-90-96 stitches in stockinette stitch (= back piece), slip the next 42-46-48-52-58-60-64 stitches on a thread for sleeve, cast on 6-8-8-10-10-12-16 new stitches on row (= in the side mid under sleeve) and work the last 38-40-43-45-49-50-53 stitches as before (= front piece). Finish body and sleeves separately. BODY: = 154-166-178-190-206-214-234 stitches. Work stockinette stitch and band stitches as before until piece measures 24-25-26-26-25-26-25 cm = 9½"-9¾"-10¼"-10¼"-9¾"-10¼"-9¾" from division. On next row from right side begin rib while AT THE SAME TIME increasing 19-21-21-23-25-27-31 stitches evenly on row (do not increase over bands), work as follows: Switch to circular needle size 4 MM = US 6, work 6 stitches band as before, work rib (= knit 1/purl 1) – remember increase until 7 stitches remain, finish with knit 1 and band as before = 173-187-199-213-231-241-265 stitches. Work rib for 3-3-3-4-4-5-5 cm = 1⅛"-1⅛"-1⅛"-1½"-1½"-2"-2", bind off all stitches somewhat loosely with knit over knit and purl over purl. Jacket measures approx. 50-52-54-56-58-60-62 cm = 19¾"-20½"-21¼"-22"-22¾"-23⅝"-24⅜" from the top of shoulder. SLEEVES: Slip 42-46-48-52-58-60-64 sleeve stitches from one thread on to circular needle size 5.5 MM = US 9 and pick in addition up 1 stitch in each of the 6-8-8-10-10-12-16 stitches cast on under sleeve - read SLEEVE TIP = 48-54-56-62-68-72-80 stitches. Insert 1 marker in the middle of the 6-8-8-10-10-12-16 new stitches under sleeve - round begins at the marker thread. Work in stockinette stitch in the round on needle - AT THE SAME TIME when sleeve measures 1-1-1-1-1-1-1" cm = ⅜"-⅜"-⅜"-⅜"-⅜"-⅜"-⅜" from division, decrease mid under sleeve – read DECREASE TIP and decrease as follows: Decrease 2 stitches 3-3-3-3-4-4-6 times on every other round, then decrease 2 stitches every 2 cm = ¾" 0-1-1-2-3-3-4 times in total = 42-46-48-52-54-58-60 stitches on needle. Work until sleeve measures 39-40-39-38-36-36-34 cm = 15¼"-15¾"-15¼"-15"-14¼"-14¼"-13⅜" from division. Switch to double pointed needles size 4 MM = US 6 and work rib (= knit 1/purl 1) while AT THE SAME TIME increasing 6-6-6-6-8-8-8 stitches evenly on 1st round = 48-52-54-58-62-66-68 stitches. When rib measures 3-3-3-4-4-5-5 cm = 1⅛"-1⅛"-1⅛"-1½"-1½"-2"-2", bind off somewhat loosely with knit over knit and purl over purl. Sleeve measures approx. 42-43-42-42-40-41-39 cm = 16½"-17"-16½"-16½"-15¾"-16⅛"-15¼" from division. NECK EDGE: Use circular needle size 4 MM = US 6, begin from right side mid front and pick up approx. 85-91-95-105-109-113-119 stitches around the neck (make sure to pick up 1 stitch in every band stitch), number of stitches must be divisible by 2 + 1. Work first row as follows from wrong side: Work 6 stitches band as before, work rib (= purl 1/knit 1 until 7 stitches remain on needle, purl 1 and work 6 stitches band as before. Work next row as follows from right side: Work 6 stitches band as before, work rib (= knit 1/purl 1) until 7 stitches remain on needle, knit 1 and work 6 stitches band as before. Continue rib back and forth like this for 3-3-3-3-4-4-4 cm = 1⅛"-1⅛"-1⅛"-1⅛"-1½"-1½"-1½". Loosely bind off. ASSEMBLY: Sew the buttons on to the left band. |
|
 |
|
Have you finished this pattern?Tag your pictures with #dropspattern #clouddriftcardigan or submit them to the #dropsfan gallery. Do you need help with this pattern?You'll find 41 tutorial videos, a Comments/Questions area and more by visiting the pattern on garnstudio.com. © 1982-2026 DROPS Design A/S. We reserve all rights. This document, including all its sub-sections, has copyrights. Read more about what you can do with our patterns at the bottom of each pattern on our site. |
|


With over 40 years in knitting and crochet design, DROPS Design offers one of the most extensive collections of free patterns on the internet - translated to 17 languages. As of today we count 324 catalogs and 12290 patterns - 12280 of which are translated into English (US/in).
We work hard to bring you the best knitting and crochet have to offer, inspiration and advice as well as great quality yarns at incredible prices! Would you like to use our patterns for other than personal use? You can read what you are allowed to do in the Copyright text at the bottom of all our patterns. Happy crafting!
Post a comment to pattern DROPS 263-32
We would love to hear what you have to say about this pattern!
If you want to leave a question, please make sure you select the correct category in the form below, to speed up the answering process. Required fields are marked *.