
Looking for a yarn?


Comments / Questions (125)
![]() Wanda wrote:
Wanda wrote:
Dzień dobry, nie bardzo rozumiem, o co chodzi w tej wskazówce dotyczącej rękawów. Na jakiej zasadzie dobiera się oczka. Wziąć z powrotem oczka z nitki z jednej strony robótki i przełożyć je na krótkie druty z żyłką/ druty pończosznicze nr 4 (= 44-48-51-53-62 oczka) i nabrać 1 oczko w każde z 6 oczek nabranych na tył/przody (= 50-54-57-59-68 oczek). Będę bardzo wdzięczna za pomoc, pozdrawiam serdecznie
02.04.2024 - 15:50DROPS Design answered:
Witaj Wando, jak to zrobić znajdziesz na filmie instruktażowym TUTAJ. Pozdrawiamy!
02.04.2024 - 15:58
![]() Tove Schatvet-Riisager wrote:
Tove Schatvet-Riisager wrote:
Kan jeg få maskeantall for hver uttaging/økning for størrelsene 9/10 år? Nå har jeg strikket, rukket opp, strikket, rukket opp, antagelig 10 ganger. Garnet blir ikke penere av dette. Jeg har strikket i mange år, mange ulike av de flotte oppskriftene hos der, og nyter virkelig mange av dem. Likevel blir det absolutt ikke lykkelig resultat med så mye stanging allerede fra pinne 7, ikke sant. Tusen takk for hjelp. Beste strikkehilsen fra 2V=Tove
22.03.2024 - 03:38DROPS Design answered:
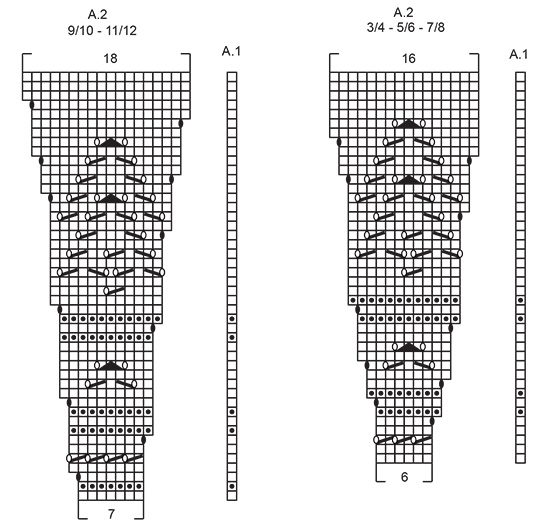
Hej Tove, du strikker A.2 14 gange, det betyder at du får 14 nye masker for hver udtagning ifølge diagrammet :)
03.04.2024 - 12:15
![]() Junifee wrote:
Junifee wrote:
Mit dem original Garn gestrickt. Statt Nadelstärke 4,0 musste ich mit 6,0 stricken um die 21 M / 10 cm Breite zu erreichen. In der Höhe hatte ich 30 Reihen statt der 28 um die 10 cm zu erreichen. Die Anleitung ist eingängig und gut verständlich. Das Garn ist superweich. Ich habe die Größe 9/10 Jahre gestrickt. Mir haben 200g allerdings nicht gereicht. Die Jacke ist toll geworden und ich würde sie wieder stricken.
09.12.2023 - 21:02
![]() Grete wrote:
Grete wrote:
Hei igjen! Beklager forrige kommentar - i en frustrert situasjon..Klarte det til slutt, og jakken blir kjempefin!
20.10.2023 - 21:23
![]() Grete Slinde wrote:
Grete Slinde wrote:
Hei! Skulle virkelig ønske at det i oppskriften kunne stå totalt antall masker på pinnen etter hvert som man legger til, slik at en kan være tryggere på at det skal stemme med mønsteret! Det gjør jo det ved rundfelling. Og med hullmønster som her er det ikke like lett å se om man er på "riktig vei". Har måttet rekke opp utrolig mange ganger... Mvh Grete
17.10.2023 - 11:43
![]() Sabrina Aceranti wrote:
Sabrina Aceranti wrote:
Lo schema non mi si riproduce come nella foto. Le V e il disegno sono confusi.Ho guastato tre volete e sto usando lo stesso filato taglia 7/8 anni. È possibile che sia qualche errore?
10.09.2023 - 22:49DROPS Design answered:
Buonasera Sabrina, sta leggendo il diagramma dal basso verso l'alto e da destra verso sinistra per i ferri di andata?
12.09.2023 - 19:33
![]() Christine Weir wrote:
Christine Weir wrote:
Hi ....I've printed this pattern ...but I can't seem to get the diagrams to it ..can you help?
02.06.2023 - 20:13DROPS Design answered:
Dear Christine, the charts seem to print fine on our side. There should be 6 pages in the printed version: the 4th page contains the chart explanations and the 5th page contains the charts themselves. You should also be able to check them online, after the pattern written instructions. Happy knitting!
04.06.2023 - 19:04
![]() Maddy wrote:
Maddy wrote:
De eerste gaatjestoer. begin met A1 = 1 recht en dan 2 samen omslag etc. aan het eind zijn na de laatste omslag direct de 5 kantsteken. Dus rechts zie je 5 kantsteken 2 recht en dan eerste gaatje en links sluit het gaatje gelijk aan op de kantsteek. Klopt dat wel? het is nu a-symetrisch
22.05.2023 - 12:38DROPS Design answered:
Dag Maddy,
Hmm ja, de naald met gaatjes wordt hierdoor asymmetrisch, maar voor de rest van het patroon met je wel eerst A.1 breien en dan de herhalingen van A.2. Als je het storend vindt, zou je bij de naald met gaatjes de 1 recht van A.1 aan het eind kunnen maken in plaats van aan het begin en daarna het patroon weer oppakken volgens de beschrijving.
23.05.2023 - 09:46
![]() Debbie Hallam wrote:
Debbie Hallam wrote:
Hi I’ve just knitted this pattern for my granddaughter and loved it . Is it ( or something similar ) available in adult sizes .? Thanks
28.04.2023 - 15:40
![]() Annis wrote:
Annis wrote:
Where do I place the marker stitches in the row?
26.04.2023 - 06:11DROPS Design answered:
Hi Annis, The marker is used to measure the yoke from, so it does not matter where you place it on the row. Happy knitting!
26.04.2023 - 06:39
|
||||||||||||||||||||||
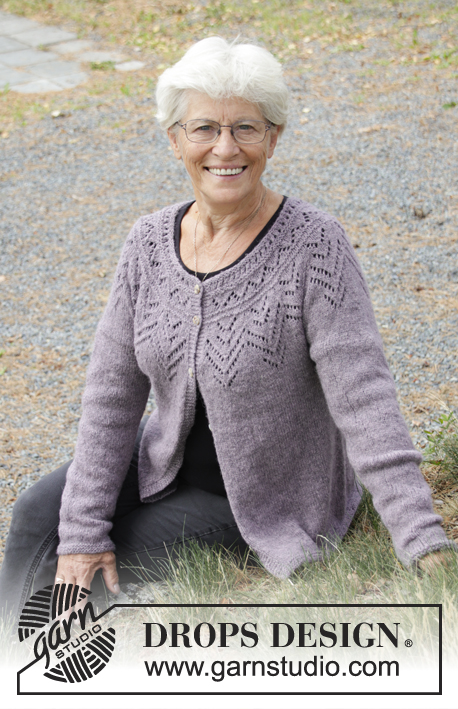
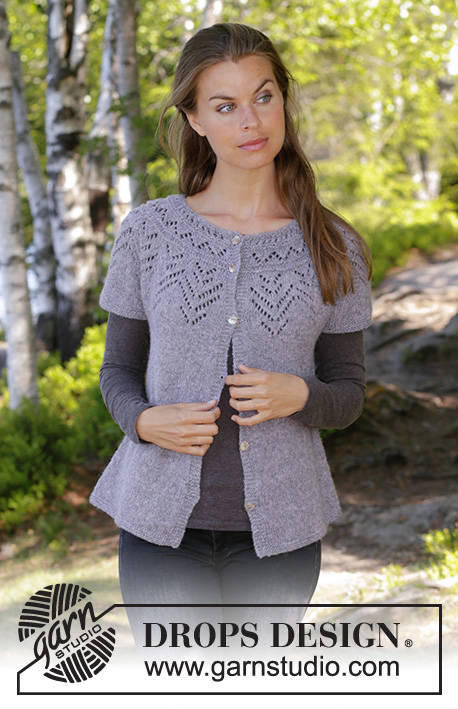
Agnes#agnescardigan |
||||||||||||||||||||||
 |
 |
|||||||||||||||||||||
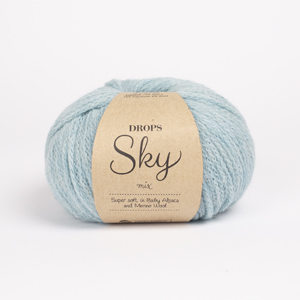
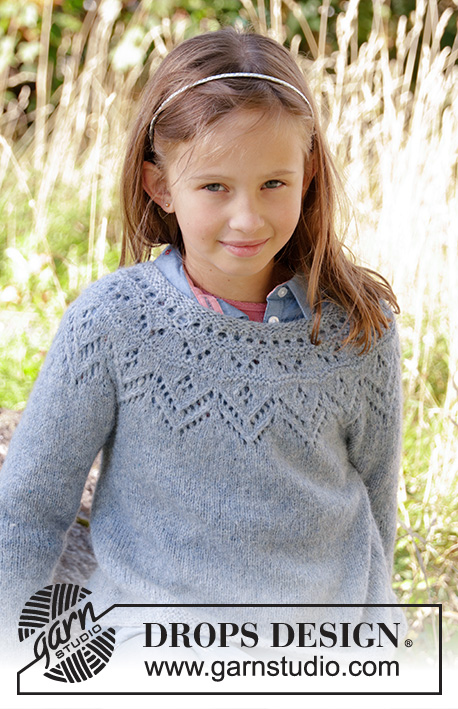
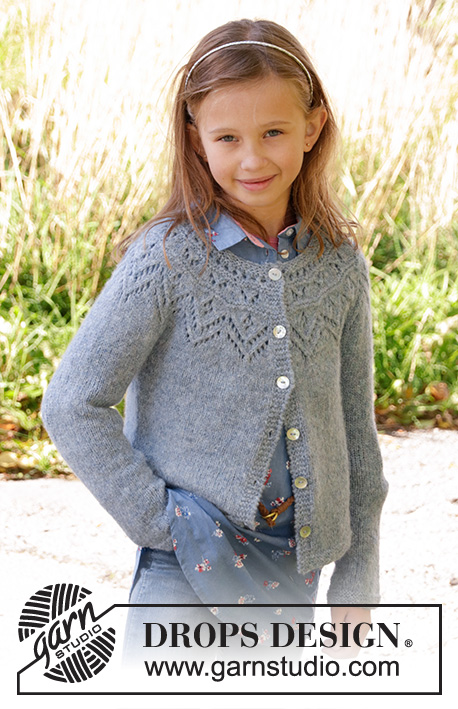
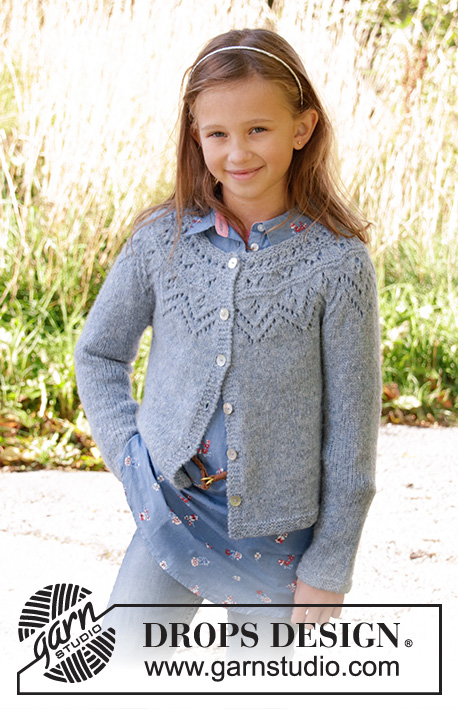
Knitted jacket for children in DROPS Sky. The piece is worked top down with round yoke, lace pattern, stocking stitch and garter stitch. Sizes 3-12 years.
DROPS Children 34-9 |
||||||||||||||||||||||
|
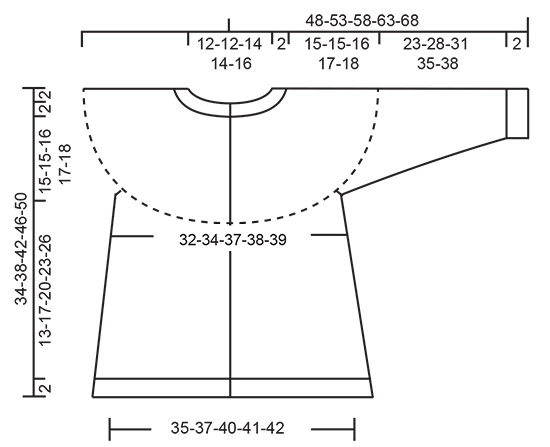
------------------------------------------------------- EXPLANATIONS FOR THE PATTERN: ------------------------------------------------------- RIDGE/GARTER STITCH (worked back and forth): 1 ridge = Knit 2 rows. RIDGE/GARTER STITCH (worked in the round): 1 ridge = 2 rounds. Knit 1 round and purl 1 round PATTERN: See diagrams A.1 and A.2. Choose diagram for your size. The diagrams show all the rows in the pattern seen from the right side. INCREASE TIP-1 (evenly spaced): To work out how to increase evenly, count the total number of stitches on the needle (e.g. 72 stitches) and divide by the number of increases to be made (e.g. 17) = 4.2. In this example, increase by making 1 yarn over after approx. each 4th stitch. On the next row work the yarn overs twisted to avoid holes. INCREASE TIP-2 (for sides of body): Work until there is 1 stitch left before the marker thread, 1 yarn over, knit 2 (the marker thread sits between these 2 stitches), 1 yarn over = 2 stitches increased. On the next row work the yarn overs twisted to avoid holes. Then work the new stitches in stocking stitch. DECREASE TIP (for sleeves): Decrease 1 stitch on each side of the marker thread as follows: Work until there are 3 stitches left before the marker thread, knit 2 together, knit 2 (the marker thread sits between these 2 stitches), slip 1 stitch as if to knit, knit 1 and pass the slipped stitch over the knitted stitch = 2 stitches decreased. BUTTONHOLE: Work the buttonholes on right band (when the garment is worn). 1 buttonhole = start from the wrong side and knit together the 2nd and 3rd stitch from the edge, make 1 yarn over. On the next row knit the yarn over to leave a hole. The first buttonhole is worked after approx. 1 cm from the neck edge, then the next 5-5-5-6-6 buttonholes every 5-6-6-6-7 cm. ------------------------------------------------------- START THE PIECE HERE: ------------------------------------------------------- JACKET - SHORT OVERVIEW OF THE PIECE: The piece is worked back and forth with circular needle, top down. It is divided for body and sleeves. The body is continued back and forth with circular needle. The sleeves are worked in the round with double pointed needles/short circular needle. YOKE: Cast on 72-76-80-86-92 stitches with circular needle size 4 mm and Sky. Work 2 RIDGES – see description above – remember BUTTONHOLES on right band – see description above. Knit 1 row where you increase 17-19-21-23-24 stitches evenly on row - READ INCREASE TIP-1! = 89-95-101-109-116 stitches on needle. Knit 1 row from the wrong side. Insert a marker thread on this round and measure from here. Work according to diagrams A.1 and A.2 as follows from the right side: Work 5 band stitches in GARTER STITCH, work A.1 over 1 stitch, A.2 a total of 13-14-15-14-15 times on the row and then 5 band stitches in garter stitch. REMEMBER THE KNITTING TENSION! When diagrams A.1 and A.2 have been completed in height there are 219-235-251-263-281 stitches on the row. On the next row from the right side adjust stitch count to 219-235-253-261-283 stitches. Continue working stocking stitch until the piece measures 15-15-16-17-18 cm from marker thread. The next row from the right side is worked as follows: Work 5 band stitches in garter stitch, 30-32-35-36-37 stitches in stocking stitch (= front piece), place the next 44-48-51-53-62 stitches on a thread (= sleeve), cast on 6 new stitches under the sleeve, work 61-65-71-73-75 stitches in stocking stitch (= back piece), place the next 44-48-51-53-62 stitches on a new thread (= sleeve), cast on 6 new stitches, work 30-32-35-36-37 stitches (= front piece) and 5 band stitches in garter stitch. BODY: There are 143-151-163-167-171 stitches on the needle. THE PIECE IS NOW MEASURED FROM HERE! Insert 1 marker thread in the middle of the 6 new stitches which were cast on in each side. Work stocking stitch back and forth with 5 band stitches in garter stitch on each side. When the piece measures 3 cm increase 1 stitch on each side of each marker (= 4 stitches increased) READ INCREASE TIP-2! Repeat this increase every 3-4½-5½-6½-7½ cm a total of 3 times = 155-163-175-179-183 stitches on needle. Continue working until the piece measures approx. 15-17-20-23-26 cm (or to desired length, there is approx. 2 cm until finished measurements). Work garter stitch for 2 cm. Loosely cast off with knit. Cut and fasten the thread. SLEEVE: Place the stitches from the one thread on short circular needle/double pointed needles size 4 mm (= 44-48-51-53-62 stitches) and knit up 1 new stitch in each of the 6 new stitches on the body (= 50-54-57-59-68 stitches). Insert 1 marker thread in the middle of these 6 stitches. Work stocking stitch in the round until the sleeve measures 3 cm. Now decrease 1 stitch on each side of the marker thread - READ DECREASE TIP. Continue with stocking stitch and repeat the decrease every 4-4-4-4-3½ cm until you have decreased a total of 5-6-7-8-10 times = 40-42-43-43-48 stitches on needle. Work stocking stitch until the sleeve measures 23-28-31-35-38 cm. Work garter stitch for 2 cm. Cast off with knit. Cut and fasten the strand. Work the other sleeve in the same way. ASSEMBLY: Sew buttons onto left band. |
||||||||||||||||||||||
Diagram explanations |
||||||||||||||||||||||
|
||||||||||||||||||||||
 |
||||||||||||||||||||||
 |
||||||||||||||||||||||
Have you finished this pattern?Tag your pictures with #dropspattern #agnescardigan or submit them to the #dropsfan gallery. Do you need help with this pattern?You'll find 26 tutorial videos, a Comments/Questions area and more by visiting the pattern on garnstudio.com. © 1982-2025 DROPS Design A/S. We reserve all rights. This document, including all its sub-sections, has copyrights. Read more about what you can do with our patterns at the bottom of each pattern on our site. |
||||||||||||||||||||||


With over 40 years in knitting and crochet design, DROPS Design offers one of the most extensive collections of free patterns on the internet - translated to 17 languages. As of today we count 320 catalogues and 12094 patterns translated into English (UK/cm). 12094
We work hard to bring you the best knitting and crochet have to offer, inspiration and advice as well as great quality yarns at incredible prices! Would you like to use our patterns for other than personal use? You can read what you are allowed to do in the Copyright text at the bottom of all our patterns. Happy crafting!
Post a comment to pattern DROPS Children 34-9
We would love to hear what you have to say about this pattern!
If you want to leave a question, please make sure you select the correct category in the form below, to speed up the answering process. Required fields are marked *.