
Popular categories
Looking for a yarn?


|
|||||||
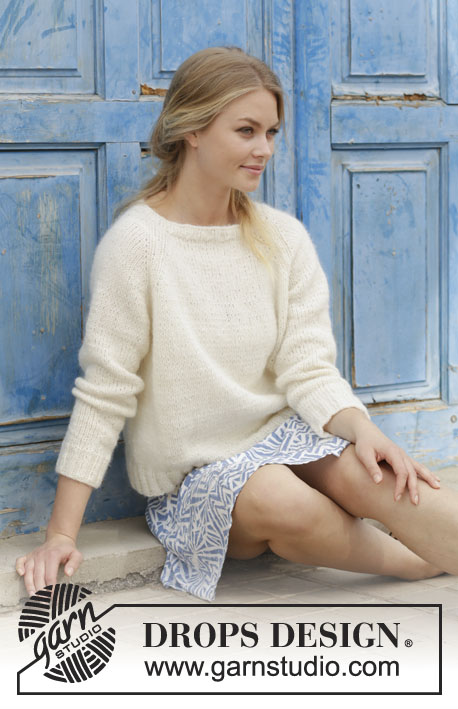
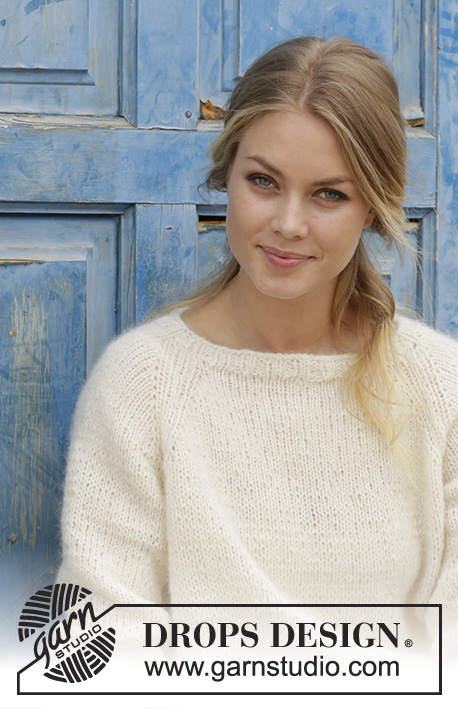
Carly Pullover |
|||||||
 |
 |
||||||
Knitted jumper with raglan, worked top down. Sizes S - XXXL. The piece is worked in DROPS Air.
DROPS 186-30 |
|||||||
|
INFORMATION FOR THE PATTERN: PATTERN: See diagram A.1. The diagram shows all the rows in the pattern seen from the right side. RAGLAN: Increase to raglan on each side of A.1 (= 8 stitches increased per round). Increase by making 1 yarn over, on the next round work the yarn over twisted to avoid a hole. INCREASE TIP (evenly spaced): To work out how to increase evenly, count the total number of stitches on the round (e.g. 168 stitches) and divide by the number of increases to be made (e.g. 24) = 7. In this example, increase by making 1 yarn over after every 7th stitch. On the next round, work the yarn overs twisted to avoid holes. DECREASE TIP (for sleeves): Decrease 1 stitch on each side of the marker thread as follows: Work until there are 3 stitches left before the marker thread, slip 1 stitch as if to knit, knit 1, pass the slipped stitch over the knitted stitch, knit 2 stitches (the marker thread sits in the middle of these 2 stitches) knit the next 2 stitches together. ---------------------------------------------------------- The piece is worked in the round with circular needle from mid back, top down. The sleeves are worked with short circular needle/double pointed needles. JUMPER: Cast on 80-84-88-96-96-104 stitches with circular needle size 4.5 mm and Air. Knit 1 round, then work rib (= knit 2 / purl 2) for 2 cm. The beginning of the round = mid back. Change to circular needle size 5.5 mm and work the next round as follows: Knit 15-16-17-18-18-20 stitches - AT THE SAME TIME as you increase 2-1-2-2-2-3 stitches evenly over these stitches, knit 10-10-10-12-12-12 stitches, knit 30-32-34-36-36-40 stitches – AT THE SAME TIME as you increase 4-2-4-4-4-6 stitches evenly over these stitches, knit 10-10-10-12-12-12 stitches, knit 15-16-17-18-18-20 stitches – AT THE SAME TIME as you increase 2-1-2-2-2-3 stitches evenly over these stitches = 88-88-96-104-104-116 stitches. REMEMBER THE KNITTING TENSION! The next round is worked as follows: Knit 14-14-16-17-17-20 stitches (=half back piece), A.1 (= 6 stitches), knit 4-4-4-6-6-6 stitches (= sleeve), A.1, knit 28-28-32-34-34-40 stitches (= front piece), A.1, knit 4-4-4-6-6-6 stitches (= sleeve), A.1, knit 14-14-16-17-17-20 stitches (= half back piece). Continue this pattern at the same time as you increase 1 stitch on each side of A.1 to RAGLAN – see description above. Increase every 2nd round a total of 20-23-23-26-28-30 times. After all the increases there are 248-272-280-312-328-356 stitches on the needle. Continue with pattern and stocking stitch (without increasing) until the piece measures 23-26-27-29-31-33 cm from the cast-on edge mid front. Work the next round as follows: Work 39-42-43-48-52-57 stitches (= half back piece), place the next 46-52-54-60-60-64 stitches on 1 thread (= sleeve), cast on 6-6-10-8-10-10 new stitches on the needle (= under the sleeve), knit 78-84-86-96-104-114 stitches (= front piece), place the next 46-52-54-60-60-64 stitches on 1 thread (= sleeve), cast on 6-6-10-8-10-10 new stitches on the needle (= under the sleeve), and work the remaining 39-42-43-48-52-57 stitches (= half back piece). BODY: = 168-180-192-208-228-248 stitches. Insert a marker. THE PIECE IS NOW MEASURED FROM HERE. Continue in the round with stocking stitch until the piece measures 25-24-25-24-24-24 cm. Knit 1 round where you increase 24-28-28-32-36-36 stitches evenly on round – read INCREASE TIP = 192-208-220-240-264-284 stitches. Change to circular needle size 4.5 mm and work rib (= knit 2 / purl 2) for 5 cm. Cast off with knit over knit and purl over purl - to avoid the cast-off edge being tight you can cast off with needle size 5.5 mm. The piece measures approx. 54-56-58-60-62-64 cm from the shoulder down. SLEEVE: The piece is worked in the round with short circular needle/double pointed needles. Place the 46-52-54-60-60-64 stitches from the thread on the one side of the piece on circular needle/double pointed needles size 5.5 mm and in addition cast on 6-6-10-8-10-10 new stitches mid under sleeve = 52-58-64-68-70-74 stitches. Insert 1 marker thread in the middle of the new stitches. THE PIECE IS NOW MEASURED FROM HERE. Work stocking stitch in the round. When the piece measures 2 cm decrease 2 stitches mid under sleeve – read DECREASE TIP. Decrease every 4-3-2-2-1½-1½ cm a total of 9-11-14-15-15-16 times = 34-36-36-38-40-42 stitches. When the piece measures 36-34-33-31-30-29 cm knit 1 round where you increase 6-4-8-6-8-6 stitches evenly on round = 40-40-44-44-48-48 stitches. Change to double pointed needles size 4.5 mm and work rib (= knit 2 / purl 2). Continue with rib for 5 cm, then cast off with knit over knit and purl over purl. The sleeve measures approx. 42-40-39-37-36-35 cm. Work the other sleeve in the same way. ASSEMBLY: Sew the openings under the sleeves. |
|||||||
Diagram explanations |
|||||||
|
|||||||

|
|||||||
|
Have you made this or any other of our designs? Tag your pictures in social media with #dropsdesign so we can see them! Do you need help with this pattern?You'll find tutorial videos, a Comments/Questions area and more by visiting the pattern on garnstudio.com. © 1982-2024 DROPS Design A/S. We reserve all rights. This document, including all its sub-sections, has copyrights. Read more about what you can do with our patterns at the bottom of each pattern on our site. |
|||||||


With over 40 years in knitting and crochet design, DROPS Design offers one of the most extensive collections of free patterns on the internet - translated to 17 languages. As of today we count 304 catalogues and 11422 patterns - 11422 of which are translated into English (UK/cm).
We work hard to bring you the best knitting and crochet have to offer, inspiration and advice as well as great quality yarns at incredible prices! Would you like to use our patterns for other than personal use? You can read what you are allowed to do in the Copyright text at the bottom of all our patterns. Happy crafting!
Comments / Questions (130)
Jeg er lige startet med at tage ud efter ribkantet. jeg kan ikke forstå, hvorfor jeg får så mange masker til ryggen allerede når jeg har strikket bare 3 omgange ud af de 20 der skal strikkes. Skal der ikke strikkes flere masker ret før A1 både på bagstykket og forstykket efterhånden som man strikker flere omgange? Der startes med 14 masker = halv ryg i str, S og 28 masker ret = forstykket. Synes der er noget der er undladt, På forhånd tak!
12.04.2019 - 11:02DROPS Design answered:
Hei Inge Elena. Før du begynner å øke til raglan har du 28 masker på for- og bakstykket og 4 masker på hvert erme. I hver overgang har du 6 masker i A.1. Du øker til raglan slik: 1 maske på hver side av A.1, annenhver omgang (= total 8 masker økt hver gang: 2 masker i hver side av for- og bakstykket, og 2 masker i hver side av hvert erme). Neste omgang strikkes kastene vridd, og så strikkes de videre i glattstrikk. Hver gang du øker vil du altså få 2 masker mer i glattstrikk på hver del. Etter første raglanøkning har du 30 masker på for- og bakstykket og 6 masker på hvert erme. Etter 20 økinger har du 108 masker mellom hver A.1 på for- og bakstykket. God fornøyelse
12.04.2019 - 12:11Hej!Dziekuje za szybka odpowiedz!
27.03.2019 - 10:48Po dodaniu oczek na reglan przerobic do 26 cm(2gi rozmiar)..Skad dokad mierzyc?Z opisu nie zrozumialam
26.03.2019 - 21:56DROPS Design answered:
Witaj Sylwio! We wzorze jest napisane 'mierząc od rzędu nabierania oczek, po przodzie'. Karczek musi mieć 26 cm w rozmiarze M, jego długość jest mierzona od najdalej wysuniętego punktu na ramieniu (zwykle najbliżej dekoltu) i dalej w dół do brzegu karczku. Miłej pracy!
27.03.2019 - 07:31Hej! När jag har börjat göra ökningarna innan o efter A1 så blir det ju mer än 14 m kvar, börjar jag direkt på mönstret igen innan varvets slut och fortsätter med det?
23.03.2019 - 16:31DROPS Design answered:
Hej. A1 stickar du 4 gånger per varv på det sätt som står beskrivet i mönstret. De ökade maskorna stickas räta och du ökar alltid till raglan på varje sida av A.1. Lycka till!
25.03.2019 - 11:28J'ai un souci pour tricoter la manche avec l'aiguille en rond, peut être je m'en sers mal, mais il met difficile de tricoter la manche en rond car les mailles sont très tendues et les aiguilles (les dures) sont trop grandes...quel est votre avis?? merci
20.03.2019 - 18:22DROPS Design answered:
Bonjour Mme Cavelier, quand on tricote en rond avec une aiguille circulaire, la longueur de celle-ci doit être inférieure à la circonférence totale de la manche (au moins 40 cm ici) - vous pouvez utiliser votre aiguille circulaire de 80 cm pour tricoter les mailles des manches en utilisant la technique du magic loop. Bon tricot!
21.03.2019 - 09:03Hej. Jeg har læst og læst opskriften, men kan ikke se om den strikkes i en eller 2 tråde air?
23.02.2019 - 01:55DROPS Design answered:
Hej Tanja, Denne bluse strikkes i en tråd DROPS Air. God fornøjelse!
28.02.2019 - 14:12Bonjour, j'aimerais tricoter ce pull ou un modèle similaire (assez simple pour mettre la laine en valeur plutôt que le modèle) mais en utilisant une laine d'aspect mohair. Puis-je utiliser la "Melody" ? Si oui en 1 fil ou 2 ? Ou en mélange avec une autre laine ? Si non avec quelle laine autre que la "Air" me le proposeriez-vous ? Merci pour votre réponse
22.02.2019 - 10:57DROPS Design answered:
Bonjour Brigitte, Air appartient au groupe C alors que Melody appartient au groupe D, vous n'aurez pas le même échantillon, toutefois, vous pouvez essayer notre convertisseur pour voir les différentes possibilités, ex: 2 fils Kid-Silk ou bien 1 fil Brushed Alpaca Silk. Vous trouverez ici plus d'infos sur les alternatives. Bon tricot!
22.02.2019 - 14:45Bonjour, j'aimerais tricoter ce pull ou un modèle similaire (assez simple pour mettre la laine en valeur plutôt que le modèle) mais en utilisant une laine d'aspect mohair. Puis-je utiliser la "Melody" ? Si oui en 1 fil ou 2 ? Ou en mélange avec une autre laine ? Si non avec quelle laine autre que la "Air" me le proposeriez-vous ? Merci pour votre réponse
22.02.2019 - 10:55Hallo, ich habe die Raglanzunahmen alle gestrickt und es fehlen mir noch fast 10 cm in der vorderen Mitte gerechnet, bis ich die Maschen für die Ärmel stilllegen kann. Meine Frage ist nun, ob ich das A1 Muster weiter stricken soll ohne Zunahmen, damit das Muster fortlaufend ist bis zur Teilung in Ärmel und Vorder- und Rückenteil.
14.02.2019 - 22:51DROPS Design answered:
Liebe Barbara, so würde ich auch stricken, dh mit A1 bis die richtige Masse weiterstricken - aber persönnlicher Hilfe bekommen Sie am besten direkt von Ihrem Laden, 10 cm sind etwas viel, stimmt Ihre Maschenprobe? Viel Spaß beim stricken!
15.02.2019 - 09:03Hei igjen! Siden dette er min første genser har jeg slitt litt med å forstå oppskriften, særlig beskrivelsen av hvor man skal begynne å øke. Og hvor man skal sette maskemarkørene. Det kommer litt utydelig frem.\r\n\r\nNå har jeg økt en del omganger, men ser ut som jeg har gjort en feil. Baksiden og fremsiden er litt ulike størrelser, skal de være like? \r\n\r\nOg finnes det en tydeligere beskrivelse akkurat hvor disse maskemarkørene skal settes?
13.02.2019 - 16:36