
Looking for a yarn?


Comments / Questions (58)
![]() Bettina wrote:
Bettina wrote:
Guten Tag, warum fehlt bei Fairy Wings plötzlich die Skizze ? Bitte wieder einfügen. Liebe Grüße
11.04.2025 - 07:14DROPS Design answered:
Liebe Bettina, Maßskizze sowie Diagramme sollten Sie mal schauen können - versuchen Sie, die Seite zu aktualisieren, die Cookies zu leeren, usw und versuchen Sie noch einmal. Gerne können Sie auch mit einem anderen Browser/Gerät versuchen. Viel Spaß beim Stricken!
11.04.2025 - 13:29
![]() Hanna Tommila wrote:
Hanna Tommila wrote:
En ymmärrä kaaviota enkä lyhennettyjä kerroksia. Ohje on minusta epäselvä.
07.01.2025 - 15:27DROPS Design answered:
Hei, kun neulotaan lyhennettyjä kerroksia, työ käännetään kerroksen keskellä. Neulo näin: Neulo 6 krs kaikilla silmukoilla, *neulo toisen sivun merkkiin, käännä työ, kiristä lanka ja neulo krs loppuun. Neulo 1 krs kaikilla silmukoilla, käännä työ, neulo toisen sivun merkkiin, käännä työ, kiristä lanka ja neulo krs loppuun. Neulo 5 krs kaikilla silmukoilla*, toista *-*.
09.01.2025 - 17:39
![]() Helle wrote:
Helle wrote:
Er det rigtigt at mønsteret strikkes fra venstre mod højre
15.06.2024 - 16:47DROPS Design answered:
Hei Helle. Diagrammet strikkes fra høyre til venstre fra retten og fra venstre til høyre fra vrangen. Men når du ser på målskissen (målskissen viser halve boleroen, øverste strek på målskissen er midt på ryggen), så strikker man fra det ene ermet til det andre ermet = pilen som viser strikkeretningen (ikke diagrammet). mvh DROPS Design
24.06.2024 - 12:59
![]() Kirsten wrote:
Kirsten wrote:
Mønsteret M1: øverste pind eller 1. Pind lige under M.1- her er der vist 10 masker, som er markeret med \ men dette er ikke vist i diagramforklaring. Hvordan strikkes disse masker?
09.04.2024 - 15:06
![]() Wenche Kristin Amundsen wrote:
Wenche Kristin Amundsen wrote:
Hei, jeg står fast på forkortede pinner samtidig med mønster? Skal de forkortede pinnene strikkes en gang, og så mønster?
12.10.2023 - 12:15DROPS Design answered:
Hej Wenche, det er de yderste masker i de forkortede pinde du strikker i hulmønster :)
17.10.2023 - 14:02
![]() Sabrina wrote:
Sabrina wrote:
Buonasera non ho capito come si deve abbinare il diagramma con i ferri accorciati. dopo l aumento il primo ferro successivo a dritto devo bloccarmi alla 24 m e tornare indietro (TG 9/10). come faccio a partire con il diagramma se c'è scritto di farlo alla fine del ferro e non ci devo arrivare? grazie
29.03.2023 - 23:28
![]() Katrine Skjevling wrote:
Katrine Skjevling wrote:
Hei. Jeg har litt problemer å forstå begynnelsen. Det står at jeg skal legge opp masker med 2 tråder og så ta bort en tråd. Det står ikke noe sted om når eller om denne tråden skal tas inn igjen. Er det bare oppleggsmaskene og fellingen som er med dobbel tråd? Mvh Katrine
19.02.2023 - 17:44DROPS Design answered:
Hei Katine. DROPS Kid-Silk er et meget tynt garn. For å få en mer stabil oppleggskant og avfellingskant brukes det da 2 tråder. Resten av plagget strikkes med 1 tråd. mvh DROPS Design
27.02.2023 - 13:13
![]() Hetty wrote:
Hetty wrote:
Moet ik enkele of dubbele omslagen gebruiken? Bij enkele houd ik uiteindelijk weinig steken over.
15.07.2022 - 14:39DROPS Design answered:
Dag Hetty,
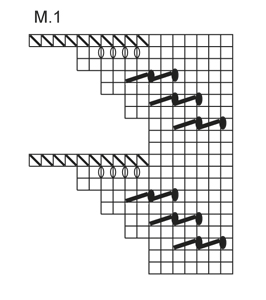
In het telpatroon staat aangegeven wanneer je enkele of dubbele omslagen moet gebruiken. De dichte ovalen zijn dubbele omslagen, de open ovalen zijn enkele omslagen.
17.07.2022 - 11:31
![]() Copla wrote:
Copla wrote:
Bonjour, suite à vos réponses aux questions posées, vous est-il possible de rectifier les explications du diagramme soit remplacer la phrase "tricoter le 1er jeté à l'endroit et tricoter le 2ème jeté torse à l'endroit" par "tricoter le 1er jeté et laissez tomber le 2ème" car je suis obligée de tout défaire et recommencer ! Merci pour les nouvelles personnes qui commenceront cet ouvrage.
15.04.2021 - 00:12DROPS Design answered:
Bonjour Mme Copla, la légende de ce symbole est correcte v- cf réponse précédente. Bon tricot!
15.04.2021 - 07:38
![]() Copla wrote:
Copla wrote:
Bonjour, faut-il tricoter les rangs raccourcis jusqu' à la hauteur totale (manche comprise) ou seulement une fois après 6 rangs et une autre fois après 5 rangs ?
14.04.2021 - 18:21DROPS Design answered:
Bonjour Mme Copla, vous répétez les rangs raccourcis (=8 rangs de chaque côté mais seulement 6 au milieu) jusqu'à ce que l'ouvrage mesure 44-49-54-59-64 cm de hauteur totale (manche comprise) = 8 cm de manche + 36-41-46-51-56 cm en mesurant au milieu. Bon tricot!
15.04.2021 - 07:37
|
|||||||||||||||||||
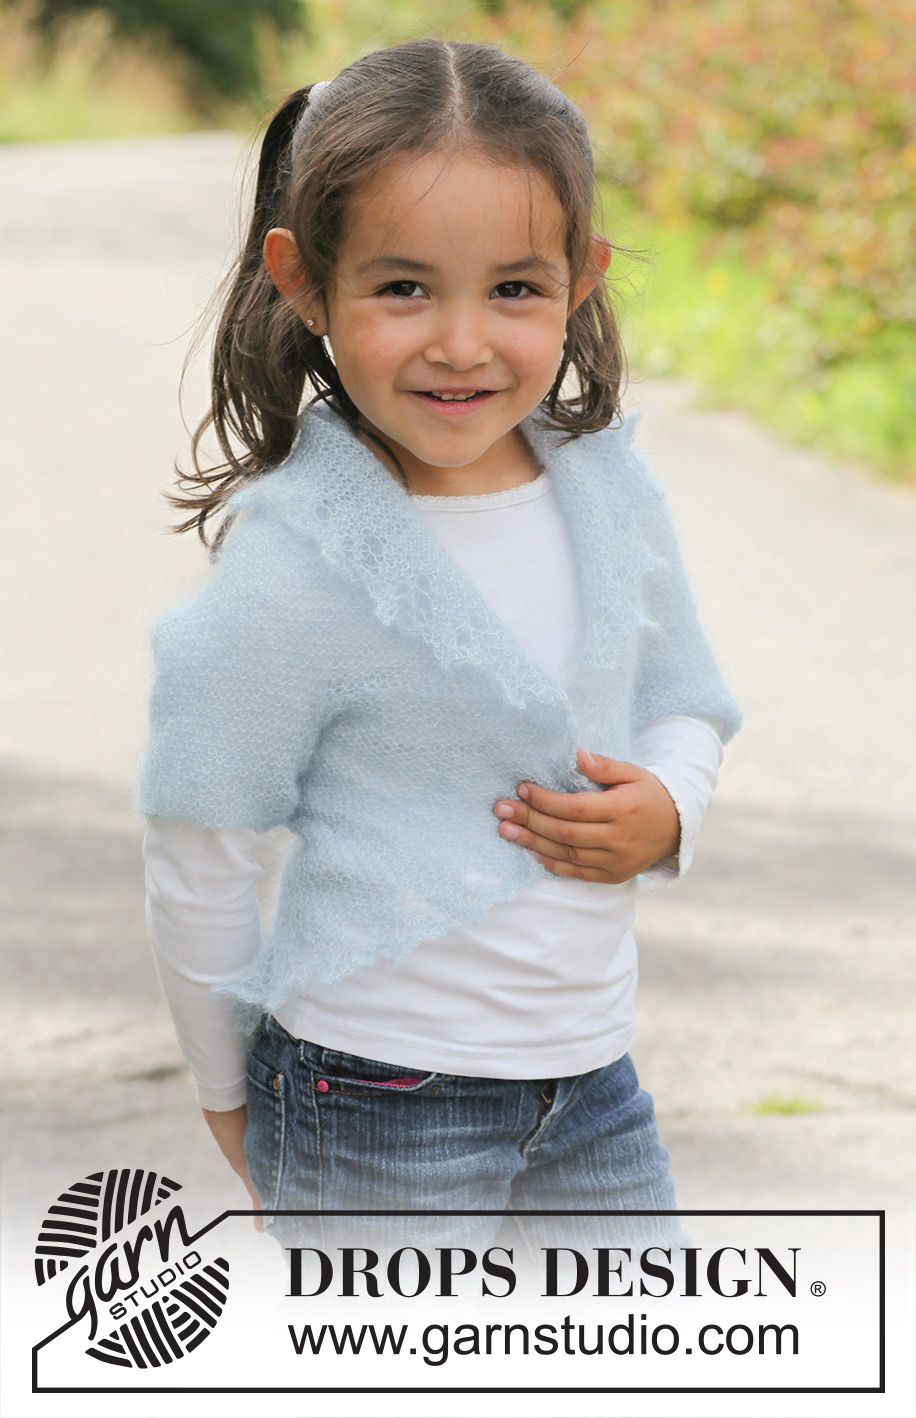
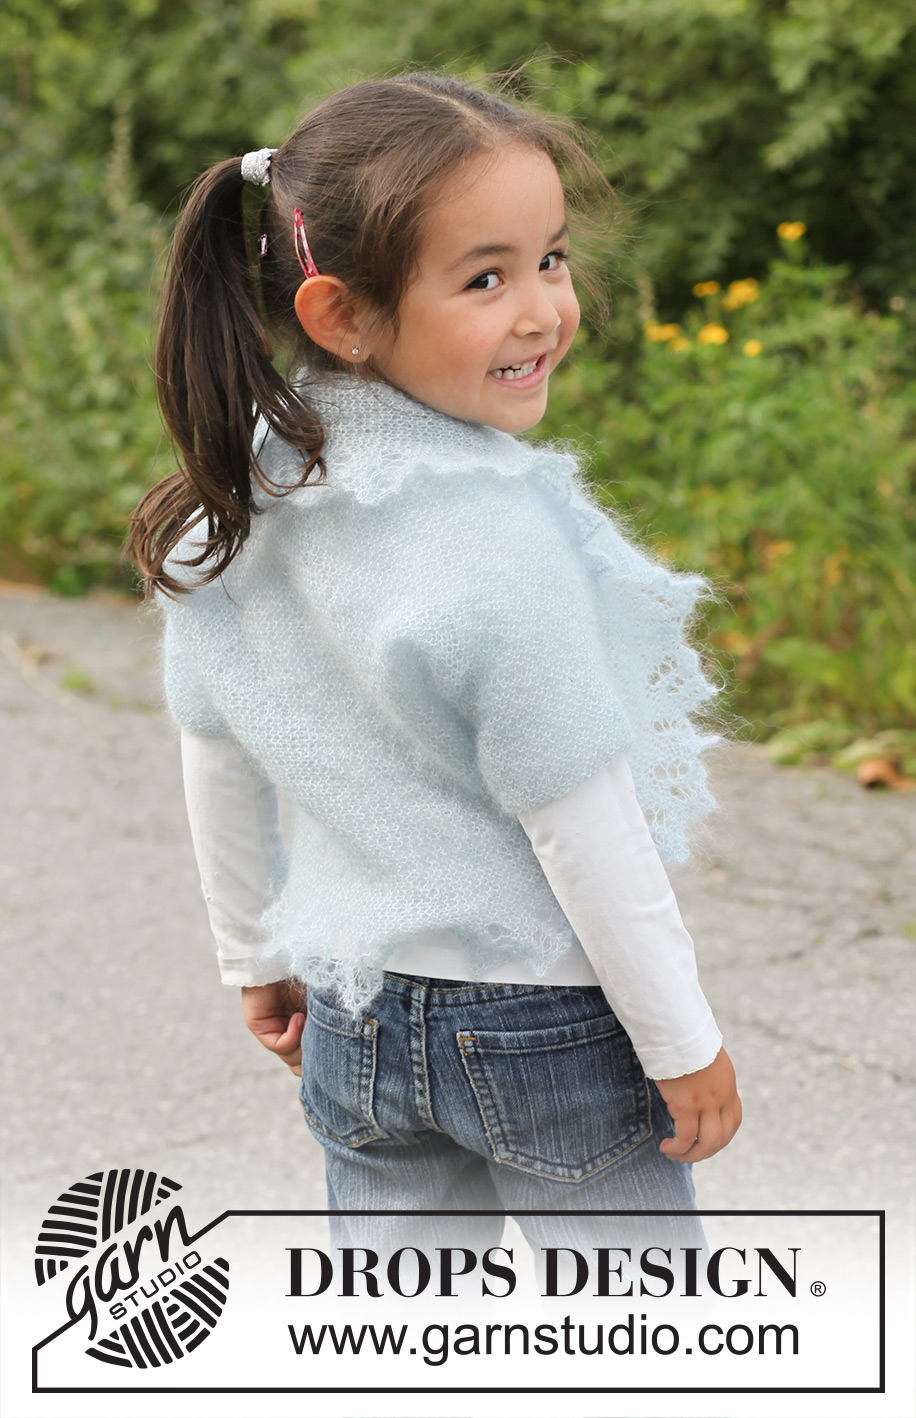
Fairy Wings#fairywingsbolero |
|||||||||||||||||||
 |
 |
||||||||||||||||||
Knitted DROPS bolero in garter st with lace edge in ”Kid-Silk”. Size 3 to 12 years.
DROPS Children 22-18 |
|||||||||||||||||||
|
GARTER ST (back and forth on needle): K all rows. PATTERN: See diagram M.1. To make the pattern the same in each side, work first row in diagram at the end of first row from RS and at the end of the second row from WS. I.e. all rows where YOs and sts-tog are worked, must be worked at the end of row. No of sts in diagram will vary from 7 to 17. SHORT ROWS: Work 6 rows over all sts, * work until marker in one side, turn, tighten yarn and work back. Work 1 row over all sts, turn, work until marker in the other side, turn, tighten yarn and work back. Work 5 rows over all sts *, repeat from *-*. I.e. work 6 rows (= 3 ridges) over the middle 70-76-78-86-92 sts and 8 rows (4 ridges) over sts in each side in every repetition. -------------------------------------------------------- BOLERO: Work sideways back and forth on circular needle from sleeve to sleeve. Then fold double and sew sleeve and side seams. Cast on 52-58-62-66-70 sts with 2 strands Kid-Silk on circular needle size 3.5 mm / US 4. Remove 1 strand and work in GARTER ST - see explanation above! REMEMBER THE GAUGE! When piece measures 8 cm / 3⅛" (= sleeve), loosely cast on 27-29-30-34-37 new sts in each side (cast on at the end of the next 2 rows) = 106-116-122-134-144 sts. Insert 2 markers in the piece, after 18-20-22-24-26 sts in from each side (= 70-76-78-86-92 sts between markers). Continue in garter st and PATTERN over the outermost sts in each side – see explanation above – AT THE SAME TIME work SHORT ROWS – see explanation above! When piece measures approx. 44-49-54-59-64 cm / 17¼"-19¼"-21¼"-23¼"-25¼" (incl sleeve), loosely bind off 27-29-30-34-37 sts in each side (bind off at the beg of the next 2 rows) – NOTE: bind off after 1 whole repetition of diagram M.1. Continue in garter st over the remaining 52-58-62-66-70 sts (= sleeve). When sleeve measures 8 cm / 3⅛", loosely bind off with 2 strands. ASSEMBLY: Fold the bolero double – chart shows piece when it is folded. Sew sleeve and side seams in outer loops of edge sts, make sure the seam is not too tight – the dotted line on chart shows where seams should be. |
|||||||||||||||||||
Diagram explanations |
|||||||||||||||||||
|
|||||||||||||||||||

|
|||||||||||||||||||
|
|||||||||||||||||||
Have you finished this pattern?Tag your pictures with #dropspattern #fairywingsbolero or submit them to the #dropsfan gallery. Do you need help with this pattern?You'll find 14 tutorial videos, a Comments/Questions area and more by visiting the pattern on garnstudio.com. © 1982-2025 DROPS Design A/S. We reserve all rights. This document, including all its sub-sections, has copyrights. Read more about what you can do with our patterns at the bottom of each pattern on our site. |
|||||||||||||||||||


With over 40 years in knitting and crochet design, DROPS Design offers one of the most extensive collections of free patterns on the internet - translated to 17 languages. As of today we count 314 catalogs and 11821 patterns - 11811 of which are translated into English (US/in).
We work hard to bring you the best knitting and crochet have to offer, inspiration and advice as well as great quality yarns at incredible prices! Would you like to use our patterns for other than personal use? You can read what you are allowed to do in the Copyright text at the bottom of all our patterns. Happy crafting!
Post a comment to pattern DROPS Children 22-18
We would love to hear what you have to say about this pattern!
If you want to leave a question, please make sure you select the correct category in the form below, to speed up the answering process. Required fields are marked *.