
Popular categories
Looking for a yarn?


Comments / Questions (11)
![]() Jacqueline Veilleux wrote:
Jacqueline Veilleux wrote:
Bonjour, je me demande pourquoi commencer le tricot en rond sur des aiguilles 2 pointes s'il faut le transférer sur aiguilles circulaires merci
27.10.2019 - 02:01DROPS Design answered:
Bonjour Mme Veilleux, comme on commence par le centre du carré, on a peu de mailles au départ, on commence donc par les doubles pointes, puis, le nombre de mailles va augmenter et les doubles pointes seront trop courtes, on continuera avec l'aiguille circulaire. Vous pouvez également tricoter tout sur aiguille circulaire avec la technique du magic loop. Bon tricot!
04.11.2019 - 12:21
![]() Nicole wrote:
Nicole wrote:
Hallo, ich möchte für diese Anleitung gerne die DROPS Cotton Light verarbeiten. Können Sie mir sagen wie viel m auflänge ich bei dieser Wolle in etwa veranschlagen sollte? Vielen Dank für die Hilfe!
10.08.2016 - 17:15DROPS Design answered:
Liebe Susan, wir würden Ihnen empfehlen, bei den angegebenen Garngruppen zu bleiben. Wie Sie dort Ersatzgarne umrechnen können, finden Sie unter Punkt 5 unserer FAQ.
17.08.2016 - 14:38
![]() Nicole wrote:
Nicole wrote:
Hallo, ich möchte für diese Anleitung gerne die DROPS Cotton Light verarbeiten. Können Sie mir sagen wie viel m auflänge ich bei dieser Wolle in etwa veranschlagen sollte? Vielen Dank für die Hilfe!
10.08.2016 - 17:14
![]() Wille wrote:
Wille wrote:
Als materiaal voor dit kussen worden Drops ALPACA nr 100 genoemd én Drops VIVALDI, kleur 06. Maar welke is gebruikt op de foto? Die vind ik juist zo mooi namelijk. Ook het patroon vind ik heel mooi.
01.01.2016 - 15:12DROPS Design answered:
Hoi Wille. Beide draden zijn gebruikt, je breit met 2 draden "DROPS Alpaca ÉN DROPS Vivaldi". Veel breiplezier.
04.01.2016 - 14:25
![]() J Hargrove wrote:
J Hargrove wrote:
The pattern instructs to "cast on with one thread of each quality". Do I use both yarns throughout the whole pattern? The requirements are 150g alpaca but only 100g vivaldi (or Nepal as I have bought) so this suggests that I should stop using vivaldi/nepal at some point - maybe the back?? Thanks, Jan
26.02.2015 - 16:55DROPS Design answered:
Dear Mrs Hargrove, cushion cover is worked entirely with 1 strand each quality hold together as just one. Alpaca and Vivaldi do not have same length/50 g, that's why you need only 2 ball Vivaldi but 3 Alpaca - calculate here the amount of new yarn when using an alternative. Happy knitting!
27.02.2015 - 09:11
![]() Maria wrote:
Maria wrote:
Hvordan skal man strikke et kast uten at det blir hull når man strikker rett? fant en instruksvideo, men der ble det bare vist når man skal strikke vrang maske
12.01.2015 - 18:48DROPS Design answered:
Hej Maria. Du skal strikke det ene kast til denne pude almindeligt i den naeste pind, saa der opstaar hul (det er en del af mönstret), men det andet kast skal du strikke vrid vr, saa lukker du hullet:
13.01.2015 - 13:19
![]() Ursula Böhm wrote:
Ursula Böhm wrote:
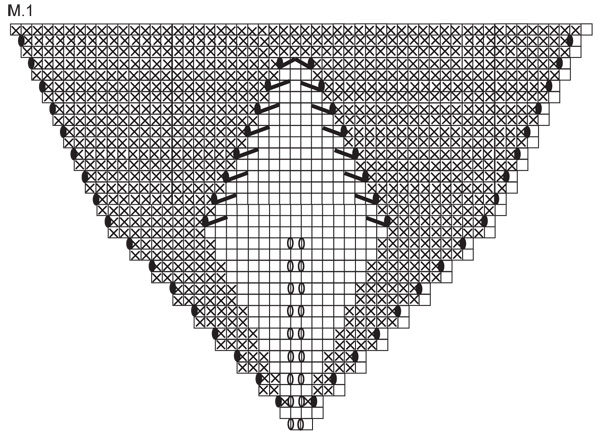
Zeigt das Diagramm dieses Kissenbezugs die Hin- und Rückreihen oder nur die Hinreihen?
12.12.2013 - 18:57DROPS Design answered:
Liebe Ursula, das Diagramm zeigt alle Reihen des Musters.
13.12.2013 - 09:57Norma Haydeé Schulman wrote:
Hermoso diseño, me podrias enviar como se realiza, muchas gracias!!
04.02.2010 - 16:16
![]() Françoise wrote:
Françoise wrote:
Très jolie modèle rafiné
22.01.2010 - 16:28
![]() Cindy wrote:
Cindy wrote:
Agreed, love both blanket and pillow patterns using a simple, clean and solid color
30.12.2009 - 23:32
|
||||||||||||||||||||||
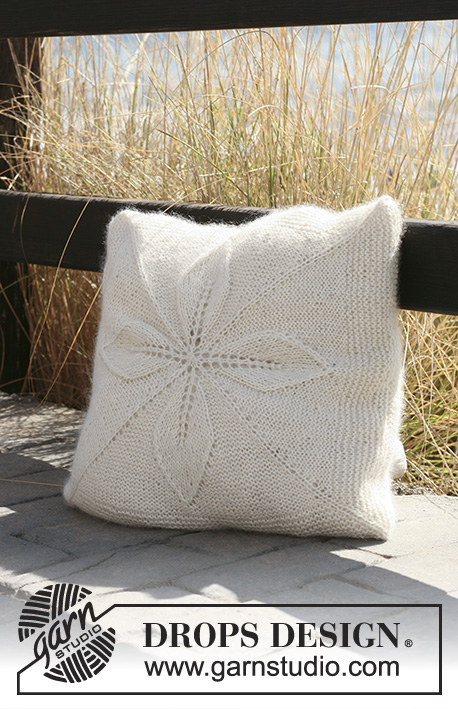
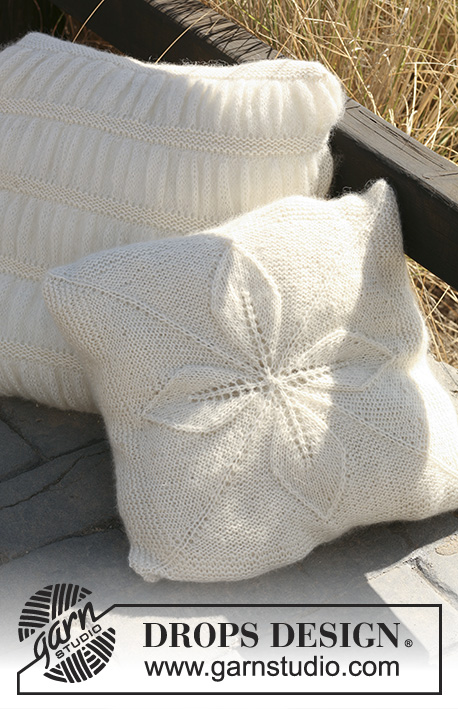
Fieldfare#fieldfarepillow |
||||||||||||||||||||||
 |
 |
|||||||||||||||||||||
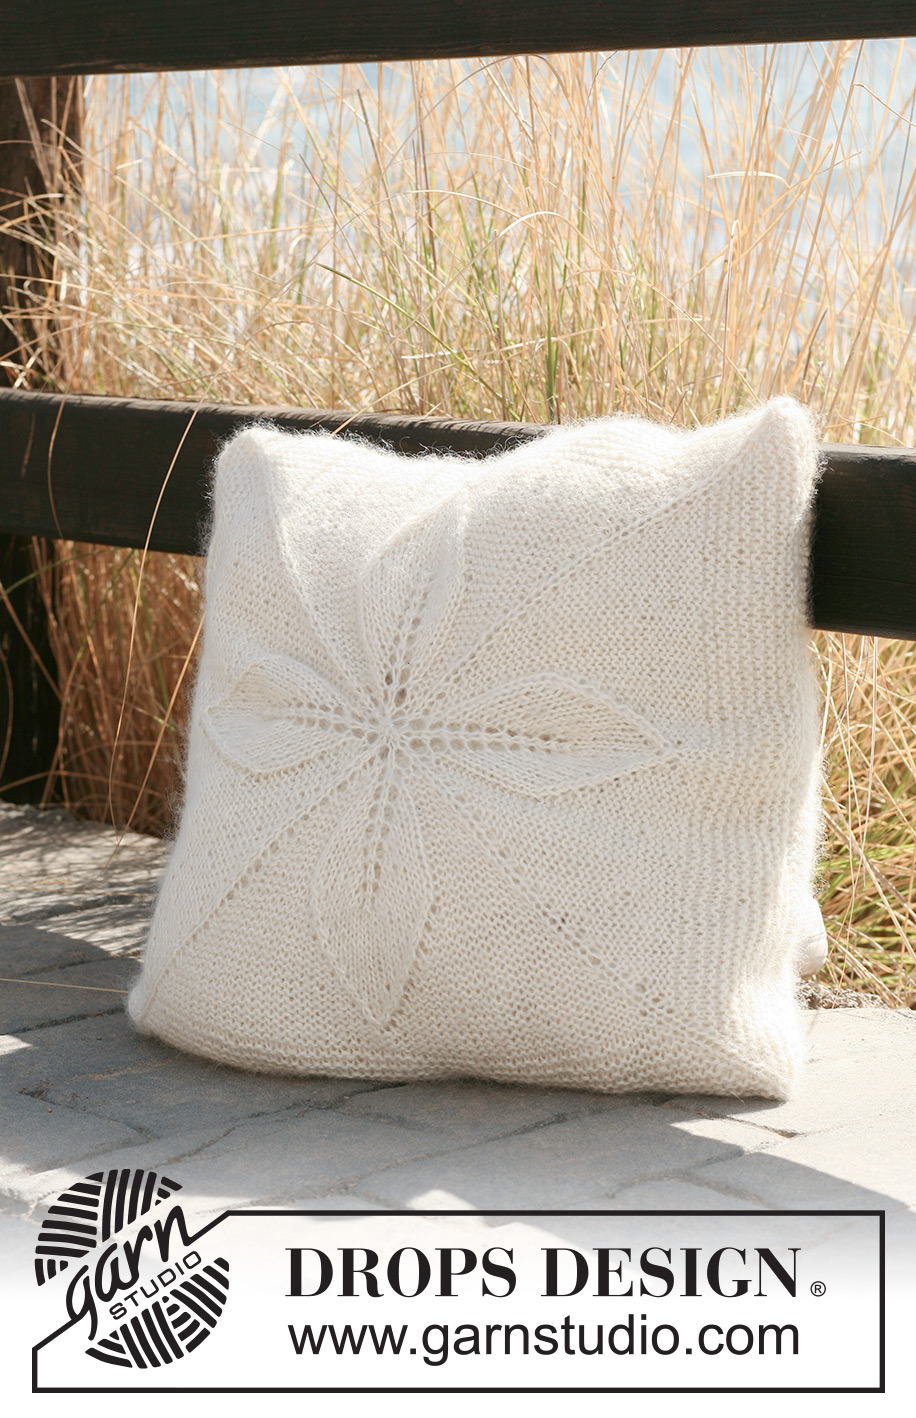
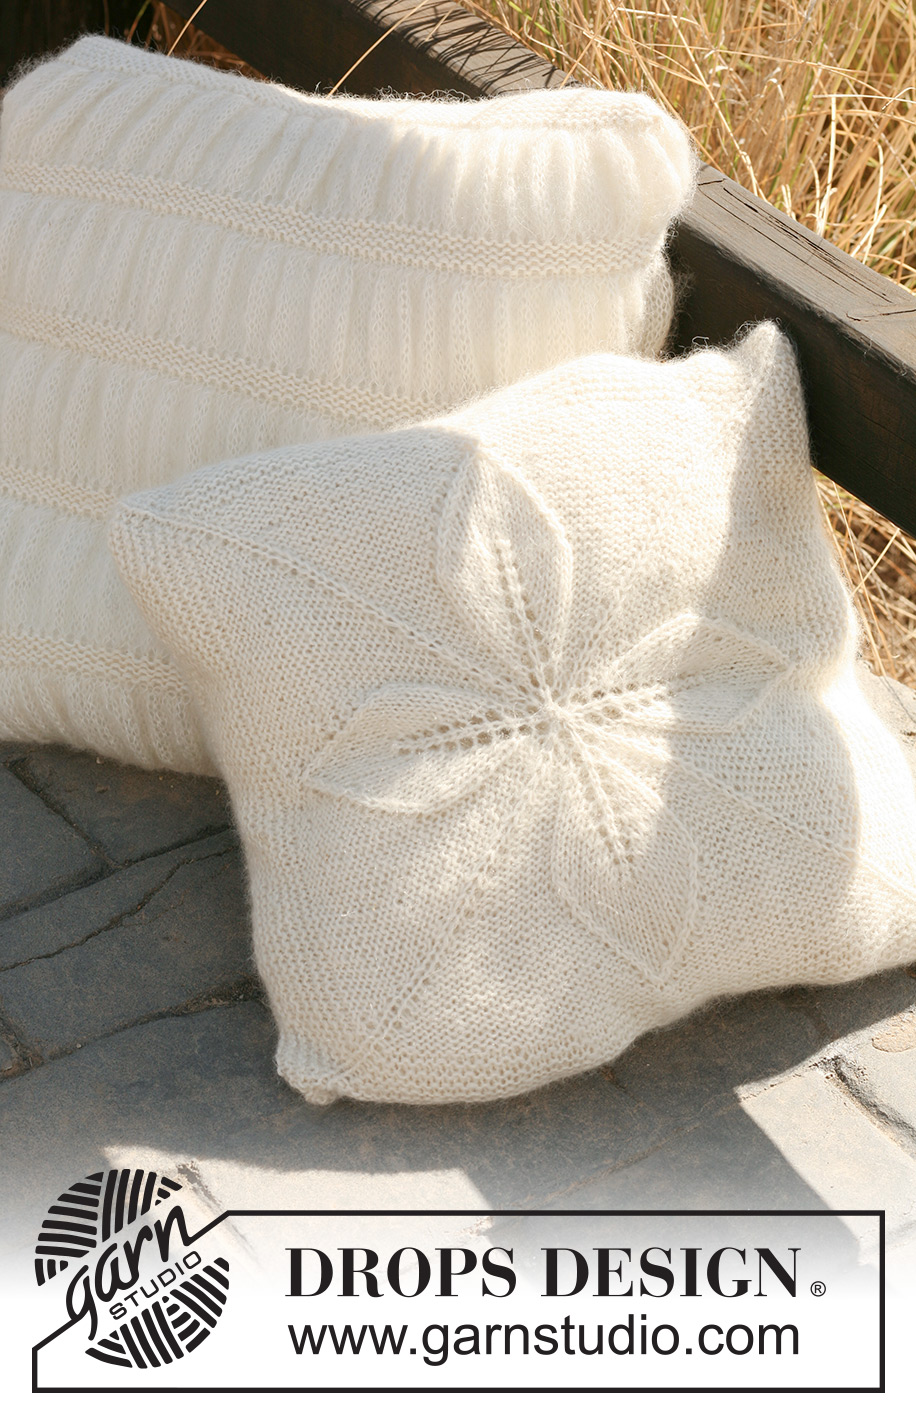
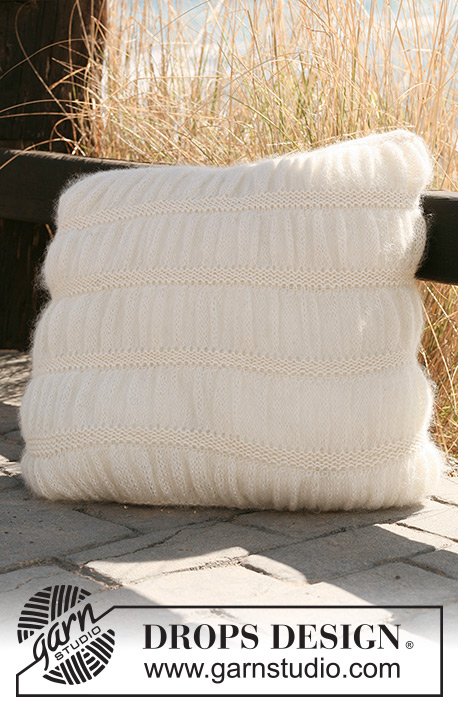
Knitted DROPS cushion cover with flower- squares in ”Alpaca” and ”Vivaldi” or ”Alpaca” and ”Brushed Alpaca Silk”.
DROPS 118-45 |
||||||||||||||||||||||
|
PATTERN: See diagram M.1. Diagram shows the pattern from RS. GARTER ST (in the round): K a round, P 1 round. GARTER ST (back and forth on needle): K all rows. INCREASING TIP: Make all inc on K rounds. Inc 1 st by making 1 YO, on next round P YO into back of loop to avoid a hole. -------------------------------------------------------- -------------------------------------------------------- CUSHION COVER: Worked in the round on double pointed and circular needles. Cast on 8 sts on double pointed needles size 4.5 mm / US 7 with 1 thread of each quality. Insert a marker at beg of round. Distribute sts on 4 needles with 2 sts per needle. K 1 round and continue in M.1 (= 4 times across the first round). REMEMBER THE GAUGE! Change to circular needle size 4.5 mm / US 7 when there are enough sts. After M.1 there are 216 sts on needle. Insert a marker in the first st, st 55, st 109 and st 163 (= 4 markers). Now continue in GARTER ST - see above - in the round on all sts, AT THE SAME TIME inc 1 sts each side of all markers (= 8 inc) - See INCREASING TIP - on every other round a total of 9 times = 288 sts. Now keep the first 73 sts on needle, bind off the remaining 215 sts. Insert a marker, and now measure piece from here. Continue back and forth on needle in GARTER ST - see above – on the 73 sts on needle. When piece measures approx 38 cm / 15'' from marker bind off. ASSEMBLY: Fold cover double and sew the sides tog. Put in the cushion and sew tog the last side. |
||||||||||||||||||||||
Diagram explanations |
||||||||||||||||||||||
|
||||||||||||||||||||||
|
||||||||||||||||||||||
Have you finished this pattern?Tag your pictures with #dropspattern #fieldfarepillow or submit them to the #dropsfan gallery. Do you need help with this pattern?You'll find 16 tutorial videos, a Comments/Questions area and more by visiting the pattern on garnstudio.com. © 1982-2025 DROPS Design A/S. We reserve all rights. This document, including all its sub-sections, has copyrights. Read more about what you can do with our patterns at the bottom of each pattern on our site. |
||||||||||||||||||||||


With over 40 years in knitting and crochet design, DROPS Design offers one of the most extensive collections of free patterns on the internet - translated to 17 languages. As of today we count 314 catalogs and 11822 patterns - 11812 of which are translated into English (US/in).
We work hard to bring you the best knitting and crochet have to offer, inspiration and advice as well as great quality yarns at incredible prices! Would you like to use our patterns for other than personal use? You can read what you are allowed to do in the Copyright text at the bottom of all our patterns. Happy crafting!
Post a comment to pattern DROPS 118-45
We would love to hear what you have to say about this pattern!
If you want to leave a question, please make sure you select the correct category in the form below, to speed up the answering process. Required fields are marked *.