
Looking for a yarn?


Comments / Questions (18)
![]() SYLVIANE LEROY wrote:
SYLVIANE LEROY wrote:
Bonjour, Quand A1 et A2 sont terminés une première fois, faut-il recommencer par A1 puis A2 et combien de fois doit-on les répéter pour la taille XL ? Avec mes remerciements Cordialement Mme LEROY
04.05.2025 - 18:08DROPS Design answered:
Bonjour Mme Leroy, on ne tricote A.1 qu'une seule fois en hauteur, il permet d'augmenter les mailles pour conserver la bonne largeur (il faut plus de mailles pour A.2 que pour du jersey en largeur); donc après A.1, on tricote A.2 jusqu'à la hauteur indiquée. Bon tricot!
05.05.2025 - 08:25
![]() Teresa Della Pietra wrote:
Teresa Della Pietra wrote:
Non sono assolutamente in grado di usare i ferri circolari (italia) . Secondo voi è possibile usare ferri molto lunghi da 60 cm. o non sono sufficenti per tenere tutte le maglie taglia M
28.02.2025 - 09:25DROPS Design answered:
Buonasera Teresa, esistono in commercio dei ferri dritti con una lunghezza maggiore. Buon lavoro!
02.03.2025 - 23:29
![]() Carolina wrote:
Carolina wrote:
Olá, eu estou a tecer o top em tamanho L e tenho algumas dúvidas: 1. Com relação às diminuições (18 malhas), devem ser feitas na mesma carreira ou posso distribuir por três carreiras pares, 6 diminuições, 3 em cada lateral? 2. Por quantas carreiras devo tecer o ponto fantasia A2 até repetir a carreira do A1? 3. Estou tecendo em agulha circular fechado, a partir das cavas, faço carreiras encurtadas em ida e volta ou devo tecer a peça aberta? Obrigada.
08.10.2024 - 22:53DROPS Design answered:
Bom dia, Em resposta a suas dúvidas, vamos tentar ajudar: 1 - Deve fazer as diminuições na mesma carreira pois deve ficar com o número de malhas correcto para fazer o ponto fantasia, 2. O ponto A.2 se repete em largura e em altura. Dependendo de sua amostra, deve repetir A.2 até ter 13 cm medido a partir da carreira de montagem. 3. As carreiras encurtadas são sempre feitas em idas e voltas. Pode fazer as carreiras encurtadas depois de separar a frente das costas (portanto, com a peça aberta) mas atenção que vai ter de tricotar também o ponto fantasia (A.2). Bons tricôs!
16.10.2024 - 12:41
![]() Jane Åhman wrote:
Jane Åhman wrote:
Jag vet inte vad jag gör för fel. Ni skriver \"När A1 har stickat färdigt i höjden...\" . Vad menar ni? Samma med A2?\r\nTack för snabb svar
28.09.2024 - 22:12DROPS Design answered:
Hej Jane. Det betyder när alla varv i höjden på diagrammet har stickats. A.1 t.ex .består av 2 varv. Mvh DROPS Design
30.09.2024 - 14:56
![]() ELSA CRISTINA T S VIEIRA wrote:
ELSA CRISTINA T S VIEIRA wrote:
Hi, in the body, the pattern is always A1 and A2 repeated (6 rows total repeated) ? Or after the first time the pattern is only the 4 rows of A2? Because if you have to repeat A1 the stitch count is off. I hope I am explaining what I mean 🙂 Thank you for your answer!
10.07.2024 - 21:51DROPS Design answered:
Boa tarde, Após tricotar o motivo A.1, continua com o motivo A.2. Bons tricôs!
12.07.2024 - 15:50
![]() Bbea wrote:
Bbea wrote:
Merci pour la rapidité de la réponse. Je vais pouvoir continuer mon tricot.
19.06.2024 - 16:38
![]() Bbea wrote:
Bbea wrote:
Bonjour, Je ne comprends pas comment se font les augmentations pour les manches ? Sur les explications il y a que des augmentations après les rangs de point mousse alors que sur le dessin on voit bien une augmentation régulière tout au long de la manche. Merci
19.06.2024 - 11:21DROPS Design answered:
Bonjour Bbea, le schéma est standard, dans ce modèle, on augmente juste après les côtes, au début du jersey/point fantaisie, puis on continue, sans augmenter, jusqu'au début de la tête de manche. Bon tricot!
19.06.2024 - 12:12
![]() Margaret wrote:
Margaret wrote:
Sorry, typo, I meant like A2, every 4 rows.
07.06.2024 - 13:00DROPS Design answered:
Dear Margaret, continue working stocking stitch with A.2 over the 13 sts in the middle of sleeve, repeat the 4 rows in A.2 to the end of sleeve. Happy knitting!
07.06.2024 - 16:04
![]() Margaret wrote:
Margaret wrote:
Stating sleeves. Being the first to knit this on Ravelry I wonder if there is a mistake. The 6 increases , are they to be repeated every other row or, like A2 every row?. It is not made clear in the pattern. I’ ll have a very wide sleeve if it is every other row.
07.06.2024 - 12:56DROPS Design answered:
Dear Margaret, the increases worked on first row with needle size 4 mm are worked only once, work the yarn overs (on each side of A.2, ie not the yarn overs included in the diagram) twisted on next row and work the yarn overs in A.2 as usual to create holes. Then repeat A.2 in height and work the remaining stitches in stocking stitch on each side (without further increases). Happy knitting!
07.06.2024 - 16:03
![]() Erna wrote:
Erna wrote:
Sun kisses
22.01.2024 - 08:29
|
|||||||||||||
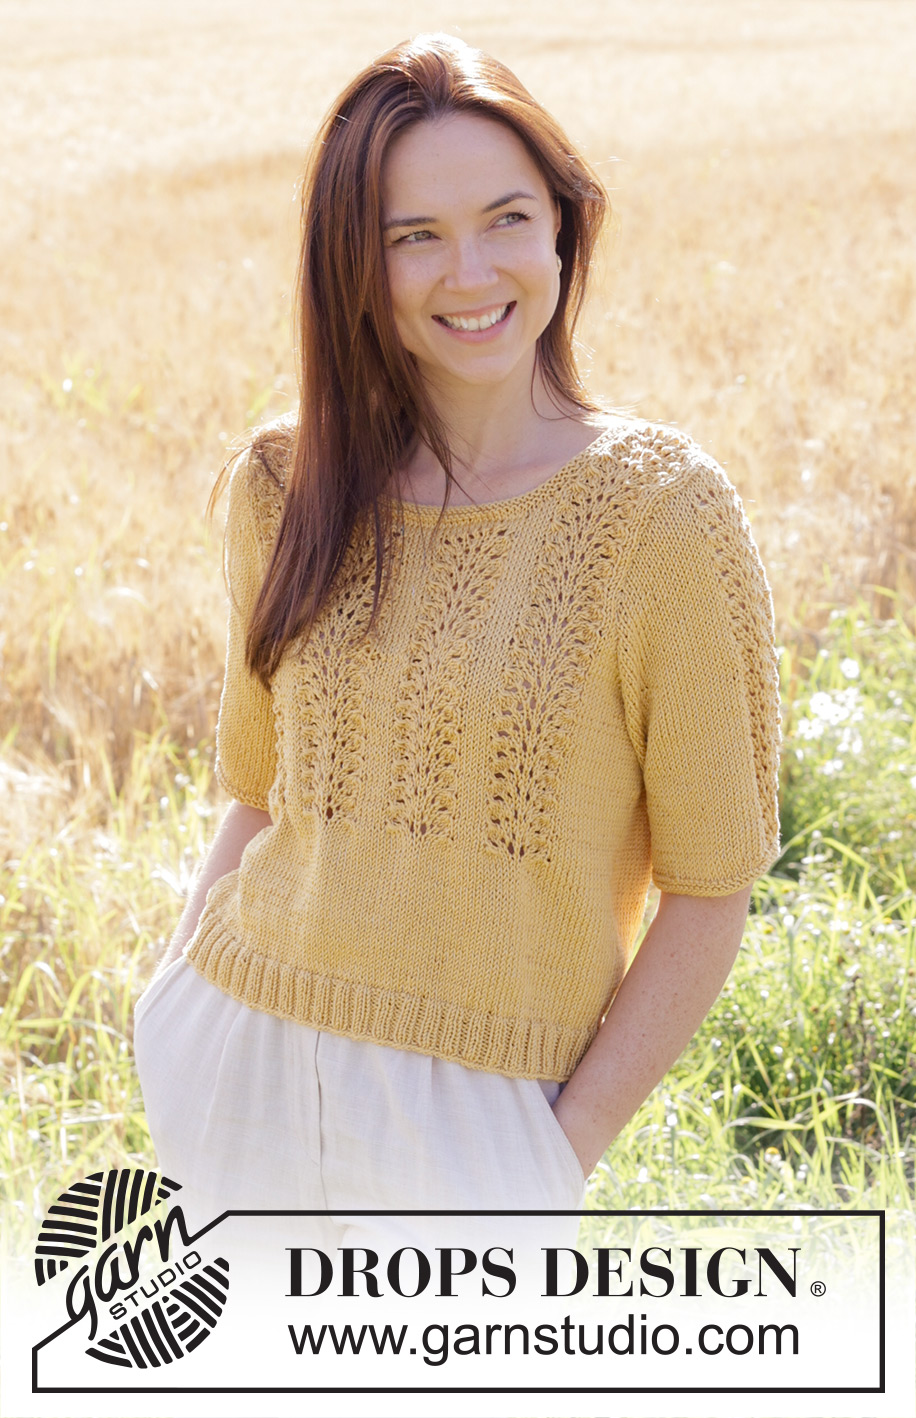
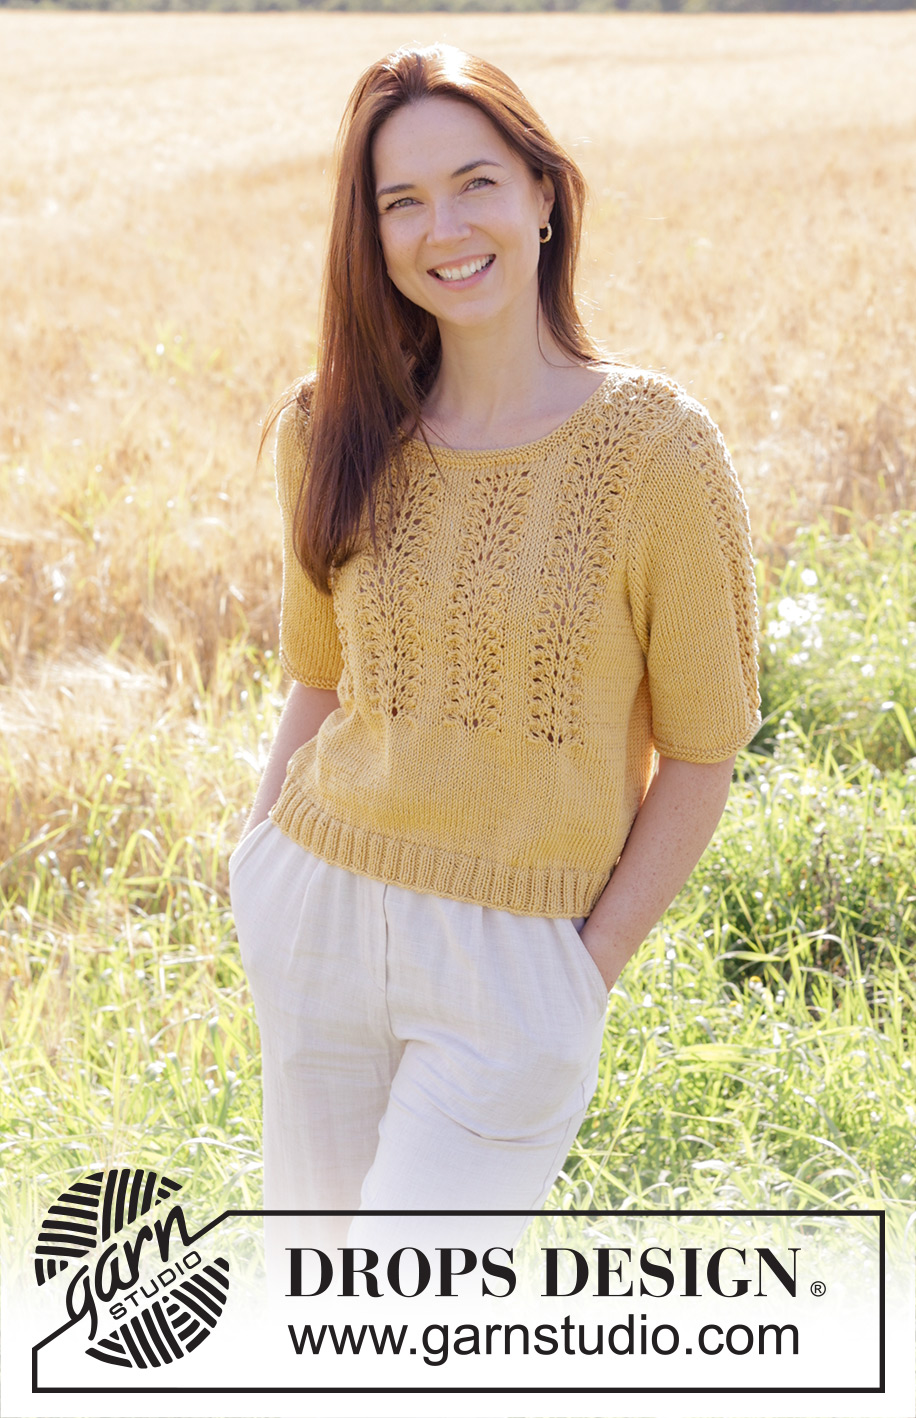
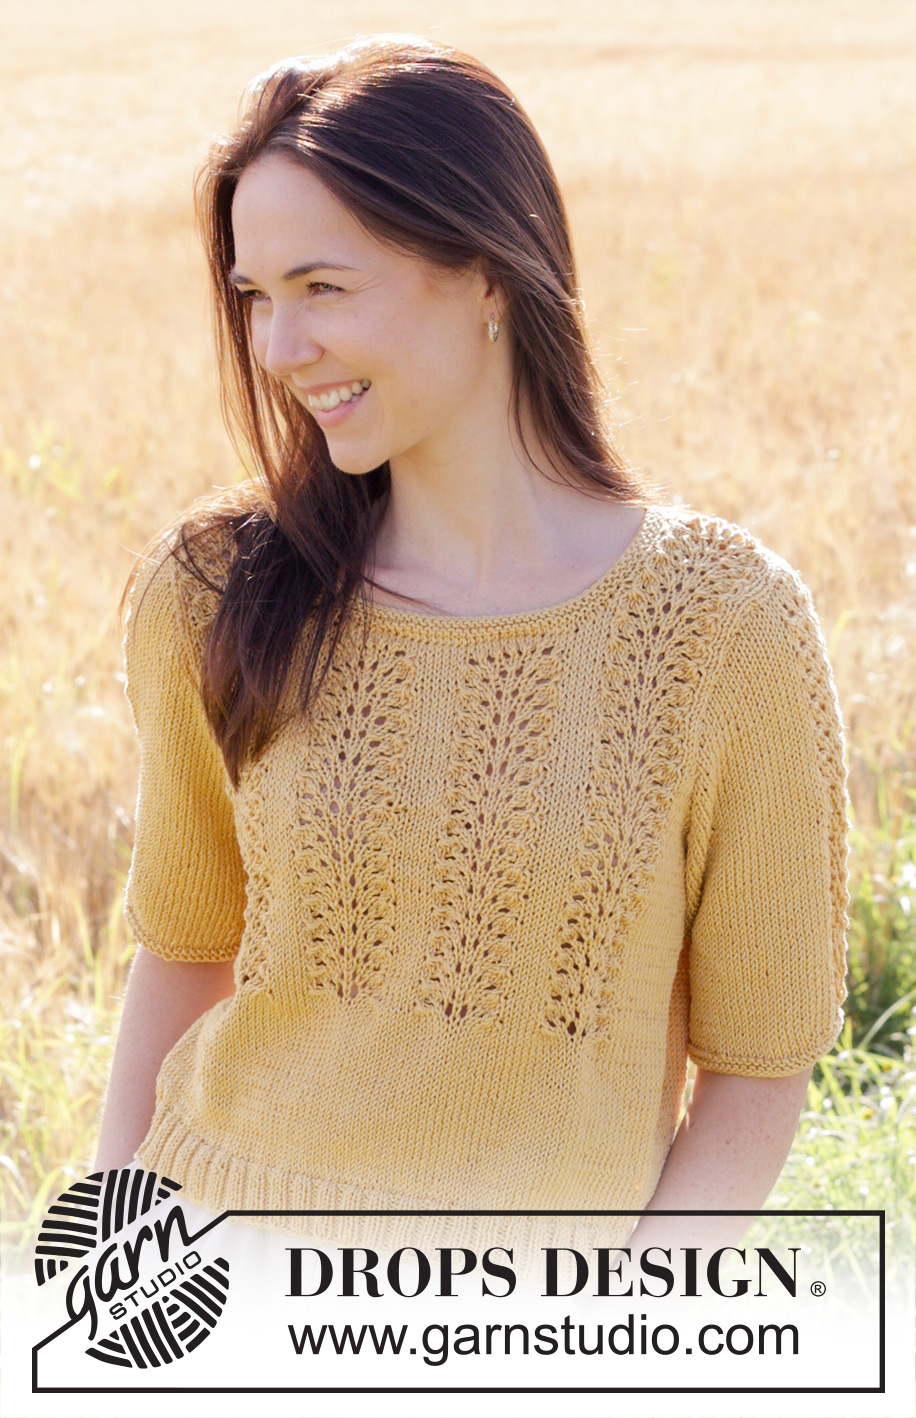
Happy Sunshine Top#happysunshinetop |
|||||||||||||
 |
 |
||||||||||||
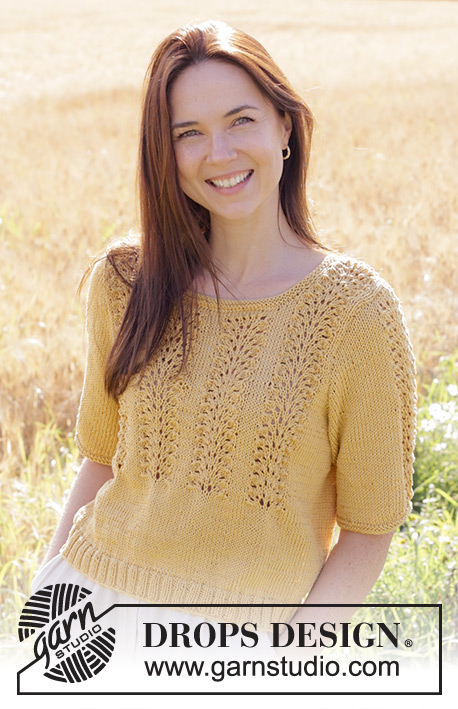
Knitted top in DROPS Muskat. Piece is knitted bottom up with short sleeves and wave pattern. Size: S - XXXL
DROPS 249-23 |
|||||||||||||
|
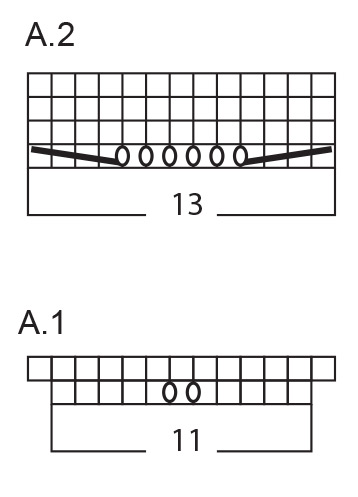
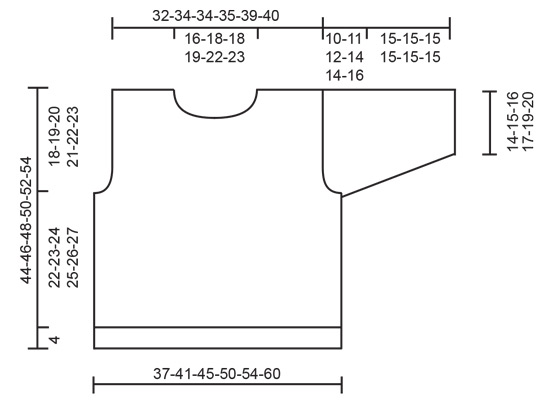
---------------------------------------------------------- EXPLANATION FOR THE PATTERN: ---------------------------------------------------------- GARTER STITCH (back and forth): Knit all rows. 1 ridge vertically = knit 2 rows. GARTER STITCH (worked in the round): 1 ridge vertically = 2 rounds, i.e. knit 1 round and purl 1 round. PATTERN: See diagrams A.1 and A.2. Diagrams show all rows in pattern seen from the right side. ---------------------------------------------------------- START THE PIECE HERE: ---------------------------------------------------------- TOP - SHORT OVERVIEW OF THE PIECE: Piece is worked in the round on circular needle, from the bottom and up to armholes. Divide the piece for front piece and back piece and finish each part separately back and forth. Work sleeves bottom up and back and forth on circular needle. Sew parts together. Finish by picking up stitches around the neck and work a neck edge in the round. BODY: Cast on 172-188-208-232-248-276 stitches on circular needle size 3 MM = US 2.5 with DROPS Muskat. Knit 1 round, then work rib = knit 2/purl 2. Work rib for 4-4-4-4-4-4 cm = 1½"-1½"-1½"-1½"-1½"-1½". Continue on circular needle size 4 MM = US 6, knit 1 round and decrease 16-14-18-20-22-22 stitches evenly on row = 156-174-190-212-226-254 stitches. Work in stockinette stitch until piece measures 15-15-15-15-15-15 cm = 6"-6"-6"-6"-6"-6". Work next round as follows (begin in the side): Work 11-14-18-22-23-28 stitches in stockinette stitch, * A.1, 4-5-5-6-3-4 stitches in stockinette stitch *, work from *-* 3-3-3-3-4-4 times in total, A.1, 11-14-18-22-23-28 stitches in stockinette stitch, insert 1 marker (= the side), 11-14-18-22-23-28 stitches in stockinette stitch, work from *-* 3-3-3-3-4-4 times in total, finish with A.1 and 11-14-18-22-23-28 stitches in stockinette stitch, insert 1 marker at the end of round (= the side) = 172-190-206-228-246-274 stitches. When A.1 has been worked vertically, work next round as follows (begin in the side): Work 11-14-18-22-23-28 stitches in stockinette stitch, * A.2, 4-5-5-6-3-4 stitches in stockinette stitch *, work from *-* 3-3-3-3-4-4 times in total, A.2, 11-14-18-22-23-28 stitches in stockinette stitch, (= the side), 11-14-18-22-23-28 stitches in stockinette stitch, work from *-* 3-3-3-3-4-4 times in total, finish with A.2 and 11-14-18-22-23-28 stitches in stockinette stitch. Continue like this with pattern vertically. REMEMBER THE KNITTING GAUGE! When the piece measures 26-27-28-29-30-31 cm = 10¼"-10⅝"-11"-11⅜"-11¾"-12¼" from cast-on edge (and the pattern measures approx. 11-12-13-14-15-16 cm = 4⅜"-4¾"-5⅛"-5½"-6"-6¼"), bind off 6 stitches for armholes under sleeve in each side (bind off 3 stitches on each side of the marker thread in each side) and each piece is finished separately (be careful so that the pattern row still is from the right side after dividing the piece). BACK PIECE: = 80-89-97-108-117-131 stitches. Work piece back and forth on circular needle from here. Continue the pattern as before, AT THE SAME TIME bind off stitches in each side for armholes, bind off on every other row as follows: Bind off 2 stitches 2-3-5-7-7-9 times and 1 stitch 1-2-2-2-3-4 times = 70-73-73-76-83-87 stitches. Continue with stockinette stitch and pattern as before. When piece measures 42-44-46-48-50-52 cm = 16½"-17¼"-18"-19"-19¾"-20½" (adjust after 1 whole repetition A.2 vertically), bind off the middle 30-33-33-36-43-45 stitches for neckline on next row and finish each piece separately. Then bind off 2 stitches on next row from the neck = 18-18-18-18-18-19 stitches. Bind off when piece measures 44-46-48-50-52-54 cm = 17¼"-18"-19"-19¾"-20½"-21¼" (adjust after a whole repetition of A.2 vertically). Work the other shoulder the same way. FRONT PIECE: = 80-89-97-108-117-131 stitches. Decrease for armholes in each side as on back piece = 70-73-73-76-83-87 stitches. Continue with stockinette stitch and pattern as before. When piece measures 34-36-38-40-42-44 cm = 13⅜"-14¼"-15"-15¾"-16½"-17¼" (adjust after 1 repetition of A.2 vertically), slip the middle 30-31-31-34-41-45 stitches on a thread for neck, and finish each shoulder separately. Continue to bind off for neck at beginning of every row from neck as follows: 2 stitches 1 time and 1 stitch 0-1-1-1-1-0 time = 18-18-18-18-18-19 stitches. Bind off when piece measures 44-46-48-50-52-54 cm = 17¼"-18"-19"-19¾"-20½"-21¼" (adjust after back piece and a whole repetition of A.2 vertically). Work the other shoulder the same way. SLEEVES: Work piece back and forth on circular needle. Cast on 61-65-71-75-81-85 stitches on circular needle size 3 MM = US 2.5. Work 2 ridges in GARTER STITCH back and forth - read explanation above! Continue on circular needle size 4 MM = US 6, work next row as follows from right side: 1 stitch in garter stitch, knit the next 20-22-25-27-30-32 stitches, knit 1, 1 yarn over, knit 1, 1 yarn over, knit 1, 1 yarn over, A.2, 1 yarn over, knit 1, 1 yarn over, knit 1, 1 yarn over, knit until 1 stitch remains, finish with 1 stitch in garter stitch = 67-71-77-81-87-91 stitches. Purl yarn overs on each side of A.2 twisted on next row to avoid holes, purl the yarn overs in A.2 to get holes. Continue with pattern and stockinette stitch vertically with 1 stitch in garter stitch in each side. When piece measures 15-15-15-15-15-15 cm = 6"-6"-6"-6"-6"-6", bind off for sleeve cap at the beginning of every row in each side as follows: Bind off 4 stitches 1 time, 2 stitches 2-2-2-1-1-1 times, 1 stitch 8-9-11-16-16-18 times, then bind off 2 stitches in each side until piece measures 24-25-26-28-28-30 cm = 9½"-9¾"-10¼"-11"-11"-11¾", bind off 3 stitches 1 time in each side. Bind off. Now sleeve measures approx. 25-26-27-29-29-31 cm = 9¾"-10¼"-10⅝"-11⅜"-11⅜"-12¼". ASSEMBLY: Sew the shoulder seams. Sew seam under sleeve inside 1 stitch. Sew in sleeves. NECK EDGE: Pick up approx. 92-100-100-105-118-122 stitches (including stitches on thread) around the neck edge on a short circular needle size 3 MM = US 2.5. Work 2 ridges in GARTER STITCH in the round - read explanation above. Bind off. |
|||||||||||||
Diagram explanations |
|||||||||||||
|
|||||||||||||
|
|||||||||||||
|
|||||||||||||
Have you finished this pattern?Tag your pictures with #dropspattern #happysunshinetop or submit them to the #dropsfan gallery. Do you need help with this pattern?You'll find 25 tutorial videos, a Comments/Questions area and more by visiting the pattern on garnstudio.com. © 1982-2025 DROPS Design A/S. We reserve all rights. This document, including all its sub-sections, has copyrights. Read more about what you can do with our patterns at the bottom of each pattern on our site. |
|||||||||||||


With over 40 years in knitting and crochet design, DROPS Design offers one of the most extensive collections of free patterns on the internet - translated to 17 languages. As of today we count 314 catalogs and 11821 patterns - 11811 of which are translated into English (US/in).
We work hard to bring you the best knitting and crochet have to offer, inspiration and advice as well as great quality yarns at incredible prices! Would you like to use our patterns for other than personal use? You can read what you are allowed to do in the Copyright text at the bottom of all our patterns. Happy crafting!
Post a comment to pattern DROPS 249-23
We would love to hear what you have to say about this pattern!
If you want to leave a question, please make sure you select the correct category in the form below, to speed up the answering process. Required fields are marked *.