
Looking for a yarn?


Comments / Questions (6)
![]() Suzan Kornelisse wrote:
Suzan Kornelisse wrote:
In de beschrijving staat bij het minderen voor de pijp, lees tip 1 maar dat is minderen voor de hiel. Op de pijp minderen is toch tip 2?
23.11.2024 - 15:28DROPS Design answered:
Dag Suzan,
Dat kopt, dit is het minderen voor de hiel aan de achterkant.
24.11.2024 - 11:51
![]() Maud wrote:
Maud wrote:
Hello! Do you know what is the name of this type of heel? I really need to figure additional information online to understand how to knit this. Thank you in advance! Kind regards, M.
09.06.2024 - 12:48DROPS Design answered:
Dear Maud, the type of heel is a wedge heel; here is a video on how to work it: https://www.garnstudio.com/video.php?id=1745&lang=en. Happy knitting!
09.06.2024 - 19:52
![]() Mia wrote:
Mia wrote:
Hi! Ich verstehe die verkürzten Reihen in diesem Zusammenhang nicht. Ich habe die Ferse bei der Zunahme Ferse so gestrickt, dass ich am Ende die 4 verbliebenen Maschen auf jeder Seite mit der letzten Reihe mitgestrickt habe. Ist das richtig? Oder bleiben diese Maschen unberührt bis ich den Fuß aufnehme. Ich habe dadurch quasi einen kraus rechts gestrickten „Lappen“, jedoch keine Maschen für die Seite des Fußes. Was mache ich falsch?
12.12.2023 - 09:03DROPS Design answered:
Liebe Mia, nach der 10. Reihe stricken Sie die verkürzten Reihen bis noch zuerst 3 Maschen, dann 2 Maschen dann 1 Maschen übrig dann bis alle Maschen gestrickt sind in diesem Video zeigen wir, wie so eine Ferse gestrickt wird; beachten Sie nur, daß die Maschenanzahl verschieden ist. Viel Spaß beim stricken!
12.12.2023 - 13:18
![]() Kersti wrote:
Kersti wrote:
Hi! I and just about tho start the wedge heel but I would need a bit of additional clarification. As i understand I should have 20 stitches on my needle. The marker will sit in the middle of the row. For Row 1 on wedge heel, does it mean the row should be knit as follows: Row 1: knit 8 stitches, increase by 1 stitch, knit 2 stitches, pass the middle marker, knit 2 stitches increase by 1 stitch, knit until the end of the row. I am unsure I understood correctly. Thank you!
24.09.2023 - 20:59DROPS Design answered:
Dear Kersti, you are working short rows. Knit over the first 12 stitches, remembering to increase as stated, before stitch 10 and after stitch 11). Now you turn the piece and knit 6 stitches (including over the newly increased ones), increasing at each side of the marker as before. You can check the following video for more information: https://www.garnstudio.com/video.php?id=438&lang=en. Happy knitting!
24.09.2023 - 23:48
![]() Hetty wrote:
Hetty wrote:
Welke instructie video past bij het breien van deze hiel?
10.03.2023 - 07:22DROPS Design answered:
Dag Hetty,
Er is niet specifiek voor deze hiel een video, maar er is wel een video waarin uitgelegd wordt hoe je verkorte toeren in ribbelsteek breit, wat van toepassing is op deze hiel. Deze vindt je bij de video's onderaan het patroon.
12.03.2023 - 11:55
![]() Gudrun wrote:
Gudrun wrote:
Für extra warme Füsse! Die Socken sehen sehr flauschig aus. Werden unbedingt nachgearbeitet. Herzlichen Dank für die Inspiration und die Anleitung!
17.12.2022 - 09:15
|
|||||||
Snow White Socks#snowwhitesocks |
|||||||
 |
 |
||||||
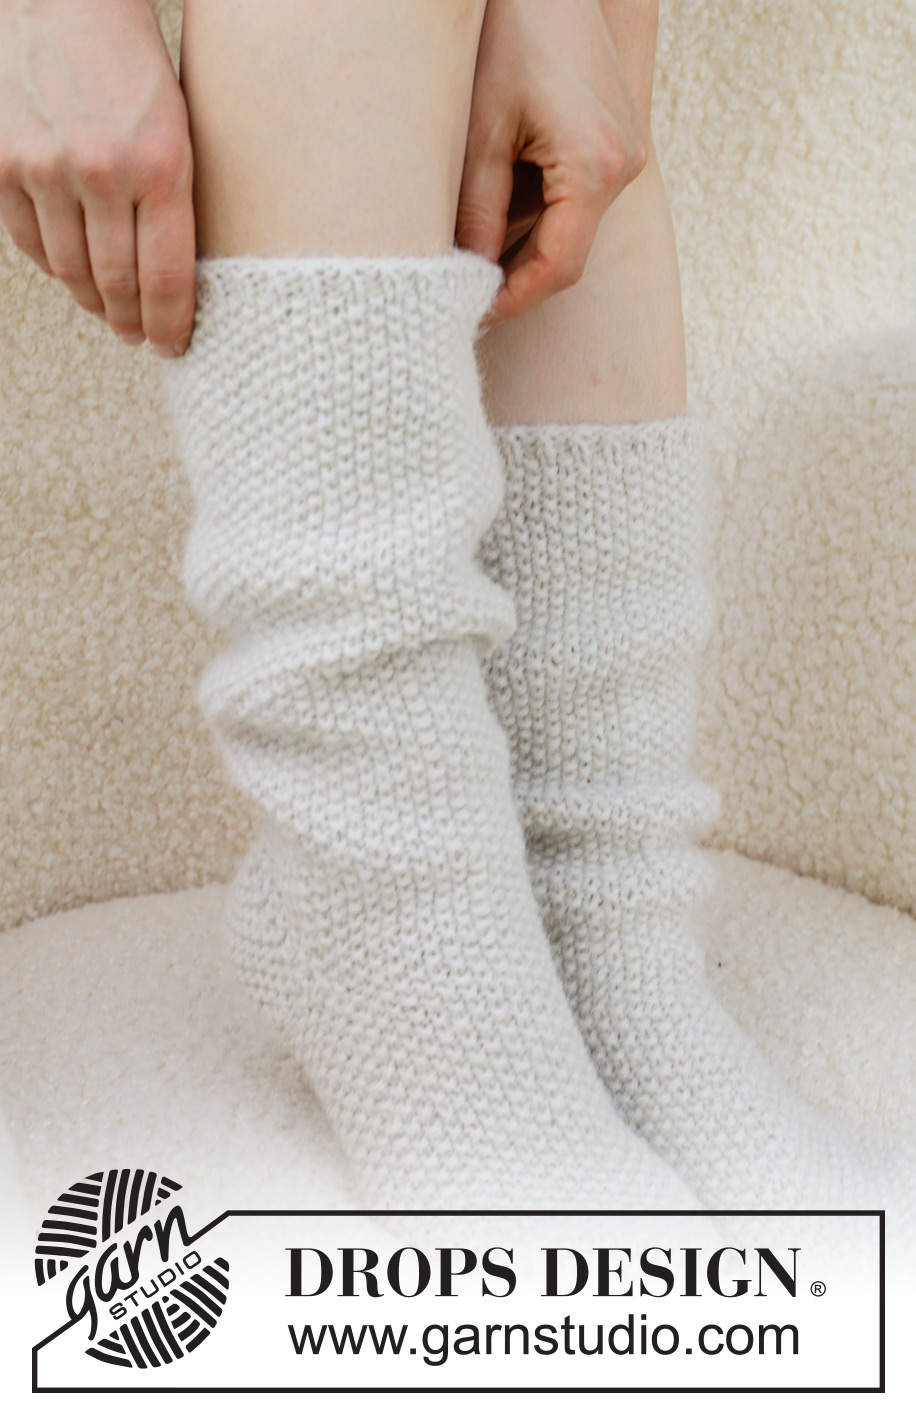
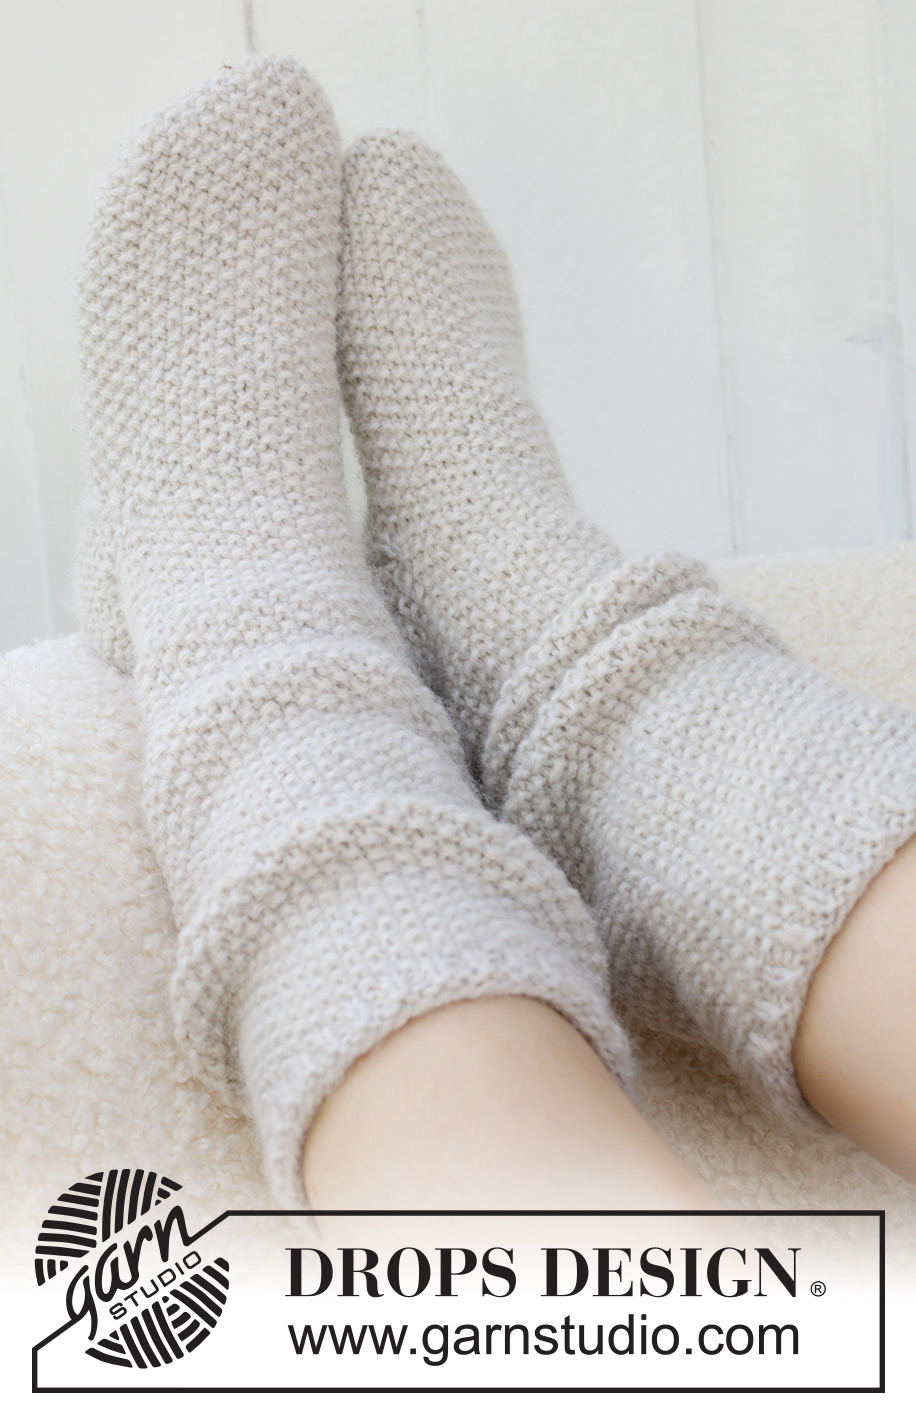
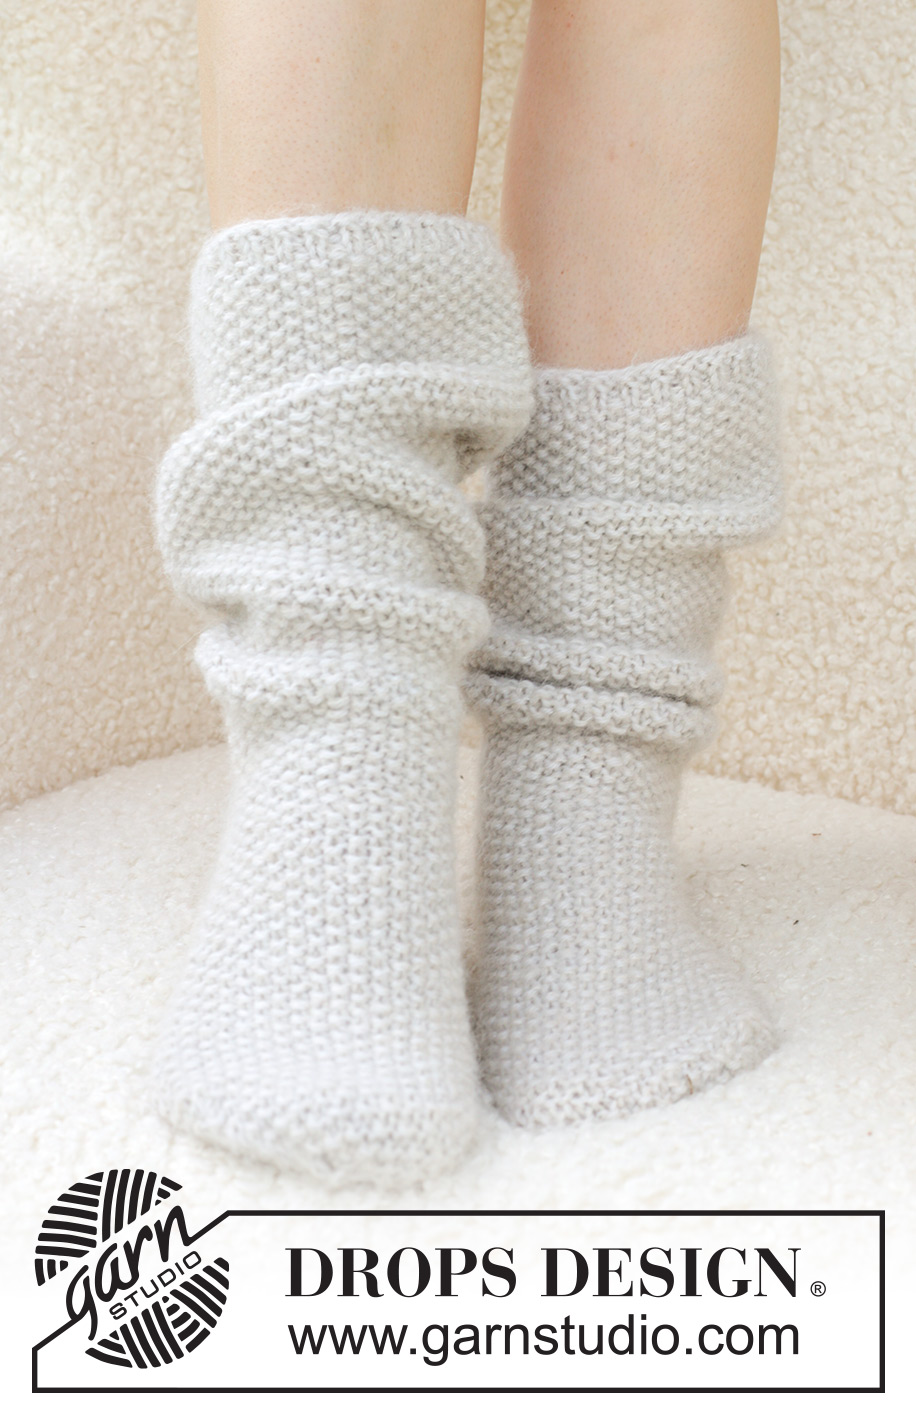
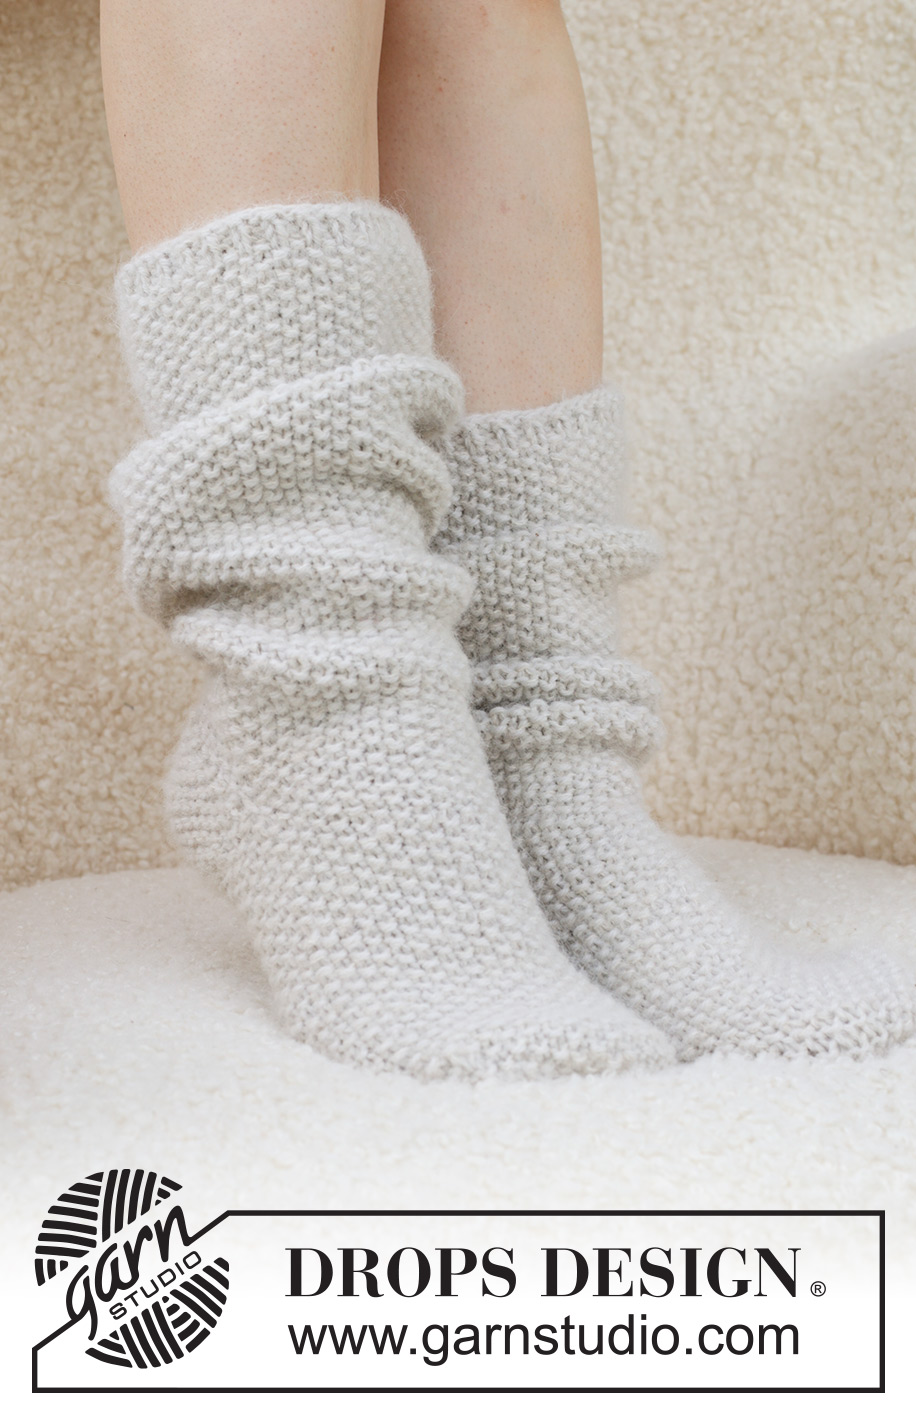
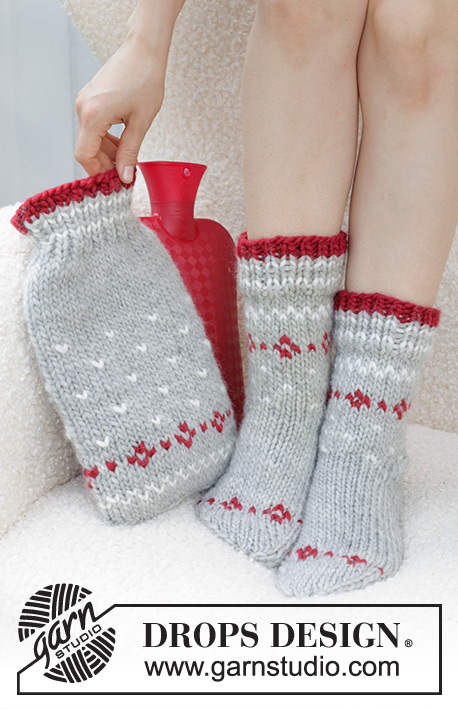
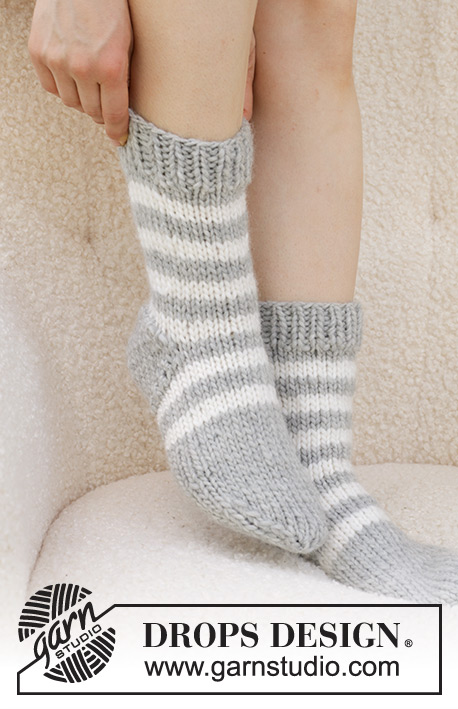
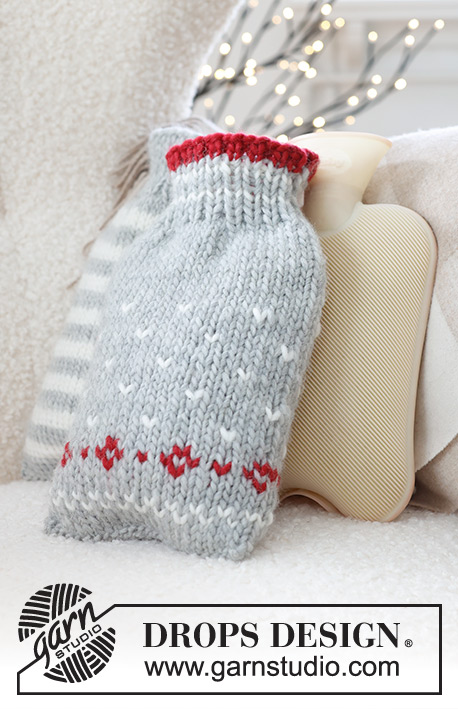
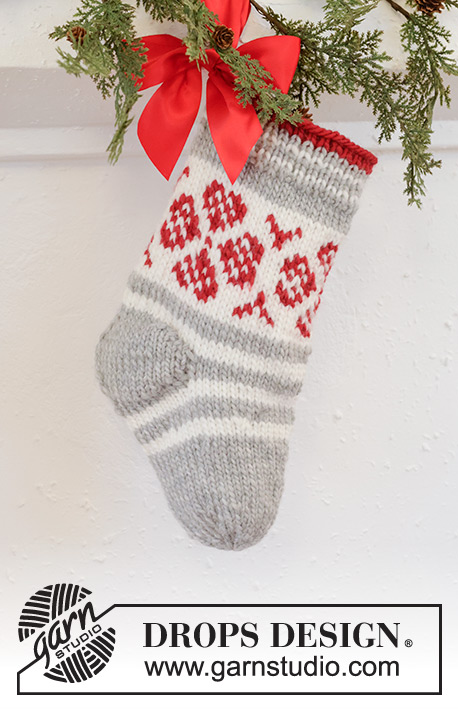
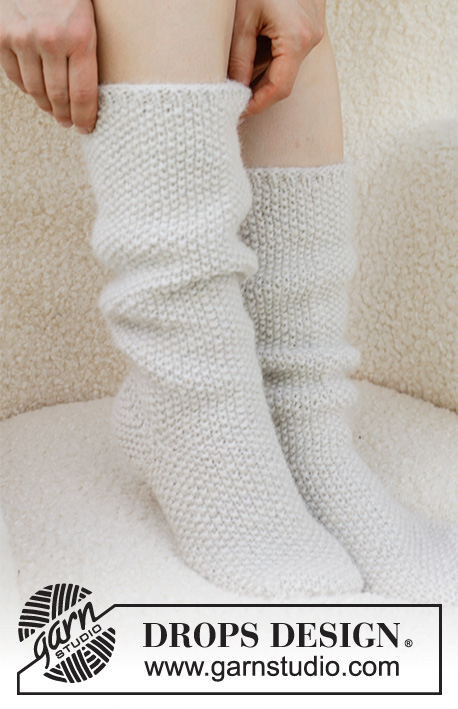
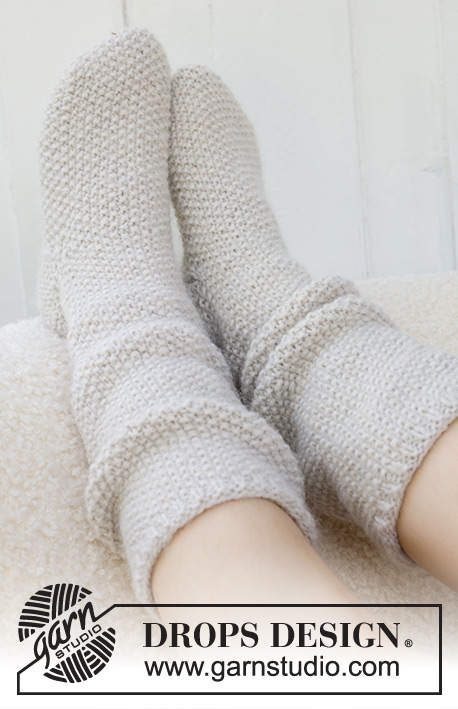
Knitted socks in DROPS Lima and DROPS Brushed Alpaca Silk. The piece is worked top down with moss stitch. Sizes 35 – 43 = US 4 1/2 – 12 1/2. Theme: Christmas.
DROPS 234-73 |
|||||||
|
------------------------------------------------------- EXPLANATIONS FOR THE PATTERN: ------------------------------------------------------- PATTERN: See diagram A.1. INCREASE TIP: (wedge heel): Start 1 stitch before the marker-thread, make 1 yarn over, knit 2 (marker-thread sits between these 2 stitches), 1 yarn over (= 2 stitches increased). On the next round knit the yarn overs twisted to avoid holes. DECREASE TIP-1 (wedge heel): All decreases are worked from the right side. Work until there are 2 stitches left before the marker-thread, knit 2 together, marker-thread, knit 2 twisted together. DECREASE TIP-2 (mid-back and toe): Start 1 stitch before the stitch with the marker, knit/purl 3 together, depending on where you are in the pattern (= 2 stitches decreased). WEDGE HEEL: The wedge heel is worked in garter stitch and back and forth. More and more stitches are worked on each row from the right side. ROW 1 (right side): Start 10-10-11 stitches before the marker-thread, knit until there are 8 stitches left on the row and increase 1 stitch on either side of the marker-thread – read INCREASE TIP, turn. ROW 2 (wrong side): Knit until there are 8 stitches left on the row – remember INCREASE TIP, turn. ROW 3: Knit until there are 7 stitches left on the row – and increase 1 stitch on either side of the marker-thread, turn. ROW 4: Knit until there are 7 stitches left on the row, turn. ROW 5: Knit until there are 6 stitches left on the row – and increase 1 stitch on either side of the marker-thread, turn. ROW 6: Knit until there are 6 stitches left on the row, turn. ROW 7: Knit until there are 5 stitches left on the row – and increase 1 stitch on either side of the marker-thread, turn. ROW 8: Knit until there are 5 stitches left on the row, turn. ROW 9: Knit until there are 4 stitches left on the row - increase 1 stitch on either side of the marker-thread, turn. ROW 10: Knit until there are 4 stitches left on the row – yarn overs knitted twisted, turn = 30-30-32 stitches on the needle. Continue like this, but without increasing by the marker-thread, until you have worked back and forth over all stitches. Insert 1 marker in the middle of the row, which is used to measure the foot. Now continue back and forth with garter stitch but turn when there is 1 more stitch left on each row as follows: ROW 1 (right side): Work until there is 1 stitch left on the row, turn. ROW 2 (wrong side): Work until there is 1 stitch left on the row, turn. ROW 3: Work until there are 2 stitches left on the row, turn. ROW 4: Work until there are 2 stitches left on the row, turn. Continue like this until there are 4 stitches left on each side. Now decrease on each side of the marker-thread – read DECREASE TIP-1 on each row from the right side until there are 20-20-22 stitches left and the last row was from the wrong side. Knit the next row. Cut the strand. ------------------------------------------------------- START THE PIECE HERE: ------------------------------------------------------- SOCK – SHORT OVERVIEW OF THE PIECE: The piece is worked in the round, top down. LEG: Cast on 56-58-60 stitches with double pointed needles size 4.5 MM = US 7 and 1 strand of each quality (= 2 strands). Purl 1 round. Then work 3 rounds of rib (knit 1, purl 1). Work A.1 (work purl over knit and knit over purl in the rib) – AT THE SAME TIME on the first round decrease 1 stitch at the end of the round by working the last 2 stitches together = 55-57-59 stitches. REMEMBER THE KNITTING GAUGE! Insert 1 marker in the first stitch – allow it to follow your work onwards; it is used when decreasing at the back. When the piece measures 8-9-10 cm = 3⅛"-3½"-4", decrease 2 stitches mid-back – read DECREASE TIP-1. Decrease like this every 2½ cm = 1" a total of 8 times = 39-41-43 stitches. Continue working until the piece measures 28-30-32 cm = 11"-11¾"-12½". Cut the strand and remove the marker. HEEL AND FOOT: Keep the first 10-10-11 stitches on the needle, place the next 19-21-21 stitches on 1 thread (top of foot) and keep the last 10-10-11 stitches on the needle = 20-20-22 heel-stitches. Insert 1 marker-thread in the middle of the row and allow it to follow your work onwards – the marker-thread is used for the increases and decreases on heel. Work WEDGE HEEL – read description above. When the heel is finished, place the 19-21-21 stitches from the thread back on the needle = 39-41-43 stitches. Start the round mid-under the foot – insert 1 marker in the first stitch (this marker should be a different color than the marker on the heel to distinguish them). Continue A.1 in the round – make sure the pattern continues neatly from the stitches on top of the foot (if you have holes along the heel where you turned, pick up the strand between 2 stitches and work it twisted together with the next stitch on the left needle). AT THE SAME TIME decrease 2 stitches on each side of the marker under the foot – read DECREASE TIP-2. Decrease like this every 4th round a total of 2-2-1 times = 35-37-41 stitches. Work until the foot measures 19-21-24 cm = 7½"-8¼"-9½" from the marker on the heel – measured under the foot. Try the sock on and work to desired length - approx. 3 cm = 1⅛" left. AT THE SAME TIME work the last 2 stitches on the round together = 34-36-40 stitches. TOE: Insert 1 marker in each side with 17-18-20 stitches both on top of and underneath the foot. Continue in the round with moss stitch. AT THE SAME TIME on the first round decrease 2 stitches on each side – read DECREASE TIP-2. Decrease like this every 2nd round 1 more time, then every round 2 times = 18-20-24 stitches. On the next round knit all stitches together 2 and 2 = 9-10-12 stitches. Knit 1-0-0, then knit all stitches together 2 and 2 = 5-5-6 stitches. Cut the strand, pull it through the remaining stitches, tighten and fasten well. The foot measures approx 22-24-27 cm = 8¾"-9½"-10⅝" from the marker on the heel. Work the other sock in the same way. |
|||||||
Diagram explanations |
|||||||
|
|||||||

|
|||||||
Have you finished this pattern?Tag your pictures with #dropspattern #snowwhitesocks or submit them to the #dropsfan gallery. Do you need help with this pattern?You'll find 20 tutorial videos, a Comments/Questions area and more by visiting the pattern on garnstudio.com. © 1982-2025 DROPS Design A/S. We reserve all rights. This document, including all its sub-sections, has copyrights. Read more about what you can do with our patterns at the bottom of each pattern on our site. |
|||||||


With over 40 years in knitting and crochet design, DROPS Design offers one of the most extensive collections of free patterns on the internet - translated to 17 languages. As of today we count 314 catalogs and 11822 patterns - 11812 of which are translated into English (US/in).
We work hard to bring you the best knitting and crochet have to offer, inspiration and advice as well as great quality yarns at incredible prices! Would you like to use our patterns for other than personal use? You can read what you are allowed to do in the Copyright text at the bottom of all our patterns. Happy crafting!
Post a comment to pattern DROPS 234-73
We would love to hear what you have to say about this pattern!
If you want to leave a question, please make sure you select the correct category in the form below, to speed up the answering process. Required fields are marked *.