
Popular categories
Looking for a yarn?


Comments / Questions (51)
![]() Caillaud wrote:
Caillaud wrote:
Bonjour Modèle en XL pouf le rabattage au niveau du dos en début de rang il faut rabattre 1×7 mailles et 8×1 mailles mais les 8×1 mailles me pose problème. Faut il le faire sur la longueur du rang à intervalle régulier et faut il tenir compte quand on retricote de comment se présente les mailles et peut on rabattre sur une mailles envers. Je suis débutante et je n'y arrive pas a faire les 8 × 1 maille je ne comprend pas comment faire. Merci pour vos réponses.
29.04.2025 - 12:12DROPS Design answered:
Bonjour Mme Caillaud, à 34 cm de hauteur totale, vous allez rabattre 7 mailles au début des 2 rangs suivants c'est-à-dire: 7 m au début du rang suivant sur l'endroit, tricotez le rang jusqu'à la fin, tournez, rabattez les 7 premières m au début du rang suivant sur l'envers, terminez le rang comme avant. Maintenant, rabattez 7 x 1 m de chaque côté ainsi: *rabattez 1 m, terminez le rang, tournez, rabattez 1 m, terminez le rang, tournez*; répétez 7 fois ces 2 rangs = vous aurez ainsi rabattu 15 m de chaque côté, soit 95-15-15=il vous restera 65 mailles. Bon tricot!
29.04.2025 - 13:41
![]() Eveline Van Damme wrote:
Eveline Van Damme wrote:
De hals van de trui rekt uit, is daar een oplossing voor ? Bedankt
29.03.2025 - 13:21DROPS Design answered:
Dag Eveline,
Ik neem aan dat je trui al klaar is en je liever niet meer het werk uithaalt om de het afkanten bij de hals wat strakker te doen. Wat je eventueel zou kunnen doen is een rand met vasten haken rondom de hals om het wat strakker te maken.
30.03.2025 - 09:59
![]() Rura wrote:
Rura wrote:
Hallo! In der Anleitung steht beim Rückenteil, dass nach 33 cm (L) ab Anschlagrand für die Armausschnitte abgekettet werden soll. Auf der Abbildung mit den Maßen ist der Armausschnitt aber erst nach 54 cm. Was ist korrekt?
19.03.2025 - 16:11DROPS Design answered:
Liebe Runa, die 54 cm rechts sind für die gesamte Länge, so haben Sie 33 cm vor Armausschnitt _ 21 cm nach Armauschnitt = 54 cm. Viel Spaß beim Stricken!
20.03.2025 - 09:07
![]() Delphine Caillaud wrote:
Delphine Caillaud wrote:
Bonjour Je débute au tricot et je me lance dans ce bel ouvrage. Pour tricoter le dos en XL il me faut 95 mailles hors en point de riz c'est un nombre pair qu'il faut et de plus est ce que les mailles lisières sont tricotées en point mousse. Pouvez vous m'éclairer
19.03.2025 - 12:30DROPS Design answered:
Bonjour Mme Caillaud, ainsi, le point de riz sera identique des 2 côtés: à droite et à gauche/au début et à la fin du rang. Bon tricot!
19.03.2025 - 16:15
![]() Kerstin NilssonPetersson wrote:
Kerstin NilssonPetersson wrote:
Är den stor i storleken?\r\n// Kerstin 🌻
05.01.2025 - 10:20
![]() Nono wrote:
Nono wrote:
Forgive me -I’m new to knitting and although read from charts before,I’m not understanding this pattern at all🙈is there any written instructions-thank you
24.11.2024 - 00:54DROPS Design answered:
Dear Nono, the chart is a simple rib pattern: knit 1, purl 1. On the next row knit over purl and purl over knit. This kind of stitch is also called moss stitch. Happy knitting!
24.11.2024 - 20:57
![]() Nono wrote:
Nono wrote:
Forgive me -I’m new to knitting and although read from charts before,I’m not understanding this pattern at all🙈is there any written instructions-thank you
21.11.2024 - 21:57
![]() Chavagnat Chantal wrote:
Chavagnat Chantal wrote:
Bonjour, Concernant les manches ( Taille M), après avoir rabattu 1 fois 3 mailles, 3 fois 2 fois et 2 fois une maille, combien de fois faut il rabattre 2 mailles de chaque côté ? Combien de mailles sont à rabattre à la fin ?\r\nMerci d\'avance
19.04.2024 - 17:42DROPS Design answered:
Bonjour Chantal, vous rabattez 2 mailles de chaque côté jusqu'à ce que la manche mesure 55-55-56-56-57-58 cm (choissessez votre taille). Le nombre de fois n’est pas precisé. Ensuite il faut rabattre 1 fois 3 mailles de chaque côté et rabattre toutes les mailles (le nombre final de mailles n’est pas precise). La manche mesure environ 56-56-57-57-58-59 cm. Bon tricot!
20.04.2024 - 10:02
![]() Jiordana wrote:
Jiordana wrote:
Hi, how is the neck finished? Is it finished with just the cast off? A pretty rough edge? Can I add an inch of ribbing to finish?
26.11.2023 - 17:25DROPS Design answered:
Dear Jiordana, the neck is simply cast off and doesn't require any type of finish. If you work a rib it's going to get slightly higher and narrower and may have trouble being adjusted. Happy knitting!
26.11.2023 - 22:49
![]() Agneta Stocklassa wrote:
Agneta Stocklassa wrote:
I mönstret står det att det är rätstickning men jag tycker attb ilden visar mosstickning, även stickfastheten visar att det är mosstickning. Är det felskrivet i mönstret?
29.08.2023 - 08:52DROPS Design answered:
Hej Agneta. Denna tröja är stickad i mosstickning. Där vi skriver "RÄTSTICKNING (stickas fram och tillbaka): Alla varv stickas räta." är bara en förklaring på hur de rätstickade kantmaskorna ska stickas. Mvh DROPS Design
30.08.2023 - 11:49
|
|||||||
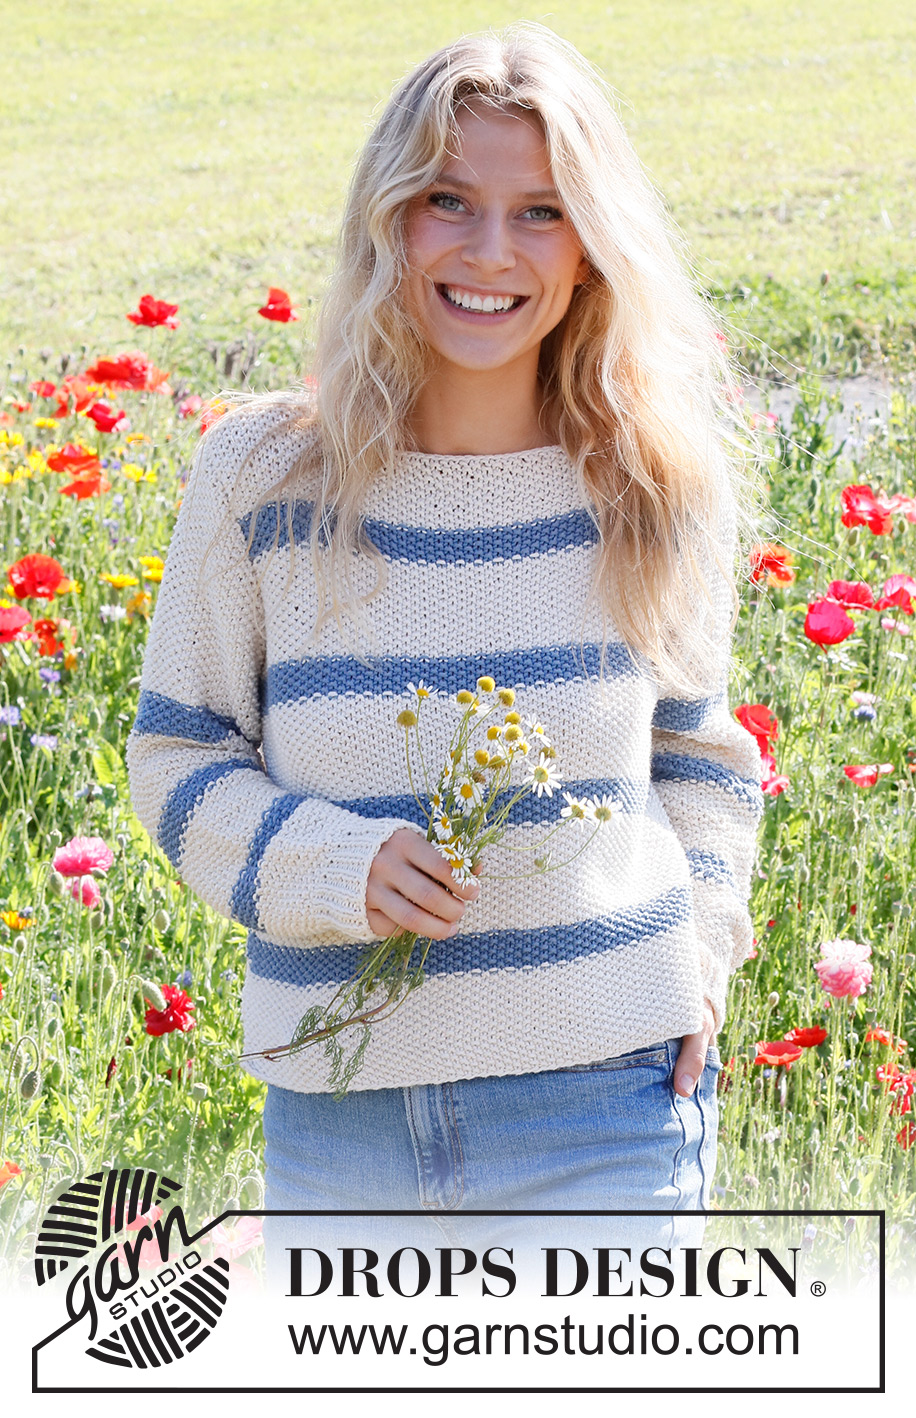
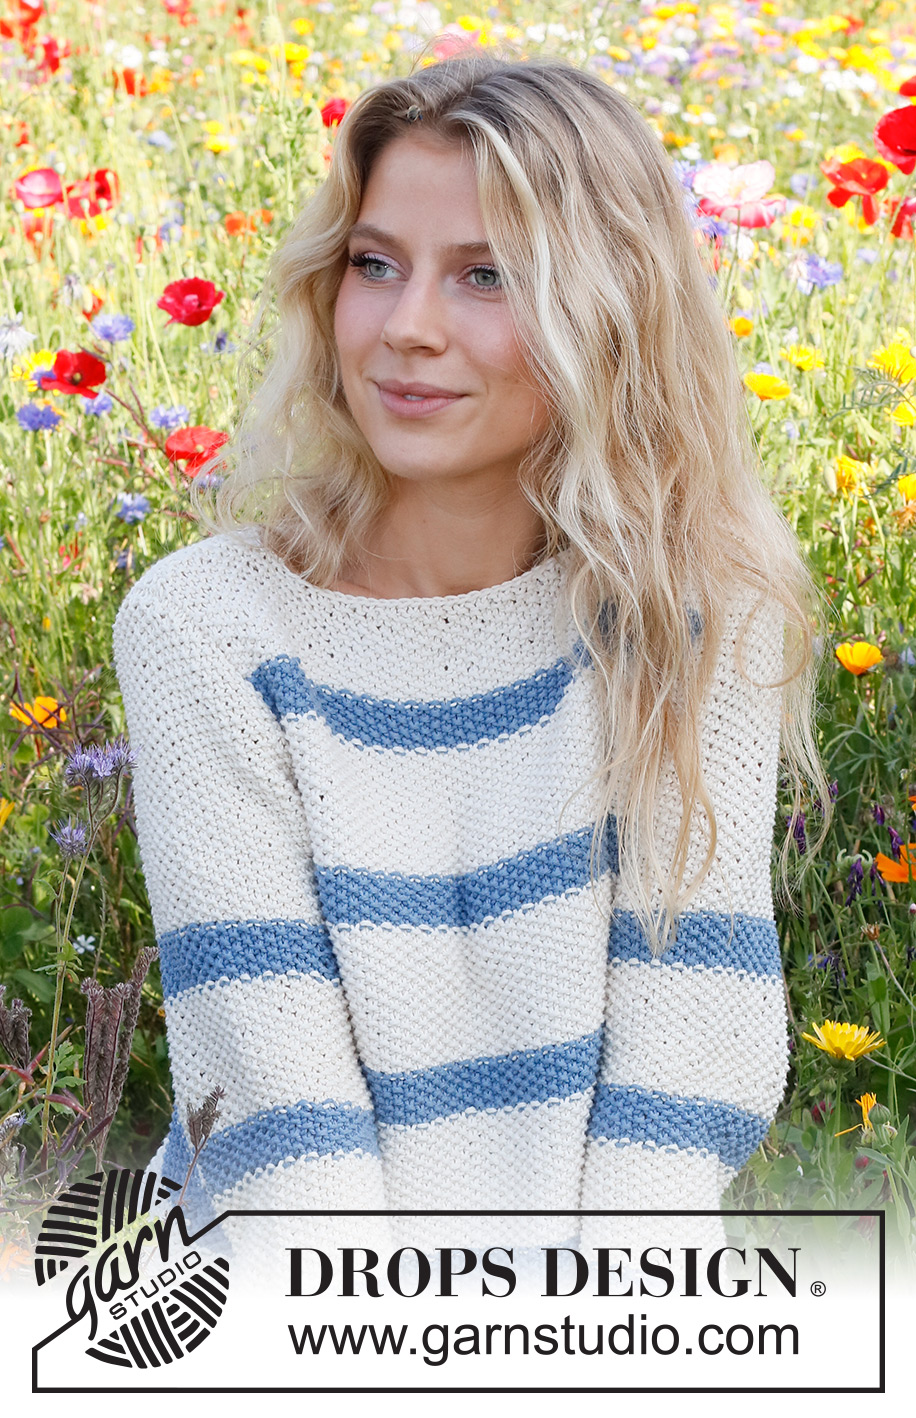
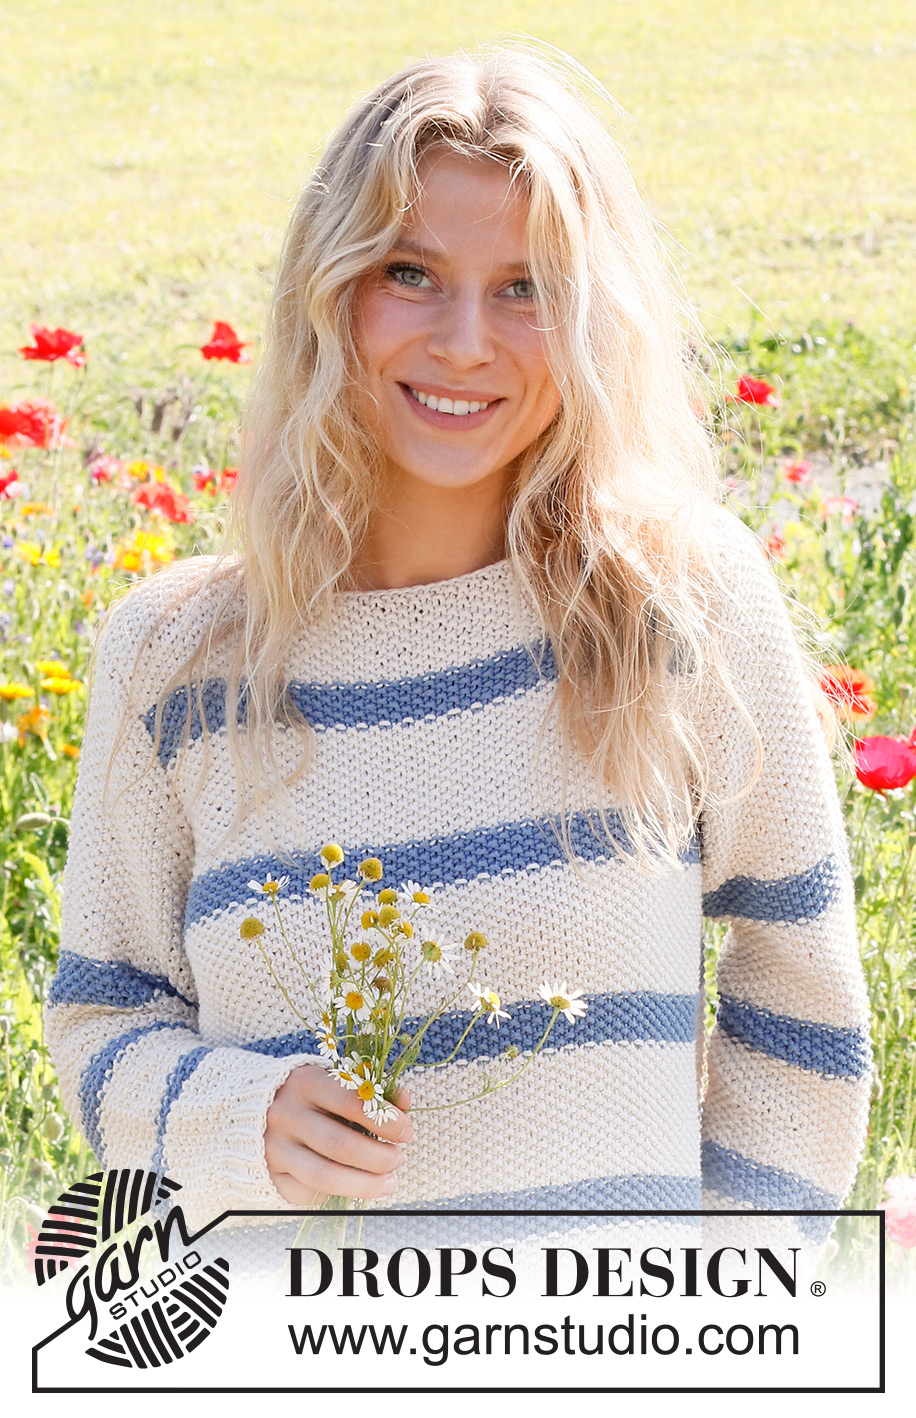
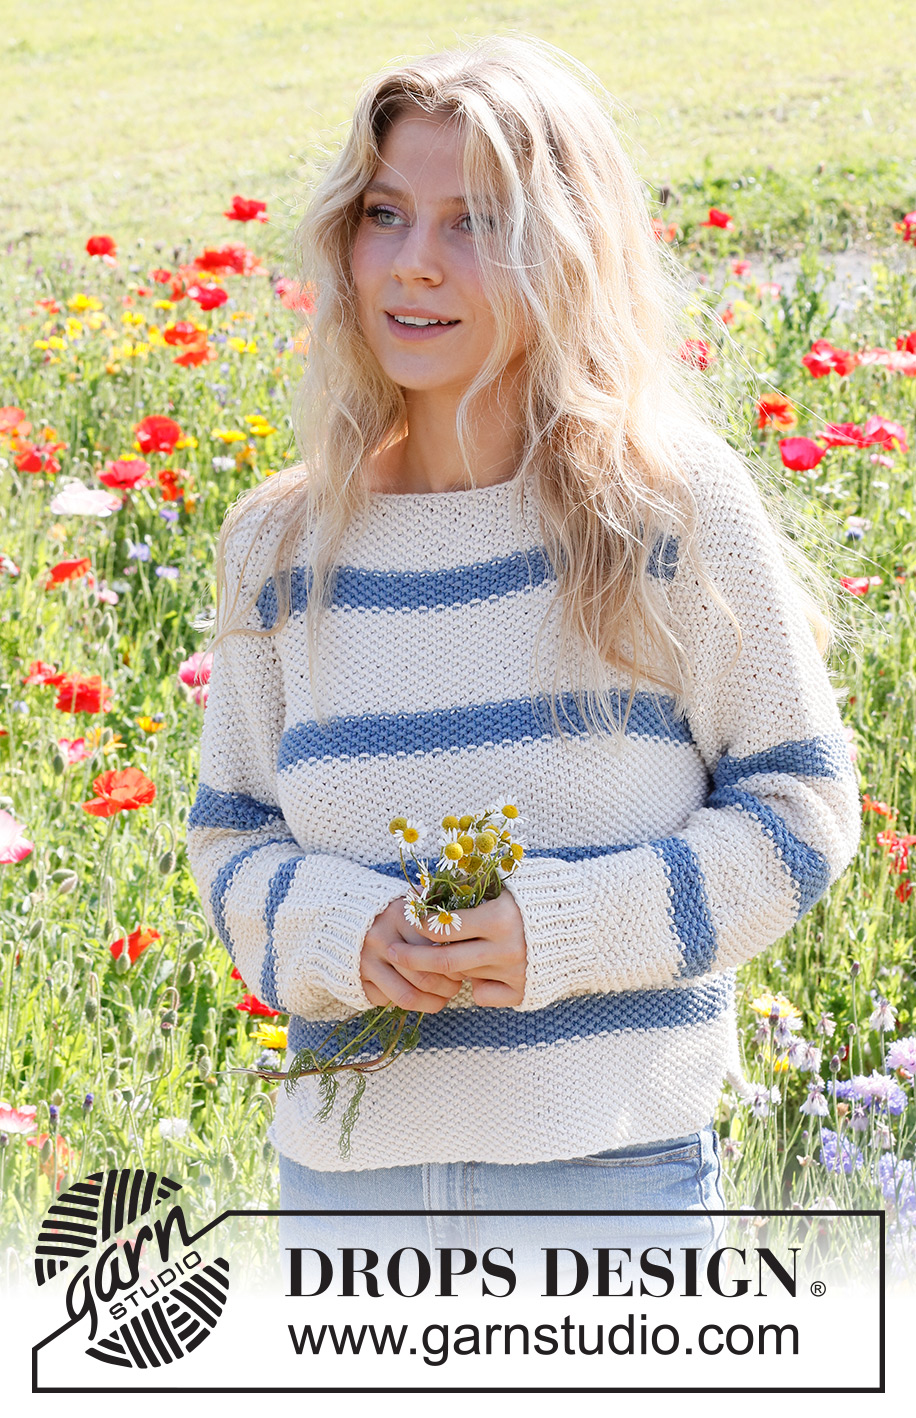
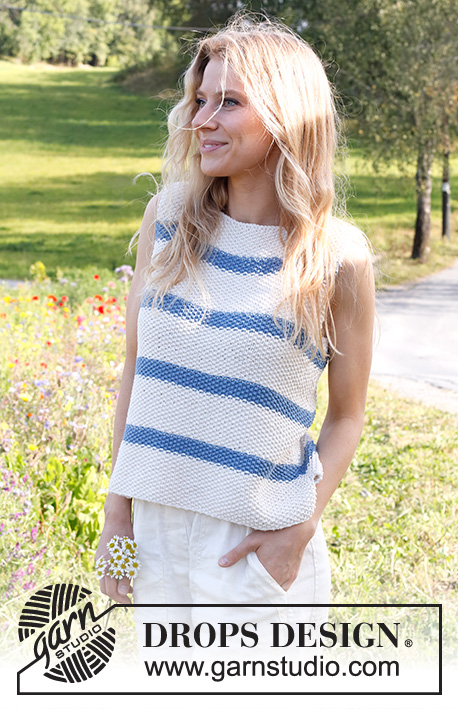
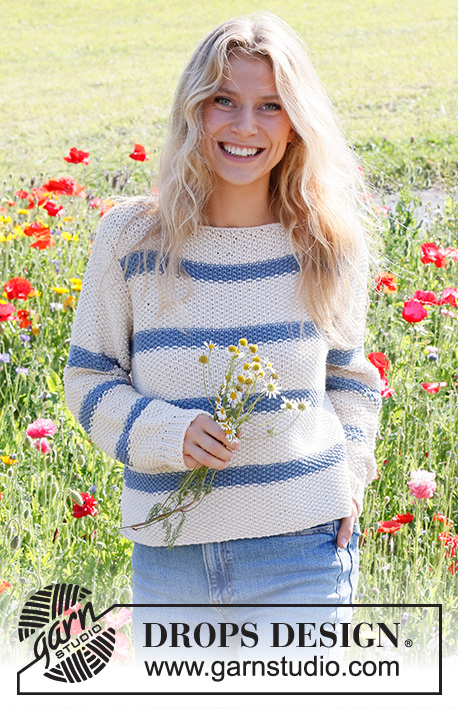
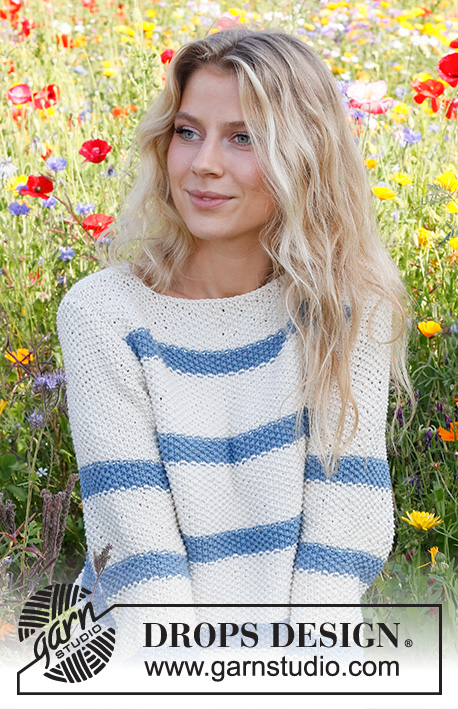
Sea Bird Sweater#seabirdsweater |
|||||||
 |
 |
||||||
Knitted basic sweater in DROPS Paris. The piece is worked bottom up, with moss stitch and stripes. Sizes S - XXXL.
DROPS 230-2 |
|||||||
|
------------------------------------------------------- EXPLANATIONS FOR THE PATTERN: ------------------------------------------------------- RIDGE/GARTER STITCH (worked back and forth): Knit all rows. 1 ridge = knit 2 rows. PATTERN: See diagram A.1. The diagram shows all rows in the pattern from the right side. STRIPES BACK/FRONT PIECE: Stripes are worked with colors off white and jeans blue as follows: Work 8-8½-9½-9½-10-10½ cm = 3⅛"-3¼"-3⅝"-3⅝"-4"-4⅛" with color off white, 3 cm = 1⅛" with color jeans blue. When you have worked 4 stripes with jeans blue, finish with color off white. STRIPES SLEEVES: Stripes are worked with colors off white and jeans blue, after the rib, as follows: Work 8 cm = 3⅛" with color off white, 3 cm = 1⅛" with color jeans blue. When you have worked 3 stripes with jeans blue, finish with color off white. ------------------------------------------------------- START THE PIECE HERE: ------------------------------------------------------- SWEATER – SHORT OVERVIEW OF THE PIECE: The piece is worked in sections, back and forth and bottom up, then sewn together. BACK PIECE: Cast on 73-83-89-95-107-117 stitches with circular needle size 5 MM = US 8 and color off white DROPS Paris. Work as follows: 1 edge stitch in GARTER STITCH – read description above, A.1 until there are 2 stitches left, work the first stitch in A.1 and 1 edge stitch in garter stitch. Work STRIPES – read description above. REMEMBER THE KNITTING GAUGE! Continue until the piece measures 31-32-33-34-35-36 cm = 12¼"-12½"-13"-13⅜"-13¾"-14¼" from the cast-on edge. Bind off for the armholes at the beginning of each row as follows: 4-5-6-7-10-12 stitches 1 time, then 1 stitch 3-6-7-8-10-12 times on both sides = 59-61-63-65-67-69 stitches. Continue with A.1 and stripes until the piece measures 47-49-51-53-56-58 cm = 18½"-19¼"-20"-21"-22"-22¾" from the cast-on edge. On the next row from the right side bind off for the neck as follows: Work the first 17-17-17-18-18-19 stitches, then place these stitches on a thread, bind off the next 25-27-29-29-31-31 stitches and work the last 17-17-17-18-18-19 stitches. Finish each shoulder separately. LEFT SHOULDER: = 17-17-17-18-18-19 stitches. The first row is from the wrong side. Then bind off for the neck at the beginning of each row from the neck as follows: 1 stitch 3 times = 14-14-14-15-15-16 stitches. Work until the piece measures 50-52-54-56-58-60 cm = 19¾"-20½"-21¼"-22"-22¾"-23⅝" from the cast-on edge. Bind off with knit. RIGHT SHOULDER: Place the 17-17-17-18-18-19 stitches from the thread back onto the needle. Start from the wrong side. Then bind off for the neck at the beginning of each row from the neck as follows: 1 stitch 3 times = 14-14-14-15-15-16 stitches. Work until the piece measures 50-52-54-56-58-60 cm = 19¾"-20½"-21¼"-22"-22¾"-23⅝" from the cast-on edge. Bind off with knit. FRONT PIECE: Cast on and work in the same way as the back piece. SLEEVES: Cast on 40-42-44-46-48-50 stitches with circular needle size 4 MM = US 6 and color off white DROPS Paris. Work rib (knit 1, purl 1) with 1 edge stitch in garter stitch on each side for 7 cm = 2¾". Change to circular needle size 5 MM = US 8 and work A.1 with 1 edge stitch in garter stitch on each side. Work STRIPES SLEEVES – read description above. When the sleeve measures 12 cm = 4¾", increase 1 stitch on each side. Increase like this every 4-3½-3-2½-2-1½ cm = 1½"-1¼"-1⅛"-1"-¾"-½" a total of 8-10-11-13-16-17 times = 56-62-66-72-80-84 stitches. Work until the sleeve measures 47-46-47-46-45-44 cm = 18½"-18"-18½"-18"-17¾"-17¼". Now bind off for the sleeve cap at the beginning of each row as follows: 3 stitches 1 time, 2 stitches 3-3-3-3-4-4 times and 1 stitch 1-2-2-4-4-6 times on each side. Then bind off 2 stitches on each side until the sleeve measures 55-55-56-56-57-58 cm = 21⅝"-21⅝"-22"-22"-22½"-22¾". Bind off 3 stitches 1 time on each side. Bind off in moss stitch. The sleeve measures approx. 56-56-57-57-58-59 cm = 22"-22"-22½"-22½"-22¾"-23¼". Work 1 more sleeve in the same way. ASSEMBLY: Sew the shoulder seams. Sew the sleeve cap to the armhole. Sew the sleeve seams and continue down the side seams, leaving a 5 cm = 2" split at the bottom. |
|||||||
Diagram explanations |
|||||||
|
|||||||

|
|||||||
Have you finished this pattern?Tag your pictures with #dropspattern #seabirdsweater or submit them to the #dropsfan gallery. Do you need help with this pattern?You'll find 20 tutorial videos, a Comments/Questions area and more by visiting the pattern on garnstudio.com. © 1982-2025 DROPS Design A/S. We reserve all rights. This document, including all its sub-sections, has copyrights. Read more about what you can do with our patterns at the bottom of each pattern on our site. |
|||||||


With over 40 years in knitting and crochet design, DROPS Design offers one of the most extensive collections of free patterns on the internet - translated to 17 languages. As of today we count 314 catalogs and 11822 patterns - 11812 of which are translated into English (US/in).
We work hard to bring you the best knitting and crochet have to offer, inspiration and advice as well as great quality yarns at incredible prices! Would you like to use our patterns for other than personal use? You can read what you are allowed to do in the Copyright text at the bottom of all our patterns. Happy crafting!
Post a comment to pattern DROPS 230-2
We would love to hear what you have to say about this pattern!
If you want to leave a question, please make sure you select the correct category in the form below, to speed up the answering process. Required fields are marked *.