
Popular categories
Looking for a yarn?


Comments / Questions (150)
![]() Jill Hickling wrote:
Jill Hickling wrote:
Hi. I have knitted the sleeve to 49cm but don’t understand how to continue. I have already tried once and it went wrong so I have had to unpick it. Please can you help?
15.03.2023 - 17:46DROPS Design answered:
Dear Mrs Hickling, when sleeve measures 49 cm, cast off 3 sts on each side of the marker thread = 6 sts mid under sleeve, then continue back and forth on needle and cast off 2 st at the beginning of the next 2 rows (from right side + from wrong side = 2 sts cast off on each side), then cast off 3 sts at the beg of neext 2 rows (from right side + from wrong side= 3 sts cast off on each side). Then cast off remaining stitches on next row. Happy knitting!
16.03.2023 - 08:45
![]() Devin wrote:
Devin wrote:
Hello again! Thank you for getting back so quickly for my last question. I am now approaching the sleeves and would like to try to knit with circular needles. The pattern says to use "short" circular needles. What size cable do you recommend? Thank you soo much!
24.02.2023 - 17:38DROPS Design answered:
Dear Devin, we recommend 40cm needles. Happy knitting!
26.02.2023 - 23:01
![]() Felicitas wrote:
Felicitas wrote:
Hallo, ich möchte in Grösse XL stricken. Es steht: Anschlag 113 Maschen. - Sind da Randmaschen schon dabei? oder schlage ich dann 113 plus 2, also 115 Maschen an? Danke
21.02.2023 - 13:29DROPS Design answered:
Liebe Felicitas, die Randmaschen sind schon dabei, die brauchen Sie nicht extra anzuschlagen. Viel Spaß beim stricken!
21.02.2023 - 17:49
![]() Devin wrote:
Devin wrote:
Hello! I am stuck at the neck section of the back piece. Can you clarify how each shoulder is finished separately and then casted off of each row at the beginning. ex: 1 stich 1 time . Thank you!
17.02.2023 - 17:49DROPS Design answered:
Dear Devin, first, cast off the middle stitches for the neck. The 2 groups of stitches on either side of these correspond to each of the shoulders. Work over these separately (each shoulder's stitches are worked separately). In the next row of the shoulder, when starting to work from the neck, cast off 1 stitch. Then finish the shouldee by working back and forth in stocking stitch until the final measurements. Repeat in the other shoulder. Happy knitting!
19.02.2023 - 22:29
![]() Pétronille wrote:
Pétronille wrote:
Bonjour ! Je souhaite tricoter le pull grey pearl, mais comme je ne veux pas faire les fentes sur les côtés j aimerais tricoter tout le bas en rond. Mais est-ce qu'il faut que j e fasse quelques mailles en moins ? Je pensais 4 mailles en moins. Y a-t-il des marges de couture qui sont comptées ? Merci d avance !
02.12.2022 - 08:00DROPS Design answered:
Bonjour Pétronille, vous pouvez conserver votre nombre de mailles en l'ajustant pour que les côtes tombent juste sur les côtés après les coutures - pensez à ajuster les diminutions ensuite. Bon tricot!
02.12.2022 - 08:19
![]() Tereza wrote:
Tereza wrote:
Dobrý den, nejsem si jistá u předního dílu s tvarováním průkrčníku. Píše se tam: Průkrčník dále tvarujeme – na jeho okraji uzavřeme vždy na začátku každé řady ještě 1x 2 oka a 2x 1 oko = zbývá 18-21-22-25-29-32 ok náramenice. Ujímají se oka na začátku každé druhé řady, aby to bylo na místě průkrčníku? Nebo v každé řadě, ale tím pádem jednou na začátku a jednou na konci řady náramenice? děkuji za radu.
07.10.2022 - 15:23DROPS Design answered:
Dobrý den, Terezo, oka pro průkrčník ujímáme jen na začátku každé řady směřující od průkrčníku, tedy ano, de facto na začátku každé 2. řady. Hodně zdaru! Hana
09.10.2022 - 22:49
![]() Valérie wrote:
Valérie wrote:
Bonjour, le mannequin porte quelle taille svp, merci par avance pour votre retour, Cordialement Valérie
21.09.2022 - 18:08DROPS Design answered:
Bonjour Valérie, nos modèles portent en général soit du S soit du M; mais rappelez-vous que chacune a sa propre morphologie, pour choisir votre taille, mesurez un vêtement identique que vous avez et dont vous aimez la forme et comparez ces mesures à celles du schéma. Retrouvez ici plus d'infos. Bon tricot!
22.09.2022 - 09:35
![]() Vibeke wrote:
Vibeke wrote:
Grey pearl Hei, jeg strikker bakstykket str M og har nå 82 m på pinnen før felling til arm. Så står det:Fell på begynnelsen av hver pinne i hver side: Fell 3 masker 1-1-1-1-1-1 gang, 2 masker 1-1-1-1-1-1 gang. og 1 maske 1-1-2-2-2-3 ganger = 64-70-74-82-92-100 masker. Jeg forstår ikke hvordan det skal bli 70m etter denne fellingen? Hva leser jeg feil?
19.09.2022 - 22:47DROPS Design answered:
Hej Vibeke, jo du feller 3m 1gang, 2m 1gang og 1m 1gang = 6 masker i hver side, så 6x2 = 12 masker. 82 - 12 = 70 masker :)
20.09.2022 - 15:19
![]() Minna wrote:
Minna wrote:
Hei, Etukappaleen ohjeessa lukee "neulo kuten takana, kunnes...". Mihin asti takakappaleen ohjeesta siis neulotaan samalla tavalla etukappaleessa?
23.08.2022 - 19:27DROPS Design answered:
Hei, etukappale neulotaan samalla tavalla kuin takana, kunnes kädenteiden silmukat on päätetty. Tämän jälkeen neulotaan sileää neuletta, kunnes työn pituus on 60-62-64-66-68-70 cm. Jatka sitten neulomista etukappaleen ohjeen mukaisesti.
24.08.2022 - 17:17
![]() Diana wrote:
Diana wrote:
Hei! Holder på med forstykket. Legg opp og strikk som bakstykket til arbeidet måler 60-62-64-66-68-70 cm. Nå settes de midterste 20-20-22-24-26-28 maskene på 1 tråd til hals, og hver skulder strikkes ferdig for seg står det. Når man legger de 22 maskene til hals på, et tråd så blir det ujevnt « feil» på skuldrene siden jeg har 103 masker til en en i størrelse L. Da vil jeg plutselig ha 40 masker på en skulder og 41 på den andre … DETTE MÅ JO BLI FEIL. Hjelp !
16.05.2022 - 18:59DROPS Design answered:
Hej Diana, du starter med 103 masker, tager 15 masker ind, lukker af til ærmegab i hver side og har 74 masker når du lukker af til hals :)
17.05.2022 - 08:57
|
|
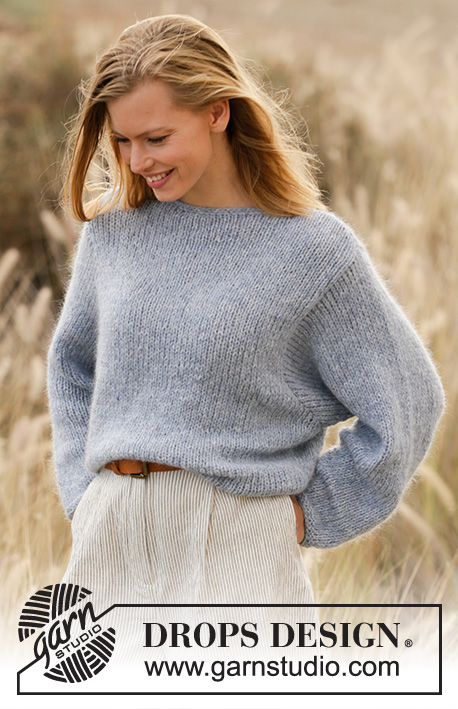
Grey Pearl#greypearlsweater |
|
 |
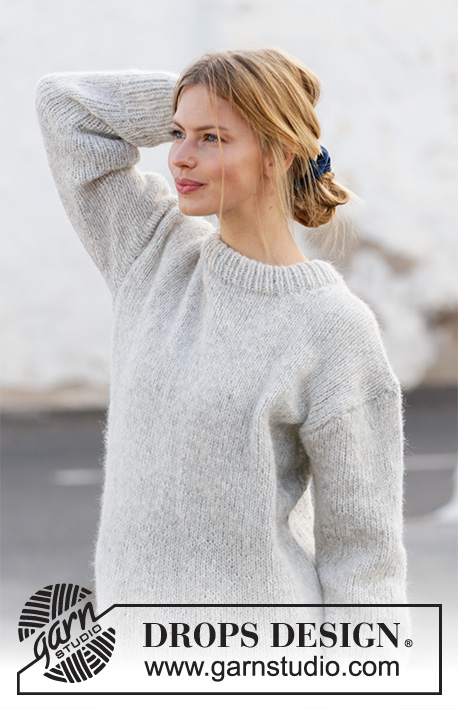 |
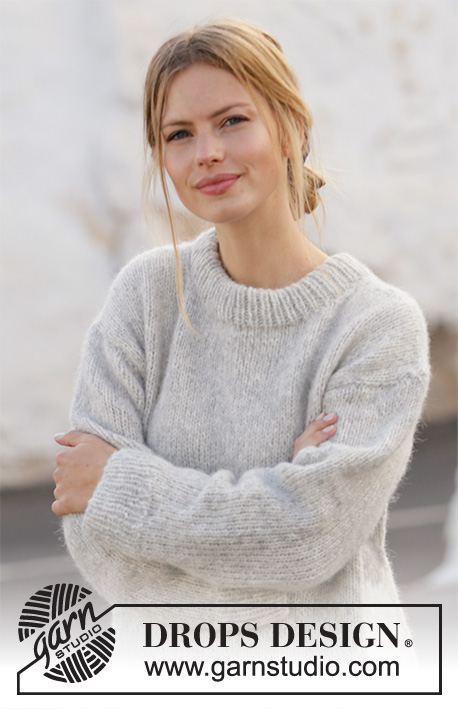
Knitted jumper in DROPS Air. Sizes S - XXXL.
DROPS 210-36 |
|
|
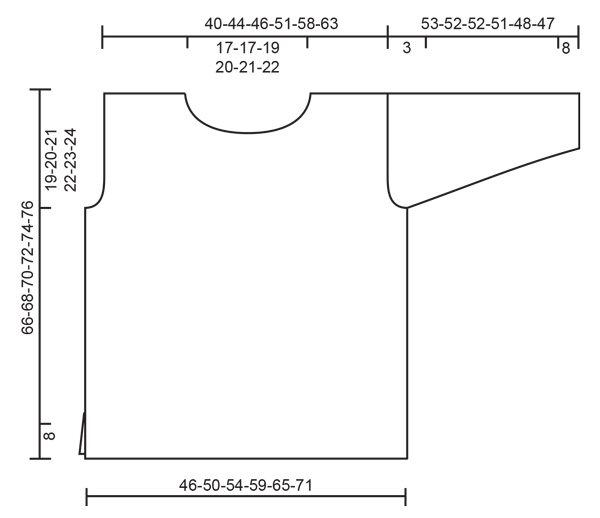
------------------------------------------------------- EXPLANATIONS FOR THE PATTERN: ------------------------------------------------------- RIDGE/GARTER STITCH (worked back and forth): Knit all rows. 1 ridge in height = Knit 2 rows. DECREASE TIP (evenly spaced): To work out how to decrease evenly, count the total number of stitches on needle (e.g. 89 stitches) and divide by number of decreases to be made (e.g. 13) = 6.8. In this example decrease by knitting together alternately each 5th and 6th stitch and each 6th and 7th stitch (approx.). INCREASE TIP (for sleeves): Start 1 stitch before the marker thread, 1 yarn over, work 2 stitches (marker thread sits between these 2 stitches), 1 yarn over. On the next round knit the yarn overs twisted to avoid holes. ------------------------------------------------------- START THE PIECE HERE: ------------------------------------------------------- JUMPER – SHORT OVERVIEW OF THE PIECE: The jumper is worked back and forth in 2 parts which are sewn together to finish. The sleeves are worked in the round with double pointed needles/short circular needle. BACK PIECE: Cast on 89-97-103-113-125-137 stitches with circular needle size 4.5 mm and Air. Purl 1 row from the wrong side then work as follows – from the right side: 2 edge stitches in GARTER STITCH – see description above, *knit 1, purl 1 *, work from *-* until there are 3 stitches left, knit 1 and 2 edge stitches in garter stitch. Continue like this until the piece measures 8 cm. Change to circular needle size 5.5 mm and knit 1 row from the right side where you decrease 13-15-15-17-19-21 stitches evenly spaced – read DECREASE TIP = 76-82-88-96-106-116 stitches. Continue with stocking stitch and 1 edge stitch in garter stitch on each side. When the piece measures 47-48-49-50-51-52 cm, cast off for the armholes on both sides at the beginning of each row as follows: Cast off 3 stitches 1-1-1-1-1-1 time, 2 stitches 1-1-1-1-1-1 time and 1 stitch 1-1-2-2-2-3 times = 64-70-74-82-92-100 stitches. Continue with stocking stitch until the piece measures 64-66-68-70-72-74 cm. Now cast off the middle 26-26-28-30-32-34 stitches for the neck and each shoulder is finished separately. Then cast off at the beginning of next row from the neck as follows: 1 stitch 1 time = 18-21-22-25-29-32 stitches on the shoulder. Continue working until the piece measures 66-68-70-72-74-76 cm and cast off. Work the other shoulder in the same way. FRONT PIECE: Cast on and work as for the back piece until the piece measures 60-62-64-66-68-70 cm. Now place the middle 20-20-22-24-26-28 stitches on 1 thread for the neck and finish each shoulder separately. Then cast off at the beginning of each row from the neck as follows: 2 stitches 1 time and 1 stitch 2 times = 18-21-22-25-29-32 stitches left on the shoulder. Continue working until the piece measures 66-68-70-72-74-76 cm, then cast off. Work the other shoulder in the same way. SLEEVE: The sleeves are worked bottom up, in the round, with double pointed needles/short circular needle. The piece is then divided and worked back and forth for the sleeve cap. Cast on 46-48-50-52-52-56 stitches with double pointed needles size 4.5 mm and Air. Knit 1 round, then work rib (knit 1 / purl 1) for 8 cm. Change to double pointed needles size 5.5 mm and continue with stocking stitch. On the first round decrease 8-8-8-8-8-10 stitches evenly spaced = 38-40-42-44-44-46 stitches. Insert a marker thread at the beginning of the round = mid under sleeve. Continue with stocking stitch, AT THE SAME TIME when the piece measures 10-10-10-10-12-12 cm, increase 1 stitch on each side of the marker thread – read INCREASE TIP. The yarn overs are worked twisted on the next round to avoid holes. Increase like this 3½-3½-3-3-2-2 cm a total of 11-12-13-13-15-15 times = 60-64-68-70-74-76 stitches. When the sleeve measures 50-49-49-48-45-44 cm, cast off 3 stitches on each side of the marker thread (= 6 stitches cast off mid under the sleeve), then continue working back and forth. Cast off for the sleeve cap at the beginning of each row on both sides as follows: 2 stitches 1 time, 3 stitches 1 time, then cast off the remaining stitches. Work the other sleeve in the same way. ASSEMBLY: Sew the shoulder seams. Sew in the sleeves and sew the side seams, inside the 1 edge stitch and until there is 8 cm left at the bottom = split. NECK: Knit up approx. 92-106 stitches with circular needle size 4,5 mm around the neck (including the stitches on the thread and the number divisible by 2). Work rib (knit 1 / purl 1) for 9 cm. Then cast off. Fold the rib at the top to the wrong side and fasten down. To avoid the neck being tight and turning outwards, make sure the seam is elastic. |
|
 |
|
Have you finished this pattern?Tag your pictures with #dropspattern #greypearlsweater or submit them to the #dropsfan gallery. Do you need help with this pattern?You'll find 30 tutorial videos, a Comments/Questions area and more by visiting the pattern on garnstudio.com. © 1982-2026 DROPS Design A/S. We reserve all rights. This document, including all its sub-sections, has copyrights. Read more about what you can do with our patterns at the bottom of each pattern on our site. |
|


With over 40 years in knitting and crochet design, DROPS Design offers one of the most extensive collections of free patterns on the internet - translated to 17 languages. As of today we count 324 catalogues and 12245 patterns translated into English (UK/cm). 12245
We work hard to bring you the best knitting and crochet have to offer, inspiration and advice as well as great quality yarns at incredible prices! Would you like to use our patterns for other than personal use? You can read what you are allowed to do in the Copyright text at the bottom of all our patterns. Happy crafting!
Post a comment to pattern DROPS 210-36
We would love to hear what you have to say about this pattern!
If you want to leave a question, please make sure you select the correct category in the form below, to speed up the answering process. Required fields are marked *.