
Popular categories
Looking for a yarn?


Comments / Questions (33)
![]() Grete wrote:
Grete wrote:
Jeg forstår ikke belegg (nedkant) er det riktig at jeg skal lage brettekant og så strikke mønster A4? vil ikke da dette komme på innsiden av skjørtet når jeg bretter inn?
31.07.2019 - 01:51DROPS Design answered:
Hei Grete, Belegget skal brettes inn mot vrangsida, så kommer ikke til å dekke noe av mønsteret. God fornøyelse!
31.07.2019 - 07:34
![]() Angelika Schledz wrote:
Angelika Schledz wrote:
Hallo Drops Desing, ich stricke gerade für ein kleines Mädel "Miss Cookie" würde auch gerne die Mütze dazu stricken, wo finde ich die Anleitung dazu? Miss Cookie sieht ganz toll aus. Es macht Spaß sie zu stricken !!! Viele Grüße
25.06.2019 - 18:59DROPS Design answered:
Liebe Frau Scheldz, hier finden Sie die Mütze. Viel Spaß beim stricken!
26.06.2019 - 06:27
![]() Jennie wrote:
Jennie wrote:
I have just finished making this for my one-year old grand-daughter and am thrilled with the result. As your yarn is hard to find in my part of Australia, I substituted Bendigo Woollen Mills 5 ply merino, which has worked perfectly. My daughter did not want the hat for her daughter so I have made a variation on the headband from the Visby Tunic pattern. Thank you so much for your wonderful patterns and the interesting videis.
14.02.2019 - 00:36
![]() Hetty Stok wrote:
Hetty Stok wrote:
What is the longer needle for?
01.02.2019 - 13:23DROPS Design answered:
Dear Mrs Stock, the longer needle (80 cm) is used for the bottom of the dress (skirt part) to have enough room for all stitches. Happy knitting!
01.02.2019 - 15:31
![]() Signe wrote:
Signe wrote:
Oppskriften på selene er litt vanskelig å forstå.. RILLE er forklart med at man skal strikke en pinne frem og tilbake - 1 RILLE = strikk 2 pinner rett. Dvs at vi fra fremsiden får en pinne med vrangt og en med rett.. etter 6 pinner rett skal man strikke «1 kantmaske RILLE i hver side av arbeidet. Så skal man strikke 1 kantmaske rille, 2 rett sammen, 1 kast osv, for å få hullkant. Blir det to rette og to vrange omganger (annenhver gang) etter hverandre før vi strikker hullkant eller?
22.01.2019 - 17:48DROPS Design answered:
Hei Signe. Du strikker 6 omganger glattstrikk MED 1 kantmaske rille i hver side. Det vil si at du strikker glattstrikk over alle masker (rett fra retten, vrang fra vrangen) men den ytterste masken i hver side strikkes i rille (rett fra retten, rett fra vrangen). Altså, på 1 pinne (fra retten) strikkes alle masker rett,. Snu. strikk 1 maske rett, strikk vrang til det gjenstår 1 maske, 1 maske rett. Snu. Gjenta disse 2 pinnene 2 ganger til = 6 omganger. Du har nå strikket 6 omganger med glattstrikk med 1 kantmaske i rille i hver side. Kantmasken i rille fortsetter langs hele selen. God fornøyelse.
29.01.2019 - 14:28
![]() Elisabeth Opland wrote:
Elisabeth Opland wrote:
Oppskrifen på lue,hvor finner jeg den?
26.12.2018 - 21:49
![]() Maria wrote:
Maria wrote:
Muss die Bruchkante für den unteren Beleg wirklich vor A4 gestrickt werden? Ich würde ihn erst danach stricken
11.12.2018 - 19:20DROPS Design answered:
Liebe Marie, ja genau, die Bruchkante muss vor A.4 gestrickt werden, A.4 wird von der Rückseite dann umgeschlagen/gesehen. Viel Spaß beim stricken!
12.12.2018 - 09:57
![]() Bente Aarsrud wrote:
Bente Aarsrud wrote:
Skjønner ikke oppskriften på selene …. prøver å prøver , men må rekke opp . Er det meningen vi skal klippe tråden hele tiden ?
30.11.2018 - 08:27DROPS Design answered:
Hei Bente. Nei, du skal strikke uten å måtte klippe tråden. Sikter du til de omgangene der det kun strikkes med natur? Om du tvinner med deg den røde tråden på baksiden av arbeidet så har du begge trådene i samme ende hele tiden. God fornøyelse
30.11.2018 - 15:02
![]() Silvi wrote:
Silvi wrote:
Hallo, habe da mal eine Frage der Beleg wird somit nach innen geklappt , ist so eine Art Verstärkung , oder. Wenn ich das ganze gestrickt habe Fang ich dann mit dem Ersten Muster an, richtig.
26.11.2018 - 20:20DROPS Design answered:
Liebe Silvi, der Beleg ist so gestrickt, daß die "Passe" (= Gürtel) so doppelt gestrickt, und oben dieser Passe haben Sie dann einen Pikot-Rand (wie z.B. in diesem Video aber das erste Teil (innenseite) wird ca genau so lang als das Farbemuster. Viel Spaß beim stricken!
27.11.2018 - 08:42
![]() Madeleine wrote:
Madeleine wrote:
Hej. Finns det möjligtvis något mönster till mössan/luvan?
10.11.2018 - 07:36DROPS Design answered:
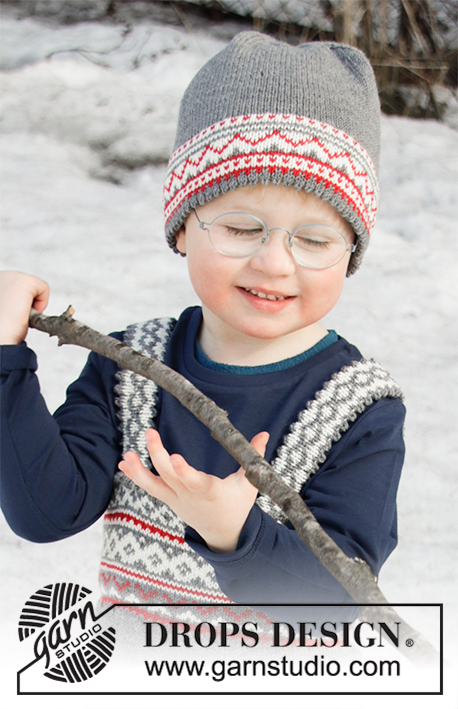
Hej, mönstret till mössan hittar du i samma katalog, mönster Barn 32-1.
12.11.2018 - 17:04
|
||||||||||
Miss Cookie#misscookiedress |
||||||||||
 |
 |
|||||||||
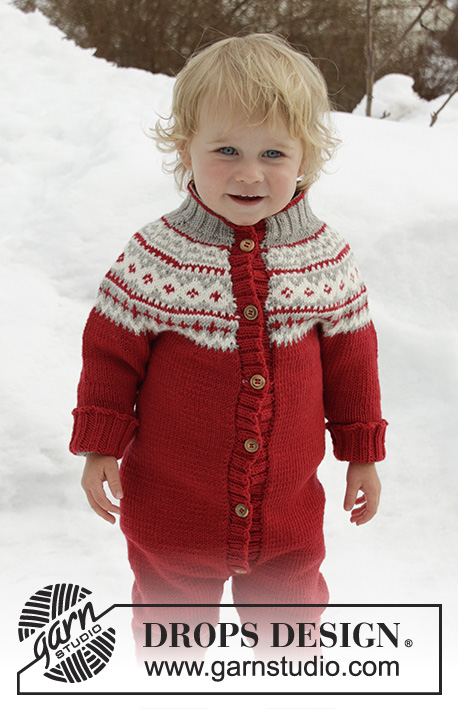
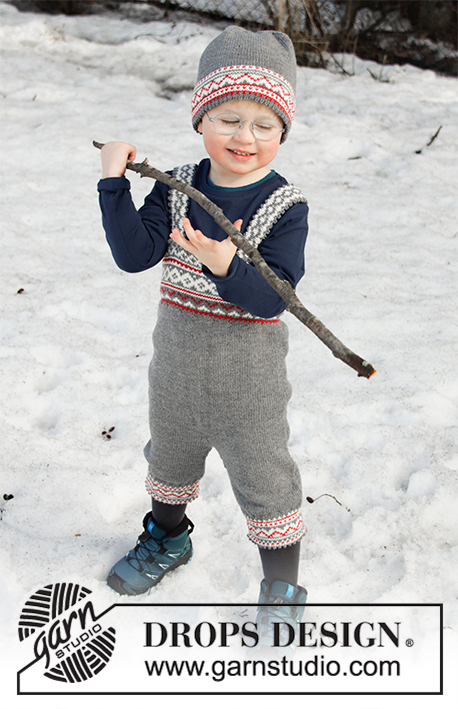
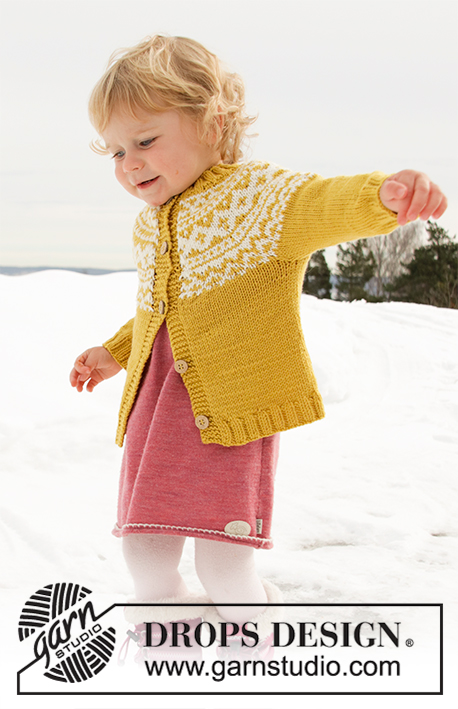
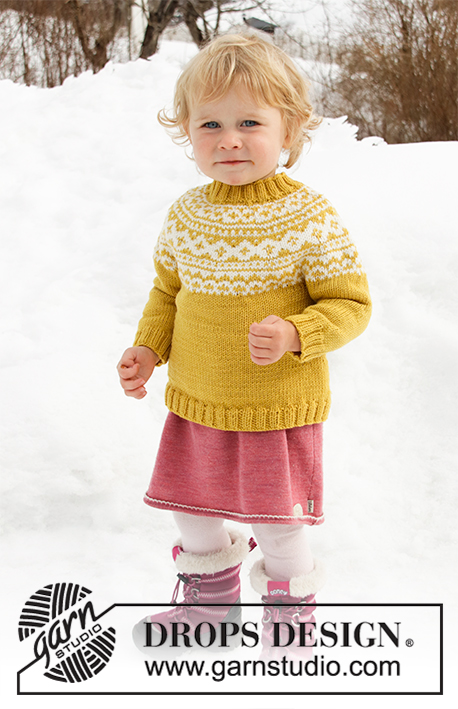
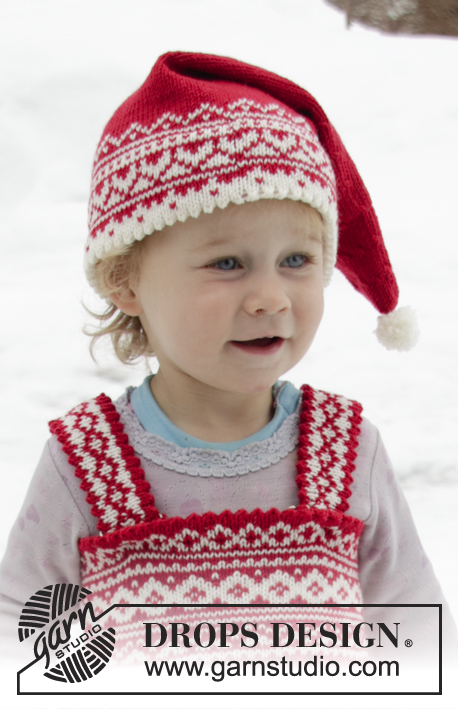
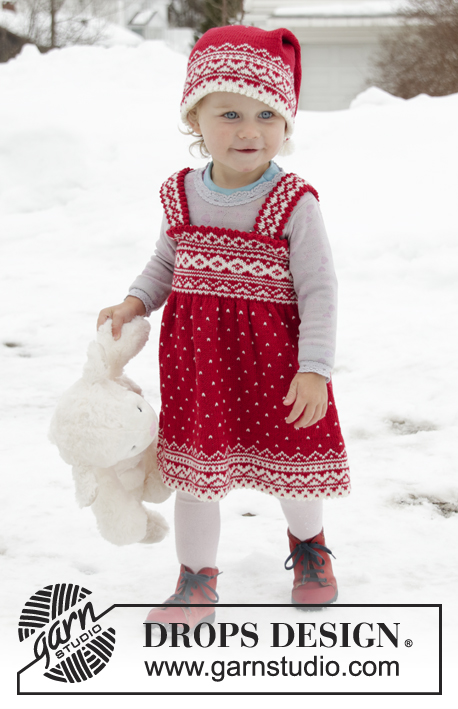
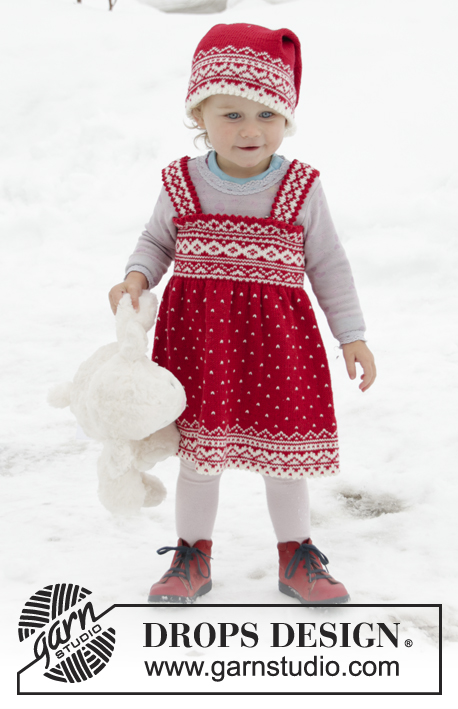
Knitted dress for babies and children in DROPS BabyMerino. The piece is worked top down with Nordic pattern. Sizes 6 months – 6 years.
DROPS Children 32-2 |
||||||||||
|
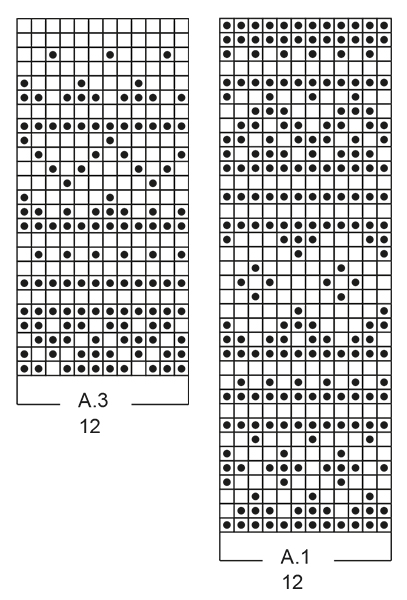
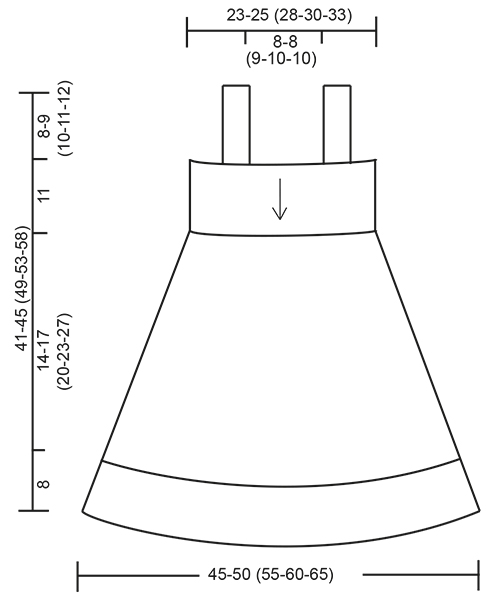
EXPLANATIONS FOR THE PATTERN: ------------------------------------------------------- RIDGE/GARTER STITCH (worked back and forth): 1 ridge = Knit 2 rows. PATTERN: See diagrams A.1 to A.5. The pattern is worked in stocking stitch. ------------------------------------------------------- START THE PIECE HERE: ------------------------------------------------------- DRESS - SHORT OVERVIEW OF THE PIECE: The piece is worked in the round, top down. You first work a belt with lining and pattern, then the skirt is worked downwards. You work a lining at bottom of skirt with pattern. The braces are worked back and forth (sideways) and sewn on to finish. LINING (for belt): Cast on 108-120 (132-144-156) stitches with circular needle size 3 mm and red. Work stocking stitch in the round. When the piece measures 10 cm, work the next round as follows: * Knit 2 together, 1 yarn over *, work from *-* to end of round (= folding edge). The yarn overs are not worked twisted on the next round - there will be holes. REMEMBER THE KNITTING TENSION! BELT: Then work A.1 (= 12 stitches) over all stitches (= 9-10 (11-12-13) times in width). When A.1 has been worked 1 time in height, the belt measures approx. 11 cm and the piece a total of 22 cm (including lining). SKIRT: THE PIECE IS NOW MEASURED FROM HERE! Work with red as follows: * knit 1, 1 yarn over *, work from *-* to end of round = 216-240 (264-288-312) stitches. The yarn overs are not worked twisted on the next round - there will be holes. Work A.2 (= 8 stitches) over all stitches (= 27-30 (33-36-39) times in width). When the skirt measures 14-17 (20-23-27) cm and the piece a total of 36-39 (42-45-49) cm (including lining) - there is now approx. 8 cm left to finished length (you can continue to desired length) - work A.3 over all stitches (= 18-20 (22-24-26) times in width). When A.3 has been worked 1 time in height, the skirt measures approx. 22-25 (28-31-35) cm and the piece a total of 44-47 (50-53-57) cm (including lining). LINING (bottom edge): Work with off white as follows: * knit 2 together, 1 yarn over *, work from *-* to end of round (= folding edge). THE PIECE IS NOW MEASURED FROM HERE! The yarn overs are not worked twisted on next round, there will be holes. Work A.4 (= 12 stitches) over all stitches (= 18-20 (22-24-26) times in width). When A.4 has been worked 1 time in height, continue working in red. Work until the lining measures 8 cm from the folding edge, and then cast off. The piece measures a total of approx. 52-55 (58-61-65) cm (including both linings). ASSEMBLY: Fold lining at the top of the dress down on the wrong side of the belt and sew down with red. Do the same at the bottom of the skirt. BRACES: The braces measure approx. 27-28 (30-32-35) cm in length when finished; there is 5 cm extra in each side so that the braces can be adjusted as the child grows. You can cast on more/fewer stitches if you would like longer/shorter braces (the number of stitches must be divisible by 4 + 2). Cast on 66-70 (74-78-86) stitches (including 1 edge stitch in each side) with circular needle size 3 mm and red. The braces are worked back and forth in stocking stitch. Work 6 rows stocking stitch with 1 edge stitch in GARTER STITCH – see description above, in each side of the piece. On the next row from the right side work 1 edge stitch in garter stitch, * knit 2 together, 1 yarn over * , work from *-* until there is 1 stitch left and finish with 1 edge stitch in garter stitch (= folding edge). Then work A.5 (= 4 stitches) with 1 edge stitch in garter stitch in each side (edge stitches are worked in same colour as the first/last stitch in A.5, first row worked from the wrong side – do not work the yarn overs twisted). When A.5 has been worked 1 time in height, work a folding edge in red from the right side as follows: Work 1 edge stitch in garter stitch, * knit 2 together, 1 yarn over *, work from *-* until there is 1 stitch left and finish with 1 edge stitch in garter stitch. Work approx. 7 rows with red (do not work the yarn overs twisted), fold the lining down and make sure that it does not tighten the brace; work more rows if necessary. Cast off. Sew cast-on edge to cast-off edge in outermost loop of outermost stitch. Work 1 more brace. ASSEMBLY: Sew the braces onto lining at top (i.e. on wrong side of belt) with neat stitches approx. 5 cm down on each side, with approx. 8-8 (9-10-10) cm between each braces mid front and mid back. |
||||||||||
Diagram explanations |
||||||||||
|
||||||||||
 |
||||||||||
 |
||||||||||
 |
||||||||||
Have you finished this pattern?Tag your pictures with #dropspattern #misscookiedress or submit them to the #dropsfan gallery. Do you need help with this pattern?You'll find 16 tutorial videos, a Comments/Questions area and more by visiting the pattern on garnstudio.com. © 1982-2026 DROPS Design A/S. We reserve all rights. This document, including all its sub-sections, has copyrights. Read more about what you can do with our patterns at the bottom of each pattern on our site. |
||||||||||


With over 40 years in knitting and crochet design, DROPS Design offers one of the most extensive collections of free patterns on the internet - translated to 17 languages. As of today we count 325 catalogues and 12298 patterns translated into English (UK/cm). 12298
We work hard to bring you the best knitting and crochet have to offer, inspiration and advice as well as great quality yarns at incredible prices! Would you like to use our patterns for other than personal use? You can read what you are allowed to do in the Copyright text at the bottom of all our patterns. Happy crafting!
Post a comment to pattern DROPS Children 32-2
We would love to hear what you have to say about this pattern!
If you want to leave a question, please make sure you select the correct category in the form below, to speed up the answering process. Required fields are marked *.