
Looking for a yarn?


Comments / Questions (16)
![]() Carla wrote:
Carla wrote:
Ik brei de cardigan 235-23. Het is me niet duidelijk hoe vaak ik telpatroon A2 moet breien? Aan het einde van telpatroon A1 ( hoogte pas moet dan9 cm zijn) moeten er steken worden gemeerderd, daarna begint A2. Na A2 worden er weer steken gemeerderd. Maar hoe hoog moet de pas zijn bij aanvang A3? De laatste 2 toeren van A3 worden herhaald totdat de pas 22cm is en dan worden er weer steken gemeerderd. Maar hoe hoog moet de pas zijn bij aanvang A3?
08.08.2023 - 10:23
![]() Lilian wrote:
Lilian wrote:
I just reached end of the rib section. Next part is stocking stitch. But which side of stocking stitch is for the right side in this pattern? Knit side or purl side? After all, the rib section has knit on the wrong side and purl on the right side. I am confused. I do wish to have knit side as right side from here on if possible.
20.07.2023 - 02:59DROPS Design answered:
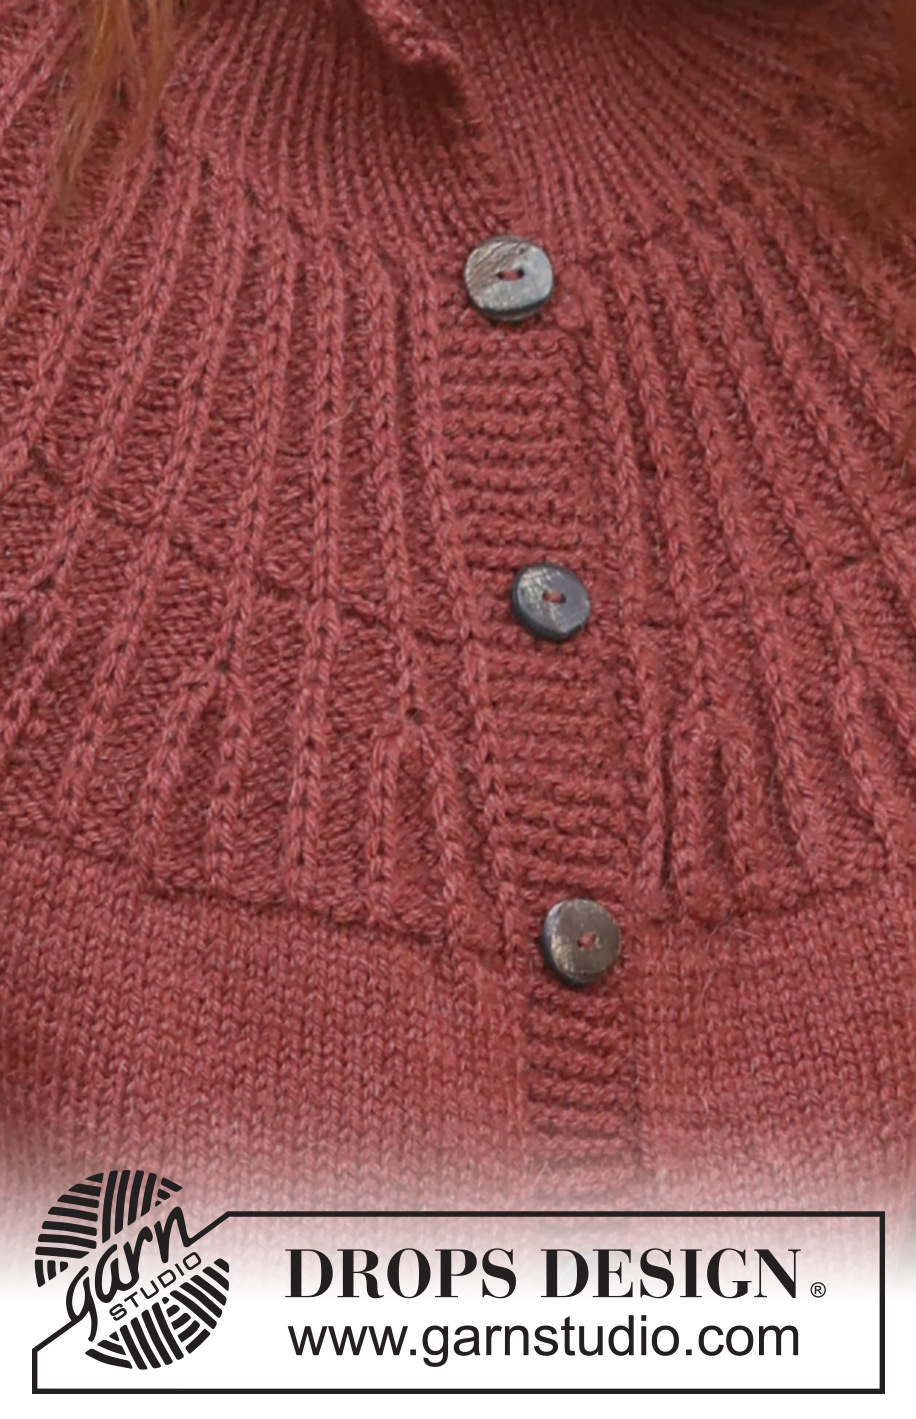
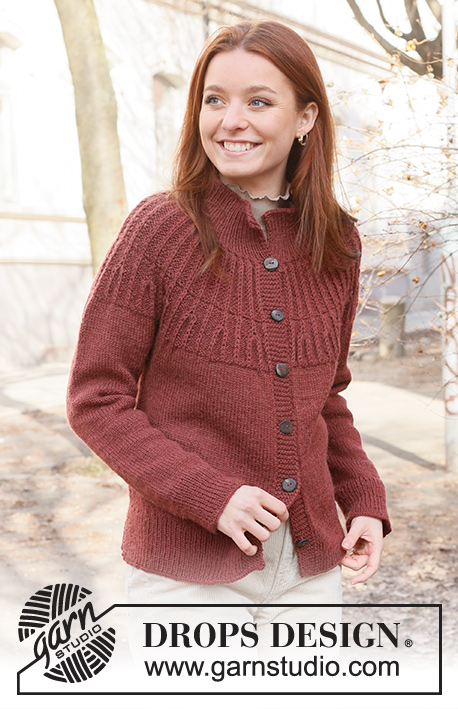
Hi Lilian, knit part is the right side of your work, as you can seen on the photo. Happy knitting!
20.07.2023 - 10:00
![]() Bine wrote:
Bine wrote:
Hallo, ich verstehe die Maschenzunahme bei A3 nicht. Nach der Zunahme komme ich auf die 327 (XL)Maschen nun sollen beim in die Höhe stricken am Ende 353 Maschen entstehen. Aber woher? das Muster zeigt dies nicht an. Freue mich über Hilfe, Bine
02.04.2023 - 11:40
![]() Tiphaine wrote:
Tiphaine wrote:
Bonjour, ce modèle taille-t-il normalement ? Merci !
25.09.2022 - 11:58
![]() Eva wrote:
Eva wrote:
Rundum Wärme
05.08.2022 - 11:40
![]() Line Klestrup Larsen wrote:
Line Klestrup Larsen wrote:
Den er flot
04.08.2022 - 13:14
|
|||||||||||||||||||
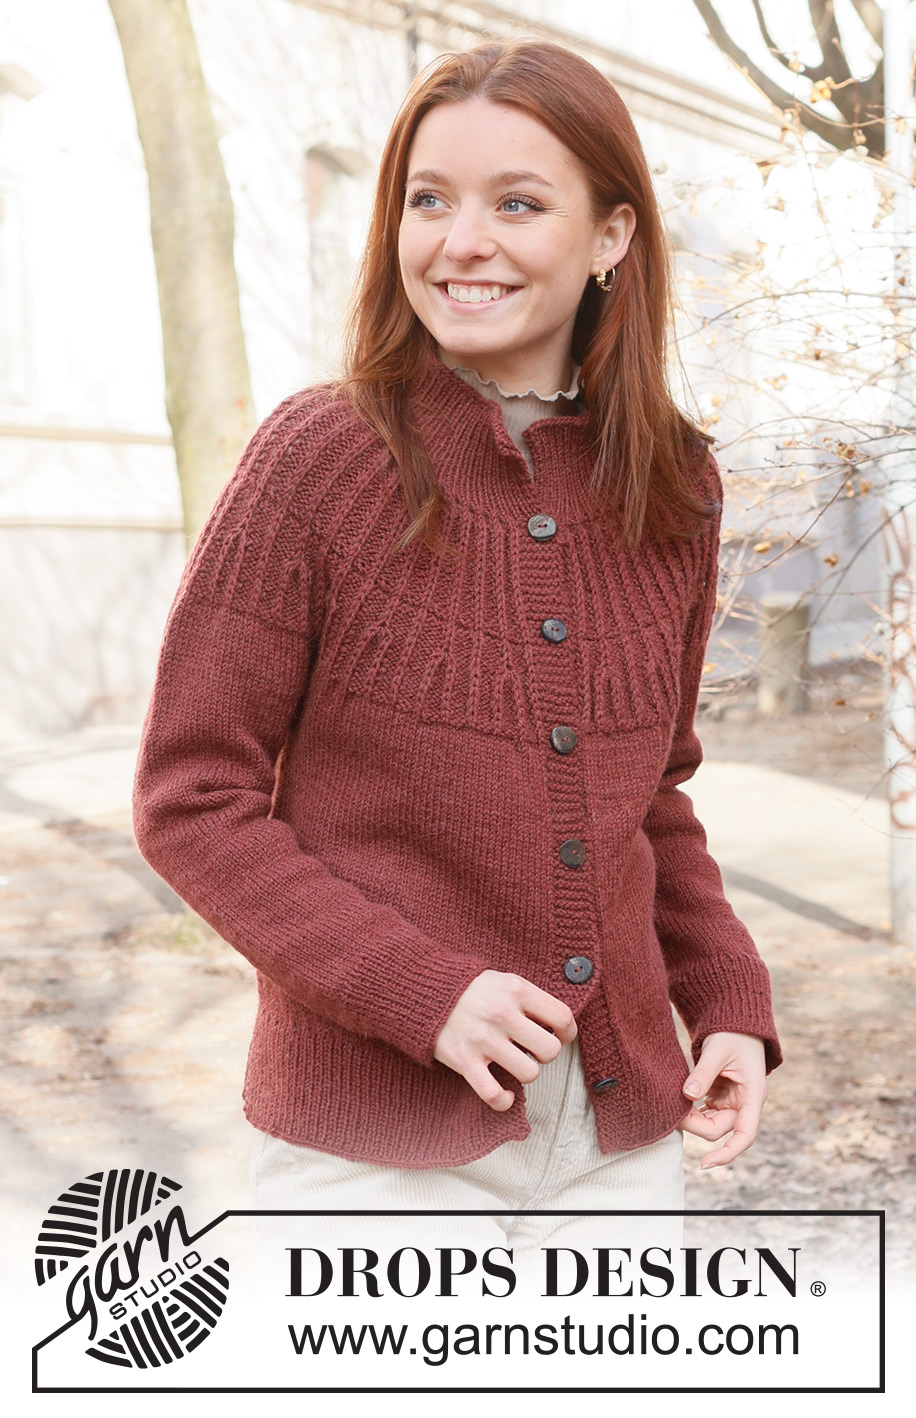
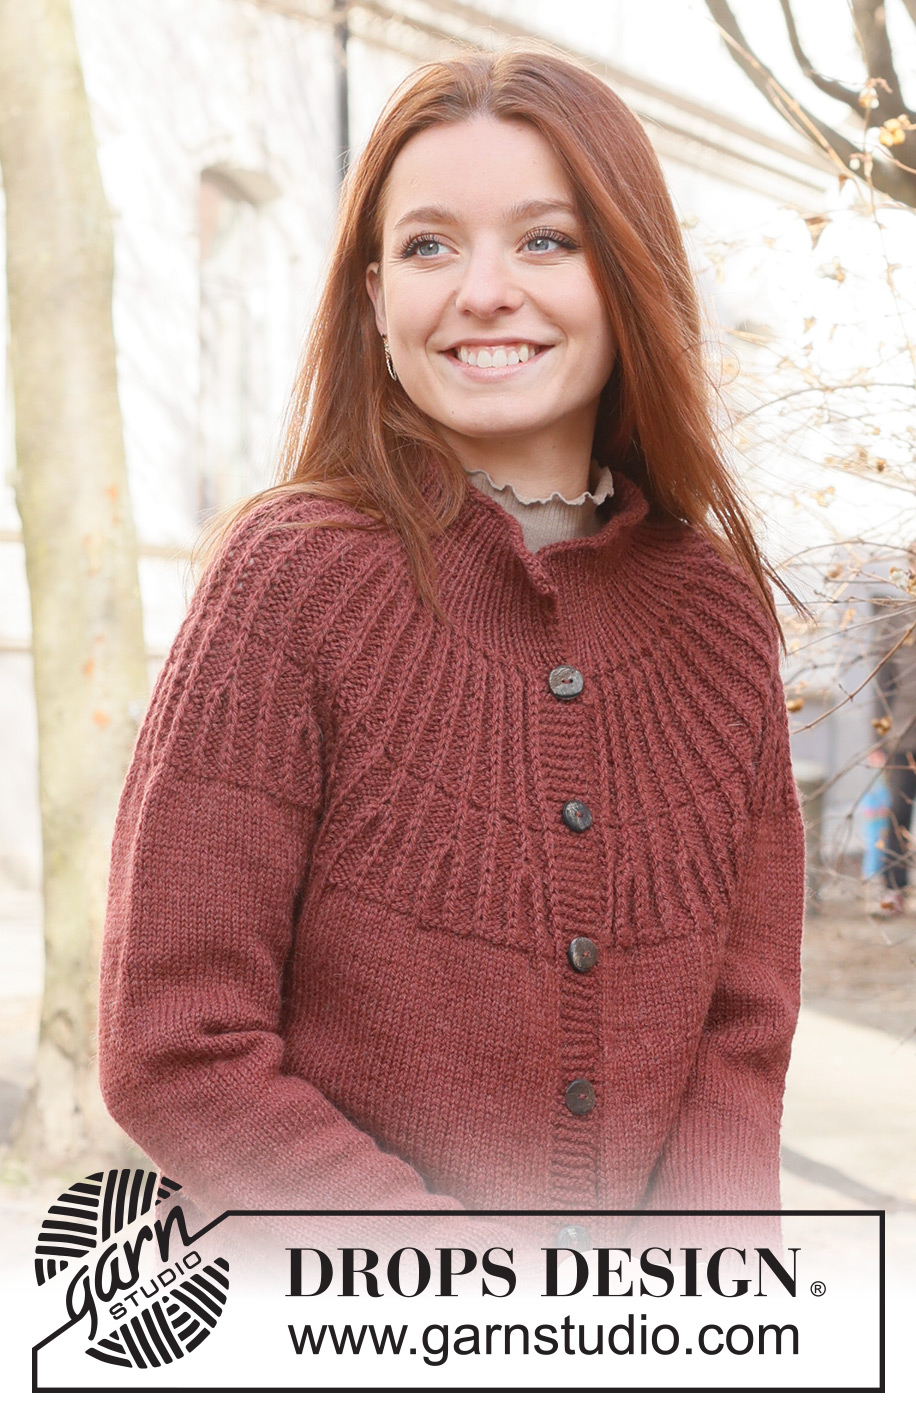
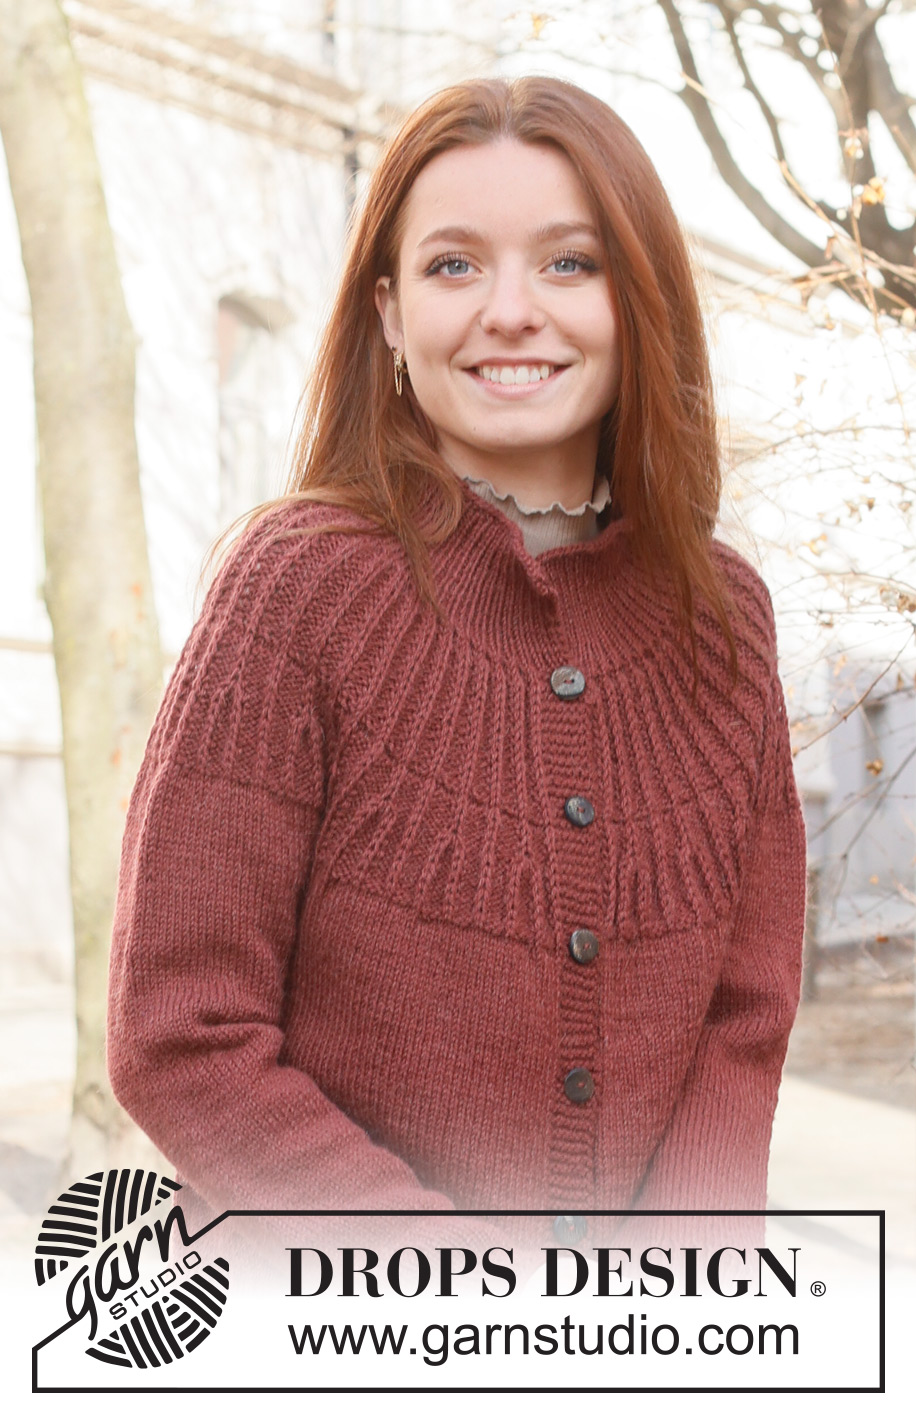
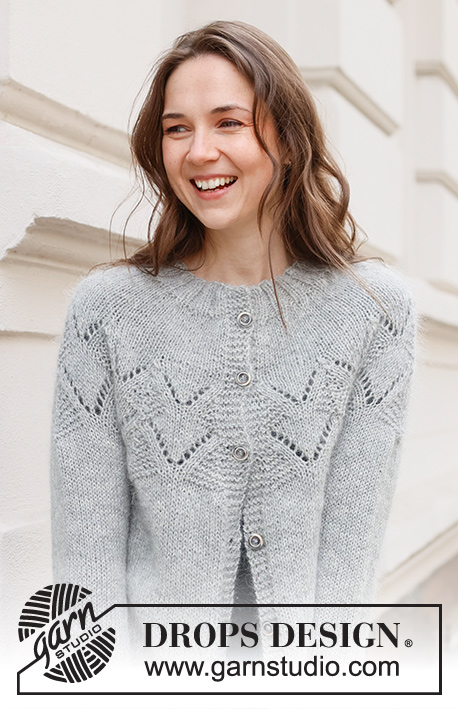
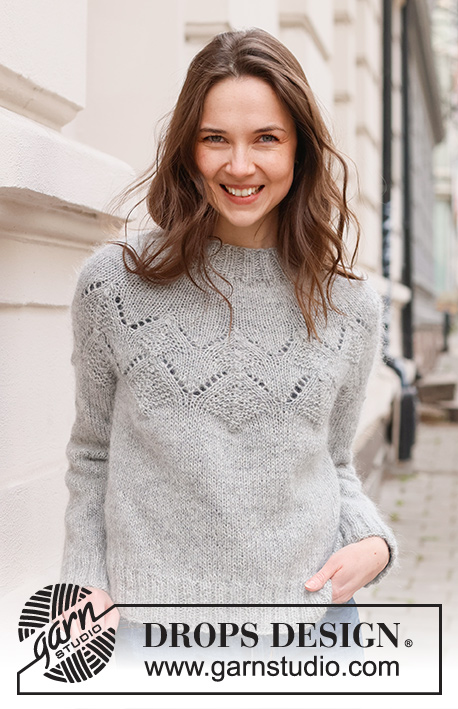
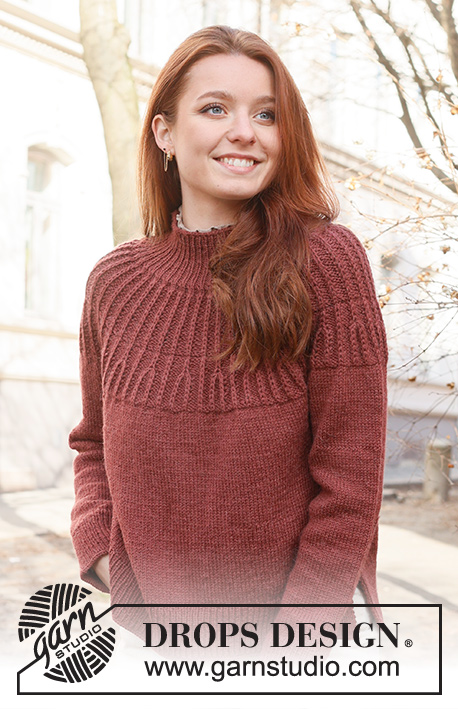
Autumn Cardinal Cardigan#autumncardinalcardigan |
|||||||||||||||||||
 |
 |
||||||||||||||||||
Knitted jacket in DROPS Lima. The piece is worked top down with round yoke and Fisherman’s rib. Sizes S - XXXL.
DROPS 235-23 |
|||||||||||||||||||
|
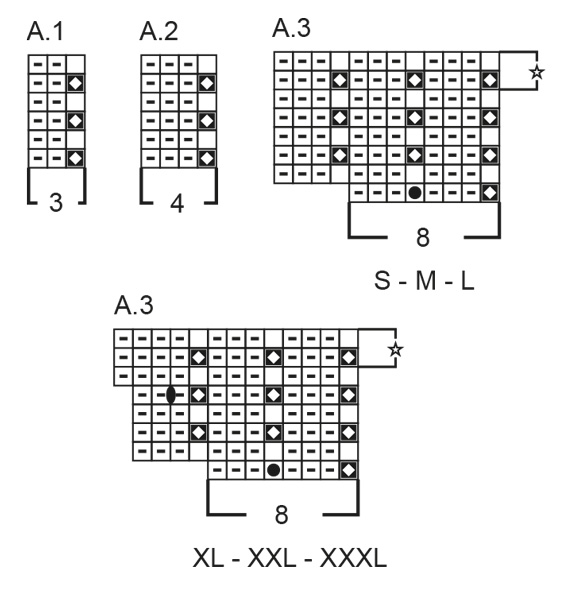
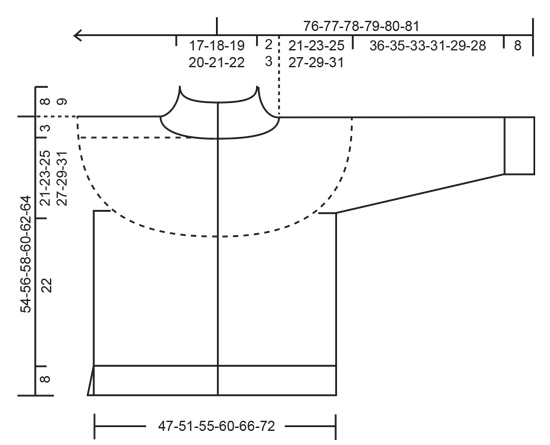
------------------------------------------------------- EXPLANATIONS FOR THE PATTERN: ------------------------------------------------------- RIDGE/GARTER STITCH (worked back and forth): Knit all rows. 1 ridge = knit 2 rows. PATTERN: See diagrams A.1 to A.3. Choose diagram for your size (applies to A.3). The diagrams show all rows in the pattern from the right side. DECREASE TIP (for sleeves): Decrease 1 stitch on either side of the marker as follows: Work until there are 3 stitches left before the marker, knit 2 together, knit 2 (marker sits between these 2 stitches), slip 1 stitch as if to knit, knit 1 and pass the slipped stitch over the knitted stitch. BUTTONHOLES: Work buttonholes on the right band (when the garment is worn). Work from the right side when there are 5 stitches left on the row as follows: Make 1 yarn over, knit 2 together and knit 3. On the next row (wrong side), knit the yarn over to leave a hole. The first buttonhole is worked when the rib on the neck measures 8-8-8-9-9-9 cm. Then work the other 5-5-5-5-6-6 buttonholes with approx. 9-9-9½-10-8½-9 cm between each one. ------------------------------------------------------- START THE PIECE HERE: ------------------------------------------------------- JACKET – SHORT OVERVIEW OF THE PIECE. The neck and yoke are worked back and forth with circular needle, from mid front and top down. The yoke is divided for body and sleeves and the body continued back and forth with circular needle. The sleeves are worked in the round with double pointed needles/short circular needle. NECK: Cast on 119-125-129-133-139-143 stitches with circular needle size 4 mm and DROPS Lima. Change to circular needle size 3 mm. Purl 1 row from the wrong side. Work the next row as follows from the right side: 1 stitch in GARTER STITCH – read description above, * knit 1, purl 1 *, work from *-* until there are 2 stitches left, knit 1 and 1 stitch in garter stitch. Continue this rib back and forth for 8-8-8-9-9-9 cm; finish after a row from the wrong side. Insert 1 marker after the band at the beginning of the row. The yoke is measured from this marker. YOKE: Change to circular needle size 4 mm. Work the first row from the right side as follows: 7 stitches in garter stitch (band), knit until there are 7 stitches left and increase 34-34-36-38-38-40 stitches evenly over these stitches, 7 stitches in garter stitch (band) – remember the BUTTONHOLES on the right band – read description above = 153-159-165-171-177-183 stitches. Purl 1 row from the wrong side (bands knitted). Work the next row from the right side as follows: 7 stitches in garter stitch, work A.1 until there are 8 stitches left, work the first stitch in A.1, so the pattern is symmetrical and 7 stitches in garter stitch. Continue this pattern back and forth until the yoke measures 8-8-9-9-10-11 cm from the marker and the next row is from the wrong side. REMEMBER THE KNITTING TENSION! On the next row increase all knit-2 (seen from the wrong side) to knit-3 by making 1 yarn over between the 2 knitted stitches = 199-207-215-223-231-239 stitches. Work 2 rows of stocking stitch with 7 stitches in garter stitch on each side (on the first row knit the yarn overs twisted to avoid holes). Work the first row from the right side as follows: 7 stitches in garter stitch, work A.2 until there are 8 stitches left, work the first stitch in A.2, so the pattern is symmetrical and 7 stitches in garter stitch. When A.2 has been finished in height, work the next row from the right side: 7 stitches in garter stitch, work A.3 until there are 8 stitches left, work the first stitch in A.3, so the pattern is symmetrical and 7 stitches in garter stitch = 291-303-315-327-339-351 stitches. When A.3 has been finished in height, there are 291-303-315-353-366-379 stitches. Repeat the two rounds marked with a star in A.3 until the yoke measures 15-15-17-18-19-21 cm from the marker. Continue with stocking stitch and 7 stitches in garter stitch on each side. AT THE SAME TIME on the first row from the right side after A.3, increase 23-24-25-39-40-42 stitches evenly spaced (do not increase over the bands) = 314-327-340-392-406-421 stitches. When the yoke measures 18-18-21-22-23-26 cm from the marker increase 5-16-27-15-25-42 stitches evenly spaced = 319-343-367-407-431-463 stitches. Work until the yoke measures 21-23-25-27-29-31 cm from the marker. Divide for the body and sleeves: Work the first 52-56-59-65-70-76 stitches as before, place the next 62-66-72-80-82-86 stitches on 1 thread for the sleeve, cast on 8-8-10-10-12-12 stitches (in side under sleeve), work 91-99-105-117-127-139 stitches, place the next 62-66-72-80-82-86 stitches on 1 thread for the sleeve, cast on 8-8-10-10-12-12 stitches (in side under sleeve), the last 52-56-59-65-70-76 stitches. The body and sleeves are finished separately and both are measured from here! BODY: = 211-227-243-267-291-315 stitches. Insert 1 marker 56-60-64-70-76-82 stitches in on each side = 99-107-115-127-139-151 stitches between the markers on the back piece. Allow the markers to follow your work onwards. Continue with stocking stitch and 7 stitches in garter stitch on each side for a further 22 cm – finish after a row from the wrong side. Now divide the piece at each marker and finish each piece separately to give a split in each side. LEFT FRONT PIECE: Knit 1 row from the right side and increase 17-19-19-21-23-25 stitches evenly spaced (do not increase over the band) = 73-79-83-91-99-107 stitches. Change to circular needle size 3 mm and work from the wrong side: 1 stitch in garter stitch, * purl 1, knit 1 *, work from *-* until there are 8 stitches left, purl 1 and 7 stitches in garter stitch. Continue this rib for 8 cm. Cast off a little loosely. The jacket measures approx. 54-56-58-60-62-64 cm from the shoulder down. RIGHT FRONT PIECE: Knit 1 row from the right side and increase 17-19-19-21-23-25 stitches evenly spaced (do not increase over the band) = 73-79-83-91-99-107 stitches. Change to circular needle size 3 mm and work from the wrong side: 7 stitches in garter stitch, * purl 1, knit 1 *, work from *-* until there are 2 stitches left, purl 1 and 1 stitch in garter stitch. Continue this rib for 8 cm. Cast off a little loosely. BACK PIECE: Knit 1 row from the right side and increase 30-32-34-38-42-46 stitches evenly spaced = 129-139-149-165-181-197 stitches. Change to circular needle size 3 mm. Work as follows from the wrong side: 1 stitch in garter stitch, * purl 1, knit 1, * work from *-* until there are 2 stitches left, purl 1 and 1 stitch in garter stitch. Continue this rib for 8 cm. Cast off a little loosely. SLEEVES: Place the 62-66-72-80-82-86 stitches from the thread on the one side of the piece on short circular needle/double pointed needles size 4 mm and knit up 1 stitch in each of the 8-8-10-10-12-12 stitches cast on under the sleeve = 70-74-82-90-94-98 stitches. Insert a marker thread in the middle of the new stitches under the sleeve. Allow the thread to follow your work onwards; it will be used when decreasing under the sleeve. Start at the marker and work stocking stitch in the round for 3-3-2-2-2-2 cm. Now decrease 2 stitches under the sleeve – read DECREASE TIP. Decrease like this every 4-3½-2½-1½-1½-1½ cm a total of 9-10-13-16-17-18 times = 52-54-56-58-60-62 stitches. Continue working until the sleeve measures 36-35-33-31-29-28 cm from the division. Change to double pointed needles size 3 mm. Work rib (knit 1, purl 1) for 8 cm. Cast off a little loosely. The sleeve measures approx. 44-43-41-39-37-36 cm from the division. Work the other sleeve in the same way. ASSEMBLY: Sew the buttons onto the left band. |
|||||||||||||||||||
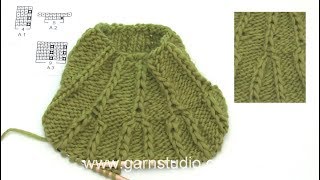
Diagram explanations |
|||||||||||||||||||
|
|||||||||||||||||||
 |
|||||||||||||||||||
 |
|||||||||||||||||||
Have you finished this pattern?Tag your pictures with #dropspattern #autumncardinalcardigan or submit them to the #dropsfan gallery. Do you need help with this pattern?You'll find 34 tutorial videos, a Comments/Questions area and more by visiting the pattern on garnstudio.com. © 1982-2025 DROPS Design A/S. We reserve all rights. This document, including all its sub-sections, has copyrights. Read more about what you can do with our patterns at the bottom of each pattern on our site. |
|||||||||||||||||||


With over 40 years in knitting and crochet design, DROPS Design offers one of the most extensive collections of free patterns on the internet - translated to 17 languages. As of today we count 320 catalogues and 12093 patterns translated into English (UK/cm). 12093
We work hard to bring you the best knitting and crochet have to offer, inspiration and advice as well as great quality yarns at incredible prices! Would you like to use our patterns for other than personal use? You can read what you are allowed to do in the Copyright text at the bottom of all our patterns. Happy crafting!
Post a comment to pattern DROPS 235-23
We would love to hear what you have to say about this pattern!
If you want to leave a question, please make sure you select the correct category in the form below, to speed up the answering process. Required fields are marked *.