
Popular categories
Looking for a yarn?


Comments / Questions (23)
![]() Linda Pontard wrote:
Linda Pontard wrote:
Bonjour, quand on fait c'est augmentations [augmenter ainsi (3) 3-3-4-4 (4) fois au total tous les (3) 3-3½ -3-3- (3½) cm - voir AUGMENTATIONS-2 = (149) 167-179-221-228 (235) mailles.] faut'il faire: 1 m.jersey,1 augmentation mousse,2 point mousse,1 augmentation mousse, 1 jersey . ou juste augmenter 1 maille après la maille jersey seulement. je vous remercie pour votre aide . merci
17.08.2022 - 14:52DROPS Design answered:
Bonjour Mme Pontard, augmentez la 1ère fois ainsi *1 jeté, 2 m point mousse, 1 m jersey* (vous avez ainsi 3 m point mousse, 1 m jersey); la fois suivante augmentez ainsi: *3 m point mousse, 1 jeté, 1 m jersey* (vous avez ainsi, 4 m point mousse, 1 m jersey). Et continuez ainsi en augmentant alternativement au début et à la fin des sections en point mousse. Bon tricot!
18.08.2022 - 08:54
![]() Marie Gidlund wrote:
Marie Gidlund wrote:
Är det tänkt att man på rätsidan enbart stickar räta maskor i denna beskrivning: 1 maska slätstickning, * 2 maskor rätstickning, 1 maska slätstickning *, sticka *-* över de nästa 69-78-84-90-93-96 maskorna (= 23-26-28-30-31-32 gånger), avsluta med 5 framkantsmaskor i rätstickning. Sedan på avigsidan gör man slätstickningen avig , alltså var 3:e maska avig? Eller ska det på rätsidan stickas var 3:e maska avig?
27.03.2022 - 12:13DROPS Design answered:
Hej Marie. Ja det stämmer att du endast stickar räta maskor på rätsidan här. På avigsidan stickar du avigmaskor där det är slätstickning (dvs på var 3:e maska). Detta skapar det mönster du ser på bilden. Mvh DROPS Design
30.03.2022 - 09:23
![]() Kristine wrote:
Kristine wrote:
Fejl i opskrift? Der mangler masker, når opskrift følges til str. 6 mdr. Her skal du afslutte bærestykket med at fjerne 7 masker, så du ender på 214, men når du så følger angivelserne for for- og bagstykke og ærmemasker, så mangler der altså 10 masker til sidste del af forstykket. Har I måske lavet en fejl ift. antal masker, der skal fordeles til de enkelte stykker?
12.03.2022 - 20:21
![]() Inge Sprunck wrote:
Inge Sprunck wrote:
Hallo, ich stricke sehr gerne nach Ihren Anleitungen und verändere die Farben oder Größen nach Vorliebe und Bedarf. In die obige Anleitung hat sich aber leider ein Fehler unter " Zunahmetipp 2" eingeschlichen. Es heißt dort: ...abwechselnd am Anfang und am Ende des kraus rechten Bereichs abnehmen." Es muss aber heißen: zunehmen! Vielen Dank für Ihre tollen Anleitungen!
02.03.2022 - 17:42
![]() Julid wrote:
Julid wrote:
Bonjour, Je ne comprends pas comment sont comptées les mailles. Je tricote pour le 6/9 mois Après les augmentations, on est à 101 mailles (+ celles de la bordure). On tricote " 2 mailles au point mousse, 1 maille jersey " au total 32 fois = 32 sections de points mousse. Sauf que, 101/3 ça fait 33,6 et non 32. Il y a donc 33 sections. Et de là, tout le comptage de maille est erroné. 33 augm x 4 = 132 m + les 101 de départ = 233 et non 221... Il y a un problème.
17.01.2022 - 14:32DROPS Design answered:
Bonjour Julid, En 6/9 mois, vous tricotez la 4ème taille: tricotez les 101 mailles ainsi: 5 m point mousse, 1 m jersey endroit, *2 m point mousse, 1 m jersey* x 30 (= 90 m), 5 m point mousse, soit: 5+1+90+5=101 mailles. Vous augmentez ensuite 4 fois 1 maille dans chacune de ces 30 sections point mousse = 101+ 4*30= 221 mailles. Bon tricot!
17.01.2022 - 15:32
![]() Vivia wrote:
Vivia wrote:
Stikkefastheden (24m=10cm) passer ikke til opskriften. Jeg har prøvet 26m, og kan stadig ikke få det til at passe. Hvilken fasthed skal jeg faktisk bruge?
30.12.2021 - 09:35DROPS Design answered:
Hej Vivia, jo hvis du vil være sikker på at du får størrelsen ifølge måleskitsen nederst i opskriften, så skal du have 24 masker på 10 cm og det bør du få når du strikker i DROPS Baby Merino :)
03.01.2022 - 15:55
![]() Inger Nielsen wrote:
Inger Nielsen wrote:
Bærestykke: når arbeidet måler 2 cm økes med 1 m i hvert rilleparti (ikke over stolpene), øk slik på hver (3.)- 3-1/2 - osv cm totalt (3) 3 - 3 -4 osv ganger. Dette kan lett misforståes slik at det er siste økning som skal gjentas 3-4 ganger. Foreslår derfor at teksten endres til totalt 3-4 økninger. Mvh Inger
16.08.2021 - 13:53
![]() Natascha wrote:
Natascha wrote:
Hallo liebes Team, ich stricke die Jacke in 68/74. Nach den ganzen Zunahmen komme ich auch auf 221 Maschen. Warum muß ich nun wieder auf 214 Maschen kommen? Dazu müsste ich wieder 7 Maschen abnehmen. Wenn das so ist in welchem Bereich? In der ganzen Passe oder nur im Rumpfteil. Vielleicht Denkfehler. Bei der Einteilung vom Vorderteil sind die Blenden schon mitberechnet oder muss ich die 5 Maschen + 33 M.= 38 M. je Vorderteil rechnen? Dann müsste ich sogar noch 1 M. mehr aufnehmen.
09.04.2021 - 19:02DROPS Design answered:
Liebe Natascha, man muss hier abnehmen, um die richtige Breite zu haben. Es wird bei der nächsten Reihe gleichmäßig verteilt zwischen den Blendemaschen abgenommen. Deise Lektion wird Ihnen helfen, diese Maschen abzunehmen. Viel Spaß beim stricken!
12.04.2021 - 07:15
![]() Agneta wrote:
Agneta wrote:
Hej! Hur lägger man upp nya maskor mitt i ett arbete? När man stickar på rundstickar och att de ska hamna under armen? Mvh Agneta
23.03.2021 - 08:12DROPS Design answered:
Hej Agneta, det ser du i denne video hur man stickar uppifrån och ner Lycka till :)
23.03.2021 - 13:15
![]() Tectin Annie wrote:
Tectin Annie wrote:
Pour un modèle top down pourquoi ne pas faire les 2 manches avant le reste du corps?
11.03.2021 - 11:36DROPS Design answered:
Bonjour Mme Tectin, c'est toujours ainsi que nous réalisons nos modèles, comme l''illustre par exemple cette leçon, vous pouvez naturellement terminer les manches en premier si vous le préférez - ajuste les explications en conséquence (montez les mailles pour les manches et relevez les mailles sous les emmanchures pour le bas du gilet). Bon tricot!
11.03.2021 - 14:25
|
|
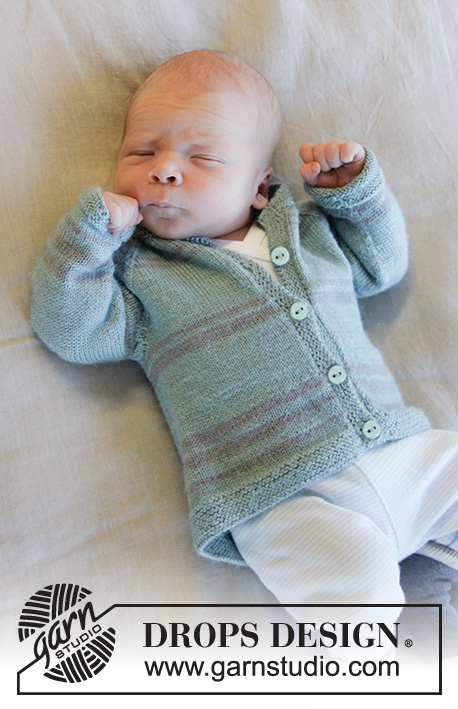
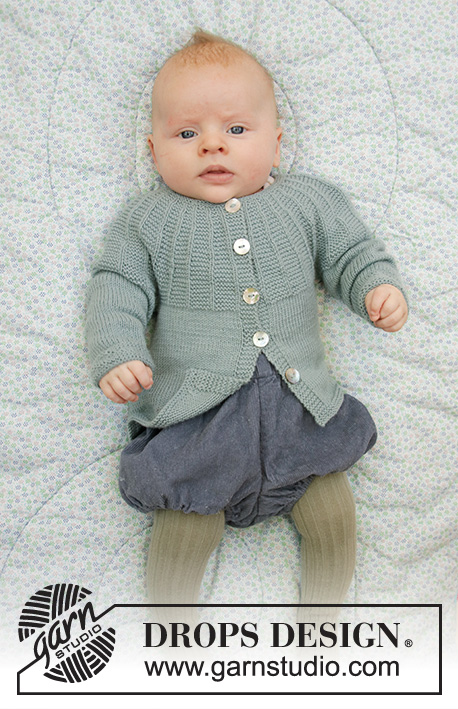
Baby Business#babybusinessjacket |
|
 |
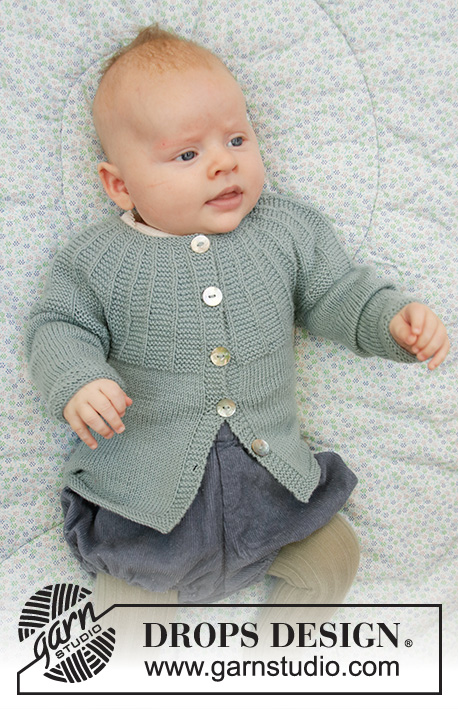 |
Jacket for babies, with round yoke and textured pattern, worked top down in DROPS BabyMerino. Sizes: Premature to 2 years.
DROPS Baby 33-19 |
|
|
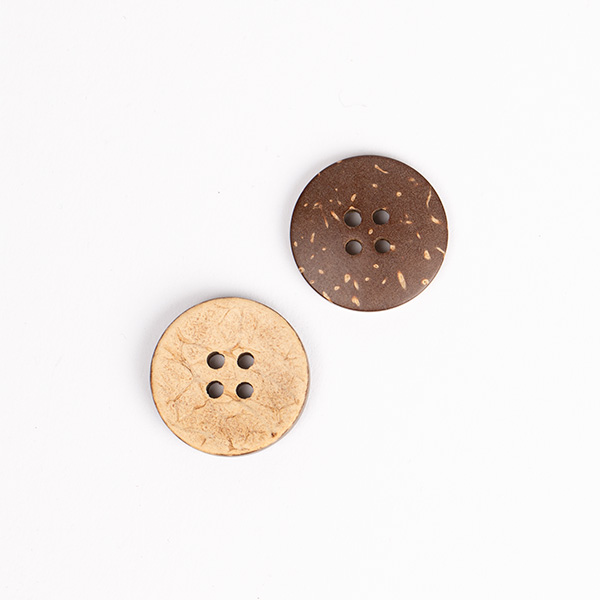
------------------------------------------------------- EXPLANATIONS FOR THE PATTERN: ------------------------------------------------------- RIDGE/GARTER STITCH (worked back and forth): Knit all rows. 1 ridge in height = Knit 2 rows. INCREASE TIP-1 (evenly spaced): To work out how to increase evenly, count the total number of stitches on the needle (e.g. 68 stitches) minus bands (e.g. 10 stitches) and divide the remaining stitches by the number of increases to be made (e.g. 12) = 4.8. In this example, increase by making 1 yarn over after approx. each 5th stitch. Do not increase on the bands. On the next row work the yarn overs twisted to avoid holes. INCREASE TIP-2: Increase 1 stitch by making 1 yarn over; on the next row knit the yarn over twisted to avoid a hole. The first time you increase make 1 yarn over at the beginning of the garter stitch section. The next time you increase, make 1 yarn over at the end of the garter stitch section. Continue increasing alternately at the beginning and end of the garter stitch section. DECREASE TIP (for mid under sleeve): Start 3 stitches before the marker thread, knit 2 together, knit 2 (marker thread sits between these 2 stitches), slip 1 stitch as if to knit, knit 1 and pass the slipped stitch over the knitted stitch (= 2 stitches decreased). BUTTONHOLE: Work buttonholes on the right band (when the garment is worn). Work from the right side when there are 3 stitches left on the row as follows: Make 1 yarn over, knit 2 together and knit 1. On the next row (wrong side), knit the yarn over to leave a hole. The first buttonhole is worked on the first row from the right side after the neck. The other 4 buttonholes are worked with approx. (3) 4-4½-5-5½-(6) cm between each buttonhole. ------------------------------------------------------- START THE PIECE HERE: ------------------------------------------------------- JACKET – SHORT OVERVIEW OF THE PIECE: The yoke and body are worked back and forth with circular needle, from mid front, top down. The sleeves are worked in the round with double pointed needles, top down. NECK: Cast on (68) 72-78-82-84 (86) stitches (including 5 band stitches on each side) with circular needle size 2.5 mm and Baby Merino. Work 2 RIDGES – see description above. Knit 1 row from the right side where you increase (12) 17-17-19-20 (21) stitches evenly spaced – read INCREASE TIP-1 and work BUTTONHOLES on the right band – see description above = (80) 89-95-101-104 (107) stitches. Knit 1 row from the wrong side. Change to circular needle size 3 mm and work the yoke as described below. YOKE: The first row is worked as follows from the right side: 5 band stitches in garter stitch, 1 stitch in stocking stitch, * 2 stitches in garter stitch, 1 stitch in stocking stitch *, work from *-* over the next 69-78-84-90-93-96 stitches (= 23-26-28-30-31-32 times) and finish with 5 band stitches in garter stitch. Continue this pattern, AT THE SAME TIME when the piece measures 2 cm increase 1 stitch in each garter stitch section (not over the bands); increase like this every (3) 3-3½ -3-3- (3½) cm a total of (3) 3-3-4-4 (4) times - read INCREASE TIP-2 = (149) 167-179-221-228 (235) stitches. The increased stitches are worked in garter stitch. Continue until the piece measures (9) 9-10-11-12 (13) cm. Work 1 row from the right side with pattern as before, AT THE SAME TIME adjust the number of stitches to (158) 182-198-214-226 (238) stitches. Work 1 row from the wrong side with pattern as before. The next row is worked with stocking stitch and 5 band stitches in garter stitch on each side as follows: Work (25) 28-31-33-35 (37) stitches (= front piece), place the next (34) 40-42-46-48 (50) stitches on 1 thread for the sleeve, cast on (4) 4-6-6-8 (8) new stitches on the needle (= in side under sleeve), work (40) 46-52-56-60 (64) stitches (= back piece), place the next (34) 40-42-46-48 (50) stitches on 1 thread for the sleeve, cast on (4) 4-6-6-8 (8) new stitches on the needle (= in side under sleeve) and work the remaining (25) 28-31-33-35 (37) stitches (= front piece). Continue with the body as described below. THE PIECE IS NOW MEASURED FROM HERE! BODY: = (98) 110-126-134-146 (154) stitches. Continue back and forth with stocking stitch and 5 band stitches in garter stitch on each side towards mid front. When the piece measures (7) 11-14-15-17 (19) cm from the division, change to circular needle size 2.5 mm. Work 3 ridges back and forth over all stitches. Change back to circular needle size 3 mm and loosely cast off from the right side. The jacket measures approx. (20) 24-28-30-33 (36) cm from the shoulder down. SLEEVE: Place the (34) 40-42-46-48 (50) stitches from the thread on the one side of the piece on double pointed needles size 3 mm and knit up 1 stitch in each of the (4) 4-6-6-8 (8) stitches cast on under the sleeve = (38) 44-48-52-56 (58) stitches. Insert a marker thread in the middle of the (4) 4-6-6-8 (8) stitches under the sleeve. Allow the marker to follow your work onwards. Work stocking stitch in the round. When the piece measures 2 cm from the division, decrease 2 stitches mid under sleeve – read DECREASE TIP. Decrease like this every (3) 2-2-1½-1½ (1½) cm a total of (2) 4-6-7-9 (9) times = (34) 36-36-38-38 (40) stitches. Continue working until the sleeve measures (7) 11-14-15-18 (19) cm from the division. Change to double pointed needles size 2.5 mm. Work 3 RIDGES in the round – see description above. Change back to double pointed needles size 3 mm and cast off loosely with knit. The sleeve measures approx. (8) 12-15-16-19 (20) cm from the division. Work the other sleeve in the same way. ASSEMBLY: Sew buttons onto the left band. |
|
 |
|
Have you finished this pattern?Tag your pictures with #dropspattern #babybusinessjacket or submit them to the #dropsfan gallery. Do you need help with this pattern?You'll find 26 tutorial videos, a Comments/Questions area and more by visiting the pattern on garnstudio.com. © 1982-2026 DROPS Design A/S. We reserve all rights. This document, including all its sub-sections, has copyrights. Read more about what you can do with our patterns at the bottom of each pattern on our site. |
|


With over 40 years in knitting and crochet design, DROPS Design offers one of the most extensive collections of free patterns on the internet - translated to 17 languages. As of today we count 324 catalogues and 12290 patterns translated into English (UK/cm). 12290
We work hard to bring you the best knitting and crochet have to offer, inspiration and advice as well as great quality yarns at incredible prices! Would you like to use our patterns for other than personal use? You can read what you are allowed to do in the Copyright text at the bottom of all our patterns. Happy crafting!
Post a comment to pattern DROPS Baby 33-19
We would love to hear what you have to say about this pattern!
If you want to leave a question, please make sure you select the correct category in the form below, to speed up the answering process. Required fields are marked *.