
Popular categories
Looking for a yarn?


Comments / Questions (126)
![]() Alexandra Stastna wrote:
Alexandra Stastna wrote:
Hi, I’m trying to find a size chart. Can you tell me the width of size XL or L? Thank you very much!
07.12.2021 - 14:05DROPS Design answered:
Dear Mrs Stastna, measure a similar garment the person has and likes and compare these measurements to those in the chart, that's the best way to find out the matching size for each pattern. Read more here. Happy knitting!
07.12.2021 - 15:33
![]() Luana wrote:
Luana wrote:
Lavoro quindi su ferro dritto avanti e indietro, parto dal centro della manica ma le lavoro tutte le maglie?
17.05.2021 - 22:54DROPS Design answered:
Buongiorno Luana, si esatto, lavora su tutte le maglie. Buon lavoro!
19.05.2021 - 15:55
![]() Luana wrote:
Luana wrote:
Buonasera, sto ultimando il lavoro e ho qualche difficoltà a comprendere alcuni passaggi. Nella manica, quando il lavoro misura 60 cm (taglia m) bisogna finire il lavoro lavorando avanti e indietro a partire dal sotto manica in mezzo. Non ho capito cosa significa. Io sto lavorando lo schema M1 con ferri circolari x maggiore comodità, cosa vuol dire "avanti e indietro dal sottomanica? C'è qualche video tutorial?
13.05.2021 - 22:29DROPS Design answered:
Buonasera Luana, da quel punto in avanti deve lavorare in piano, non più in tondo: può continuare con i ferri circolari ma lavorando con ferri di andata e ritorno. Buon lavoro!
14.05.2021 - 18:17
![]() Eoghan wrote:
Eoghan wrote:
In the body, when we insert the 2 markers to indicate front and back, do I then start the stranded work from the beginning of the round (from the side marker) or from the front/back "marker" (the middle of the round)?
25.03.2021 - 11:15DROPS Design answered:
Dear Mrs Eoghan, you start on the side as before, but to know which will be the first stitch to work you have to calculate from the middle stitch so that the pattern is centered - this lesson should help you. The stitch with the arrow in diagram should be the stitch with the marker in the middle of front piece + in the middle of back piece. Pattern will not match on the sides. Happy knitting!
25.03.2021 - 11:39
![]() Kamilla Korsgaard wrote:
Kamilla Korsgaard wrote:
Hej, Kan det være rigtigt at man efter at have strikket rib kanten på ryg og forstykket skal tage masker ind. Synes ikke helt det giver mening da man jo normalt tager ud efter at have strikket ribben. Kan også se på oversigtstegningen, at bredden er større ved ærmegab end ved ribkant.
20.01.2021 - 14:55
![]() Eva Klírová wrote:
Eva Klírová wrote:
Dobrý den, nerozumím , jak sešít rukávy k tělu. Na těle mám uzavřená oka pro průramky a na konci rukávu pletu teprve vzor M1 6 cm, mám ještě plést vzorem další cm a potom teprve rozdělit a dokončit vzor rukávu již v rozdělené části - v lícových a rubových řadách??
06.01.2021 - 12:20
![]() Chalani wrote:
Chalani wrote:
Hi there, i would like this pattern with high neck. what should i do?
04.09.2020 - 14:17DROPS Design answered:
Dear Chalani, you might just continue the rib on collar until desired length - find inspiration from jumper for men in the same yarn group with a high collar. Happy knitting!
07.09.2020 - 07:59
![]() Annalisa Doedens wrote:
Annalisa Doedens wrote:
HI- I am not sure what you mean when doing the top of the sleeve when it says ; finish the piece back and forth on needle from mid under sleeve. Then I increase stitches. what exactly do i do? It looks great otherwise
12.06.2020 - 14:23DROPS Design answered:
Dear Mrs Doedens, when sleeve measures 53 cm in all sizes you start working diagram M.1, then when piece measures 61-60-59-58-56-54 cm from cast on edge, you then continue back and forth, ie from the beg of round, work all sts to the end of the round, but instead of continuing in the round, cast on 1 new stitch (for seam allowance), turn and purl all sts (in M.1 as before, reading now diagram from the left towards the right) cast on 1 st at the end of the row (seam allowance), turn and continue working back and forth. until sleeve measures 63 cm. Happy knitting!
12.06.2020 - 15:09
![]() Luana Minasso wrote:
Luana Minasso wrote:
Mi scuso ma non ho ancora compreso bene. Ho chiuso 31 maglie sul dietro del maglione, anche queste vanno riprese per fare il collo? Sul davanti ne ho chiuse diverse sui lati e 17 centrali, come da schema. Le maglie da riprendere per il collo per me sono 84, e quindi saranno 17 + 36 sul davanti e anche le 31 intrecciate sul dietro?
06.05.2020 - 16:35DROPS Design answered:
Buongiorno Luana. Per il collo, deve riprendere le maglie tutto intorno allo scollo e lavorare in tondo. Quindi riprende le maglie del davanti, riprende la maglie lungo i due lati dello scollo e riprende le maglie sul dietro. Buon lavoro!
06.05.2020 - 17:00
![]() Luana wrote:
Luana wrote:
Buongiorno, per il collo del maglione devo riprendere le maglie solo sul davanti ? Lo scollo dietro serve solo per la cucitura?
06.05.2020 - 14:45DROPS Design answered:
Buongiorno Luana, deve riprendere le maglie in sospeso e anche le maglie del collo, fino ad arrivare al numero indicato. Il collo verrà poi lavorato a coste e verrà risvoltato e affrancato sul dietro del collo. Buon lavoro!
06.05.2020 - 15:23
|
||||||||||
Nordic Midnight#nordicmidnightsweater |
||||||||||
 |
 |
|||||||||
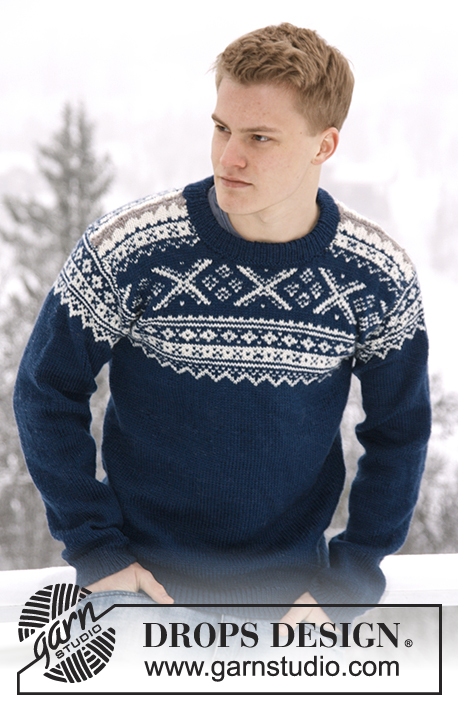
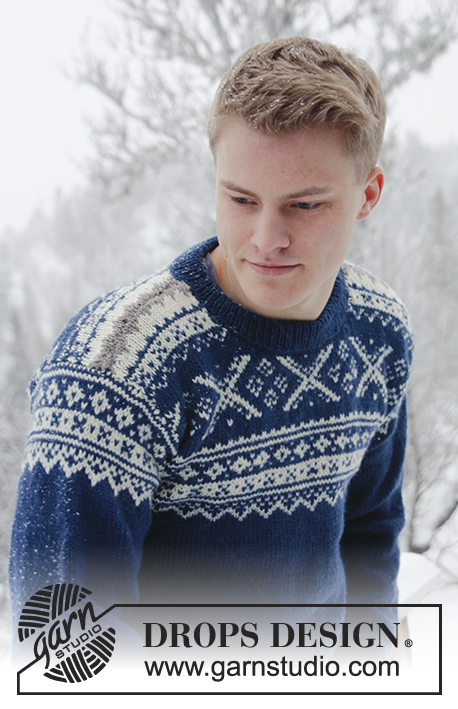
Knitted jumper for men with Norwegian pattern, in DROPS Karisma. Size: S - XXXL.
DROPS Extra 0-809 |
||||||||||
|
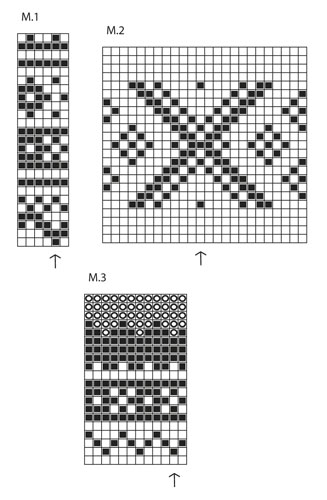
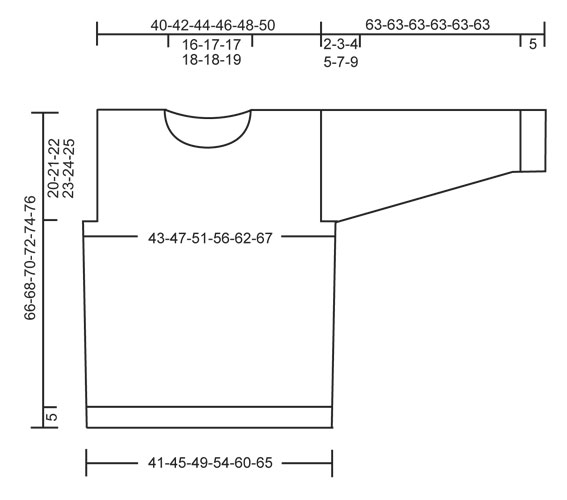
PATTERN: See diagrams M.1 to M.3 – diagrams are worked in stocking st and show 1 repetition of pattern. -------------------------------------------------------- BODY: Worked in the round on circular needle. Cast on 210-228-246-270-306-330 sts on circular needle size 3 mm with dark grey blue Karisma. Work rib = K 1/P 1 for 5 cm. Switch to circular needle size 4 mm and K 1 round while AT THE SAME TIME dec 36-38-40-44-52-56 sts evenly = 174-190-206-226-254-274 sts. Insert a marker at beg of round and a marker after 87-95-103-113-127-137 sts (these marks the sides). Continue in stocking st. REMEMBER THE KNITTING TENSION! When piece measures 15 cm, inc 1 st on each side of both markers. Repeat inc when piece measures 30 cm = 182-198-214-234-262-282 sts. When piece measures 41-43-45-46-48-50 cm, insert 2 markers in the piece; 1 in the middle st at the front and 1 in the middle st at the back. Then work diagram M.1 – st marked with arrow in diagram should be sts with marker mid front/back - count out towards the side. Count out again when at the marker in the side so that pattern is the same on the front and on the back. AT THE SAME TIME when piece measures 46-47-48-49-50-51 cm, cast off 6-10-14-20-30-36 sts for armholes in each side (i.e. 3-5-7-10-15-18 sts on each side of both markers in the sides). Finish front and back piece separately, back and forth on needle. FRONT PIECE: = 85-89-93-97-101-105 sts. Finish diagram M.1, then work diagram M.2 and finally M.3 before continuing with light beige brown until finished measurements (st with arrow in diagram should be st with marker mid front/back – count out towards the side). When piece measures 58-60-62-64-66-68 cm, slip the middle 15-17-17-19-19-21 sts on a stitch holder for neck and finish each shoulder separately. AT THE SAME TIME cast off at beg of every row from neck: 2 sts 3 times and 1 st 3 times = 26-27-29-30-32-33 sts remain on shoulder. Cast off when piece measures 66-68-70-72-74-76 cm. BACK PIECE: = 85-89-93-97-101-105 sts. Work as on front piece but do not cast off for neck until piece measures 64-66-68-70-72-74 cm. Now cast off the middle 29-31-31-33-33-35 sts for neck and finish each shoulder separately - AT THE SAME TIME cast off 2 sts on next row from neck = 26-27-29-30-32-33 sts remain on each shoulder. Cast off when piece measures approx. 66-68-70-72-74-76 cm – cast off on same row in pattern as on front piece. SLEEVE: Worked in the round on double pointed needles, switch to circular needle when needed. Cast on 62-64-66-66-68-68 sts on double pointed needles size 3 mm with dark grey blue. Work rib = K 1/P 1 for 5 cm. Switch to double pointed needles size 4 mm and K 1 round while AT THE SAME TIME dec 11 sts evenly = 51-53-55-55-57-57 sts. Insert a marker at beg of round (= mid under sleeve) and continue in stocking st. When piece measures 6 cm, inc 1 st on each side of marker. Repeat inc a total of 17-18-19-21-22-24 times in Size S: On every 9th round, Size M: Alternately on every 8th and 9th round, Size L: Every 8th round, Size XL: On every 7th round, Size XXL: Alternately on every 6th and 7th round and Size XXXL: Alternately on every 5th and 6th round = 85-89-93-97-101-105 sts. AT THE SAME TIME when piece measures 53 cm in all sizes, work diagram M.1 (st with arrow in diagram = mid on top of sleeve – count out towards the side). After diagram M.1, continue with dark grey blue until finished measurements. AT THE SAME TIME when piece measures 61-60-59-58-56-54 cm (shorter measurements in the larger sizes because of longer sleeve cap and broader shoulder width), finish the piece back and forth on needle from mid under sleeve. Cast on 1 new st in each side (= edge st for assembly) and work until sleeve measures 63 cm in all sizes, cast off. ASSEMBLY: Sew shoulder seams and sew in sleeves (section worked back and forth at the top of sleeve should fit the cast off for armhole). NECK: Knit up from RS approx. 82 to 98 sts around the neck (incl sts on stitch holder at the front) on a short circular needle size 3 mm with dark grey blue. P 1 round, then K 1 round while AT THE SAME TIME inc evenly to 102-108-110-116-118-122 sts. Then work rib = K 1/P 1 for approx. 7 cm, cast off with K over K and P over P. Fold the rib double towards WS and fasten it to the back of neck edge with neat little loose stitches. |
||||||||||
Diagram explanations |
||||||||||
|
||||||||||
 |
||||||||||
 |
||||||||||
Have you finished this pattern?Tag your pictures with #dropspattern #nordicmidnightsweater or submit them to the #dropsfan gallery. Do you need help with this pattern?You'll find 26 tutorial videos, a Comments/Questions area and more by visiting the pattern on garnstudio.com. © 1982-2026 DROPS Design A/S. We reserve all rights. This document, including all its sub-sections, has copyrights. Read more about what you can do with our patterns at the bottom of each pattern on our site. |
||||||||||


With over 40 years in knitting and crochet design, DROPS Design offers one of the most extensive collections of free patterns on the internet - translated to 17 languages. As of today we count 324 catalogues and 12290 patterns translated into English (UK/cm). 12290
We work hard to bring you the best knitting and crochet have to offer, inspiration and advice as well as great quality yarns at incredible prices! Would you like to use our patterns for other than personal use? You can read what you are allowed to do in the Copyright text at the bottom of all our patterns. Happy crafting!
Post a comment to pattern DROPS Extra 0-809
We would love to hear what you have to say about this pattern!
If you want to leave a question, please make sure you select the correct category in the form below, to speed up the answering process. Required fields are marked *.