
Popular categories
Looking for a yarn?


Comments / Questions (66)
![]() Corsini Rosanna wrote:
Corsini Rosanna wrote:
Vorrei fare un maglione con il vostro disegno del traforo da ripetere in verticale su tutto il davanti mi serve la procedura del lavoro grazie
03.02.2021 - 16:26DROPS Design answered:
Buongiorno Rosanna, ci sono tanti modelli gratuiti sul nostro sito, continui a cercare. Buon lavoro!
03.02.2021 - 22:25
![]() Lyne wrote:
Lyne wrote:
J’aimerai s’avoir si je peu modifié la largeur du châle présentement est de 155 cm a 175 cm Dit moi si on peut le faire . Mon idée serait À la section dentelle au lieu de 15 faire augmenter de 1 de plus soit 16 de chaque côté automatiquement nous allons devoir relevé plus de mailles pour 289 au lieu de 271 . Dit moi si mon idée est bonne Merci de me revenir
19.11.2020 - 21:51DROPS Design answered:
Bonjour Lyne, probablement, mais nous ne sommes malheureusement pas en mesure de vous aider à ajuster les explications à votre convenance, n'hésitez pas à demander assistance auprès de votre magasin ou bien auprès d'un forum spécialisé, merci pour votre compréhension. Bon tricot!
20.11.2020 - 08:36
![]() Katharina wrote:
Katharina wrote:
Wunderbar die Korrektur! Herzlichen Dank! Eine Frage bleibt mir dennoch. Wenn ich nun die Lochborte anstricke, nehme ich ja nur von der einen Hälfte der Lochborte die Maschen auf, was ist mit der anderen Seite? Es steht:Nun aus beiden Kurzseiten der Lochborte die Maschen auffassen (= je 25 Maschen an beiden Seiten) = 321 Maschen insgesamt auf der Nadel. Das verstehe ich nicht. Was ist die Kurzseite? Eine Hälfte der Lochborte ist doch garnicht angestrickt? DANKESCHÖN!
16.09.2020 - 20:54DROPS Design answered:
Liebe Katharina, Sie stricken zuerst M.1 über 25 M, legen diese 25 M still, dann stricken M.1 von den 25 angeschlagenen M und legen diese M still - dann fassen Sie die 271 M auf und stricken mit verkürzten Reihe wie erklärt, und dann stricken Sie die 25 M, die am Anfang stillgelegt waren (= die von M.1 auf beiden Seite) und stricken 4 Reihen rechts mit 2 Fäden. Viel Spaß beim stricken!
17.09.2020 - 10:03
![]() Katharina wrote:
Katharina wrote:
Ja, es fehlt! Nun habe ich 360 Randmaschen insgesamt und wenn ich nach der Beschreibung die Maschen nun aufnehmen soll habe ich insgesamt 540 Maschen, nicht 270 ((+1 Zunahme)). Denn ich habe ja 180 Maschen in die eine Richtung und in die andere Richtung.
08.09.2020 - 09:54
![]() Katharina wrote:
Katharina wrote:
15 x 12 Rapport Reihen meinte ich
07.09.2020 - 17:48DROPS Design answered:
Liebe Katharina, ja ganz genau, wenn Sie die ersten 15 x 12 Reihen in M. 1 gestrickt haben = 180 Reihen dann legen Sie die Maschen still. Die Maschen an der Lochkante auffassen und über die 25 Maschen nochmal 15 Mal die 12 Reihen in M.1 stricken = 180 Reihen. Es sieht aber so aus, daß etwas in die deutsche Anleitung fehlt, sie wird korrigiert, danke für den Hinweis. Viel Spaß beim stricken!
08.09.2020 - 09:41
![]() Katharina wrote:
Katharina wrote:
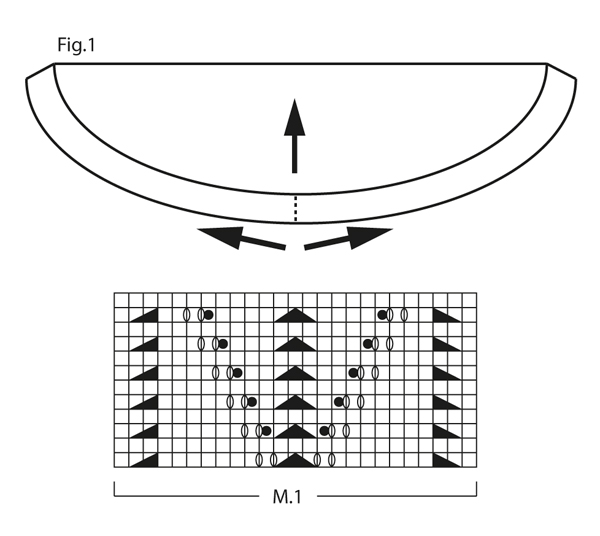
Hallo! Nein das meine ich nicht. Ja es sollen 15 mal die 12 Rapporte gestrickt werden. Aber wenn man sich das Schema Fig 1. anschaut, sieht man das sie einmal von der Mitte des Tuches nach rechts und einmal nach links gehen. Das heißt man strickt einmal ein paar Rapporte und geht dann zum Anfang zurück nimmt Maschen auf und strickt in die andere Richtung wieder welche ran. Aber 15 Rapporte kann man schlecht durch 2 Teilen. Vielen lieben Dank für ihre Mühe und schnelle Antwort!
07.09.2020 - 17:47
![]() Katharina wrote:
Katharina wrote:
Es sollen 15 Raporte gestrickt werden, aber aie gehen von der Mitte einmal nach links und einmal nach rechts weg. Jedoch kann man 15 nicht halbieren. Es sei denn, ich habe an beiden Enden jeweils nur einen halben Raport.???
07.09.2020 - 15:53DROPS Design answered:
Liebe Katharina, ich verstehe vielleicht Ihre Frage, aber 15 Mal die 12 Reihen in M.1 sind insgesamt 180 Reihen. Meinten Sie etwas anderes?
07.09.2020 - 16:03
![]() Matty wrote:
Matty wrote:
What language is written this pattern? If anyone could tell me please. Thank you!!
05.06.2019 - 02:13DROPS Design answered:
Dear Matty, all available languages to this pattern can be found by clicking the scrolling down menu under the picture. Happy knitting!
05.06.2019 - 10:15
![]() Marie-Ève wrote:
Marie-Ève wrote:
Bonjour, lorsqu'on doit tricoter les 116 m, les mettre en attente, ensuite tricotez les 39 m suivantes, est que je dois simplement glissez les 116 dernières mailles avant de les mettre en attente ou les tricoter et les mettre en attentes? Car si je dois les tricoter, je ne comprends pas comment faire pour tourner et poursuive sur les 39 mailles au rang suivant... Merci à l'avance.
29.05.2019 - 03:18DROPS Design answered:
Bonjour Marie-Ève, tricotez 1 rang envers, glissez les 116 premières mailles de ce rang en attente, tricotez les 39 m suivantes (= les 39 m centrales) et glissez (sans les tricoter) les 116 dernières mailles du rang. Ainsi, votre fil se trouve juste au début des 39 m. Bon tricot!
29.05.2019 - 08:30
![]() Pia wrote:
Pia wrote:
Jeg undre mig over at der står at sjælen skal strikkes vådt, er det en fejl?
15.05.2019 - 08:37DROPS Design answered:
Hej Pia, Nej, hvis du strikker sjalet i DROPS Lace, så fugter du sjalet bagefter og strækker det til de rigtige mål. God fornøjelse!
15.05.2019 - 09:37
|
|||||||||||||||||||||||||
Lily#lilyshawl |
|||||||||||||||||||||||||
 |
 |
||||||||||||||||||||||||
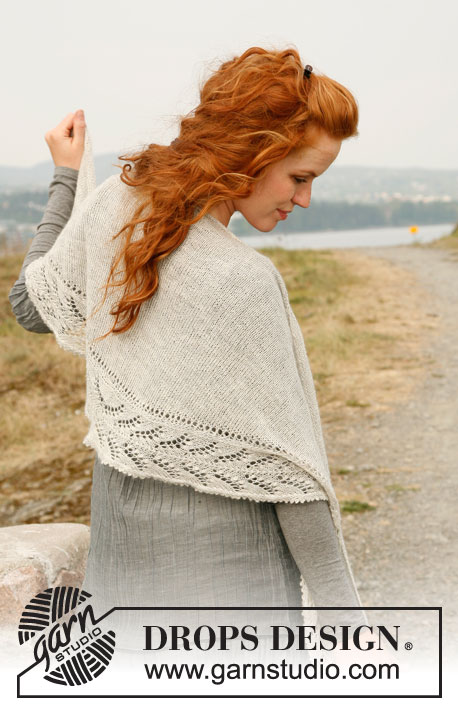
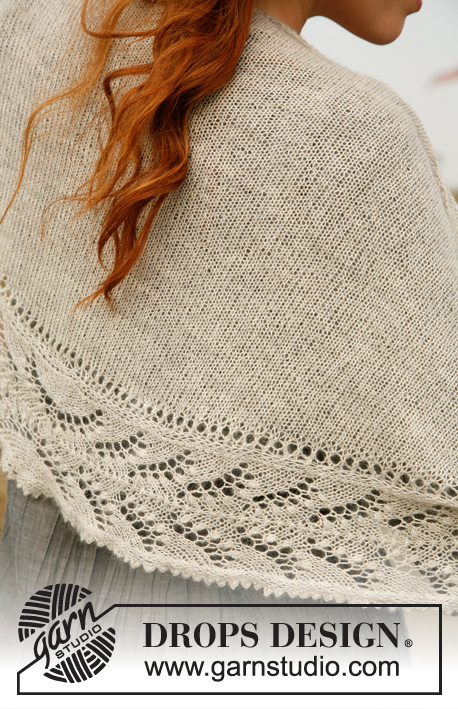
Knitted DROPS shawl with lace pattern in "Lace".
DROPS 133-2 |
|||||||||||||||||||||||||
|
KNITTING TIP 1 (provisional cast on): Work a row with 26 ch on hook size 3.5 mm in Lace. Cut the thread - do not fasten. Use a new thread to knit up 26 sts in this ch-row with circular needle 3.5 mm – this is the row you will be unraveling afterwards to slip the cast on sts back on needle again. KNITTING TIP 2: To make the edge look nice, slip first st as if to P without working it – this is done on all rows (i.e. the outermost st each side is only worked on every other row – i.e. half as many rows vertically over this st). PATTERN: See diagram M.1. The diagram shows the pattern from RS. BOBBLE: 1st row (RS): Work 7 sts in 1 st as follows: * K 1, 1 YO *, repeat from *-* a total of 3 times and finish with K 1 = 7 sts. It is important to work the sts loosely (approx. 1 cm long). 2nd row (WS): P these 7 sts tog. It will be difficult to work the sts from 1st row tog if they are too short and too tight. --------------------------------------------------------- SHAWL: Beg by working the lace edge on the shawl then knit up sts along this edge and work the shawl - piece is worked back and forth on circular needle to make room for all the sts. The lace edge is worked in 2 parts starting mid back - see Fig. 1. For cast on - follow KNITTING TIP 1 on how to cast on with Lace - and read KNITTING TIP 2 before continuing. Start by working 1st row from WS as follows: P 1 row and P the last 2 sts tog = 25 sts. Work 15 repetitions of diagram M.1(= approx. 60 cm = 180 rows have been worked). Then slip these 25 sts on a stitch holder. Unravel the crochet row at the cast on edge, the cast on sts are then released and are ready to be worked as follows: Slip the 25 cast on sts on circular needle size 3.5 mm and work 15 repetitions of diagram M.1 in the opposite direction (= approx. 60 cm = 180 rows have been worked). Then slip these 25 sts on a stitch holder. Now work the shawl itself: Knit up sts along the lace edge on circular needle size 3.5 mm from RS in front loop of outermost st as follows: * Pick up 1 st in each of next 3 sts, skip 1 st *, repeat from *-* finish the row = 270 sts on needle - pick up 1 extra sts in last st = 271 sts on needle. P 1 row from WS. Work next row as follows: * K 2 tog, 1 YO *, repeat from *-* and finish with K 1. P 1 row while at the same time slipping the outermost 116 sts in each side on two stitch holders and keeping the middle 39 sts on the needle. Now work back and forth in stocking st over the middle 39 sts while AT THE SAME TIME working 3 sts from stitch holder at the end of every row until 24 sts remain on the two stitch holders in each side. Continue to work back and forth in stocking st over the middle sts while AT THE SAME TIME working 2 sts from stitch holder at the end of every row until 11 sts remain on the two stitch holders in each side. Continue to work back and forth in stocking st over the middle sts while AT THE SAME TIME working 1 st from stitch holder at the end of every row until all sts from the two stitch holders have been worked. Now slip sts in each side of the lace edge with diagram M.1 back on circular needle = 321 sts. K 4 rows over all sts with double thread. Loosely cast off. CROCHET BORDER: The border is worked along bottom edge of diagram M.1. Use hook size 2.5 mm and Lace. In every edge st work as follows: * 1 dc, 2 ch, 1 tr, 2 ch, 1 dc *, repeat from *-*. BLOCKING: Place the shawl in lukewarm water until it is soaking wet. Carefully squeeze the water out of the shawl - do not twist the shawl - then roll the shawl in a towel and squeeze to remove more water - the shawl will now only be moist. Place the shawl on a carpet or mattress - carefully stretch it out to size and fasten it with pins. Leave to dry. Repeat the process each time when the garment has been washed. |
|||||||||||||||||||||||||
Diagram explanations |
|||||||||||||||||||||||||
|
|||||||||||||||||||||||||
 |
|||||||||||||||||||||||||
Have you finished this pattern?Tag your pictures with #dropspattern #lilyshawl or submit them to the #dropsfan gallery. Do you need help with this pattern?You'll find 13 tutorial videos, a Comments/Questions area and more by visiting the pattern on garnstudio.com. © 1982-2026 DROPS Design A/S. We reserve all rights. This document, including all its sub-sections, has copyrights. Read more about what you can do with our patterns at the bottom of each pattern on our site. |
|||||||||||||||||||||||||


With over 40 years in knitting and crochet design, DROPS Design offers one of the most extensive collections of free patterns on the internet - translated to 17 languages. As of today we count 324 catalogues and 12290 patterns translated into English (UK/cm). 12290
We work hard to bring you the best knitting and crochet have to offer, inspiration and advice as well as great quality yarns at incredible prices! Would you like to use our patterns for other than personal use? You can read what you are allowed to do in the Copyright text at the bottom of all our patterns. Happy crafting!
Post a comment to pattern DROPS 133-2
We would love to hear what you have to say about this pattern!
If you want to leave a question, please make sure you select the correct category in the form below, to speed up the answering process. Required fields are marked *.